The Sinew Series Part 4
In this article I’d like to share with you my 11 secret tricks and tips for making a high quality, functional and beautiful primitive sinew bow string.
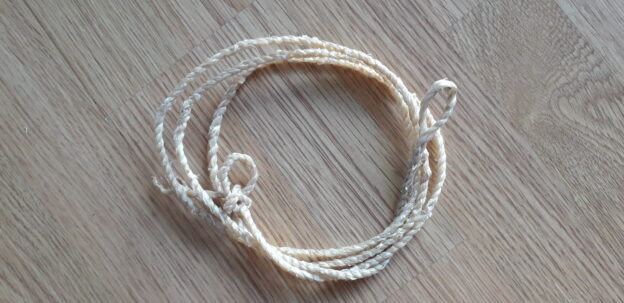
For this project you will need about 1-1.5oz of fully processed and prepared sinew, although most of my sub 68″ sinew strings usually finish around 1oz in weight.
I have already covered the acquisition, preparation and processing of sinew ready for use in bow string making in two previous articles. You will find these articles here:
The Sinew Series Part 1: https://southmoorbows.com/the-sinew-series-part-1/
The Sinew Series Part 2: https://southmoorbows.com/the-sinew-series-part-2/
Tools needed:
- Something to act as a weight which you can tie your finished string to (bucket of water/kettle bell etc.
- A strong hook/nail/screw etc, fixed aprox 7-8ft off the ground.
- A couple of G clamps.
- A sink or medium sized bowl full of water.
Regarding your work environment, you will want to build your sinew bow strings in a dry place which has a reasonably clean floor to prevent your sinew from getting wet and dirty during the building phase.
Tip One:
Build your string from dry sinew. Some primitive bowyers like to build their sinew strings from wet sinew. Personally I find it much harder to get the right sort of tension into the twist required to produce a good strong reverse twist string when the sinew is wet. Dry sinew is so much easier to grip between your index finger and thumb when applying twisting pressure, so nowadays I build all my sinew strings with dry sinew. We will discuss the soaking of the finished string later in this article.

Tip Two:
Initially build your top loop one third smaller than you would like it to be once fully stretched and dried. Once you have finished building your string, you must stretch it. Stretching is done after soaking the string and by adding a weight to the end of the string. The string will then be hung from a hook until it is completely dry. The wet string will be under load from the added weight and the whole string including the loop will stretch considerably during the drying process so if you make your loop the required size before soaking and stretching, you will end up with a loop which is much larger than you would like.


Tip Three:
Build your dry pre stretched string to be one third thicker than your desired final thickness. I aim for a finished sinew string thickness of no less than 4-5mm (3/16”). A 4-5mm thick fully stretched and dried sinew string will cope adequately with bows weighing up to 70lb draw weight. Once you are up above this weight then a minimum thickness of 5mm would be your target. Since most of my bows are sub 60lb draw weight, I aim for a finished string width of 4.5mm which means starting out with a string 6-7mm before soaking and stretching. A 6mm dry unstretched/unsoaked string should finish out about 4.5mm after a good soak and stretch and plenty of time to dry thoroughly.

Tip Four:
Splice in fresh strands of sinew by placing the new strands across both halves of the string as illustrated in the picture sequence below. Aim to add in a fresh piece of sinew after every two twists. By splitting an equal amount of sinew across both halves of the string before twisting it in you will splice in an equal amount of sinew into both halves of the bow string. This will maintain an equal thickness between both halves of the string throughout the entire build. This method of one fresh piece of sinew laid equally across both halves of the string every two twists produces a very uniform thickness of string along the entire length.


Tip Five:
Do not let any thin spots develop. If you follow the splicing method detailed in tip 4 then you should not end up with any thin spots however if you do things differently and notice a thin spot then stop building your string and back up. A bow string is only as strong as the weakest point. If you have a noticeable thin spot then that spot will be significantly weaker than the rest of the string. Even if it means undoing a substantial section of your string to get back to your thin spot you must fix it before you proceed any further. Take the time and effort to fix thin spots with extra splices of sinew as soon as you notice it. You will never have confidence in a sinew bow string with a thin spot. A broken sinew string is scrap. Given the time and effort required to build a good sinew string, go the extra length and fix thin spots before they fix your string to the bin!
Tip Six:
Perform your reverse twist from a hook or some other means to secure you top loop. I secure a bolt in the jaws of my vice and hook my string loop over the bolt. This enables me to use both hands to twist both halves of the string at the same time (see pic below). Many good sinew strings are made with a reverse twist performed with one hand pinching the built section of string and the other hand performing the twists. Personally however, I find that by hanging my loop from a hook I can now twist my string up with both hands. This allows me to apply significant and equal twisting pressure to each half of the string. This produces a very tightly twisted string which has a very equal appearance. Because the string is hanging, I also find that I can pull hard of the string at the same time as applying the twists which also aids in keeping the twisting tension equally distributed across both halves of the string.


Tip seven:
Initially build your dry string no longer than the approximate length of your bow nock to nock. Your dry string will stretch by as much as 6 inches after it has been soaked and weighted. If you make your string longer than the bow you intend to use it with then you will end up with a string much longer than is required to produce a bowline/bowyers knot suitably positioned to brace your bow appropriately. This excess length ends up getting cut off or wrapped around the bow bottom nock which is wasteful and unsightly. 6 inches of surplus sinew string can also add enough weight to your bows bottom limb tip to throw out the timing of you bows limbs.

Tip eight:
Stretch you soaked string with as much as 10kg of weight. Make sure your weight stays off the floor so that it is hanging freely throughout the entire drying process. Keep an eye on you weighted setup as your string slowly stretches out. You will likely find that your sinew string weight slowly drops to the floor, especially during the first couple of hours of stretching. If you start out with 3 inches of clearance between the ground and your weight then after 2 hours of stretching you weight will likely be on the ground. Keep the weight clear of the ground by raising the height of your hanging point as necessary throughout the entire stretching and drying process. Your weight should still be well clear of the floor 24 hours later by which time your string should be fully dry if left in the right air-drying conditions.


Tip Nine:
Spin you wet string up with 30 twists before weighing it for stretching and drying. By inducing extra twist into your string during the stretching phase, when you sinew string is still wet, you will maintain a nice tight even pattern of twist throughout the entire length of your string. Remember that your soaked and weighted string will stretch in length considerably whilst drying. This addition of extra length has the effect of diluting the initial twist you created when building your string with the reverse twist method previously shown. The extra twists now spun to your hanging string will compensate for the loss of twist which results from the stretching phase. If you notice that the coils of twist in your string are still pulling out during the stretching phase, then simple keep twisting up your string via spinning your weight until your string coils look nice and tight again. Continue to monitor the twist as the stretching and drying phase continues through to completion.
Tip Ten:
Brace your weight so that the twist does not spin back out. You will notice very quickly that after spinning your chosen weight 30 times, the newly applied string twist will want to spin your weight back the other way to undo not only the twist which you have just spun in, but also the initial twist that was achieved through the reverse twist building phase. Prevent any spin back by bracing you freely hanging weight so that it physically cannot spin back on itself.
Tip Eleven:
Leave your string to fully dry before removing from the stretching hook and weight. If you become impatent and remove you sinew string from the drying/stretching hook before your string is completely dry then you will have a string which will continue to skrink in length not thickness. You will end up with a plump string which might end up drying out too short for your bow. In adition to these issues you will also notice that your string will have lost much of the twist that you put in because, as the string continues to dry, it will uncoil without any mechanical means to prevent the string from untwisting. The resultant string will retain a great deal more elasticity than a properly stretched and dried string. this increased elasticity will dramatically reduce arrow speed when you finally come to shoot the bow which has been fitted with your new string. I’ve seen bows suddenly lose 10+ ft/sec when shot with poorly stretched sinew strings. This is invariably the result of increased mass and elasticity brought about by a string that has been allowed to shrink up in length as opposed to thickness.


Tip Twelve:
Once your string is fully dry and all the tag ends have been trimmed off, Keep your string dry at all times. If you are intending to use your sinew bow string outdoors in a climate like ours then, keeping your string dry is not quite as simple as some might think! The best mitigation measure for a sinew string getting wet is to treat your finished string with a water proofing agent. I achieve this result best by treating all of my sinew bow strings to a good rubbing down with a bow string wax. Whilst this could be done with a modern string wax made from bees wax plus additives, I personally prefer to use a homemade string treatment composed of the same natural materials that our ancestors would have used. vigorous rubbing helps to melt the wax into the string improving the water proofing effect of the wax.
In a future article I will detail how you can make your own string wax which doubles well as a natural wood sealer too.
Until next time!