Ash is a timber which is super common in my part of the world. As a firewood, Ash is a favourite of mine. As a bow wood though, it is never my first choice. Nor is it my second choice come to think of it!
Ash staves always seem to find their way into my stave collection though. Not surprising really given the abundance of clean and relatively straight logs which abound within my local landscape.
The stave which this bow came from was cut out of a hedgerow by one of my neighbours who was in the process of laying an old derelict hedgerow. The hedgerow in question was full of nice straight and clean 4-6” diameter Ash stems which had coppiced up from the remnants of the parent trees which were laid decades earlier.
I dread to think how many bows I’ve made from Ash. Back in my late teens I would try and make English style D shaped longbows from Ash only to be bitterly disappointed when the bellies chrysaled and the set was measurable in feet not inches! (Joking of course).
So when I pulled this stave out of the rack a few months ago I knew that, without optimising the bow design, a bow made from this stave would only make a “reasonable” bow at best, no matter how clean and straight it was.
So I decided to make yet another Ash bow, but one which would incorporate design features which would enhance efficient and durability whilst also making it a pleasure to shoot. But without any frills! This was going to be a quick and simple primitive bow with only one none essential addition – An arrow rest. Just because I fancied one!
As is the norm around here, this typical Devonian Ash stave showed thin rings and way more early wood than I like to see. But this is just the way most of the Ash in this part of the world grows. Here in the South West, our mild and wet 10 month growing season produces timber which is fast growing through the spring months. This long growing season leads to many of our native hardwood species laying down a considerable proportion of its total seasonal growth ring to early wood.
Ash in general is weak in compression. Our local Ash is even weaker in compression than normal, so if this stave was going to make a bow which would perform and last, then I would have to pull out all the stops to prevent any delaminating in the fades and/or the belly getting crushed. Both of these faults are common place with our local Ash unless extra care is taken.
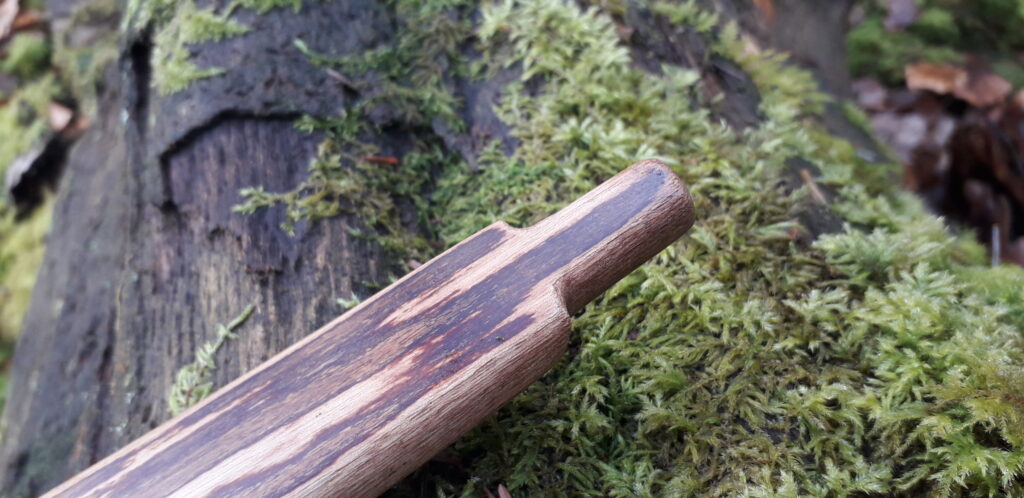
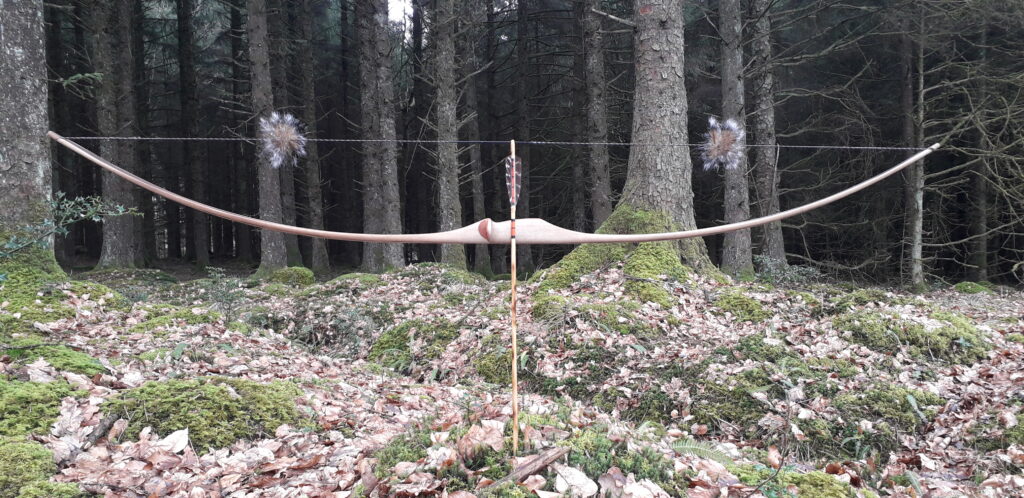
This bow came from a stave which was 76” long. I cut it down to 68” to ensure that the length was adequate enough to mitigate for the weaker than average compression strength I’d envisaged this stave suffering from. The plan was to end up with a bow measuring 66” nock to nock with limbs 2” wide for the inner thirds tapering down to 3/4″ wide self nocks
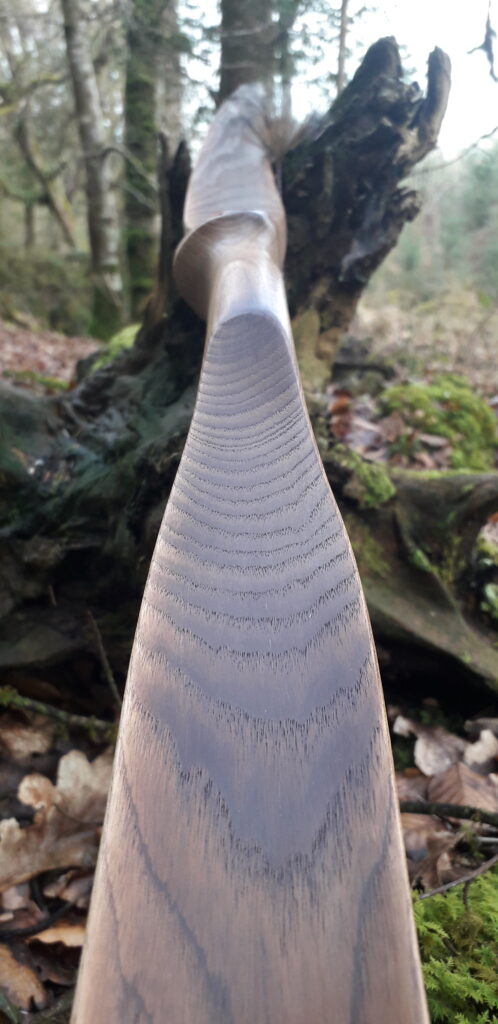
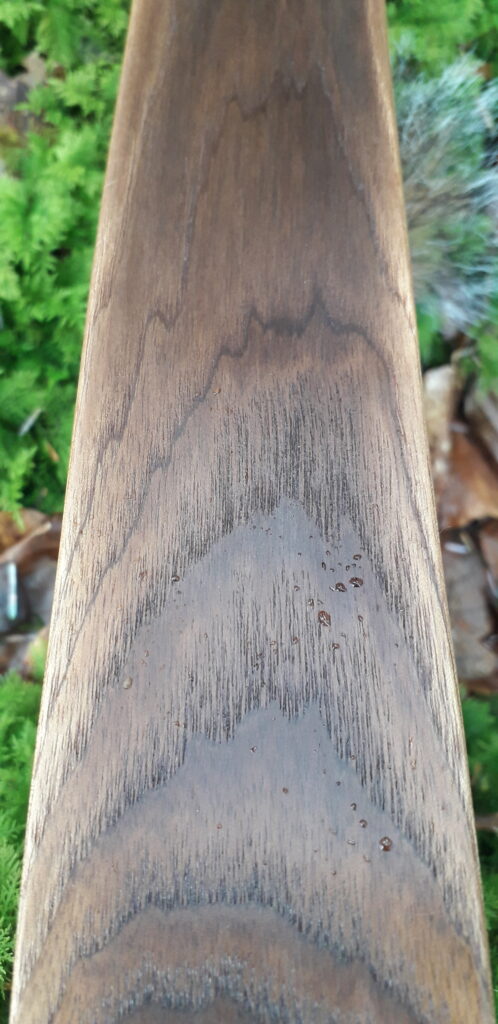
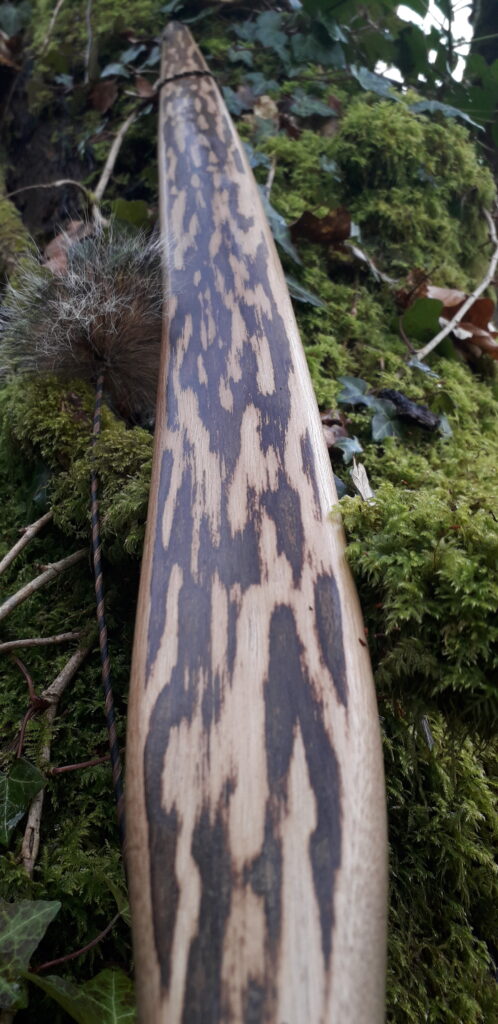
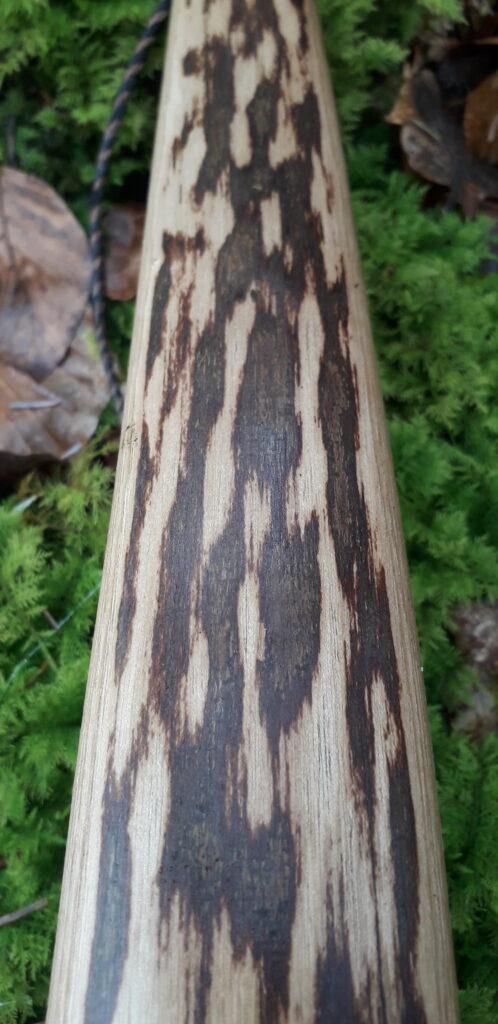
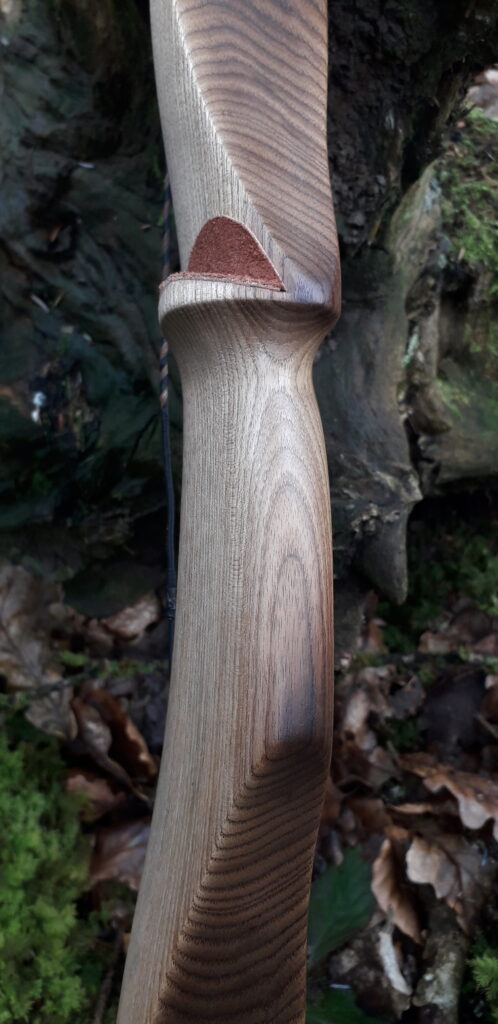
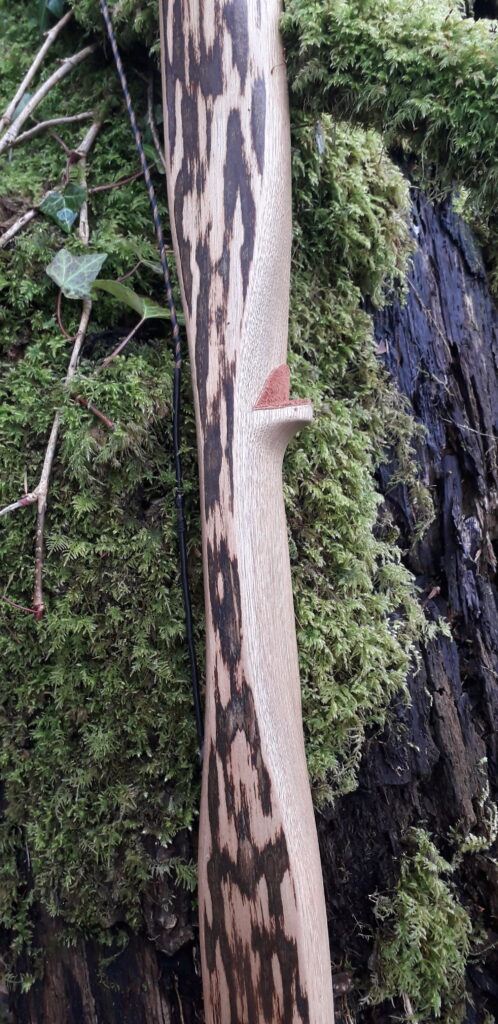
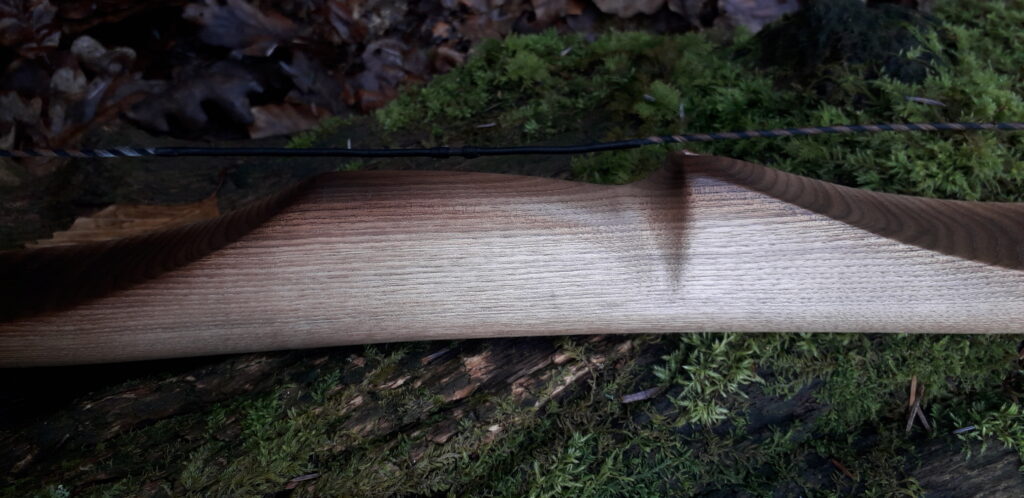
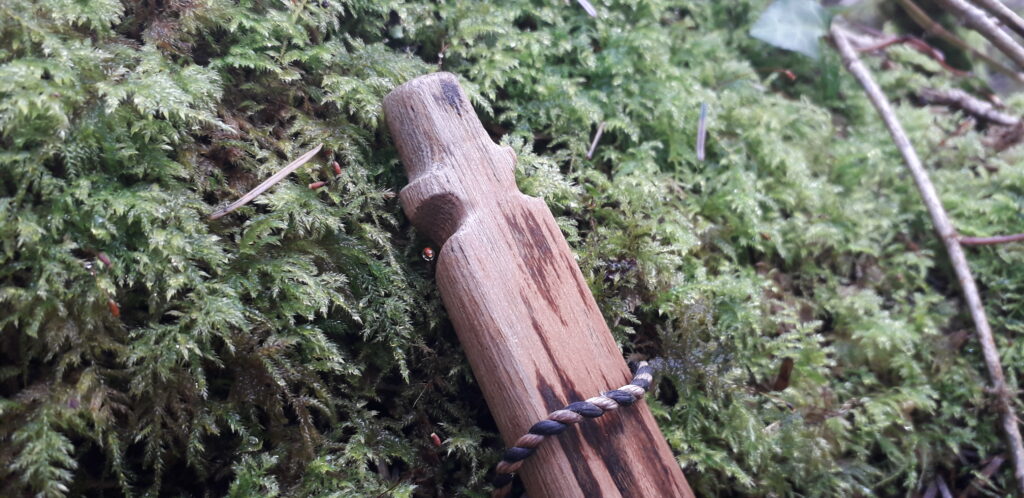
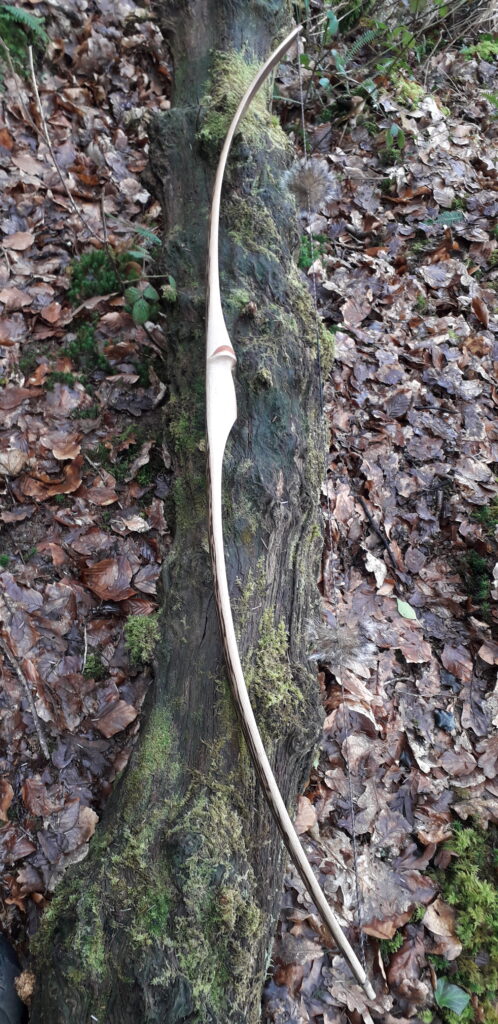
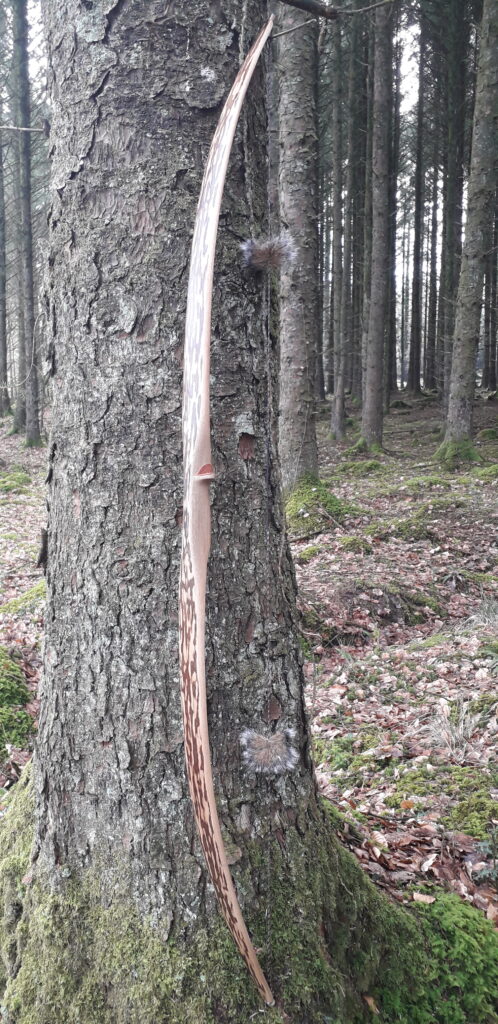
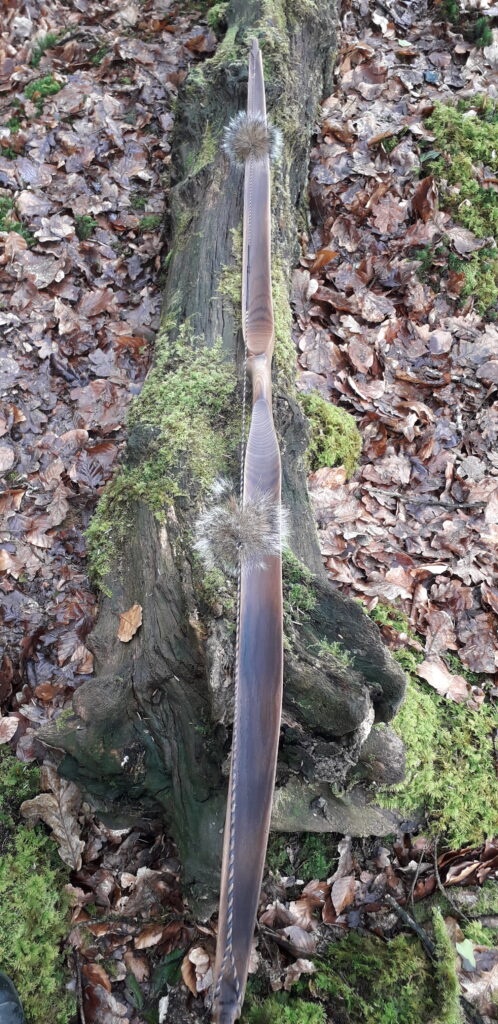
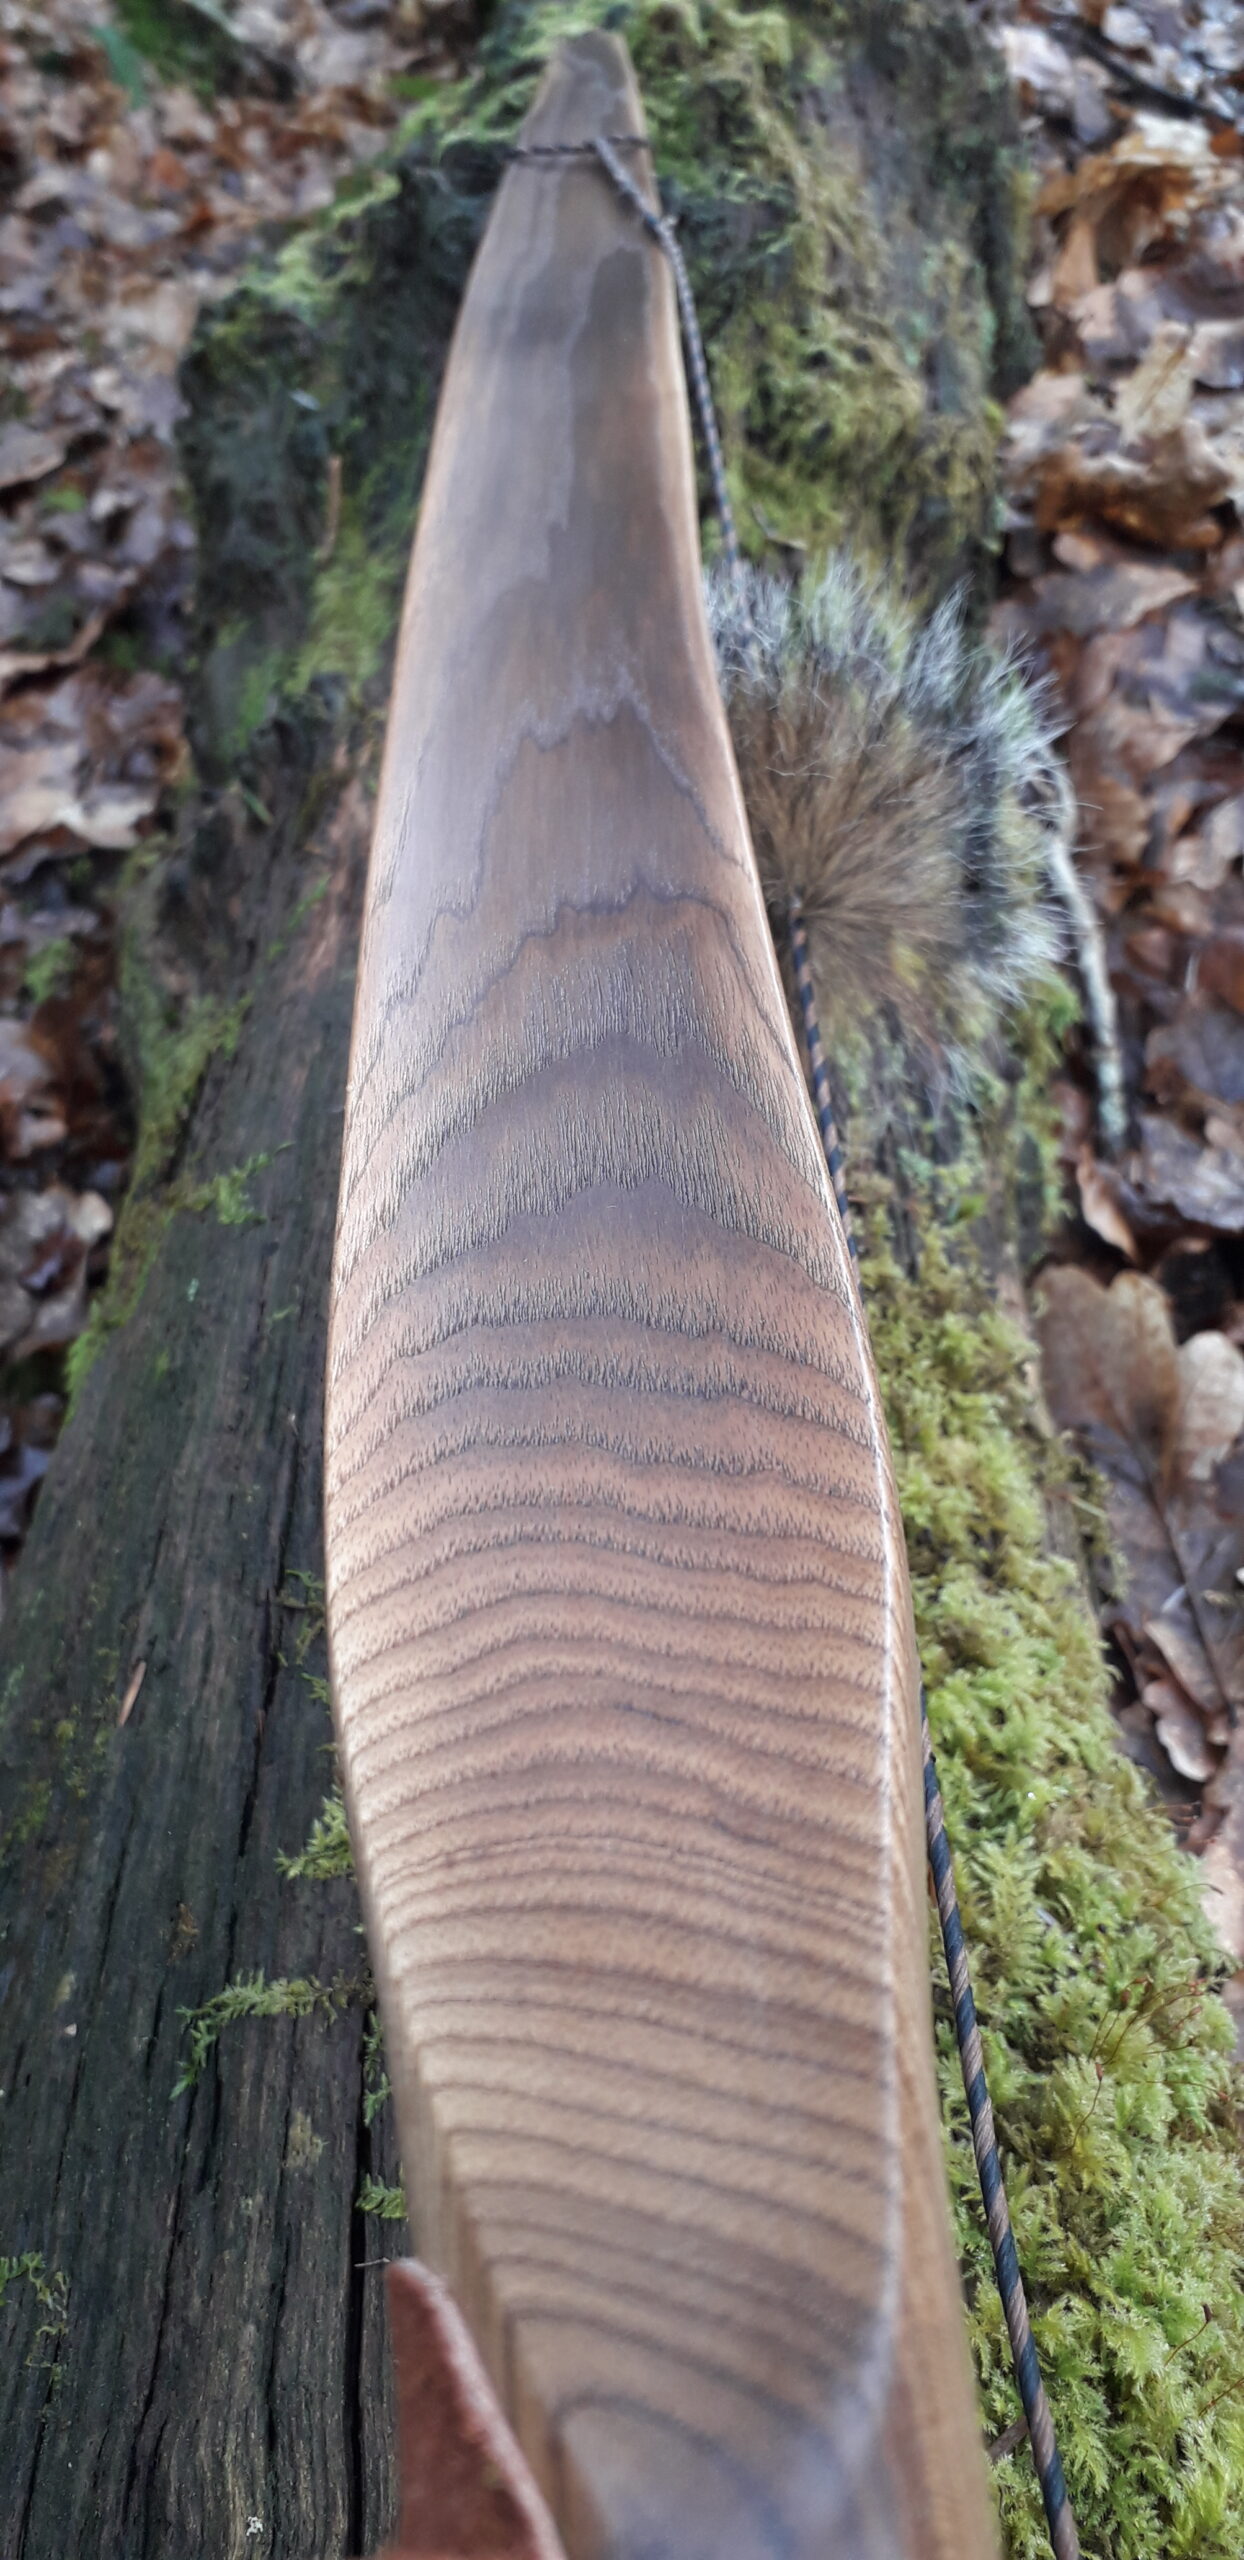
In terms of basic appearance I was going for the typical flatbow face profile with limbs lenticular in shape. The cambium had been left on this stave so I worked a camo effect pattern into it. The handle would be deep and contoured simply because I can knock my favourite shape out so quick and easy these days that it takes me no time but adds tremendous comfort to the grip.
Tiller would be circular and the limb tips would be made to do as much work as the rest of the limb in order to maximise the distribution of compression over the greatest possible surface area. Fades would be 3” max in order to get as much limb bending as I could without sacrificing a rigid handle.
The limbs would be slightly hollowed out so as to almost mimic the crown on the back in order to increase the surface area of the belly. Thickness across the width of the limb would increase slightly towards the centre line and thin towards the edges. And the corners on the back would be slightly rounded in order to take some of the tension strong back wood out of commission. This would achieve a better balance between the overpowering tension strength and the compression weak belly wood which this particular Ash stave presented me with.
After basic roughing out, the stave was pretty straight and with a moister content probably around 12%. I wanted some overall reflex in the bow before starting the tillering process so I clamped the stave to a reflex form with about 2” of induced reflex. Clamped in reflex, I then force dried the roughed out stave over my wood burner until the weight would not reduce any further.
After some time to recover ambient moisture levels (6-8%) I tillered the bow to brace height. Most of the force drying reflex had fallen out so before commencing with full tillering, I decided to put the bow back on the same reflex form and thoroughly heat treat it over my wood burner stove top.
My stove was running scolding hot thanks to some lovely dry beech logs. Each limb got about an hour and a half sat over the stove top in order to cook both limb bellies right through to the centre of the limb. The bow’s mass was reduced significantly and given the depth of the cook, there was no way this bow was going to take in much ambient moisture again.
One of the benefits of heavily heat treating white woods is that the cooking process makes the belly side of the bow somewhat hydrophobic. This reduces the woods ability to suck ambient moisture back in. Raw untreated/unsealed Ash loves to suck in atmospheric moisture, which is why it can become a noodle very quickly in damp condition without very good sealing.
After heat treating, I gave the bow a couple of days to rehydrate back to something more like 6-8% moisture content. An untreated, unsealed ash bow will soon suck in enough ambient moister to raise its moister content back up to around 10%. that would be a recipe for set. However a heavily heat treated bow will not slip back to that kind of moisture content without actually wetting it.
After a couple of days to reacclimatise, I then carried on with tillering the bow back to brace again. The cooking of the belly had moved the tiller slightly and added several pounds in draw weight. This is usually what happens so should be expected. In fairly short time she was finished on the tiller tree and looked and felt about 1/8th positive at 53lb at 27”.
I find that heavily heat treated bows will produce the same arrow speeds as untreated bows of significantly higher draw weights and this bow proved that theory once again. The chronograph demonstrated average arrow speeds of 168fps with a 450 grain arrow. That’s not bad for a simple Ash self bow which was only drawn to 27”!
For a finish I just used a clear polyurethane which I had kicking about. The colour which you can see in the remnants of the cambium are as a result of a couple of days sat in the ammonia fuming pipe before roughing out and force drying began. The tannins in the bark went a nice dark green/brown. The cammo effect looks great.
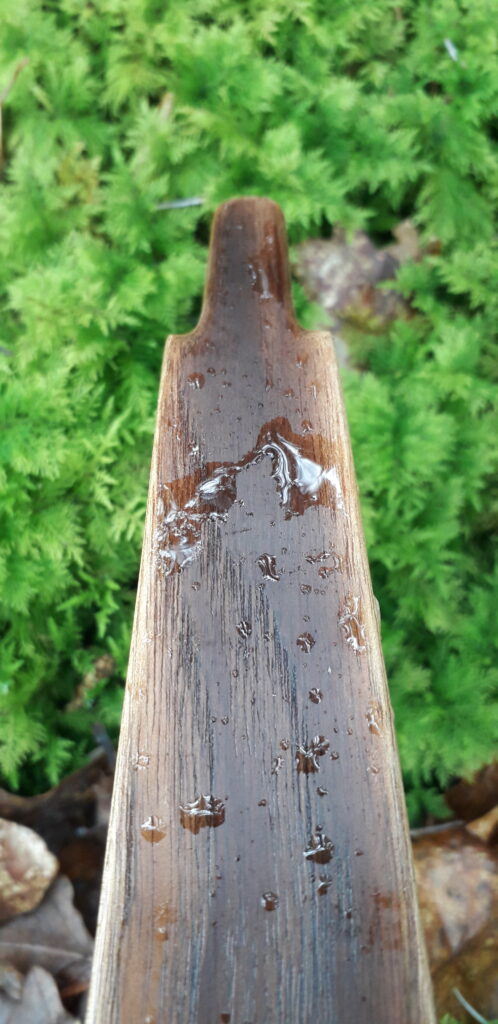
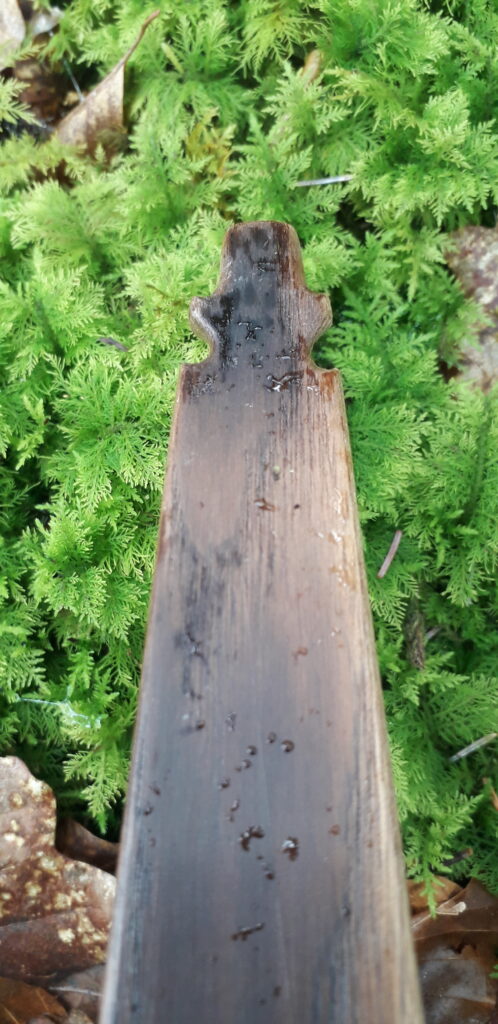
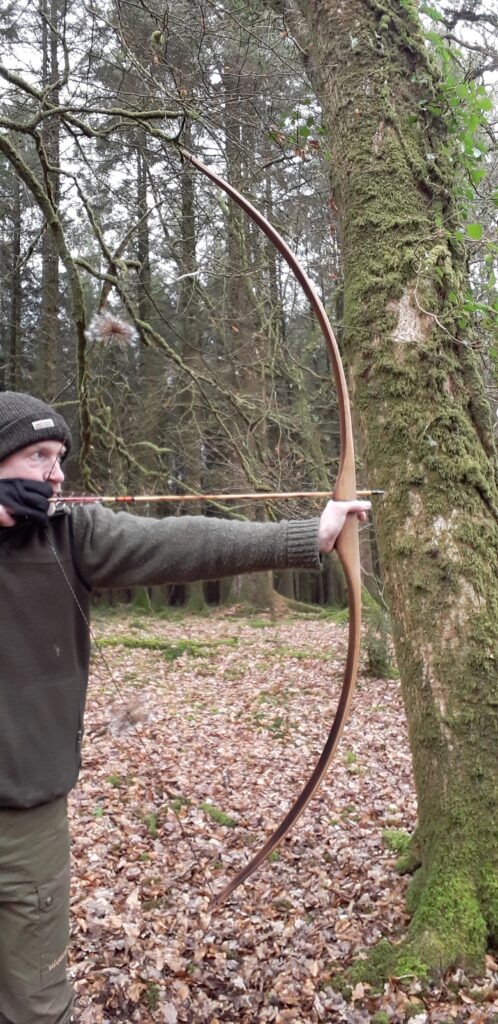
I didn’t bother with a handle covering on this one. It feels very comfortable even without a covering. For the arrow rest I just used some leather scraps. Nocks were a rendition of the classic Sudbury bow design as depicted in the fantastic book: Encyclopedia of Native American Bows, Arrows & Quivers Volume 1 page 32. My nocks were filed in at 45 degrees though, as opposed to the original 90 degrees as illustrated in the previously mentioned book.
The mass was reduced tremendously by the heat treating process and this bow feels nice and light and manoeuvrable in the hand. After shooting her in, the reflex had dropped a bit. Immediately after unstringing there is about 1” of reflex which settles back to about 1 ½” after resting.
This ended up being a super snappy lightweight bow settling in after 2 weeks of shooting at 51lb at 27”. She is certainly plain and simple but has all the power and functionality that you would want in a primitive hunting bow.
She balances well in the hand whilst being carried and feels well balanced through the draw cycle. She doesn’t stack and is lovely and comfortable to hold back at full draw. The release is nice and quiet without any hand shock due to the low limb mass and comfortable grip. The bow string is the one I made for the previous blog post article I did a few weeks ago discussing using a squirrel tail to make string silencers. You can read that post here: https://southmoorbows.com/squirrel-tail-bow-string-silencers-quick-and-easy-way/
So here she is, hope she inspires you to have a go at heat treating an otherwise simple white wood flatty. Enjoy!