After a fun few hours chasing after some squirrels with the airgun and the hound the other day, it dawned on me that a squirrel’s tail might just make for a useful and rustic looking bow string silencer.
I’ve made god knows how many string silencers before, usually from rabbit or fox (my personal favourite) fur but have never thought to give squirrel tails a go.
From time to time I will egg tan a pelt just for use as string silencers. A properly egg tanned, softened and smoked rabbit or fox pelt lends itself perfectly to being cut into nice soft thin strips of fur which can be wrapped around a bow string to produce great authentic looking string silencers which function very well.
But the truth is, in terms of performance, you don’t actually need fully tanned and softened pelts to make simple and effective string silencers. You can just wrap a piece of raw pelt around your bow string and let it dry in situ.
In fact, without laying your hands on them, most people would not be able to tell the difference between a properly tanned piece of pelt and a raw fur pelt strip which has simply been wrapped and left to dry thoroughly on your bow string.
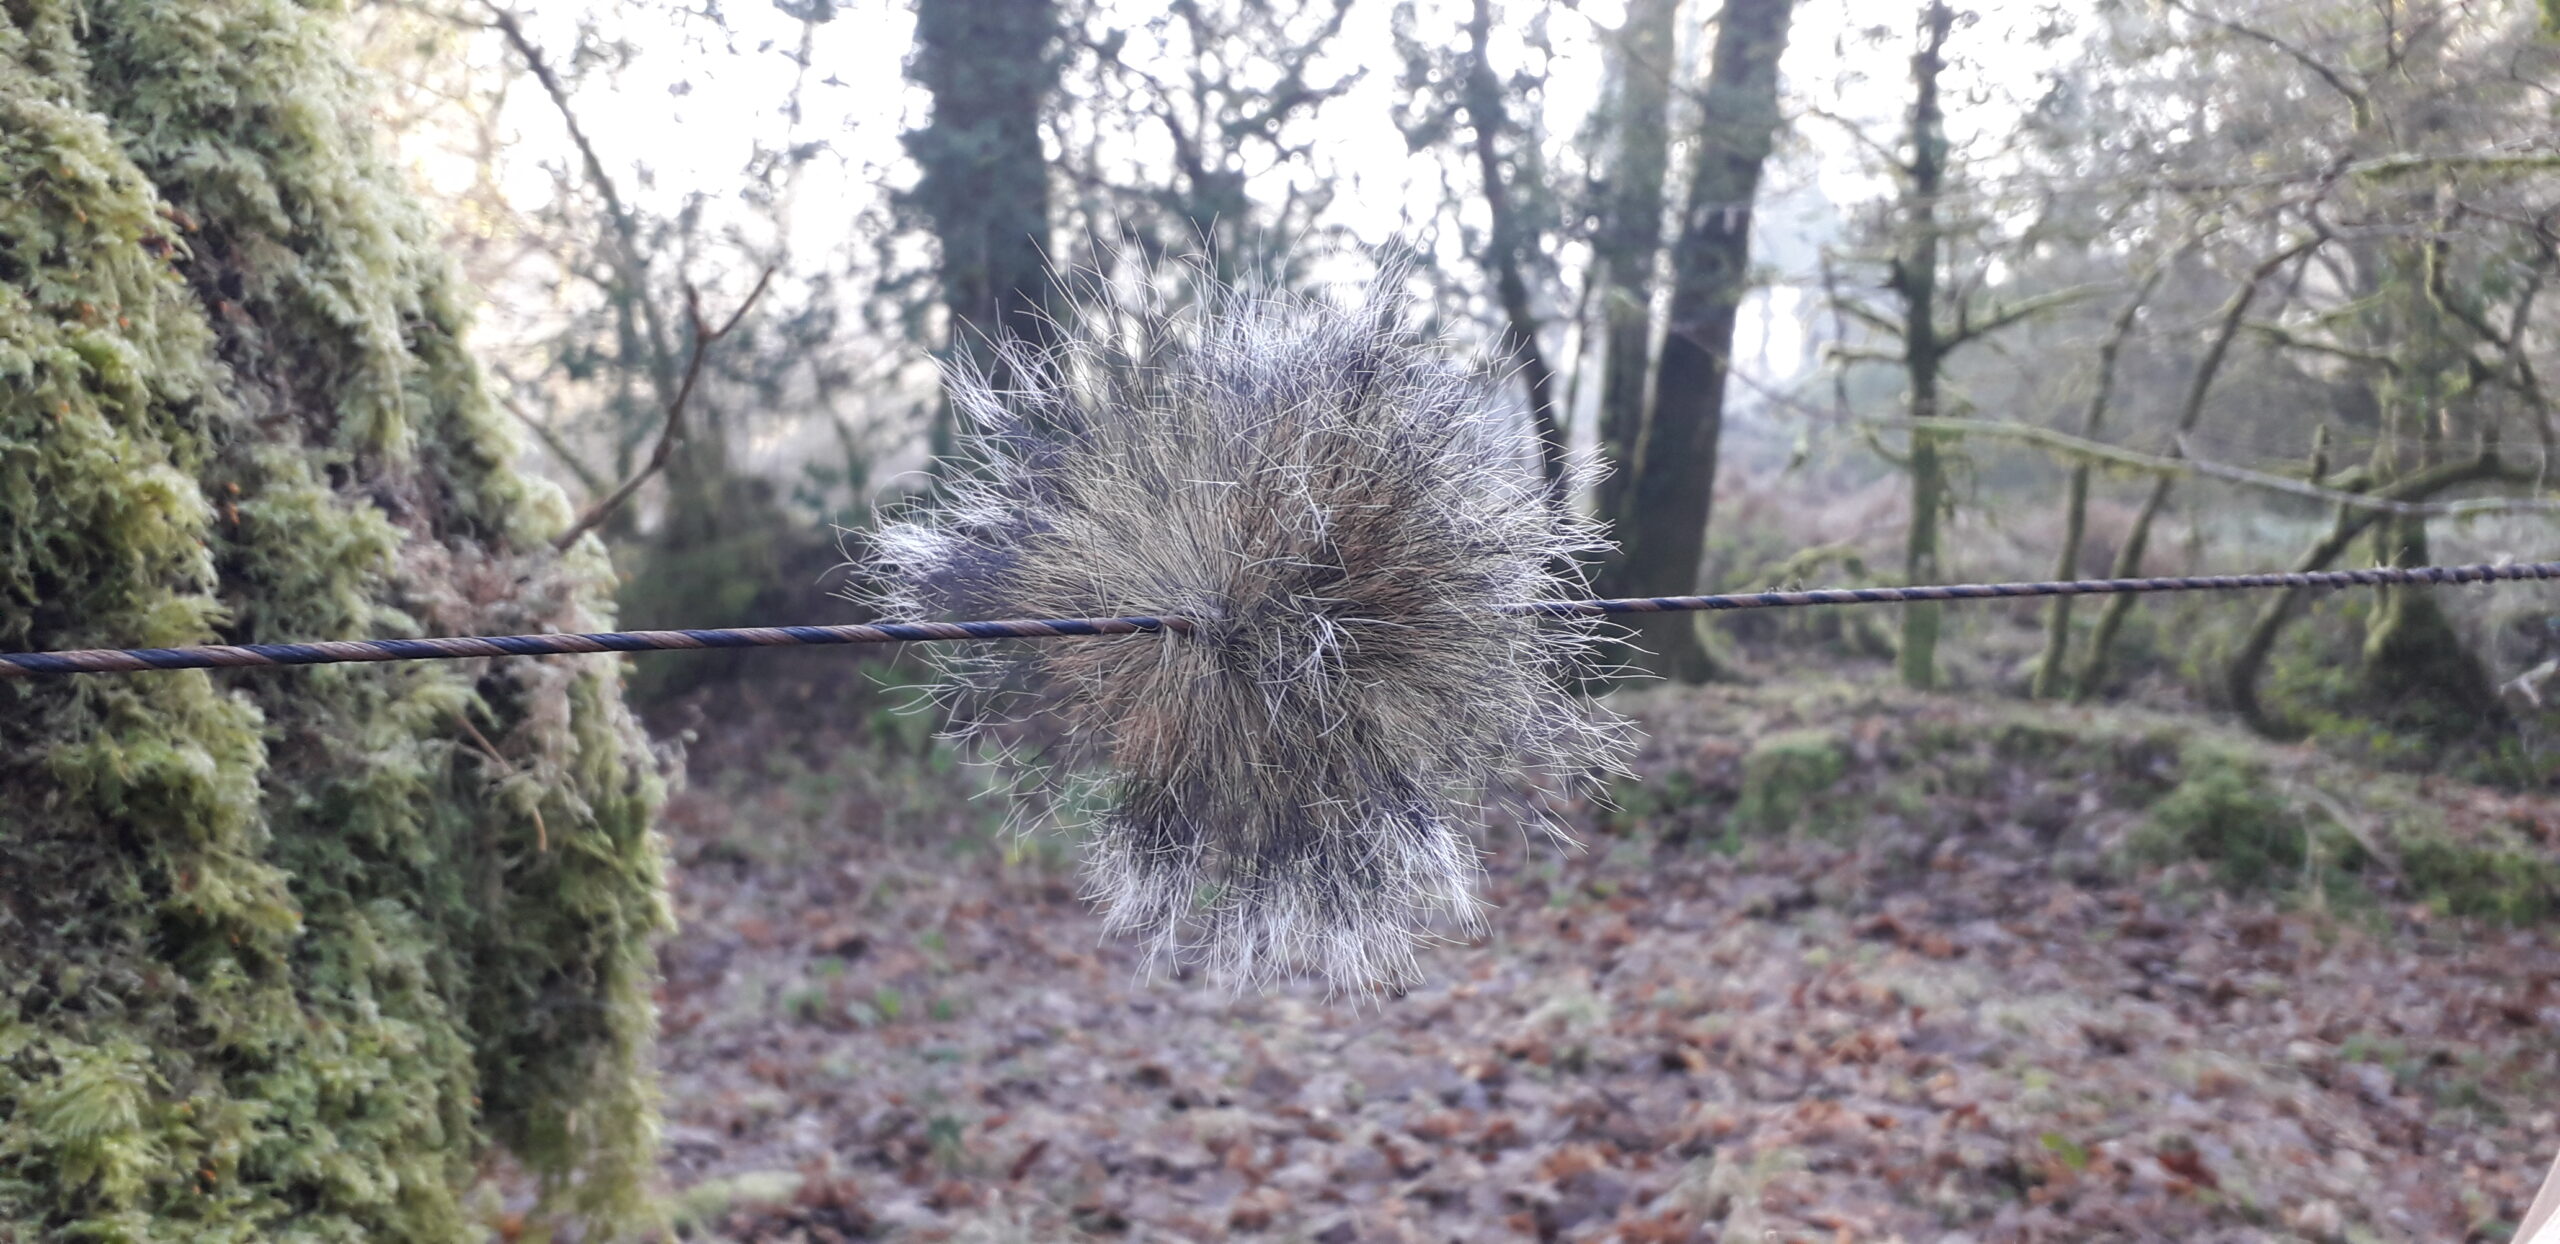
So interested primarily in what a squirrel tail silencer would look like, I decided to skin off a squirrel tail, split it down the middle and wrap it in its raw albeit dried state around a bow string to see what it looked/functioned like.
Here is a description of how I went about the experiment and what the end result looked like:
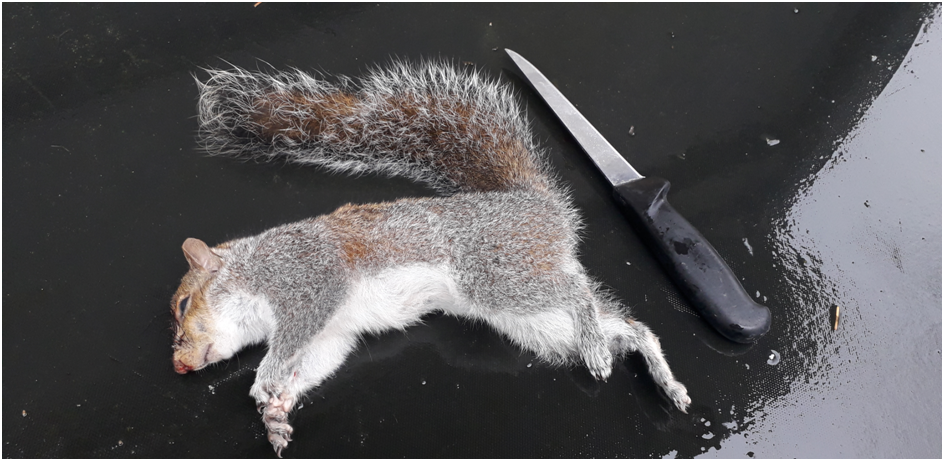
For this project you will need a sharp knife, cut resistant gloves and a squirrel (preferably a dead one like this guy!)
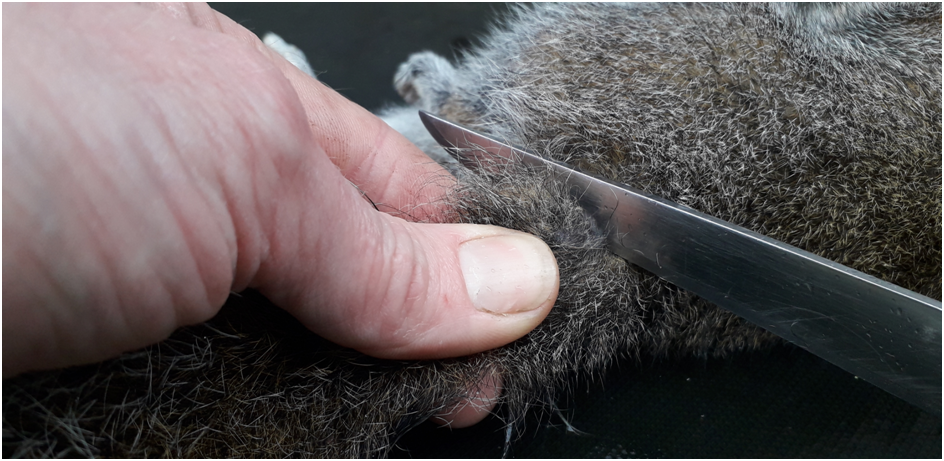
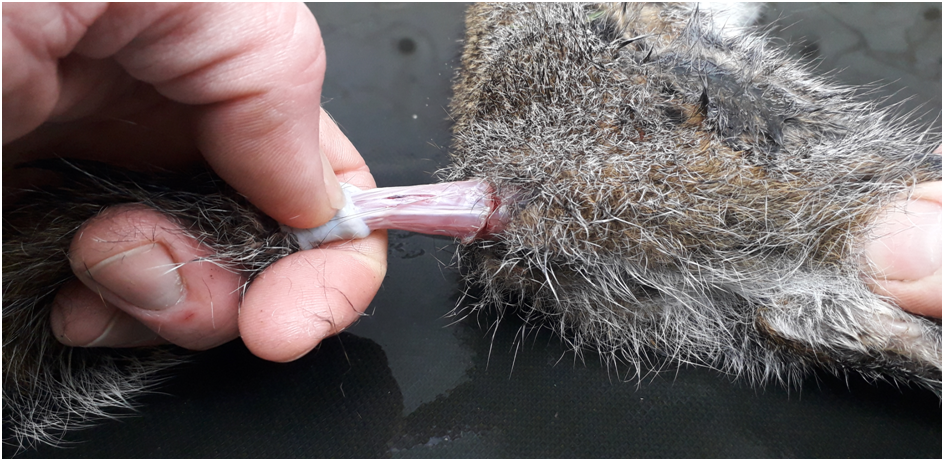
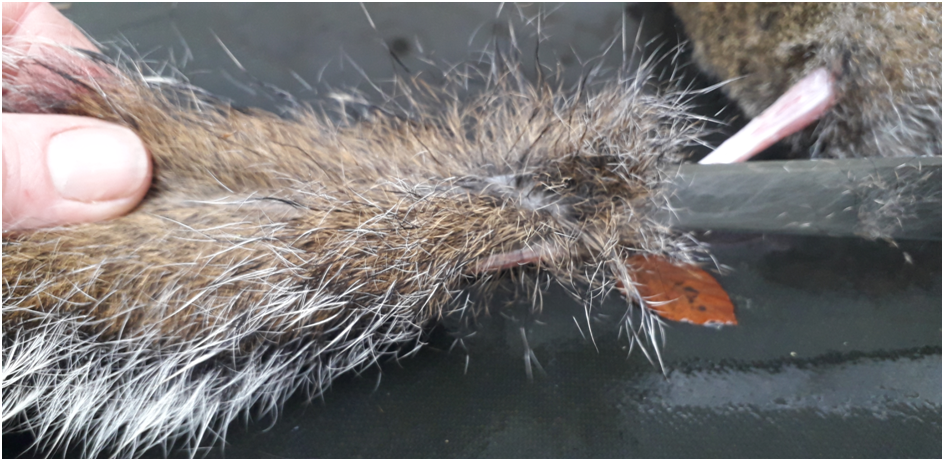
Start by making an incision at the base of the tail. Only cut deep enough to cut through the skin. Try to refrain from cutting through the deeper tail muscles as you will weaken the tail to a point where it could rip it completely off when you come to pull the skin away from the bone in a minute.
Once you have cut through the tail skin all the way around, start to pull the skin down towards the tip of the tail. Try and work around the whole tail so that you can see the underlying muscles all the way around.
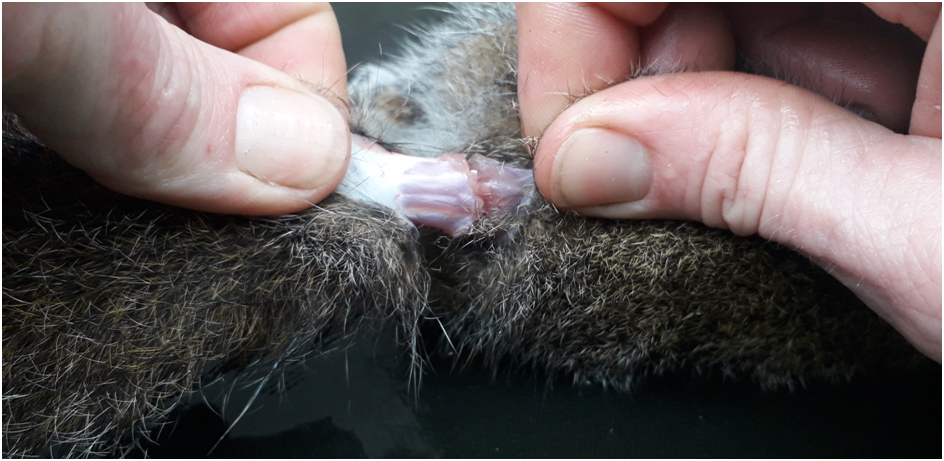
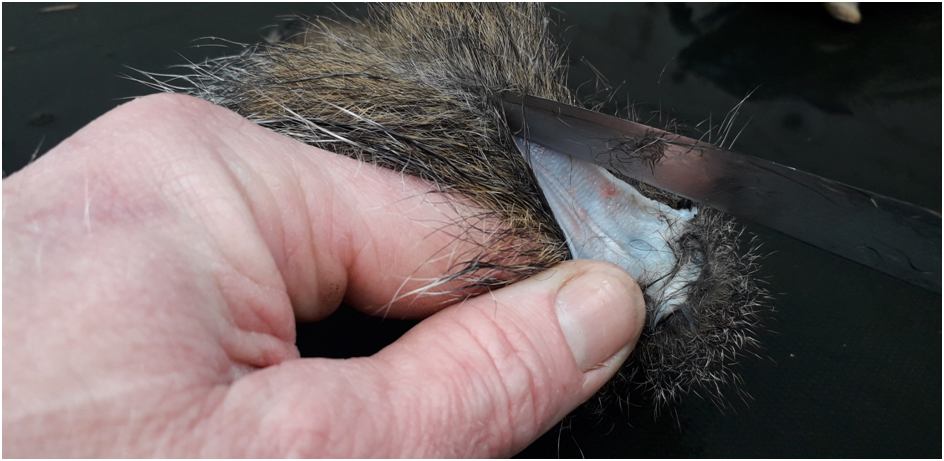
Now work the skin back about an inch. Then take your thumb nail and press down against the roll of skin that you have formed so that the force imposed by your thumb is directed down towards the end of the tail. At the same time, start to gently pull your hand which is gripping the skin down and away from the base of the tail.
You should start to feel the skin slip away from the bone and muscle within the tube of skin. Make sure that you pull hard enough to pull the skin away, but don’t pull so hard that you rip the whole tail off the body.
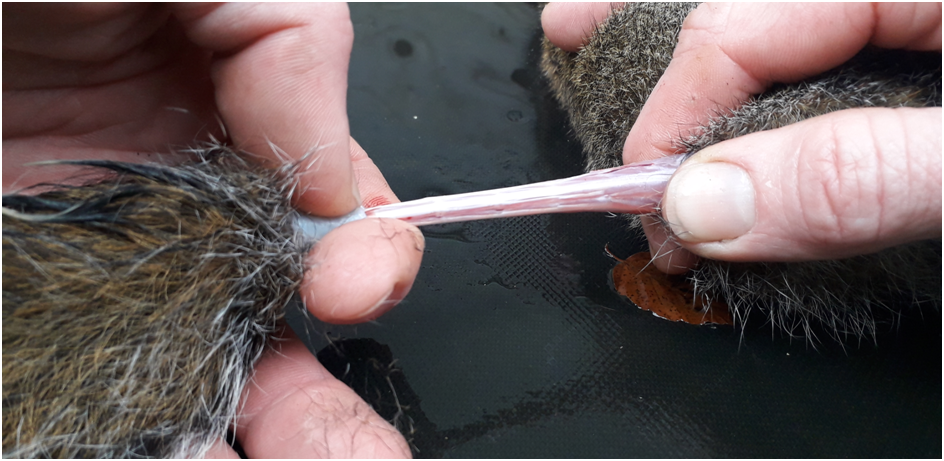
The tail skin should just slip right off the end of the bone/muscle like pulling a sock off.
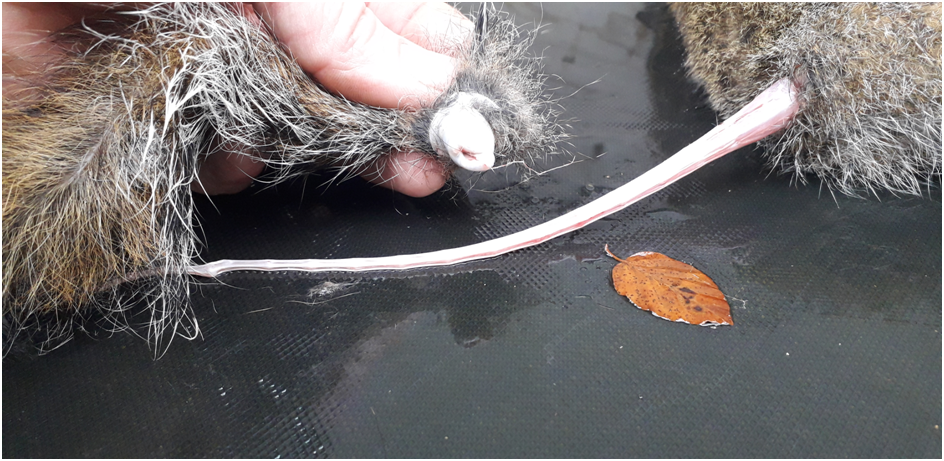
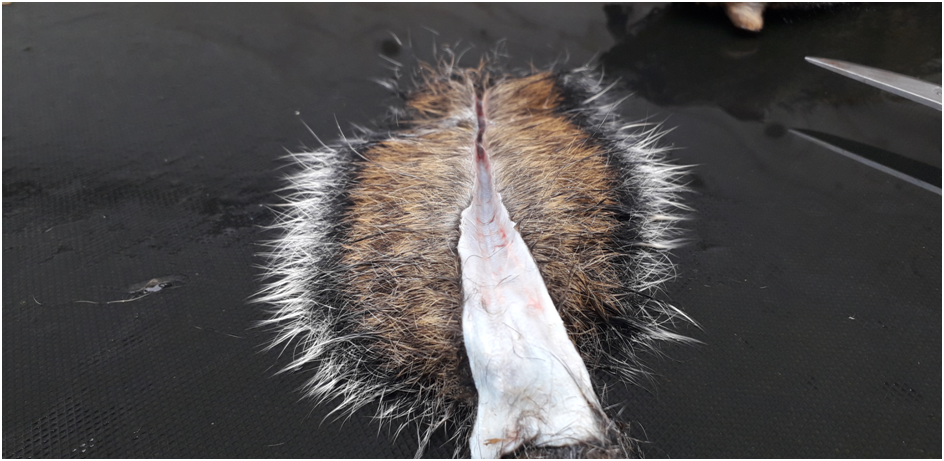
Now stretch out your skin tube and lay it down on your work surface so that the widest two faces of the fur/skin tube are facing downwards and upwards. You want to cut your skin tube in half by making the first incision along the widest face which is now facing upwards. I do this by inserting the tip of my knife into the opening and making a slit from one end all the way to the tip of the tail.
Push the blade into the opening as far as possible and slit the skin tube right down the middle.
Take your time to make sure that you are keeping to the centre line so that your strips end up equal in width.
Once you have split the skin tube right down the middle you can lay the skin out flat and straight ready for the next cut.
Now find the centre of your skin and with a rolling, slicing and pressing motion, cut straight down the middle of your tail skin.
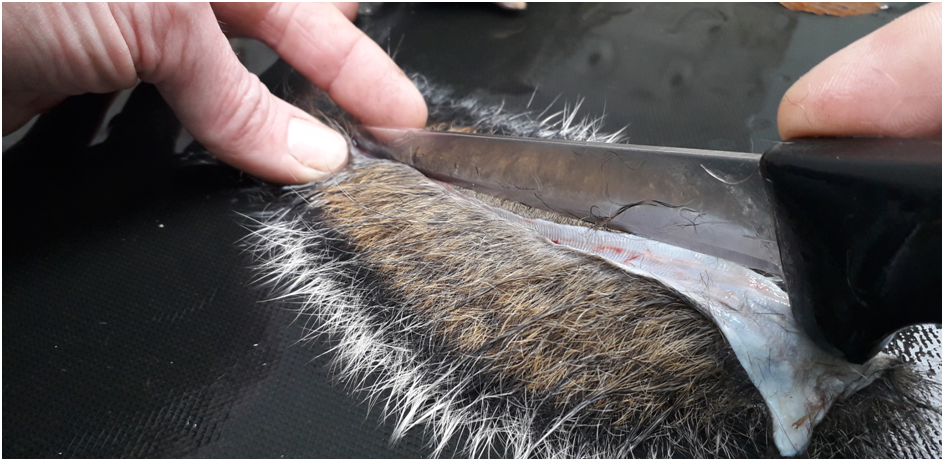
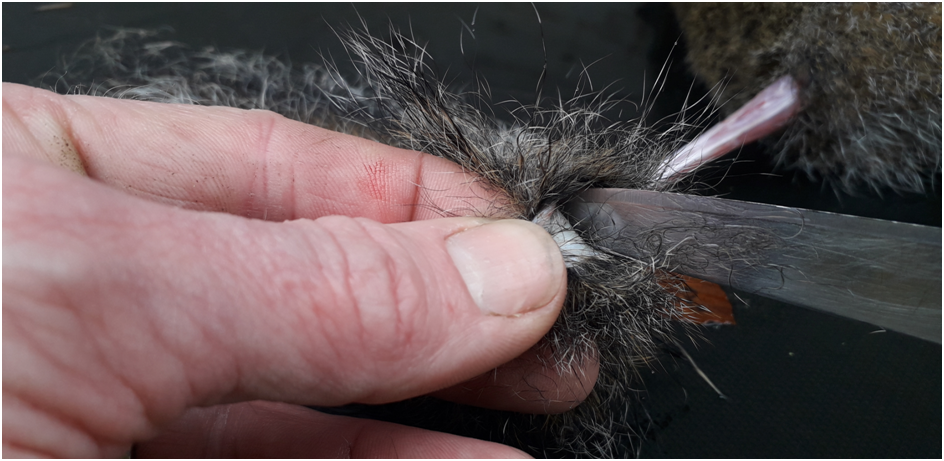
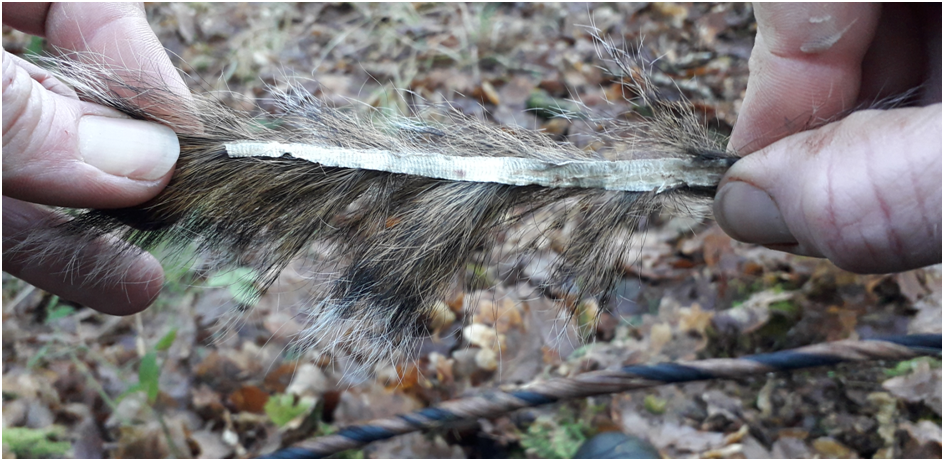
You should be left with two strips of raw tail skin with hair still attached. Trim off the base end a bit to remove the widest piece of skin and the adjoining short hair. This section with short hair is of no use to us.

Give the two strips a good wash with soap and water to clean them up a bit.
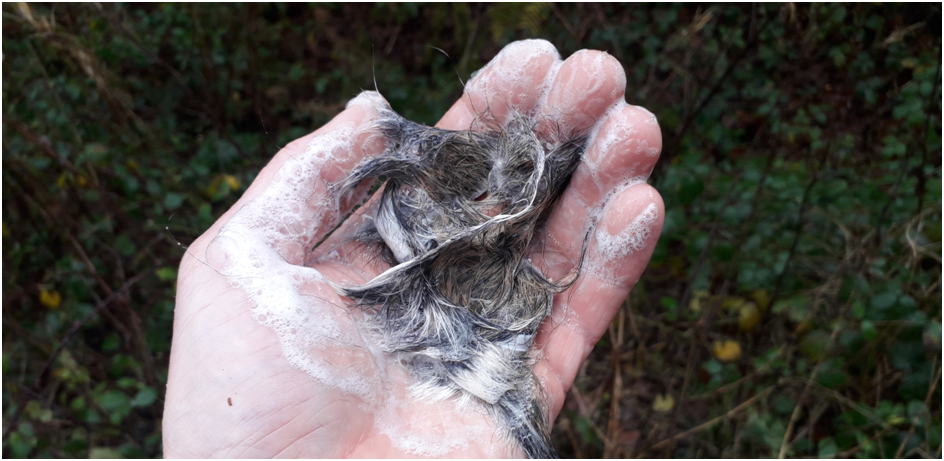
Now rinse them off and hang them out to dry somewhere that will stay dry and warm. I hung my two strips above my wood burner and they were completely dry after just one night. The next day I gave the dried skin strips a bit of gentle manipulation with just my fingers in order to soften the stiff, dry skin a little.
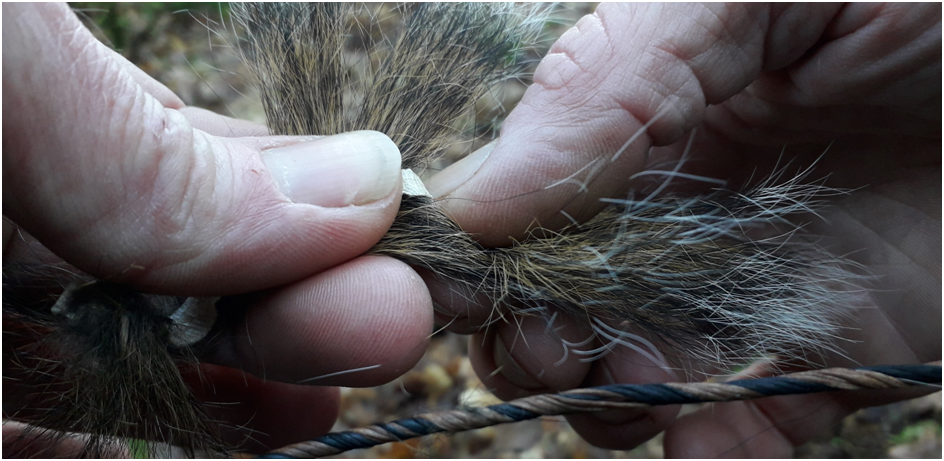
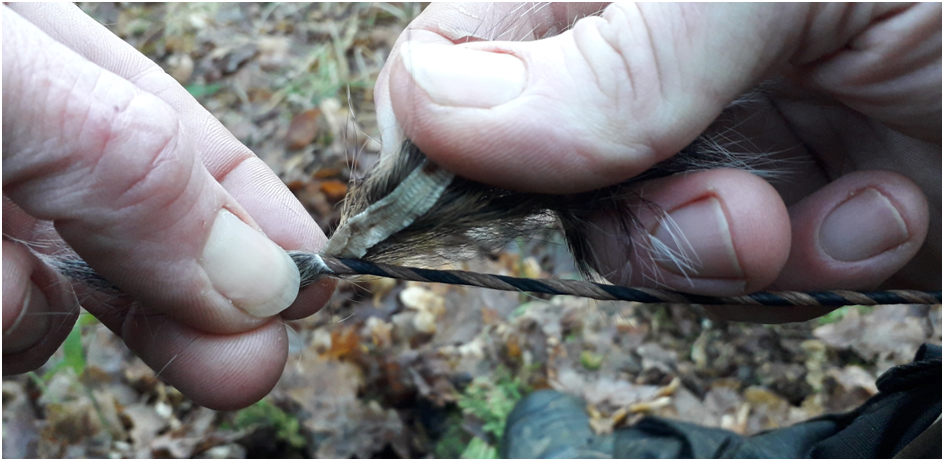
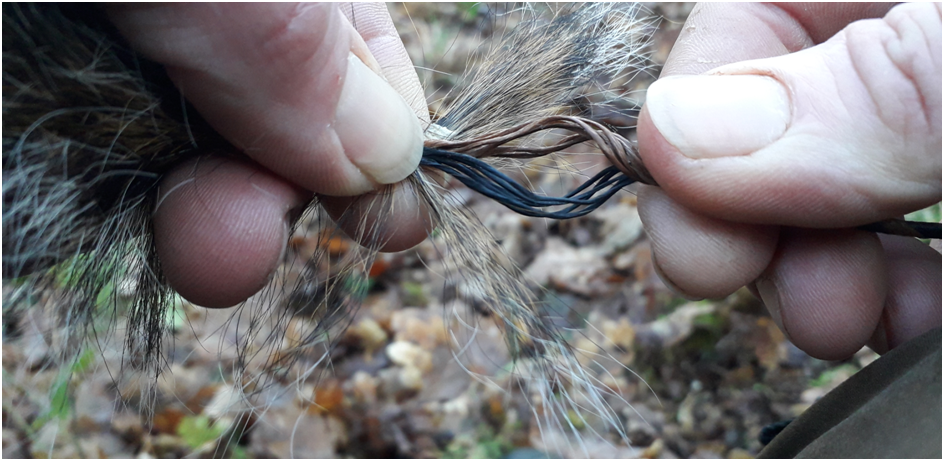
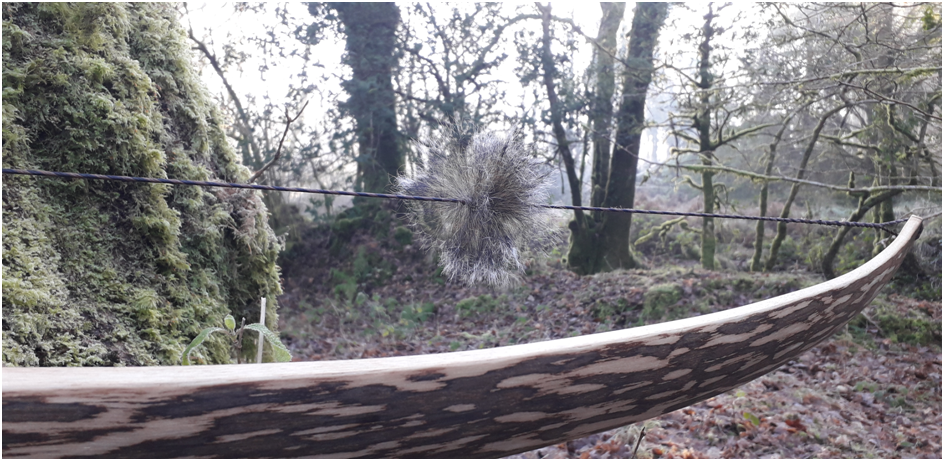
I then fitted them to a new bow string the same way I would fit any pelt strip string silencer. After securing one end of the skin strip to the slack bow string by parting the string and threading the end through the gap.
I then re-apply tension to the bow string and begin to wrap the rest of the skin strip around the bow string in the same direction as the bow string has been twisted up.
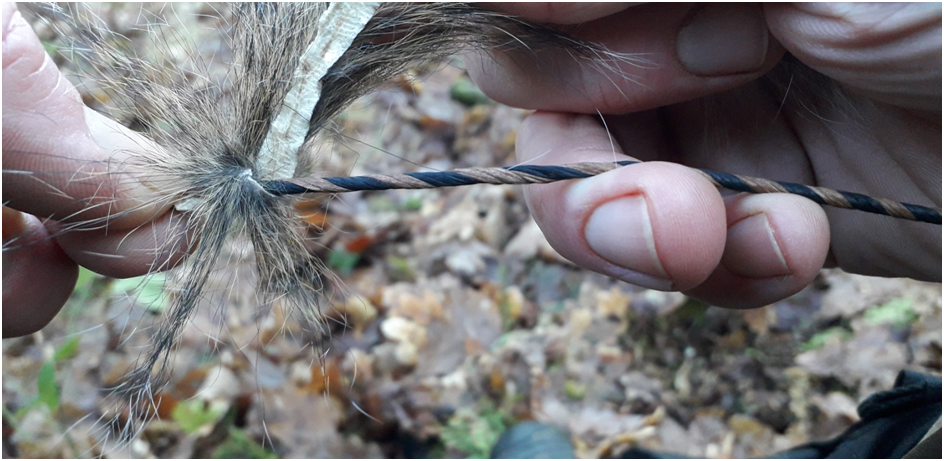
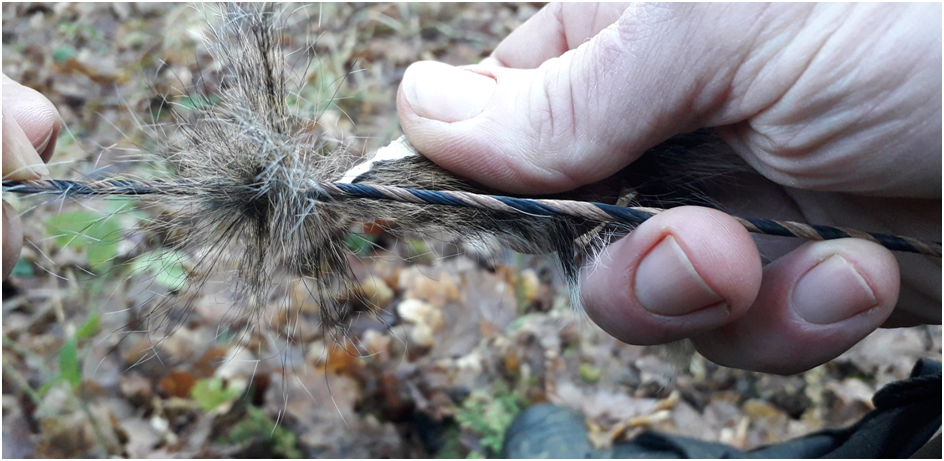
Once I’m only left with 3/8 inch or so of the skin strip, I will take the tension out of the string again and part the string so that I can pass the tag end of the skin strip through the gap I’ve created, securing it in place once the string tension is re-applied.
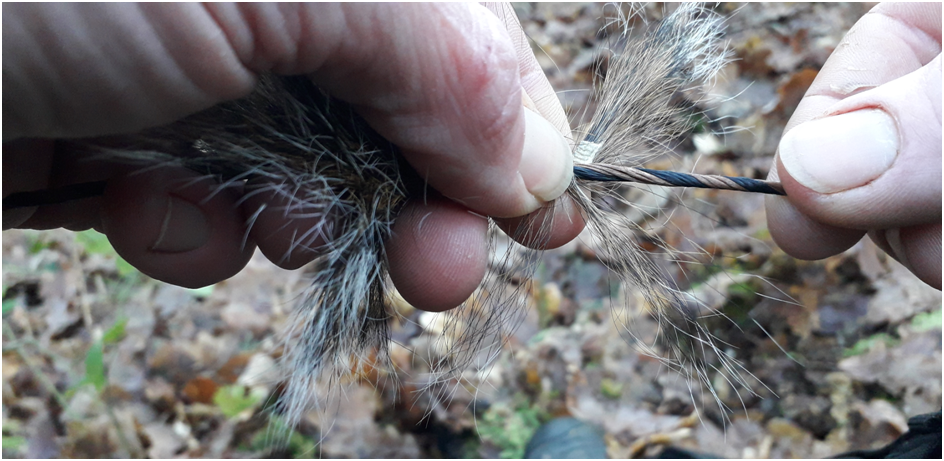
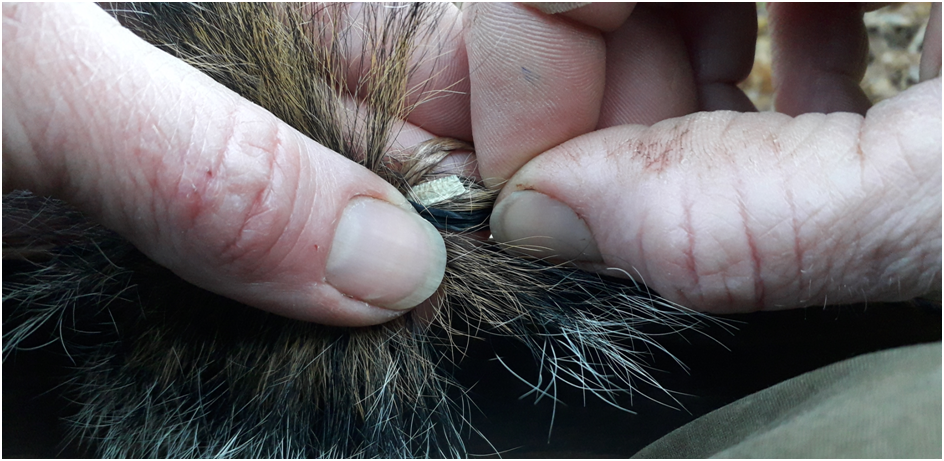
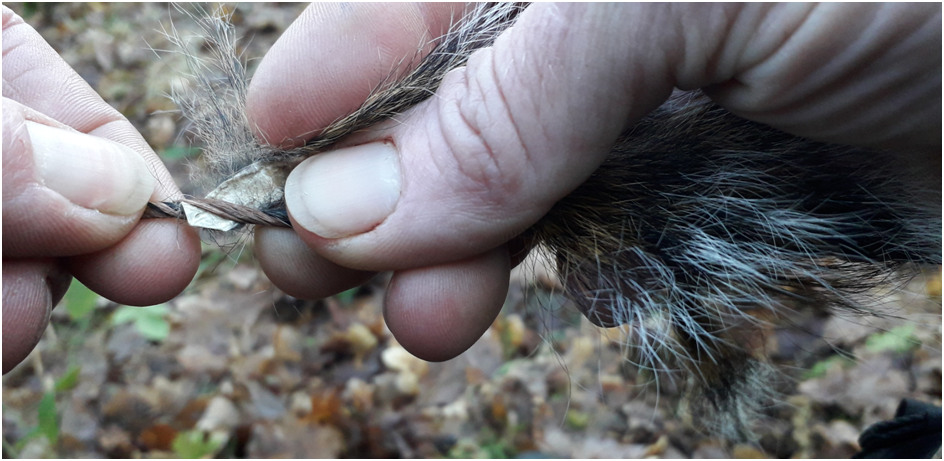
At this point I will typically push the two end of the skin strip towards each other with hand pressure. This causes the skin strip to bunch up nicely which in turn helps to flair out the hair more evenly.
If need be, the last thing to do now that the string is taught again is to trim off any tag ends of the skin with a pair of scissors.
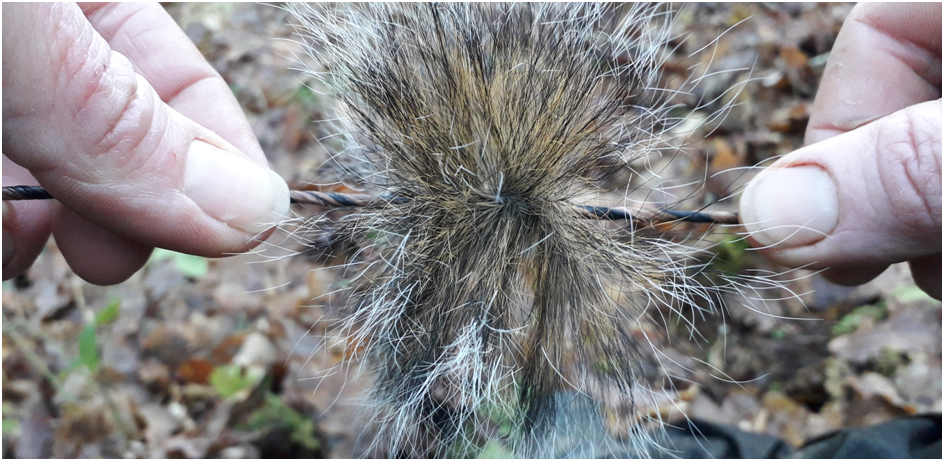
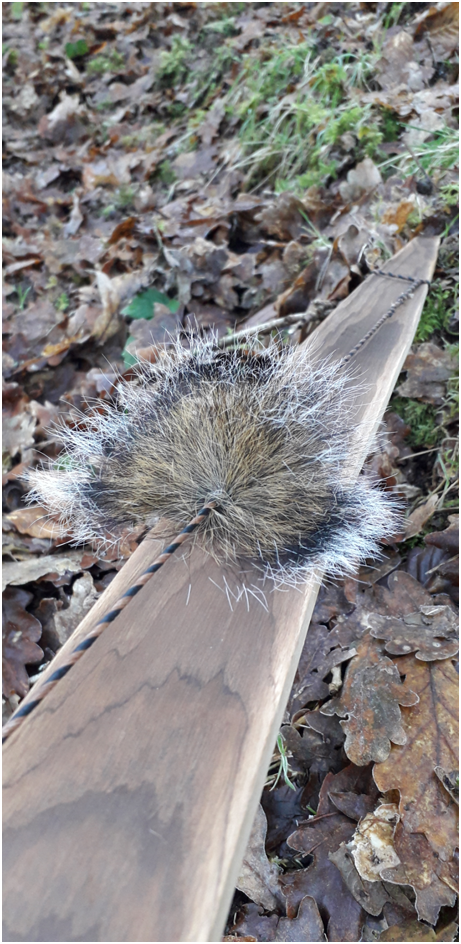
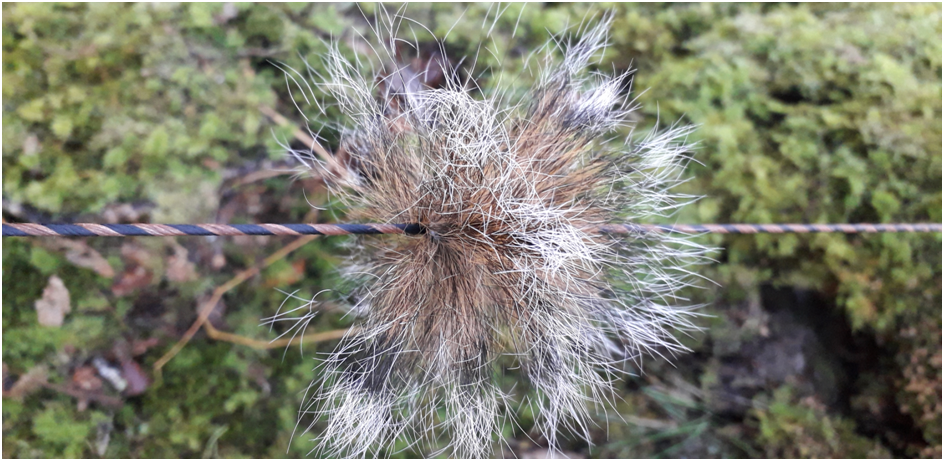

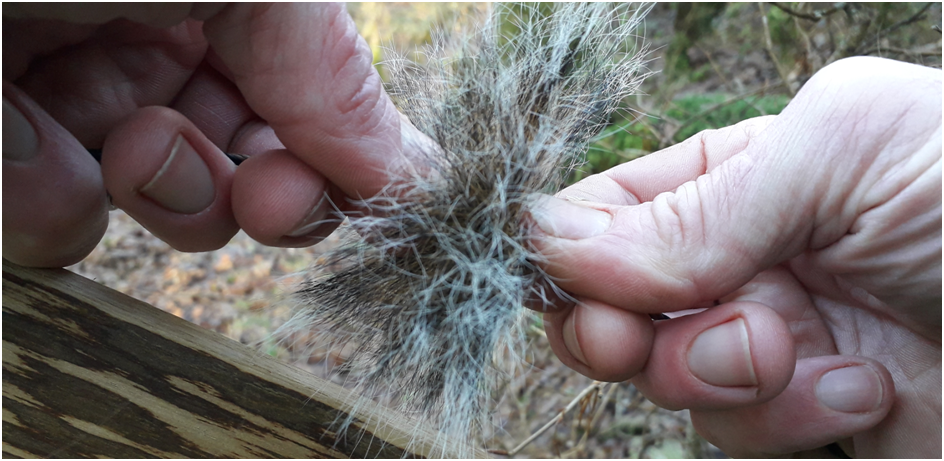
I think they look pretty cool and they seem to hold up to the wear and tear as well as any other pelt strip silencers. The only criticism I have is that they do look a little dishevelled the moment they receive a soaking. But then don’t most fur silencers!?
Give then a try and see what you think.