The Sinew Series Part 3 – Sinew Glue
In the previous two Sinew Series articles we went through the various processes of sourcing, extracting, drying and processing deer leg tendon into usable sinew material which you can use for your next primitive archery project. If you haven’t yet read these previous two articles, then you can find them here:
Sinew Series Part 1: https://southmoorbows.com/the-sinew-series-part-1/
Sinew Series Part 2: https://southmoorbows.com/the-sinew-series-part-2/
If you have followed along through these first two articles, then by now you will have a nice pile of perfectly prepared sinew material which will be pleading with you to find a permanent home for it!
If your intention was to use your sinew for making cordage/bow strings etc then you might need to wait until the next article where I will cover making strings from leg sinew. If, however, your intended use for your carefully processed sinew is to back a bow then you will next need some hide glue, or better still, sinew glue.
In this article I will show you how I make my own sinew glue.
I’ve messed about with “animal glues” for several years only to conclude that simple sinew glue is strong enough, flexible enough and easy enough to make for it to be my go-to adhesive for many primitive crafting projects. It’s a good all-round glue for sticking things to wood, including sinew.
Sinew glue is also great for sticking down leather, rawhide, fletchings, wrappings, points etc although I think that pitch is a better option for arrow construction for reasons which we will discuss in a moment.
I’ve personally never tried to use sinew glue for bone/horn/antler tip overlays etc so I don’t know how well it would bond to these semi porous materials however I’m sure it would probably work well enough, as long as the glue joint was kept dry and away from high humidity.
On the subject of moisture, we should discuss the weaknesses of sinew glue before trying to use it for everything. Moister is the enemy of all animal glues, including sinew glue. I can’t imagine sinew glue, or any other type of animal glue, having much application in a very wet or humid climate unless the exposed sinew glue has been very well sealed from moisture.
The downside to sinew glue, and all animal glues for that matter, is that they are very water soluble. Unlike pitch, without some kind of water proofing, all animal glues will begin to dissolve if exposed to water or even just high humidity.
Making any animal glue also requires a bit of time and effort, however it is not at all difficult to make, and the time factor is mostly as a consequence of the cooking process which requires minimal input once cooking commences.
Nowadays I only really use sinew glue for sinew backing and for that purpose it is excellent. I seal all of my backed bows and keep my bows in an indoor environment which has very consistent temperature and humidity so I never have to worry about moister ingress damaging any bonding achieved through the use of sinew glue.
Many primitive bowyers report better shrinking and subsequent reflexing of sinew backed bows when sinew is bound to the back of a bow with sinew glue rather than hide glue. Personally, I haven’t experienced much difference between hide glue and sinew glue in this regard.
The main reason I tend to use sinew glue over hide glue is that I’ve always had a surplus of sinew scraps and sinew rich tendon sheaths at my disposal. Since after processing out all my sinew I end up with all this scrap material anyway, I might as well make use of it and make it into sinew glue.
One thing I will say is that the purest, cleanest and possibly strongest sinew glue is made from pure clean sinew minus all the chaff and connective tissues which often ends up in the pile of sinew scraps. All this none sinew chaff gets created when the pounding and splitting of dried tendons take place.
Tendon sheaths also contain a lot of fasciae and other none sinew connective tissues too. Some of this none sinew material contains little to no collagen so will provide no real benefit to your glue. It is the collagen content that makes sinew and hide glue a strong, flexible adhesive.
As with hide glue, the less fascia/connective tissue/muscle tissue that ends up in the sinew glue the better the purity and corresponding quality of the final glue product. All that said though, for our purposes, small amounts of contamination don’t appear to reduce the strength of the final product by much. So don’t be afraid to cook up your scrap tendon sheaths whole. I’ve never noticed any measurable reduction in a glues performance even when I’ve known the glue to be full of impurities.

Hide glue is a great alternative to sinew glue and the making process is essentially the same. The only thing to consider is that the raw hide which is required to make hide glue requires processing first. Making rawhide is a lot of work, whereas sinew glue can be made from all the sinew scraps and tendon sheaths.
If I’ve been processing a pile of sinew to back a bow, then I will have already created a bunch of tendon sheaths and sinew scraps as a by-product of all the tendon processing. Which I’m going to be doing anyway hence the need for a backing glue in the first place!
So on with the program, let’s make some sinew glue. First you will need the following materials/equipment:
- 2 0z of dry sinew scraps or a dozen dry/raw tendon sheaths (see sinew part 1 article).
- A slow cooker/crock pot with a low setting (approx. 85- 90℃)
- One litre of water.
- Tubs/jars for glue storage.
- A dehydrator (optional).
- A blender/coffee grinder (optional).
Step one:
Place your dry or raw sinew scraps/tendon sheaths and the water into your slow cooker/crock-pot. Make sure that the temperature which you set your slow cooker to is less than a simmer. If the sinew is boiled, then the collagen proteins, which give sinew glue its strength, will break down reducing the strength of the glue considerably.
A small amount of very gentle bubbling around the edges of you cooking pot is fine but a simmer is definitely not. A rolling boil will completely destroy your glue so be warned!

Step two:
Let the sinew slowly and gently stew for at least 12 hours. I don’t time mine, but I do leave it cooking at least overnight. I leave my slow cooker out in the garage as the smell of slow cooked sinews are not to everyone’s liking!

Step three:
First thing in the morning, lift the lid on your sinew stew and check the water isn’t simmering. If all looks good take a pair of scissors and snip your sinew scraps/tendon sheaths up as small as you can manage. This should be easy now that the sinew has had chance to cook the tendon sheaths down to a tender state. Cutting your sinew up will expose even more of the sinew’s surface area to the hot water further extracting the sinew’s collagen out into the cooking water.
Once you’ve snipped up your sinew nice and fine replace the lid and continue cooking for another three or four hours. Longer will be fine if you accidently forget about it!

Step Four:
Once your tendon sheaths/sinew scraps have had at least 12 hours of cooking, turn the cooker off and allow the sinew stew to cool for half an hour with the lid on. Your sinew stew should stay warm enough to move on to the next step but if you’ve left it too long and the mixture has gelled then simply warm it up enough to turn the mixture back into a liquid form. (Careful not to let it reach a simmer or worse still a boil!)
Step Five:
Your sinew stew should have a viscosity which is something like warm syrup. If it is very watery then it will likely need reducing a bit. This can be done by continuing with the cooking process with the cooker lid removed. It can also be done by drying the gelled liquid at a later stage. We will cover this later.
Place a metal sieve/colander over the top of a bowl and place both items in you sink. Pour the sinew stew into the sieve/colander and let the stew juice pour through into the bowl below. Remove the sieve/colander and dispose of all the bits which the sieve/colander has caught.


Step six:
Now you will have a bowl full of relatively clean translucent light brown liquid. If it looks clouded up with tiny particles, then you could pass the liquid through a fine sieve or a muslin cloth to remove the last few bits of gunk.


Step Seven:
Now test the gelling quality of your glue. If your glue gels well then it will make a good, strong and flexible glue. To test the gelling quality of you glue, take a teaspoon full of your glue and drip it onto a cold clean plate to form a small puddle of glue. Leave it at room temperature for ten minutes. After ten minutes, test how well your glue has gelled by pushing your fingertip into the edge of the glue puddle you made. If the viscosity of your glue has stayed the same then, ask yourself if the room temperature might be a little too warm to let the glue gel up.
If you feel that the ambient temperature is perhaps too hot to allow the glue to gel up, then place the plate into your refrigerator for another ten minutes then try the same procedure again. If your glue has now started to set up into a gel and can be pushed up into a ridge of jelly, then your glue is good.


Step Eight:
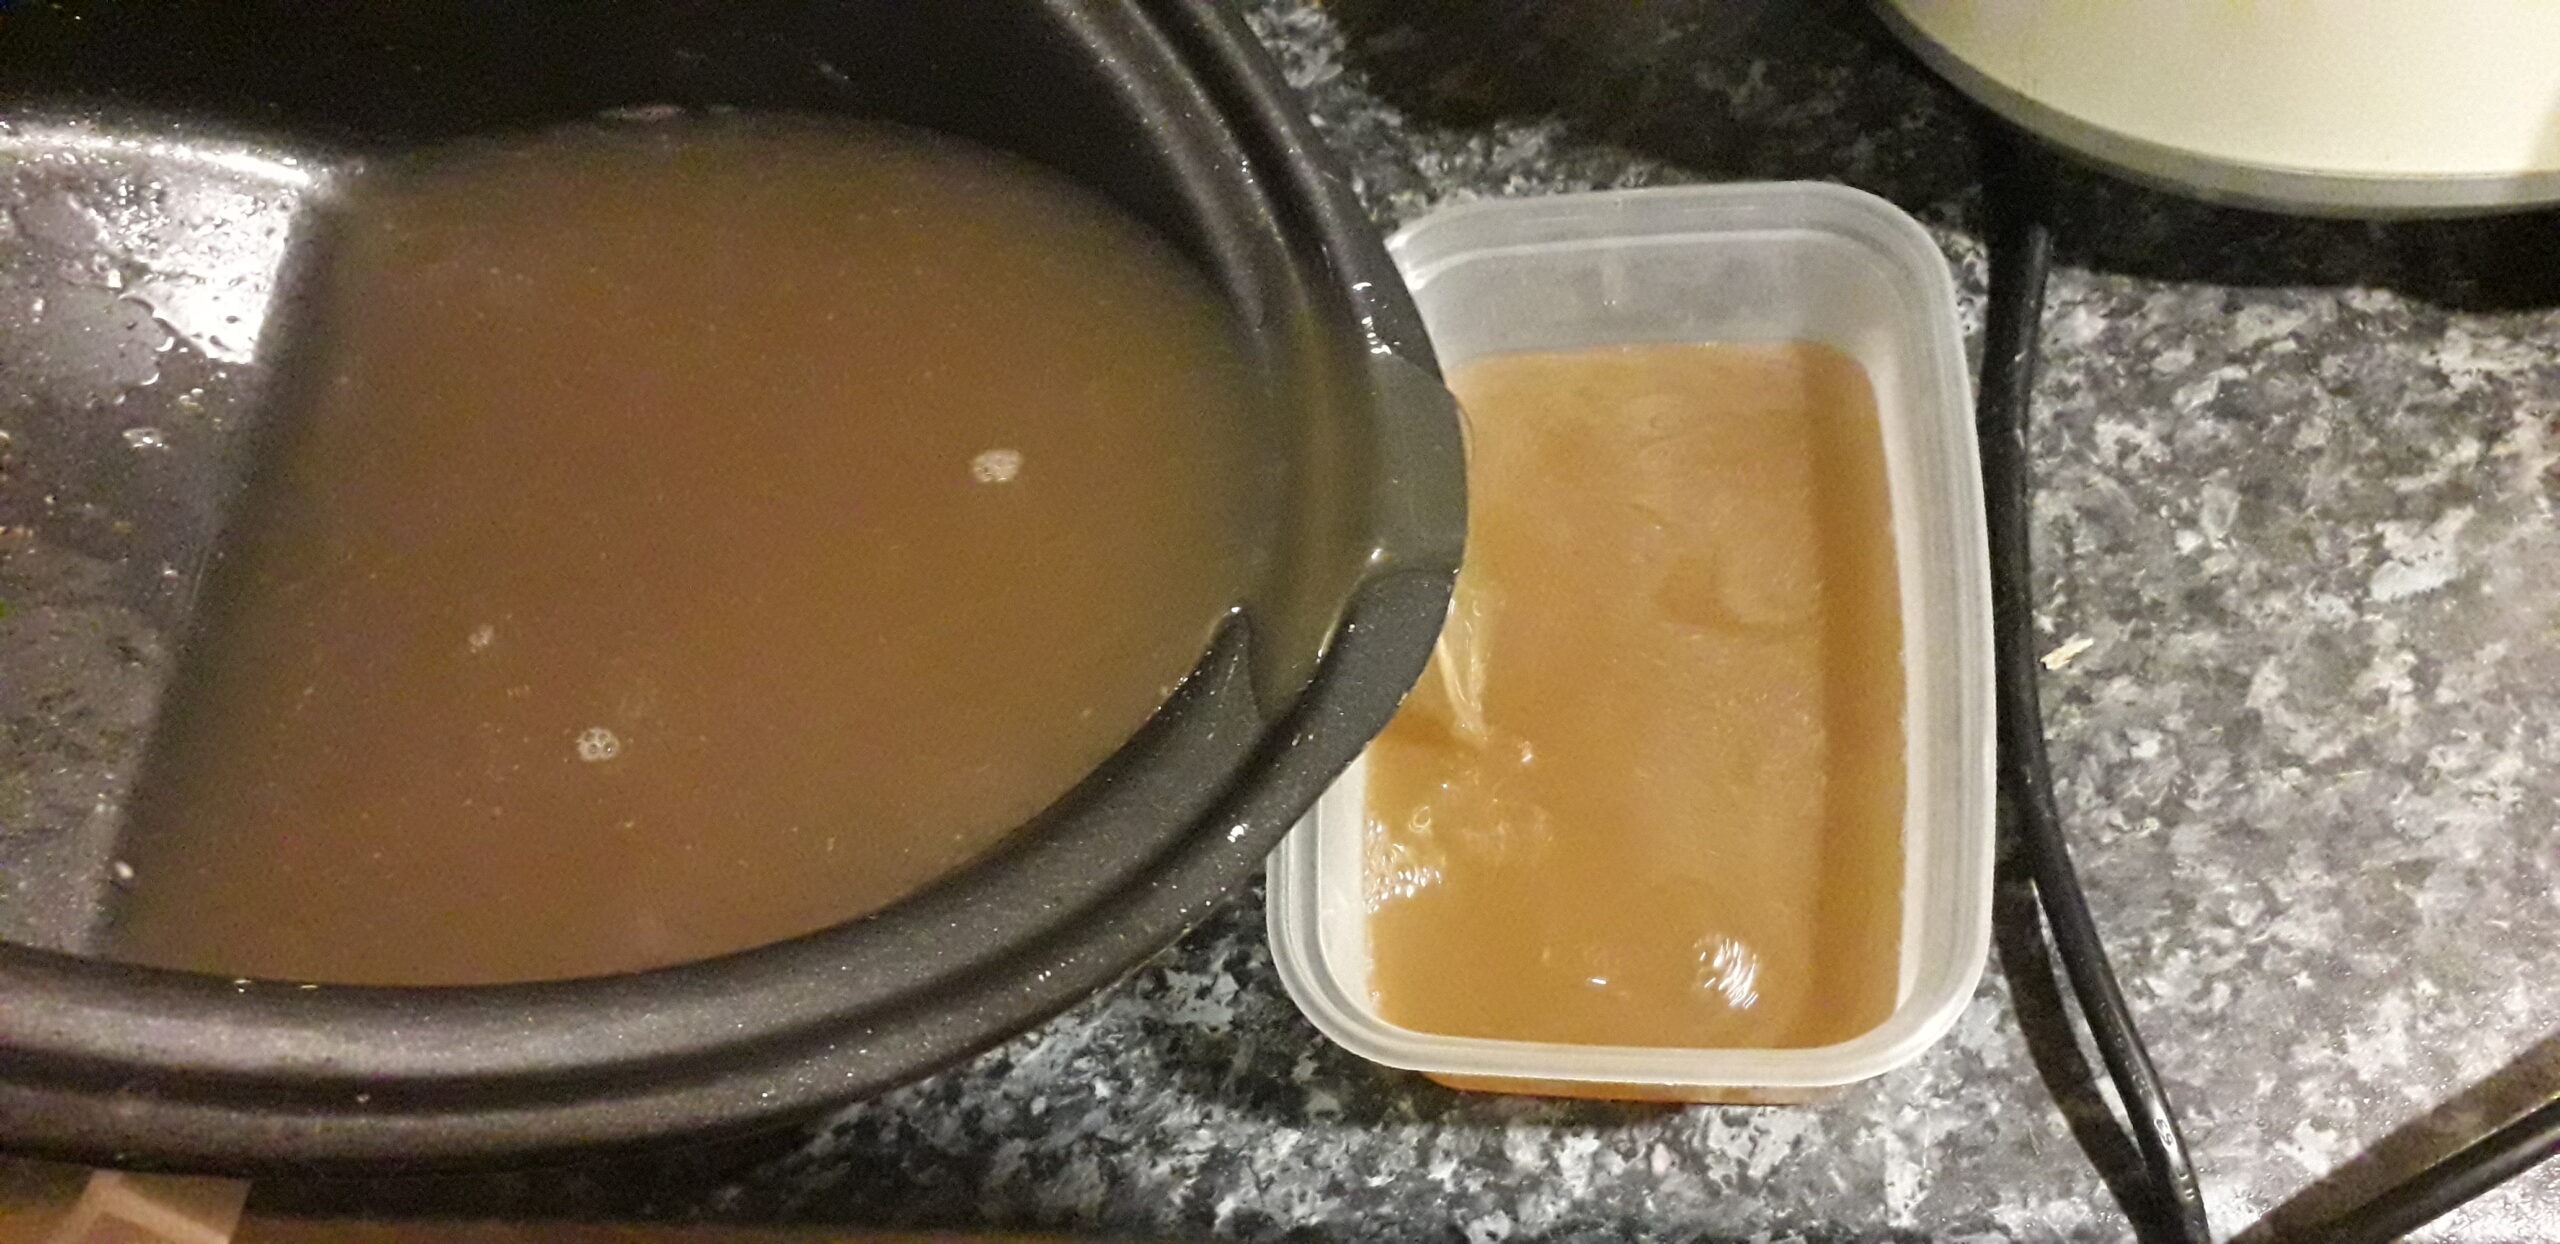
If your glue is gelling up fine, then the next job is to arrange your glue for storage. Pour your still warm liquid glue into a large enough tub, bowl or tray and leave to set into a gel. You may place it in your refrigerator if it is a hot day.
Once your glue has set up into a gel you can either freeze it if you’re planning on using it soon or you can dry it down to a solid form which can be rehydrated when needed at a later date.

Step nine:
If you wish you dry your glue into a solid form for long term storage then take one of your trays of gelled glue and cut all the gel up into small cubes.
Spread the cubes out on a large tray and allow to air dry in a clean and airy location. This can take a few days depending on drying conditions however if you have access to a dehydrator then you can speed the process up by placing the gel cubes into shallow impermeable trays and drying them in a dehydrator set to the very lowest temperature setting.
Remember that heat will revert gelled glue back to a liquid so make sure that the tray which the gel is placed into is not likely to leak your liquid glue out into the inside of your dehydrator. With my dehydrator set at 38℃/100℉ I can get my gelled glue down to a thin sheet of solid glue in about 12-16 hours.
Step Ten:
Once your glue is in a solid form then you can store it like this, or you can take it one step further and break the sheet of dry glue up into pieces which you can then grind down into a powder using a blender or a coffee grinder.
I store my glue powder in glass jars kept in a cool dark place. Keeping the glue powder in glass jars keeps the contents from being eaten by rodents and insects, both of which will dine on your hard work with glee!
Be warned, rodents will also make a meal of your sinew and raw hide too so always keep these materials away from hungry critters. And by critters I also mean dogs!
Step Eleven:
To rehydrate your glue simply add enough glue powder to half a litre of hot water to re-create a viscosity which is akin to that of warm syrup. By “hot water” I mean at about the temperature which you can just about put your fingers into without getting burnt. Hot but not too hot!
Simply place two or three dessert spoons of your glue powder into your hot water and mix thoroughly.
Remember, you’re aiming for a consistency of warm syrup before application. If your glue is still too thick and you’re sure that your water is hot enough, then add more hot water. If your glue is too thin, then add more glue powder. If you do not have more glue powder, then you will have to slowly reduce the water content by warming your glue over a low heat until the viscosity looks right.
Just a quick note on working with all animal glues including sinew glue. If you are embarking on a gluing up project which might take a fair while to complete such as sinew backing a bow, you will need to keep your glue at a temperature of around 40-50℃ throughout the whole process. If you don’t keep your glue warm, then it will start to set up into a gel again. I keep my glue in a liquid state by placing my liquid glue in a shallow metal tray which I place on top of my oven’s plate warmer. This keeps my glue at the perfect temperature for application.
So there you are. Go and give sinew glue a try. If you only have raw hide at your disposal then follow the exact same procedure with good clean rawhide instead of sinew and you will produce very high quality glue fit for many of the purposes useful to a primitive archer.
Alternatively, if you can’t be bothered with making glue but want to get your hands on some ready-made glue then I do sell jars of dehydrated sinew glue powder. Give me a shout via the contact page if you’d like to buy some. I also sell by weight, dried red deer leg tendons which you can be processed into sinew. I also sell dried leg tendon sheaths for glue making if you wish to give glue making a go from scratch.
Keep your eyes open for one of my next articles where I will go into detail and explain how to go about taking your dried, processed sinew and your glue and backing a bow to produce the original primitive composite bow!
Until next time!