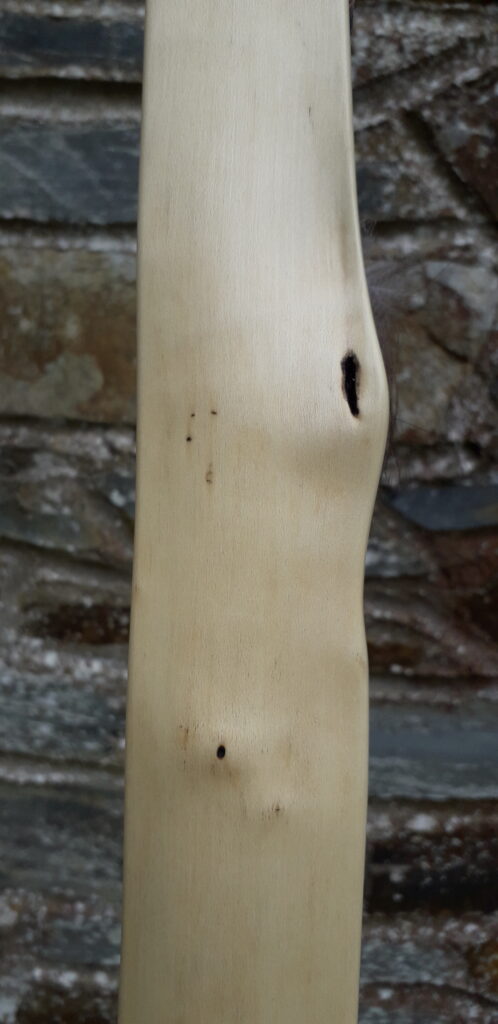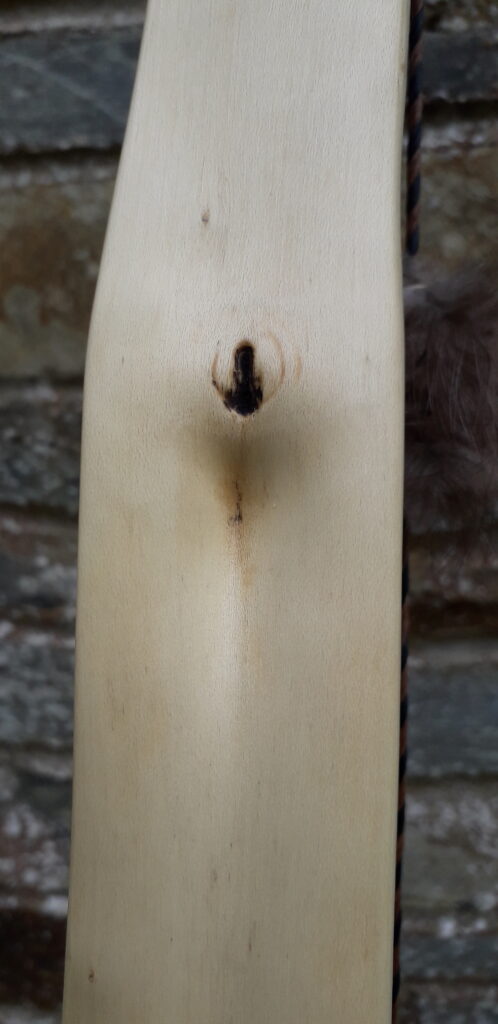
I’ve had the stave this bow came from hanging in the rafters for at least three years and to be honest, I can’t for the life of me remember where it came from. Every time I moved it out the way to get to a different stave it would catch my attention. I love making bows from holly as it is excellent bow wood (if you can find a clean straight bit that is!) But every time I inspected this particular stave I’d be reminded of the bloody great chainsaw cut which was three parts of the way through the belly of what would end up being one of the limbs outer 1/3 sections. (Bloody tree surgeons!) And that is why this particular stave kept getting put back in the rafters!
There was little intact belly wood remaining usable at this cut point, which led me to believe that the likelihood of this stave making a bow over 20lbs was low. So with those thoughts in my head I decided to quickly chop down to the bottom of the saw cut to see exactly how much wood remained intact. If there wasn’t enough I’d just scrap the stave and make space in the rafters.
But after 10 mins with the axe I was able to see that there was actually a little bit more wood left behind than I first thought, although definitely not enough to make a hunting weight bow. Enthused by this discovery I roughed out a basic profile and limb thickness to see exactly what I was able to play with. About 8mm of wood was all of what remained just outside of where the static tip fade would end and the working part of the outer limb would start. Not Ideal!
After completing the roughing out of both limbs, I set to tillering the stave to brace height. At this point I could see that some fairly minor propeller twist and string alignment issues would need resolving before taking the tiller much further. At this point it was already apparent that the weight was going to end up pretty low so I thought I’d have a go at fixing all the bending and twisting issues whilst at the same time adding a few more pounds of draw weight through heat treating the belly of the stave. The heat treatment took place whilst the stave was clamped strategically into an optimal position on a form with a touch of reflex. And it worked out pretty well! After taking a blow torch to the entire belly for half an hour, nearly all of the propeller twist came out, and the string alignment was resolved to. And all whilst adding a good 5 or 6lbs of well received draw weight too! Bonus!!
After tillering down to 26” on the tree I was now getting about 40lbs ish on the scale. So with a slightly whippy positive tiller I decided to shoot in the last couple of inches rather than pulling her down to 28” on the tillering tree. I often find that I’m best doing this towards the end of the tillering process as lets face it, the way we pull on a bow when actually shooting it is really quite different to how the bow is stressed on a tillering tree.
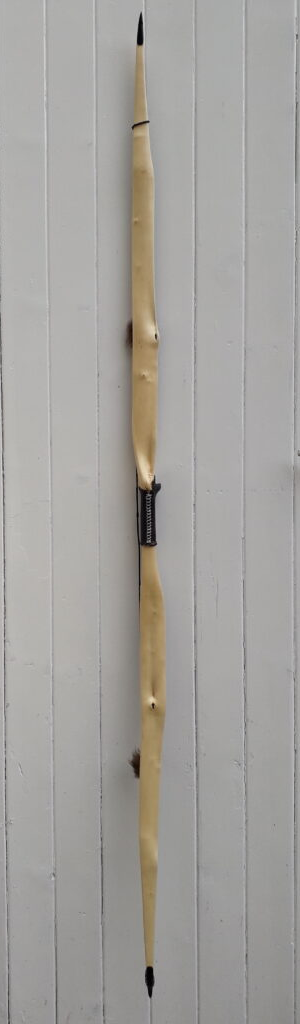
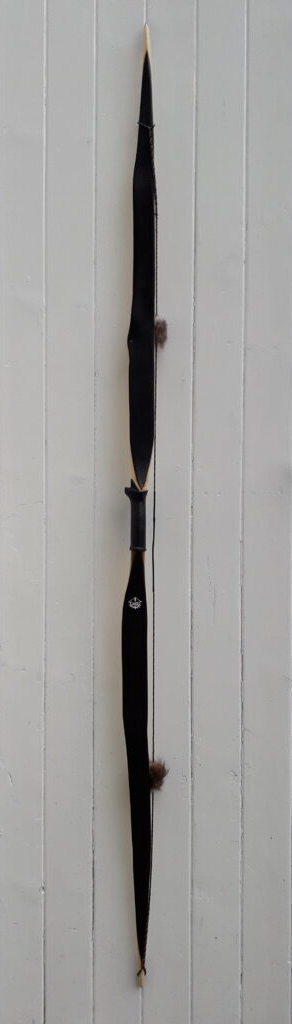
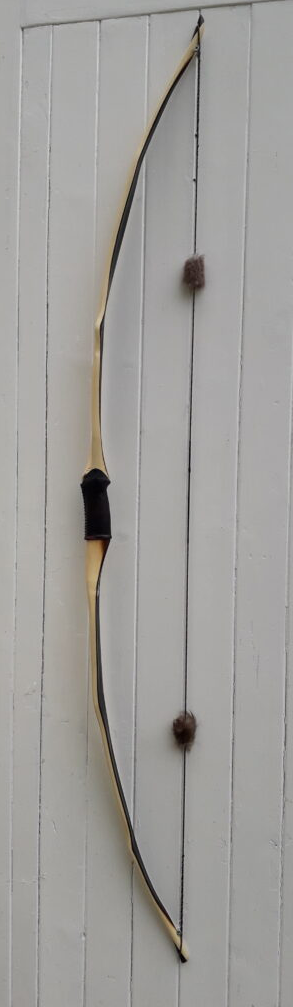
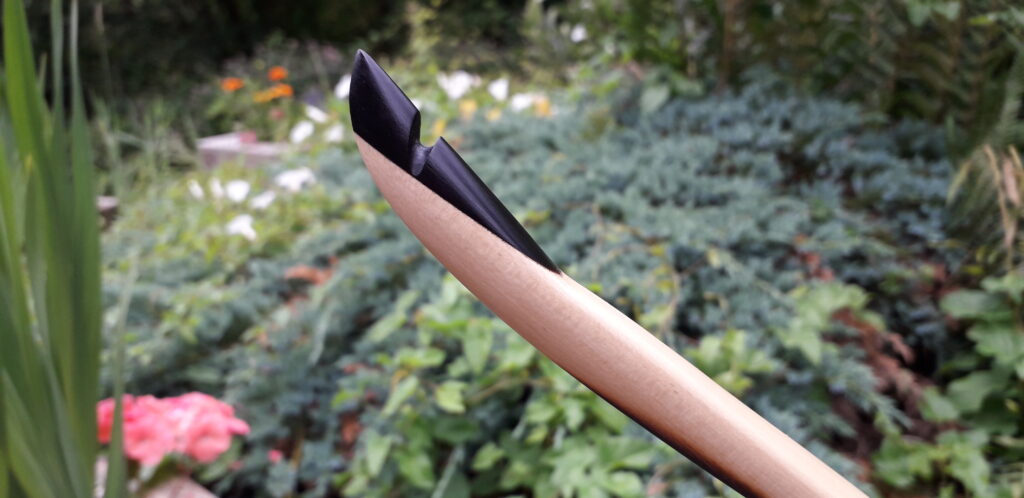
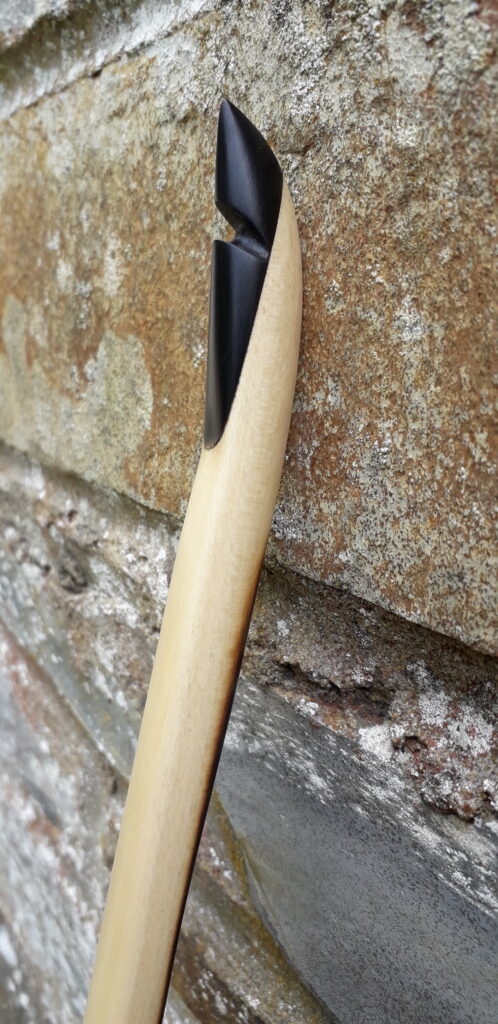
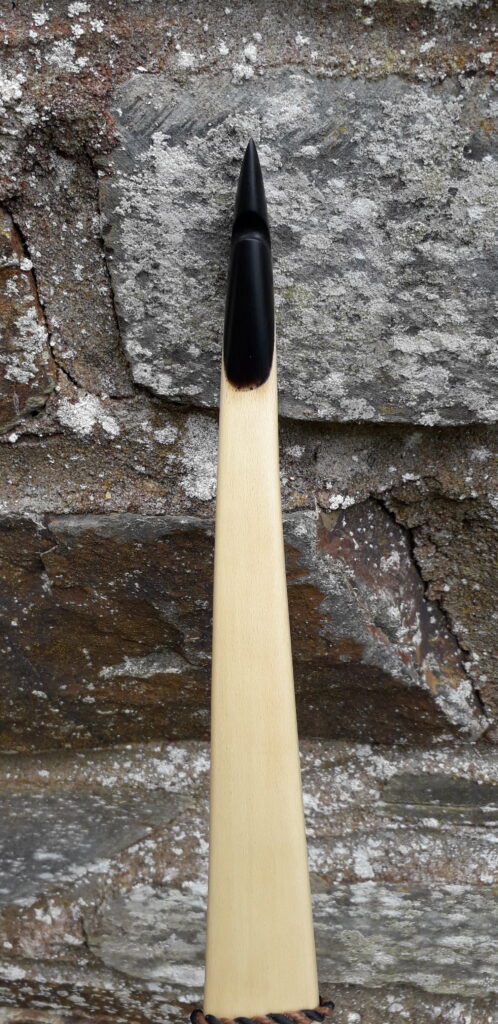
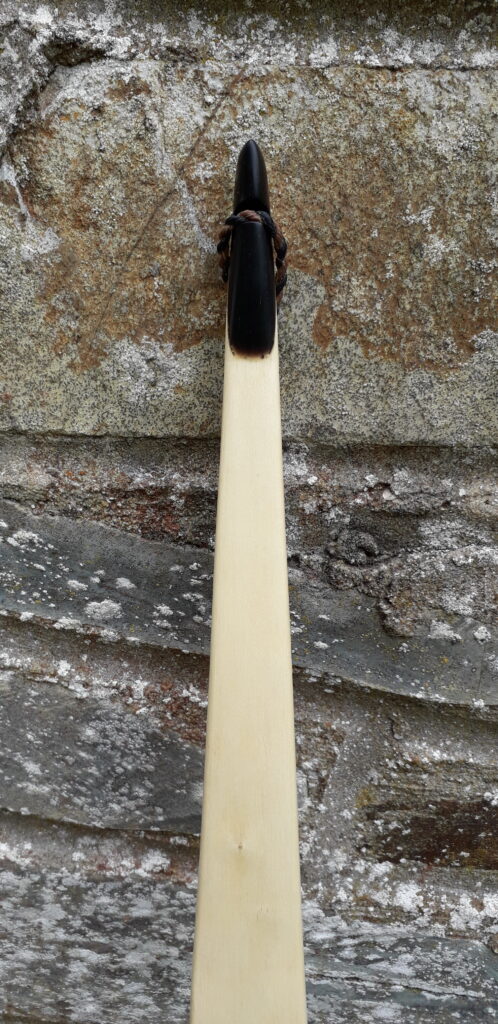
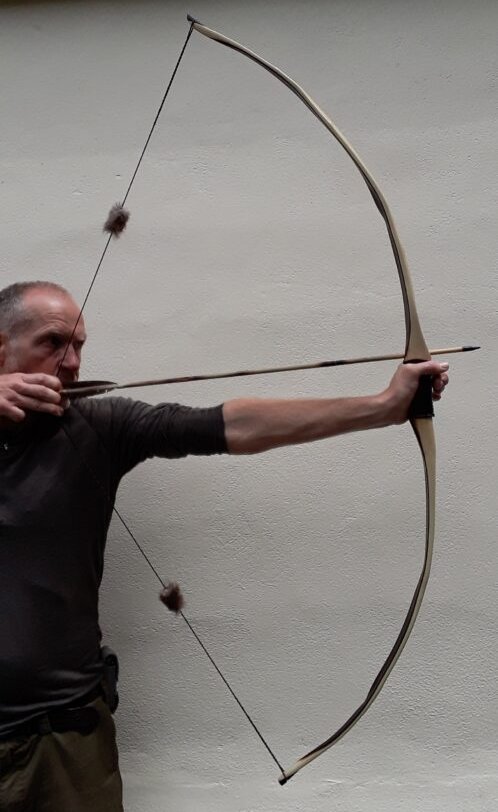
After a couple of hundred arrows I checked the tiller and all looked good so I finished sanding her down which knocked a pound or so off and left her pulling 40lbs at 28”. The positive tiller held good and I was pleased to have managed to pull off a sweet shooting light weight selfy, which actually looks quite good. I really like the contrast between the light and dark of the back and belly. Buffalow horn tip overlays also contrast sharply with the light wood of the back.
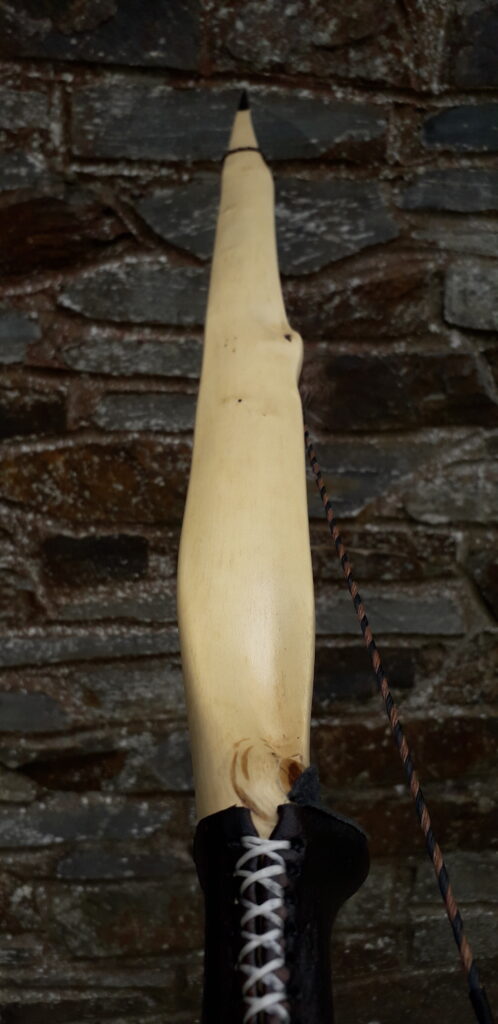
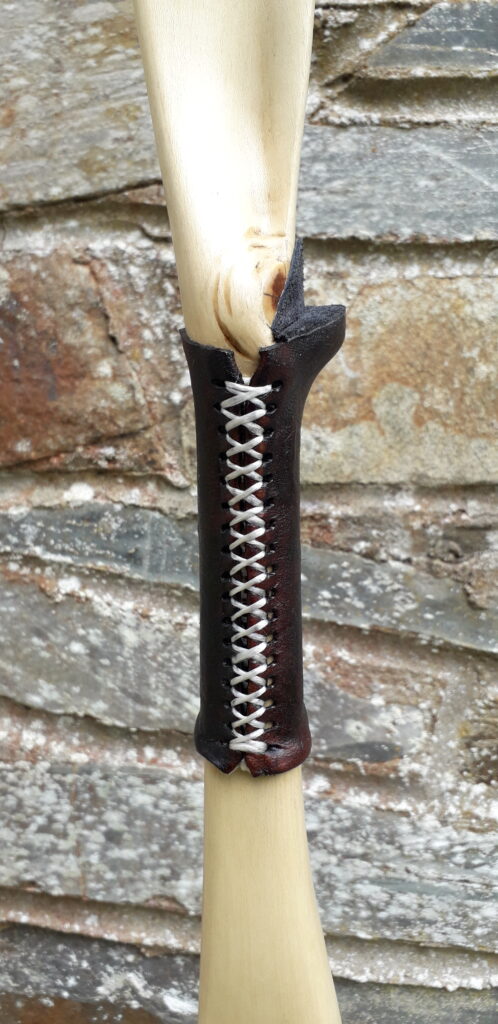
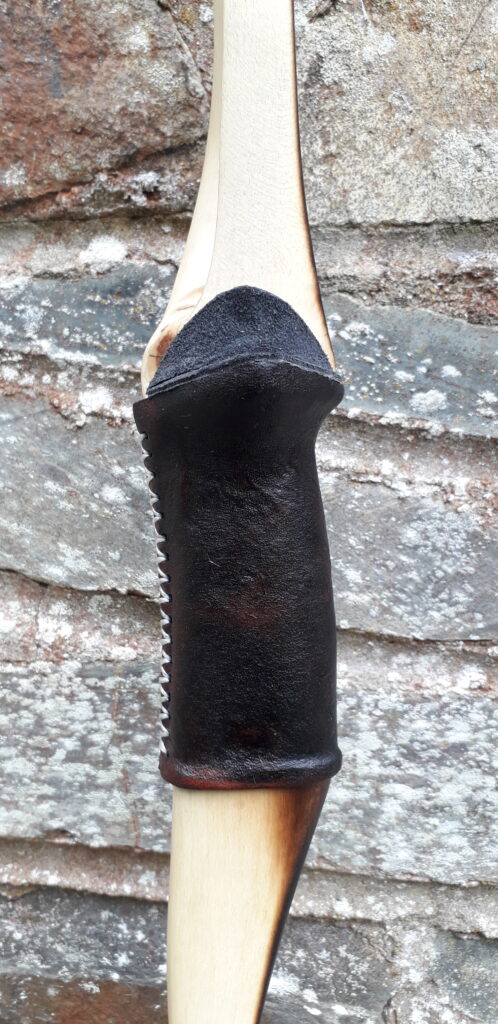
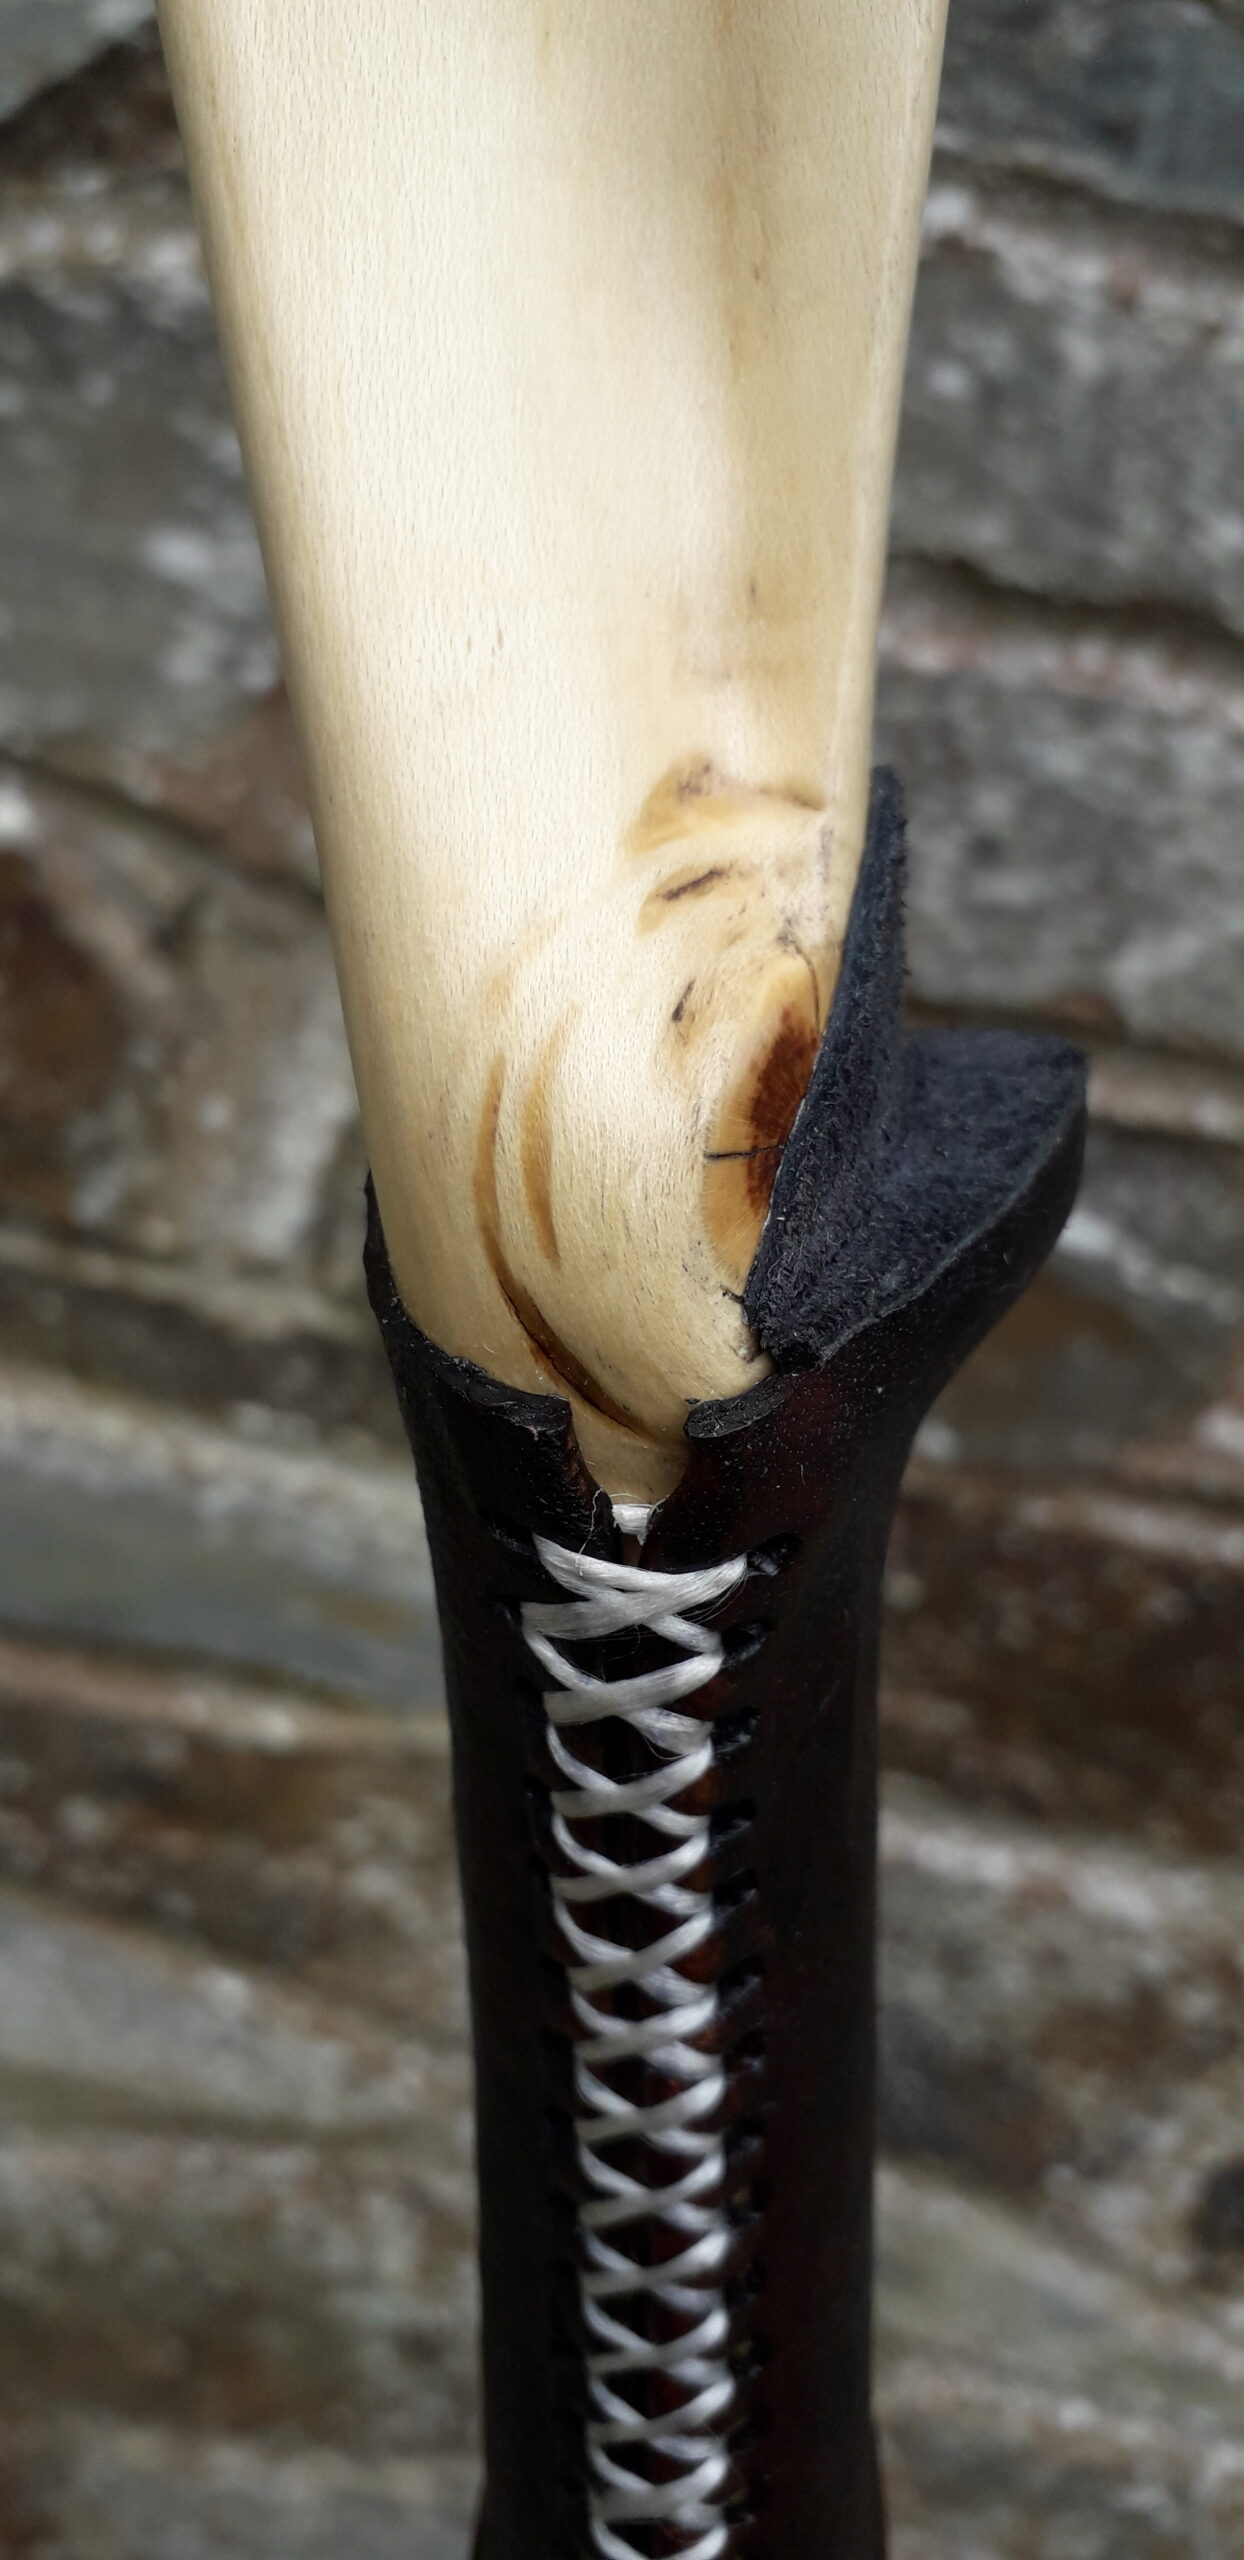
I finished the handle with some really nice thick wild red deer rawhide which I processed myself from a neck cape which came from a stag I shot back in the autumn. After re-wetting the rawhide and forming it around the contoured grip I let it dry for a couple of days. Once dry it got trimmed, punched, stained and glued/sewn back on. I dyed the rawhide dark tan with an impressive product which is new to me, Leather Dye WB – Furniture Clinic. I’ll certainly be using this product again as it works extremely well on rawhide. It’s a water based leather stain and soaks into both dry and wet rawhide amazingly. It penetrates really deep and dries quickly too and once dry it doesn’t rub off either unlike many other leather stains I’ve used before. And as it is a water based stain, you can oil over the stain to leave the whole thing totally water proof and looking like traditionally tanned leather. After a single coating of the leather stain I gave this particular handle covering along with the rest of the bow 6 coats of tung oil. Each coat being left a couple of days between coats to soak right in. I love the satin finish tung oil gives and I think that it sometimes suits certain bows better than the usual glossy Truoil type finishes. The handle covering is glued in situ with Titebond III.
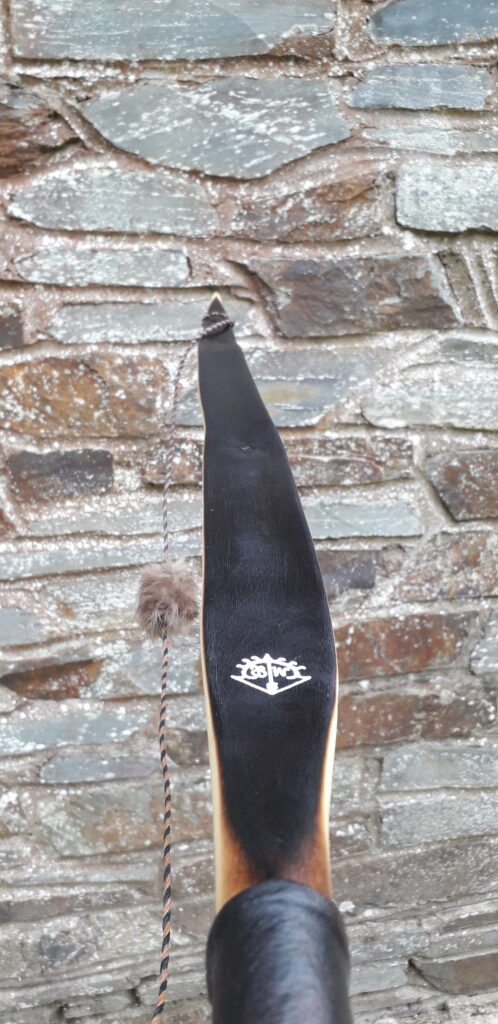
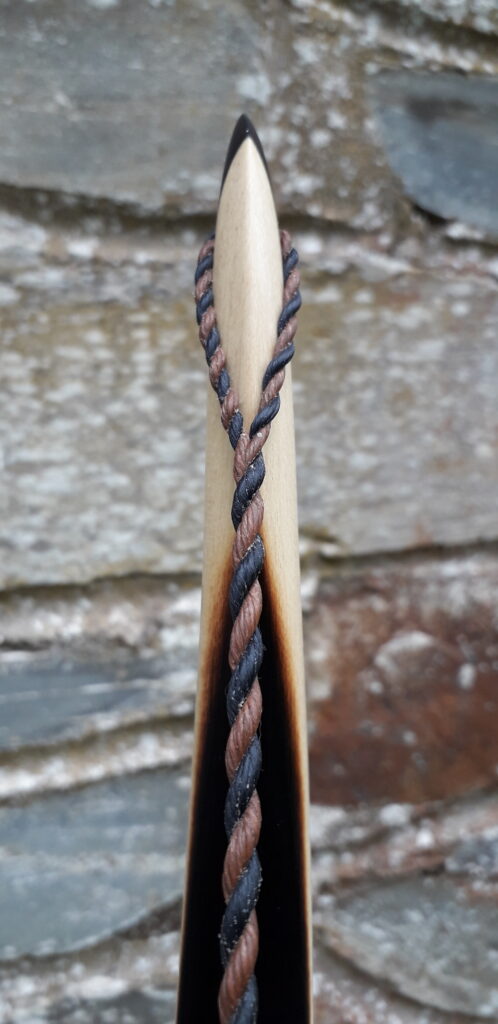
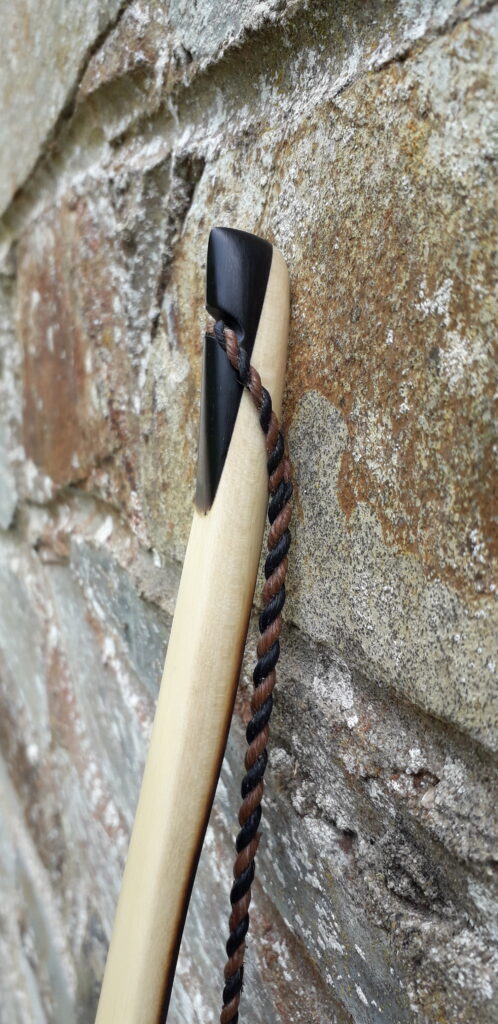
The string is 12 strands of B55 and the silencers are Wild Beaver fur.
This bow would make a great ladies/tennagers primitive longbow and will be listed for sale on my ETSY Shop very soon. My Shop can be found here: https://www.etsy.com/uk/shop/Southmoorbows?ref=l2-about-shopname
Stats are as follows:
Mass: 554 grams
Length NTN: 62”
Width: 1 ¾” at widest part
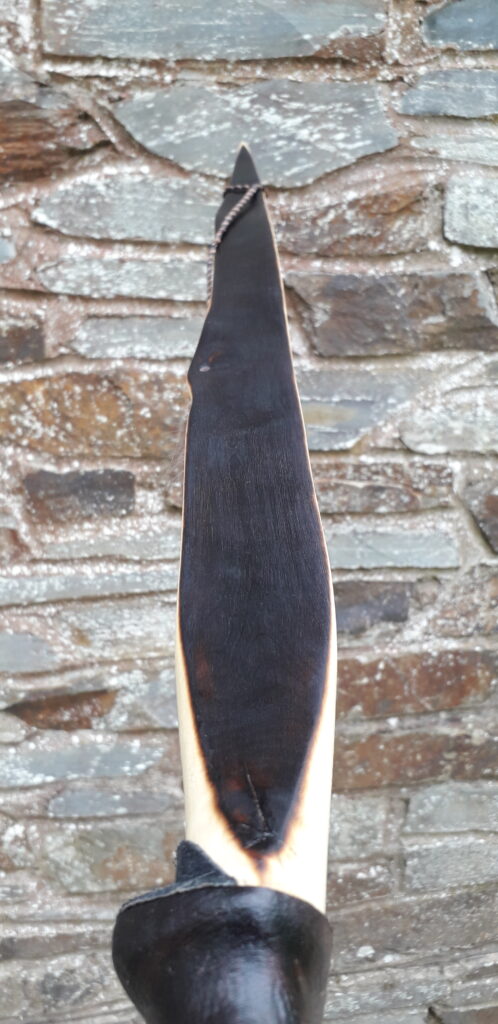
Tips: 4” static 3/8” wide
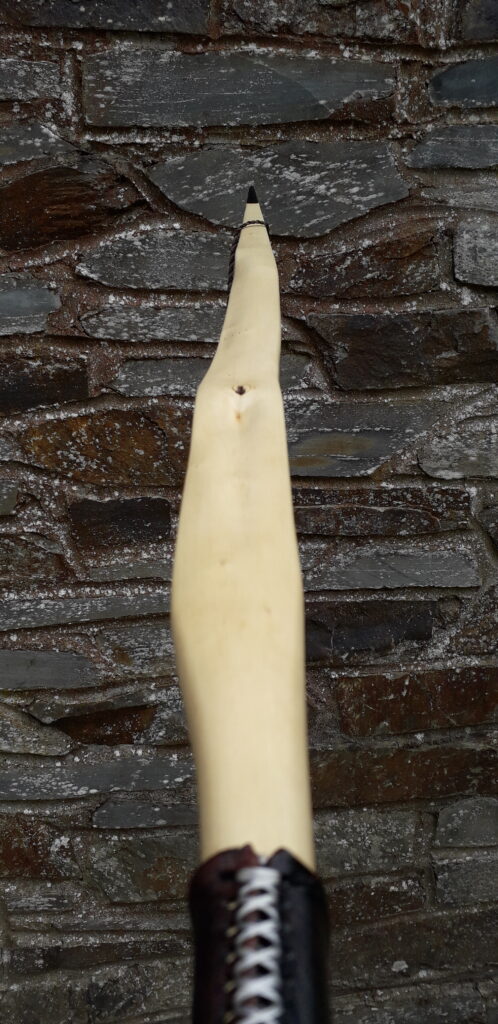
Back: Moderately crowned with valleys. : Pyramidal face profile
Belly Profile: Undulating between flat and concaved to mirror the bows back.
Tiller: Lightly whipped. 1/8” positive
Brace height: 5 1/2″
Draw Weight: 40lbs at 28”
Here are the pics. Hope you like her!