This is one of the many “lockdown bows” which I made through 2020/21. Having been furloughed for a couple of months I took the opportunity to tinker with a pile of difficult staves which I’d had kicking about for years. A good time to try and sort the potential staves from the firewood!
This bow came from one such stave. It was nothing more than a branch to be honest but was still one of the better potential staves in terms of its overall shape. That said, It was still flawed to some extent with masses of pin knots on what would be the back side of the stave. It also had quite a lot of deflex across the entire length of the back. Especially in what would be the bottom limb.
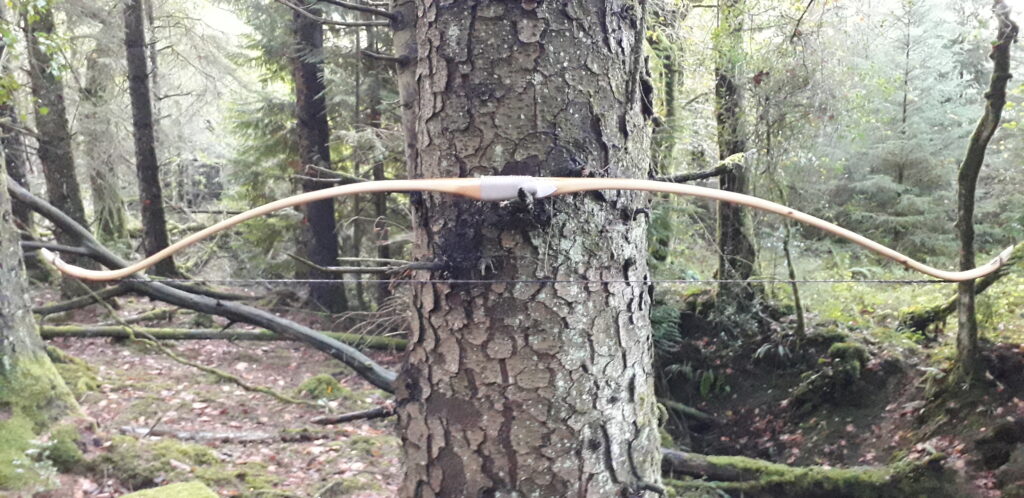
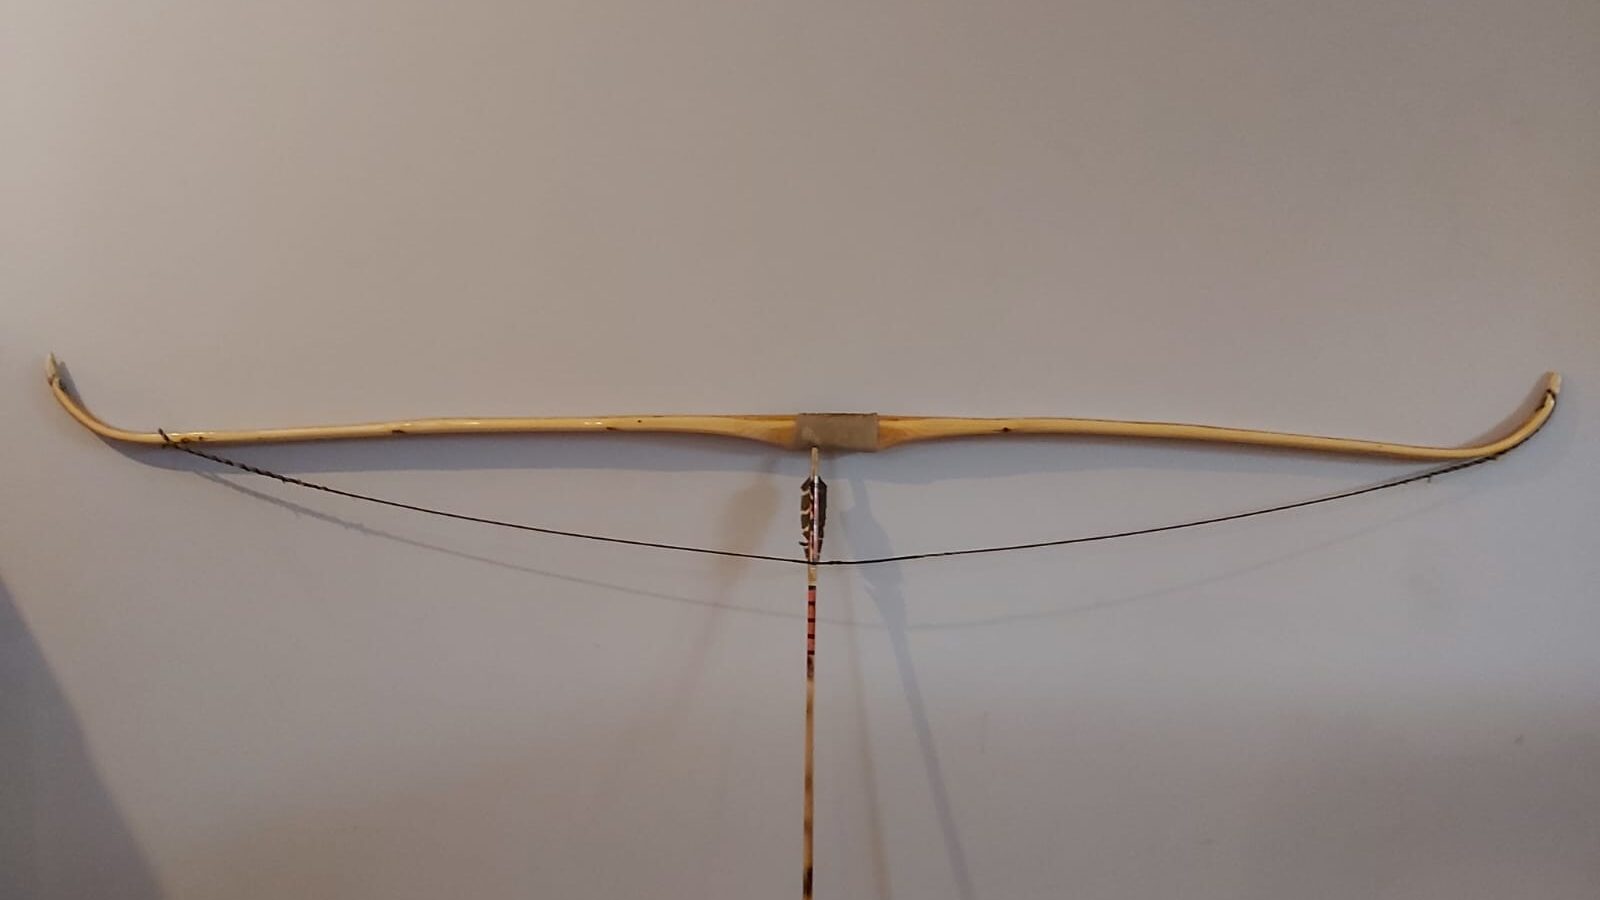
Despite the imperfections I committed to making a bow from this stave and had long since promised to build a mate of mine a yew recurve. So I made it my mission to honour my promise using this far from optimal Yew branch. The basic plan was to build a 66″ nock to nock” 50-55lb recurve flatbow.
The stave had nice tight growth rings of between 1-2mm thickness but unfortunately carried little heartwood. The sapwood on what would be the back was too thick at around 12mm thick, but due to all the tiny raised pin knots, it would be impossible to properly chase a ring down to a better sapwood thickness without violating the back around all the tiny raised knots.
A trick which I have used many times before in this situation is simply to accept the violation of rings on the back but mitigate against limb failure by sinew backing. So that’s what I decided to do with this bow.
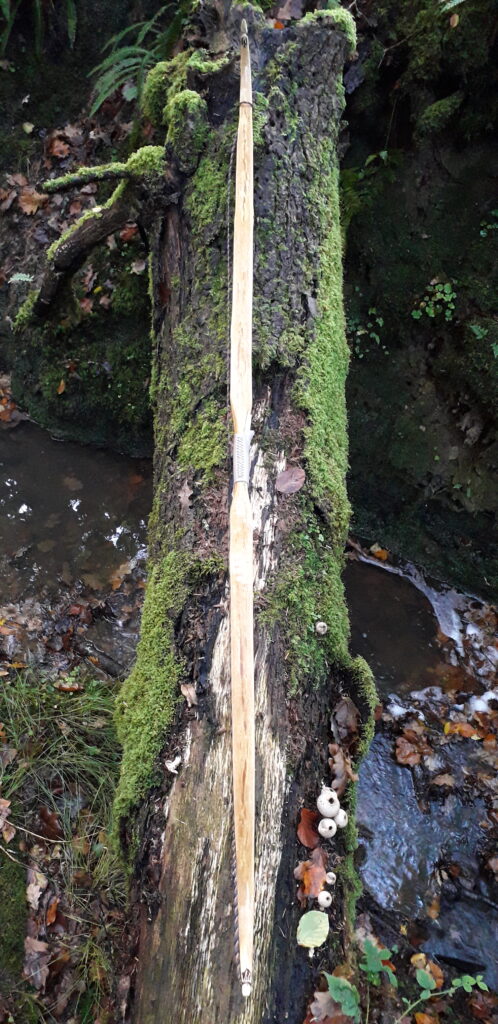
The stave was only 3″ wide so the crown was moderate. Rather than try and reduce the sapwood thickness in a rounded fashion as would be necessary to mimic the natural crown, I decided to just flatten the whole back with a rasp. In doing this I was able to work down to approximately one sapwood growth ring right down the centre line of the bows back and follow that from one end to the other maintaining a totally flat back profile.
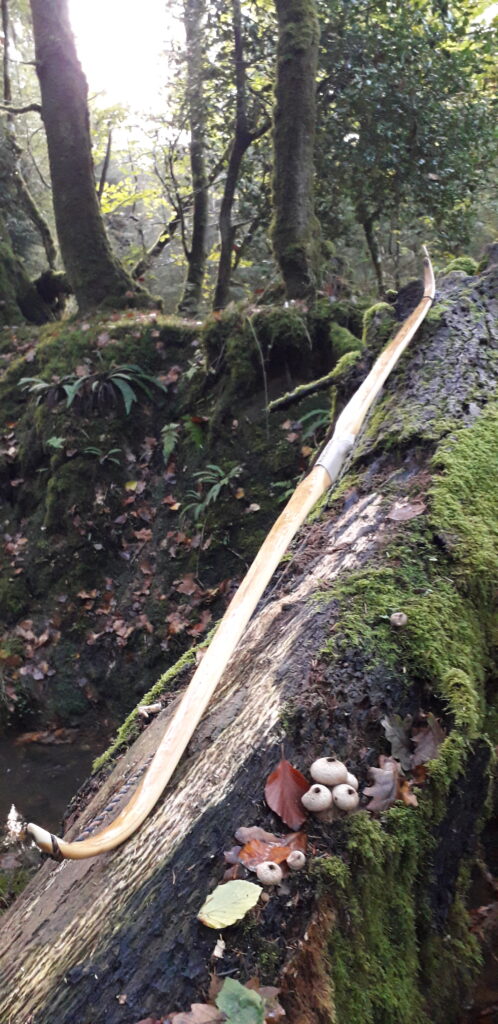
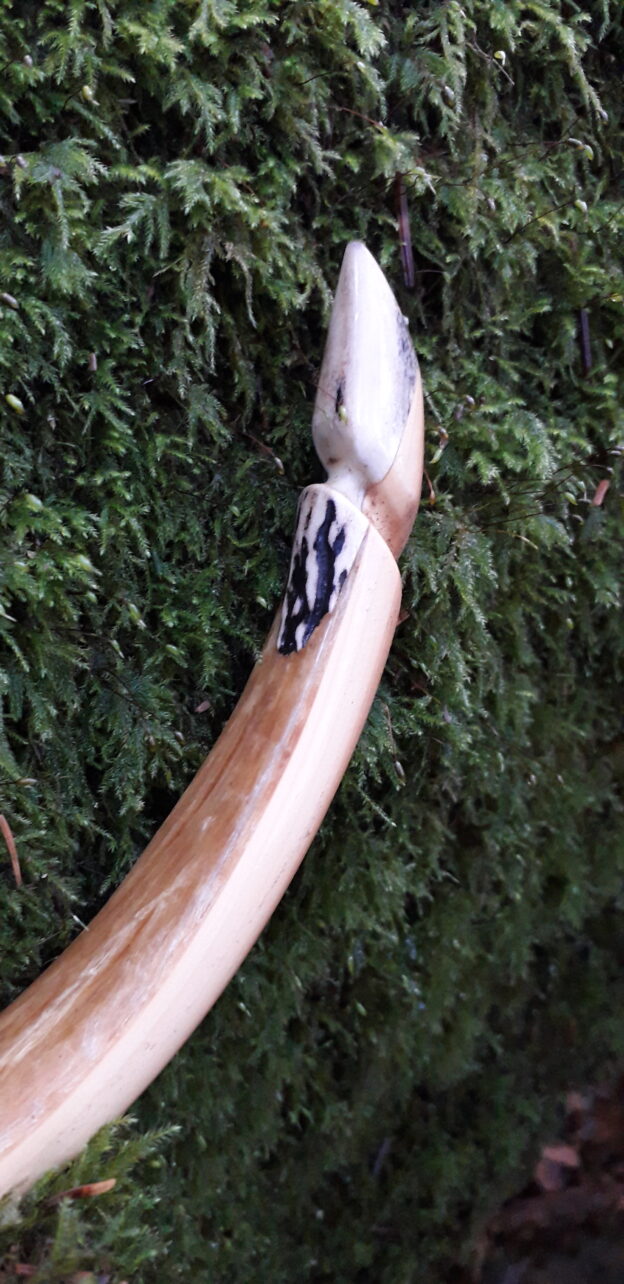
Now that I had nearly 50% of the limb represented by heart wood, I roughed out the general limb thicknesses and finalised the face profile. In order to counter the significant deflex I recurved the tips with steam and performed a small amount of dry heat correction to line up the tips and correct some small string alignment issues. Then it was on with 3oz of deer leg sinew, glued on with my own home made sinew glue.
After the backing was completed I wrapped the whole thing up for a few days in cloth strips to keep the sinew from peeling away from inside the recurves and around the handle.
Once I could see that the sinew was dry I unpeeled the wrapping so I could take a peek. To my disappointment some of the sinew had dried out to form some small fissures. I put this down to one reason. Taking way too long to apply the sinew!
I’d timed the sinew application with the kids getting home which invariably led to a pile of requests, Dad jobs and other frivolous distractions all when I’m trying to slap on my glue soaked sinew bundles. Lesson learnt!!
Anyone who has done any amount of sinew backing will tell you that the best sinew jobs are done quickly and smoothly whilst the glue is still warm and not allowed to set up in between bundle applications. Each fresh bundle of sinew wants to be laid down alongside its neighbour before the neighbouring bundle has started to “Gel”. That’s where I’d gone wrong.
All the distractions had led to me applying bundles as and when I got chance as opposed to in one fast fluid operation. This meant that by the time my next sinew bundle got applied it’s neighbour has gelled up reducing the ability of the fresh sinew bundle sticking to it’s neighbouring bundle.
The result is bundles of sinew separating apart from one another when the bundles start to shrink during the drying process. I should add however that the adhesion between the glue soaked sinew and the bow’s back is not affected by this phenomena.
As disappointing as the end result was, the imperfections that I was seeing in the dried backing were only aesthetic. The functionality of the bow’s backing was completely unaffected.
So onwards we went. After the cloth wrappings had been removed and re-tightened several times over the initial drying period (a week), the wrappings came off and the stave was set aside for nearly a year to cure thoroughly.
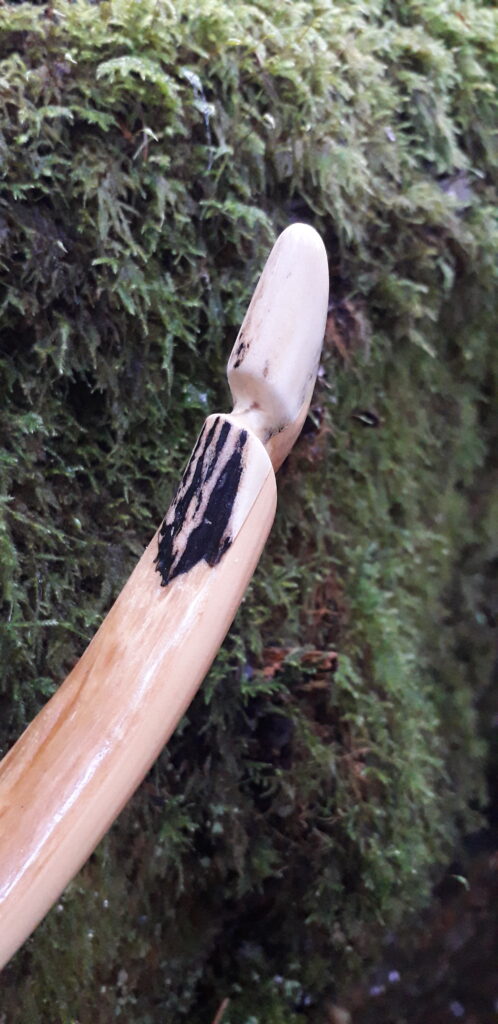
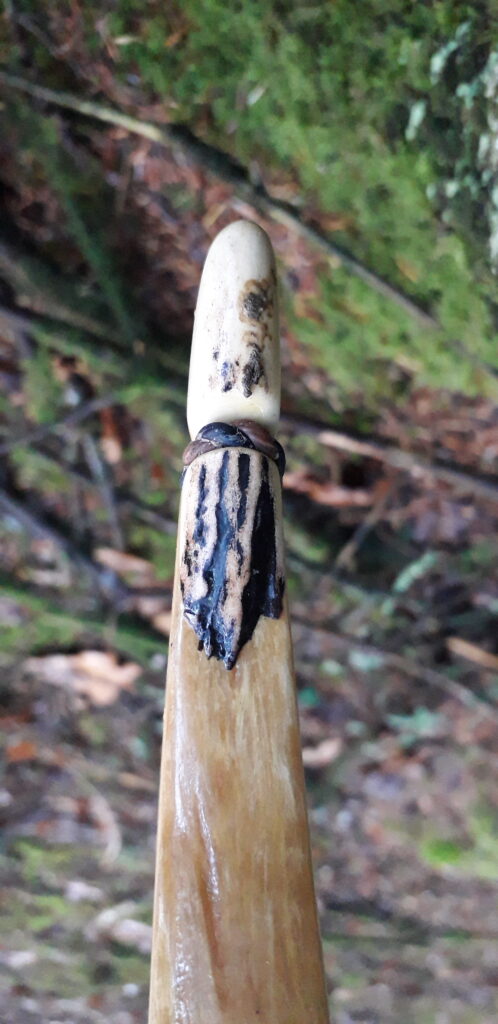
I’d kept the limbs asymmetric to try and mitigate for the lower limb deflex which was now substantially less than it was. This was due to the sinew backing pulling the stave back about 1 & 1/2″. Now the deflex was only about 3/4″ in total which was a massive improvement as before backing the natural deflex was about 2 “. After coming out of hibernation, deer antler tip overlays were fitted over the top of the sinew and the tillering began.
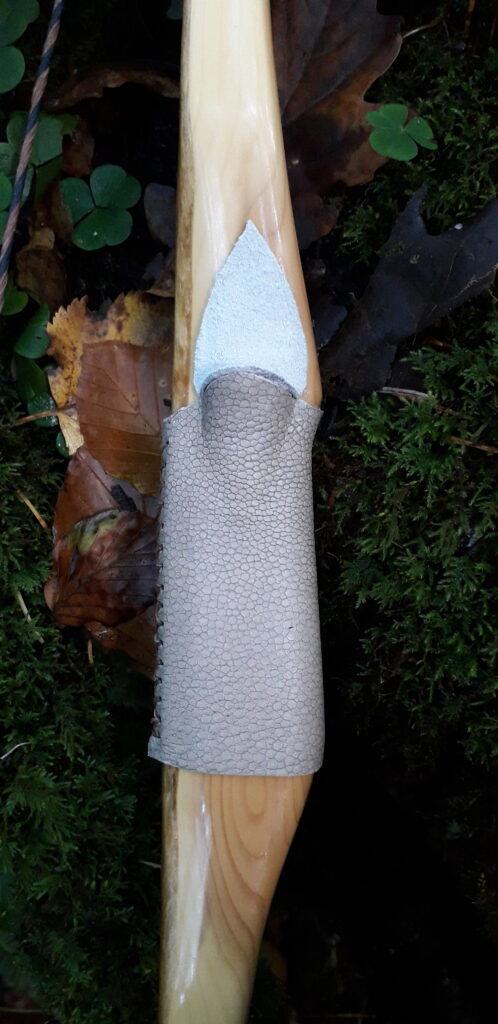
In order to preserve as much heart wood on the belly as possible I opted to create a slightly rounded albeit mainly flat belly. An arrow shelf was added in the form of a scrap piece of deer antler.
The bow was quick and easy to tiller and looked nice pulled down to 28″. At this point the weight was 58lb which was about right for the guy who would be getting this bow.
Before finishing the bow I shot stumps with it for a couple of weeks then re adjusted the tiller slightly to weaken the top limb just a tad bit more then called her done at 55lb at 28″ with a neutral tiller. (The owner of this bow shoots three under.) To finish I coated the sinew with a good covering of Titebond III so seal and smooth out the sinew. After sanding it was on with 8 coats of Truoil to finish.
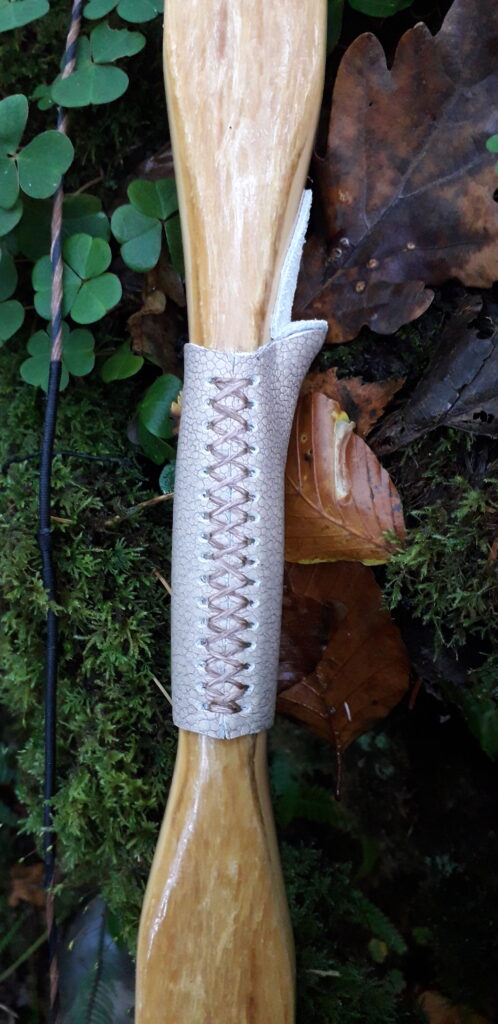
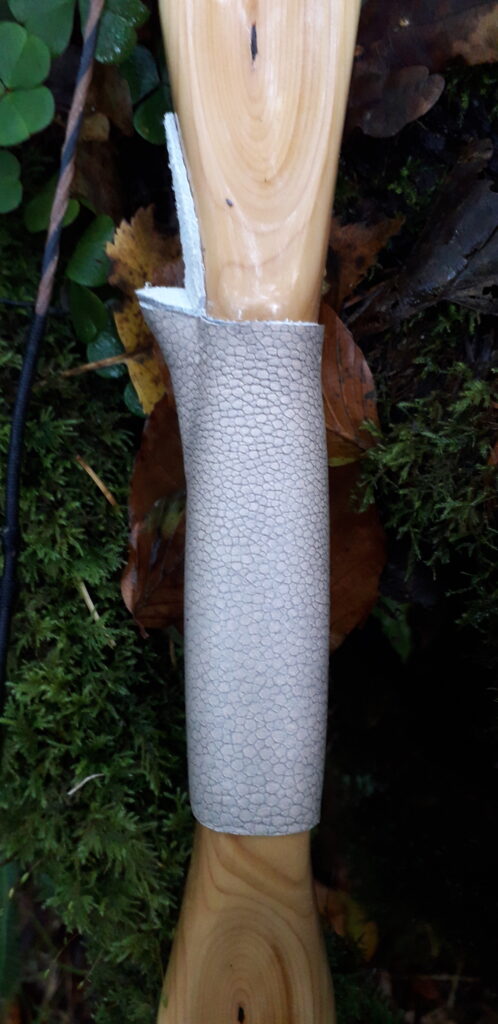
The handle was covered with a piece of scrap leather and the same leather in reverse was used to protect the arrow pass.
I really like this bow. It’s a bit heavy in the hand (630Grams) due to the extra weight from the sinew but isn’t really noticeable once you get in the swing of shooting her. The limbs are an even tapper from 1″ 3/8ths at the fades down to 1/2″ at the tips.
This bow made for a snappy shooter which I really enjoyed shooting. I shot her over the chrono to see if she was quicker than usual and, whilst hardly getting blown away by the speed, I was quite happy with the 162ft/sec average that I got with a 500 grain arrow. That’s not bad for a stick and string bow!
Anyway, I hope you like the pics!