Tag Archives: Arrow Pass

Yew HLD Recurve Character Branch Bow. 48# @ 27″ (Bow No. 7)

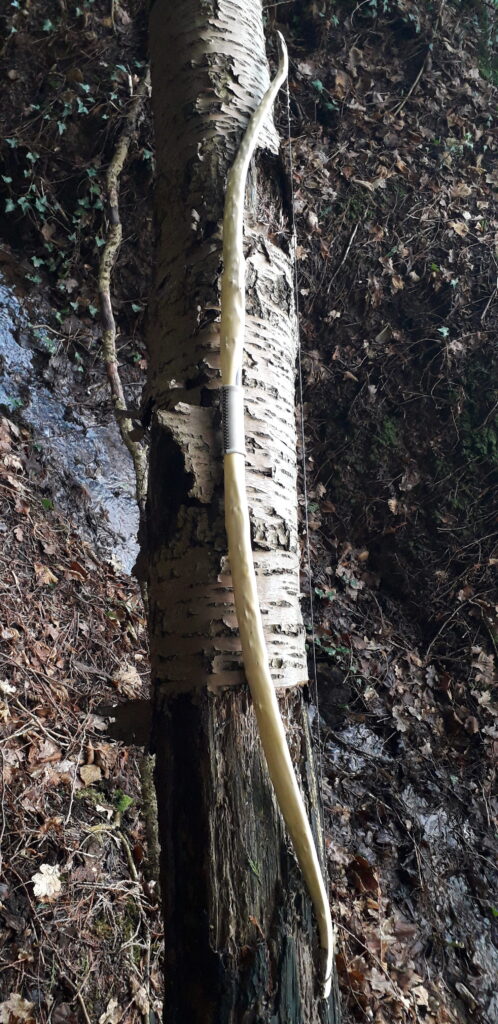
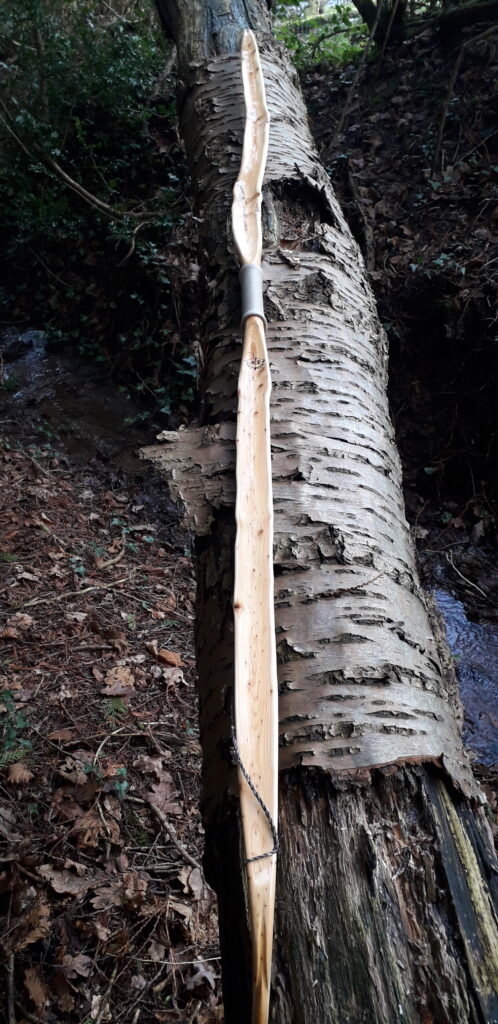
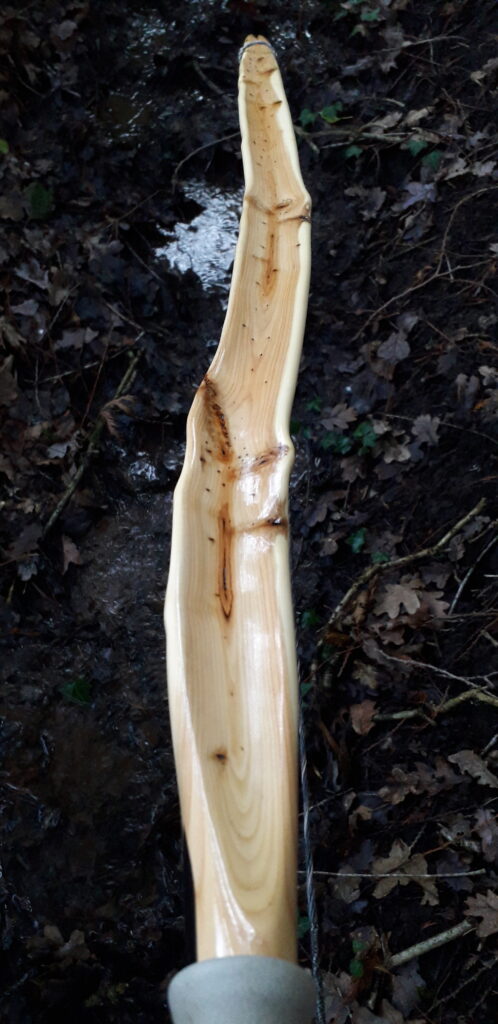
This bow started out life as a 2-3” branch which I harvested a couple of years ago. Given all the knots, kinks and wiggles, I knew it was going to be a challenge to turn this ugly little stick into a bow. Yew is one of those few bow woods which can be incredibly forgiving however, so I decided to give it a go!

The main challenge with this branch was going to be placing a bow back somewhere on it, and in a way which would keep the back from including any of the larger more fragile knots. One particular face was cleaner than the rest, but by choosing to use this face as the bows back, I would have to deal with a significantly deflexed 8” section which would have to fall somewhere between one of the limbs fades and the middle of that limb.

The branch measured only 68” long so I would have little opportunity to manipulate the handle location anywhere other than in the approximate centre. Given all the potential weak points on this branch, I did not dare to aim for a bow any shorter than 66” nock to nock.

I knew that I’d be able to steam out some of the unsightly deflex in what ended up being the top limb, but given all the knotty material in this deflexed section, I dared not try to straighten it out completely as the likely hood of one on the knots popping was very high.

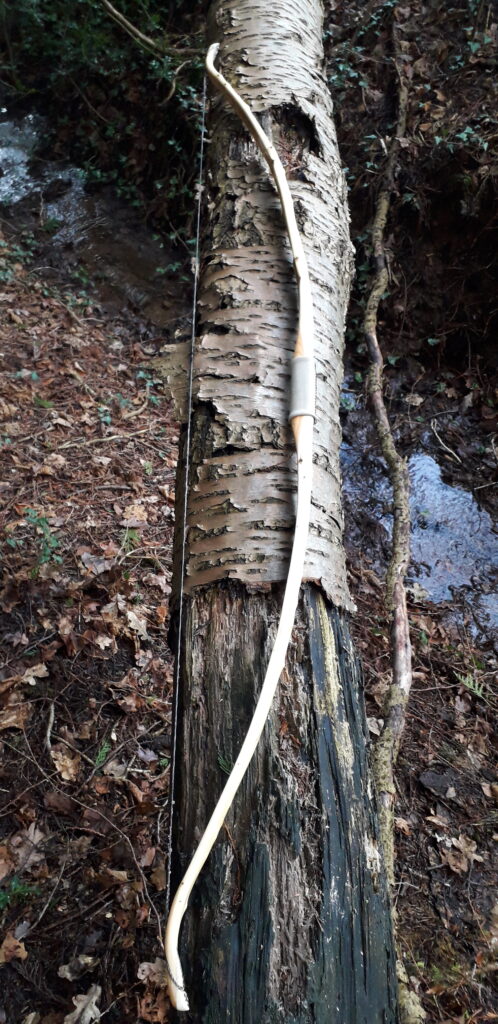
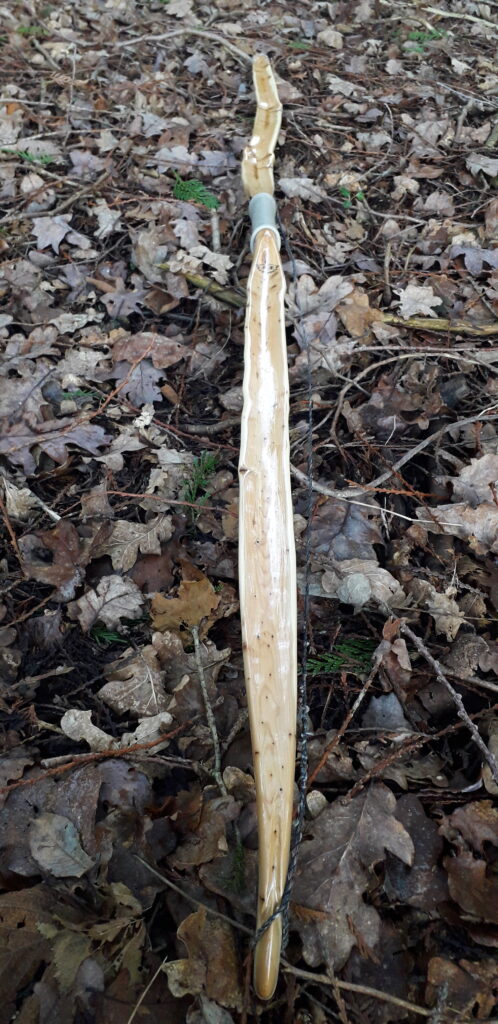
After roughing out the basic limb thickness and face profile, I set about reducing the deflexed section with steam. After that was taken care of the small amount of string misalignment plus a little twist was corrected with some dry heat. At this point I also steamed in the gentle recurves. Now I had a more workable and predictable shape, I could then start to think about the final limb width and general profile/cross section.

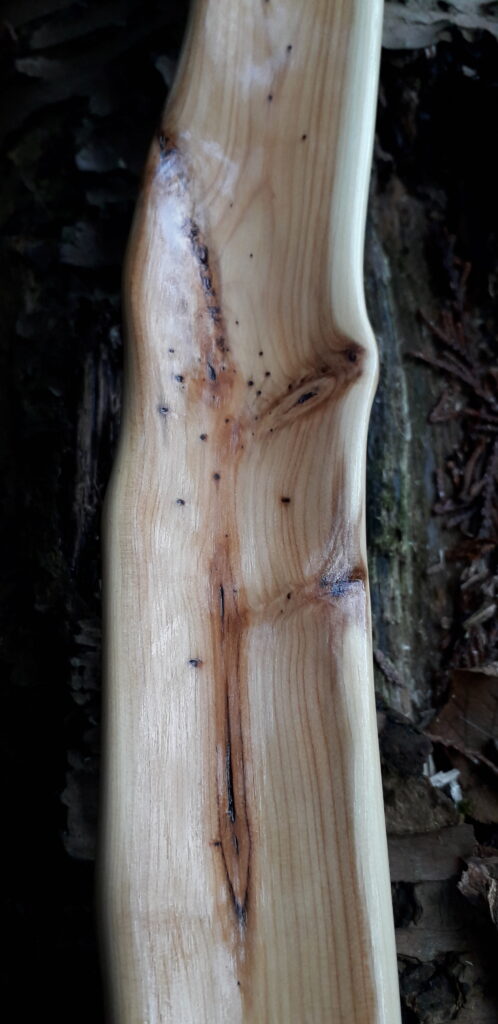
The heartwood content of this bow was not great and the sapwood was about 8-10mm thick. The back was covered in small raised pins so chasing a ring was totally out of the question. And since the likely-hood of this branch ending up as firewood was high, there was no way I would consider investing time and effort to sinew back a risky bow like this, just to get away with violating the back in order to improve the ratio of sapwood to heart wood.

As with all branches, the pithy centre was biased towards the side which had the tighter growth rings (1-2mm) which happened to be on the same side of the branch which I’d chosen as the back. This meant that the pith was currently contained within both limbs and ran right through the handle.

Whilst I have no problem with the pith running through the handle section or even the thicker parts of the fades, I do not like leaving the pith in the working parts of the limbs. Experience has taught me to expect cracking, splitting and even fretting to occur when the pith runs close to the surface of the belly material.

Given that the crown on this branch was significant and the pith was currently buried inside the roughed out limbs I opted to hollow out both limbs to match the crown, whilst hopefully getting deep enough to remove the pith at the same time.

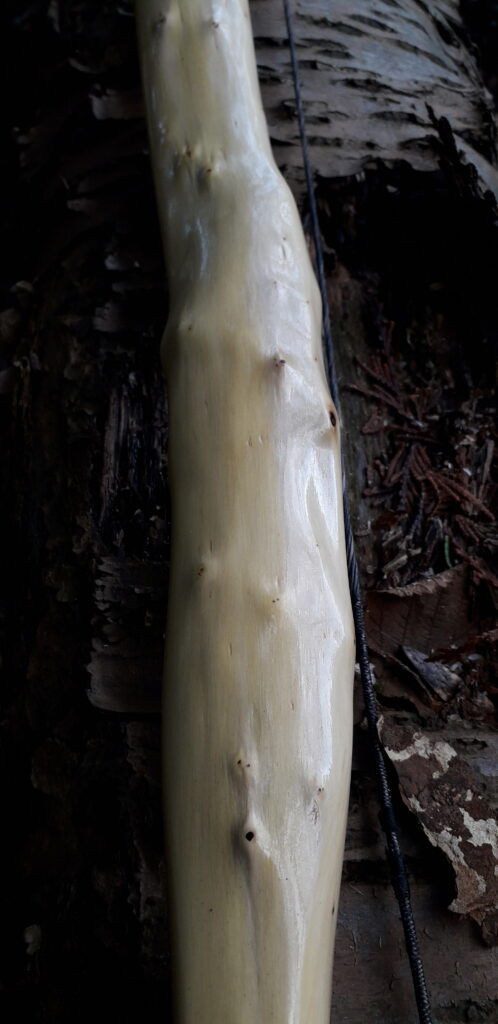
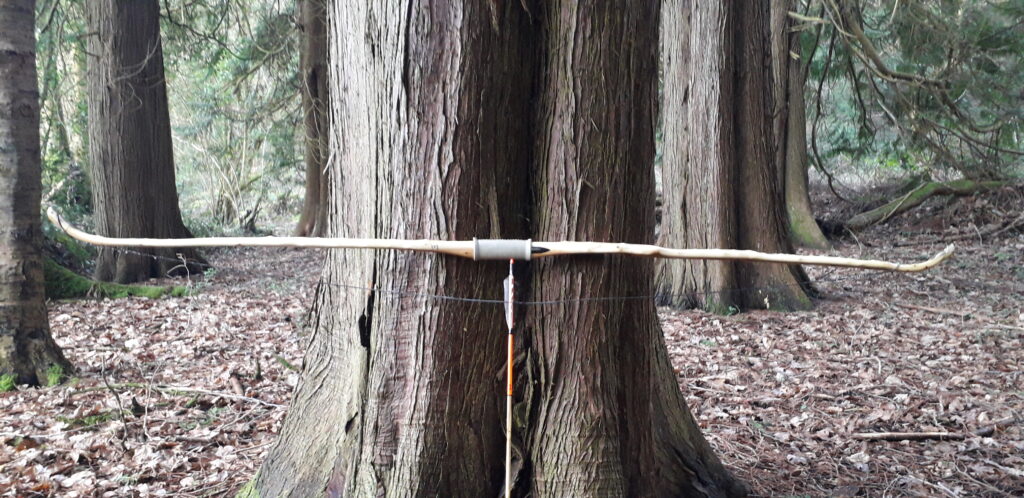
This worked fine but left me with very little heart wood. In fact the sapwood to heartwood ration was around 70/30%. Not ideal so I decided to take the sides in as the sides were entirely sapwood. This reduced the limb width down from about 1” 7/8ths to around 1” 5/8ths.

Now that the pith was out of the limbs and the heartwood sapwood ration had been improved, I didn’t have a great deal of bow left to play with, so I had to be realistic with the outlook. I guessed she would probably make for a finished bow around 35 40lbs at best. So I was really suprised when I actually managed 51lb at 27”!

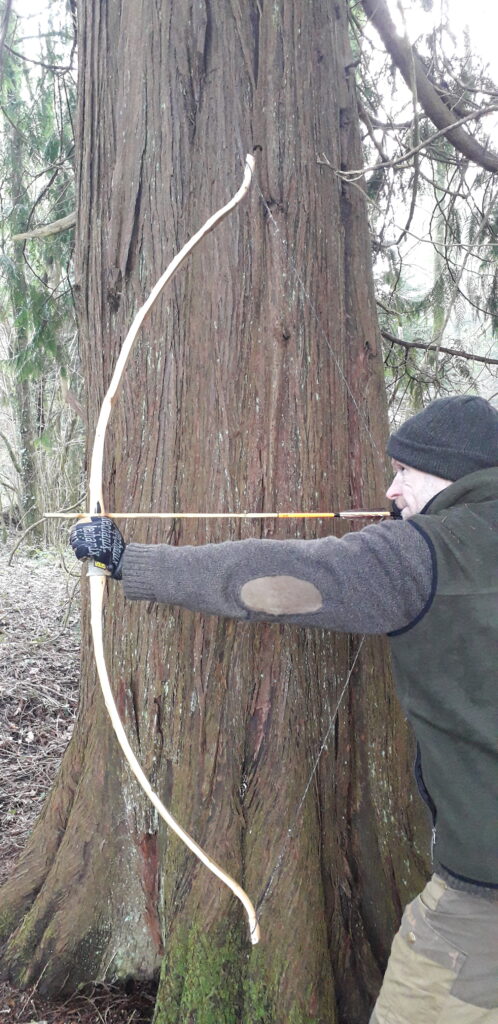
I tillered the bow to 27” as my brother will likely get this bow. His draw length on a good day is about 27”. I took the tillered (albeit unsealed) bow stump shooting for a couple of weeks with only tillering nocks cut in and a leather strip wrapped around the handle to double as a grip and arrow pass. After a hundred plus arrows I checked her over for faults but found none.

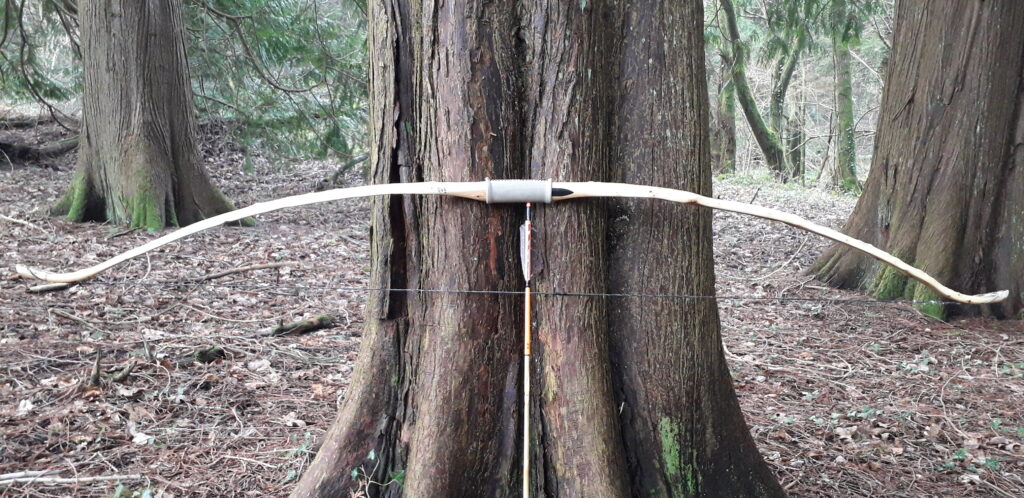
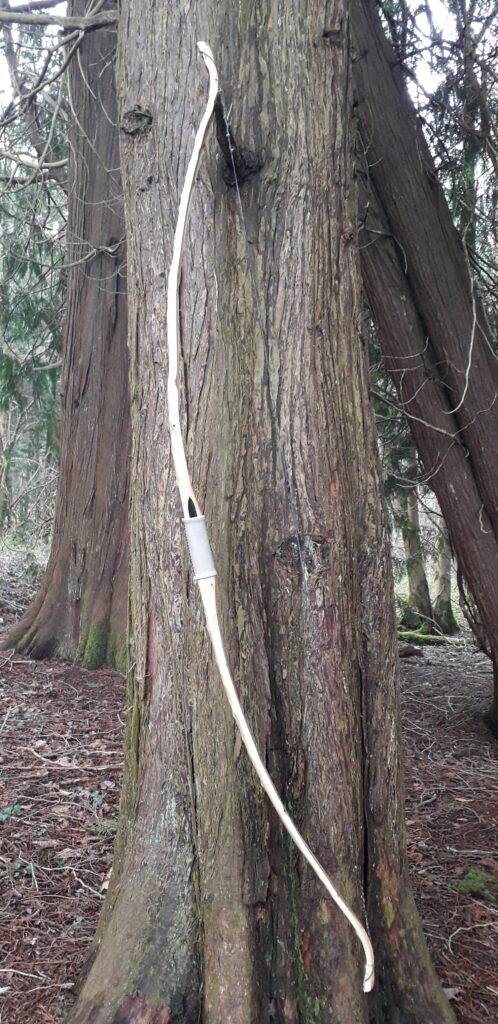
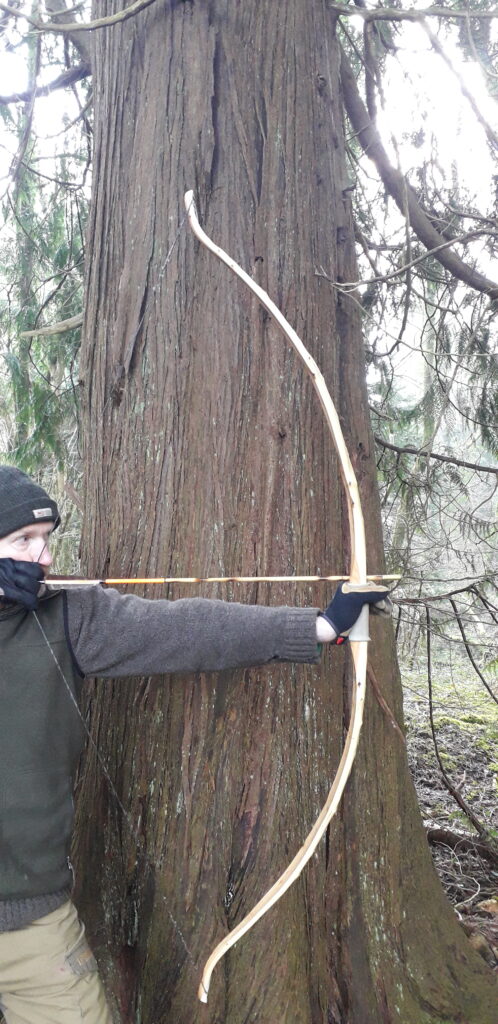
I was expecting some of the steam correction to pull out in the deflex section but it didn’t. The finished bow looks like it has a very positive tiller but it is deceptive. The deflex section right out of the top fade is what gives this bow the look of excessive positive tiller.

In reality, this bow feels very well balance through the entire draw cycle and the limbs time together great when I shoot it with split fingers. I’ve shot enough bows over the year to be able to feel when a limb is weaker than the other. Despite the appearance, this bow is very well balanced.

After double checking the bows tiller by feel and then by tiller tree, I confirmed that the top limb is only slightly weaker than the bottom limb which is perfect for both my use, and my brothers use, since we both shoot split fingers.

It never ceases to amaze me how you can take a bow which looks to be tillered very well, only to draw it back and feel that torque on the wrist that you get when one limb is significantly stronger than the other. Nowadays, when it comes to final tiller, I place more emphasis on feel than I do on appearances. Where wooden bows are concerned (especially character bow) appearances are incredibly deceiving!

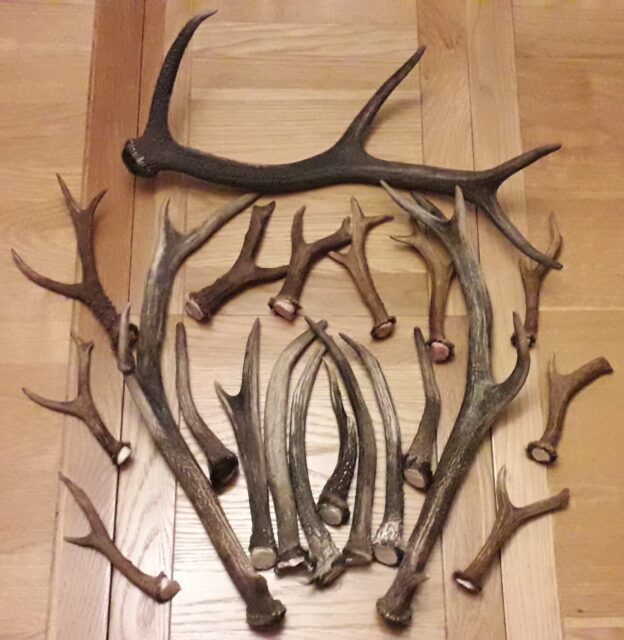
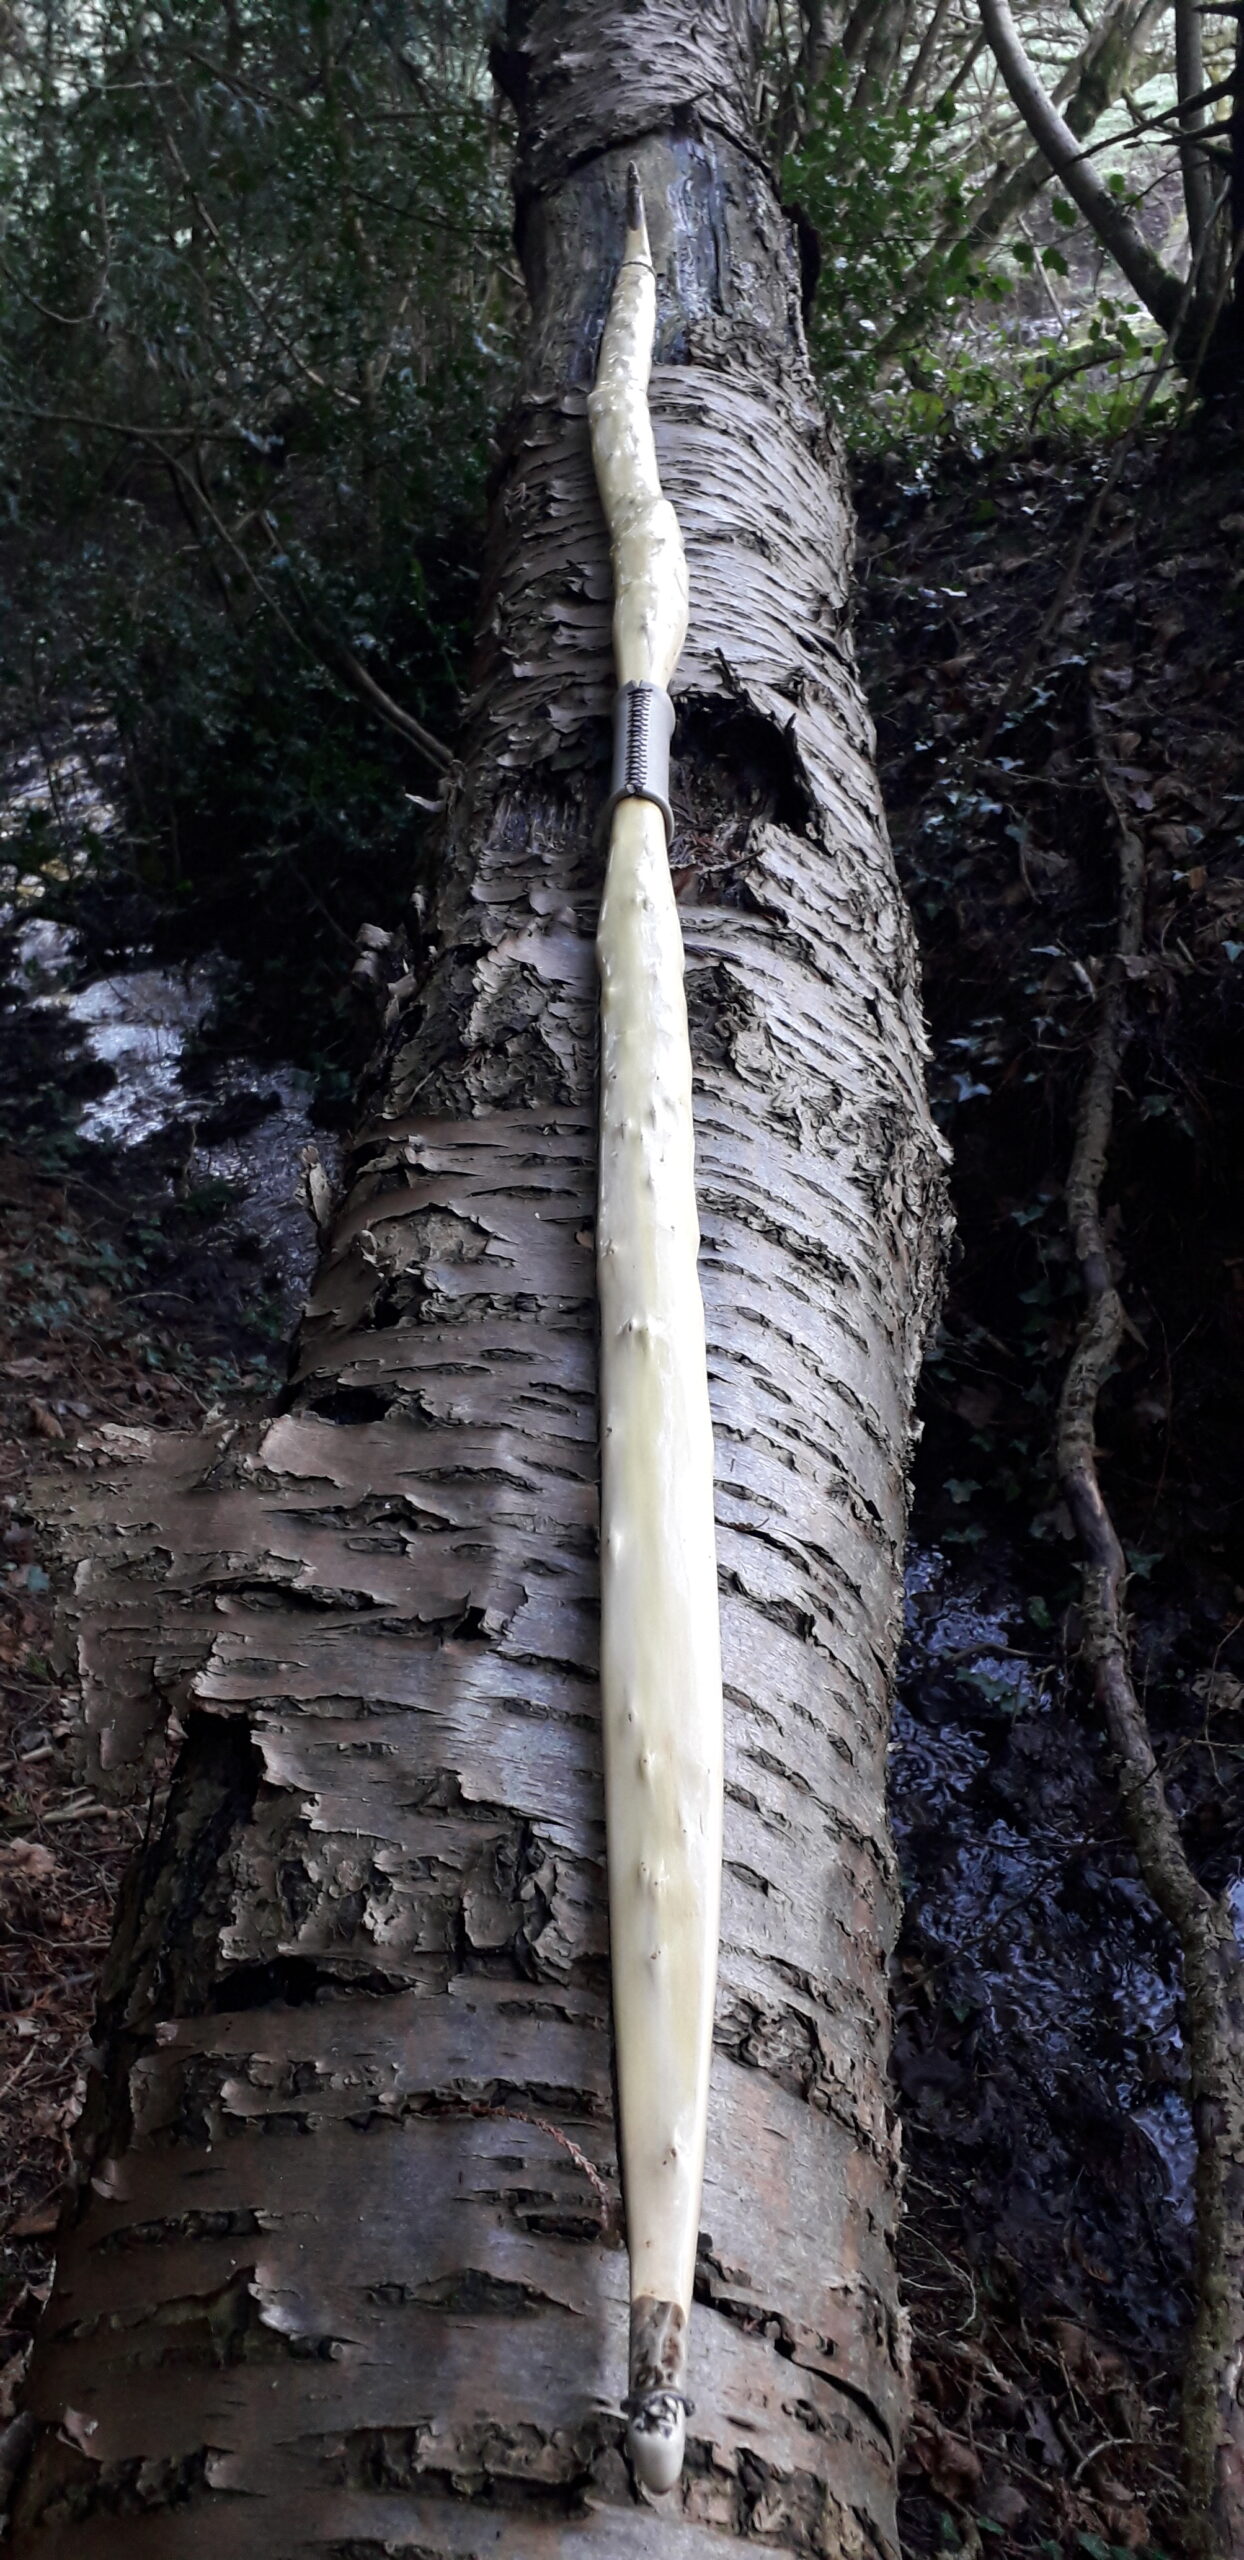
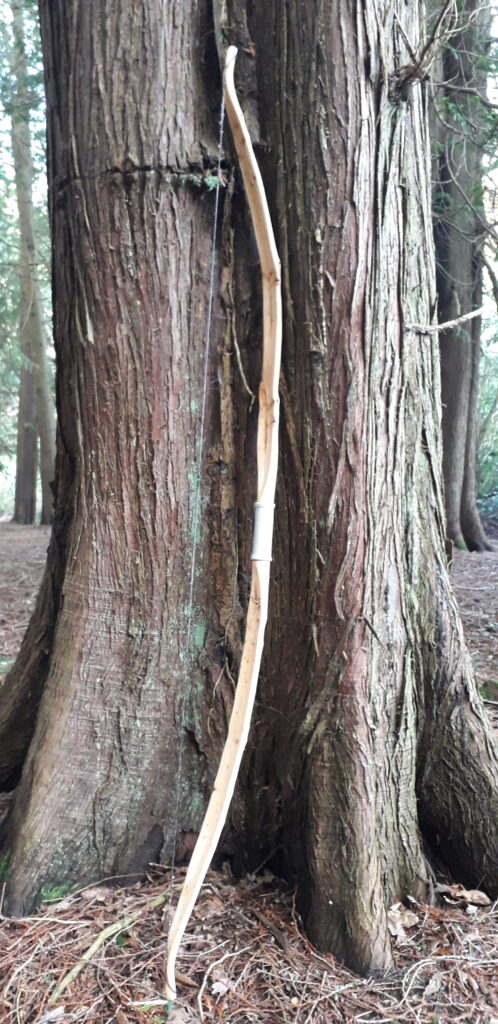
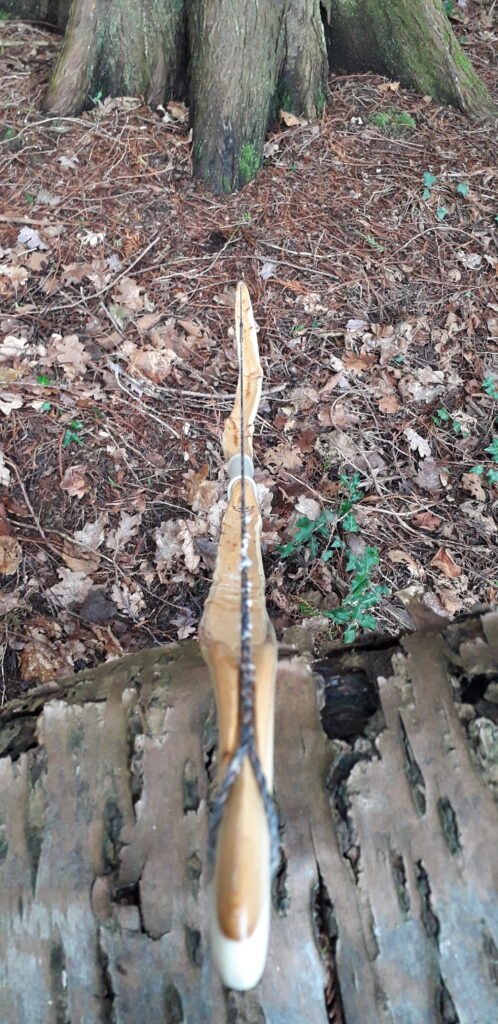
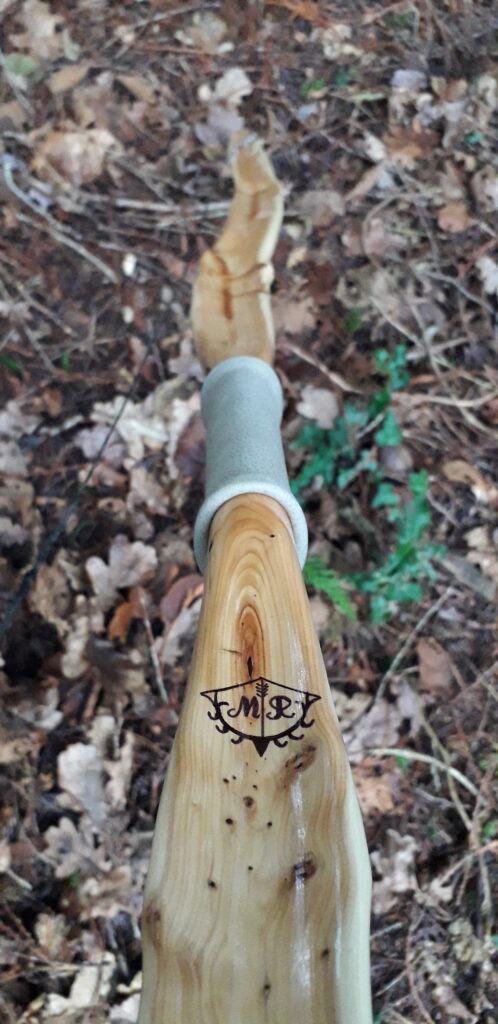
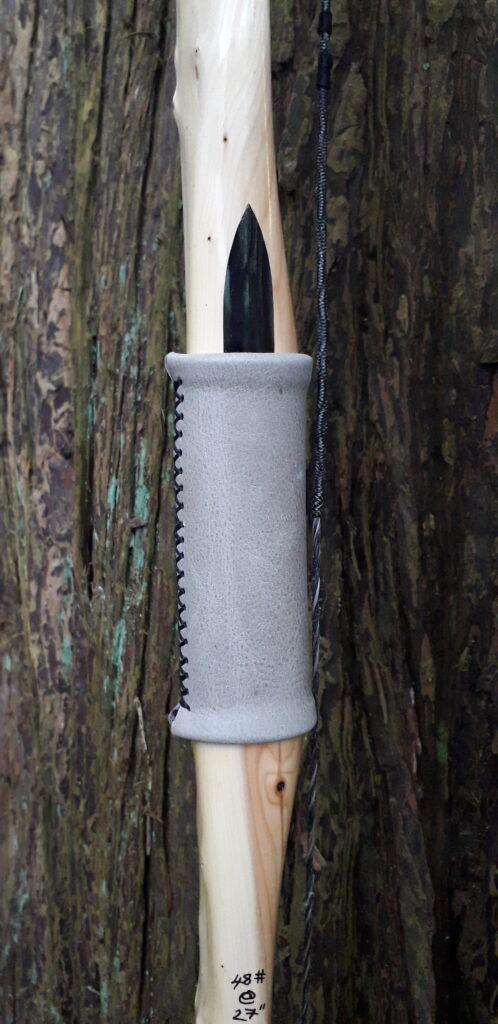
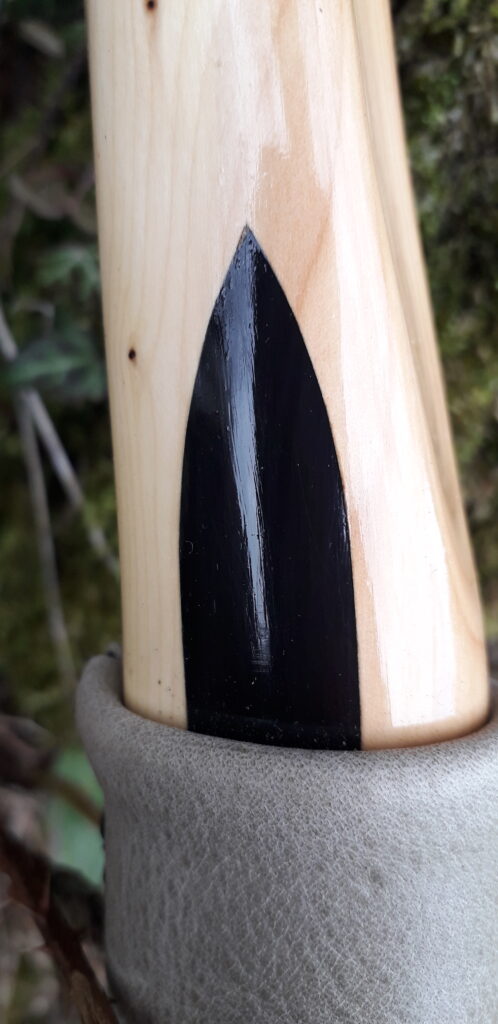
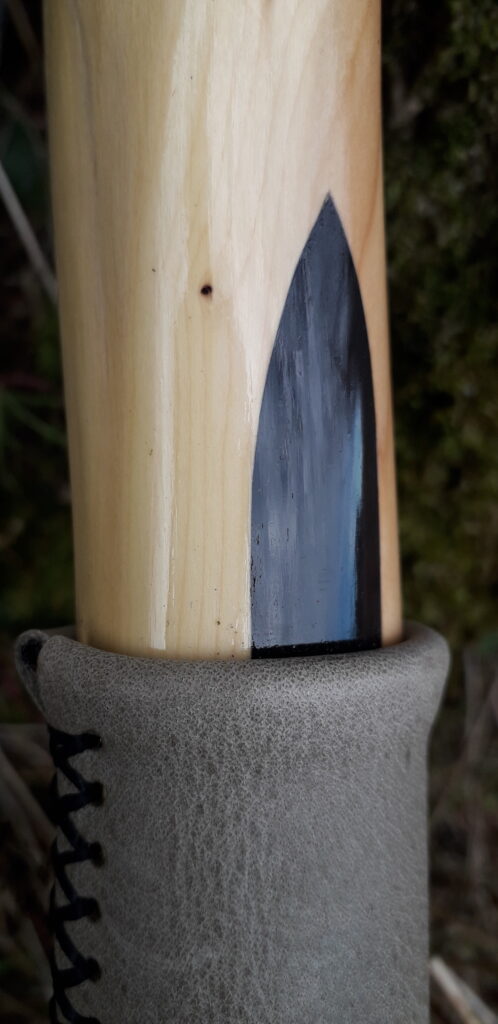
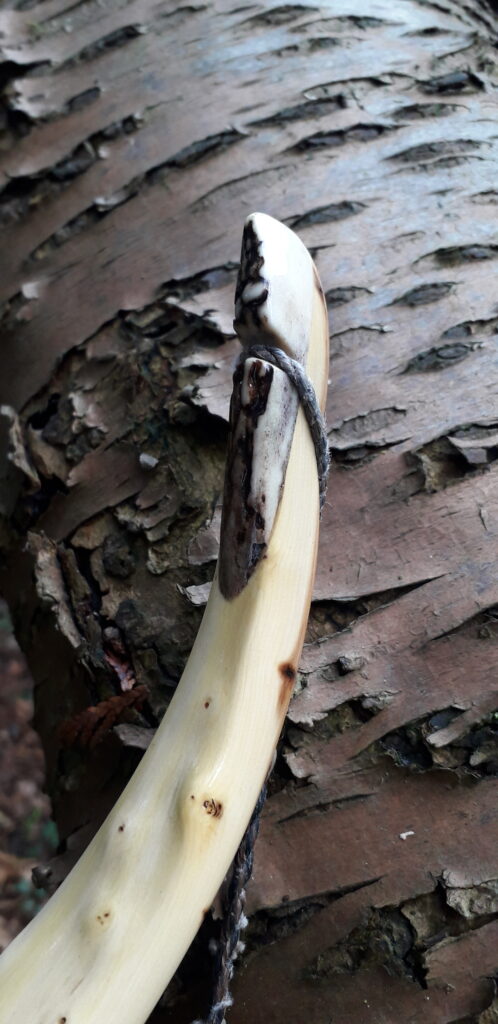
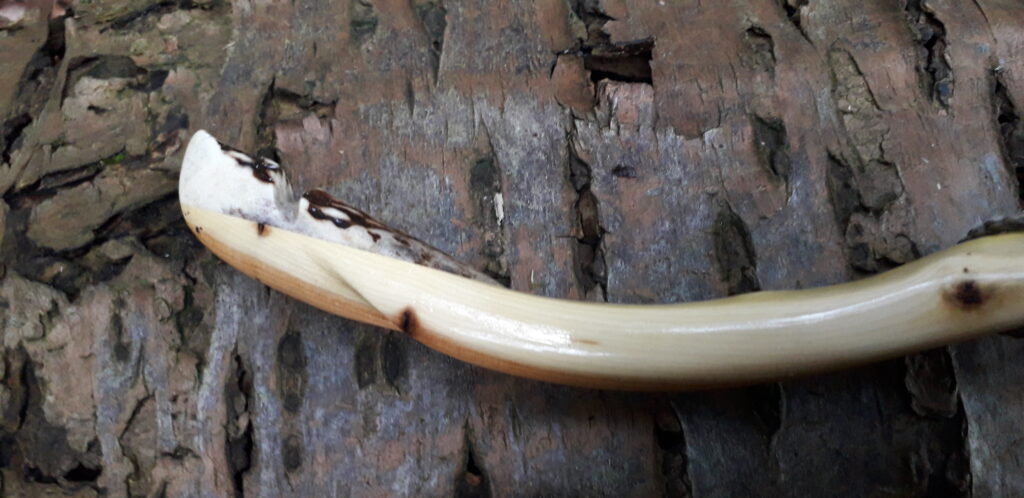
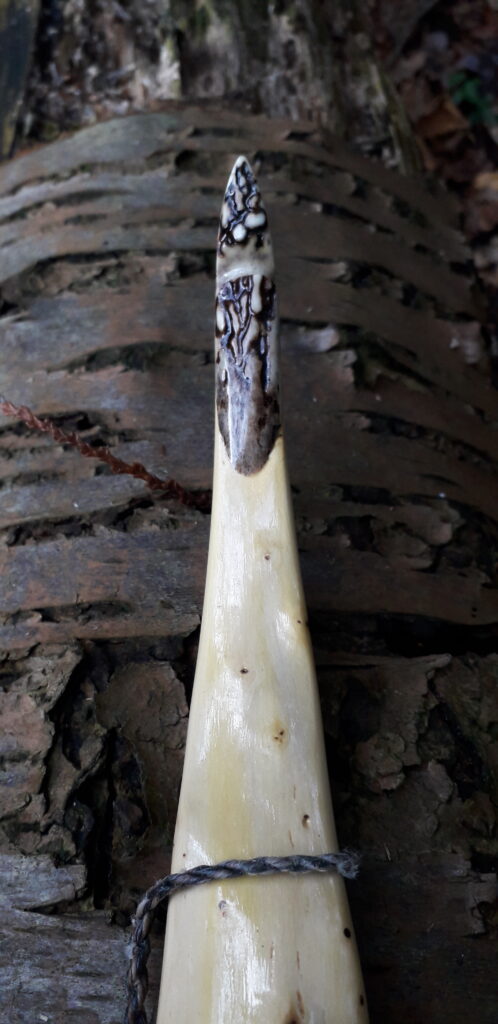
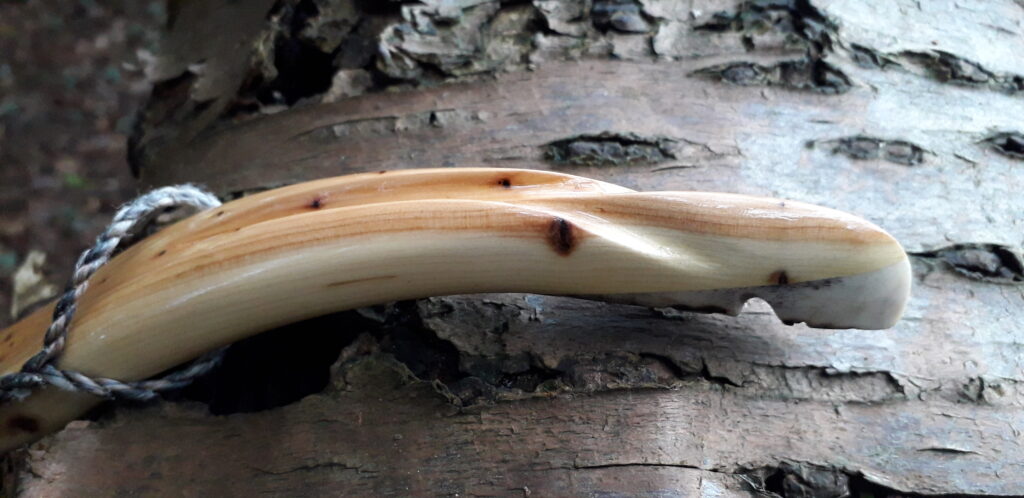
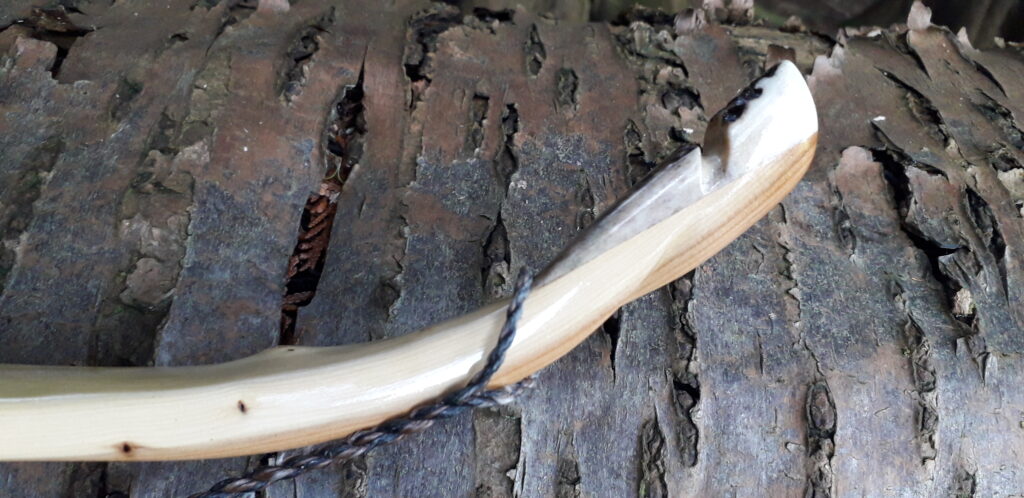
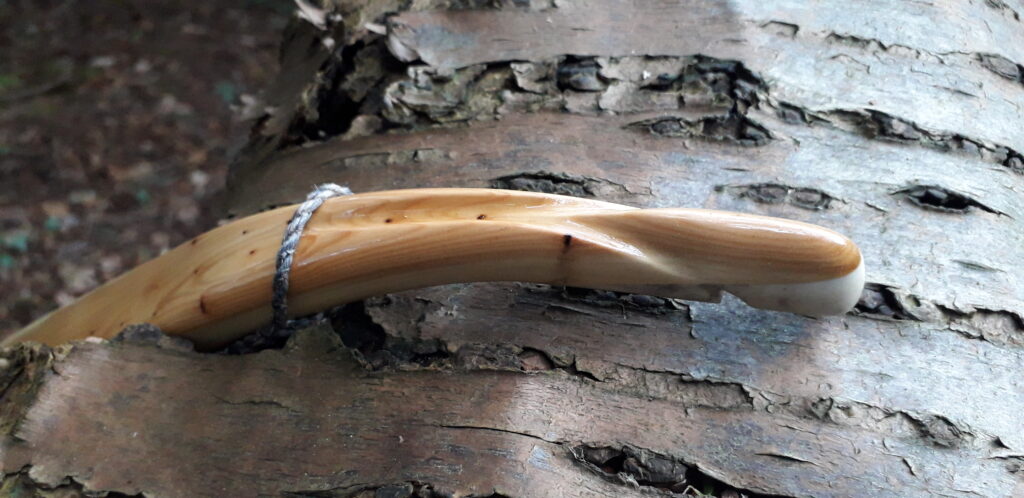
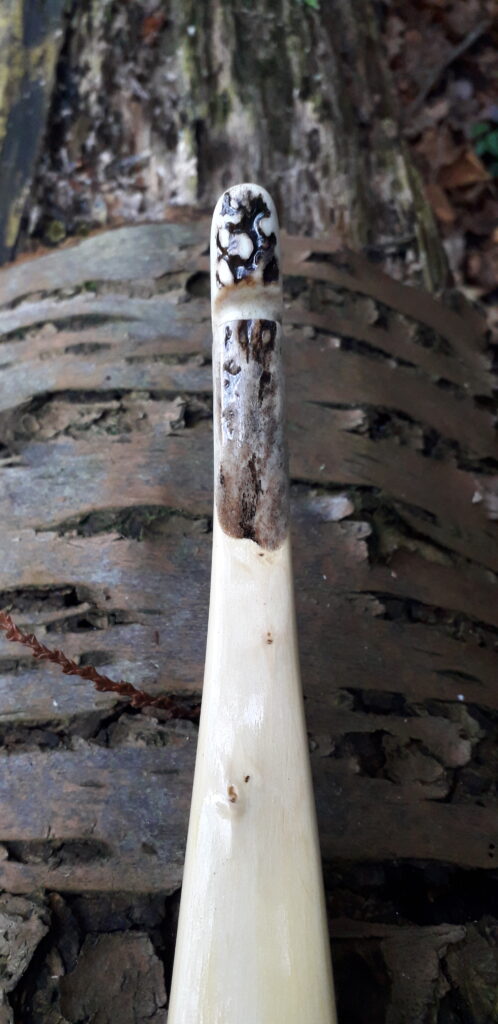
After shooting and sanding, I weighed her again and she was settled in at 48lbs at 27”. Happy with that I fitted her static recurved tips with a pair of Red Deer antler tip overlays, and I inlayed the arrow pass with a patch of buffalo horn. For the handle I chose a simple leather grip fitted after sealing the finished bow with 8 coats of Tru-Oil.

This bow put a smile on my face. I could well have imagined this bow breaking mid tiller. Not only was I impressed that she held together, but she actually ended up a being a proper little looker too. So much character and more than satisfactory performance has made this little bow one of my favourite character bows so far this year. (I have others to show off soon!)

In terms of performance, with a 12 strand B50 string on she sent a bunch of 450 grain arrows over the chronograph at an average speed of 143ft/sec. Not bad for a knarly old branch bow! Mass is 560 grams and she carries about ¾” of set immediately after unstringing which returns back to almost straight after resting.

Here she is. Enjoy!

Top nock
Top nock
Top nock
Top nock
Top nock
Bottom nock

Bottom nock
Bottom nock
Drawn to 26″
Drawn to 26″
About 3/4″ of set immediately after unstringing. Returns to almost straight after resting.

Thanks for looking!

13 Important Characteristics of Antler That Every Bowyer Must know.

The Antler Series Part 1

Deer antler is a material which has been used by man in primitive arts and crafts for many thousands of years. In fact, deer antler has been used both as a raw material, and as a tool, to make all kinds of primitive artefacts.

Deer antler is a versatile material. It has qualities which lend itself to promoting its use in the construction of tools and equipment. And as far as primitive archery equipment is concerned, antler adds both functionality and aesthetics to bows, arrows and many other associated items.

Personally, I love using deer antler as a natural material for building primitive archery equipment. And by using an authentic raw material such as antler, we primitive crafters are very much in keeping with tradition.

Deer antler presents an element of symbolism too. Antler is a well-recognised representation of nature. Deer are truly wild and majestic creatures, honoured throughout time, and respected by hunters the world over.

It is certainly fair to say that our primitive archery ancestors (as well as many contemporary archery hunters for that matter) pursued deer as a prized and challenging target species. It therefore seems appropriate to adorn a primitive bow (or even a modern traditional bow) with a functionality promoting, and decorative material sourced from one of the very creatures which inspired man’s most notable primitive hunting innovation – archery.

But before you race out to incorporate deer antler into your next primitive archery build, there are some things you must first consider. As with all materials, deer antler has some pros and some cons. Before committing to using antler as your material of choice, first you should be aware of what antler does well and what is does not do well.

This article discusses 13 things you should first know before embarking on a project using deer antler. First, we will discuss the upsides!

Pros:

1 – Antler is easy to source: Deer antler is easily available. It can be readily purchased in pet shops as dog chews, and it can also be bought online and at game/countryside fairs etc. Ebay has any amount of deer antler available throughout the year so getting hold of some should not be a challenge. I also stock and sell a wide variety of different sizes, shapes and colours of antler so if you’re in the UK, give me a shout via the contacts page if you would like to discuss your antler needs with me.

2 – Antler is easily worked with wood working tools: Deer antler is soft enough to be worked with high carbon tool steel, which is what most rasps, files and saws are made from. Common abrasives such as sandpaper, wire wool etc also work well as a means to finish antler. This means that you won’t need to buy extra tools, materials or equipment to work with antler. You will find that you will get by perfectly well using many of the tools that you already have for general woodworking. The only exceptions being bladed tools such as knifes, chisels drawknives and axes which will dull very quickly if used on antler.

Most saws, files and rasps as well as most abrasives work well on antler.

3 – Antler is aesthetically pleasing: I think deer antler is beautiful. It’s just plain nice to look at. It also has that wild rustic appeal to it which aids in generating the character that primitive bows are renowned for.

The contrast in colour between the browns and creams of the antler stand out from typical wood colours making it an ideal decoration for bows. Wooden bow tip and riser overlays made from deer antler look amazing!

Red Deer Antler used as a tip overlay on a sinew backed yew character recurve.

4 – Antler is hard enough to avoid string wear: Antler is harder than wood and therefore does not suffer from bow string wear. This is another reason why deer antler makes a great material to make bow tip overlays from. For the same reason, antler also makes for a good choice as an arrow rest or as a material for an inlayed arrow pass.

The coronet of this roe deer antler is about 1″ 1/2 in diameter. Note how it is the perfect size and shape to make an arrow rest which could be shaped and glued onto the handle of a primitive bow.

5 – Antler works well with most glue: Antler is usually added to a work piece with a glue being used as the binding agent. Antler can be stuck to other natural material such as wood and sinew very easily using regular wood glue, epoxy and superglue. My favourite glue to bond antler to wood and sinew is Titebond III.

This antler tip overlay is being glued on to a maple longbow tip with Titebond III, which creates a super strong bond between antler and wood or sinew.

6 – Antler is weakly porous: There have been times when I have wanted to stain a bow which has antler components built into the design, but I’ve not wanted the antler parts to take on the stain intended to alter the colour of the adjacent wood. Finely sanded and polished antler is only very weakly porous. This means that it does not readily take up a stain into its surface. This makes it easy to remove stain from polished antler. If I get stain on a tip overlay for example, I simply wipe the stain off with some kitchen towel dipped into acetone. This will bring the antler right back to its natural colour state.

Elm longbow stained dark Jacobean. Whilst the stain penetrates the wood, it is easily wiped off the antler tip overlays, which allows the antler to remain light in colour preserving its ability to contrast against the darkened wood.

7 – Antler is strong in compression: Tribes from various parts of the world have used antler as the main structure of their bows for millennia. These bows were either backed with a heavy sinew application or they were supported in tension with sinew cabling. Our ancestors knew that the compression strength of antler was effective at creating an efficient and effective bow belly.

Cons:

8 – Antler can be expensive to buy: Depending on where you source it, it can be costly to stock up on some decent antler. I frequently see antler being offered for sale in pet shops and on the internet for silly money. Ebay will likely be the cheapest place to buy antler. Country fairs often have buckets full of antler on sale priced per piece for reasonable prices too.

If you have a particular use in mind for a piece of antler, then you really should lay your hands on a few different bits first so that you can be sure that the bit you choose will serve the intended purpose before you part with your cash. At least a bucket full of antler gives you a chance to pick out the bit that suits your purpose best.

I sell premium quality antler on a piece-by-piece basis for a very reasonable price. If you would like to buy some then contact me through my contact page to discuss your particular requirements.

9- Antler can vary considerably in its appearance from one piece to the next: The external structure of the antler, in combination with the vegetation type of the area inhabited by the deer, dictates the colour of the antler. This is why some antler is darker than other pieces, especially when antler is compared to other antler belonging to animals which live in completely different areas.

The time of year which the antler departed from the deer will also influence the amount of staining and subsequently, the colour of the antler. Male deer grow a new set of antlers each year. This new antler growth occurs under a thin membranous tissue called velvet. Once their antlers are fully grown the velvet covering dies. As the dying velvet peels away from the hard antler beneath, the exposed antler is white in colour with a structure and appearance of bone.

As the season progresses the deer clean off the rest of this dead velvet by “fraying” their antlers against vegetation in their surrounding area. This “fraying” activity is what colours up their antlers. If male deer didn’t fray vegetation, then their antlers would stay white.

The dark brown colour that you see on antlers is from the sap and dirt from countless fraying sessions. So, with this is mind, the vegetation type in the locality of the deer will influence the colour and the darkness of deer antler. And if a piece of antler was removed from a deer shortly after cleaning of its velvet, then the antler may not have had much time to be coloured up through fraying.

Antlers acquired early in the season will be much lighter in colour than antlers taken from deer late in the season. Especially after the rutting period which is when deer spend vast amounts of time scrapping their antlers against anything and everything!

2-year-old Red Stag antler from a stag taken in late Autumn. This antler is nice and dark due to plenty of fraying of local vegetation. If this stag had been shot in late summer, it would be much lighter in colour. This antler would produce sections of its main beam which are perfect for bow handle/fade veneers.
Yearling Red Deer stag spike. The beautiful “pearling” at the base of this antler spike will lend itself perfectly to making a very attractive antler tip overlay or arrow rest/inlayed arrow pass.

10 – Not all parts of the antler can be useful for certain jobs: The appearance and usability of a piece of antler will depend to a large extent on the species of deer which it came from and the age of that animal. Remember that male deer grow a brand-new set of antlers each year. A young male deer will only grow a small set of antlers for the first couple of years of its life. Older animals will generally have larger antlers up until a deer gets too old in which case their antlers begin to reduce in size with each passing year. This old aging process is referred to as “going back”. Big antler therefore comes from mature but not old male deer.

If you take an antler and saw it in half lengthways, you will notice that the main beam was significantly honeycombed on the inside. Back down towards the coronets however is far more solid.

The honeycombed section is no good for tip overlays or arrow rests as the porous parts are much weaker than the solid parts. These porous areas will crush under compression. If you are planning on making your bow tip overlays or arrow rest from antler, then use the solid section down at the very bottom of the antler by the coronet.

Antler coronets (bottom end) – note how this section is solid looking.
Sections cut from the rest of the antler. Note the weak honeycomb centre.

11- Antler does not take up stains/colours well: If you actually wanted to stain your antler a darker or different colour, then you will find that most regular stains will not impart and significant change to the appearance of antler. The outside of antler is not permeable so will not allow a stain to soak in deep enough to have any real affect. Anything that you apply to antler will merely remain on the surface so will likely wipe off if you apply a solvent type of sealer to finish your project.

12- Antler is weak in tension: Antler will break when exposed to tension forces unless it is supported by a strongly elastic material like sinew. This is why bows with limbs made from antler were backed with sinew, either glued on in layers as is conventionally done, or by supporting the back of the bow with sinew cabling as done by the likes of Eskimo and Inuit people.

13- Poor flexibility can make antler behave brittle: Don’t expect antler to bend much on its own. Bending forces along the tension plane can cause antler to snap, especially if the solid outer surface of the antler has been compromised through working with tools.

A classic example of this tendency to break is sometimes witnessed on bow tip overlays. The break happens where the string groove has been filed into the overlay and the usual cause of the break is a heavy impact on the tip of the overlay caused by a bow being dropped.

Another cause of tip overlays breaking at the string groove is as a result of using overlays which are very long and are fixed to a working section of the bow limb tip. The bending of the tip presents a bending force to the overlay which results in a break at the weakest point which is always at the string groove. Static tips prevent this issue.

String groves are weak points on antler tip overlays. Make sure the bow tip under the overlay is not a working part of the limb else the overlay will break at the string groove when the bow is flexed.

So, there you have it. Now that you are aware of some of the main benefits and pitfalls of using deer antler, see if it’s time to incorporated antler into your next primitive archery project!

Until next time!