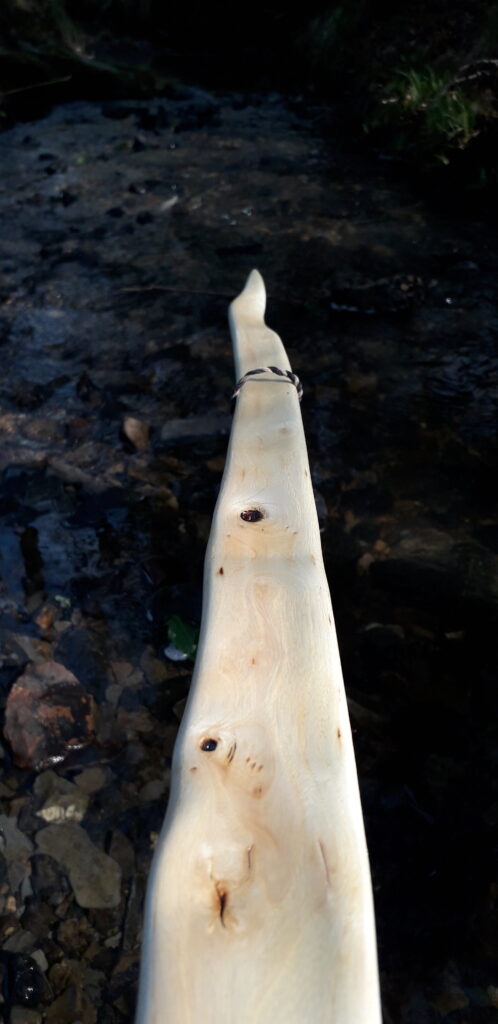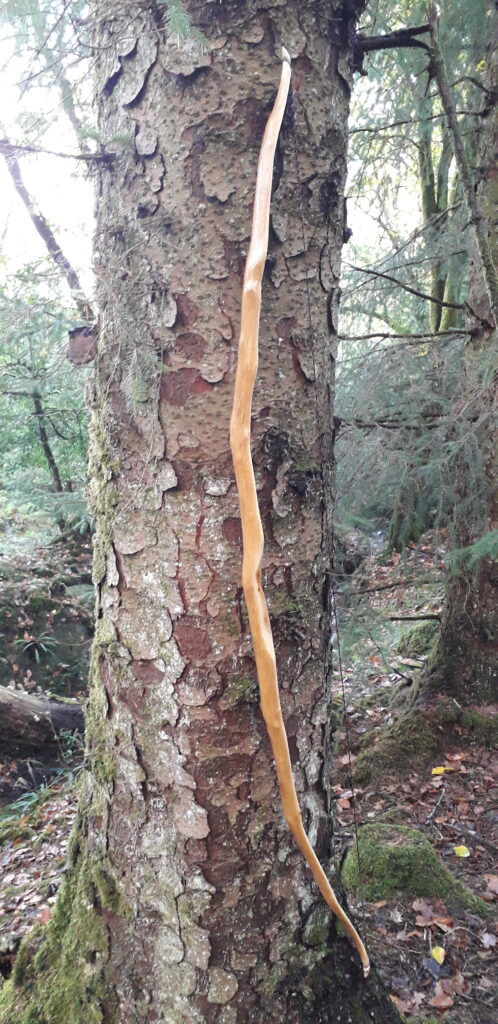
I wanted a yew branch stave to start thinking about beginning work on, so I set about rummaging through the pile of yew branch staves I have in storage. There I came across an interesting and character laden stave which was cut several years ago. I know this because I write the date that all of my staves were cut on one end after the end grain sealer has dried.
This particular branch stave caught my eye because it had a nice bit of wiggle and a few small knots which would add character without compromising strength. This stave was pretty long but one end kicked out massively and also held a dodgy looking bulge/knot. I decided to lop this 8” section off and just try and work with whatever length I was left.
Even with the end missing, I was still left with 63” ish to play with. So now that this stave had been significantly reduced in length, the shorter than ideal overall length would definitely influence the design of this bow, as bows this length and with this much character typically need a bit of thought in order to mitigate stress if intended to be drawn to 28” or more.
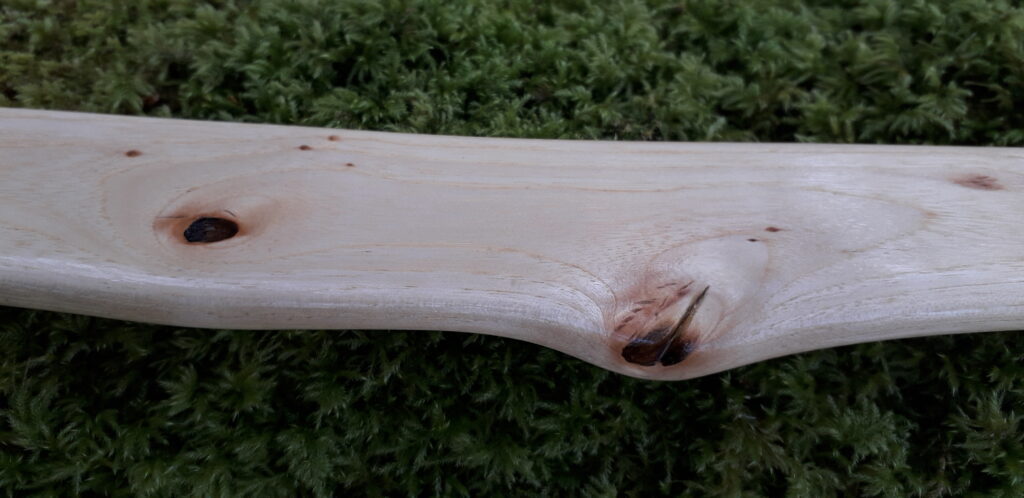
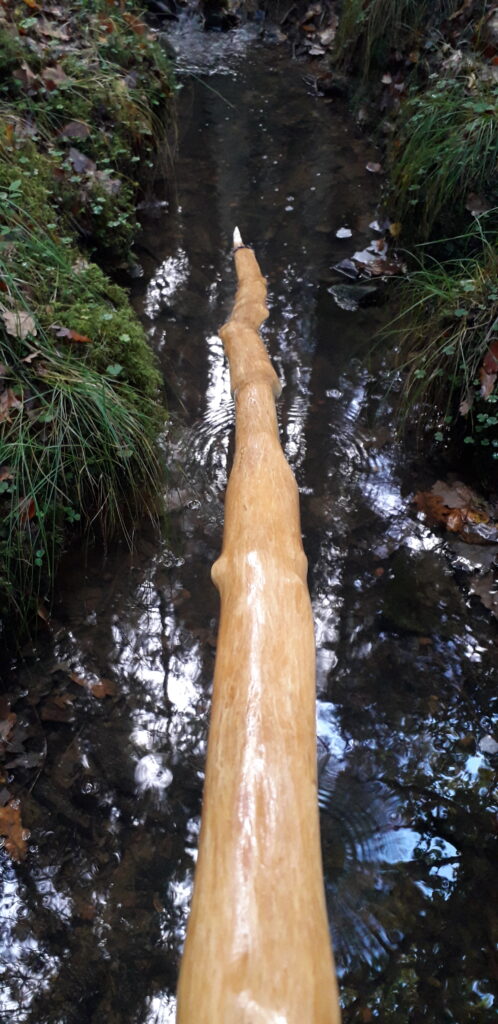
Before committing to a build though, I always like to give a stave a bit of axe time in order to get a bit of a feel for the stave, plus to try and identify any major problems I might encounter once work commences properly. 10 mins with the axe and I’d uncovered a potential problem. Hidden under the bark on the belly side of this stave was a drying check, and it looked like it might run deep.
Much of the bark on the face which I’d chosen as the back was very loose. I managed to pop a fair bit of this bark off by hand. I’d managed to uncover the section of sapwood under the crack, and fortunately, I could see no sign of the crack emerging on the surface of the back. Phew!
So I pushed on working down the belly, hoping that the crack would fall out at some point. And to some extent it did but the belly side of the handle section was never going to lose that crack completely, unless I reduced the handle thickness down to proportions which would make it bend slightly. And even then there was a good chance that some of the cracked pith wood would remain within the bow.
I wasn’t averse to this though, as the bow was going to end up fairly short by longbow standards, and a bendy handle would spread the work load by adding an extra 8” (4” handle + 4” fades) of bow to the total length of “working” bow.
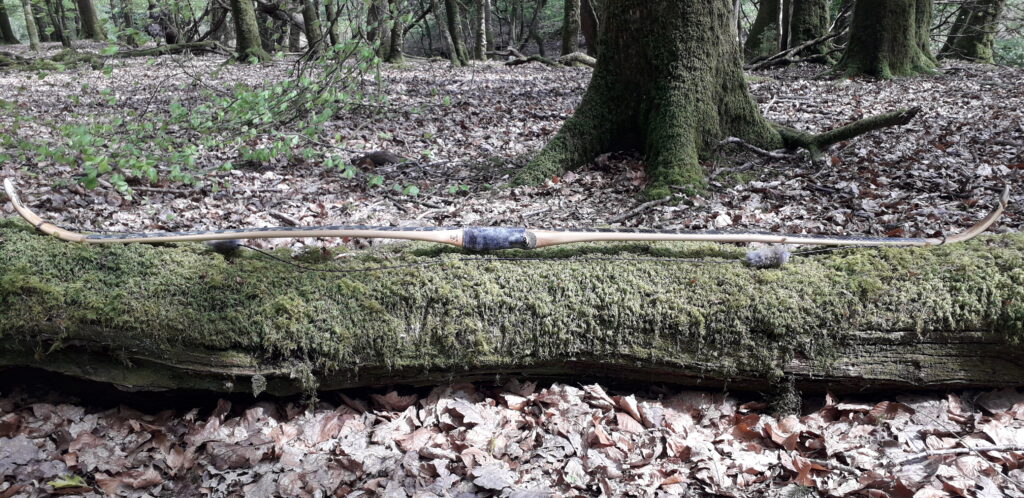
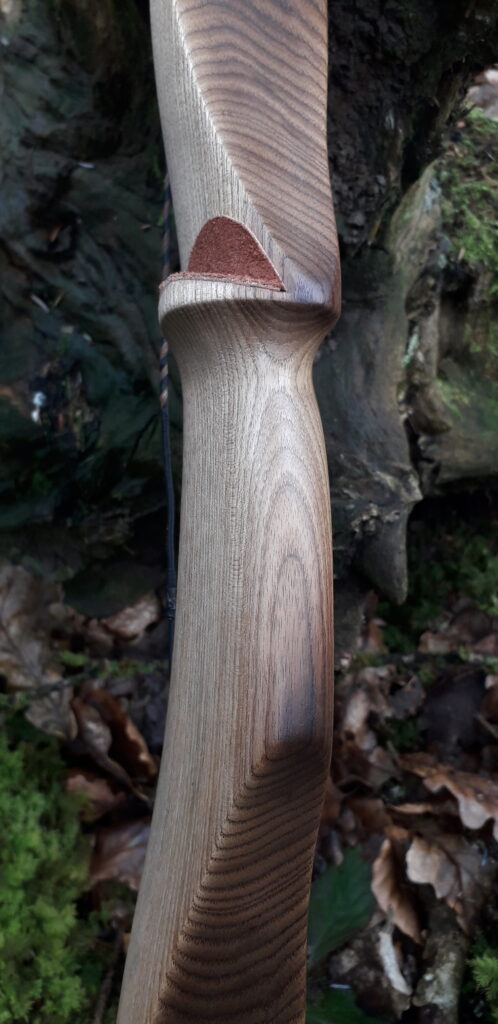
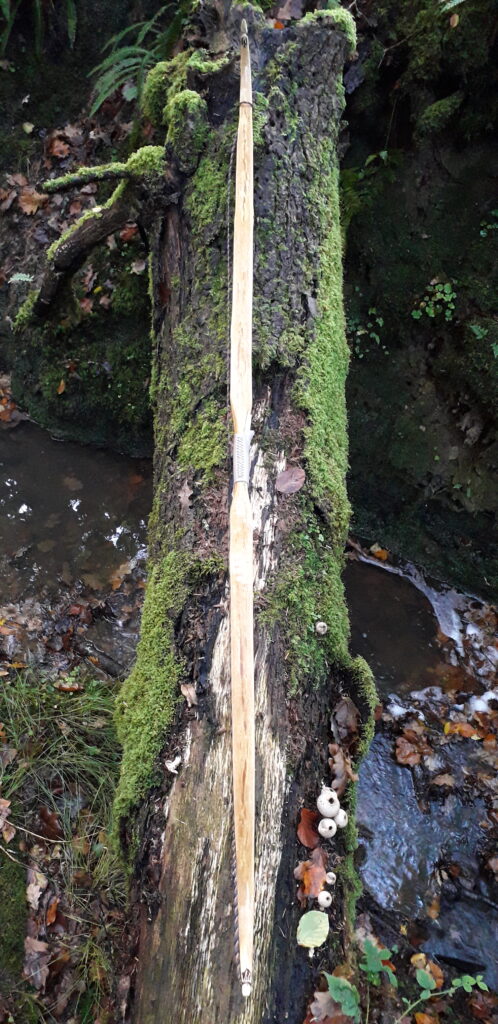
After roughing out the belly a bit more to give me some feel for where the bow would best sit, I set about marking out the handle. The best spot for the handle given the crack and the other features was actually about 2″ away from dead centre between the limbs, so I decided to make this bow asymmetrical.
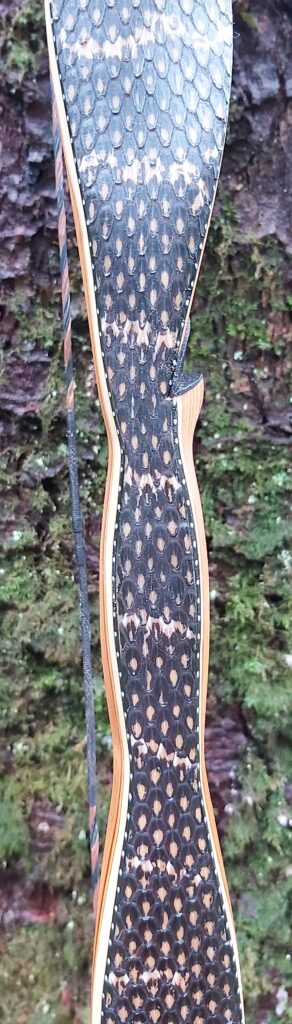
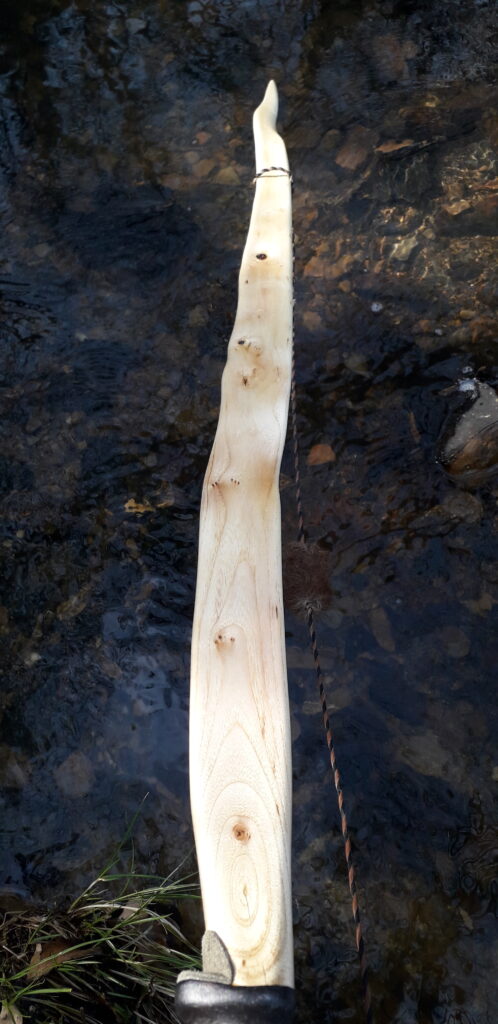
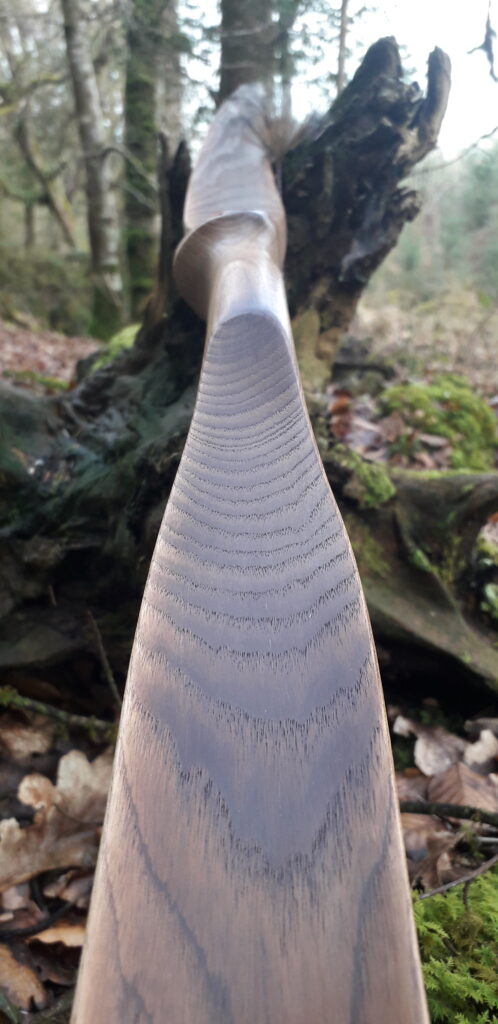
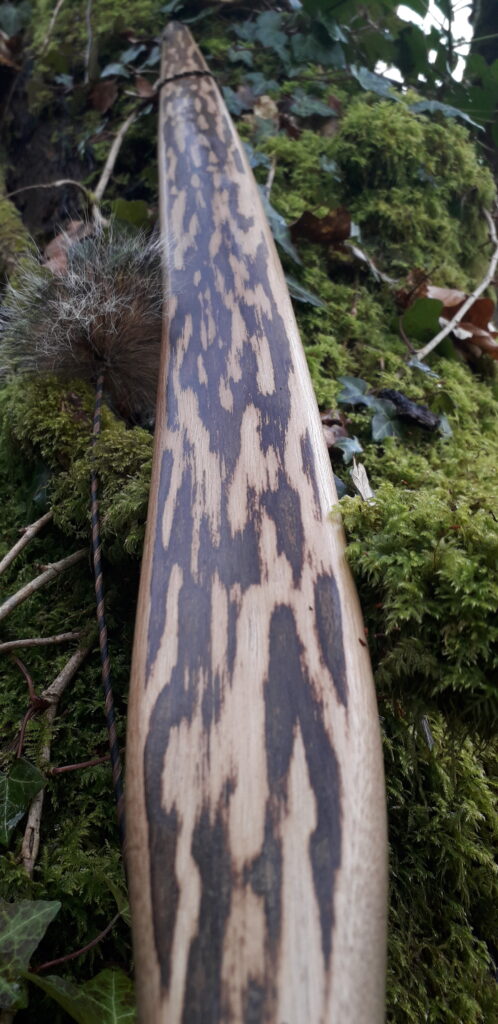
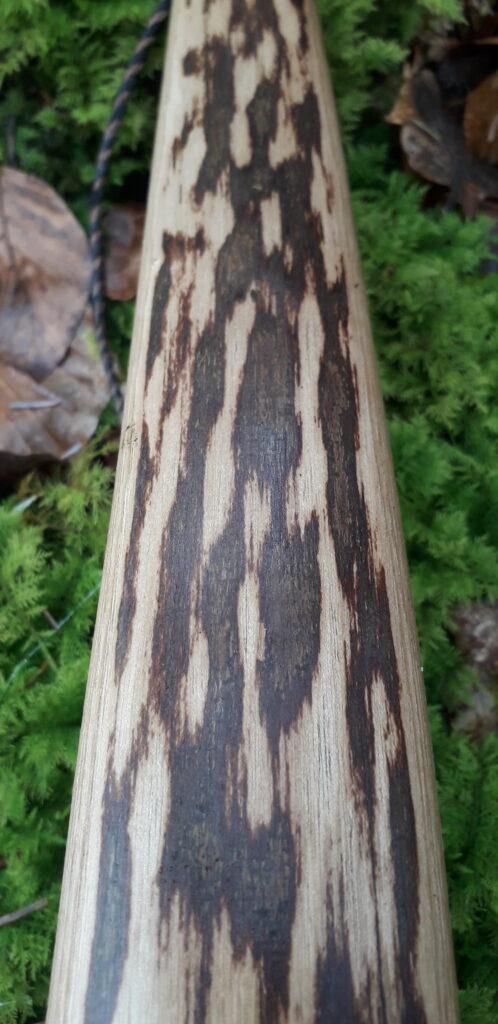
Next I wanted to rough out the face profile so that I could see what the sapwood/heartwood ratios were like, so after popping off as much bark from the limb sections as possible, I took the draw knife to the sides. This stave was only moderately crowned and was always destined to be a flatty, so I worked the edges down to a vague pyramidal profile to see if I could work around the major features without compromising strength.
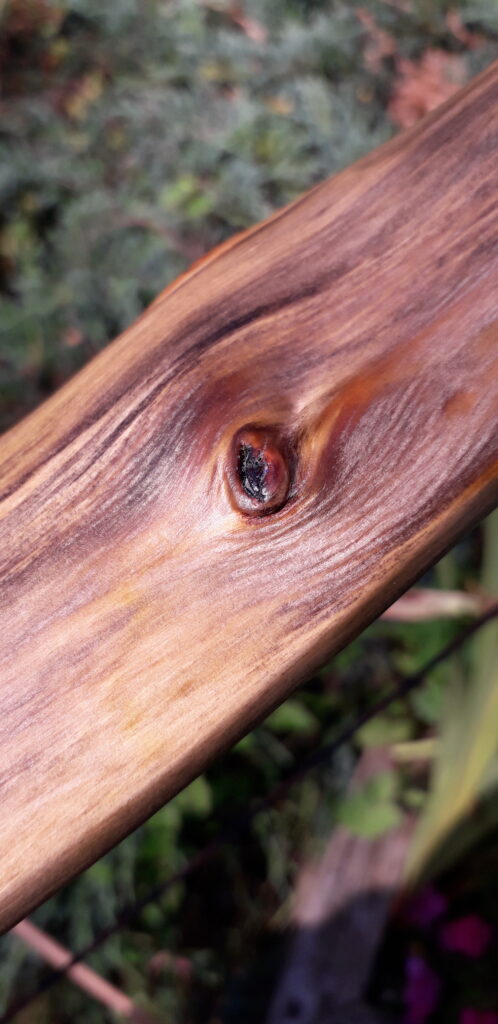
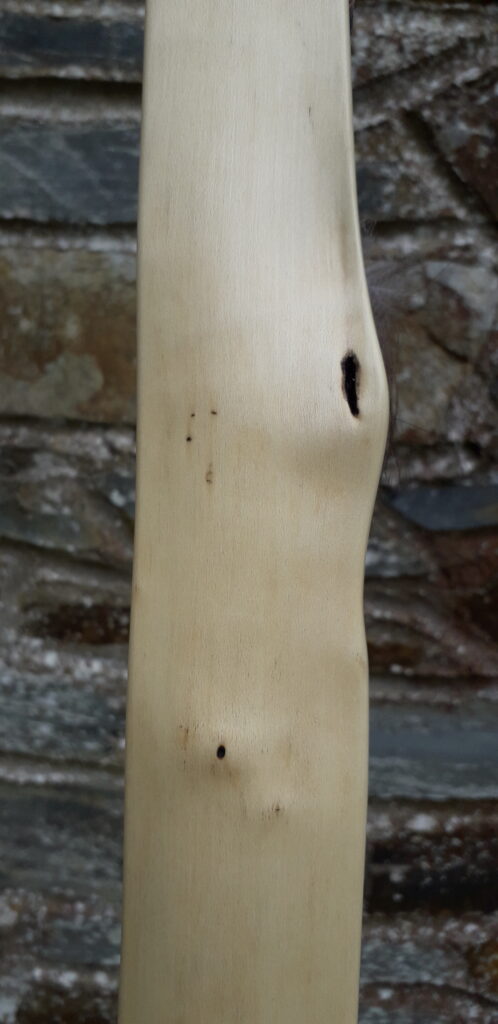
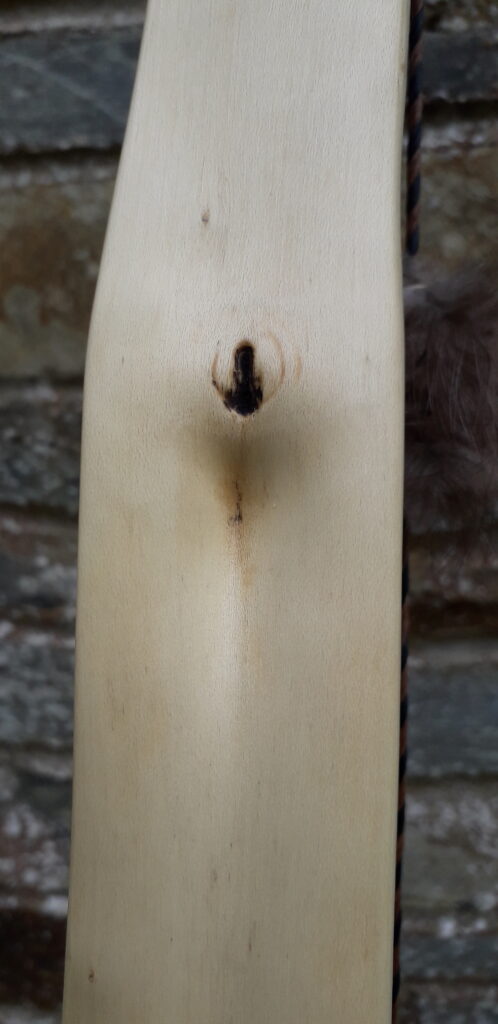
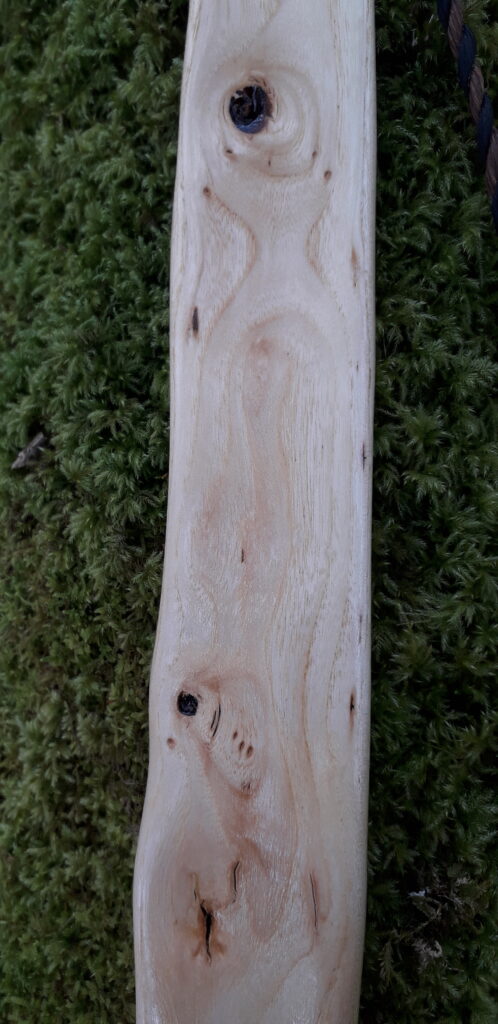
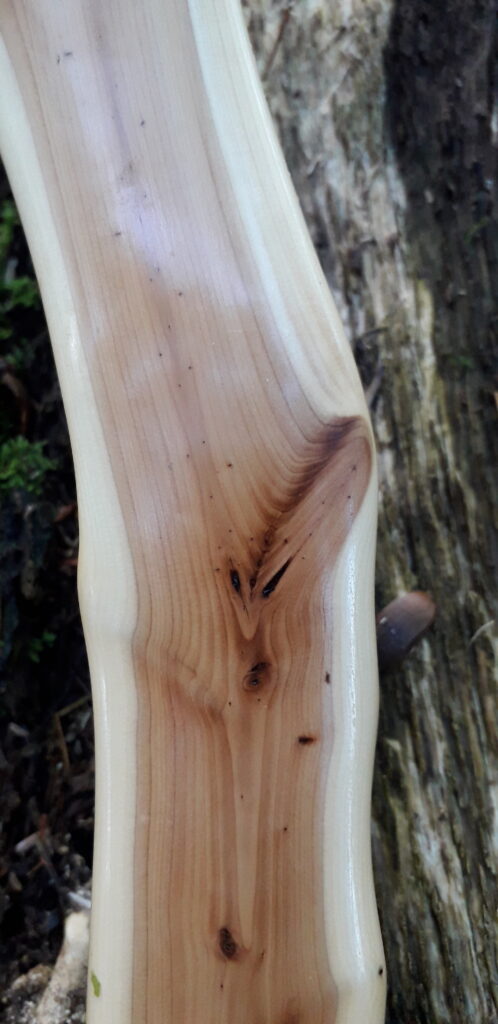
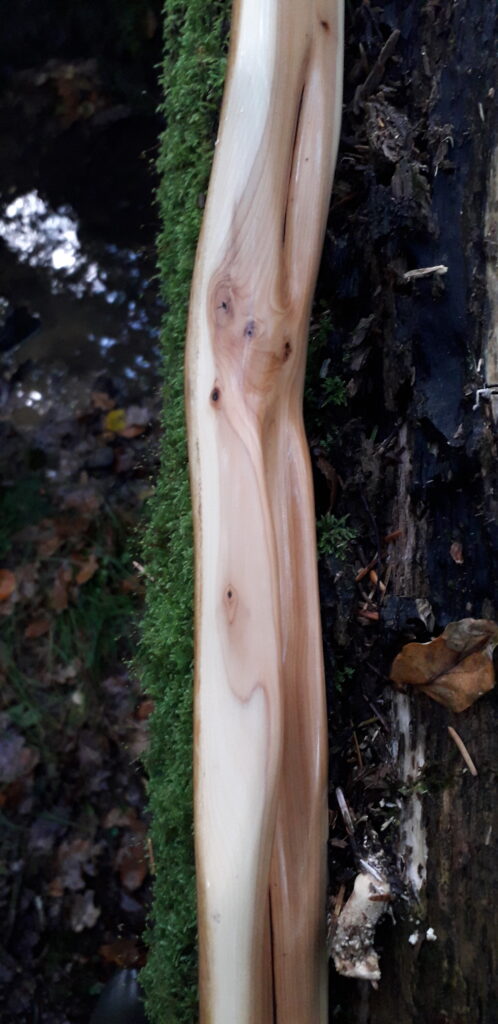
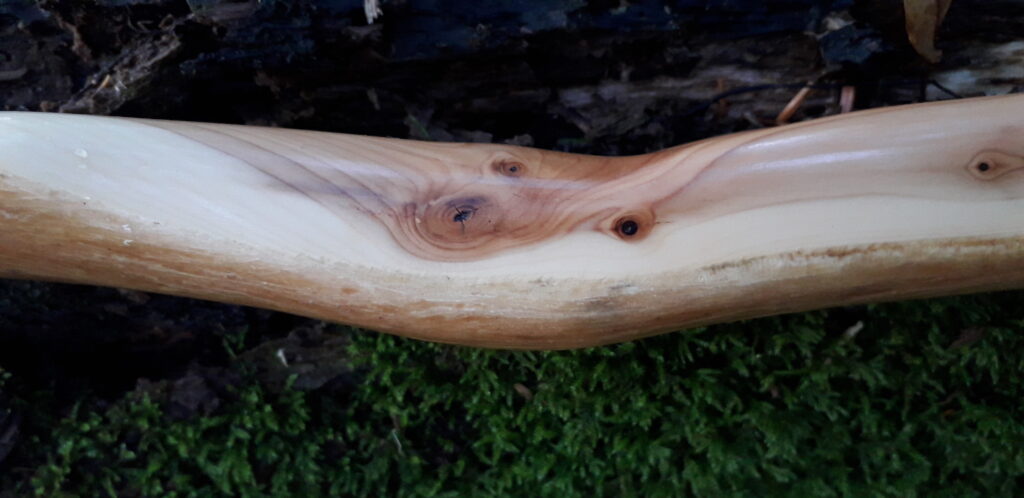
There were four knots which were large enough to need to be kept away from the edges, two in each limb. Fortunately, all four of these knots could be kept off the edges without having to divert the natural flow of the lateral grain which could potentially compromise the integrity of the bow through excessive grain run out. I always like to follow the grain!
A few pin knots would present on the edges but none of these looked like they would cause me any trouble. The only other issue that the knottiness of this stave would create would be in preventing the application of significant heat bending. Recurving the tips was definitely out of the question as the top tip section was carrying enough knots to cause it to bust off if significant heat bending pressure was applied.
A lack of recurve was actually a good thing as I could now simply reflex the outer thirds slightly leaving both tips static for the last 4” therefore minimising stress to this fairly short stave. Since the handle section plus all but 4” of the tips would be working to some extent, there was now a real likelihood that this bow might even draw to 28”, despite being as short as it was plus having lots of potential weak points, AKA “character”!.
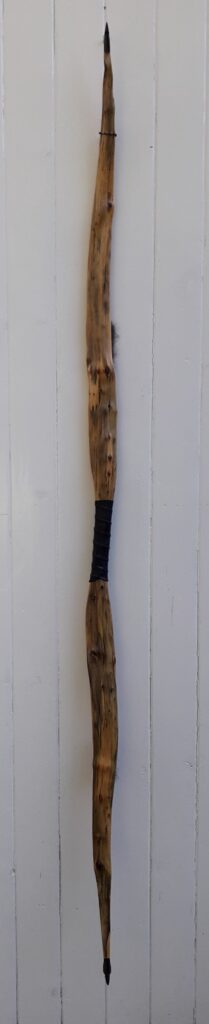
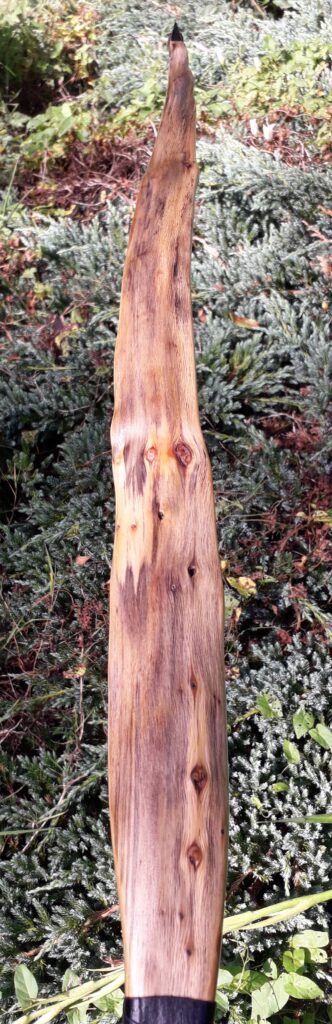
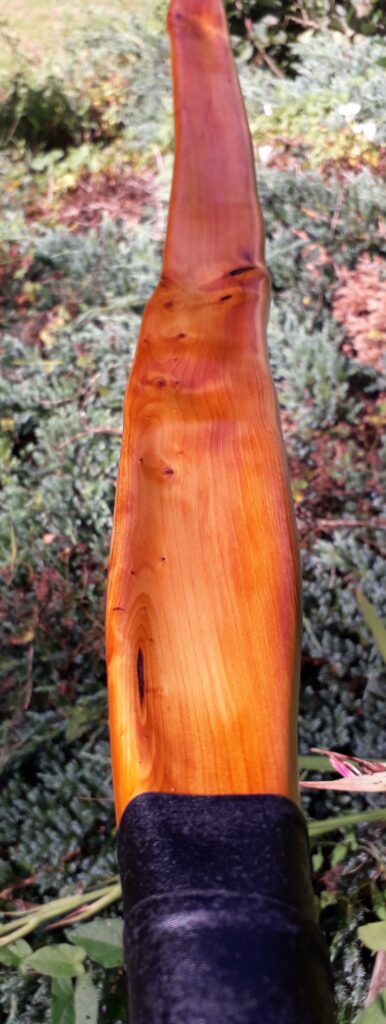
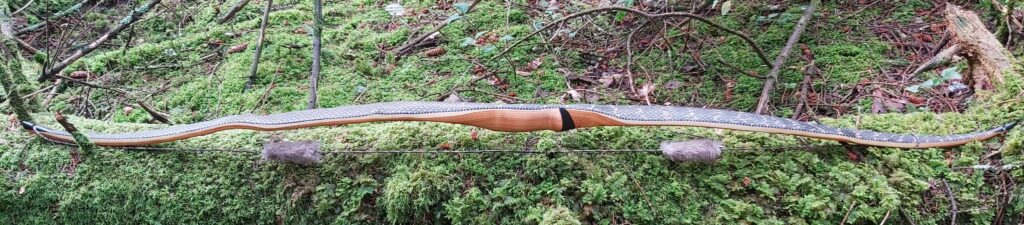
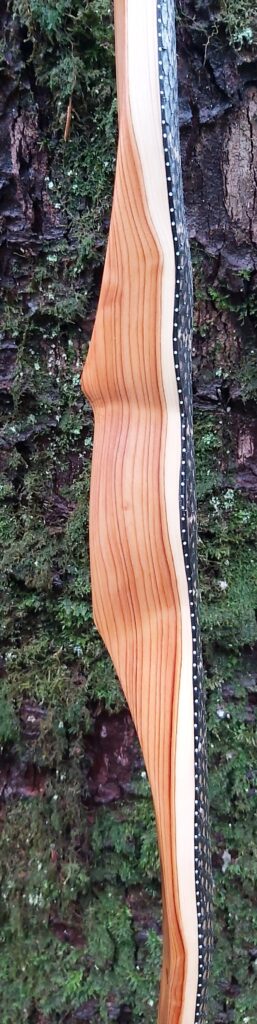
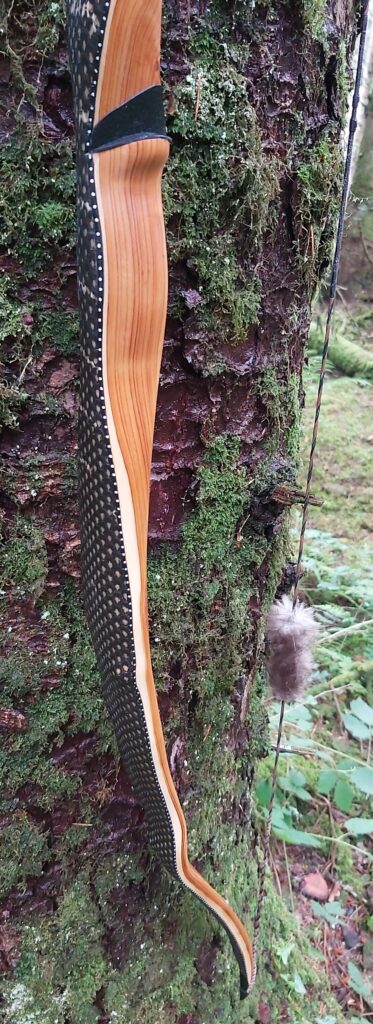
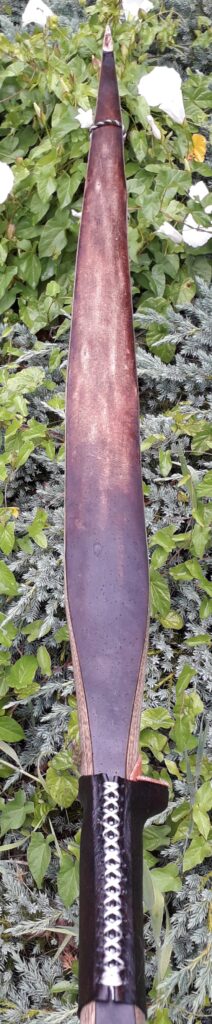
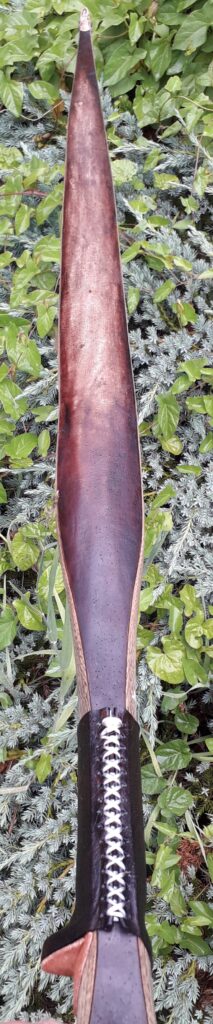
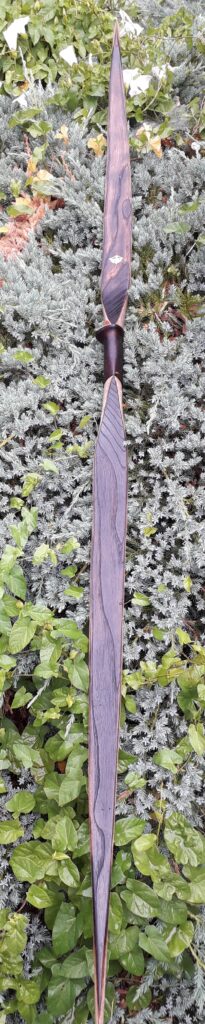
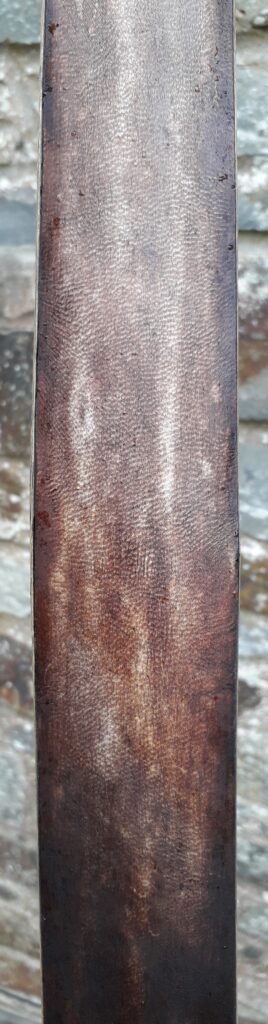
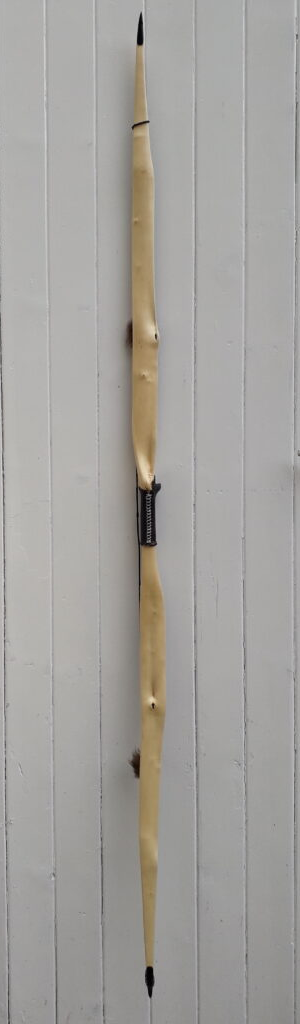
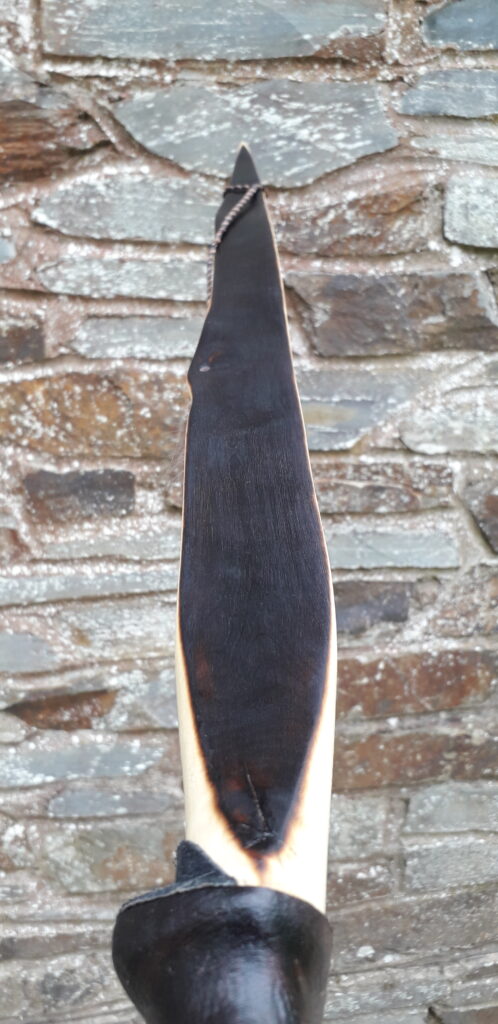
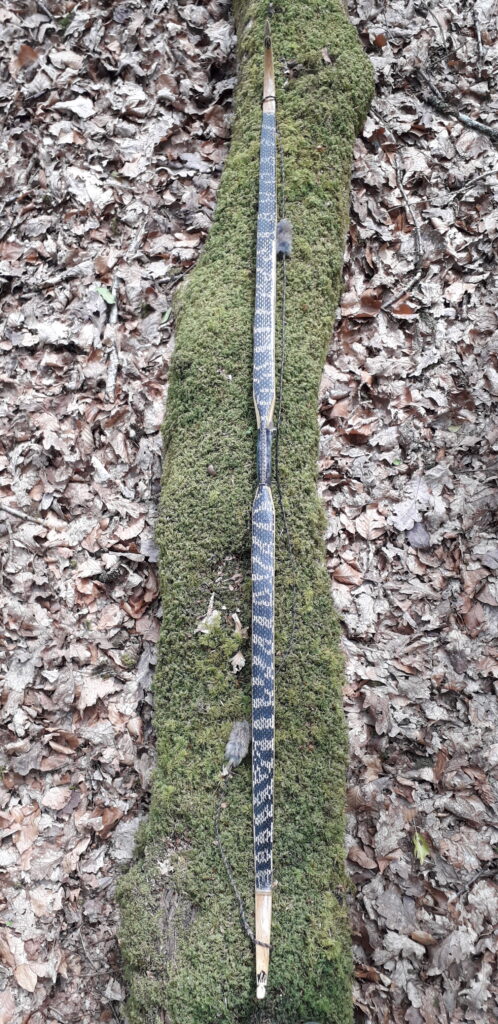
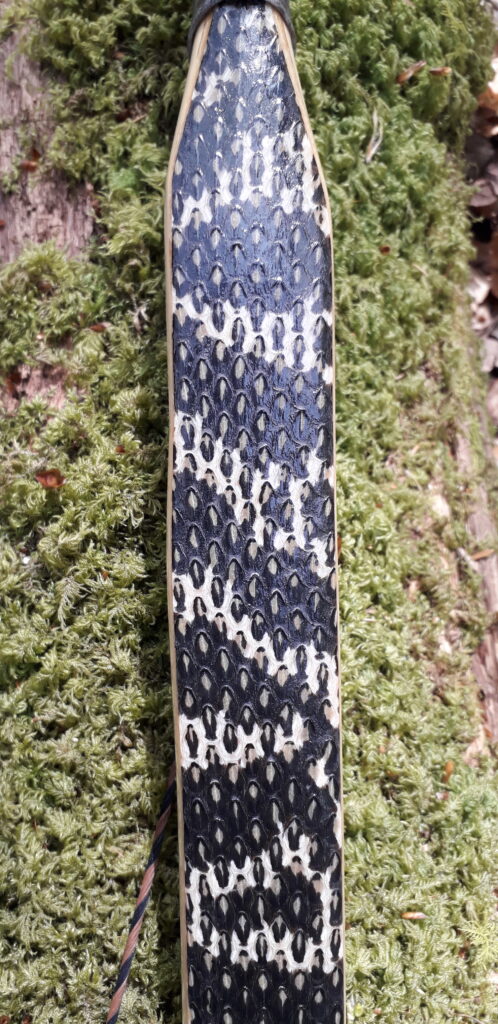
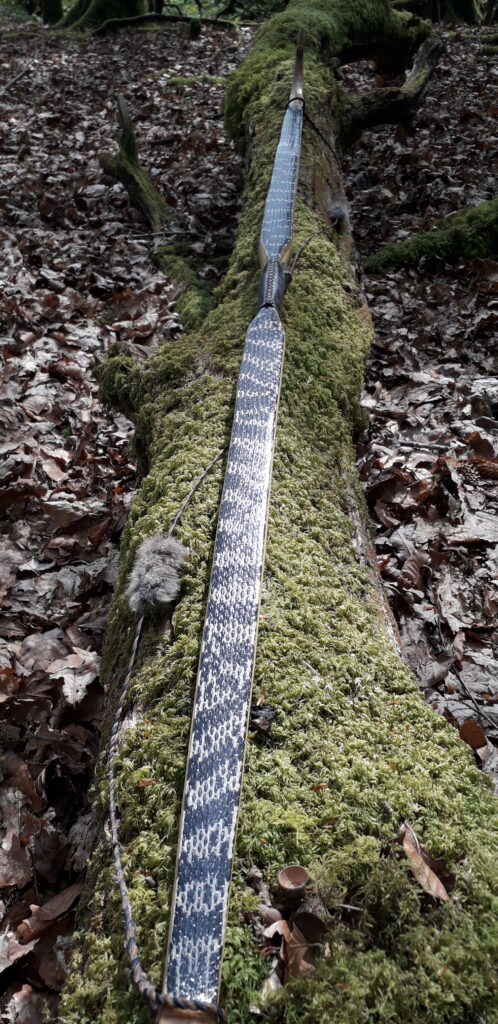
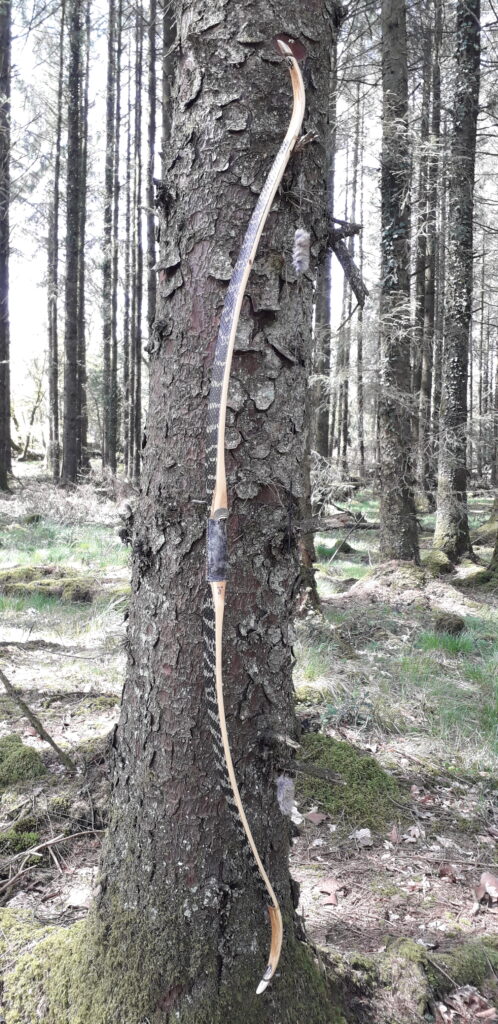
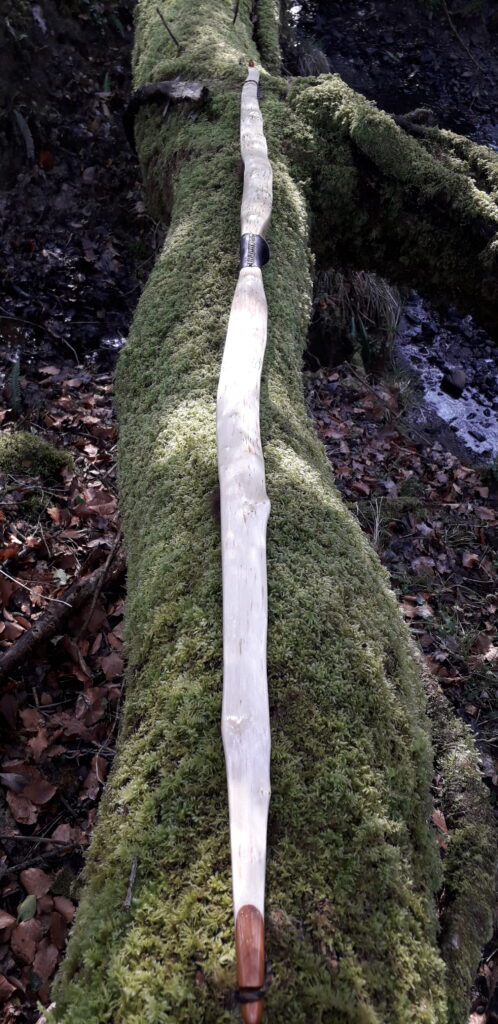
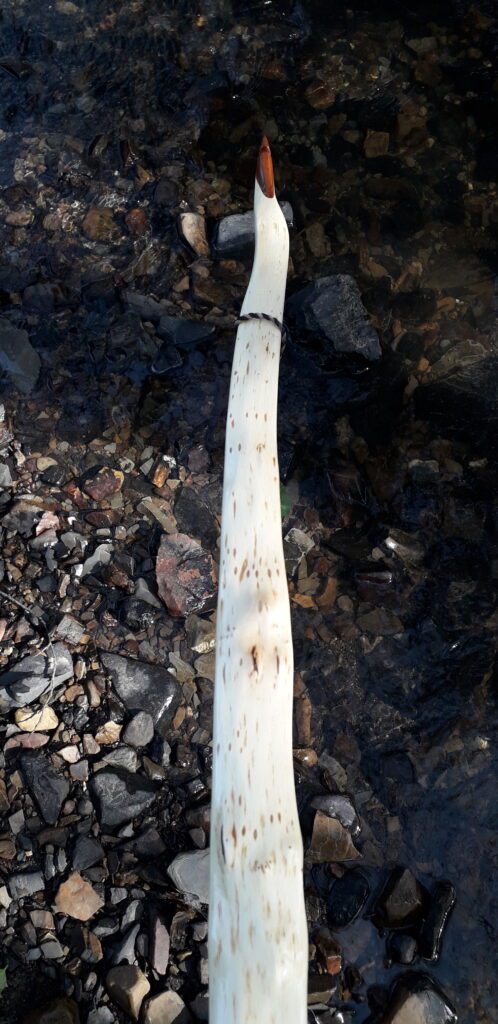
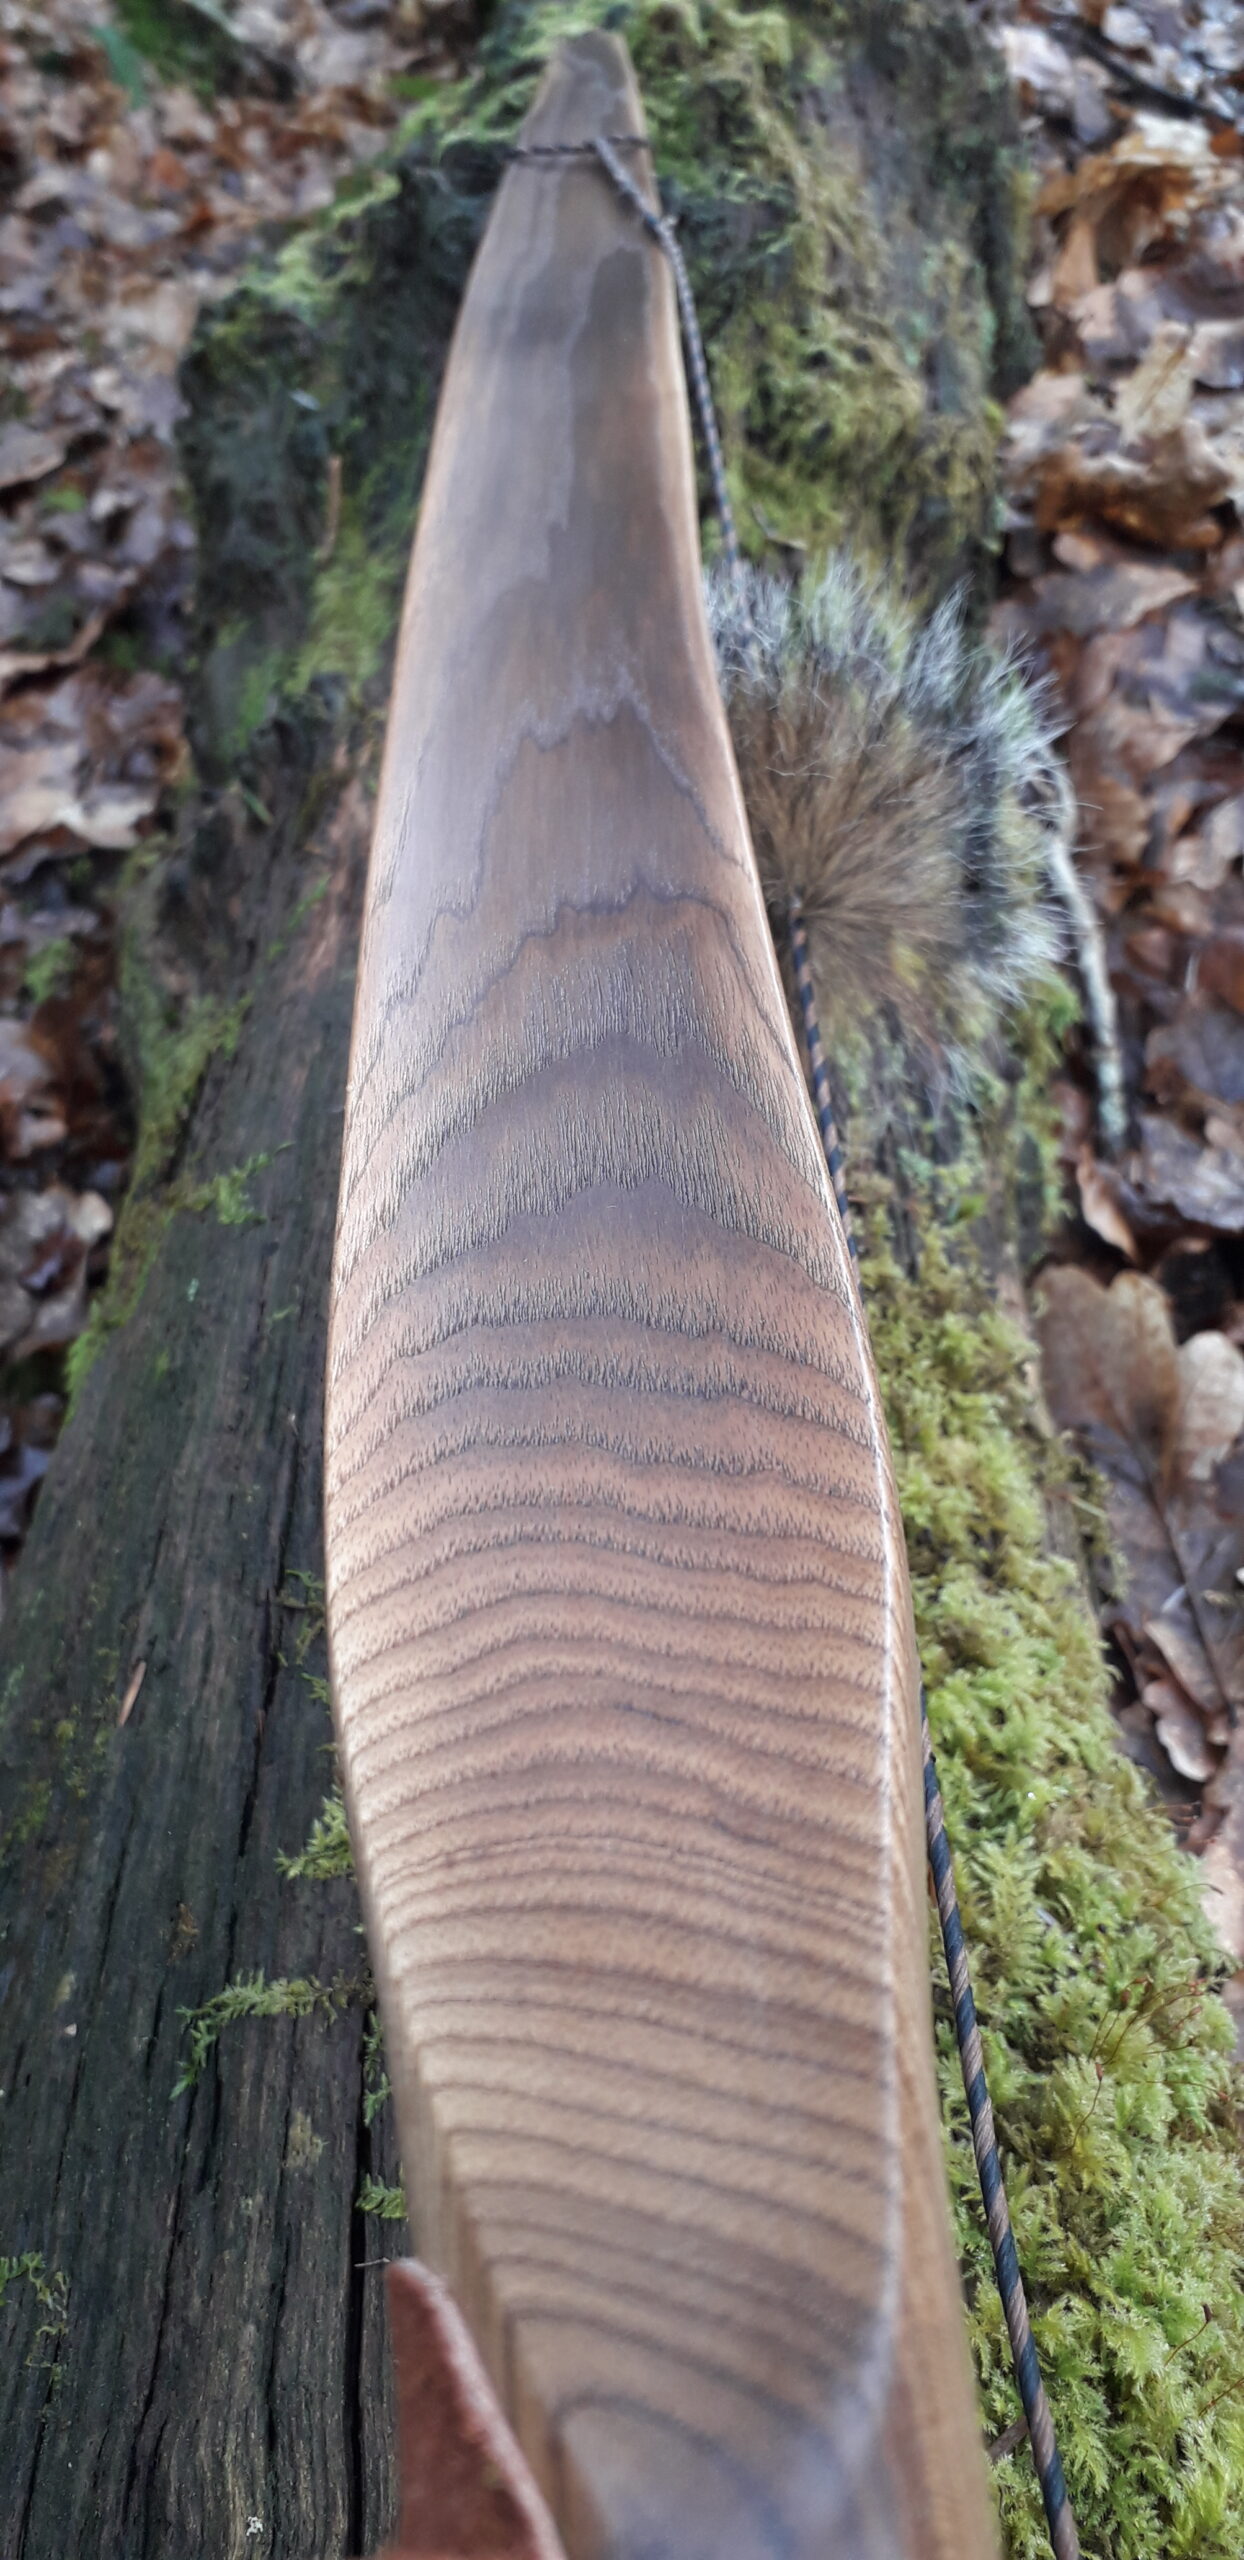
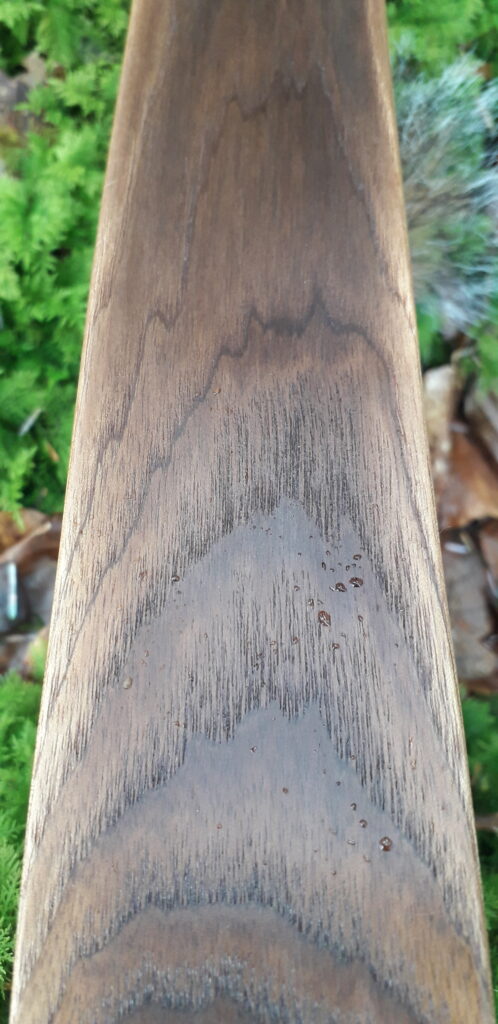
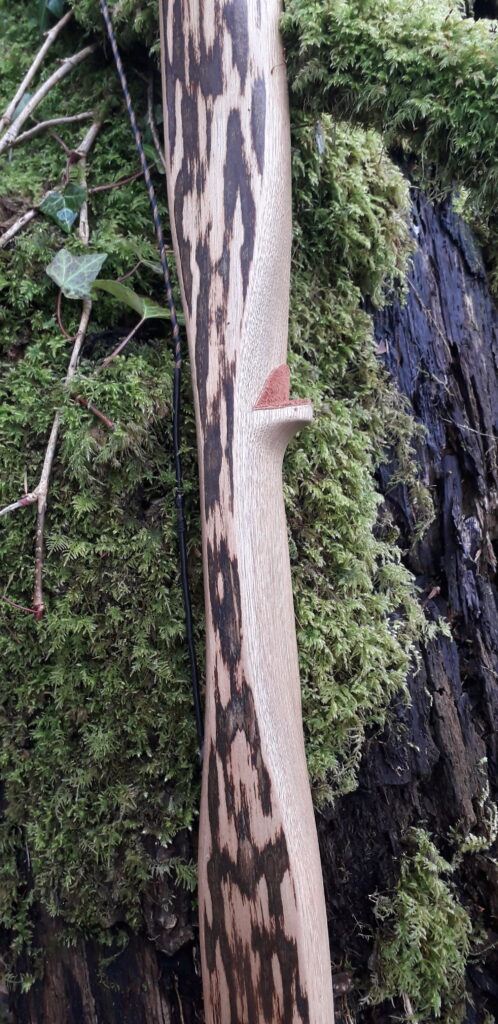
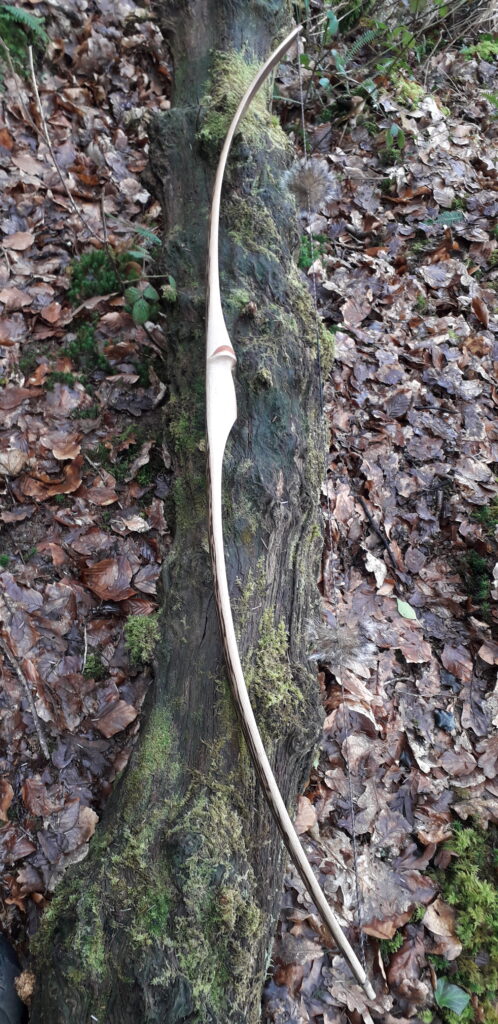
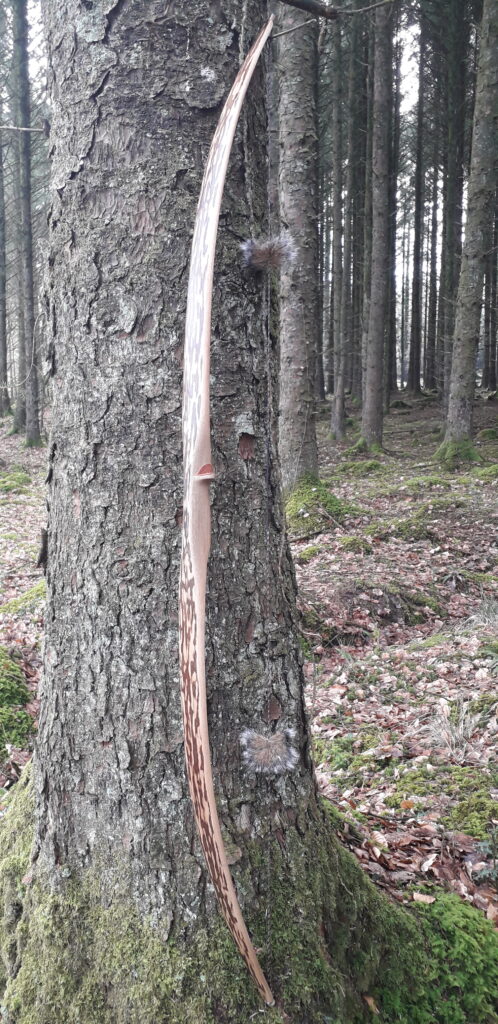
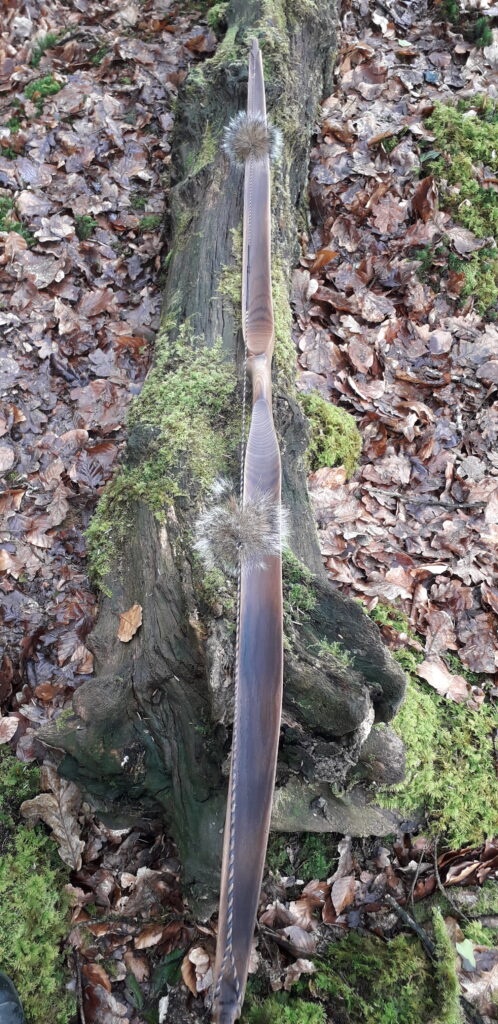
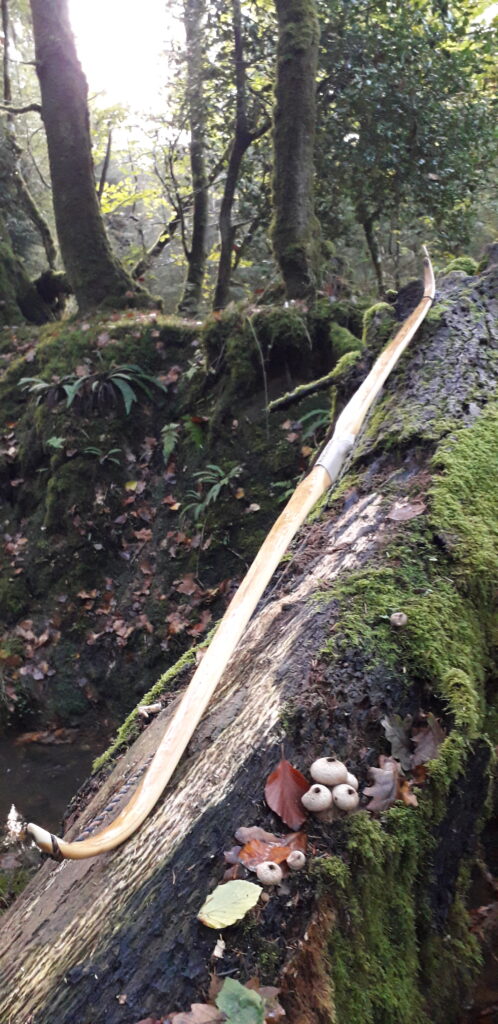
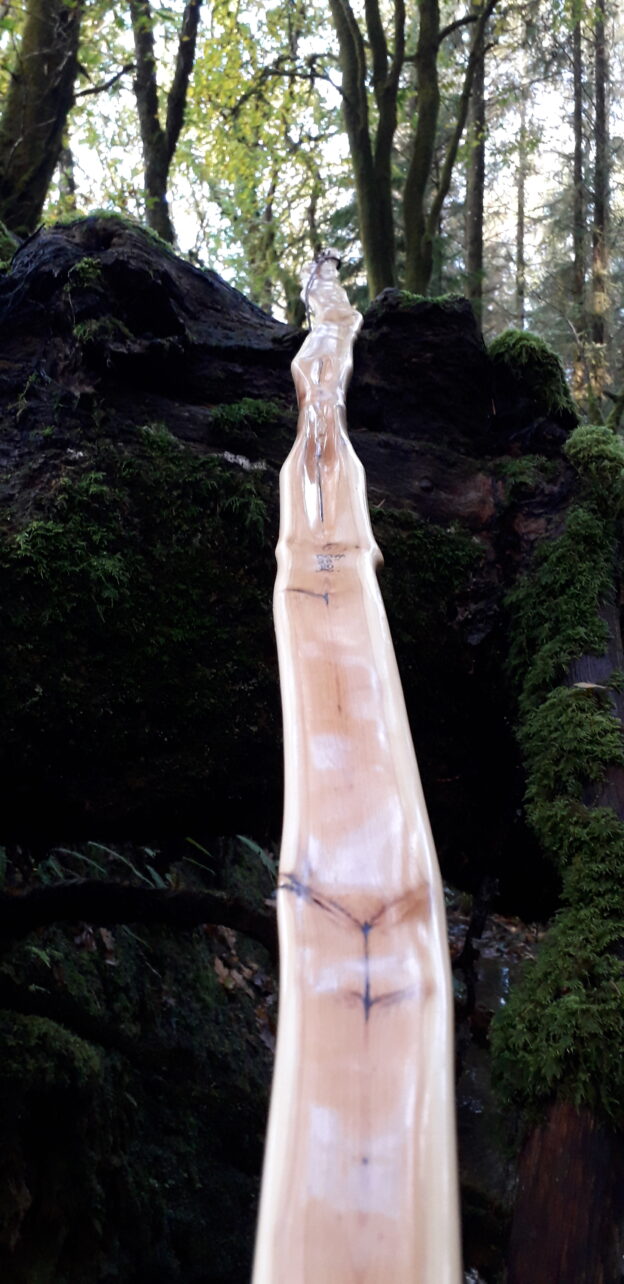
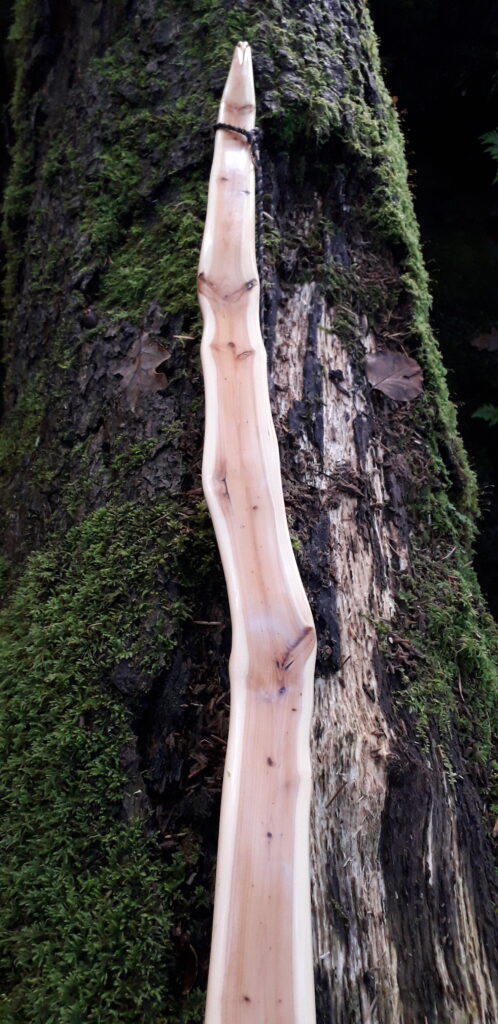
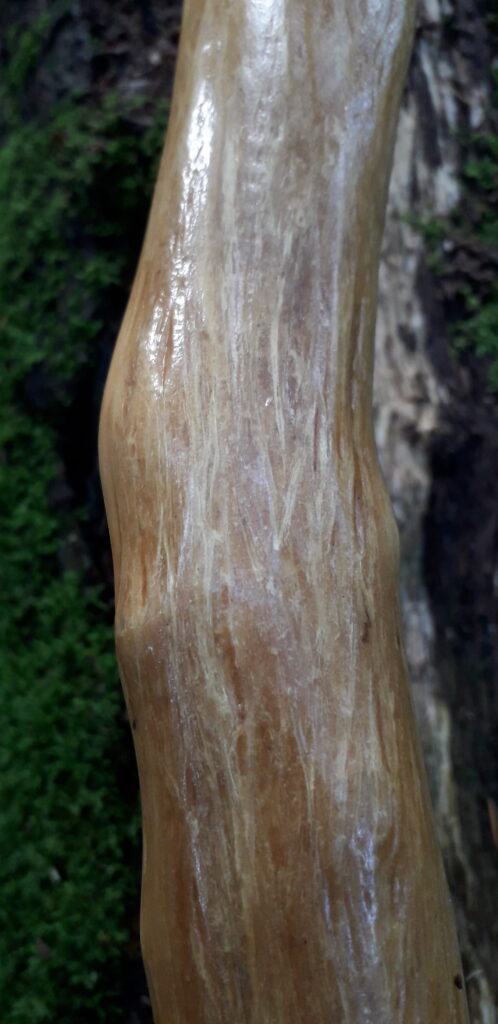
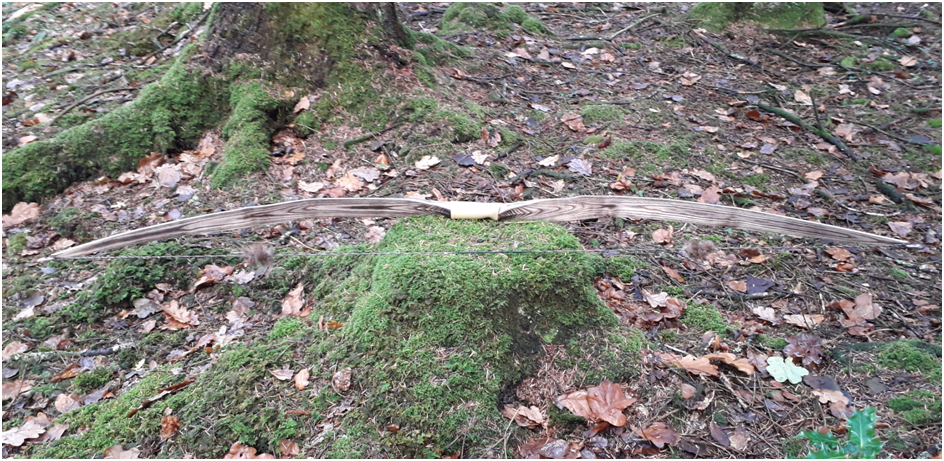
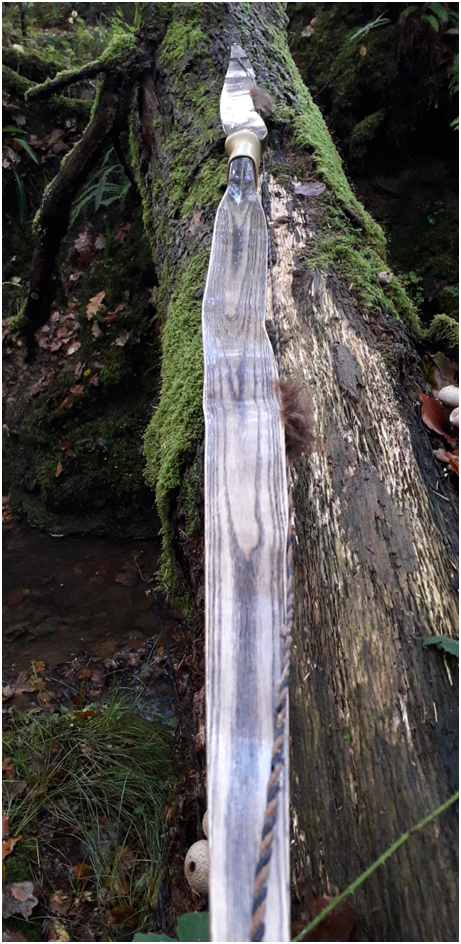
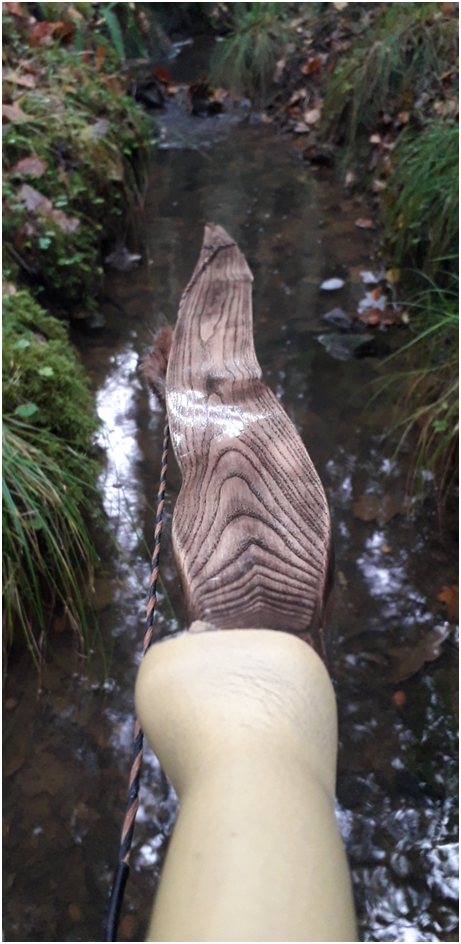
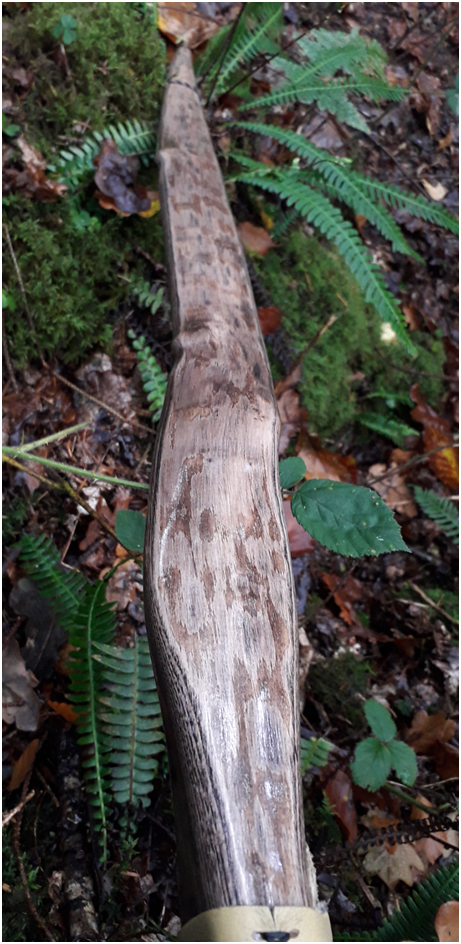
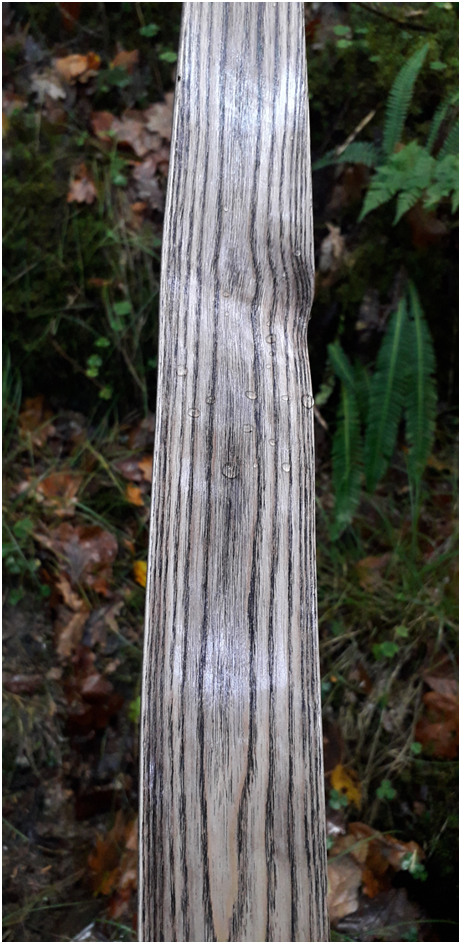
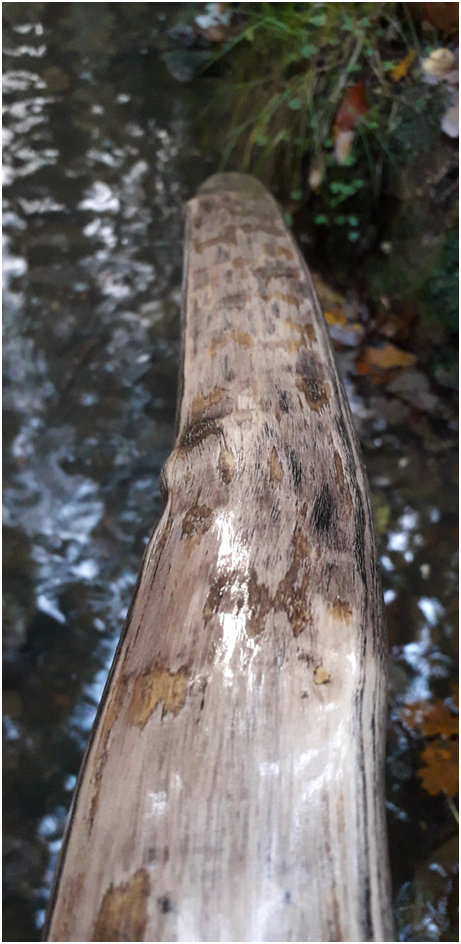
I should probably mention here that after getting all the bark off, I was struck by the beauty of the back of this bow. The sapwood was infected by that gorgeous bluey grey staining which yew sapwood often gets, This gave the back some wonderful colour variation which I know from past experience looks great when finished with a quality hardening oil such as Tung or linseed oil . In addition to the wonderful colour, the back of this stave had quite a bit of nice wiggle and undulation too, all of which was orientating around and over a multitude of pins and knots on both limbs. It reminded me of a piece of driftwood art, only with a tangerine belly!
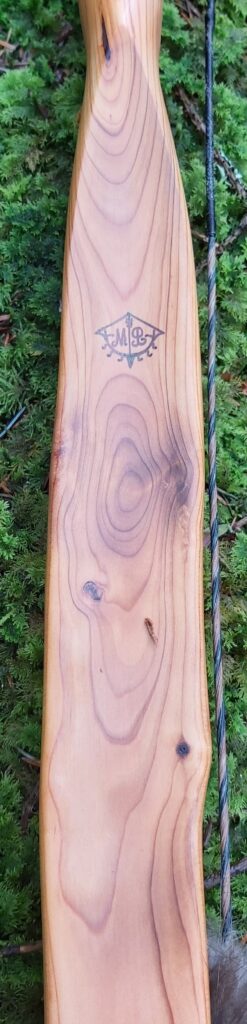
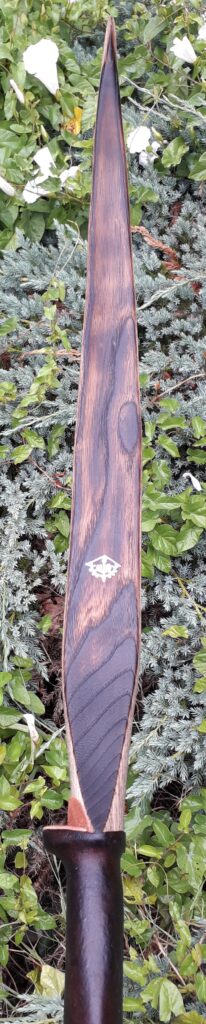
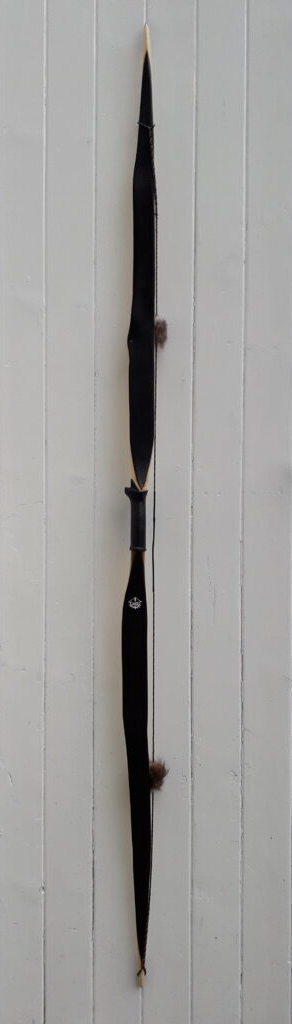
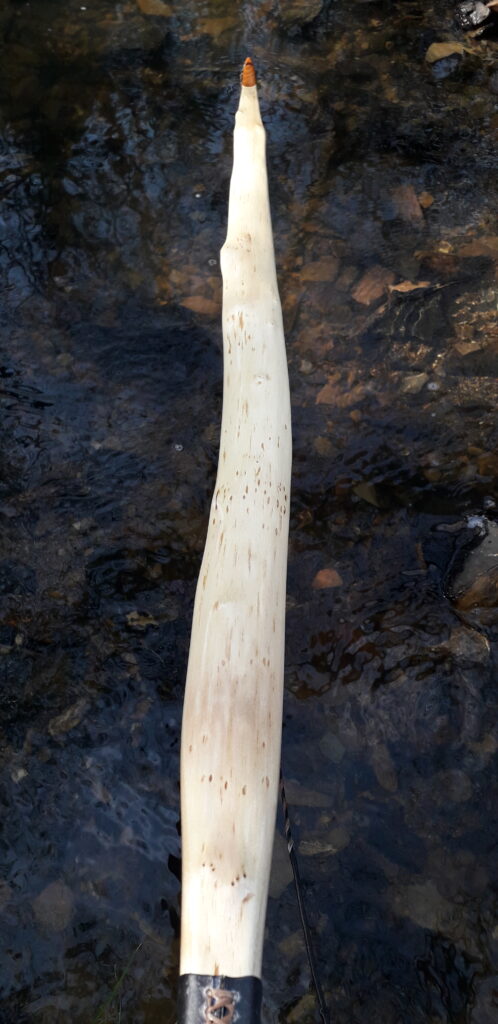
The ratio of sapwood to heartwood was around 60/40 but there was absolutely no way I was going to attempt to reduce the sapwood on a stave like this one with such a striking and character laden back. So the ratios would have to remain. Not that this was going to be an issue anyway as the heartwood on this bow was that wonderful deep and dense orange stuff with the nice tight growth rings. Yummy!
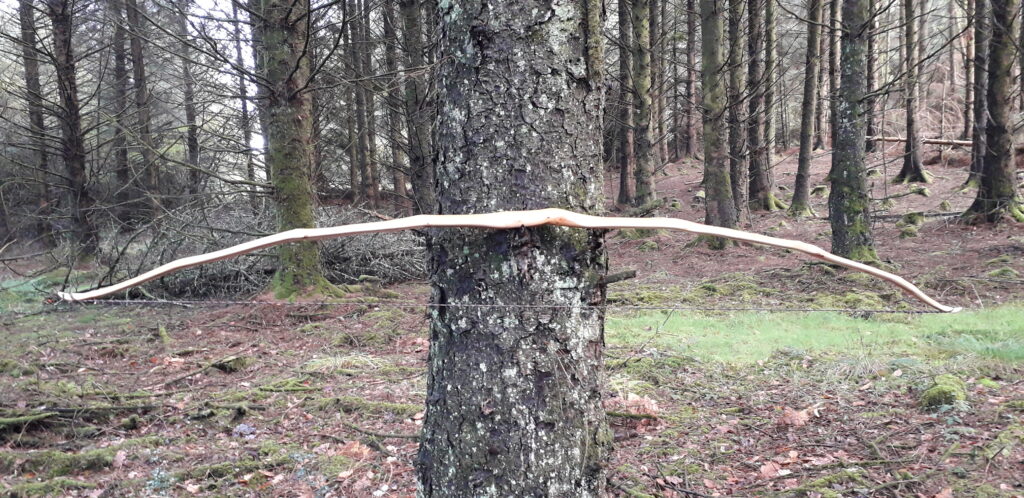
Once the face profile was established and the handle and fades roughed out, I took a bit of time to study the small amount of twist in both limbs. This would come out easily with dry heat, as would much of the excessive deflex and reflex which was apparent at several points between the fades and the tips of both limbs.
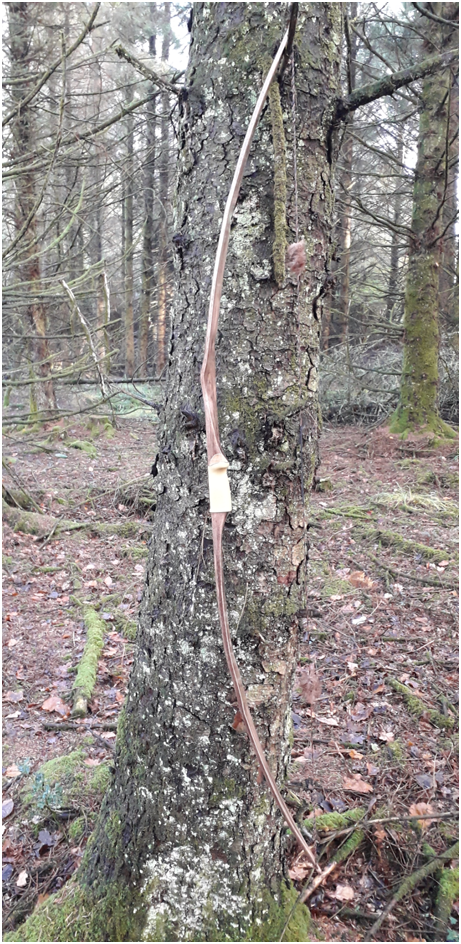
So before going any further, I decided to spend a bit of time getting all the twist out, as well as easing off some of the unsightly deflex and reflex. A total of six sessions with the heat gun spread across a couple of day finally resulted in a stave which now looked completely free from twist and had a fairly even distribution of about 2” of overall reflex.
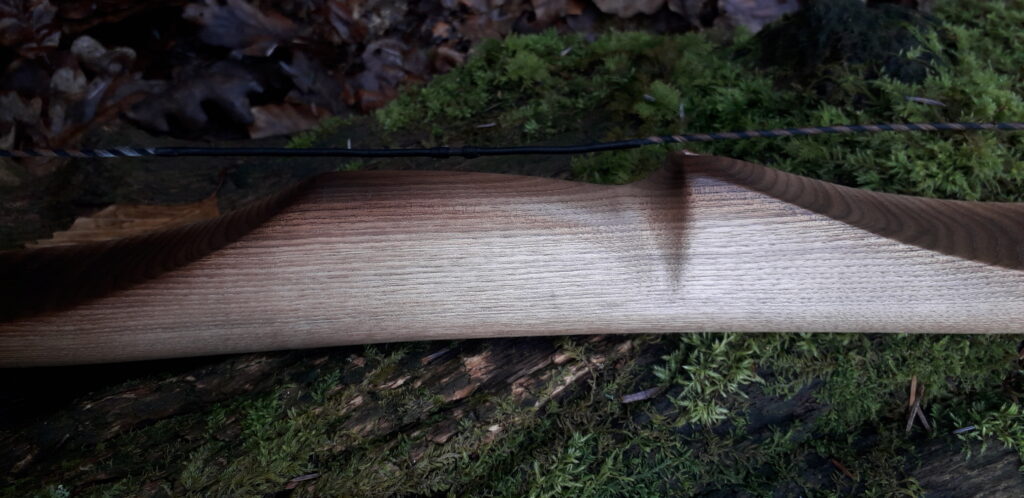
At this stage I’d left the limbs a bit on the thick side so that I could dig out the belly to mirror the crown and its generally undulating topography. There was no way this bow would have an even distribution of thickness (and therefore stress) unless I followed the back as a guide to dictate the profile of the belly.
So once the final thickness of the sides was established with the drawknife and the rasps, I began to dig out all the dips and valleys with the gouge and curved scraper. As is usually the case, this wasn’t a five minute job, but a job well worth doing all the same – in my opinion. And once I felt that I’d created an even thickness throughout, I set about floor tillering both limbs.
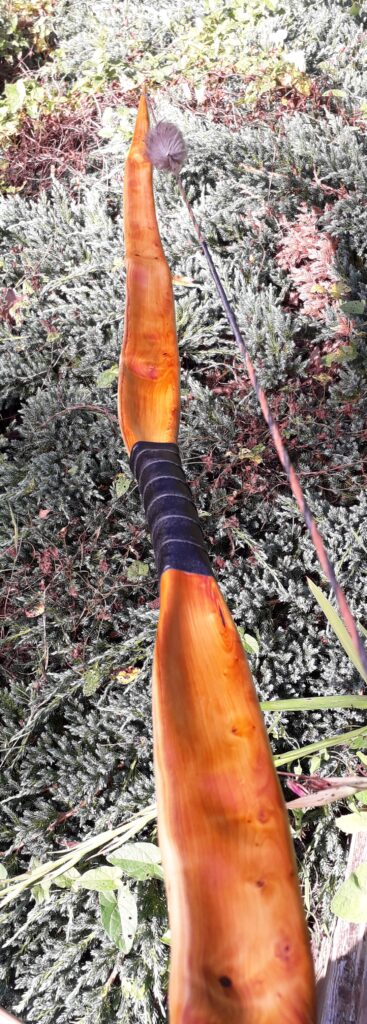
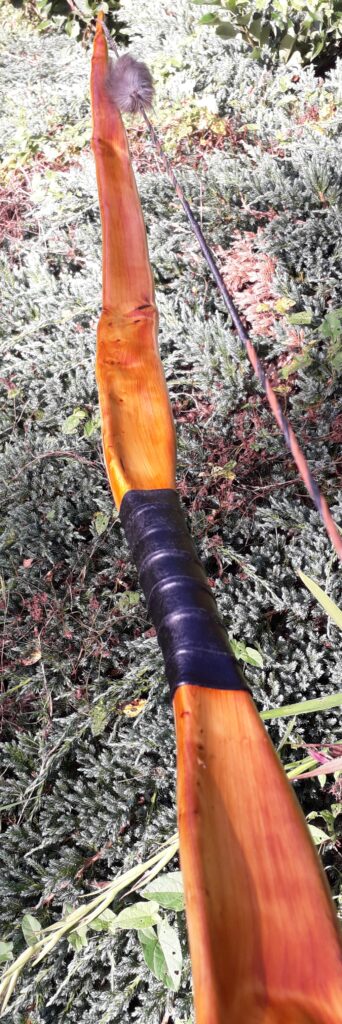
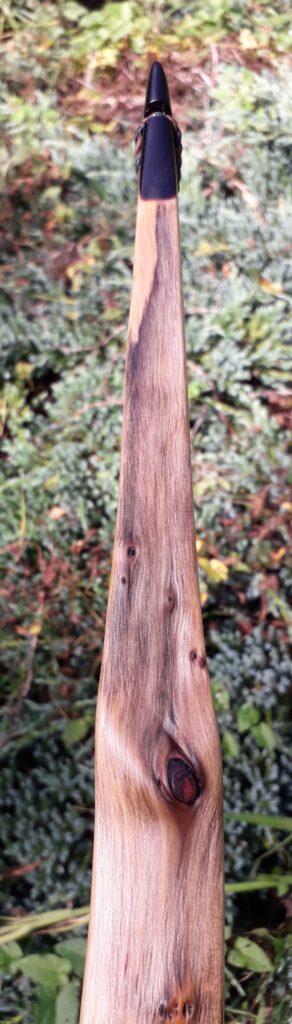
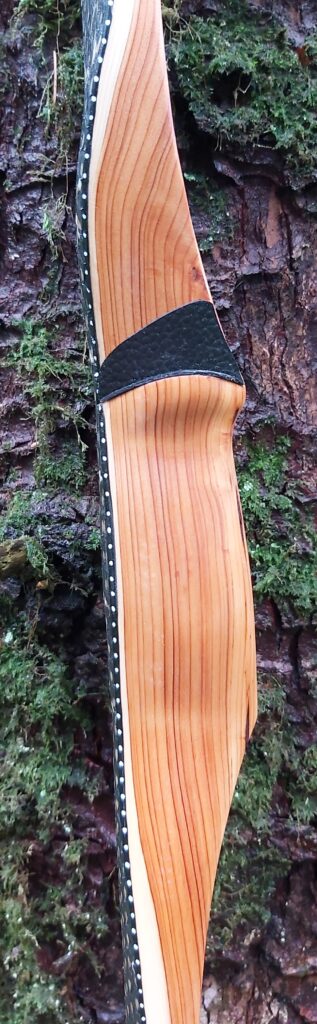
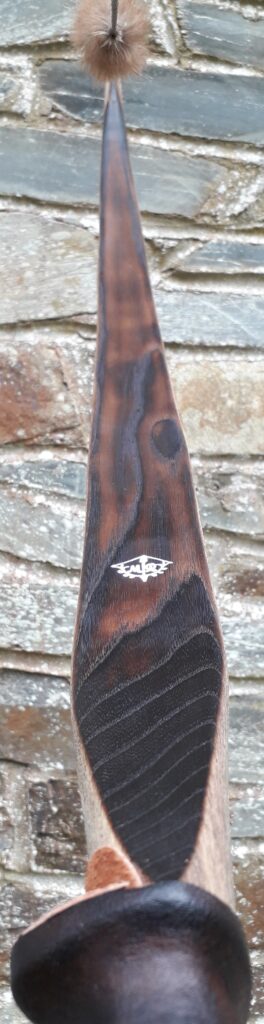
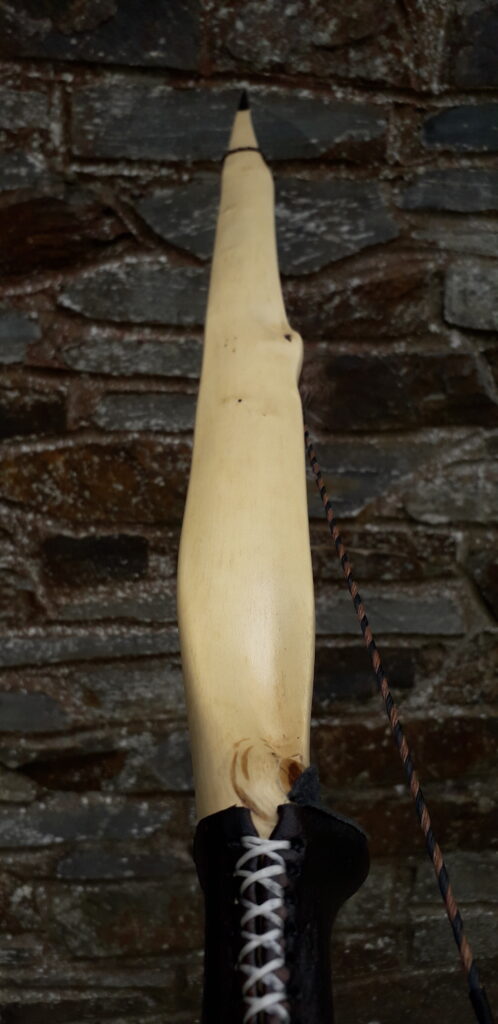
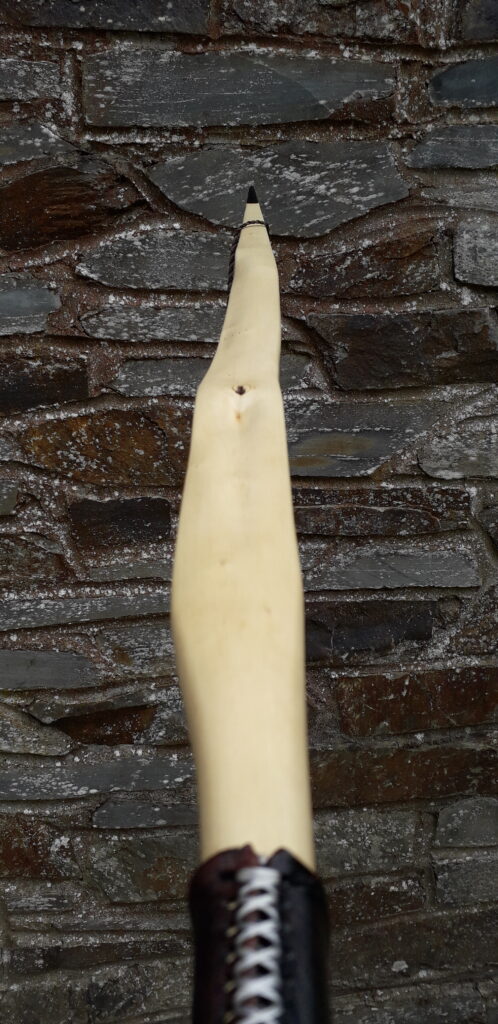
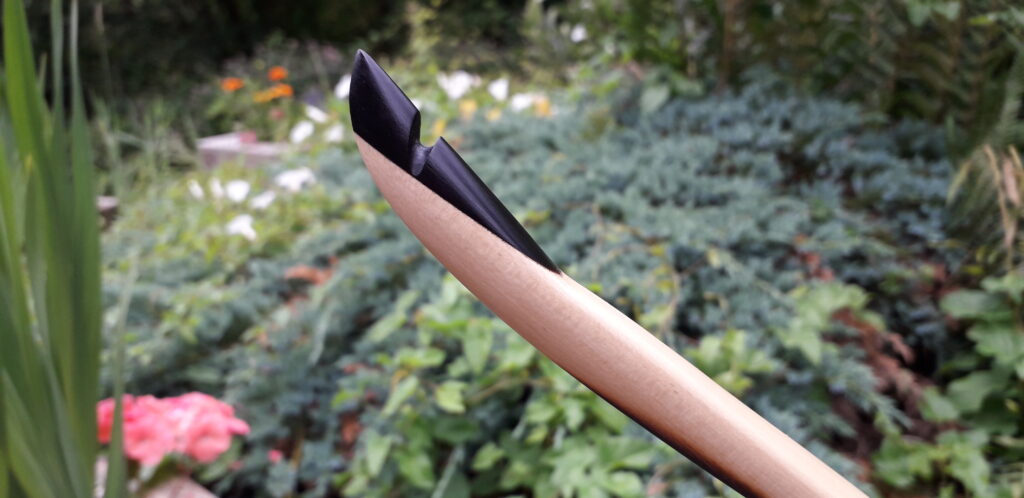
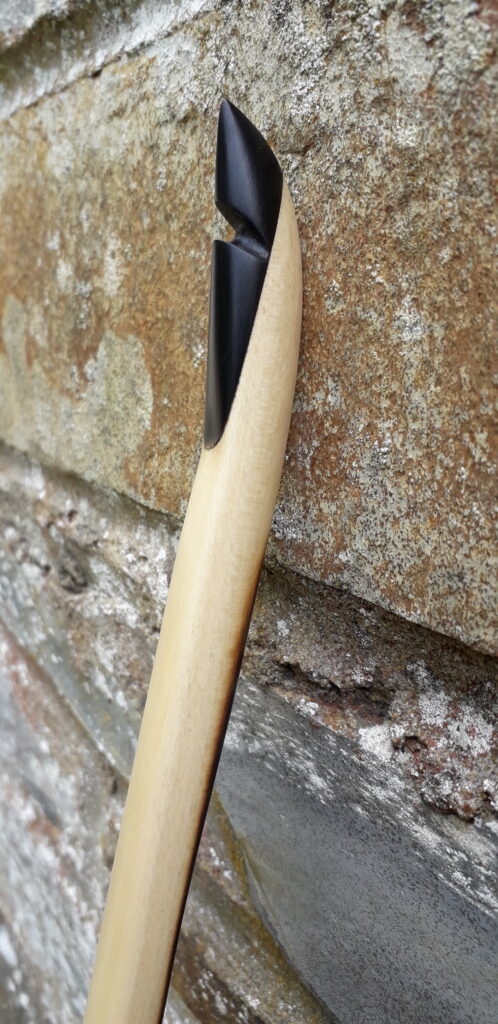
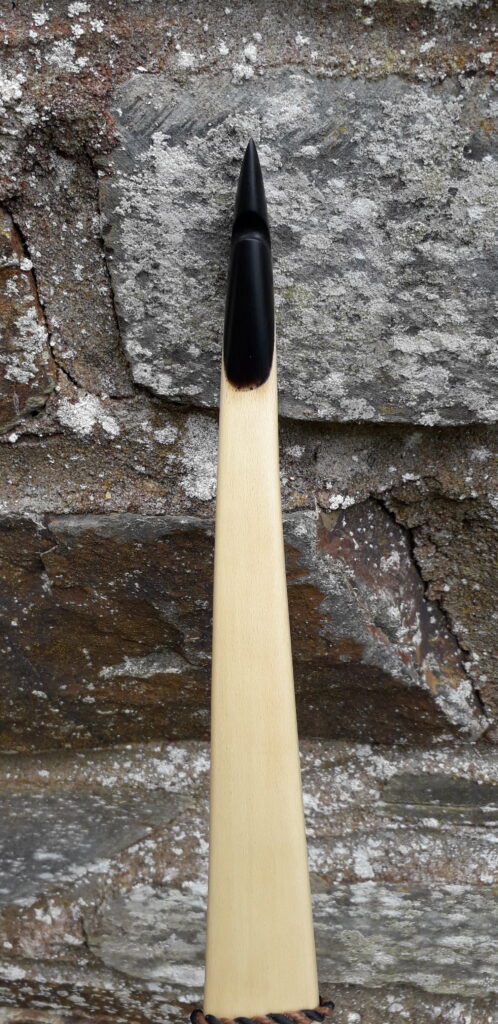
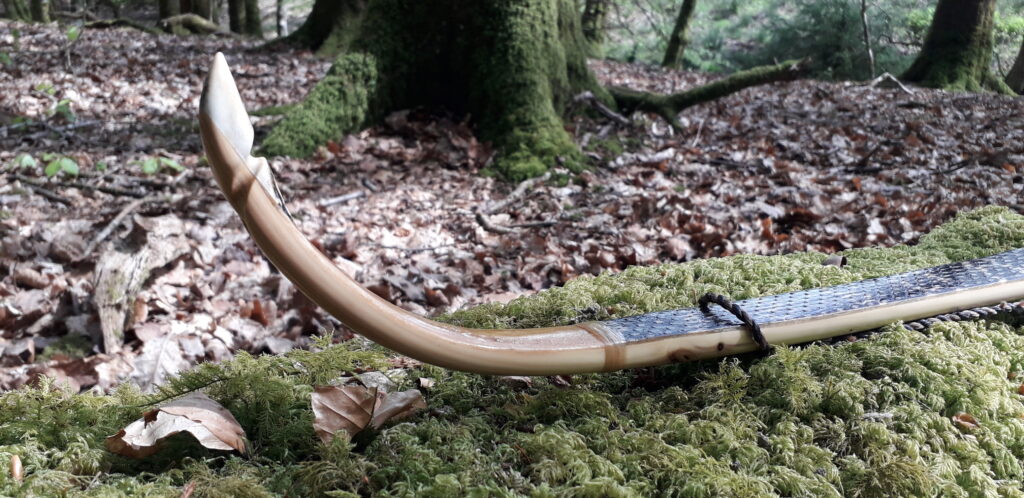
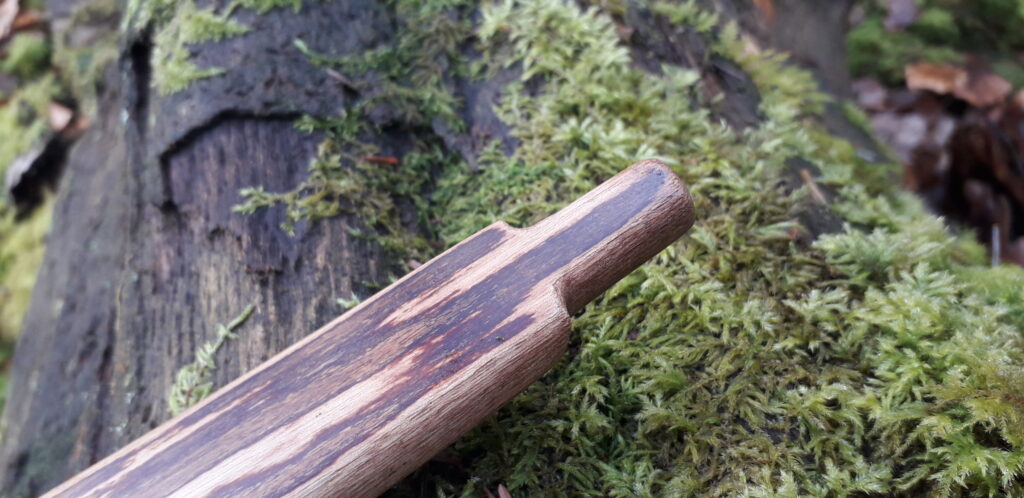
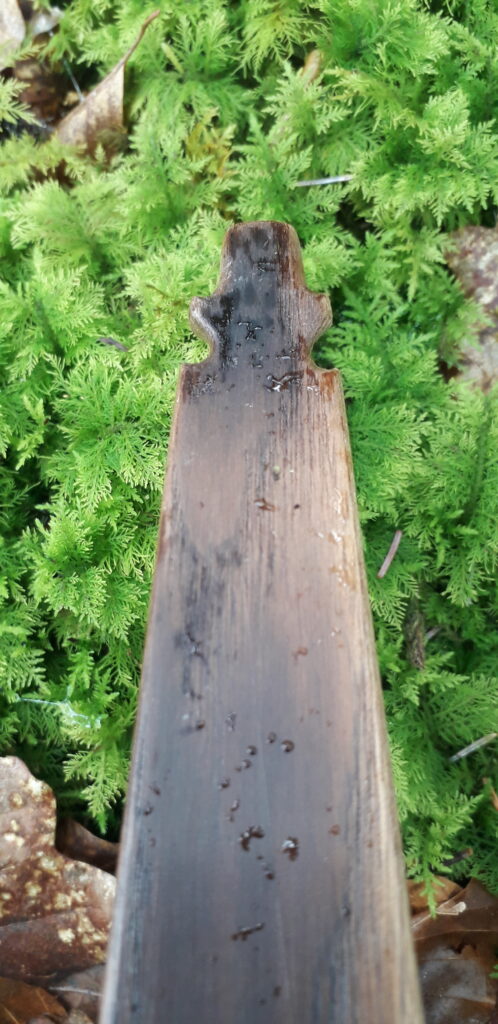
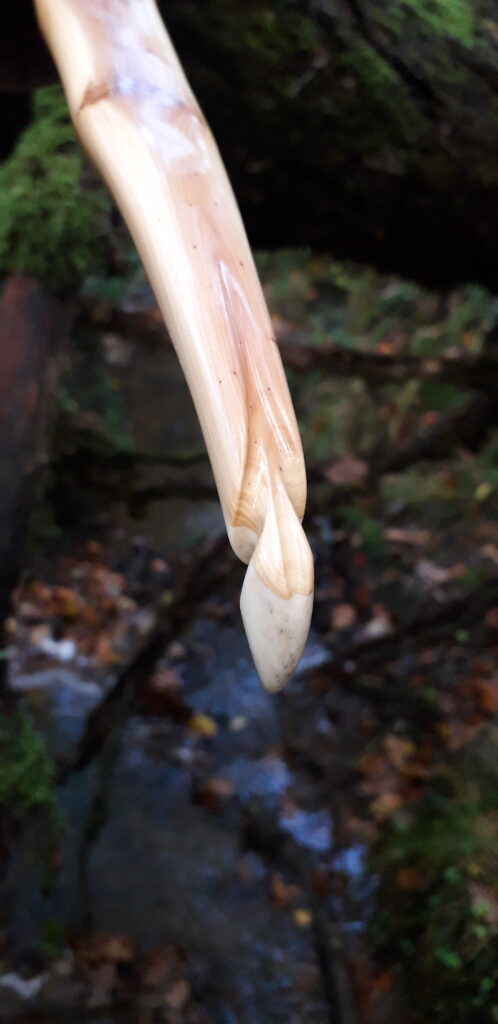
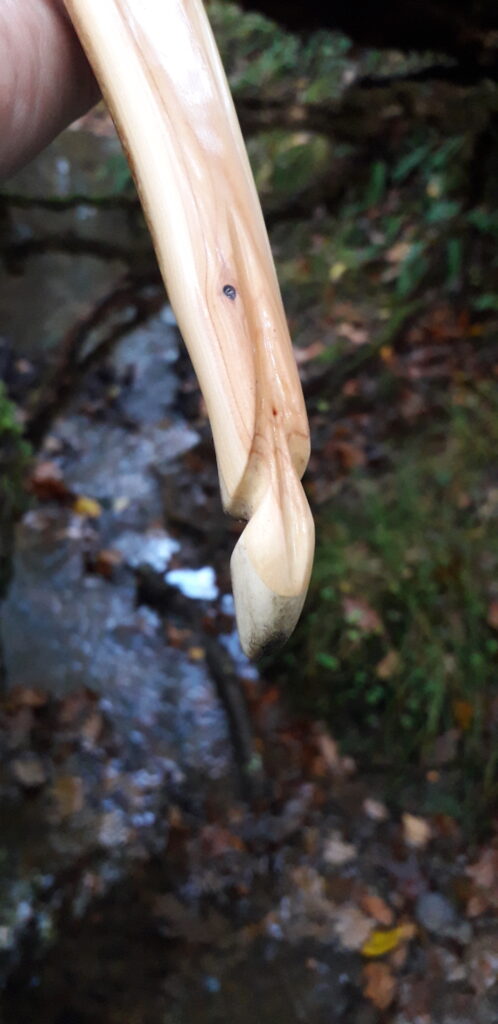
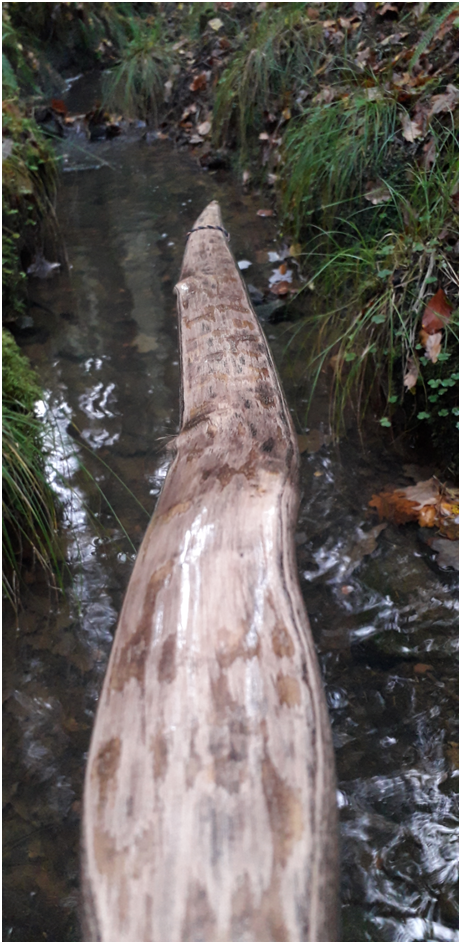
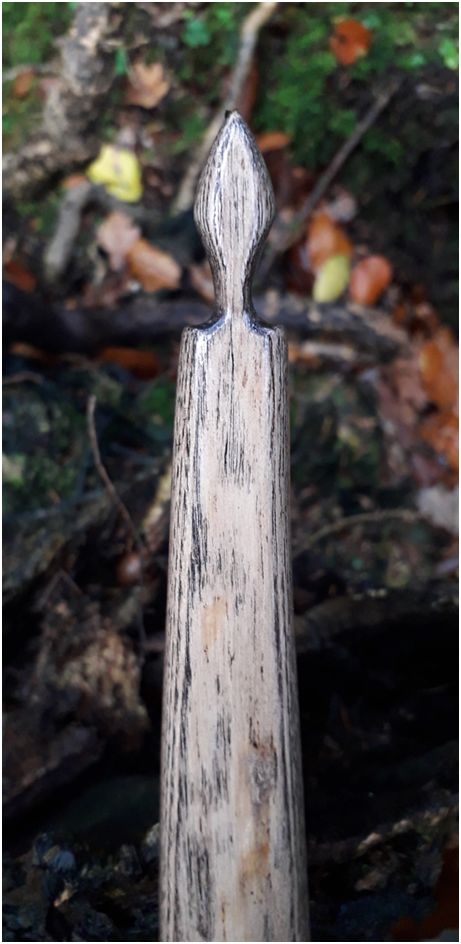
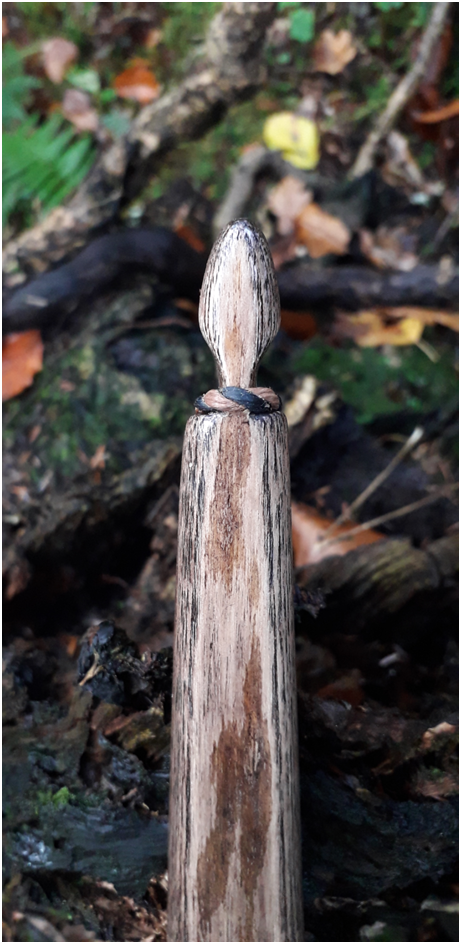
Once both limbs felt and looked like they were bending evenly on the floor, I cut in some tillering nocks and popped her up onto the tiller tree for a few first pulls with the long string. “Pretty good” was my first thought, although I was now made a little more aware of a bit of rather ugly looking deflex which was presenting itself in the top fade and also at a point about one third up the top limb. At this point I should probably say that I’d chosen the top limb to be the limb which had a rather nice wiggly tip section. I could imagine this tip looking great once refined and augmented with a nice elegant overlay.
This delfex in the fade just would not do however. It would not be possible to remove it completely but I felt confident that much of it could be reduced. I should also say that the top limb which contained this 4” deflexed fade was showing significantly weaker than the bottom limb on the tiller tree. So by straightening out as much of the deflex in this weaker top limb, I’d hopefully enhance the look of the top limb whilst simultaneously added some strength to it.
I couldn’t be bothered with trying and steam bend out the deflexed fade, so I simply clamped the deflexed fade over one of my reflex forms and gave it a good heating up with the heat gun. After a couple of attempts I was much happier with the small amount of deflex which remained. The heating process had also added significant strength to the top limb too and now had the bow presenting a ¼” positive tiller.
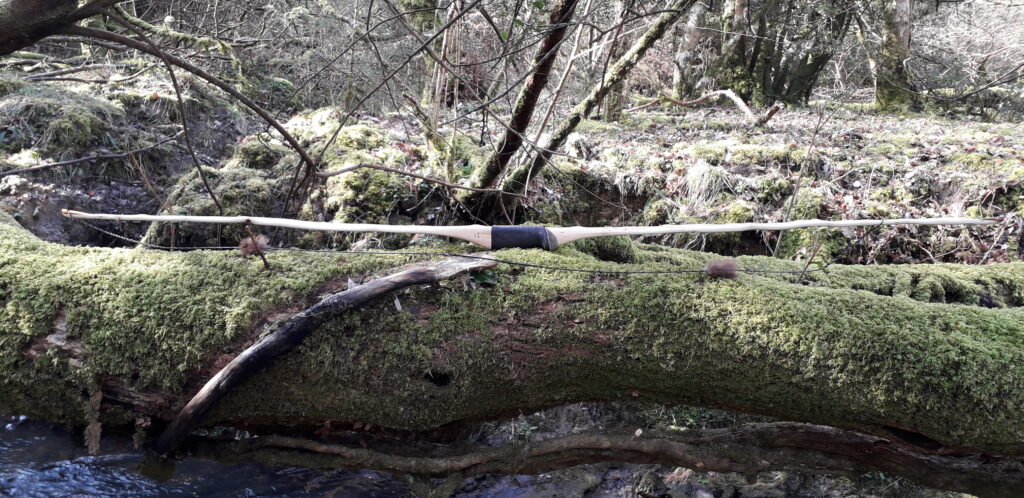
Conscious that some of the newly applied heat adjustment might pull out, I opted to reduce the bottom limb a tad in a couple of very slightly stiff spots. Brace height was achieved quickly thereafter and in no time I was pulling down to 22”.
A quick check with the scale showed around 40# at 22” which wasn’t too bad considering the amount of belly wood which had come off in order to lose the initial cracked section. I figured 28” would be pushing 50# by the time the tillering was finished so was quite happy with where she was at this point.
A few more tweaks with the scraper and 26” was reached quite quickly. Time to check tiller, string alignment (which was pretty good all along), and also check to see if any twist had returned. The tiller was holding firm at ¼” positive and the string alignment looked to be dead centre. A very small amount of twist had returned to the last 10” of the bottom limb tip. So a quick session with the heat gun took the twist out again and all was looking quite good.
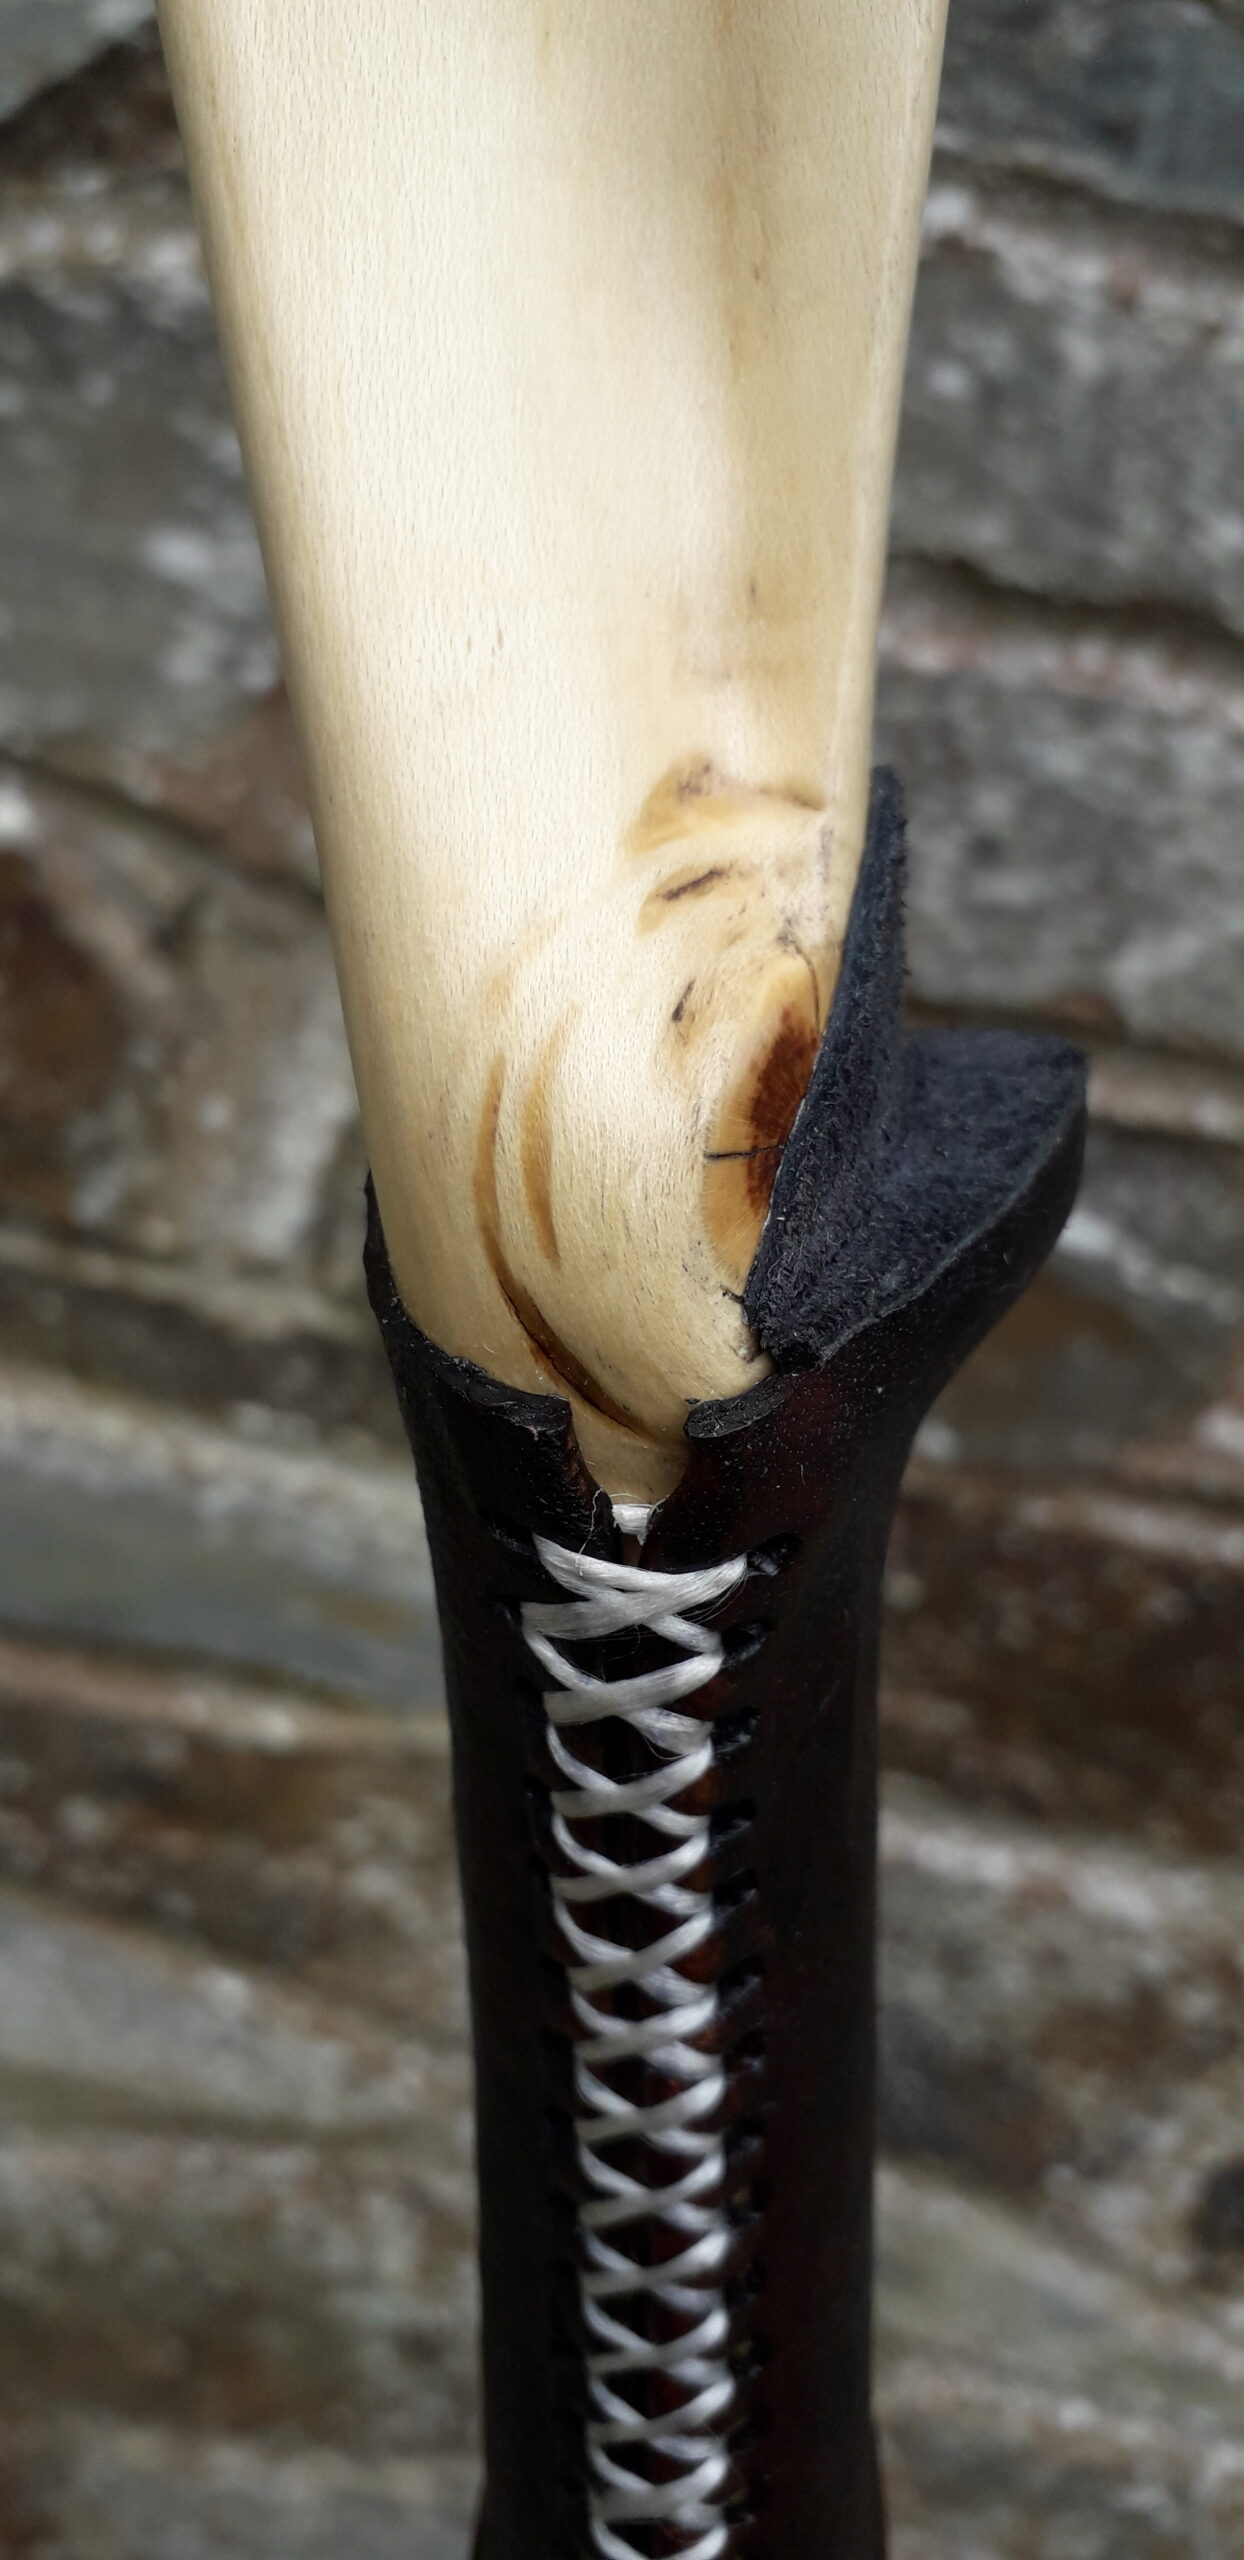
The pith wood cracks in the handle section were not going to fall off this bow since I had already narrowed the handle thickness as much as I could. Any more wood removal from the handle and fades would see them start bending too much. In my experience, too much bend in the handle ends up robbing a bow of significant cast. I wasn’t going to take this risk just to lose a few pith wood cracks which were never going to compromise anything other than aesthetics.
So instead, I opted to pump all the handle/fade cracks and belly knots full of good old nice thin super glue, so that they would stay shut up forever and would sand nice and smooth for finishing. In no way would any of these features ever compromise the structural integrity of this bow.
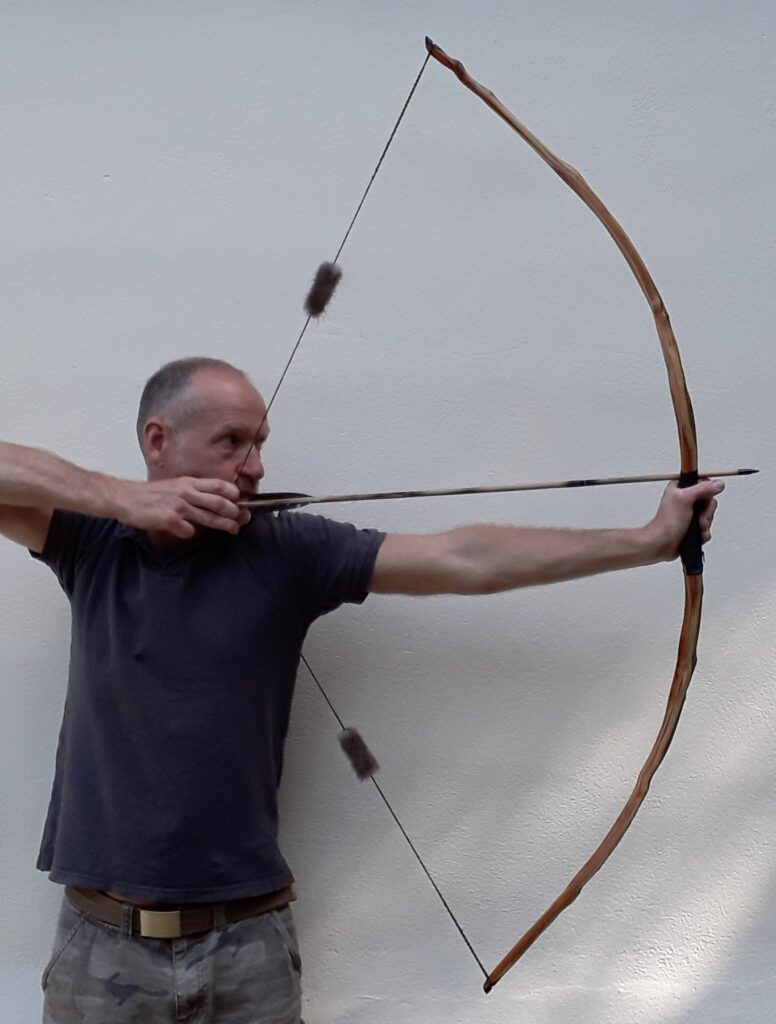
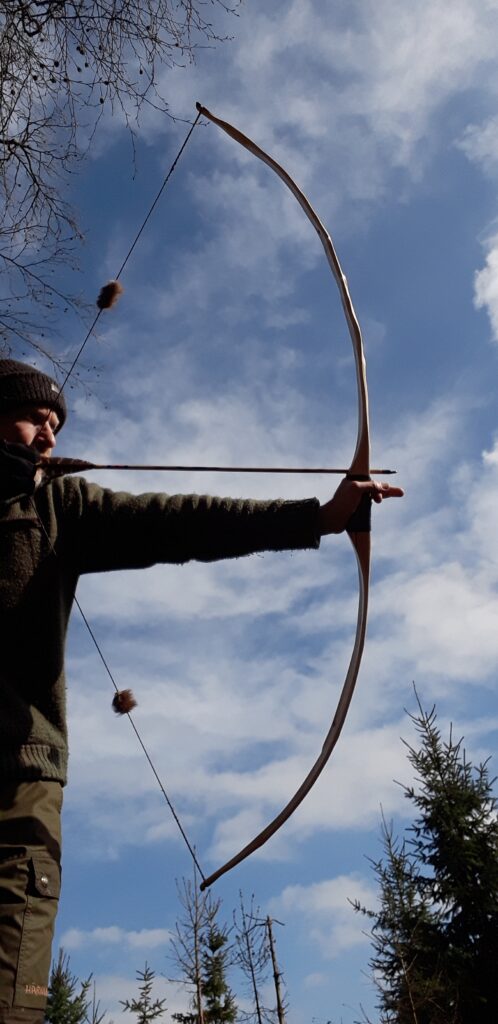
The scale was reading around 49 ish# at 26” and everything was looking quite good so I called it done for now, opting as usual to shoot in the last 2“ of tiller. A couple of weeks of stump shooting with this bow was great fun and I was pleased to see that the tiller still felt very well balanced for split fingered shooting and had only reduced by a fraction.
After a lot of shooting she had settled into a tiller of 3/8” positive. Limbs felt and sounded like they were timing well which is likely why no hand shock was apparent when shooting this bow, even with the limb tips left wide for temporary tillering nocks.
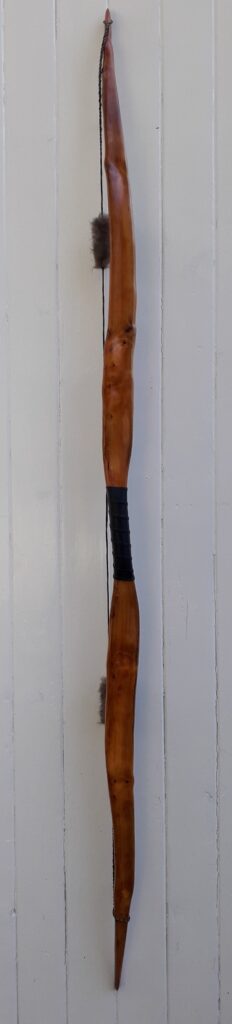
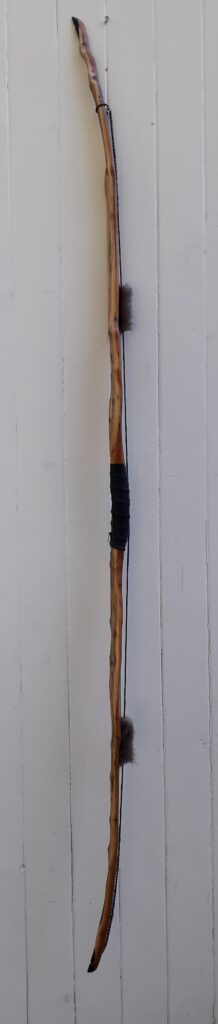
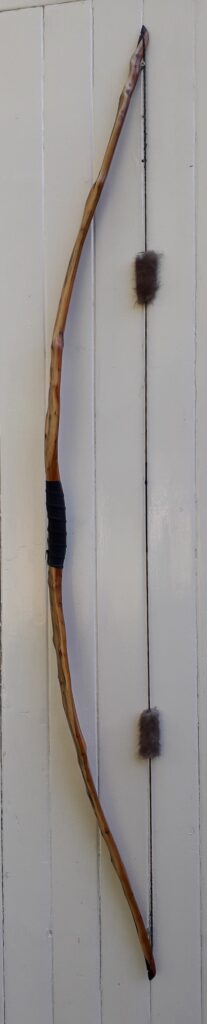
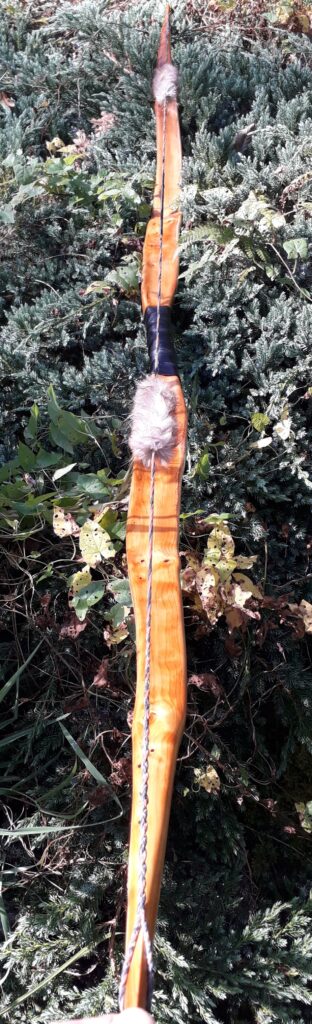
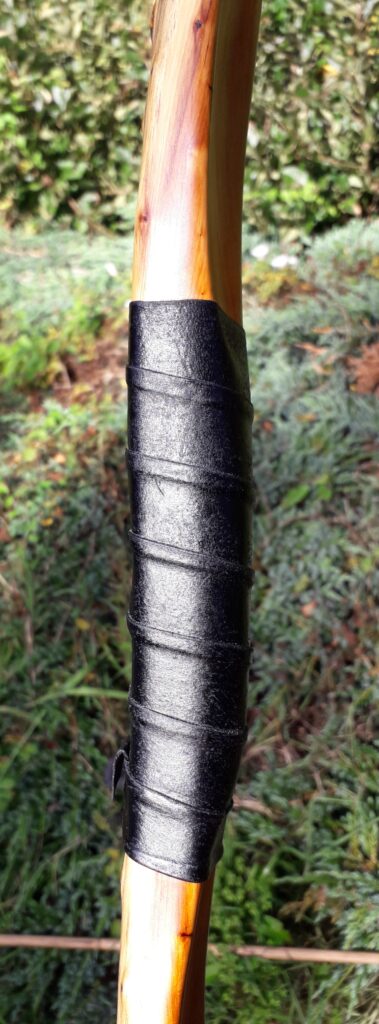
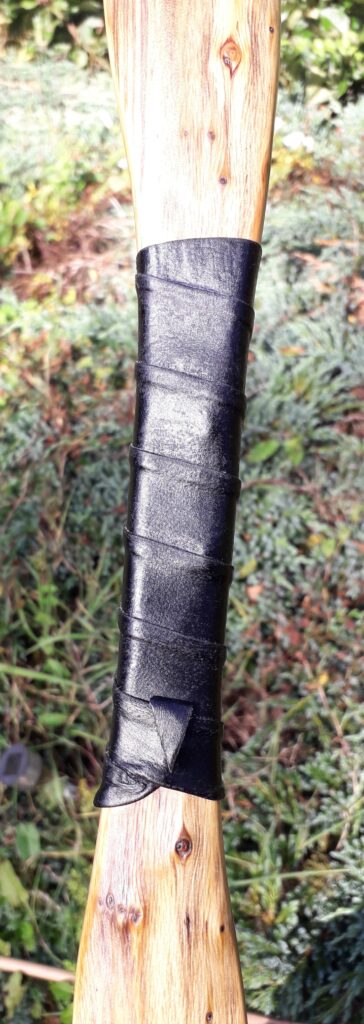
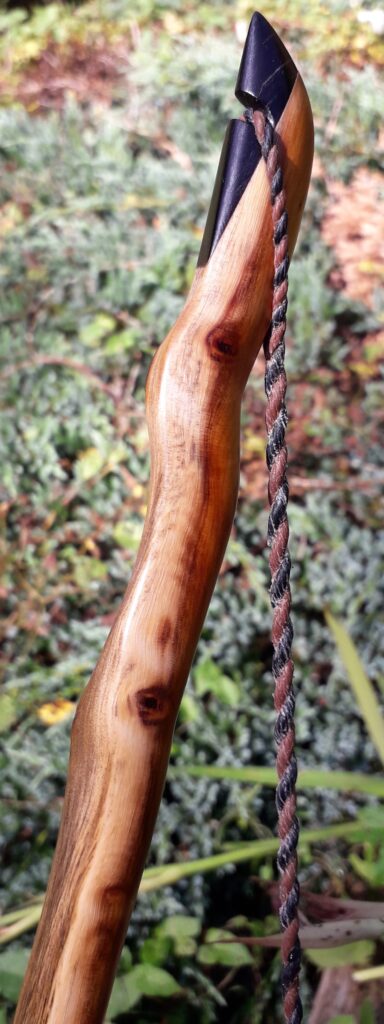
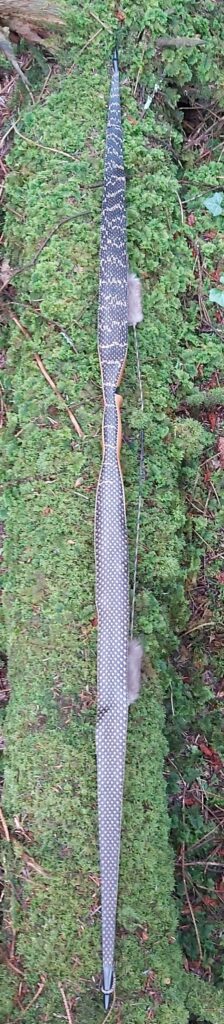
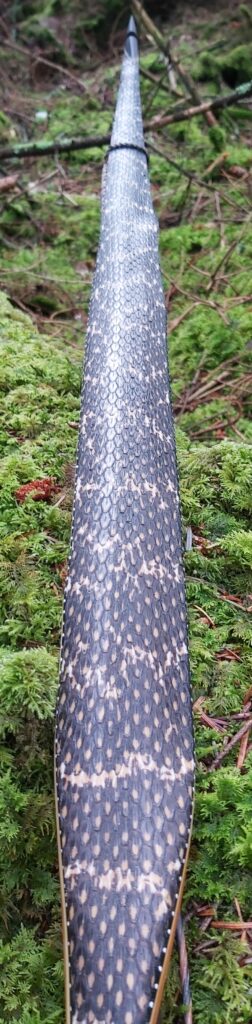
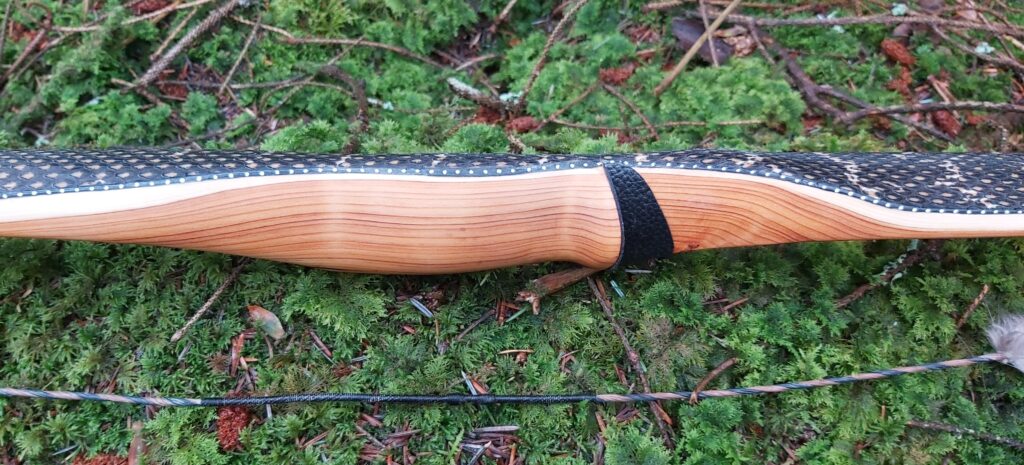
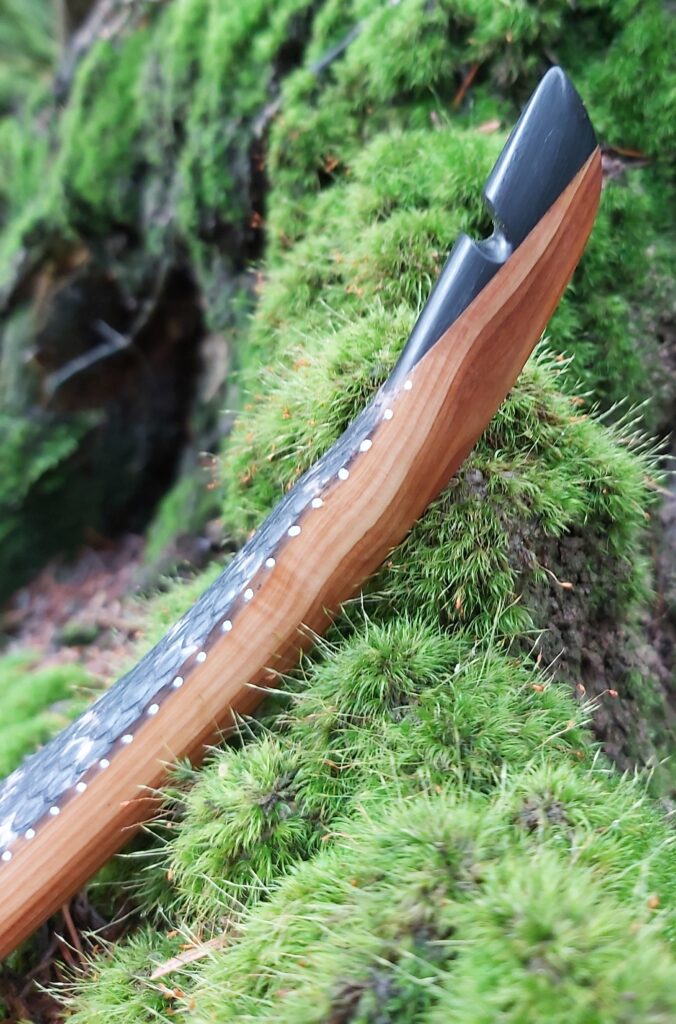
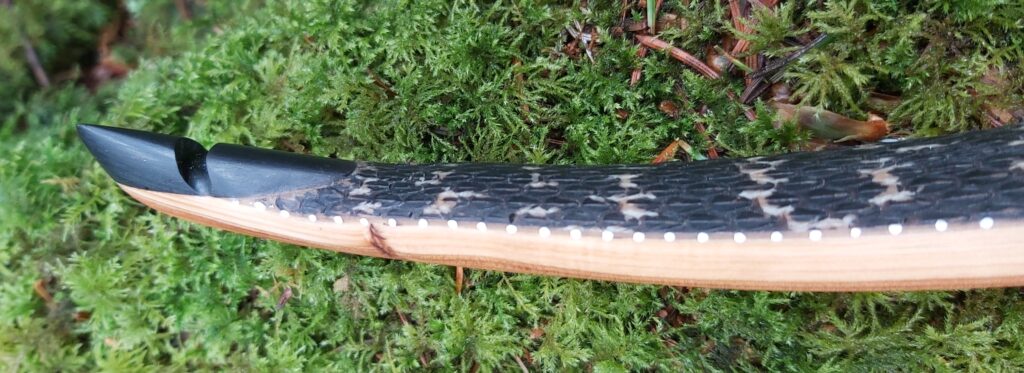
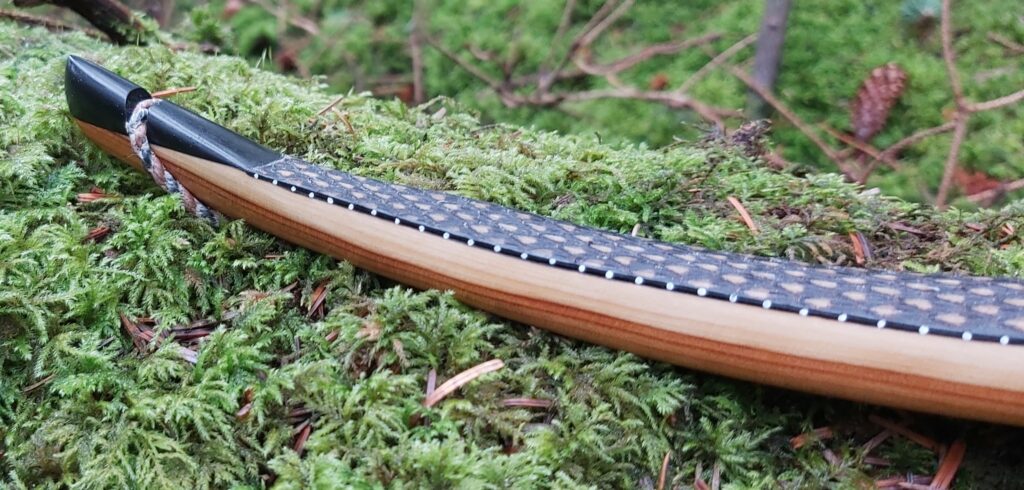
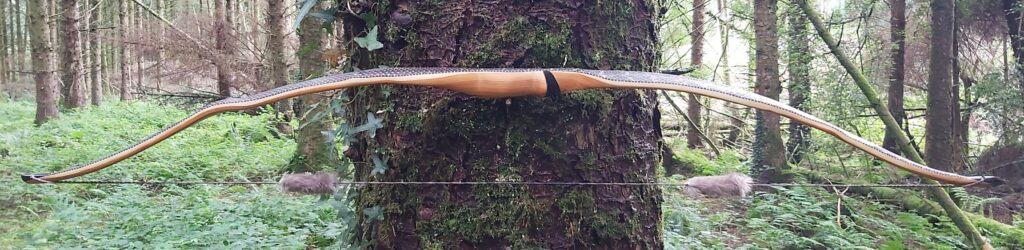
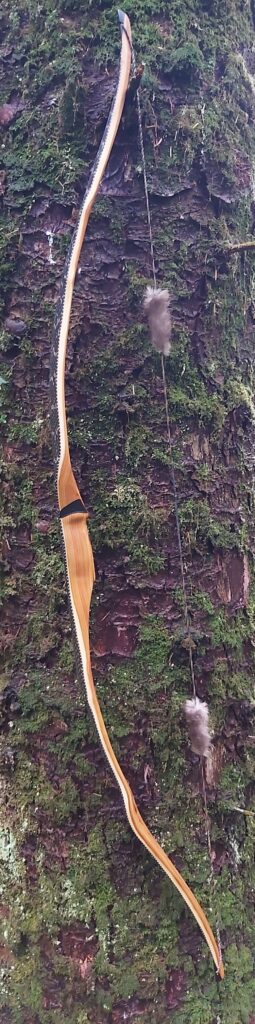
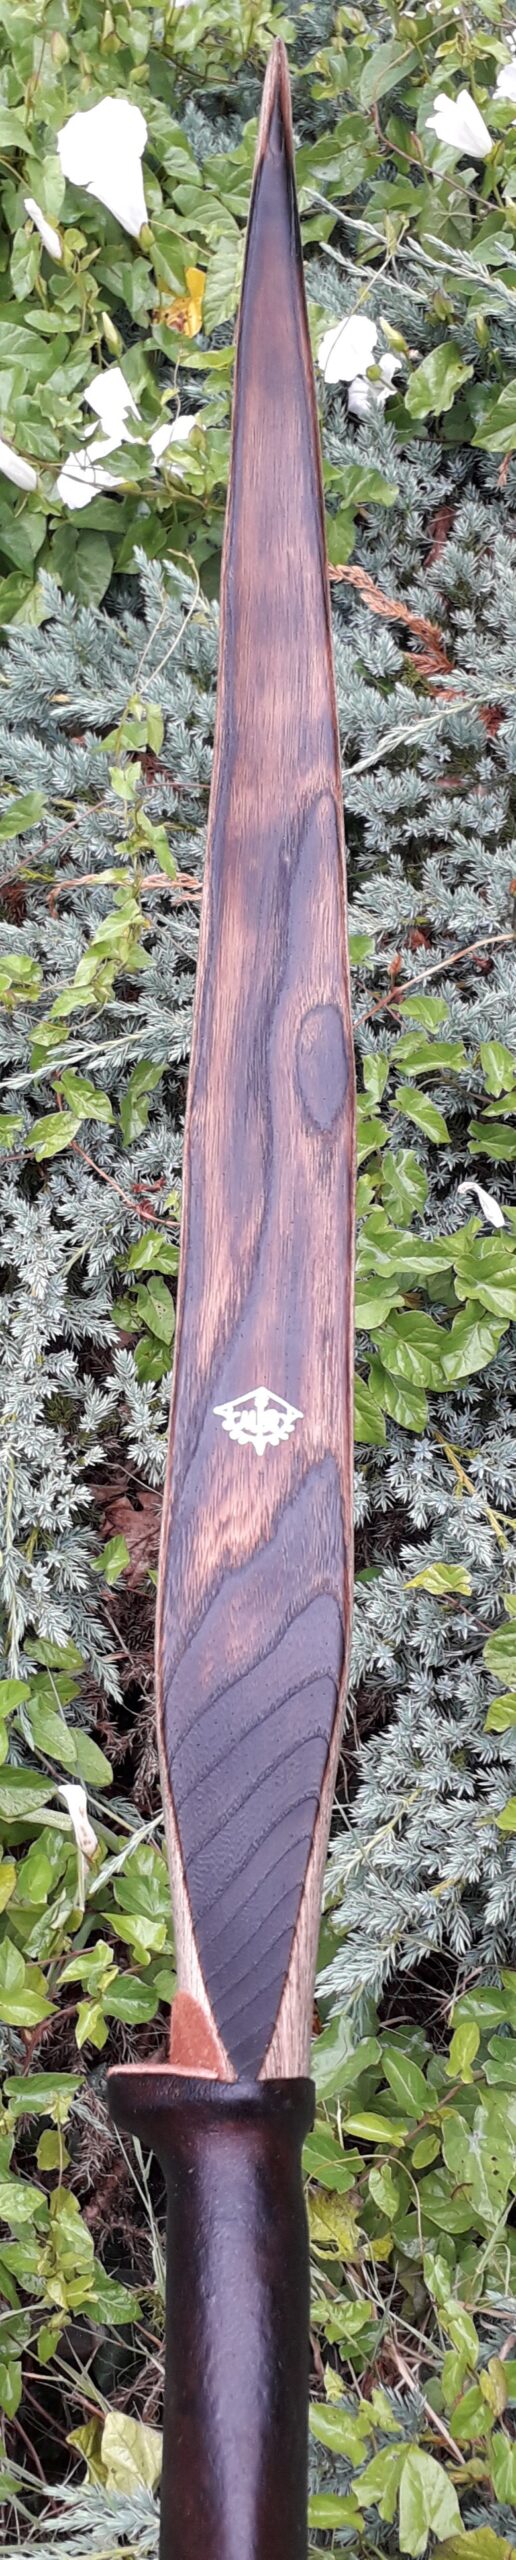
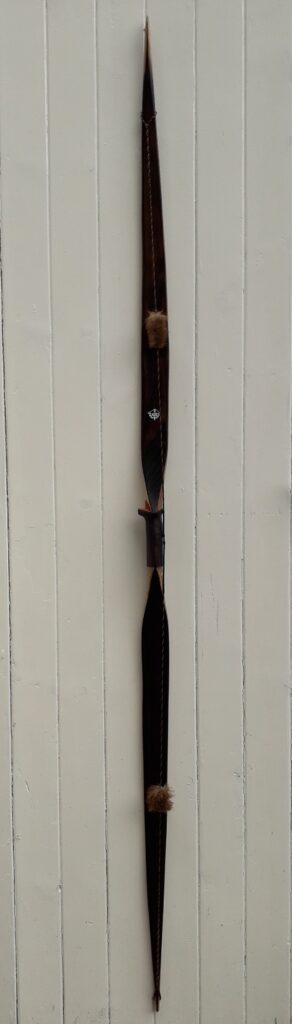
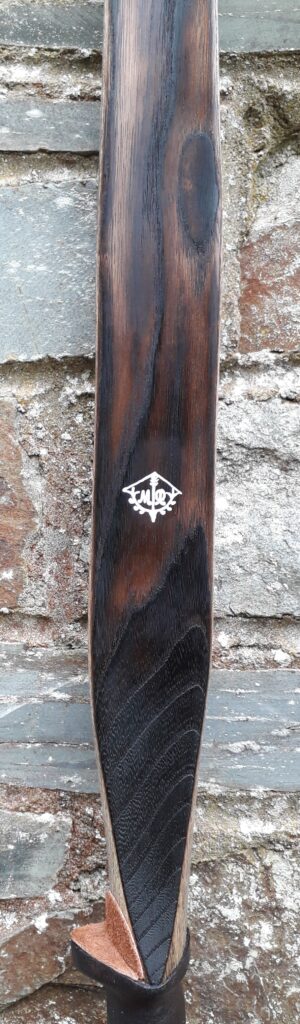
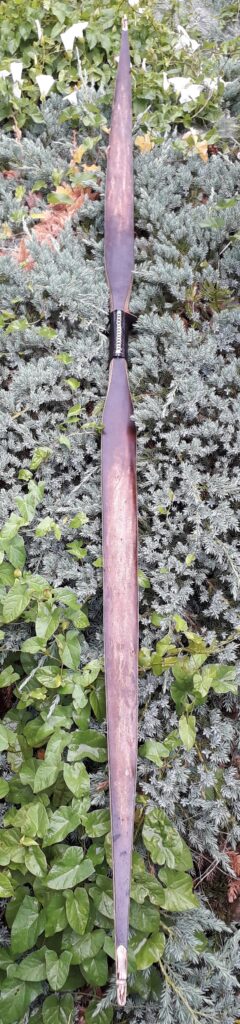
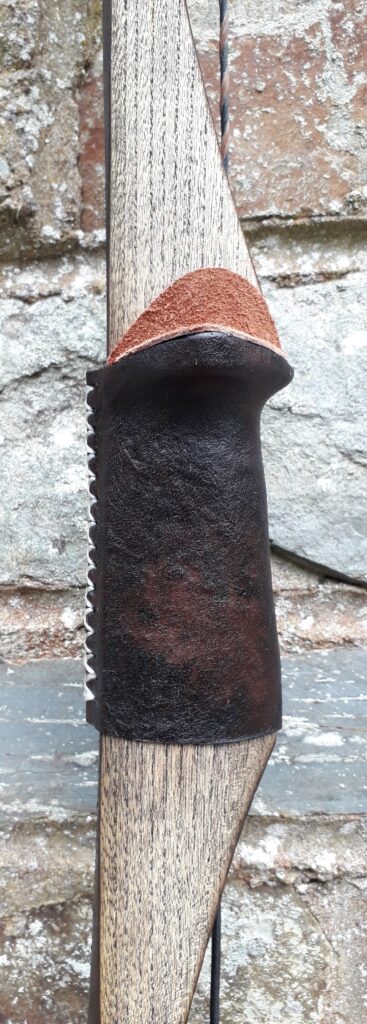
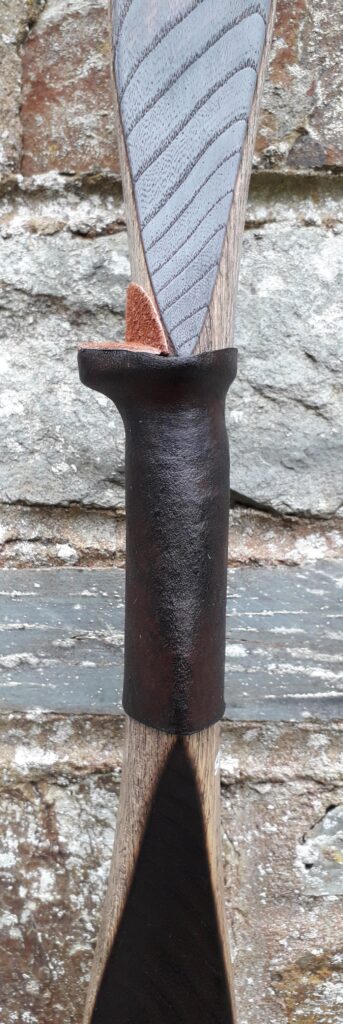
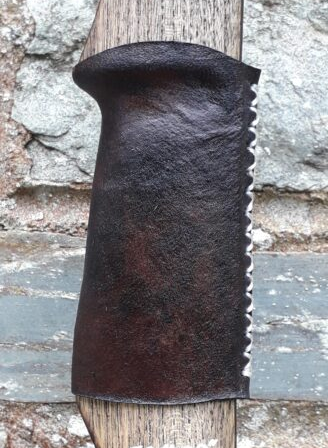
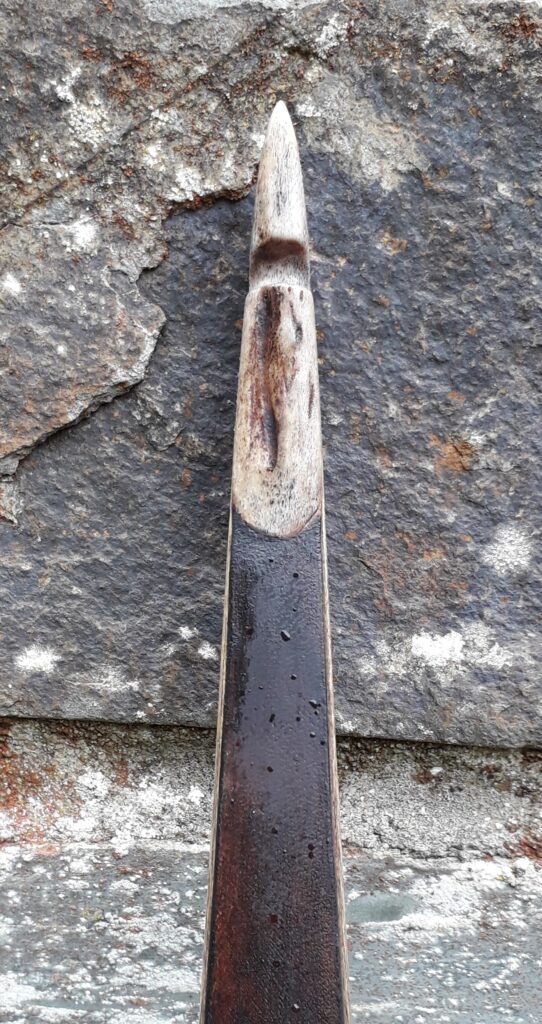
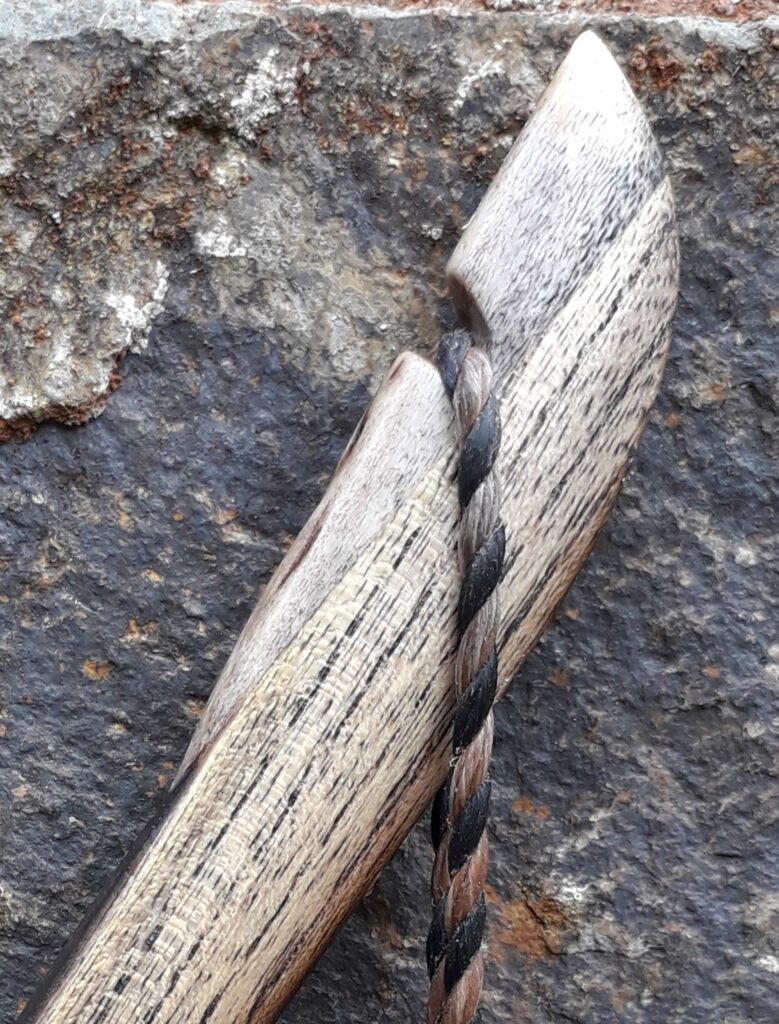
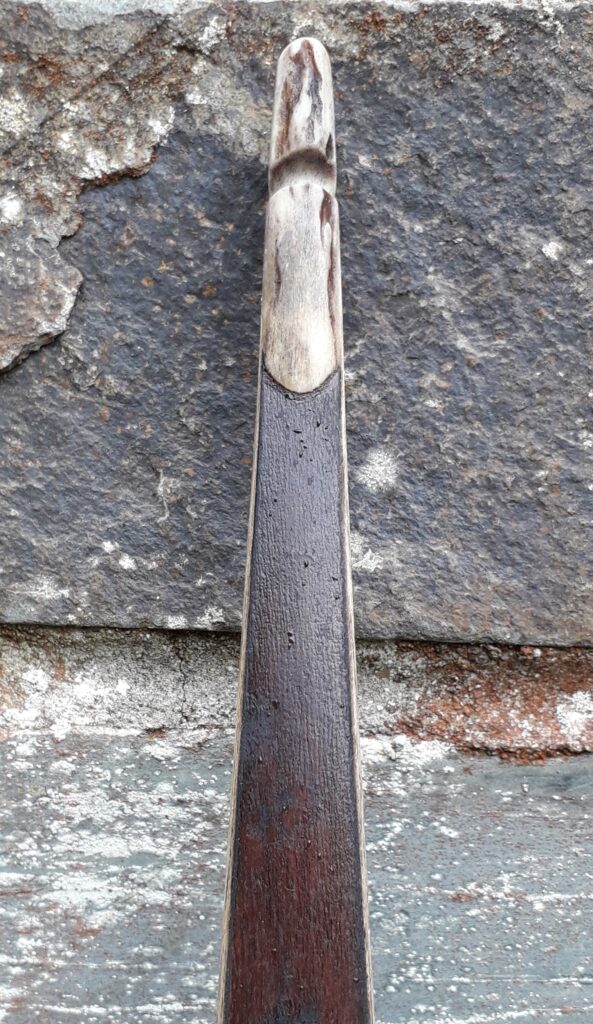
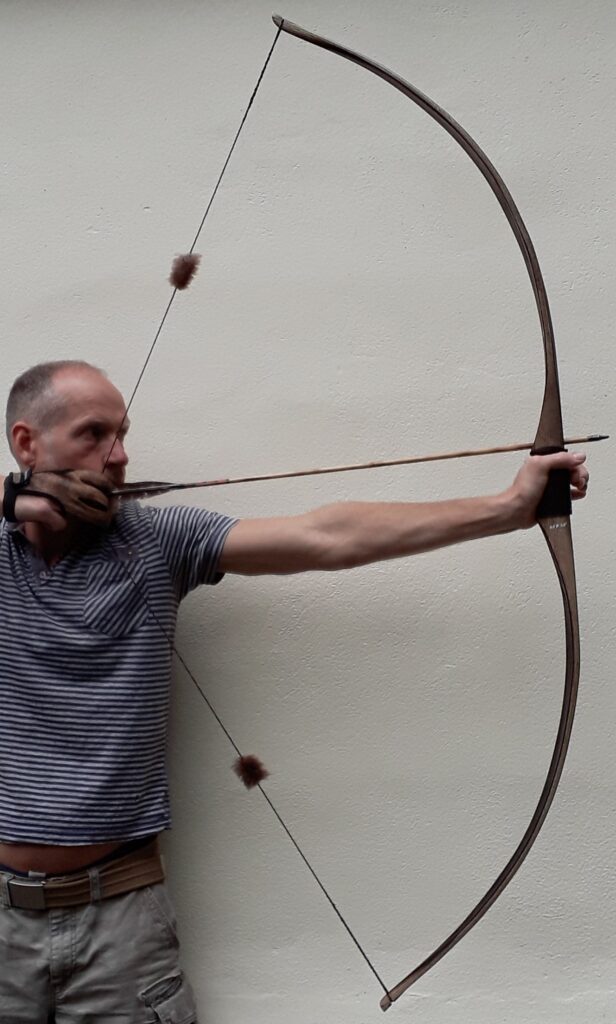
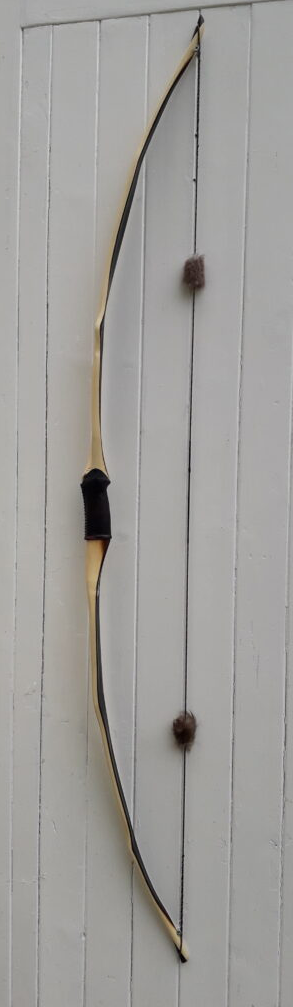
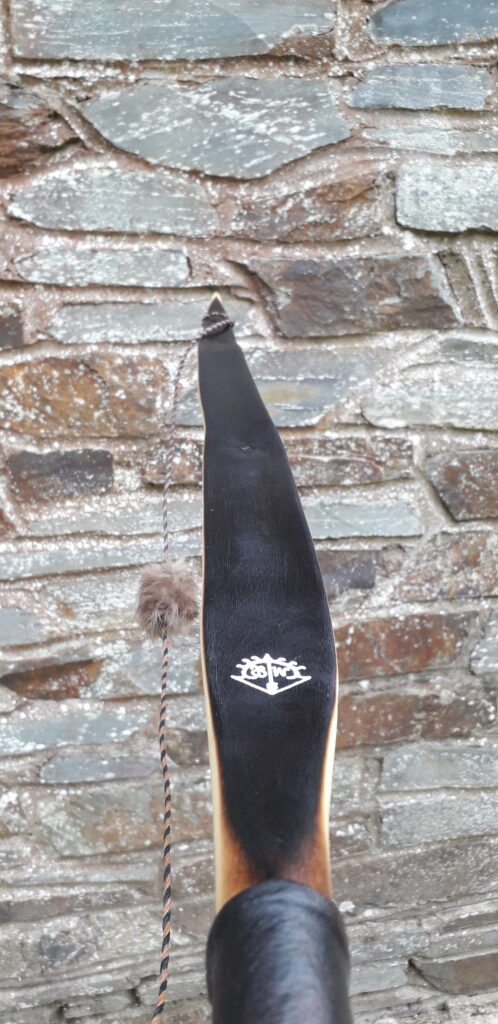
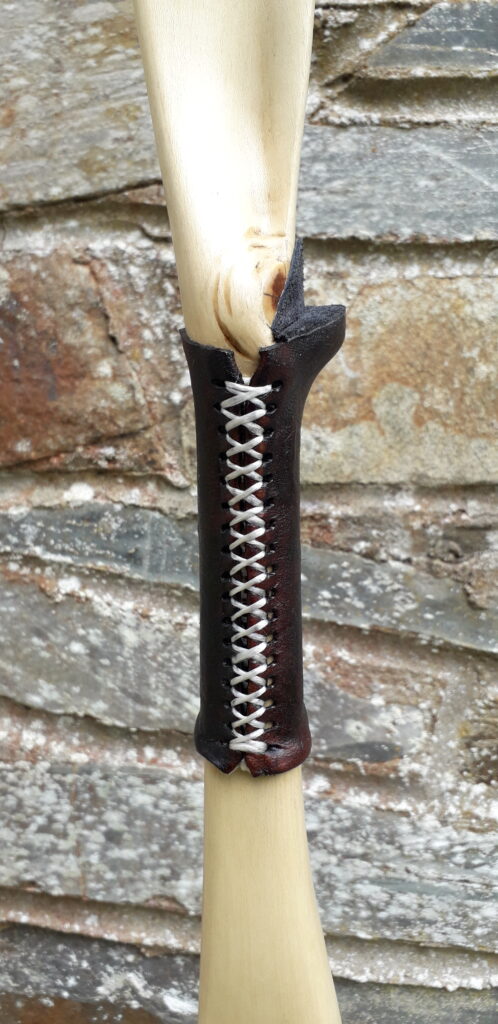
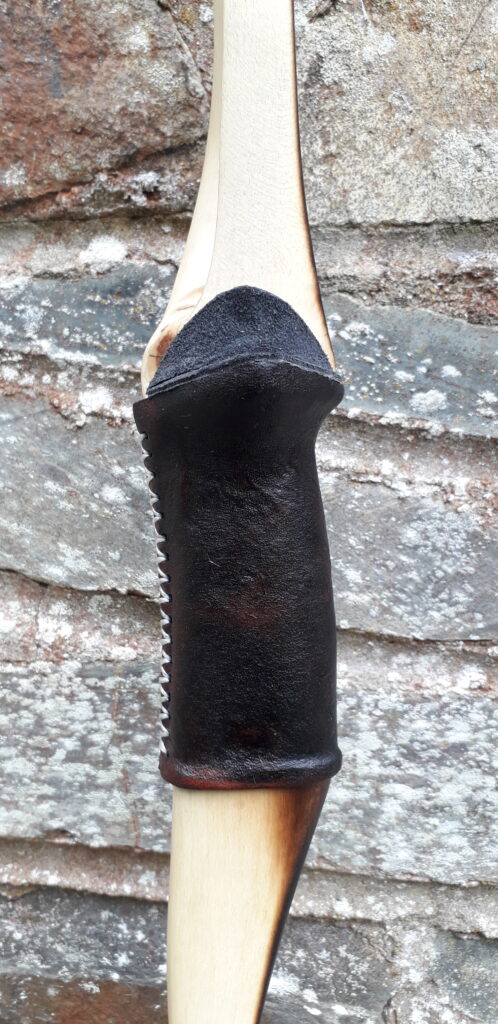
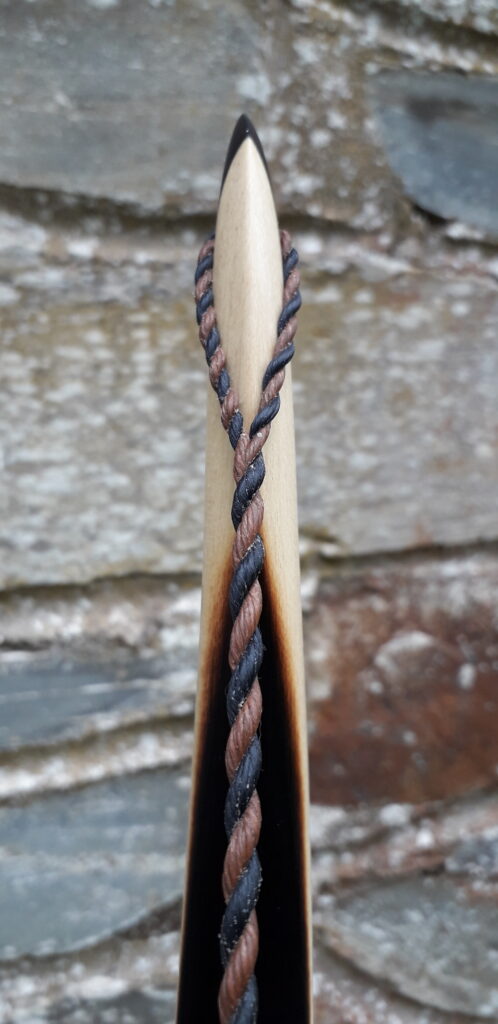
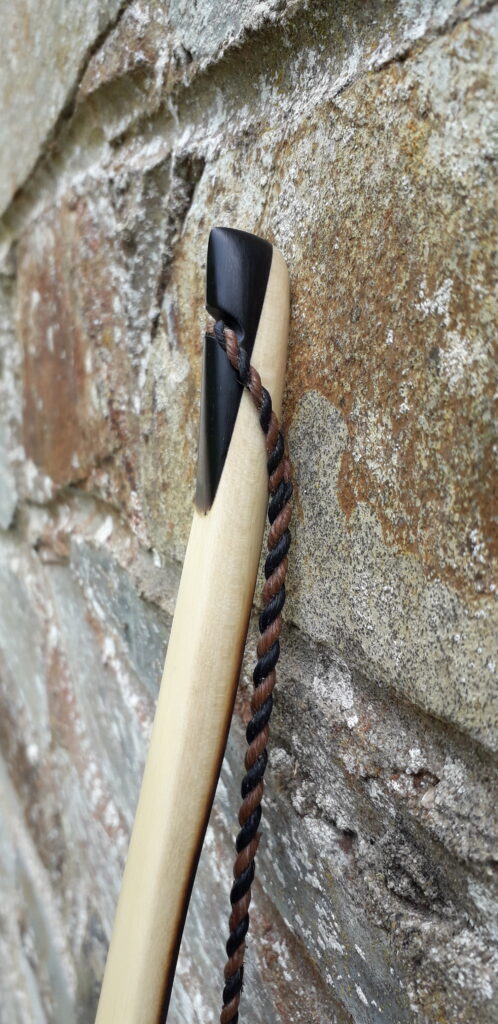
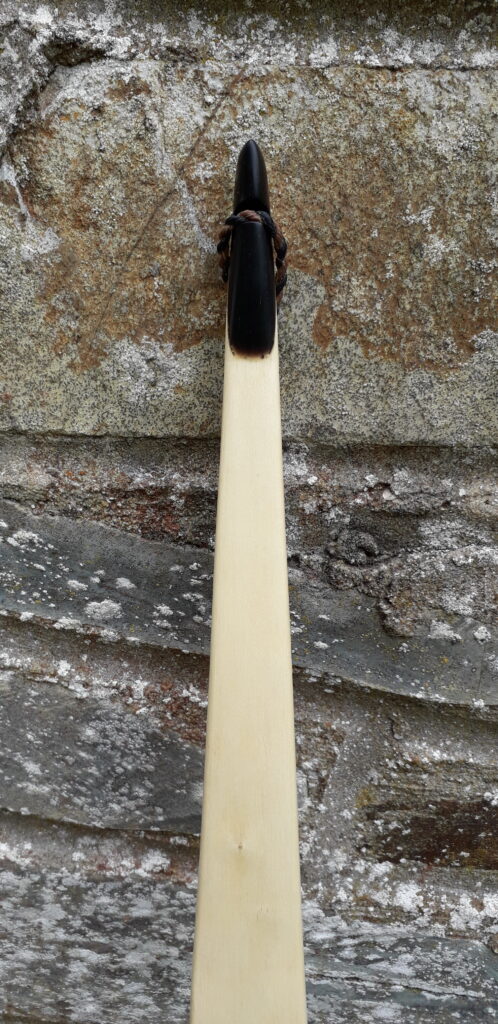
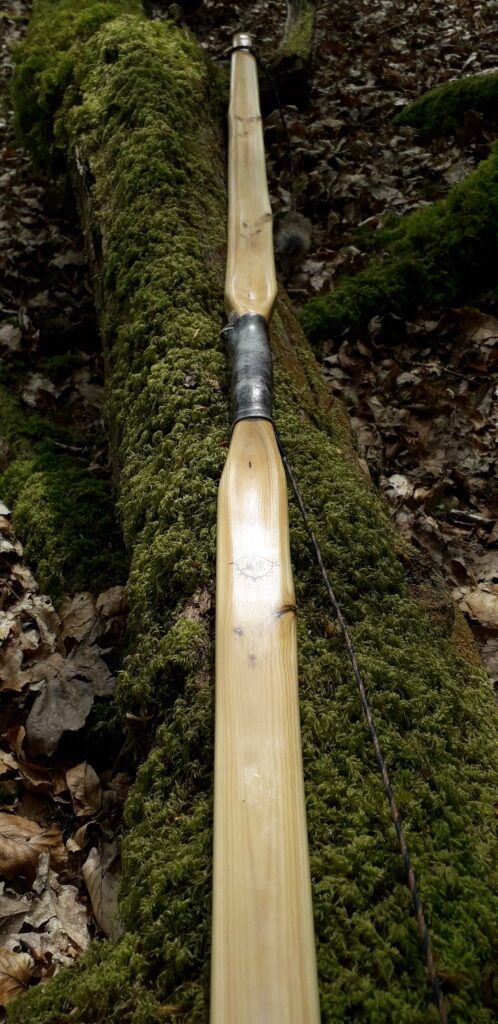
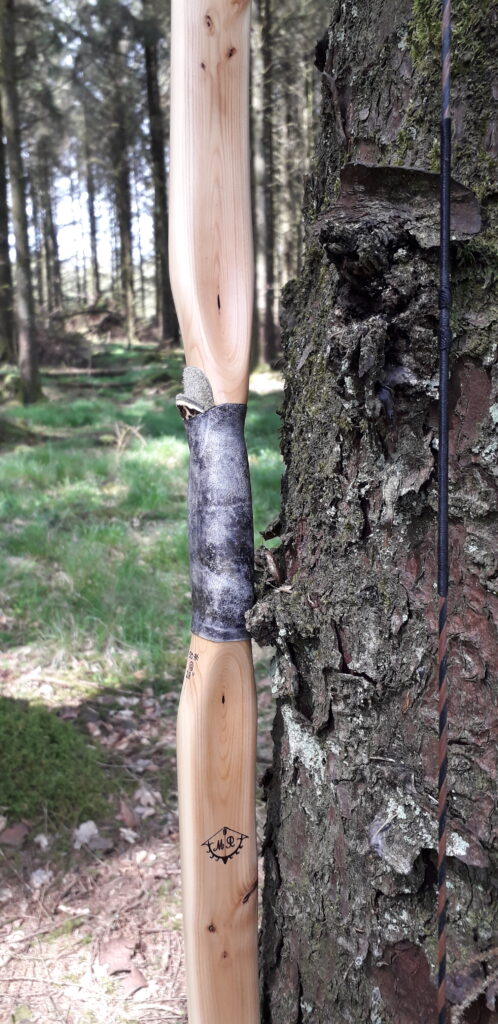
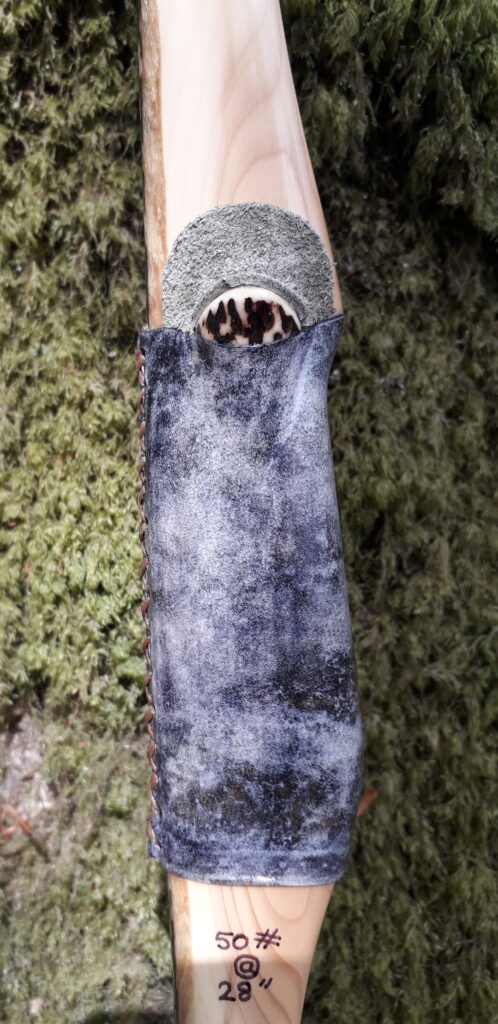
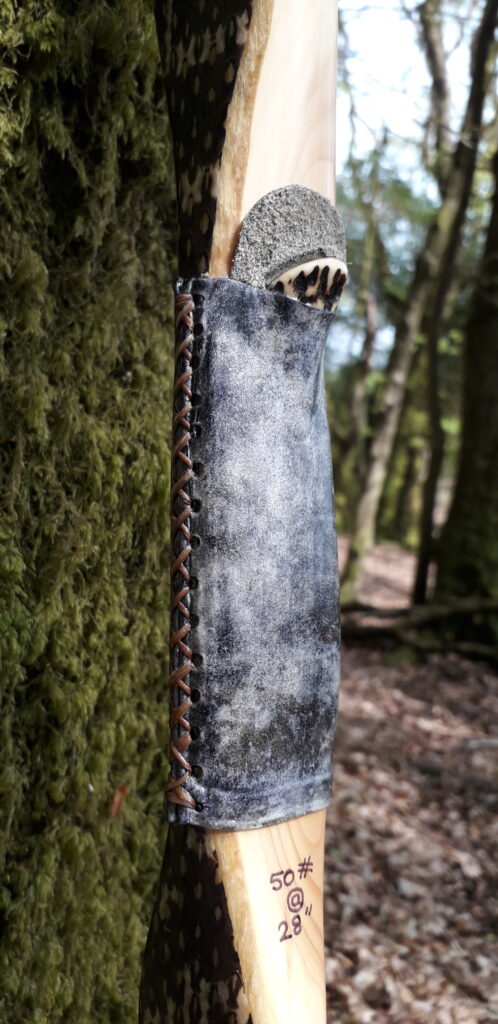
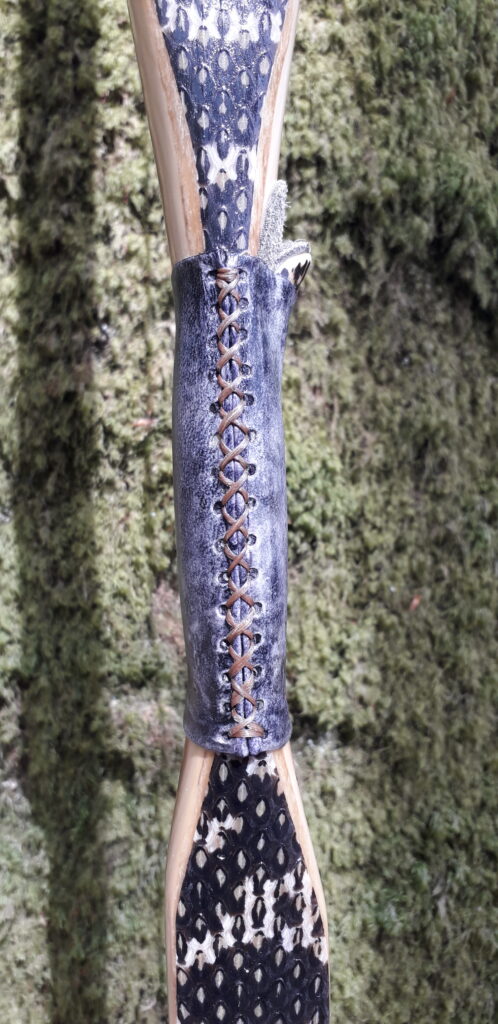
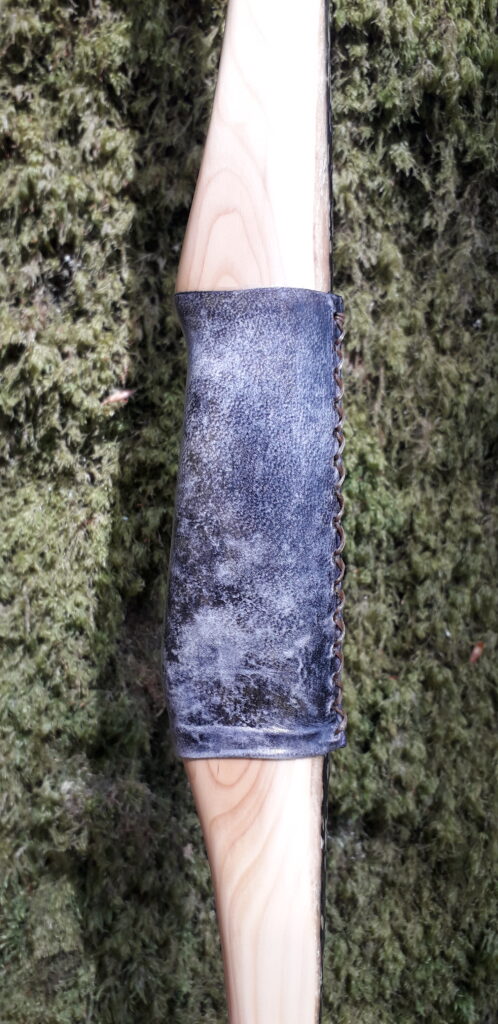
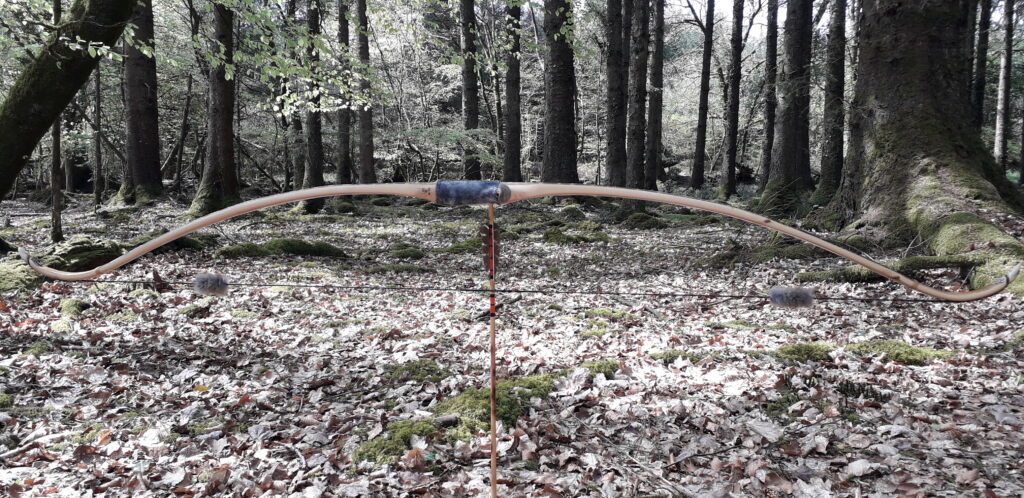
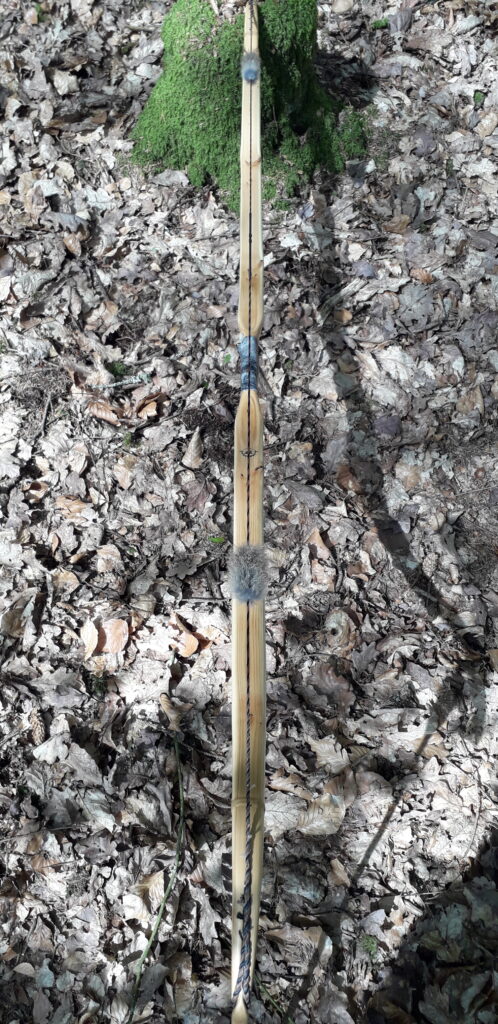
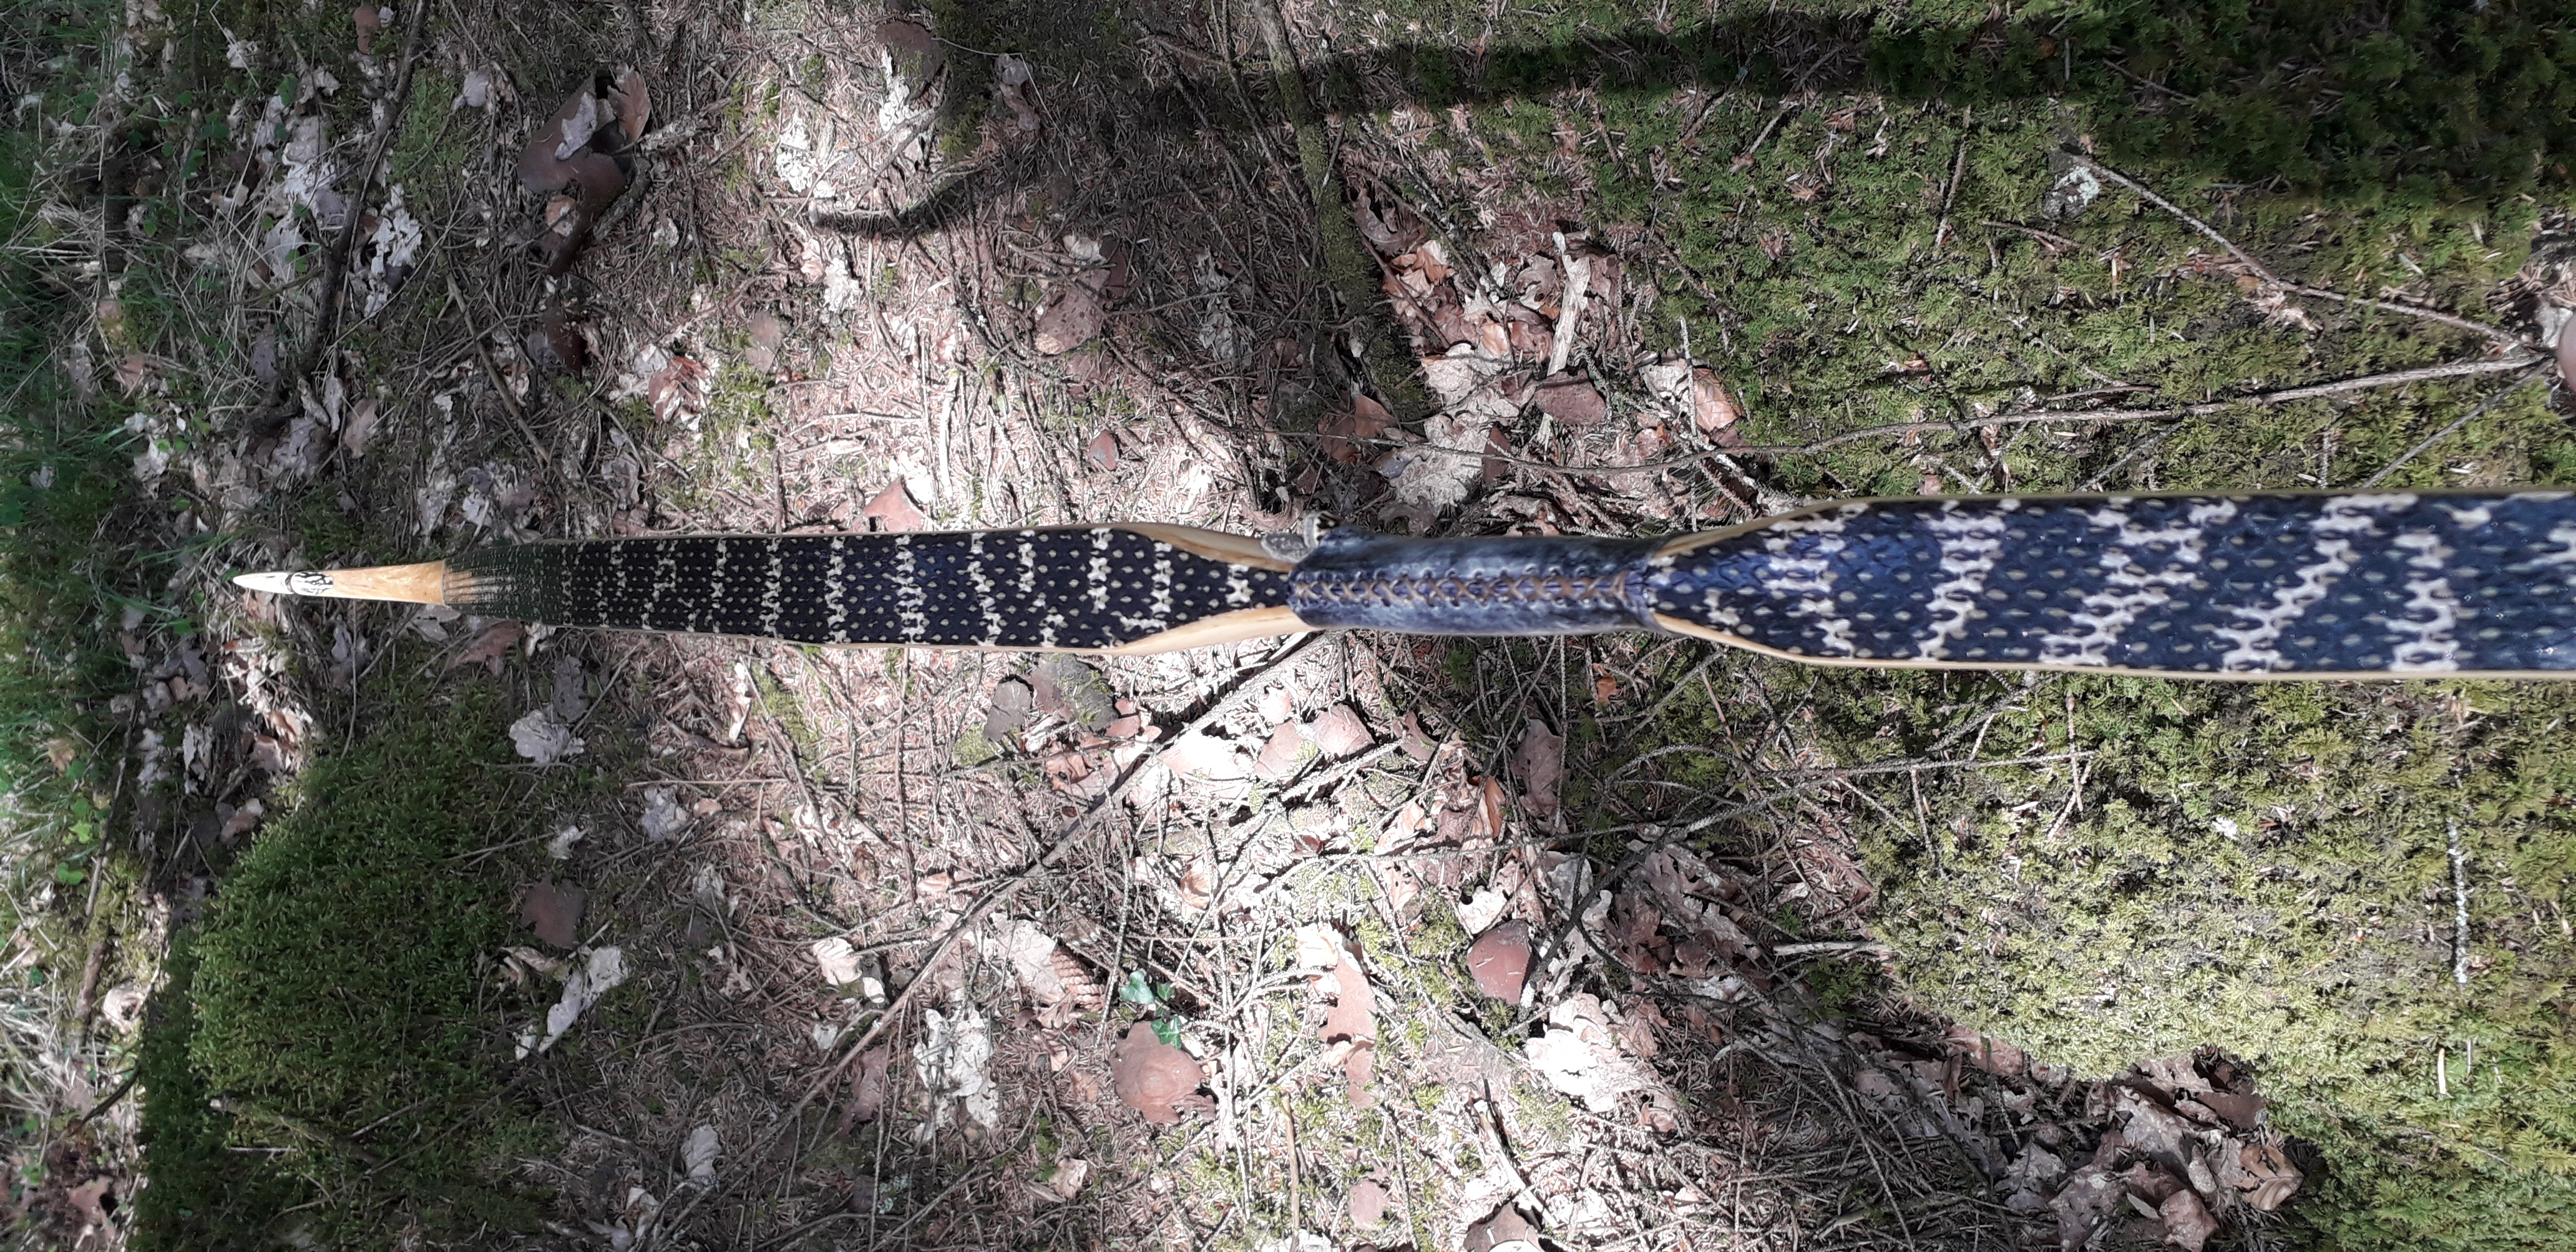
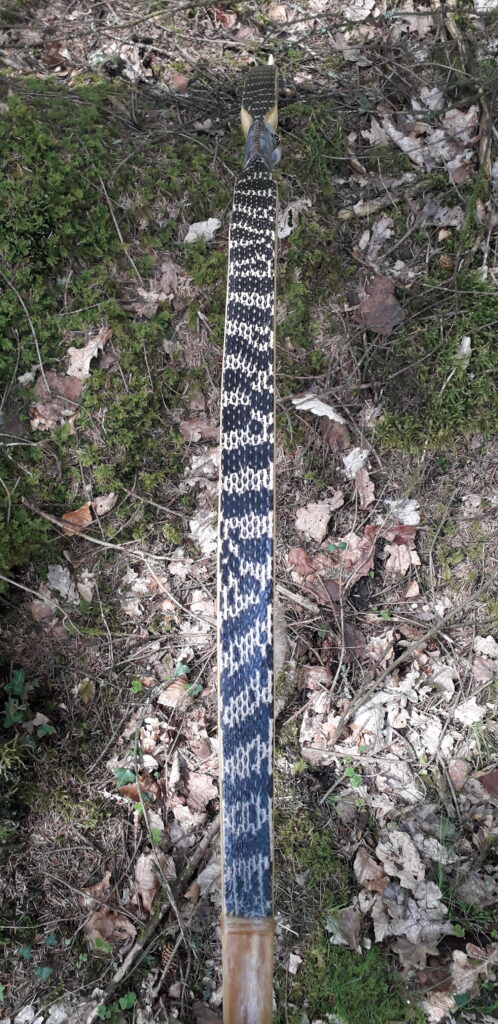
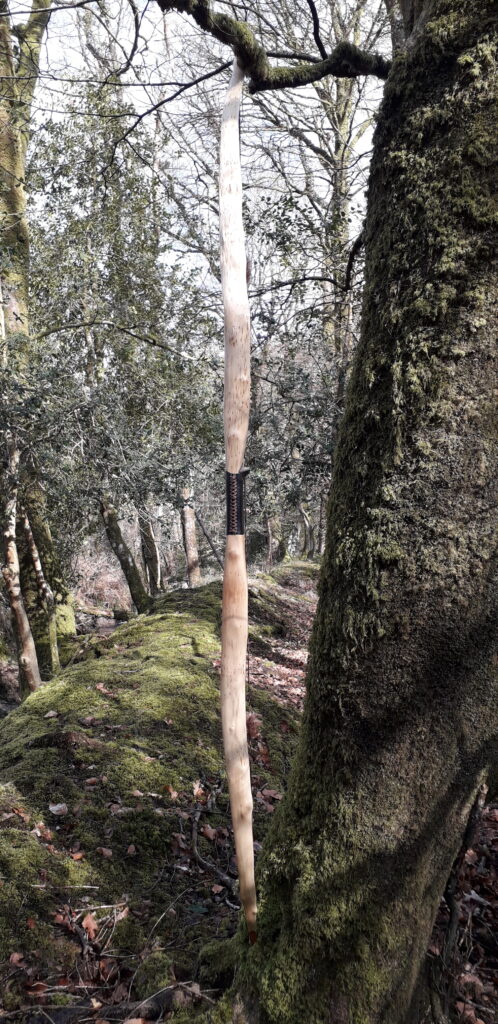
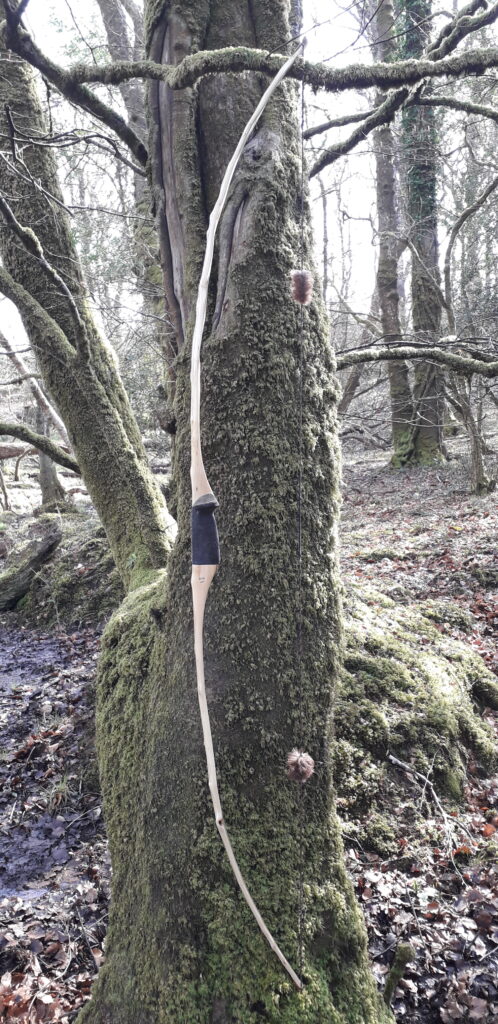
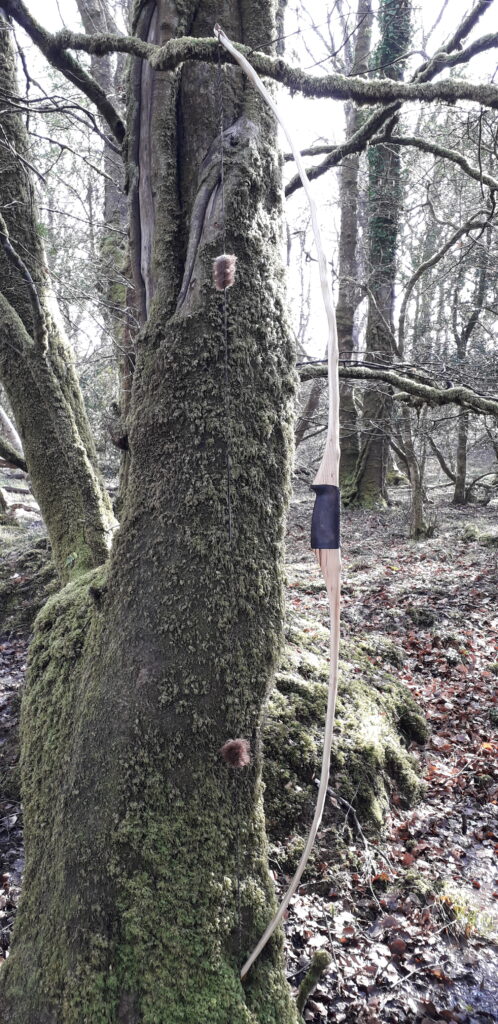
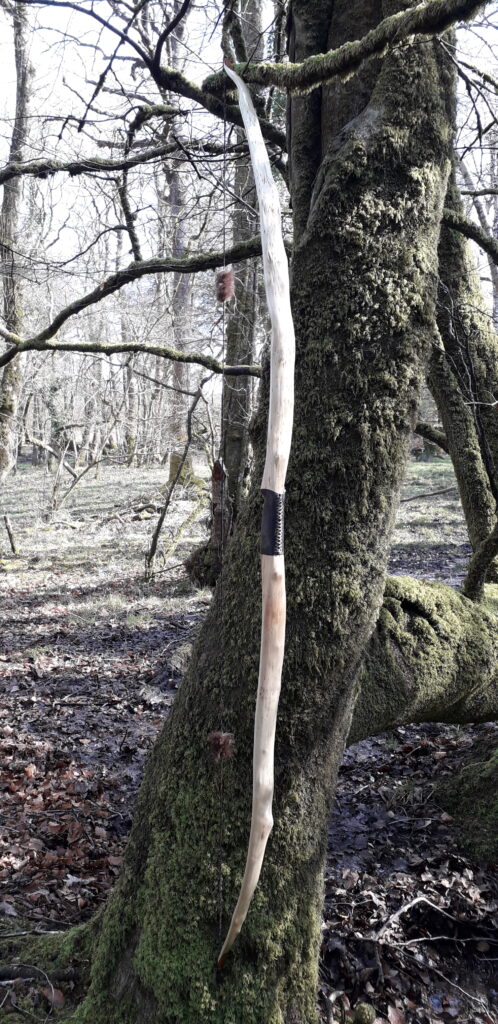
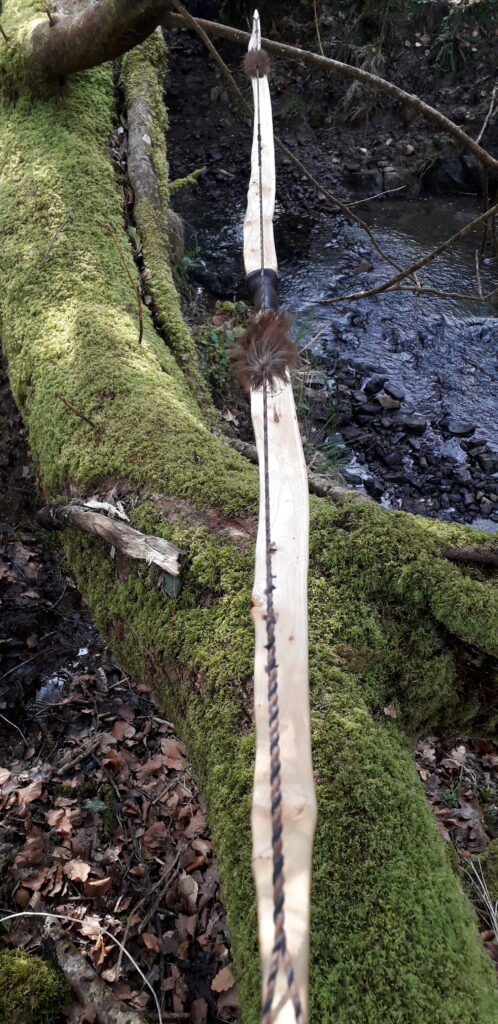
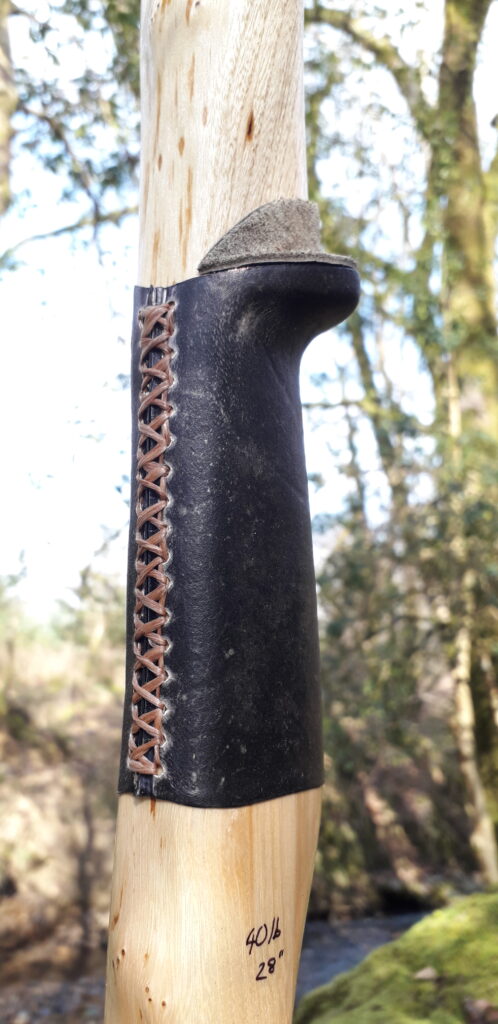
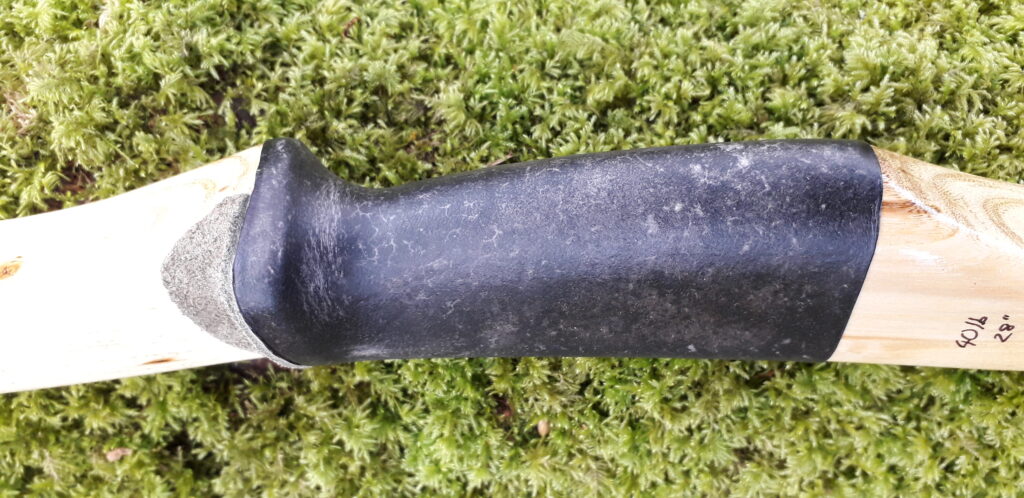
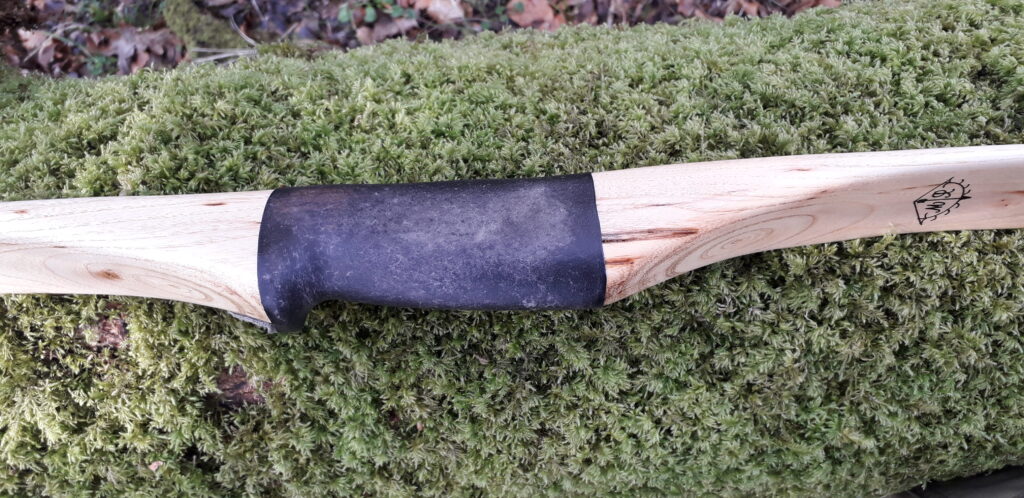
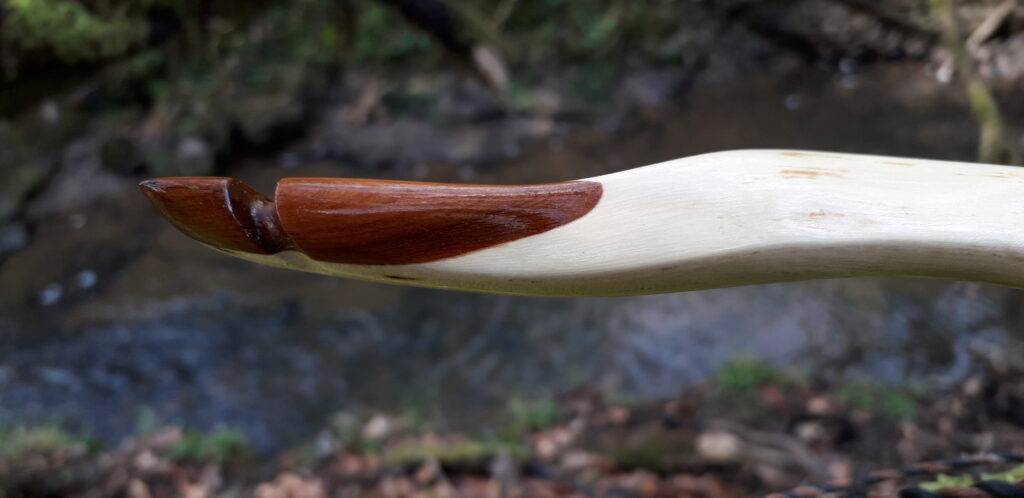
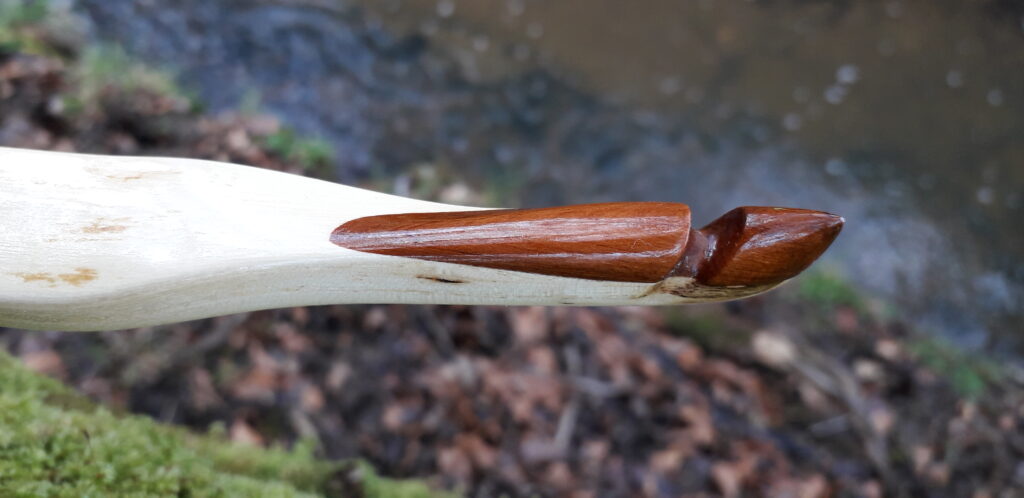
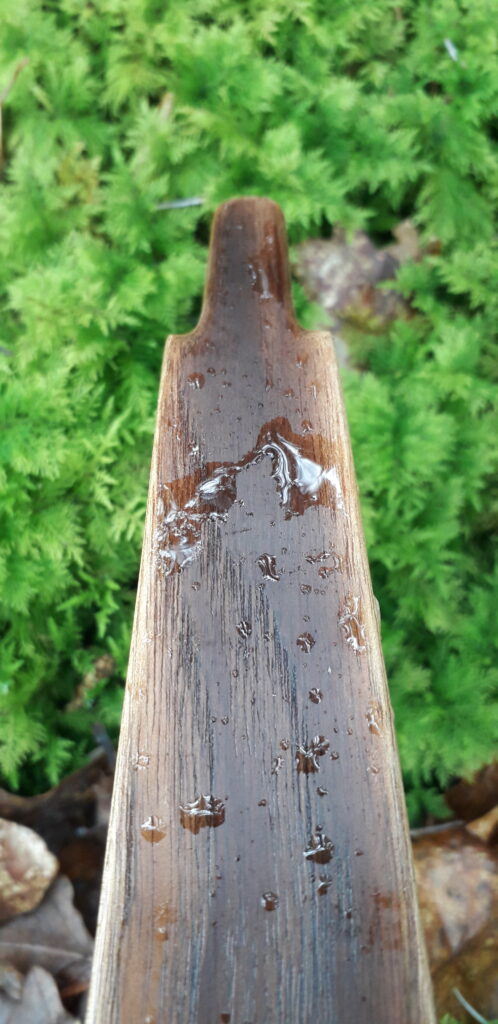
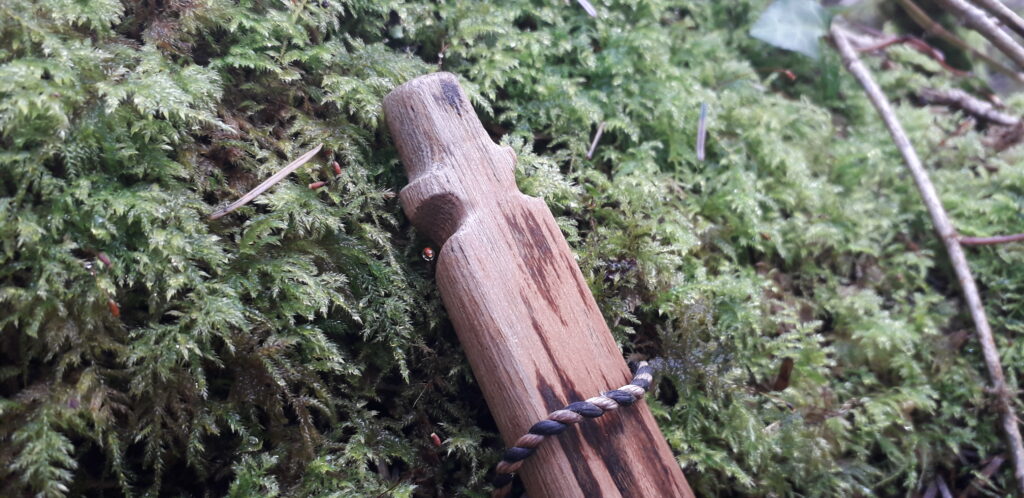
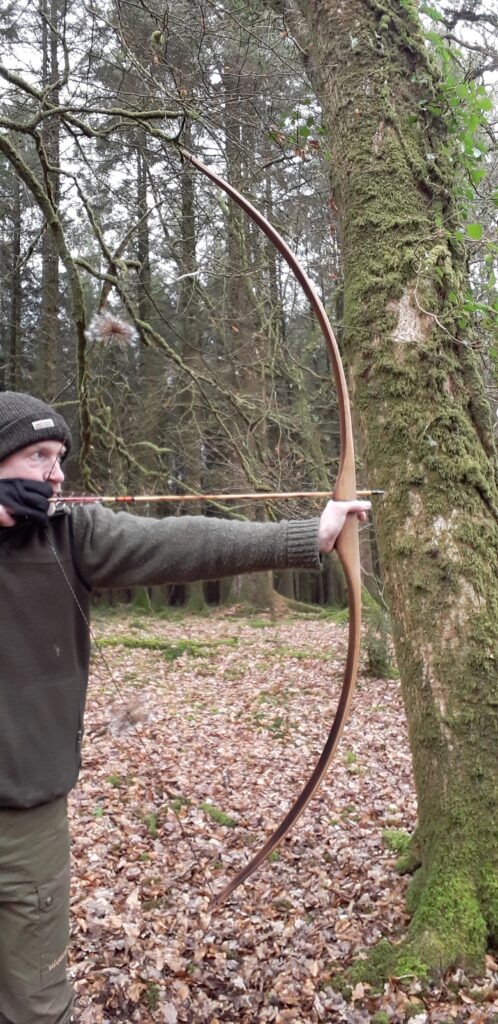
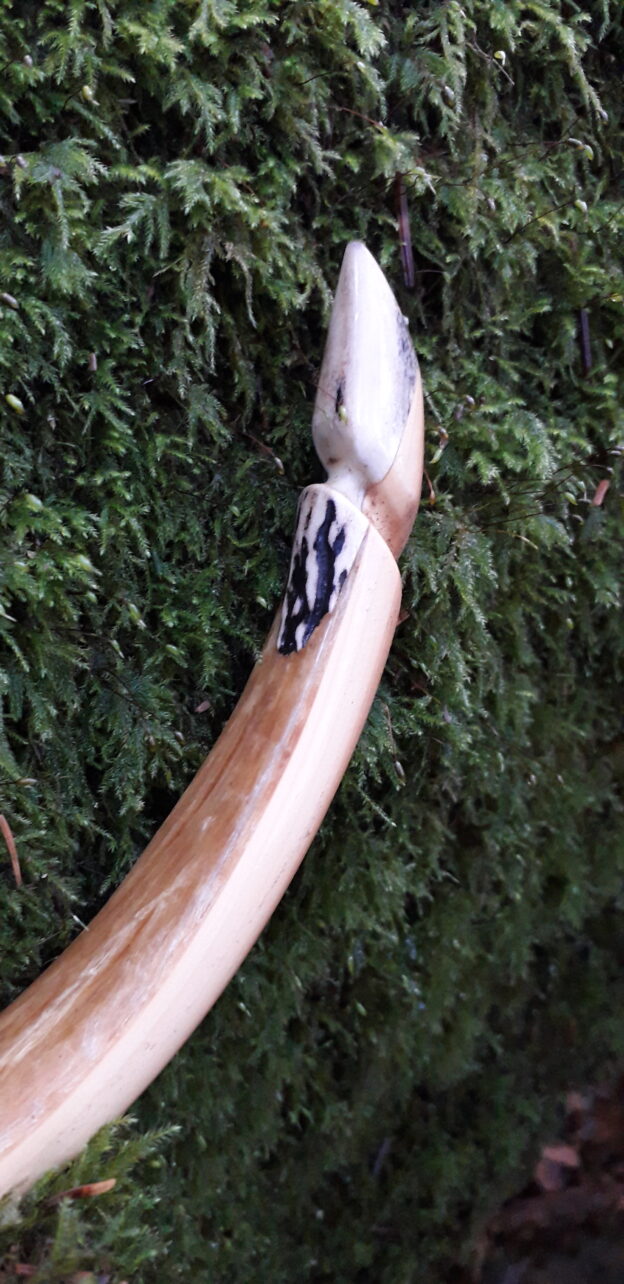
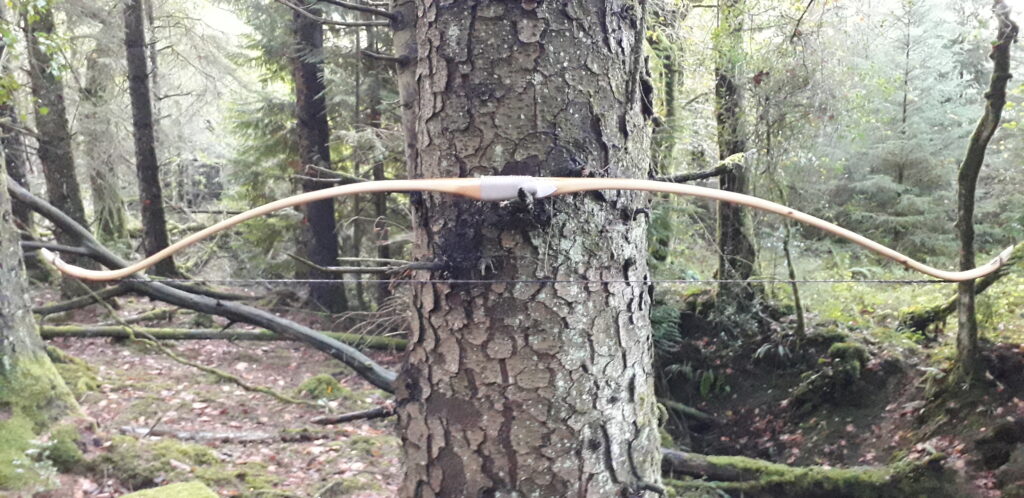
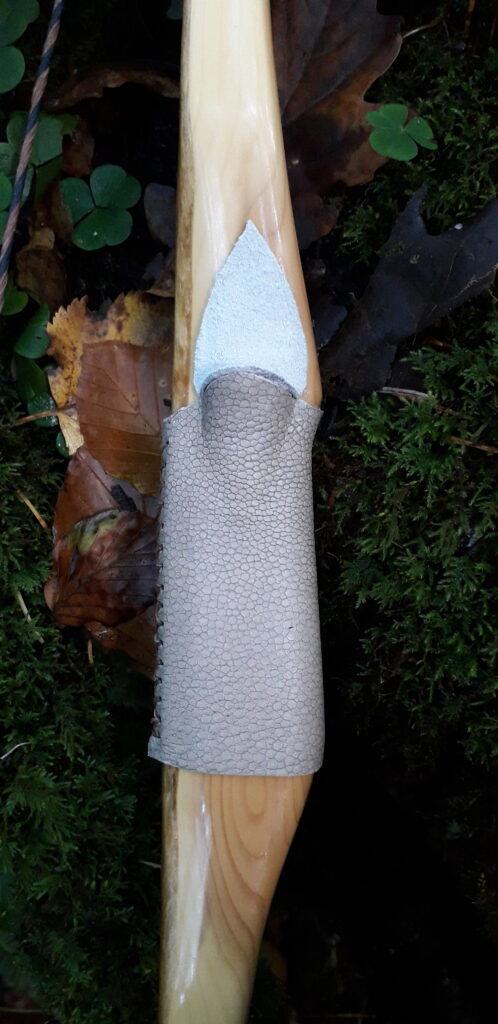
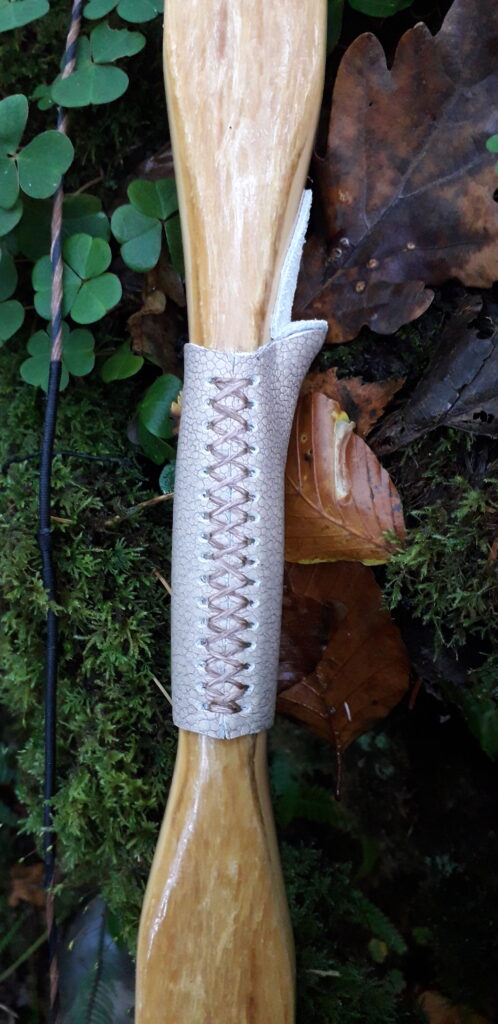
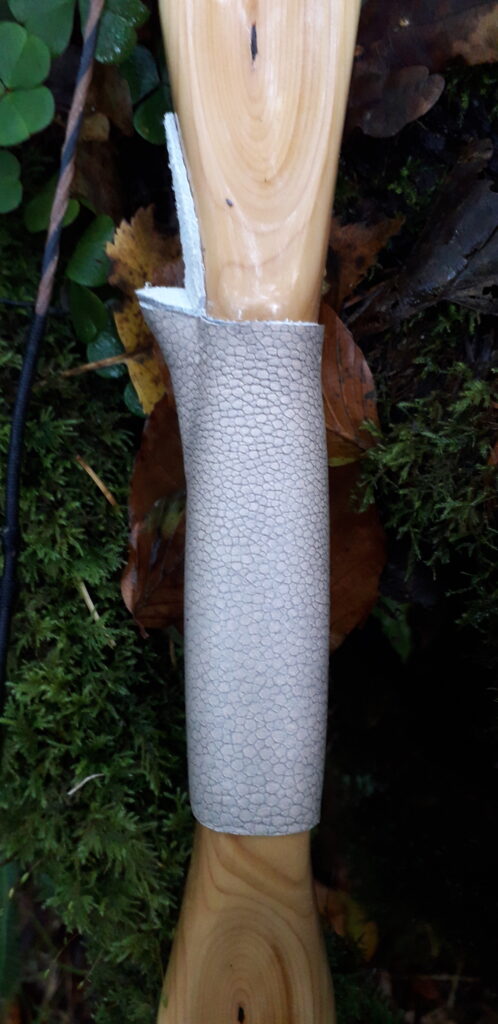
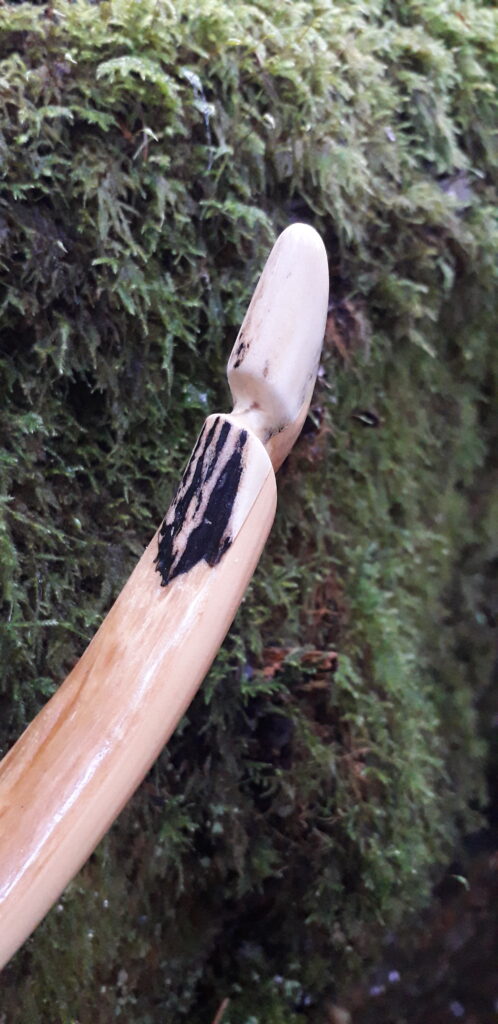
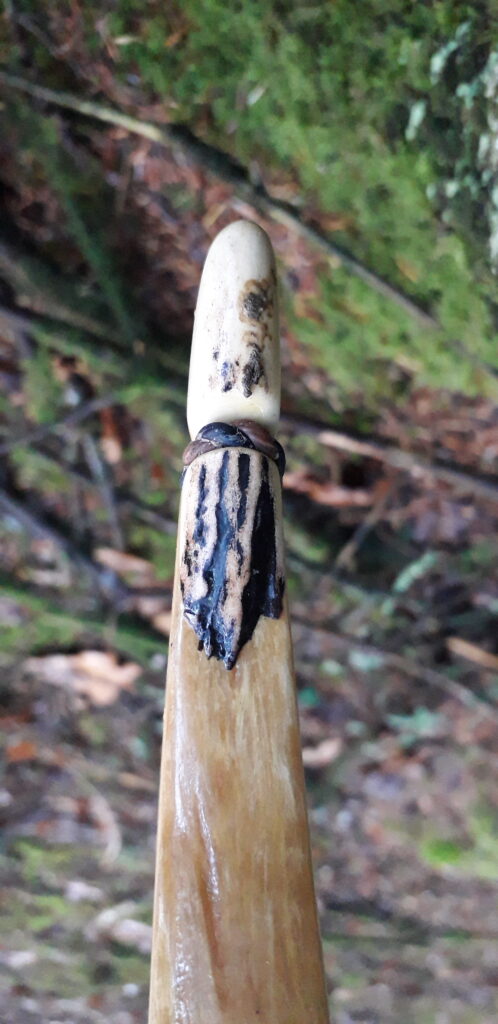
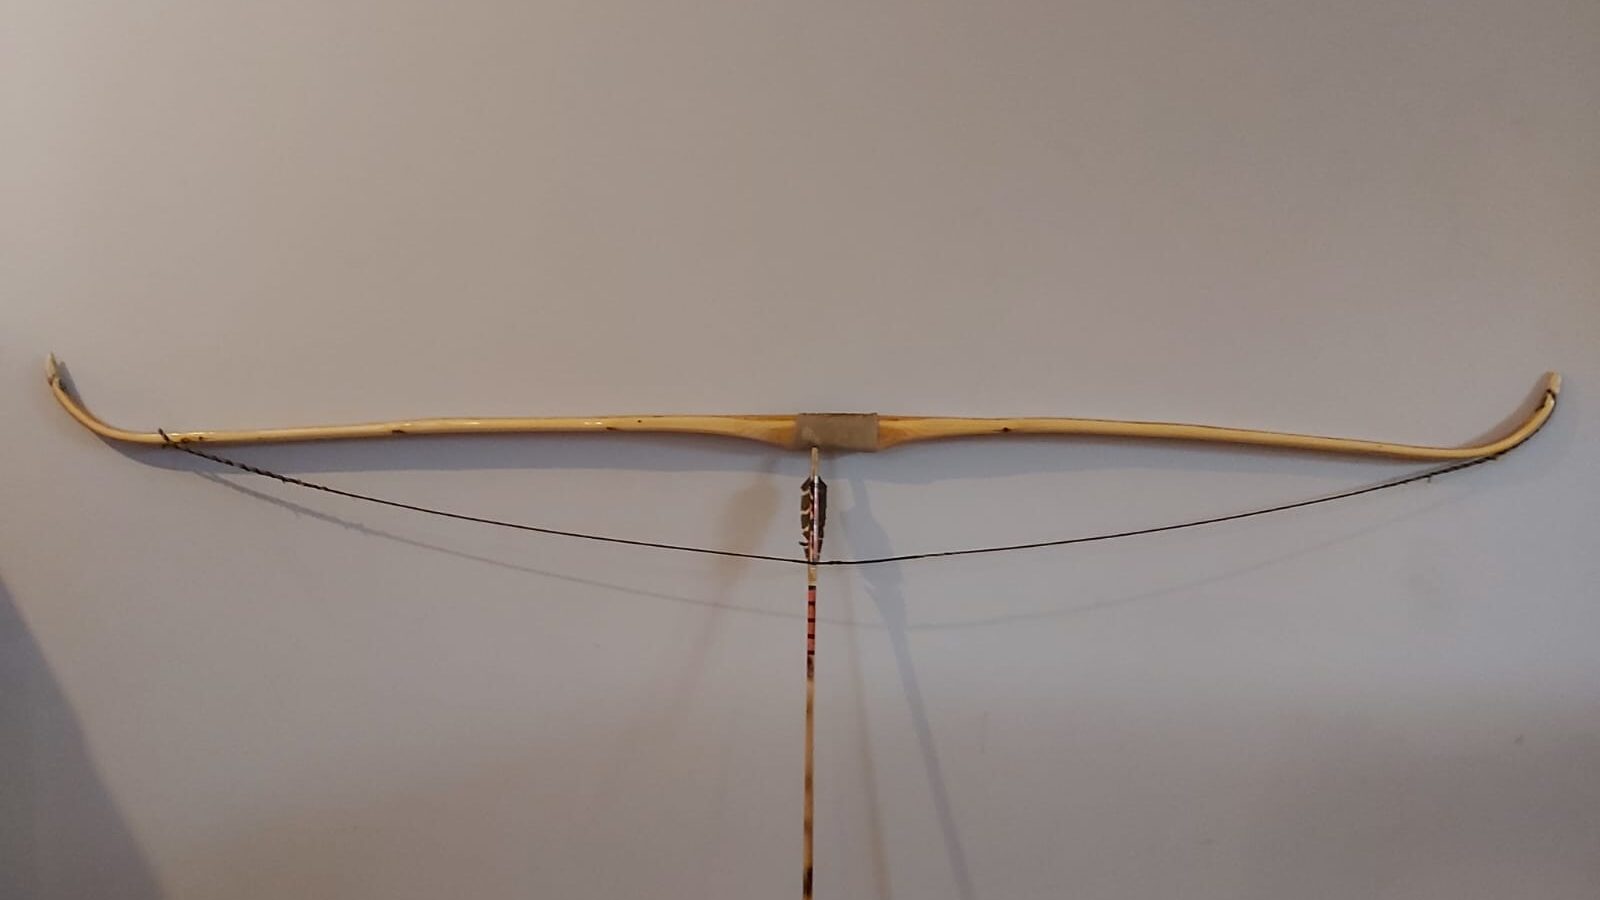
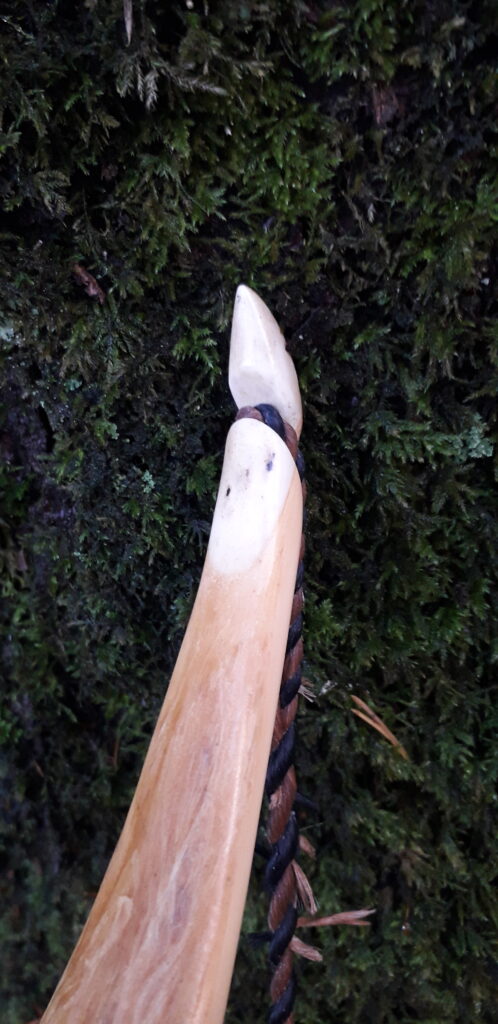
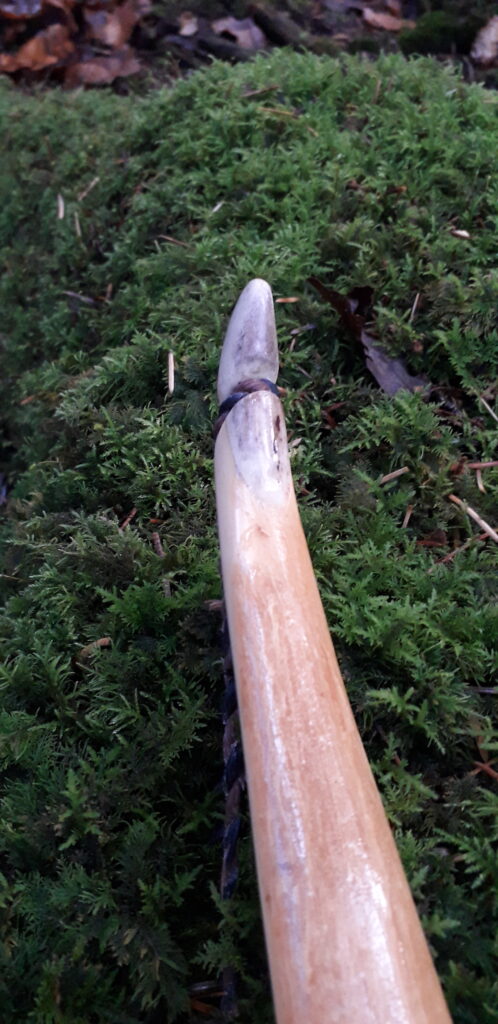
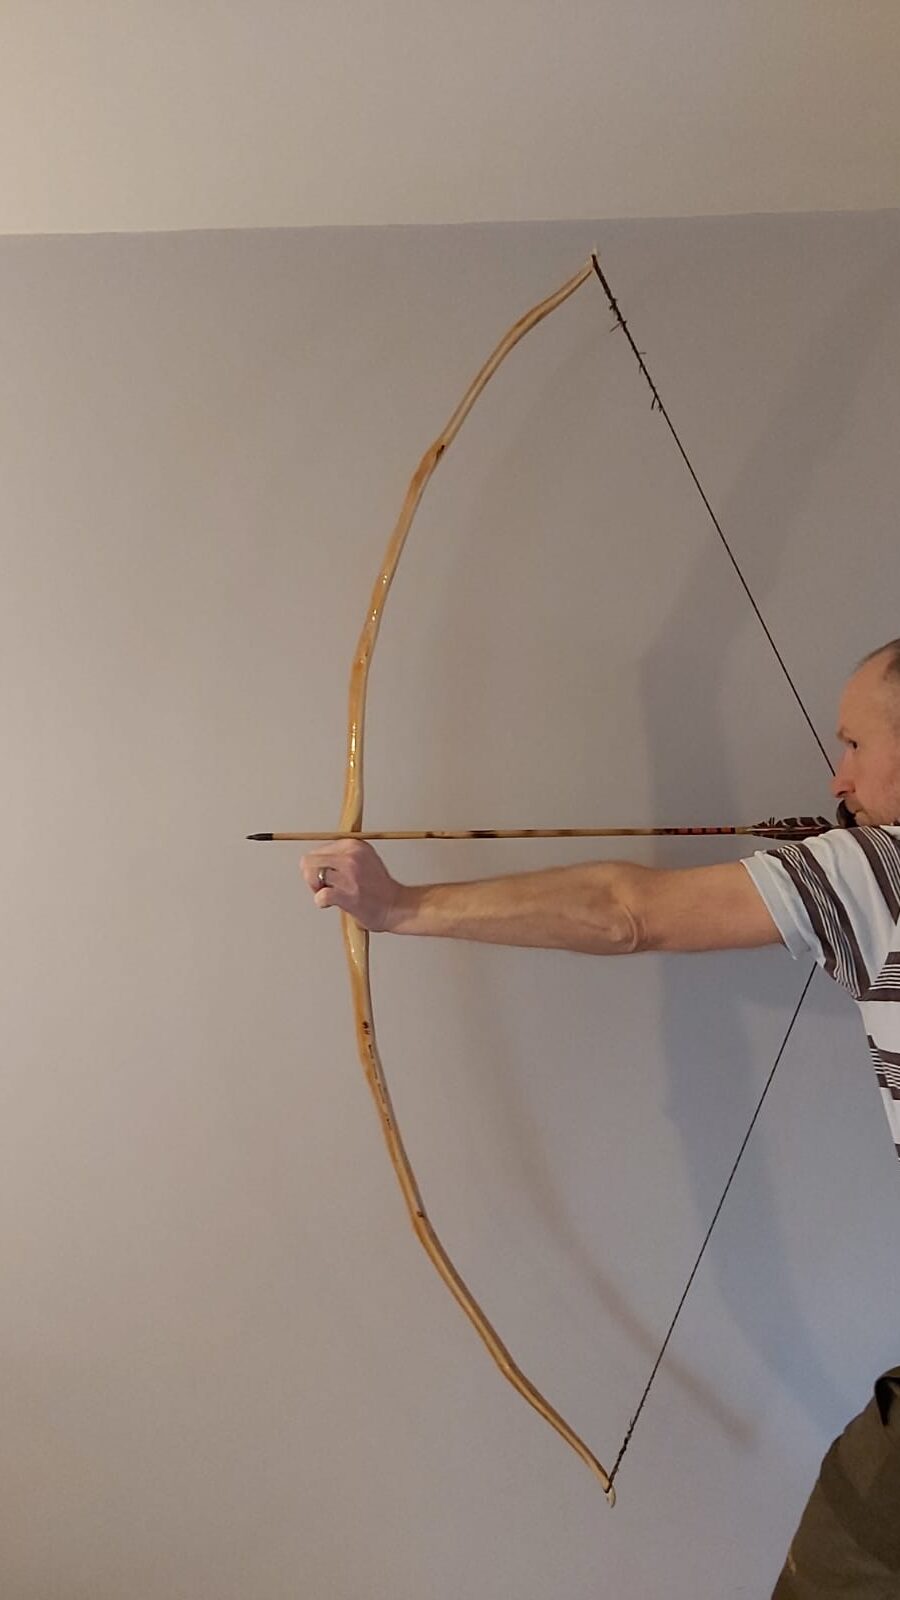
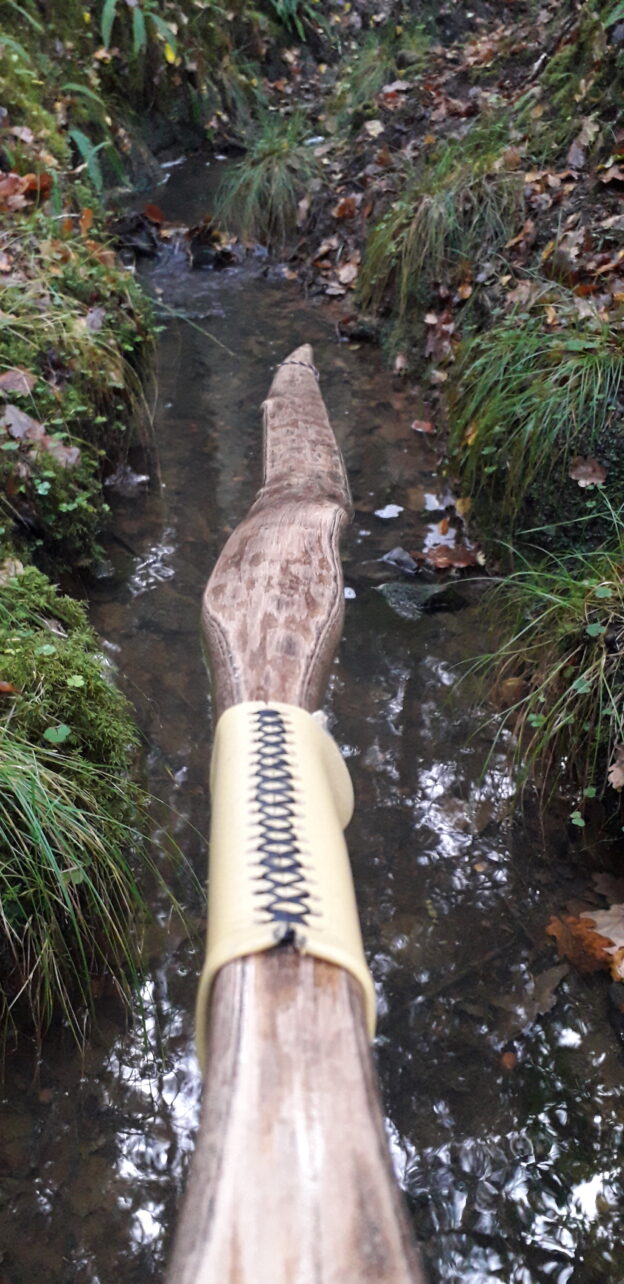
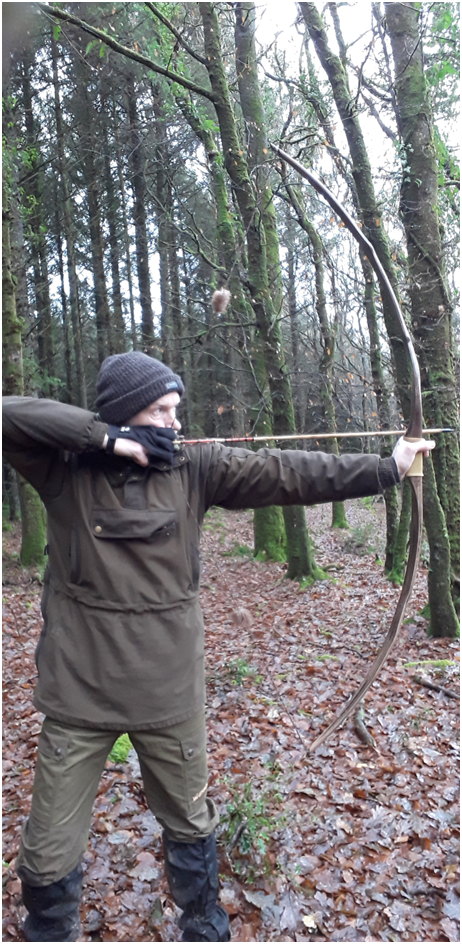
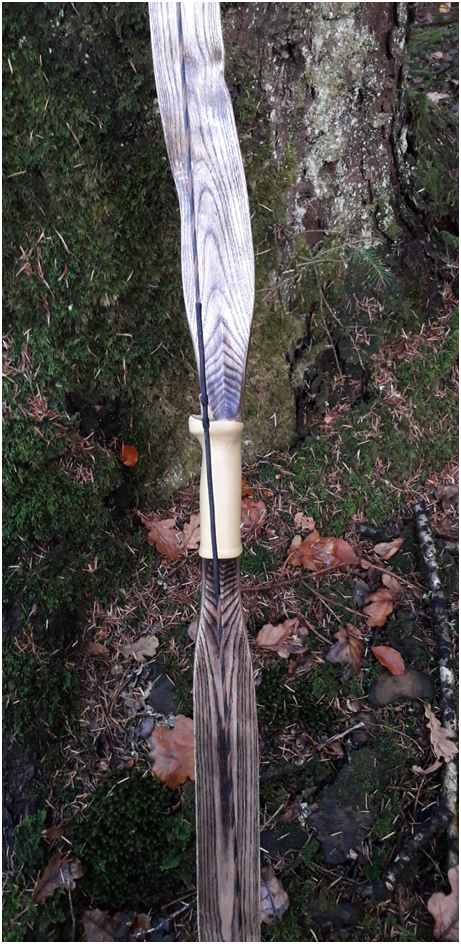
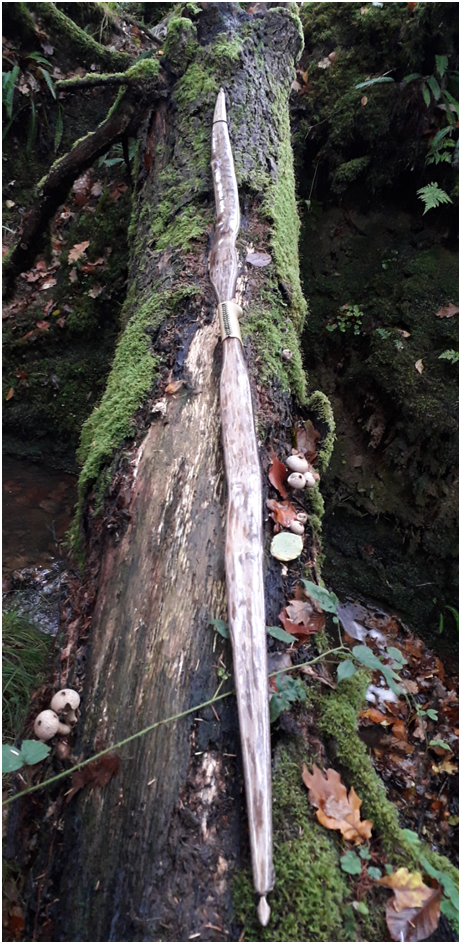
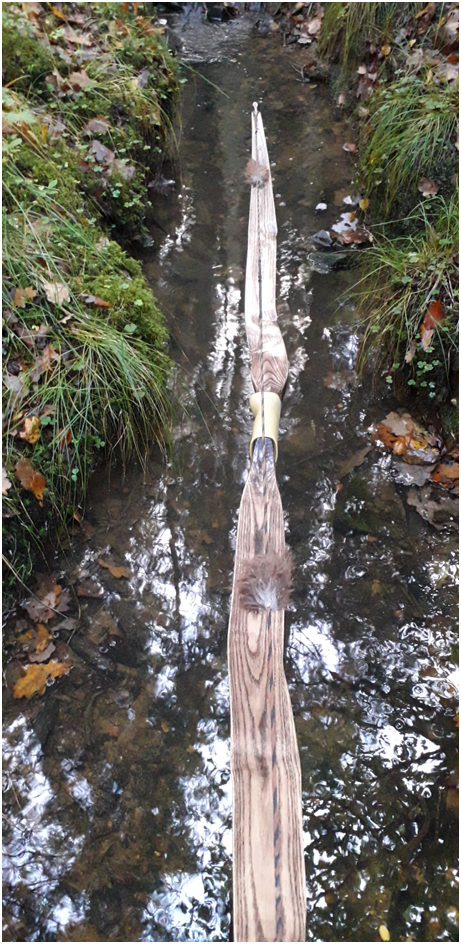
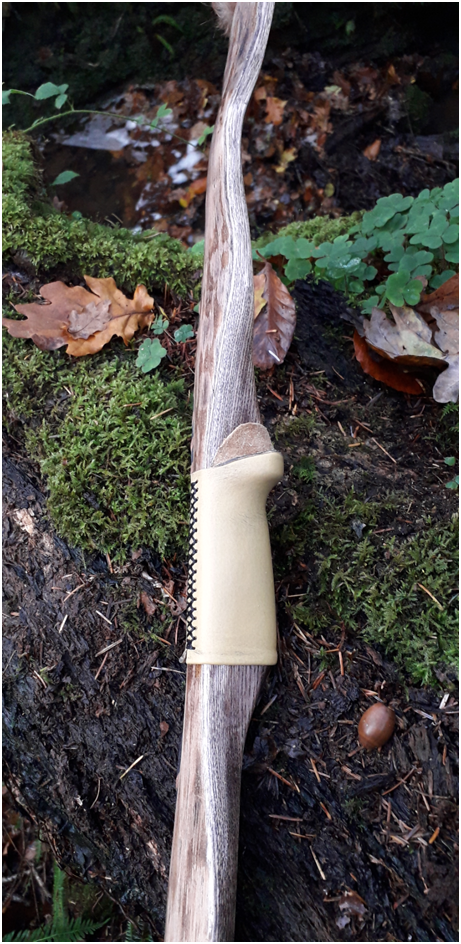
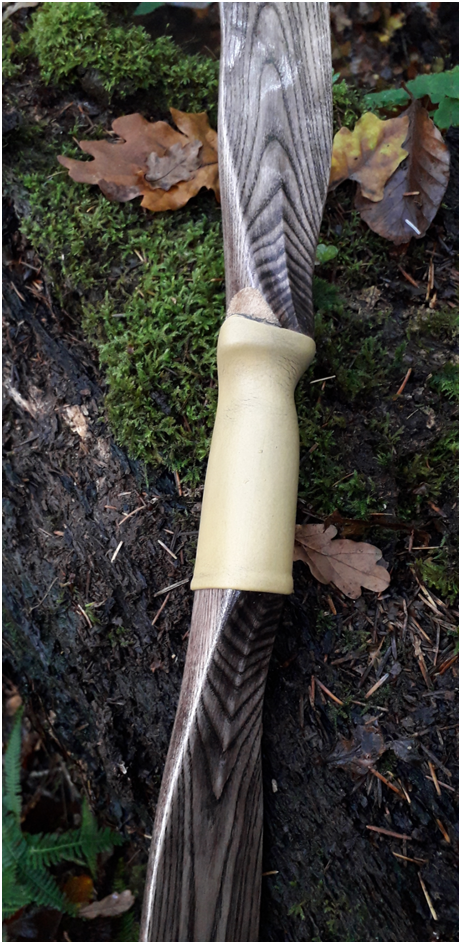
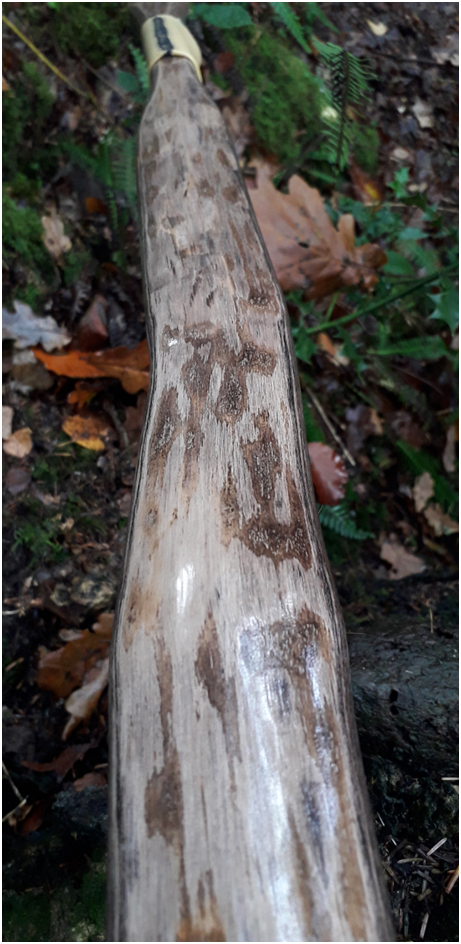
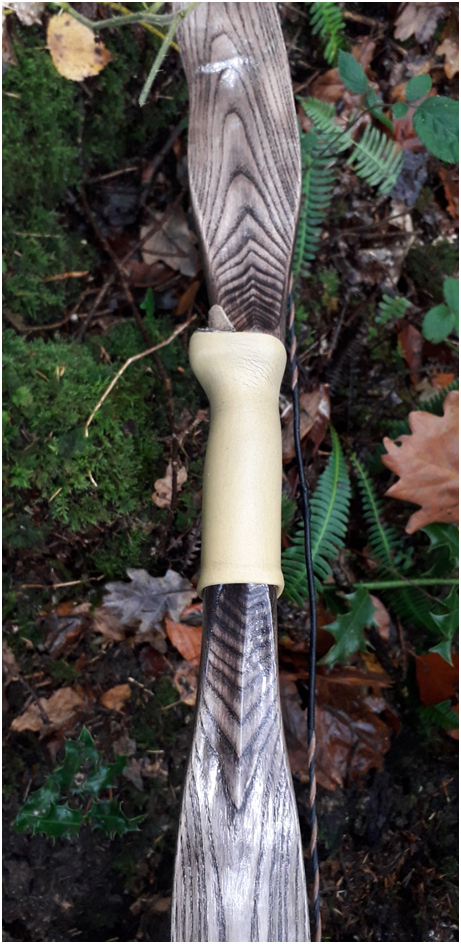
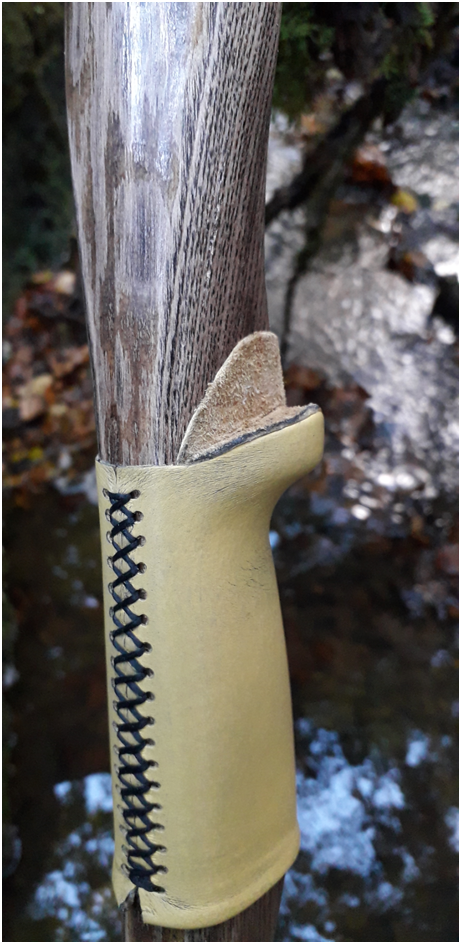
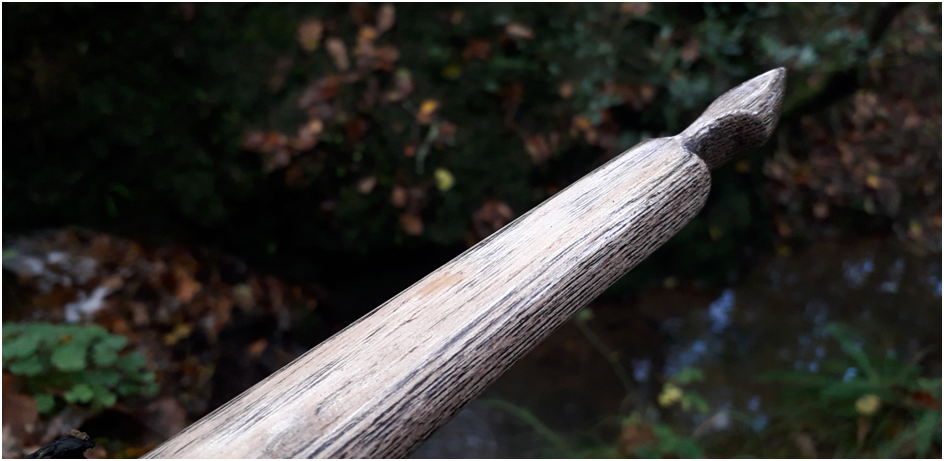
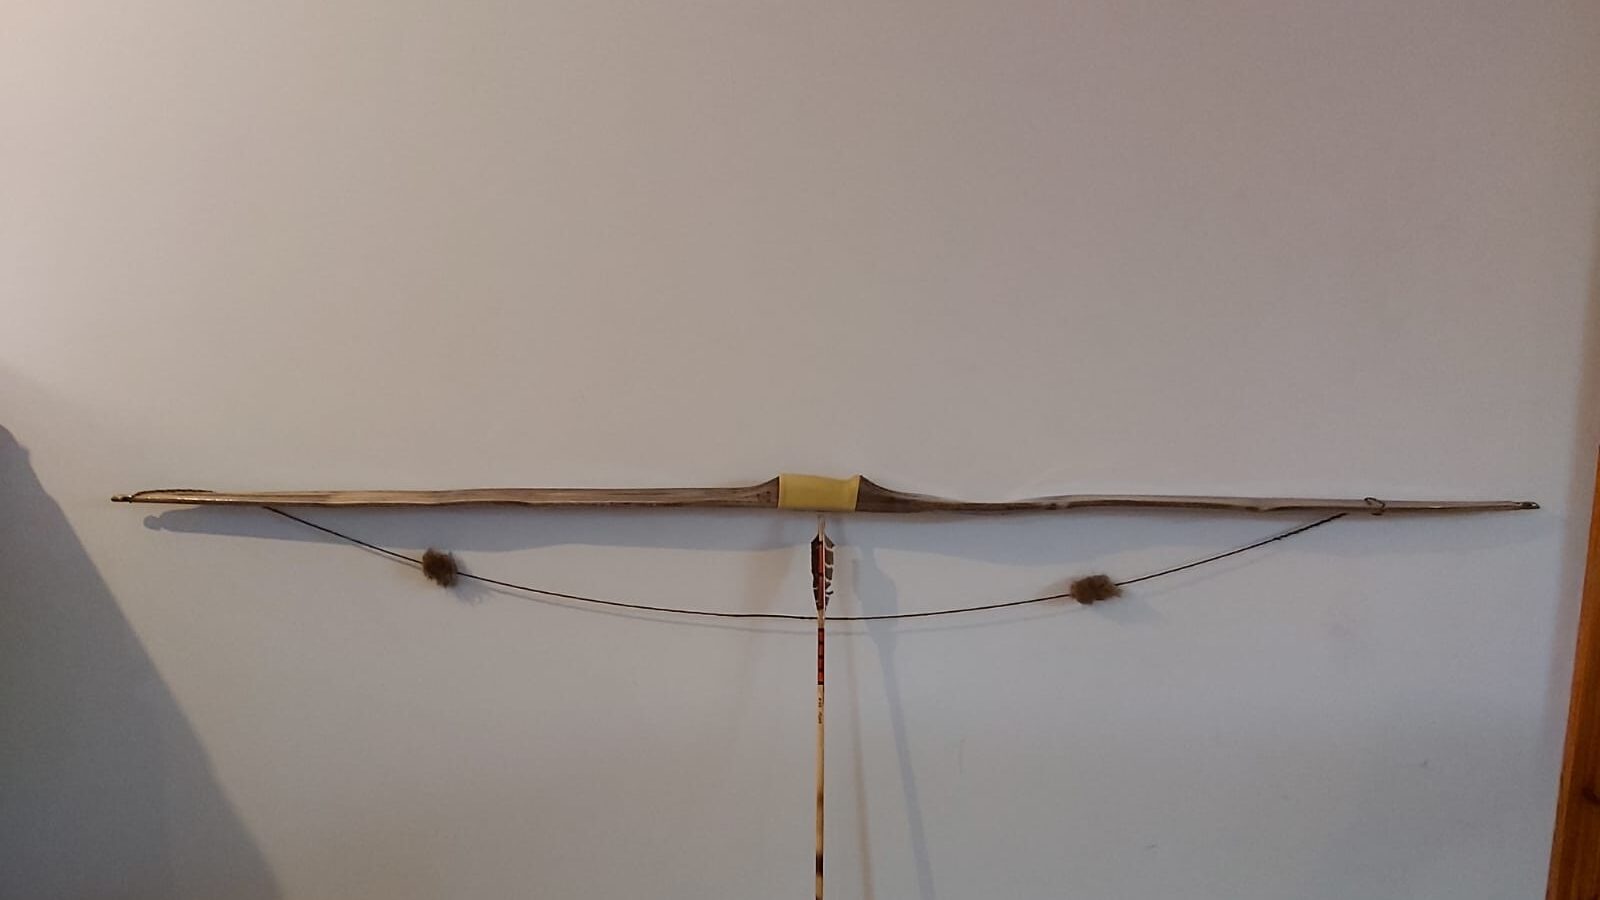
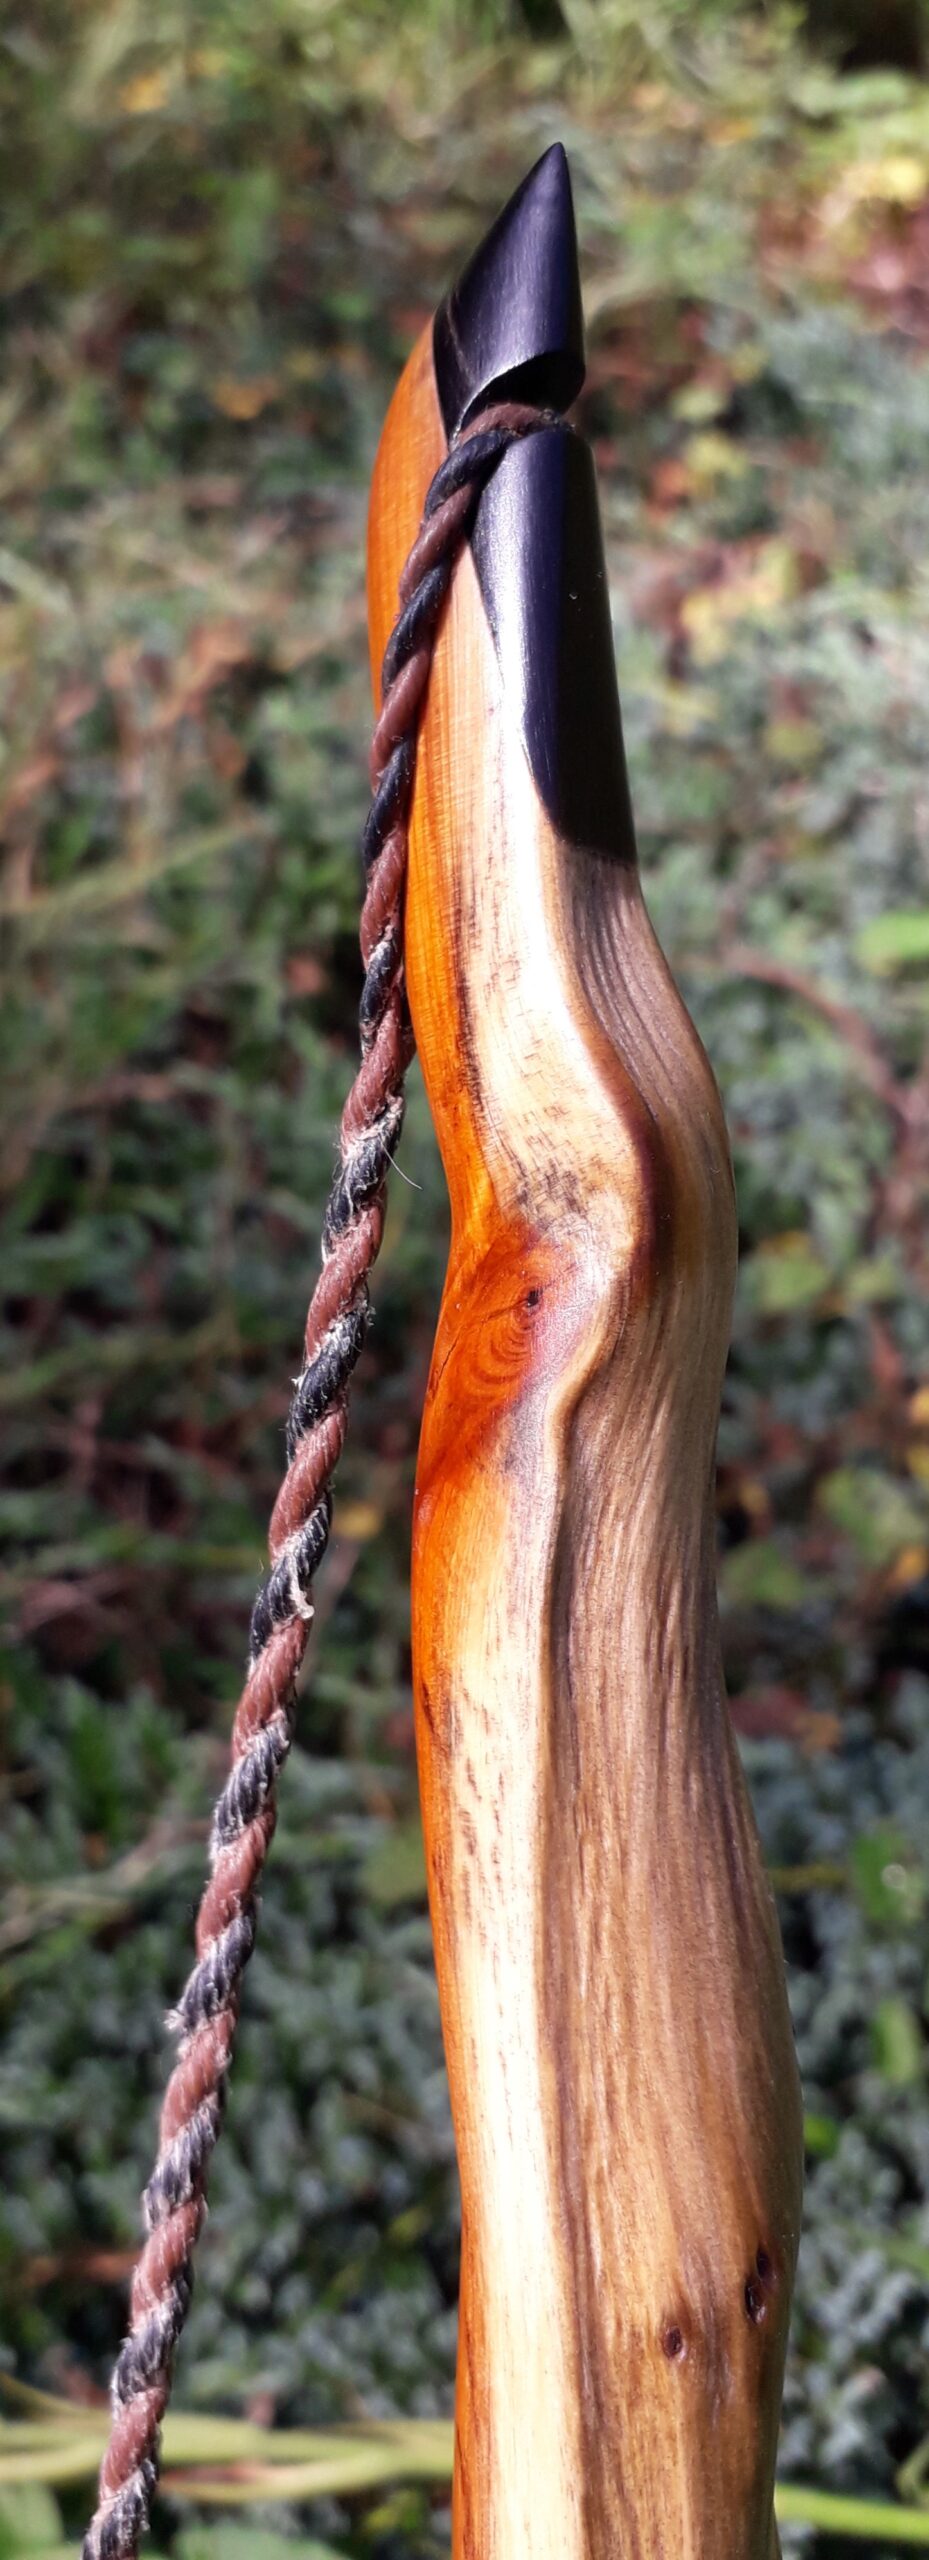
Happy with the tiller and having proven that the bow was a survivor, I cracked on with finishing her. I gave her a pair of buffalo horn tip overlays and a good sanding and polishing before sealing her up with a bunch of coats of oil. The handle was begging to be kept simple and since she was always destined to be shot off the knuckle, I opted to wrap the handle primitive style with a nice strip of deer rawhide which I stained black with an application of bark tannin solution followed up with some home made iron chloride. The black rawhide wrapping matched the buffolo horn tips which I thought was both fitting and functional.
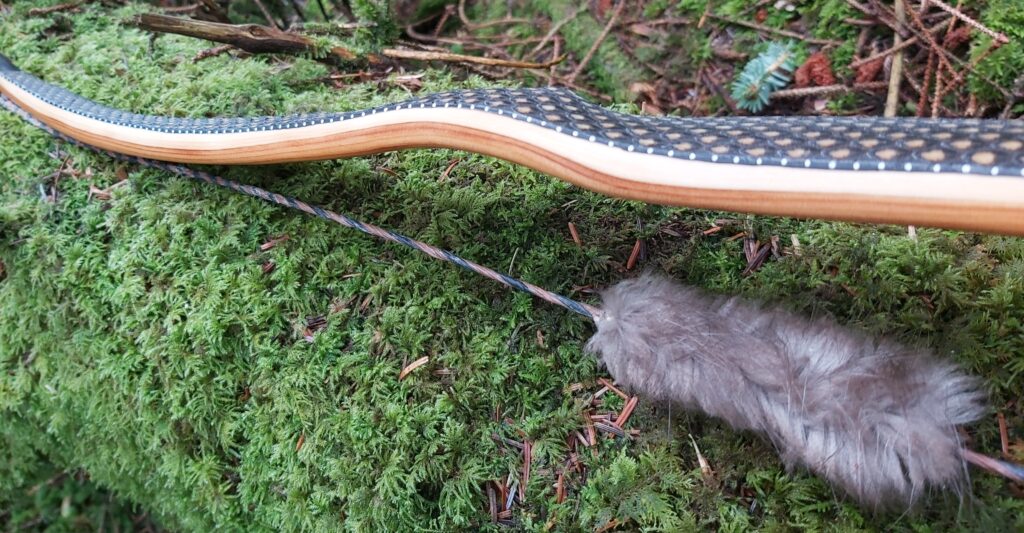
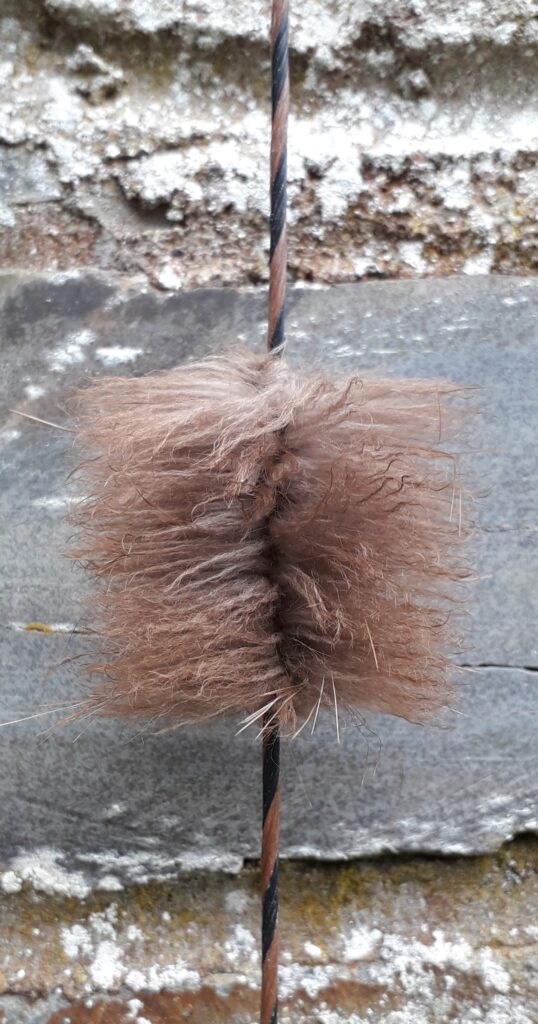
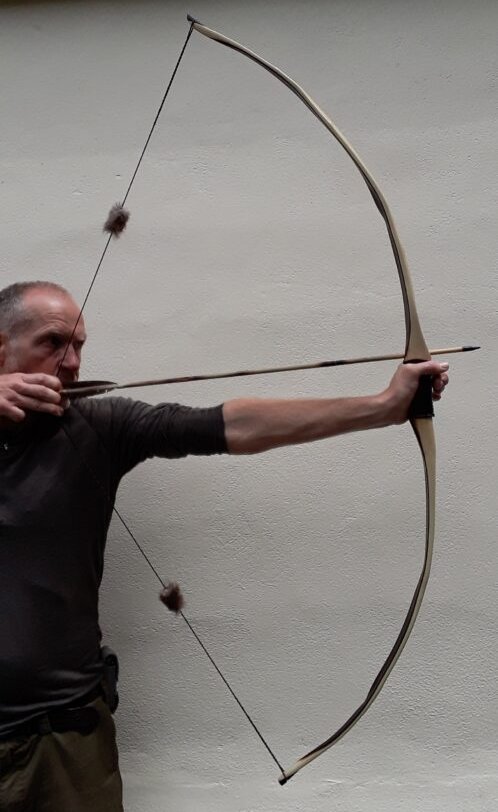
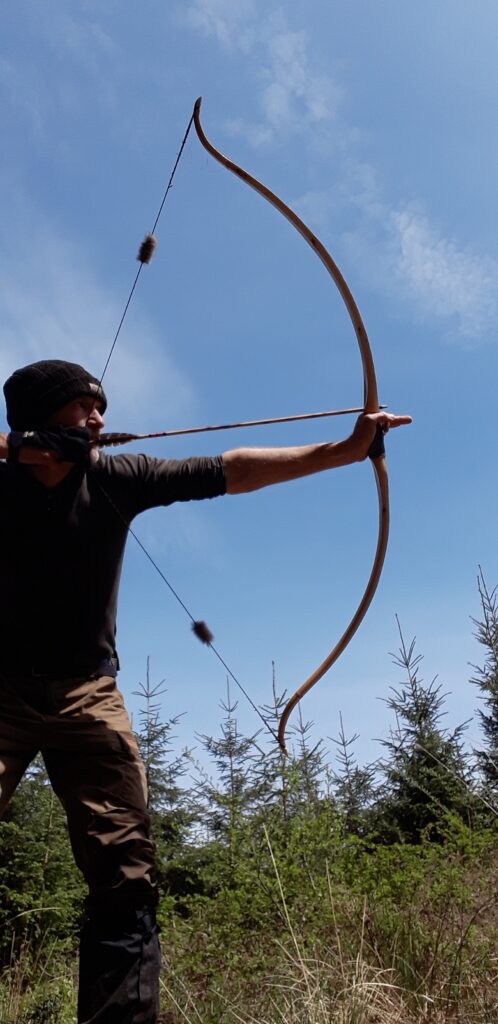
With the bow finished I put another hundred or so arrows through her to see what she felt like now the handle was wrapped up and the tips had been refined. She was now more comfortable to hold and a fair bit quieter to shoot too. The beaver fur string silencers were helping in this regard but I always notice a reduction in vibration when a bow has mass reduced from the tips. And since the tips on this bow were reduced by quite a bit after the initial shooting in phase, I felt sure that the final fine tips not only quietened the bow significantly but they also sped her up a fair bit too. A final check on the scale was reading 52# at 28”. A good weight for most flatty fanatics (myself included). I really like this bow. I think she looks great and is a real character. She’s a pleasure to shoot being quiet, smooth to draw and pretty fast. She was sending 550 grain arrows whistling along to their destination with ease and I was quietly entertained by the noticeable slap that those stump heads were being delivered with.
Anyway, I hope you enjoyed the story of her build and like the look of her. This bow is now listed for sale in my Etsy shop and is available for purchase here: Primitive Character Yew Longbow 5228 – Etsy UK
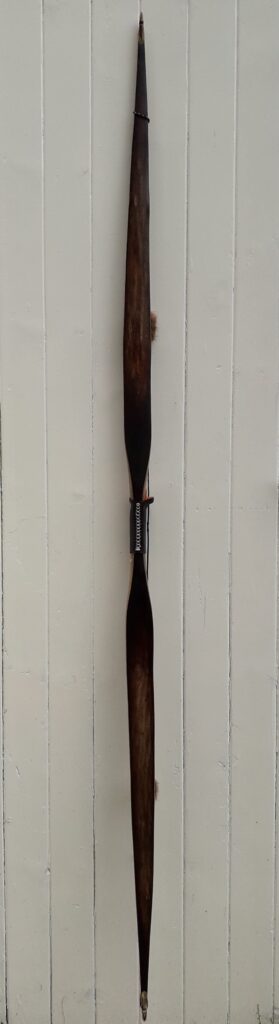
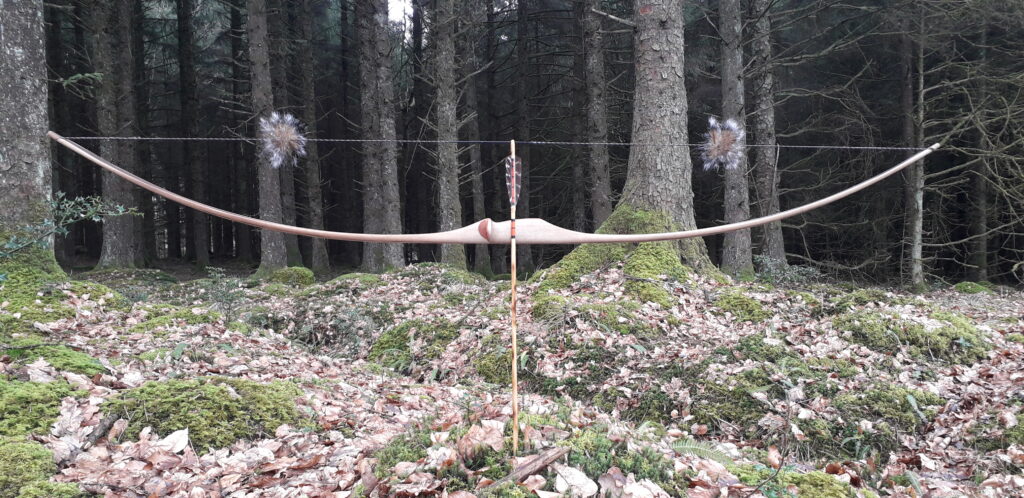
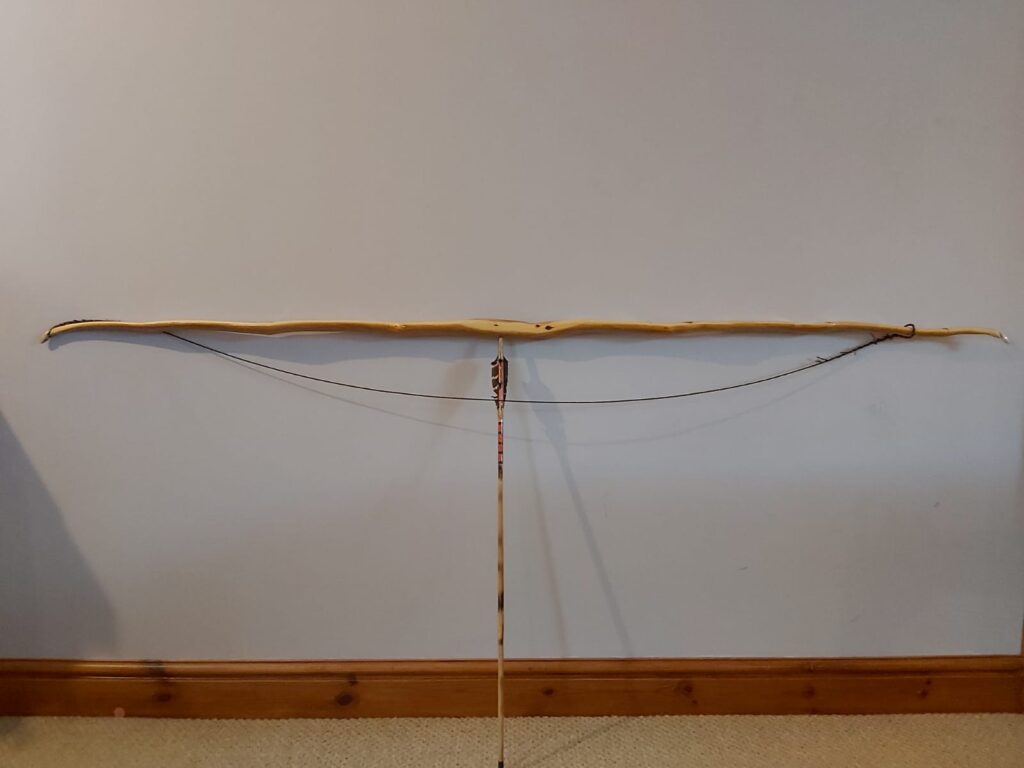
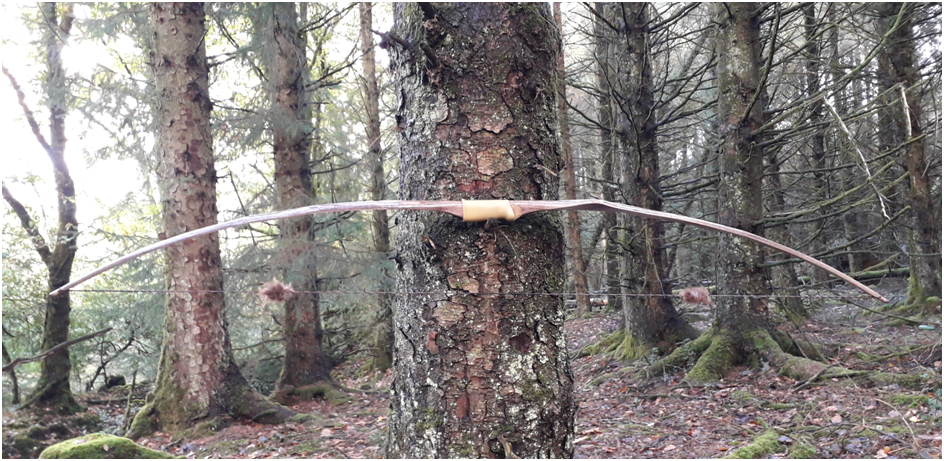
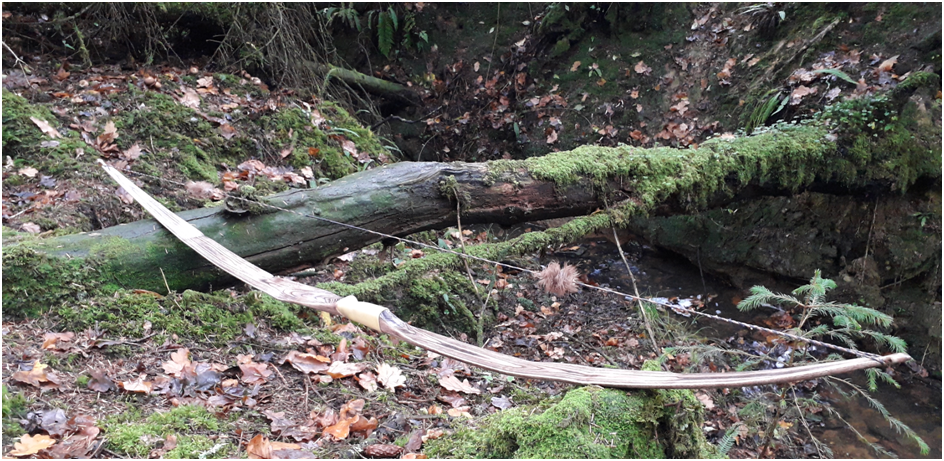
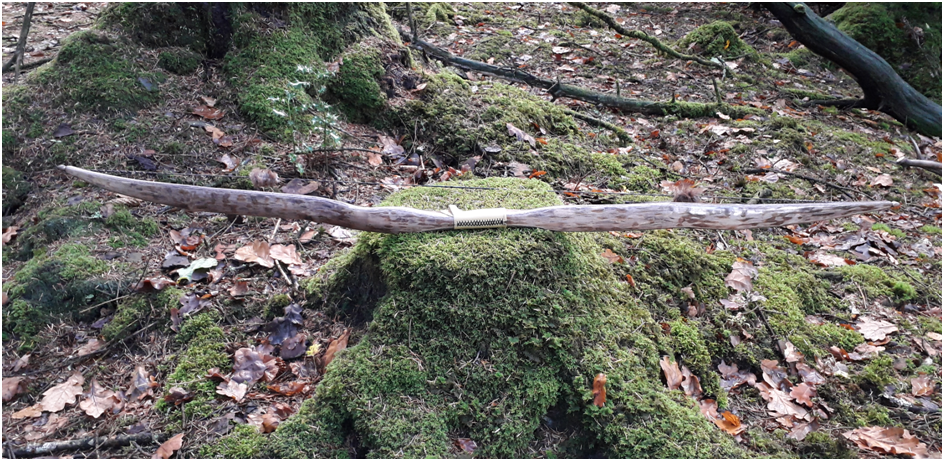
Here are her stats and a bunch of pics. Enjoy!
Mass: 664 grams
Length NTN: 61.5”
Width: 2” at widest
Tips: 4” static 3/8” wide at tips
Back: Marginally crowned with undulations. Face profile pyramidal.
Belly Profile: Working limb sections undulating to mirror back, transitioning at the tips to D shaped then triangular cross sections.
Tiller: Elliptical 1/8” positive.
Brace Height 5 1/2″
Draw Weight: 52lbs at 28”