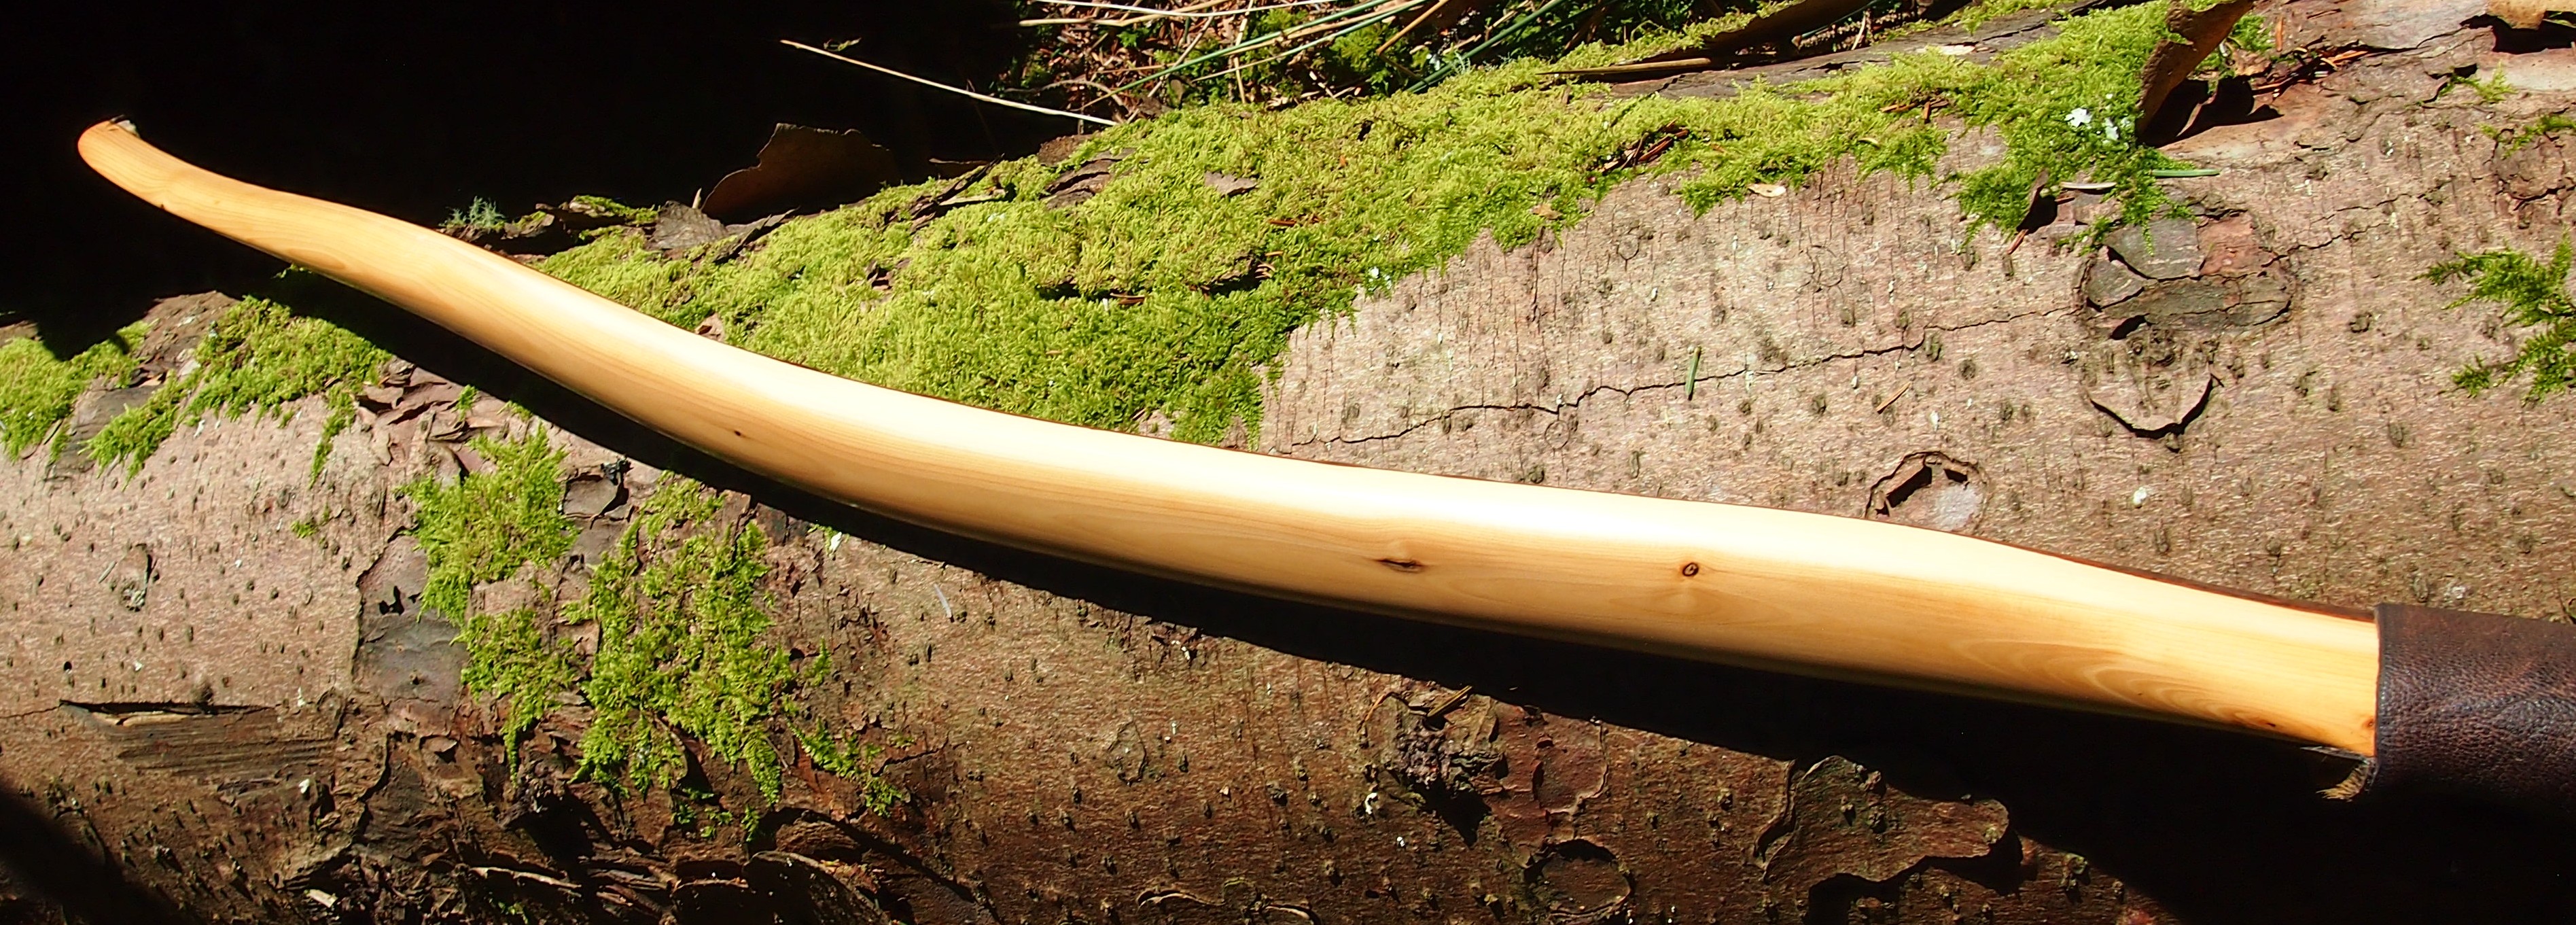
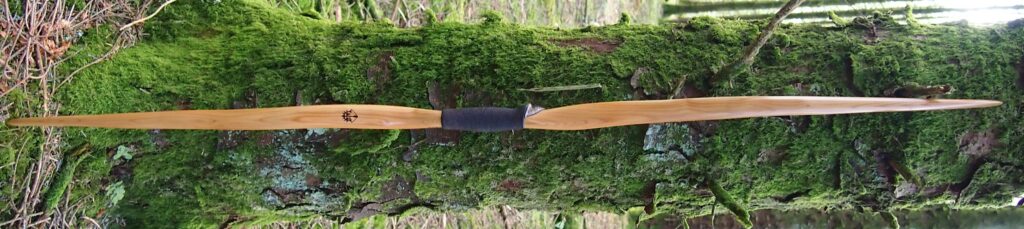
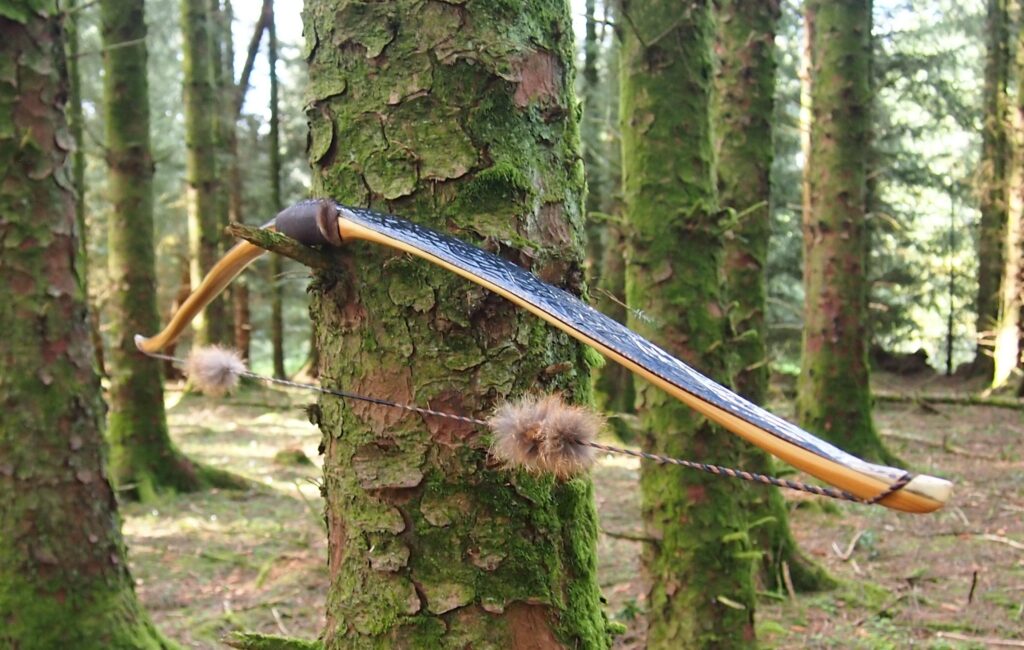
This bow was built from a really nice clean English yew stave which had been put up in my barn rafters to season back in 2020. It measured 68″ in length and had about 8 inches of almost perfectly symmetrical distributed natural reflex running from end to end. This was obviously way too much reflex to be used as it was, but with some tweaking, I figured most of that reflex could be retained and put to great use.
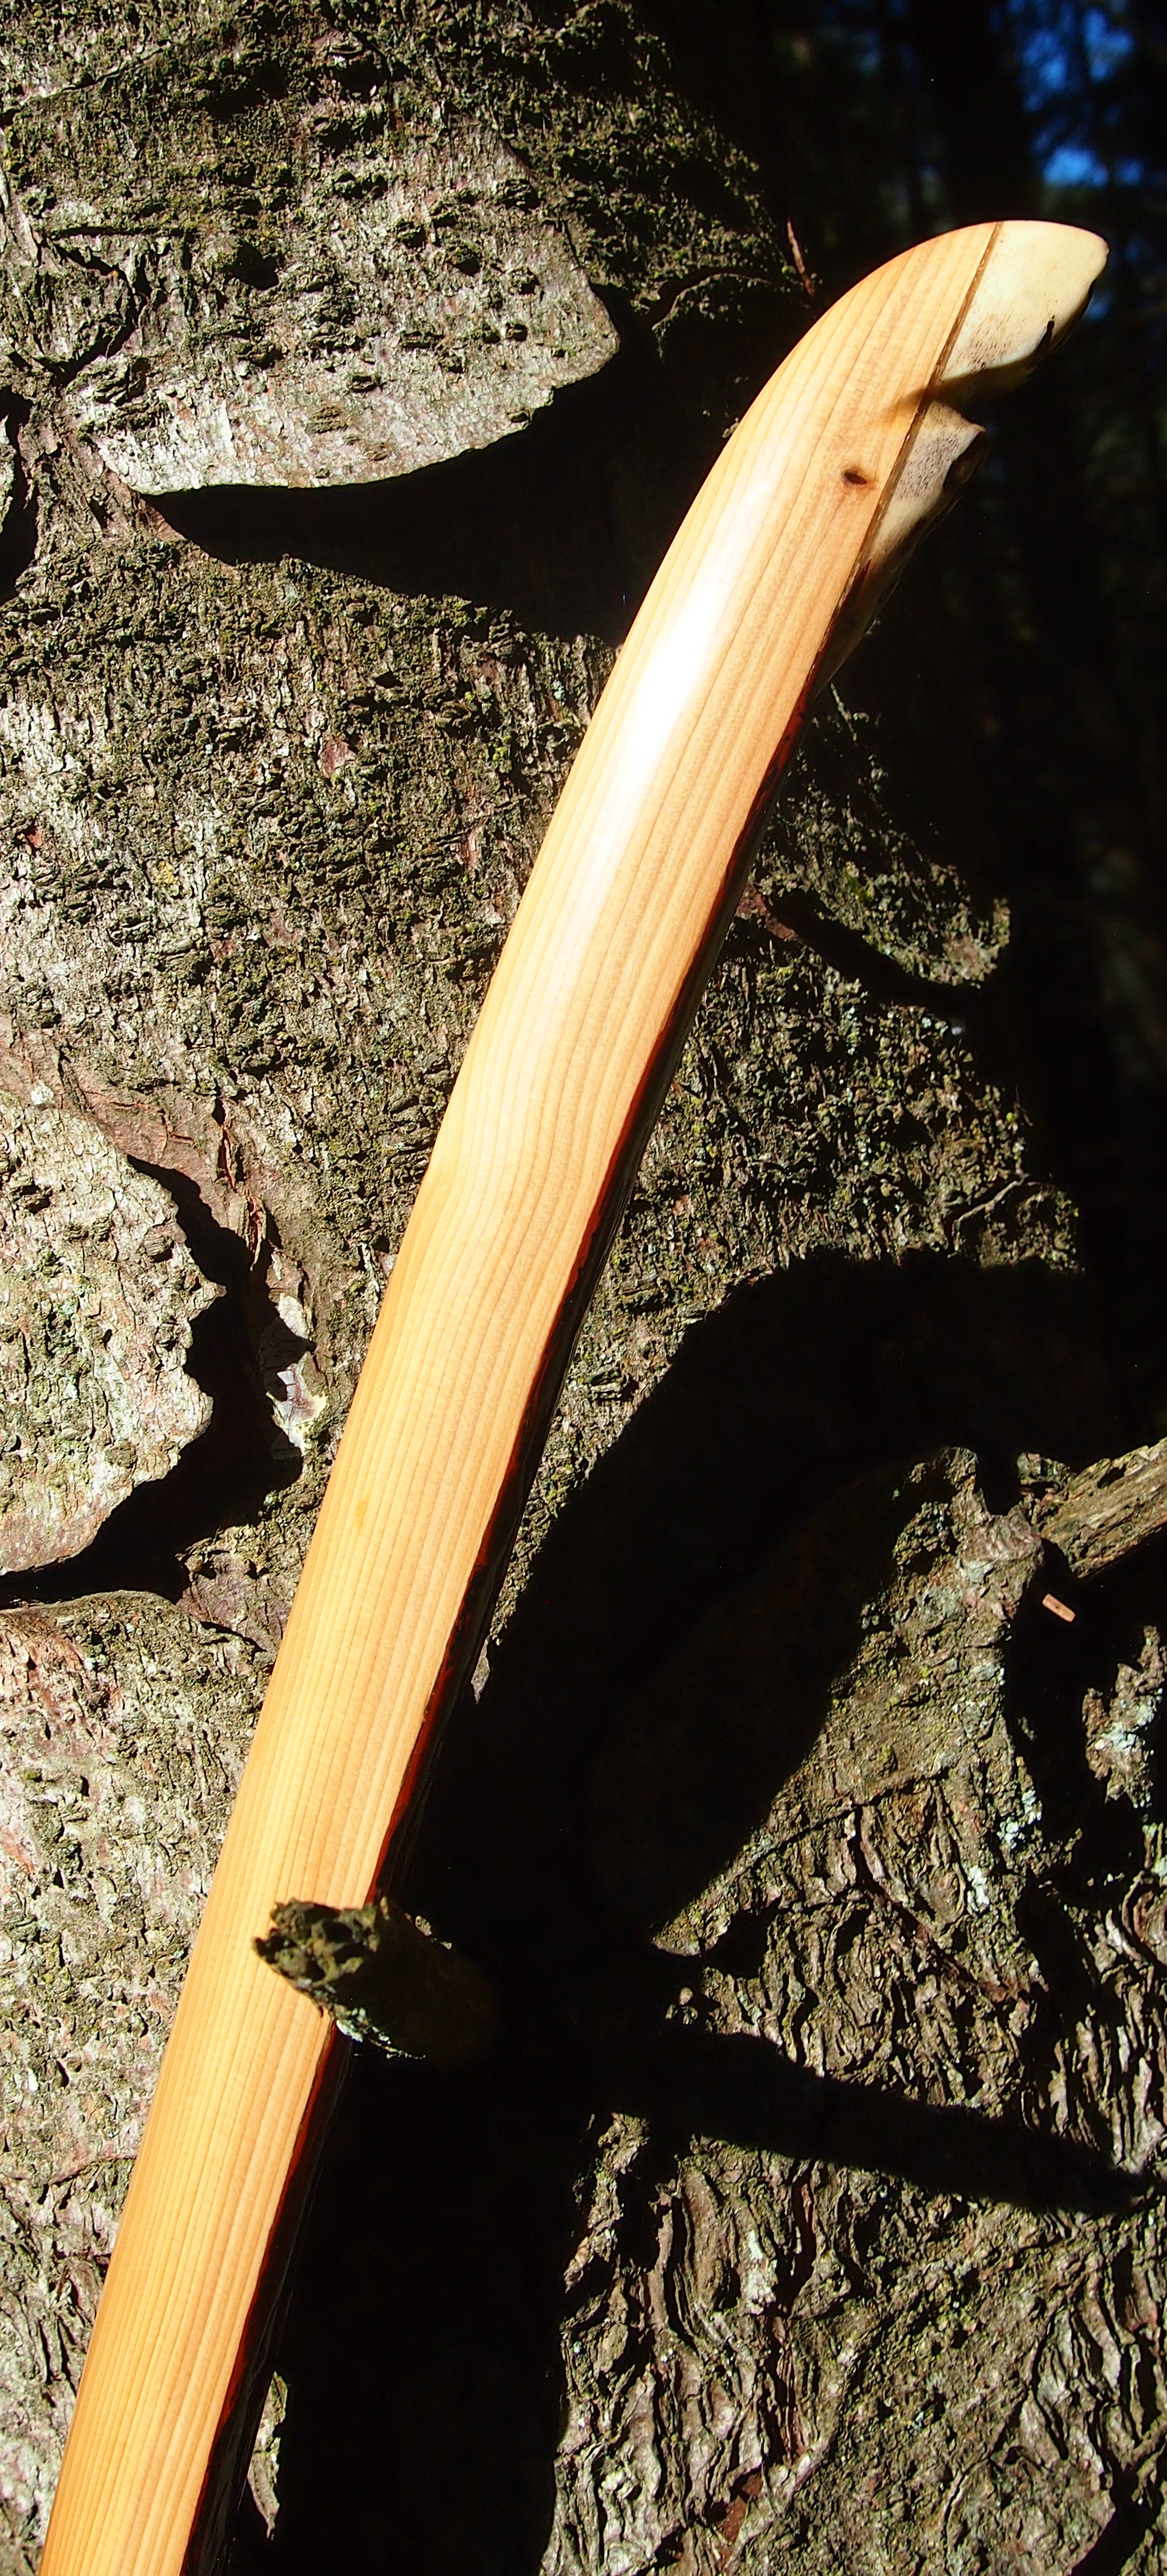
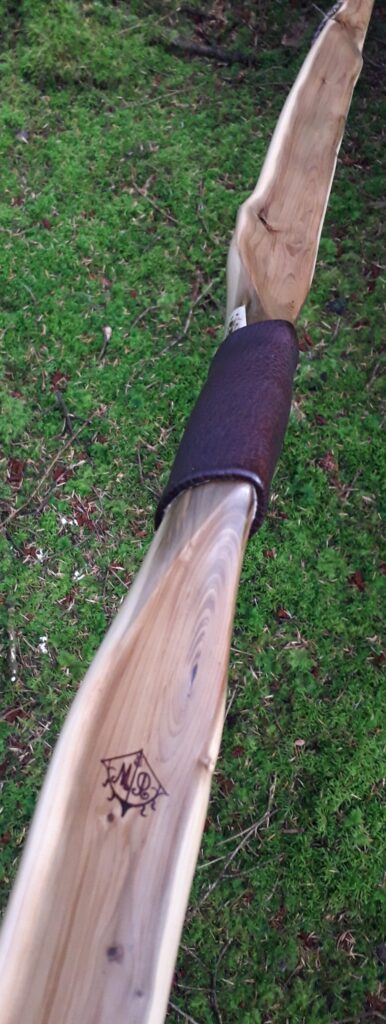
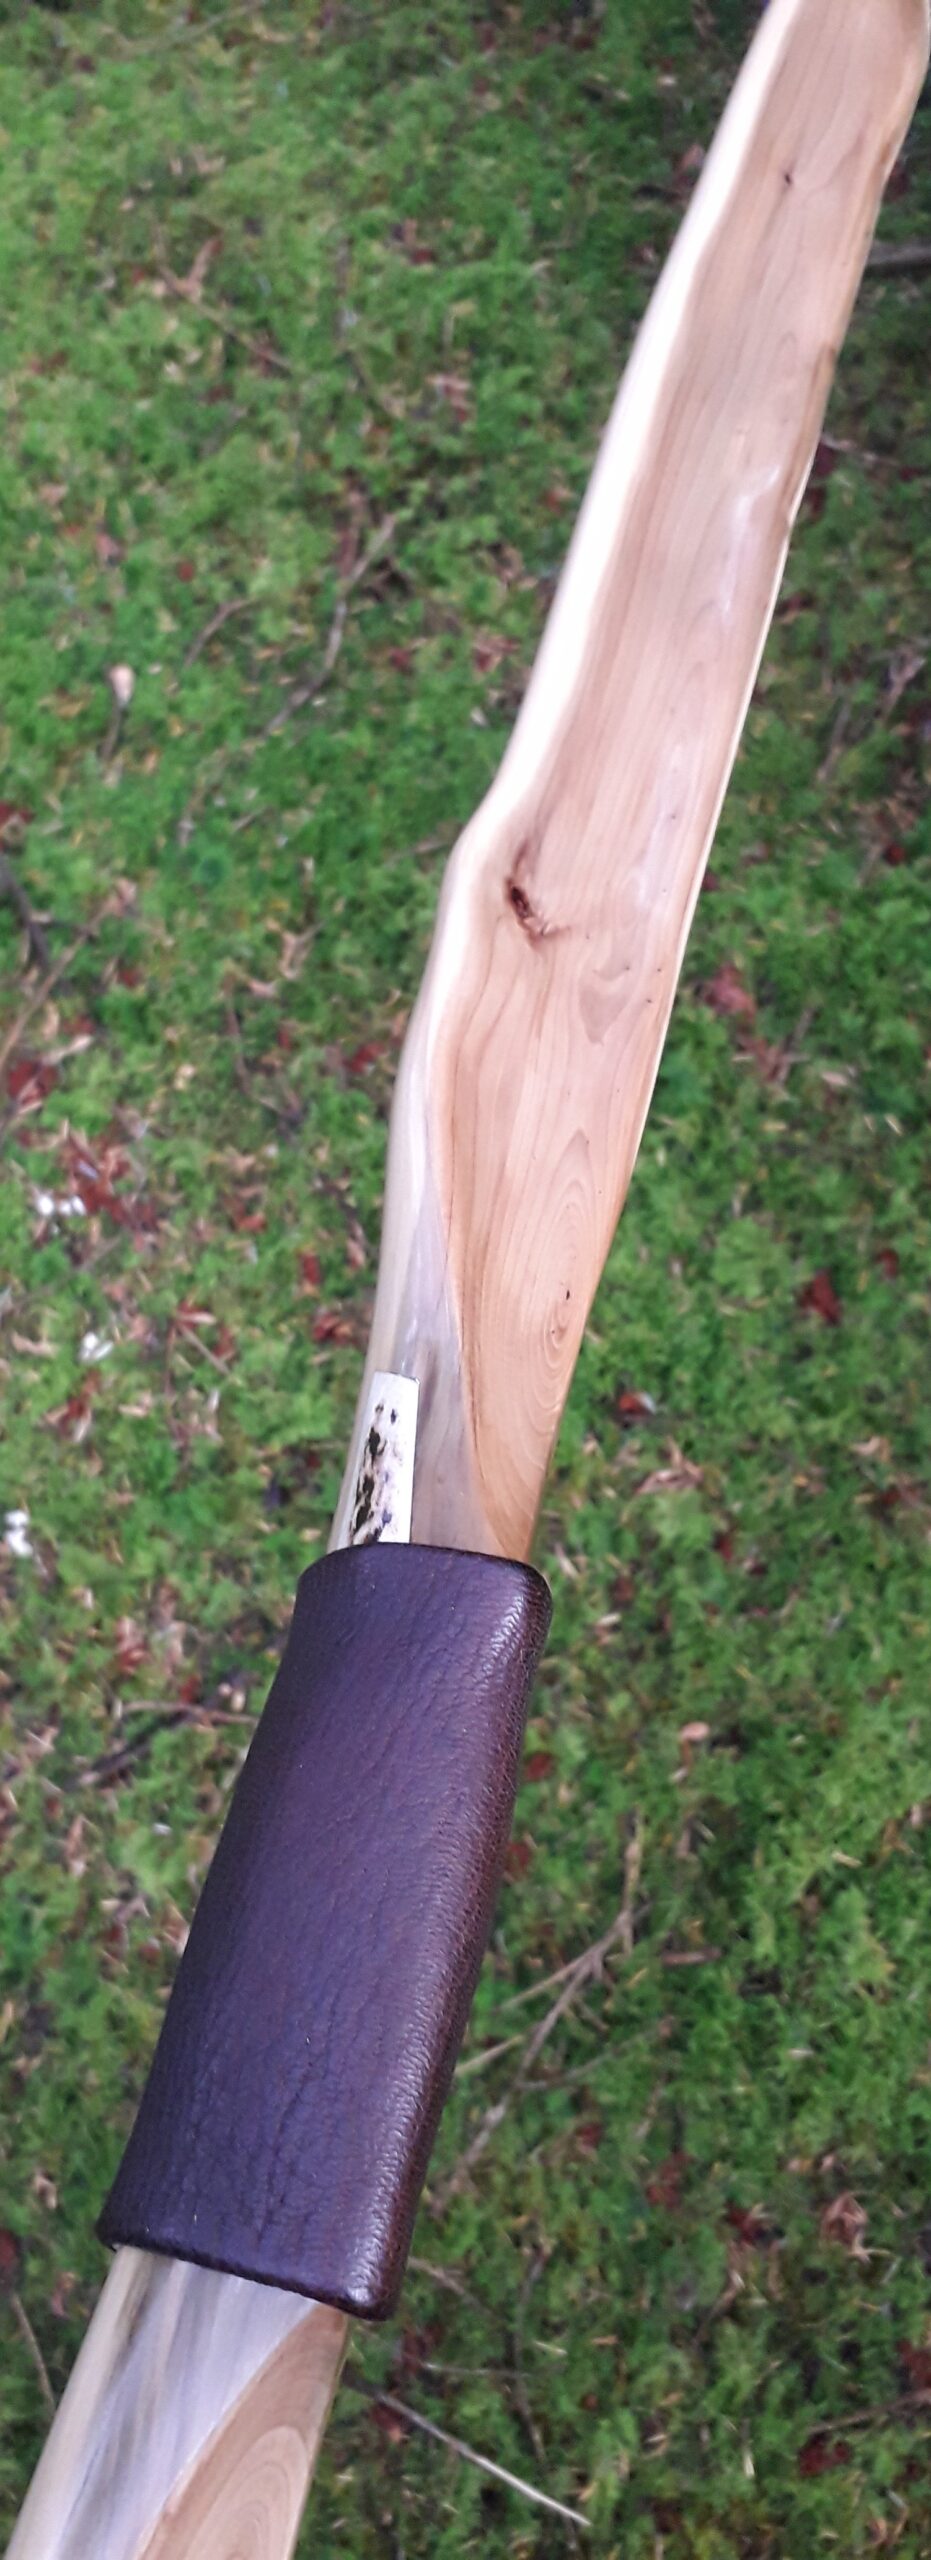
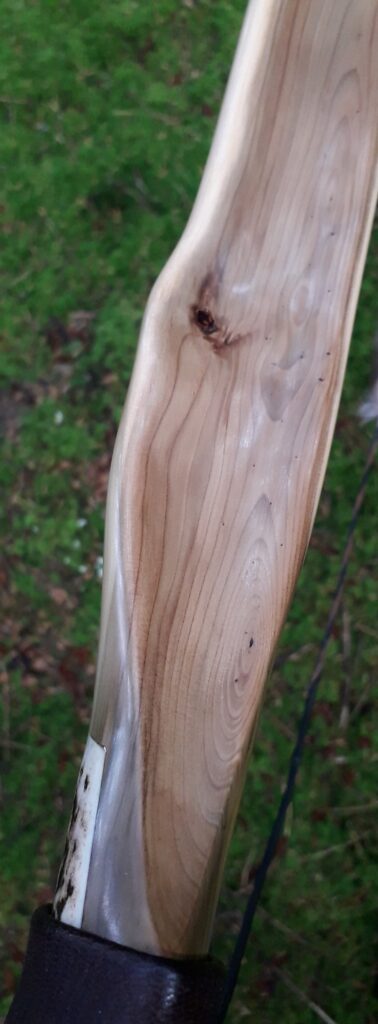
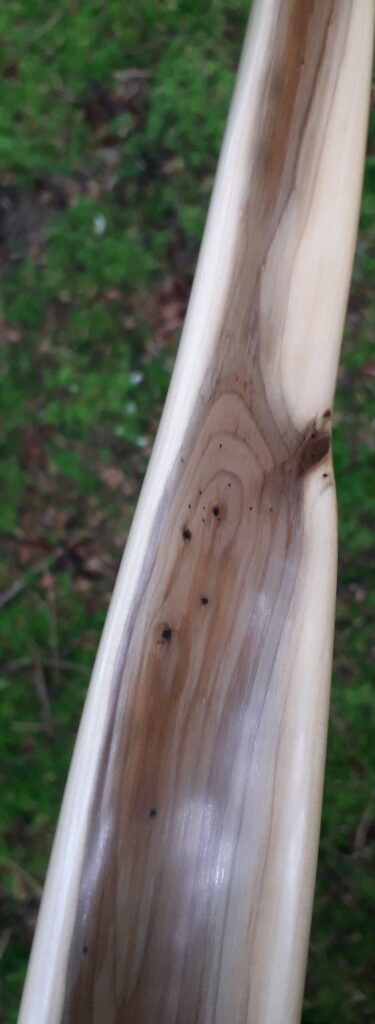
The cleanest face on this stave was going to make the back of this bow and it only had a couple of tiny pins showing through the sap wood/bark. If it wasn’t for the fact that the sapwood was so thick, I could have just popped the bark off and called the back done. But I clearly needed to get the sapwood down from around 1/2″ thick to something more like 3/16″. This would maximise the potential to incorporate all the lovely heartwood this stave had to offer. Plus I intended to sinew back this bow so in all honesty sapwood retention wasn’t even necessary.
Knowing that the back of this bow was going the be backed with 3oz of Red deer leg tendon sinew, I didn’t have to worry about chasing a ring on the back. The sinew would make the back of this bow totally bomb proof so I just hogged off nearly all the sapwood leaving just a bit around the sides as an aesthetic compliment. I do like some sapwood on a yew bow, even if just to contrast against the heartwood in that classic “coffee with cream” composition. So I left enough sapwood around the edges so as to please the eye, but in truth this bow is comprised of mainly heartwood.
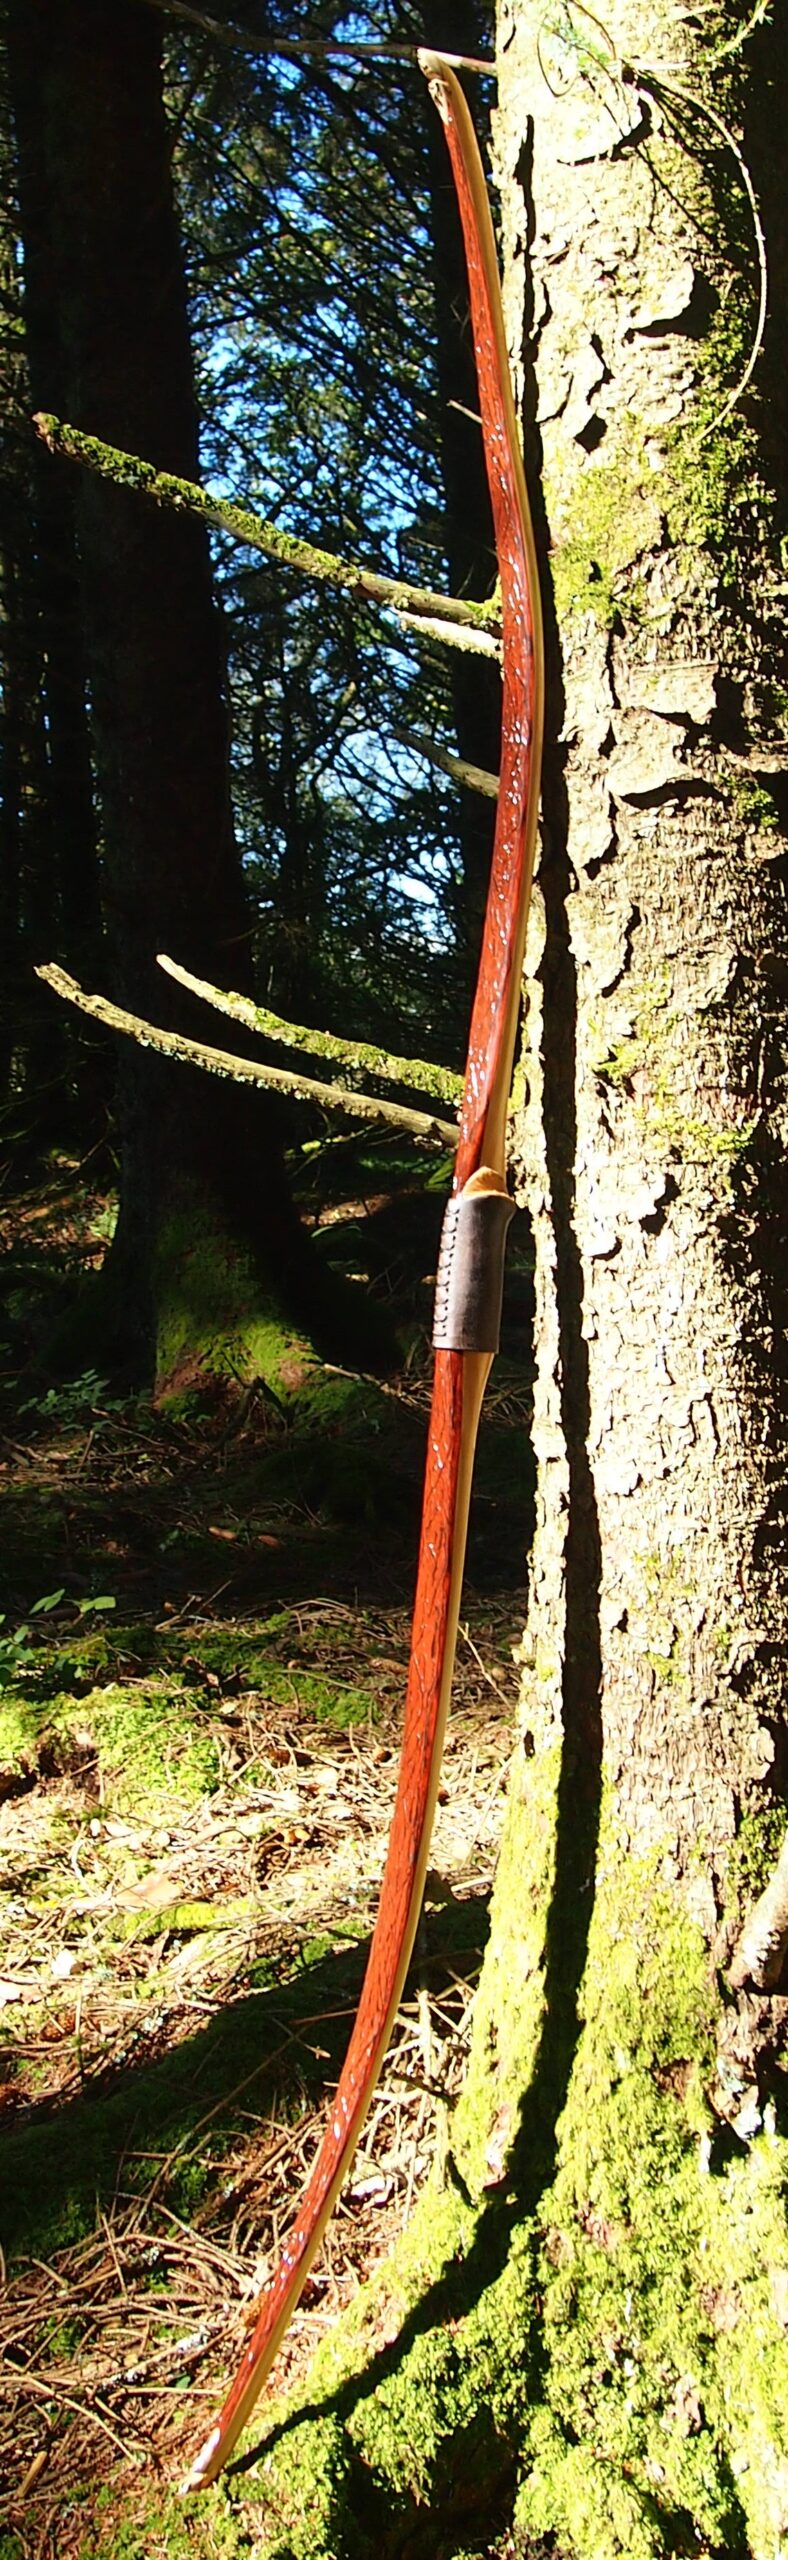
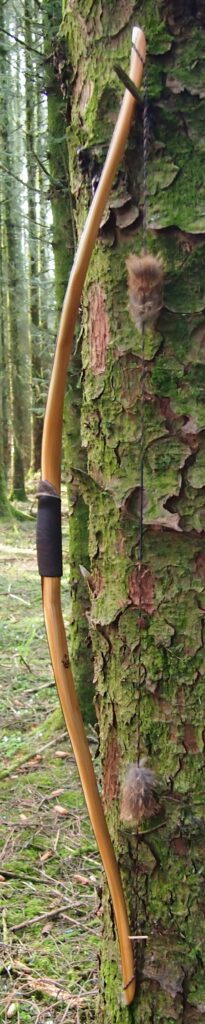
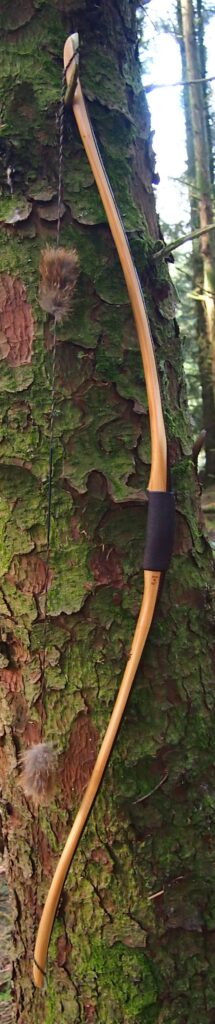
After flattening the back out evenly I laid out the bows face and thickness profiles so I could get the overall dimensions roughed out. For this build I planned on making a R&D pyramidal flatty but not too wide and with a slightly thicker rounded belly. So once the stave was roughly bow shaped I steamed the handle section and put the stave onto one of my R&D forms so I could bend a good bit of deflex into the handle. This was to reduce the overall reflex to something more manageable so it would be easy to string and less stressed at full draw.
Whilst the stave was on the form I used the heat gun to straightened out a slight issue with the string alignment. And I also took the opportunity to even up the reflex in both limbs so that they were as close to matching as possible. After a couple weeks for the handle section to dry out post steaming, I took the blank off the form and was happy with the overall shape and alignment.
With the deflex now added to the handle the blank was now carrying around 3″ of overall backset/reflex, which was far more realistic and functional. Next the blank was sinew backed, wrapped up and put away fixed to a drying form to retain the wonderful new shape and to allow the sinew to fully cure for 6 months.
After the sinew had cured out completely, the stave was inspected then very quickly tillered out to 26″. I find that blanks which have been shaped optimally prior to tillering are so much quicker and easier to tiller to full draw due to the even shape and profile achieved before the bow is asked to bend.
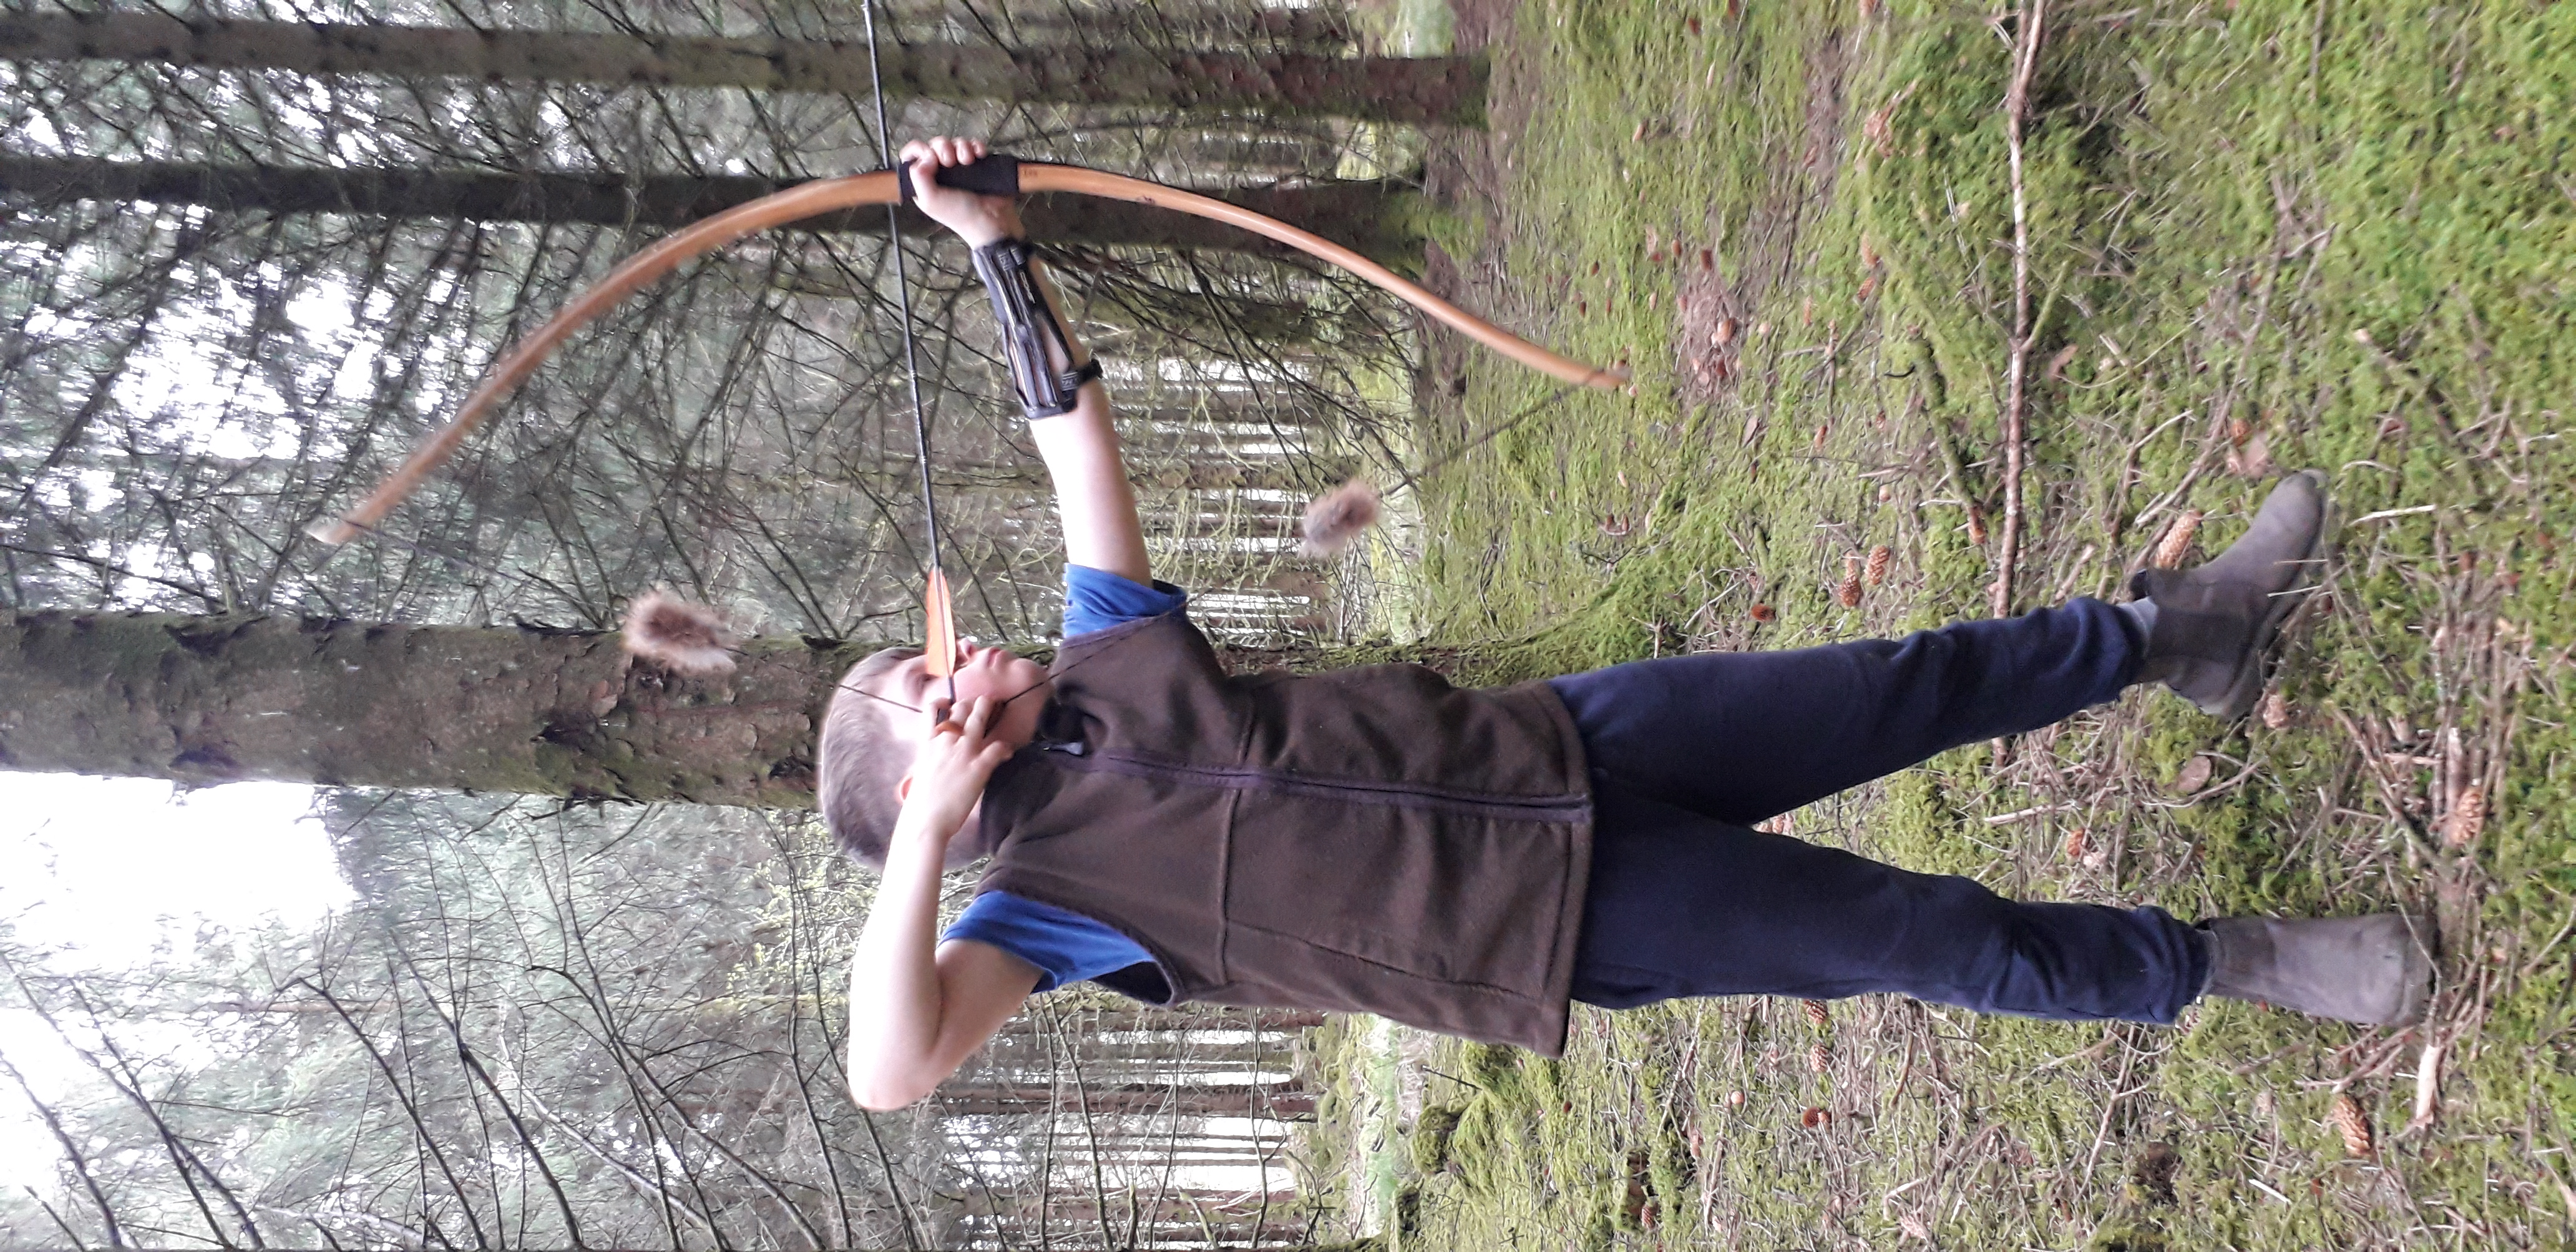
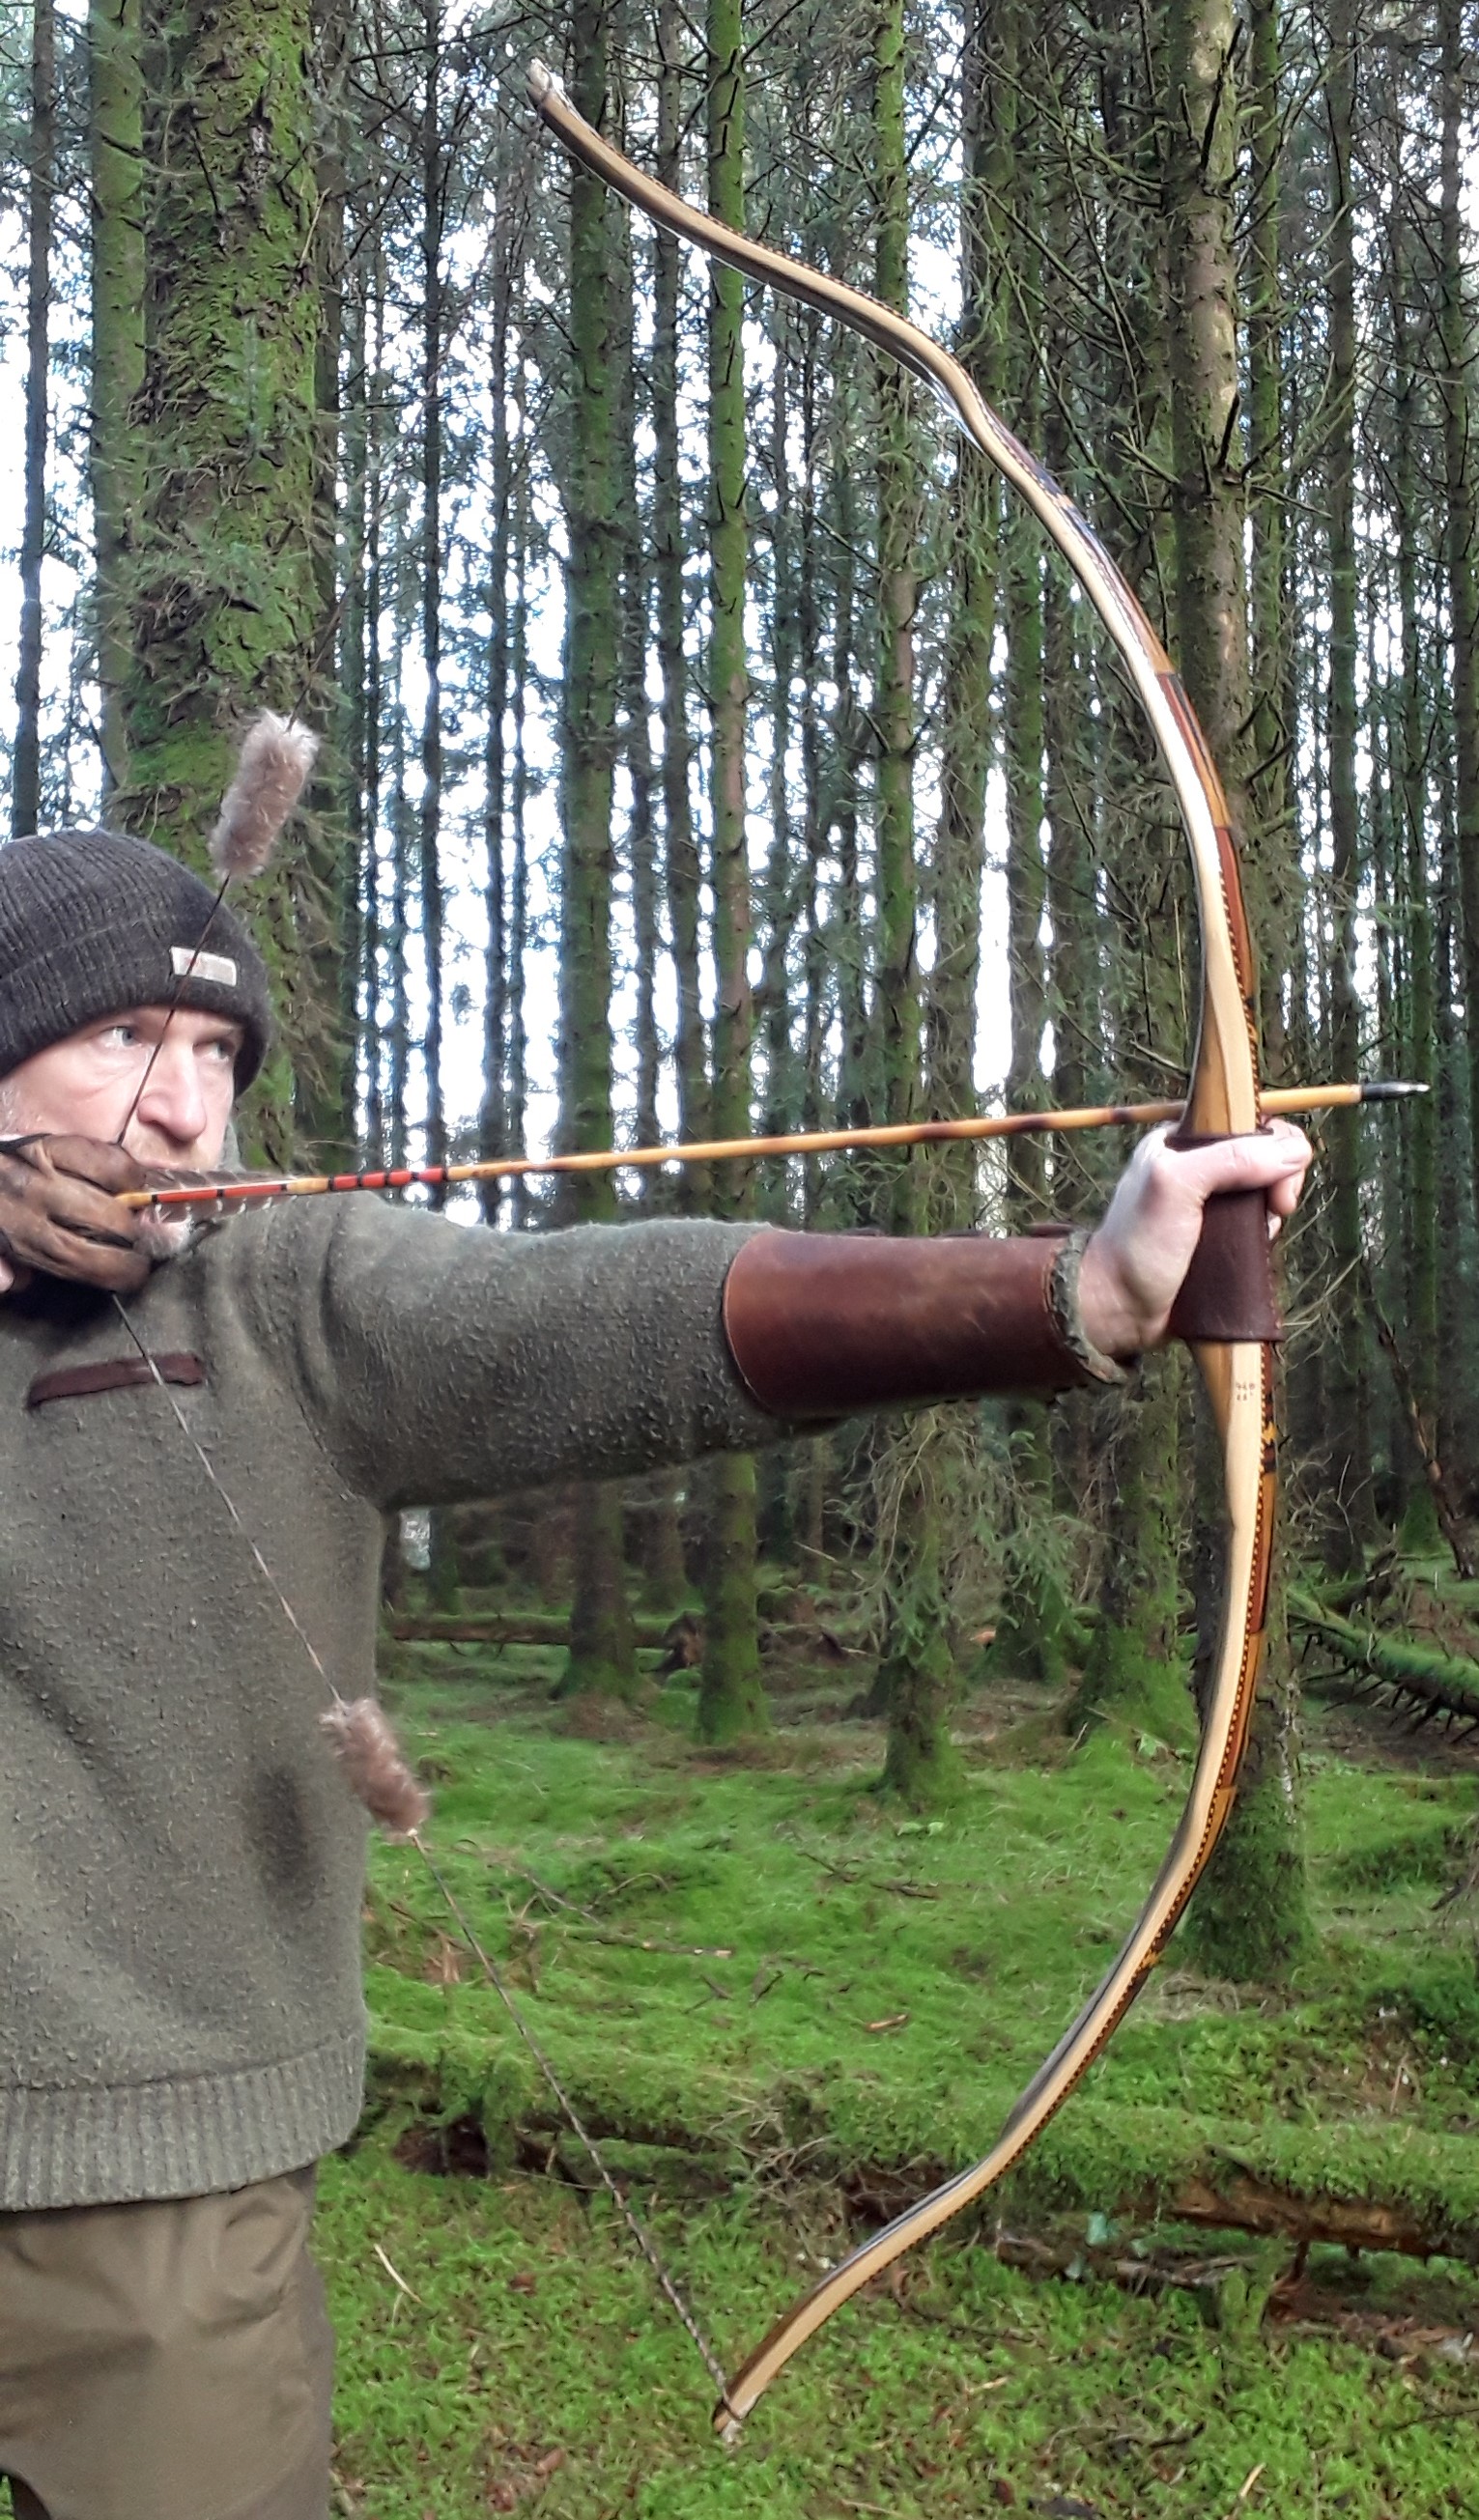
Once tillered to a point where the bow could be shot, I used it as my “stumping bow” for a couple of weeks of stump shooting out in the woods. The reflex held solid, as did the positive tiller and string alignment. Shot in she was registering 45 pounds of draw weight at 28″, which was exactly my intended target draw weight, so it was time to move onto finishing touches.
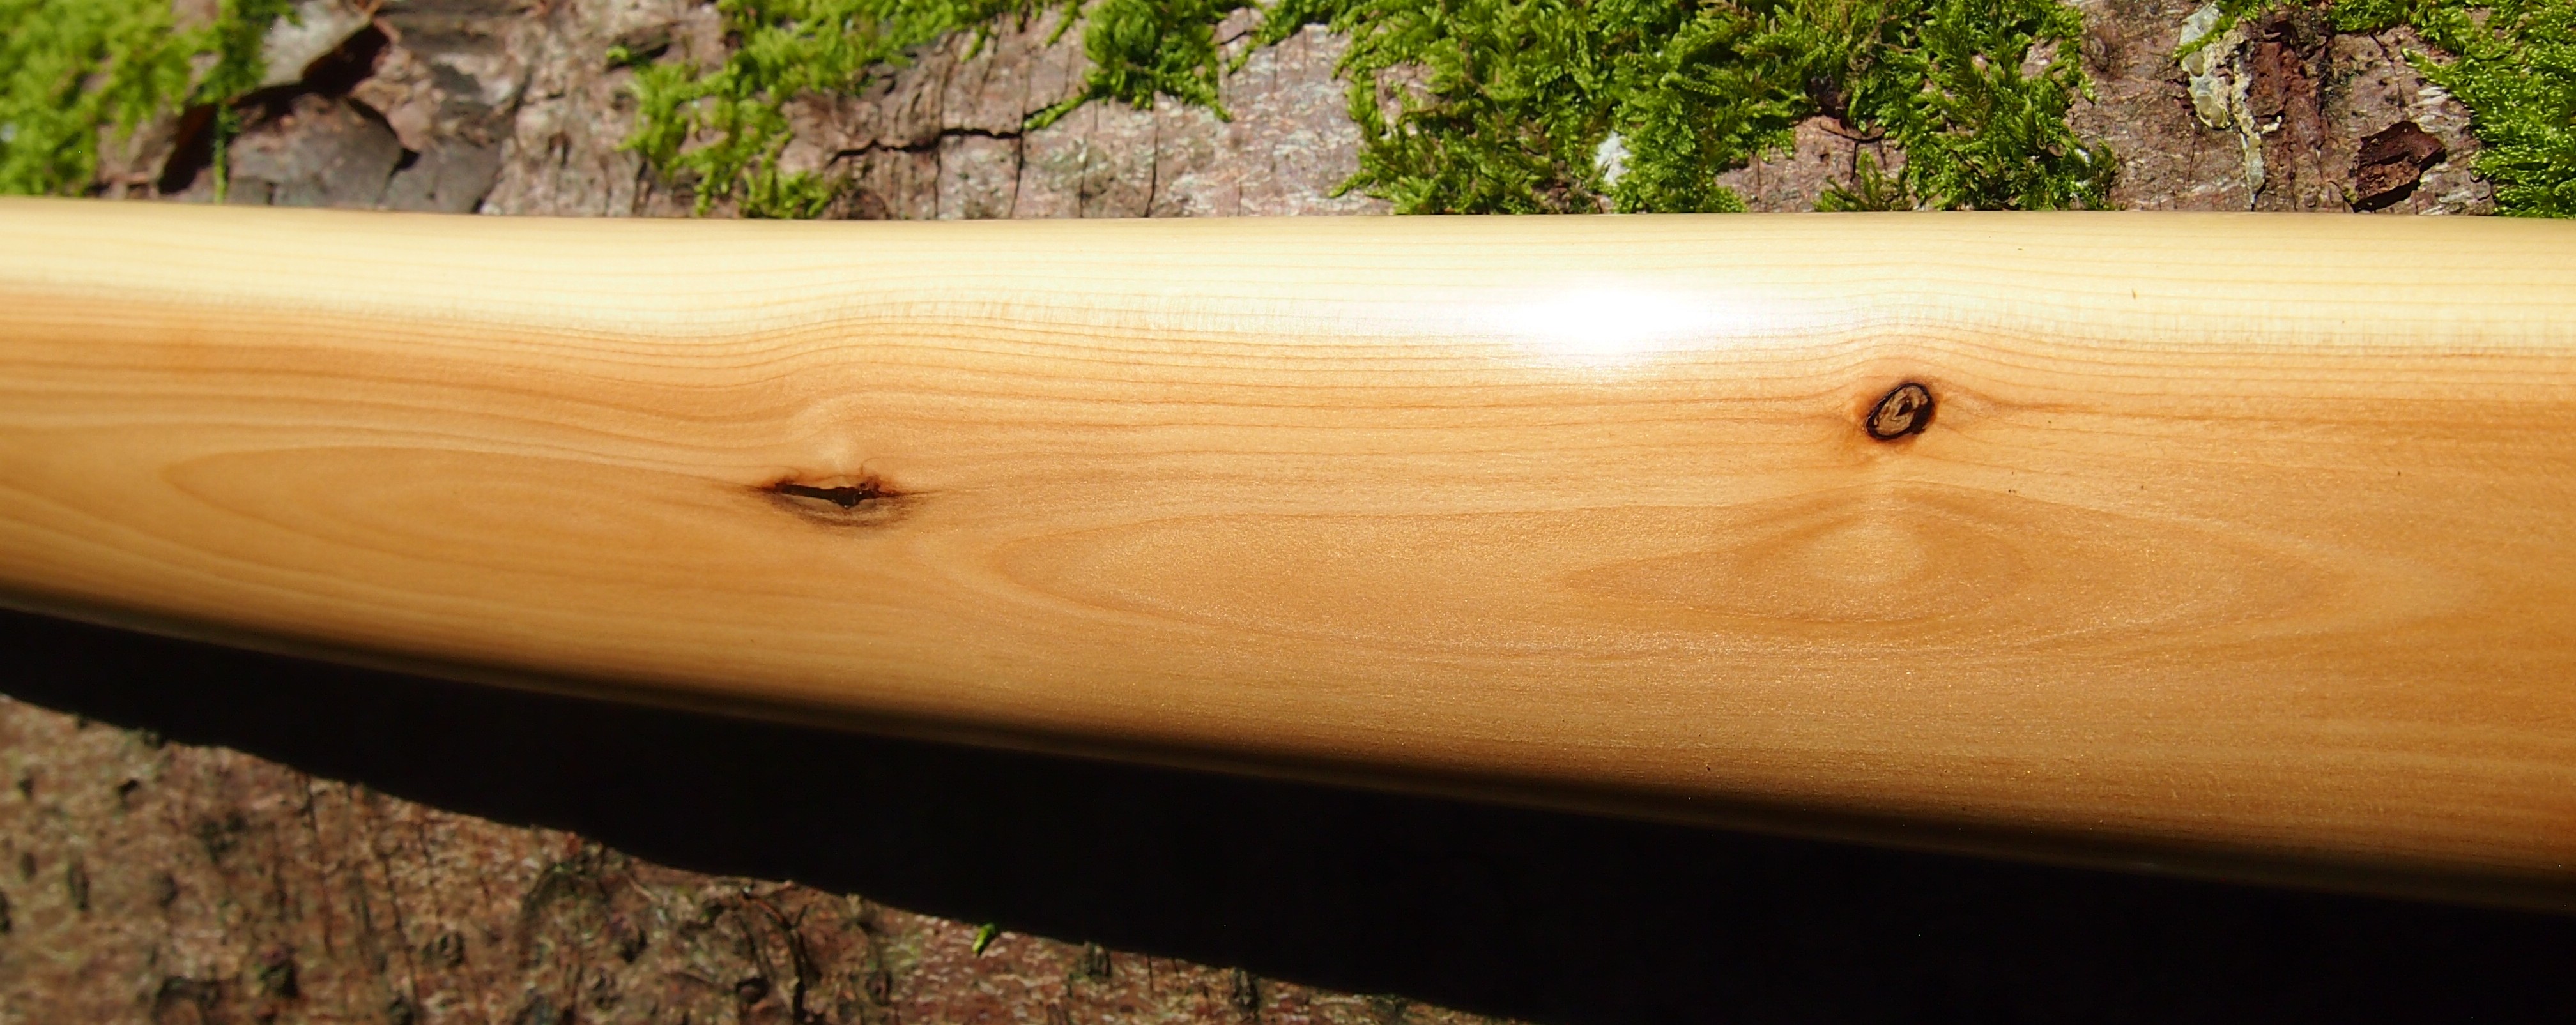
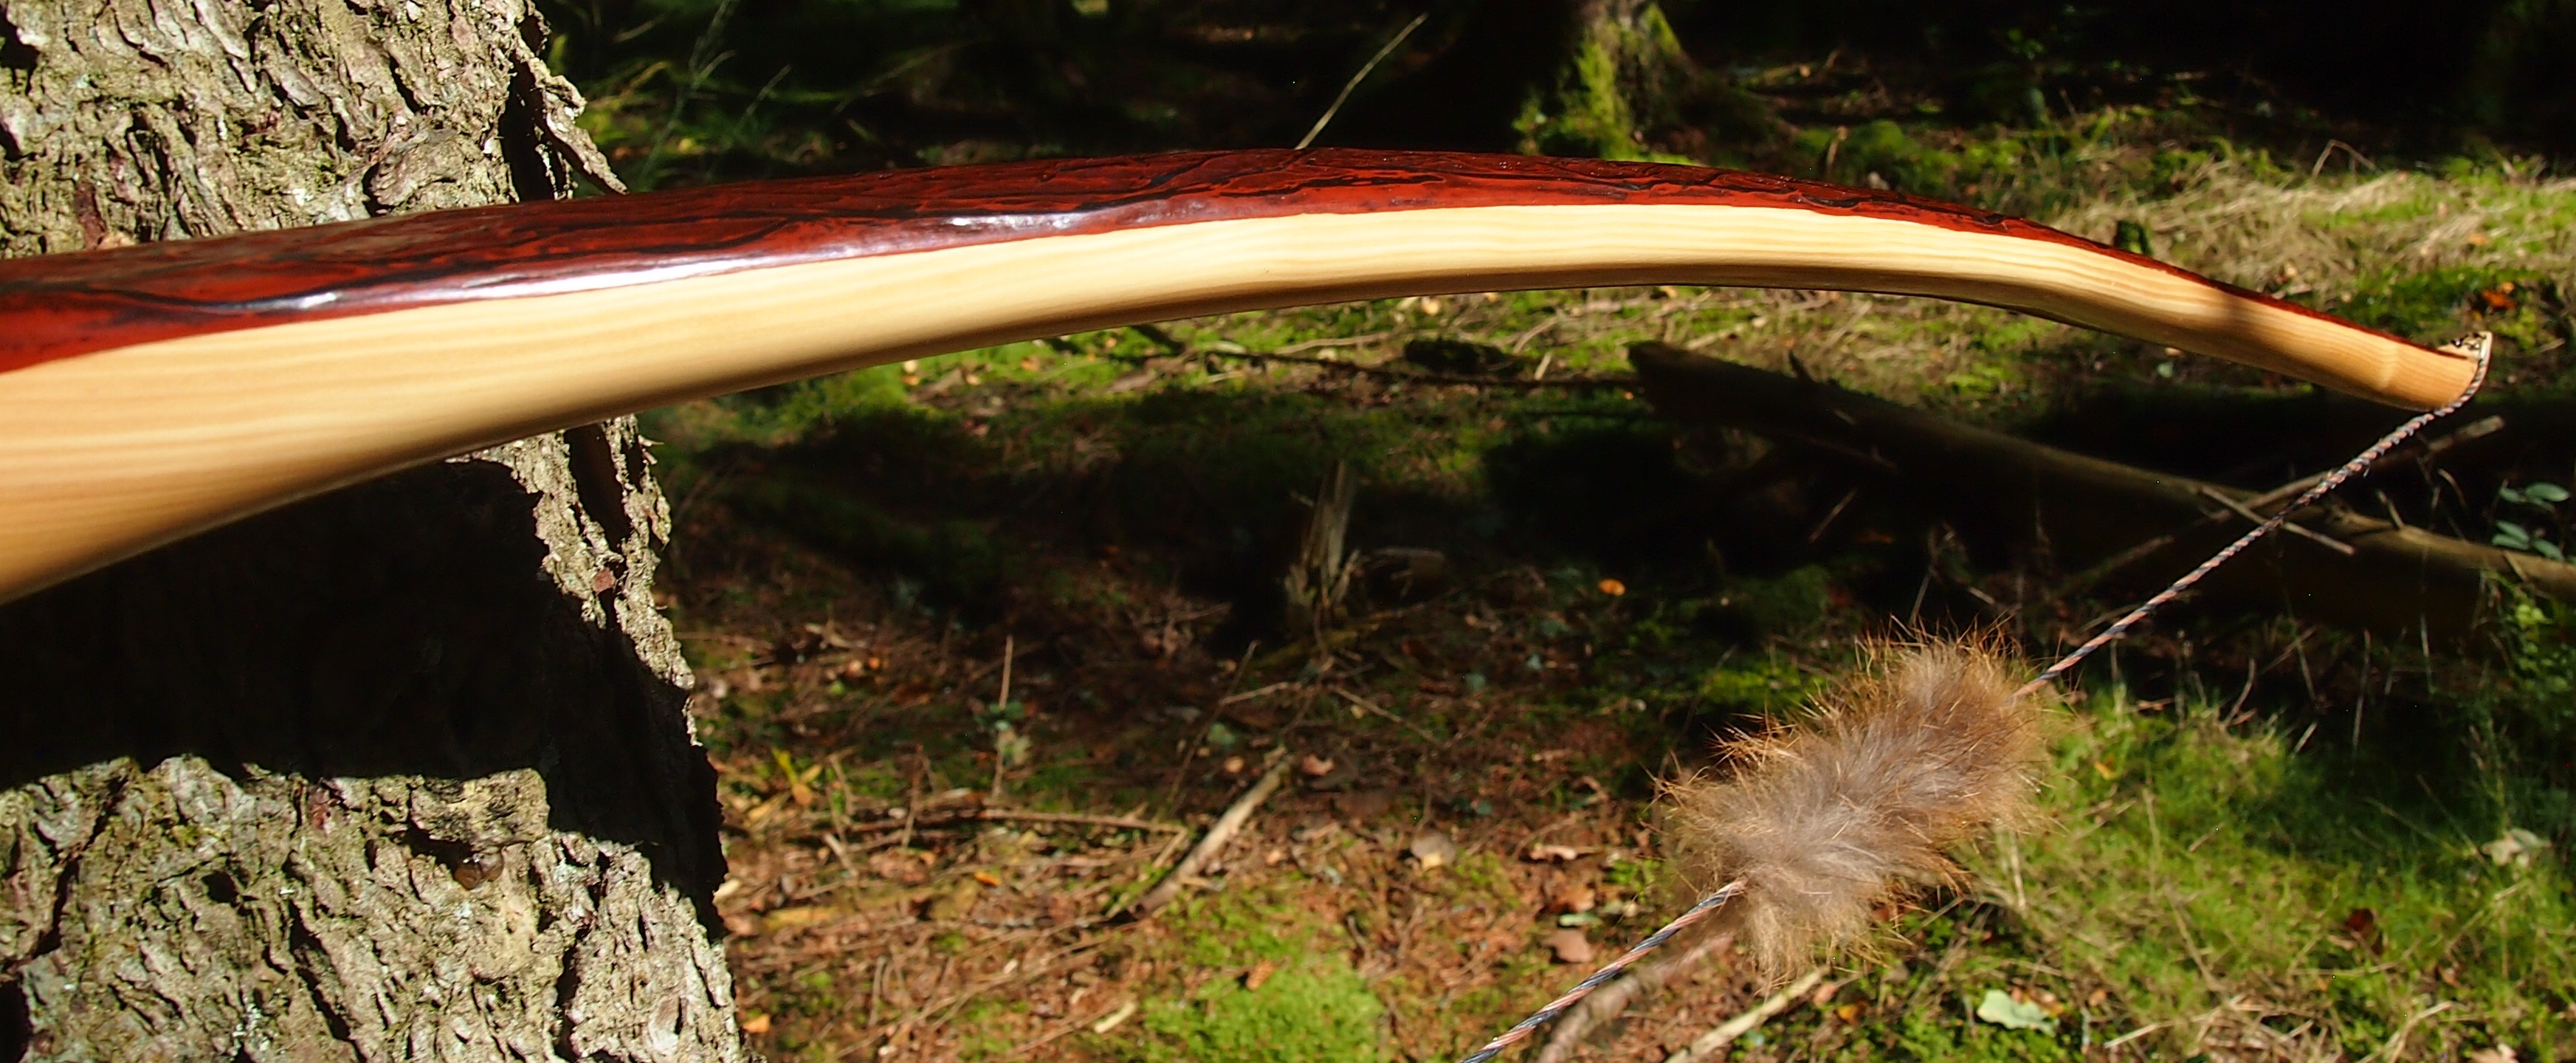
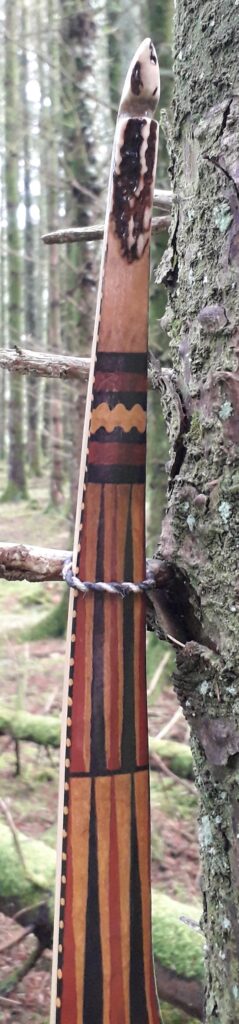
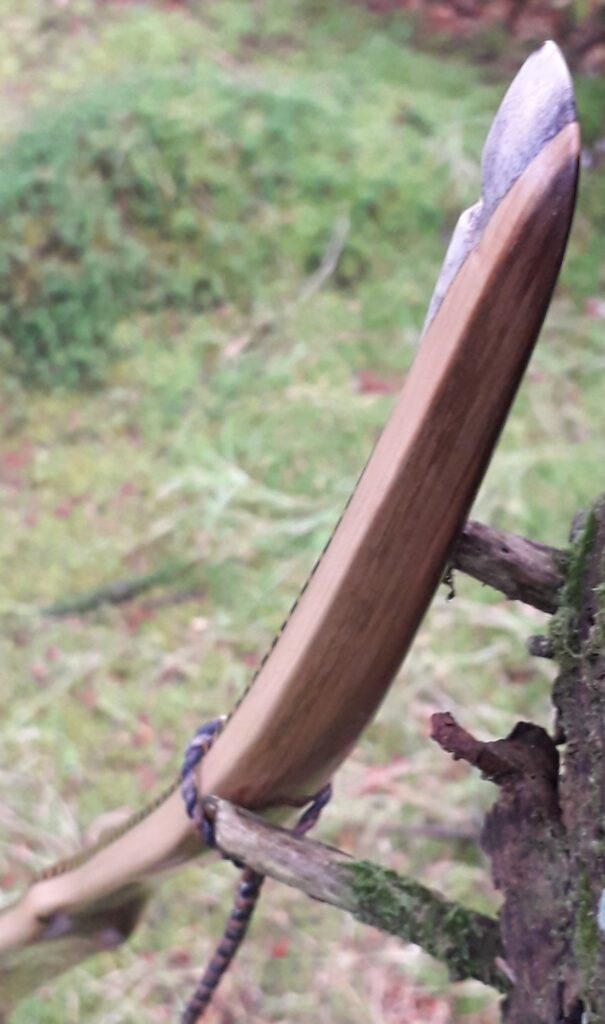
This stave was a very dense, high mass stave, and was noticeably heavier in the hand than other bows I’ve made of similar dimensions. So in order to minimise any kick that high mass limbs can produce upon string release, I opted to reduce the width of the limbs outer thirds as much as I dared in order to reduce the mass in the tips as much as possible and tame any kick felt in the hand.
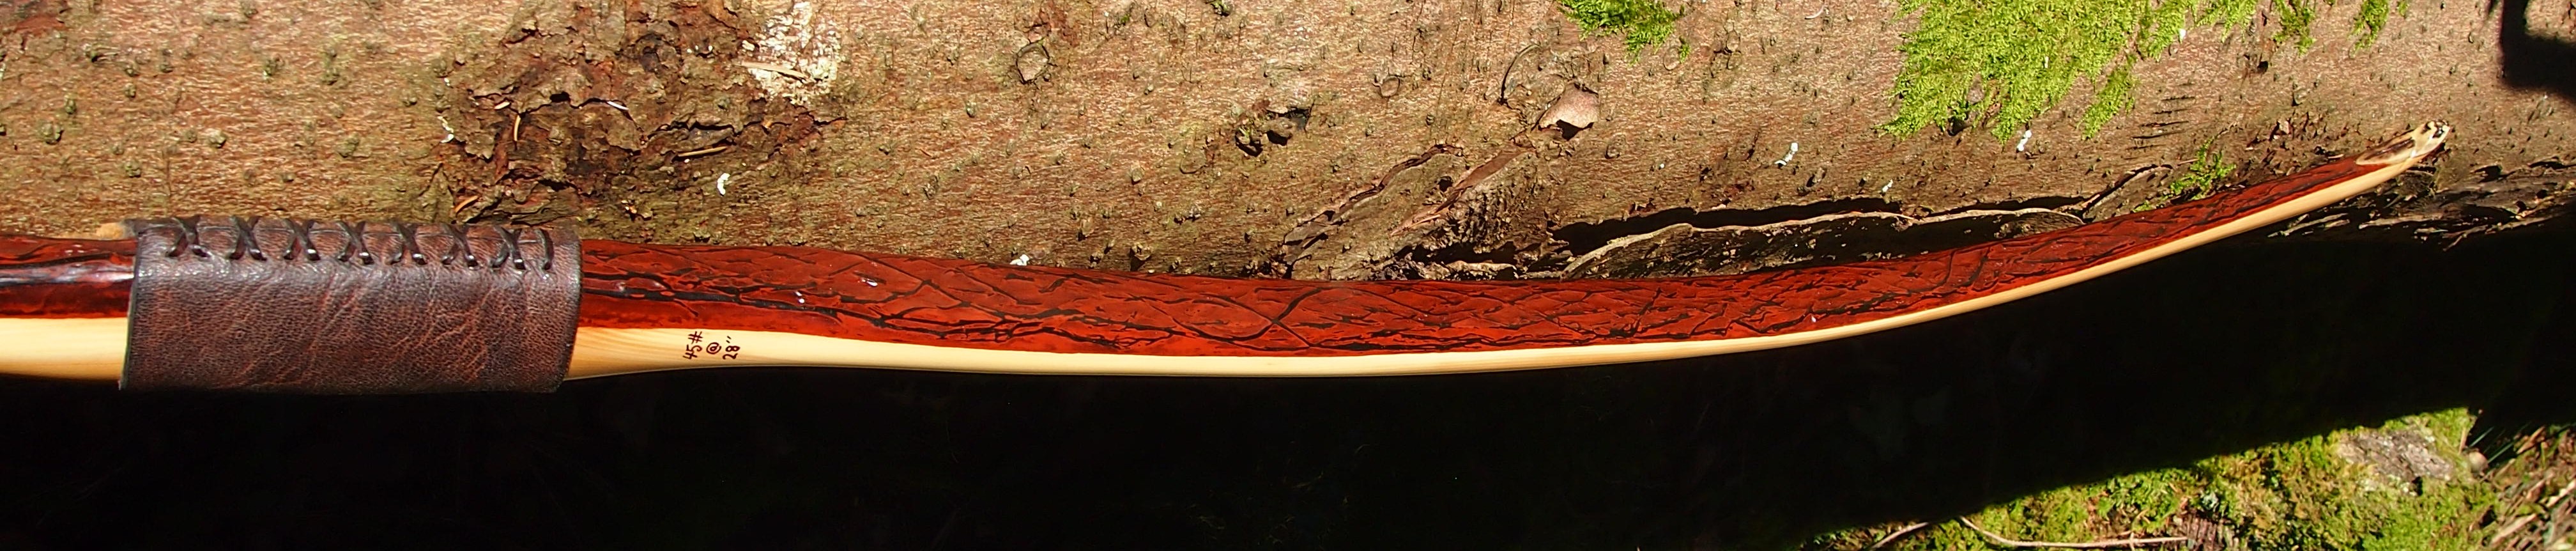
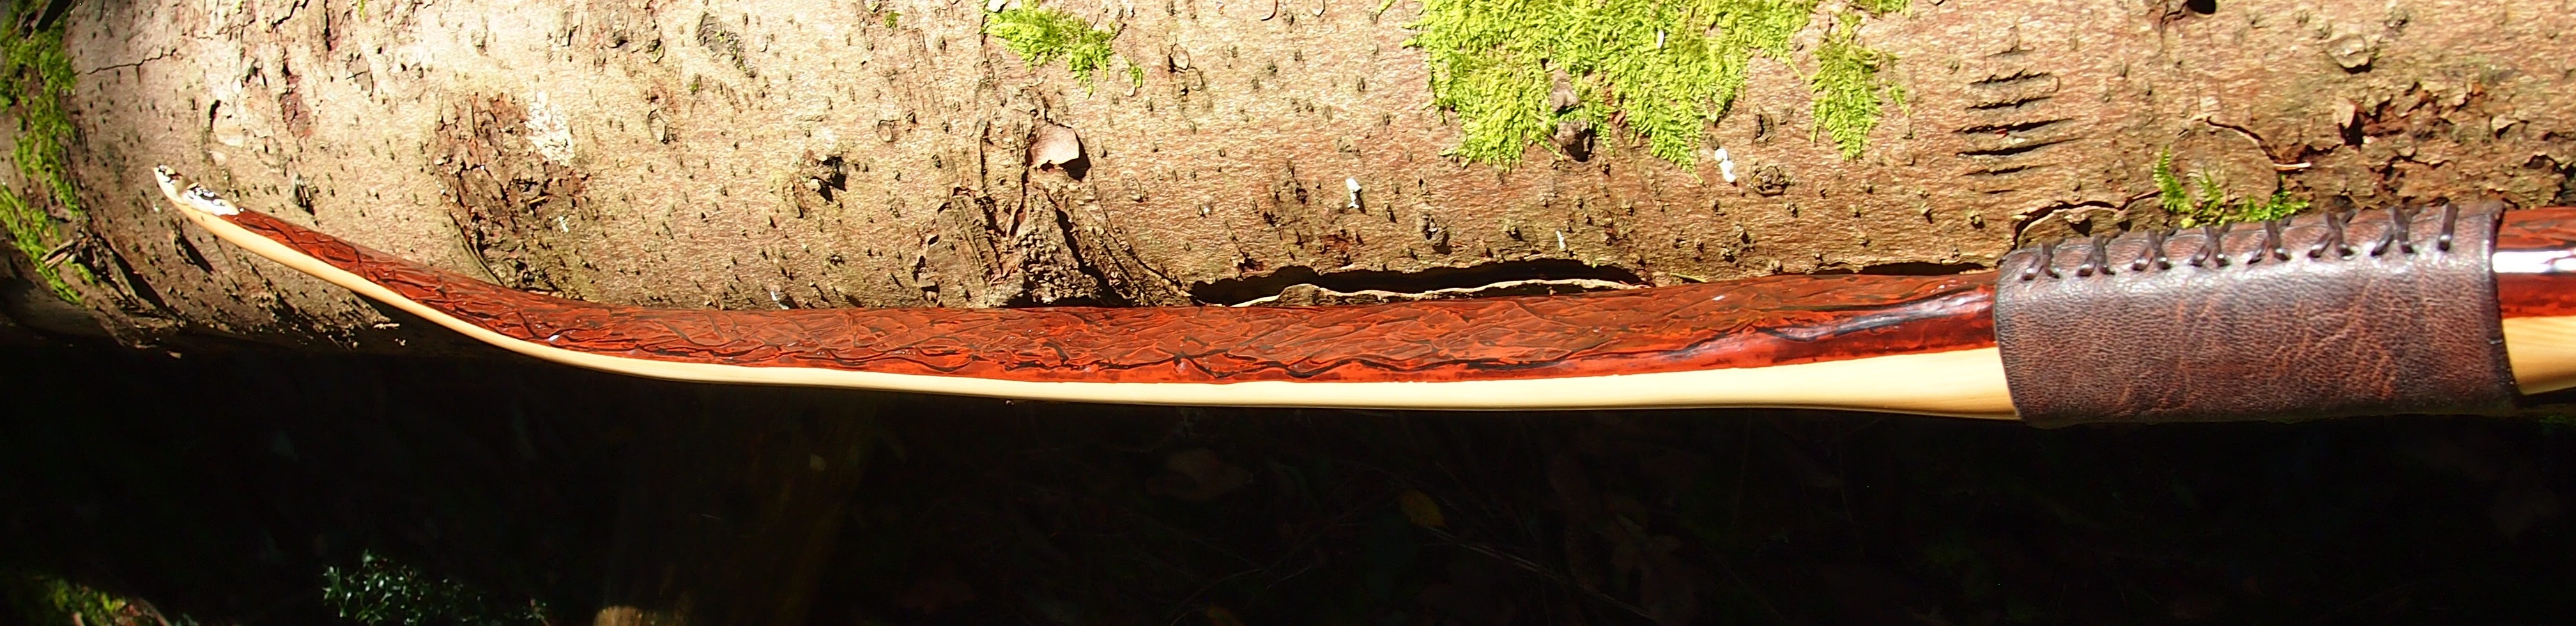
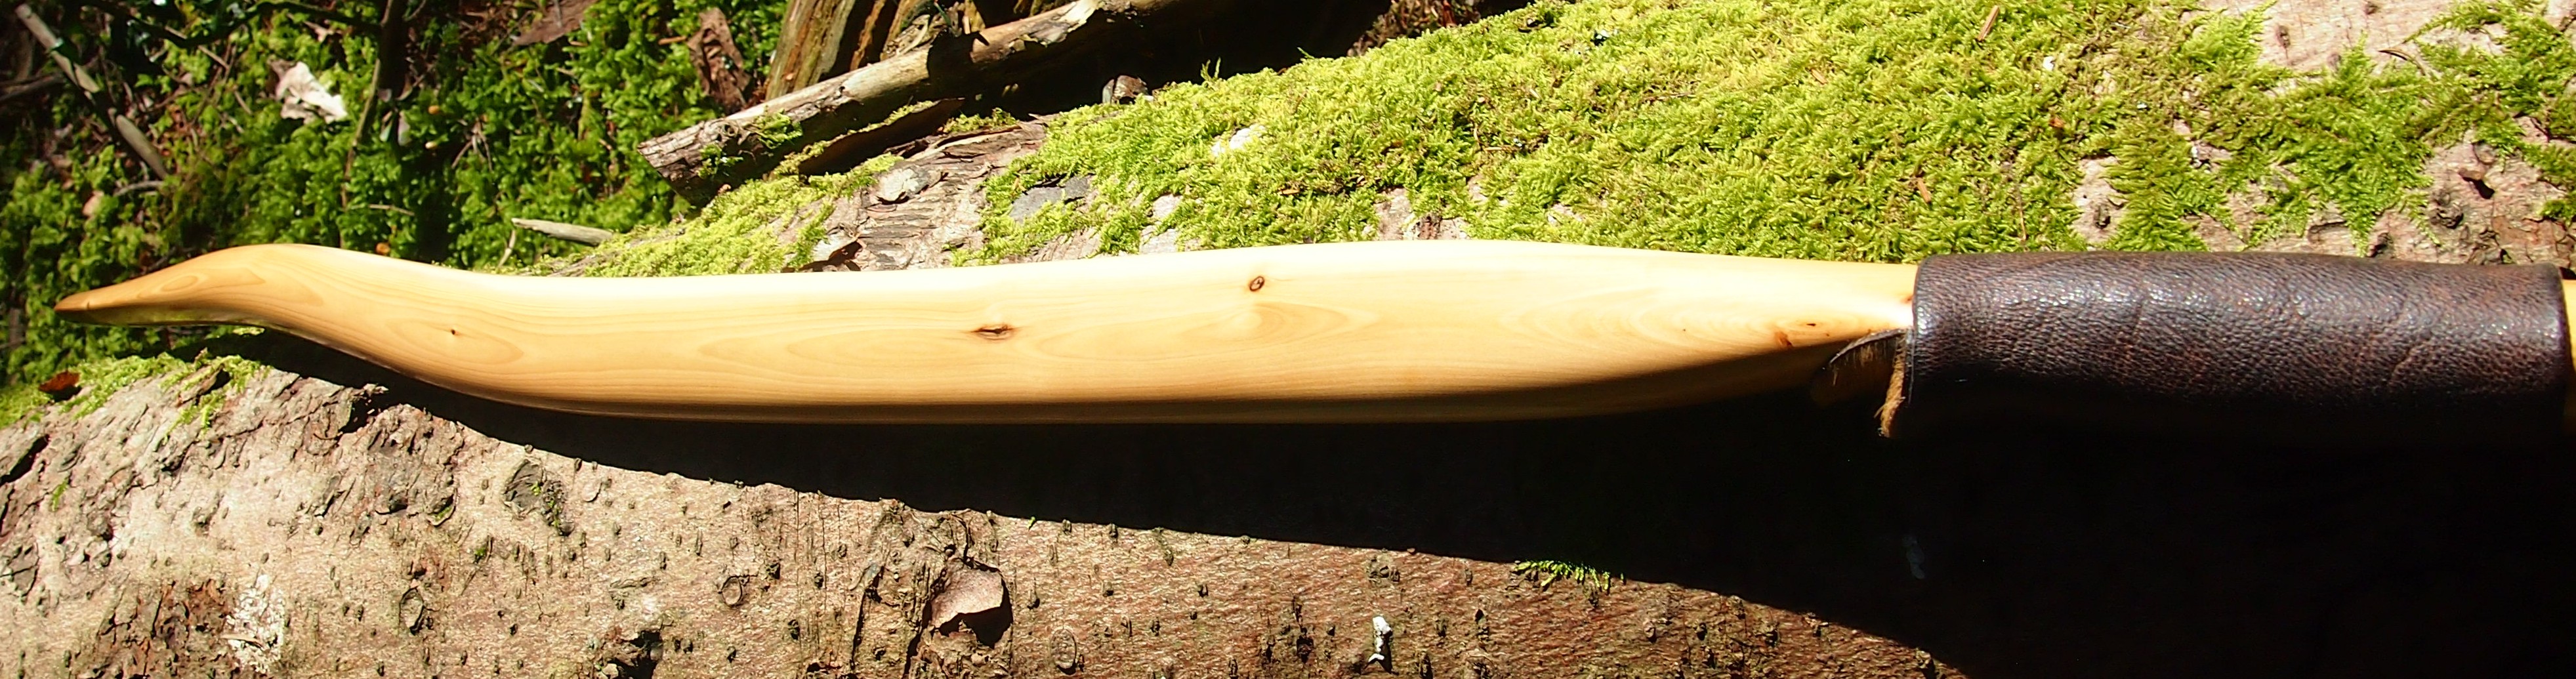
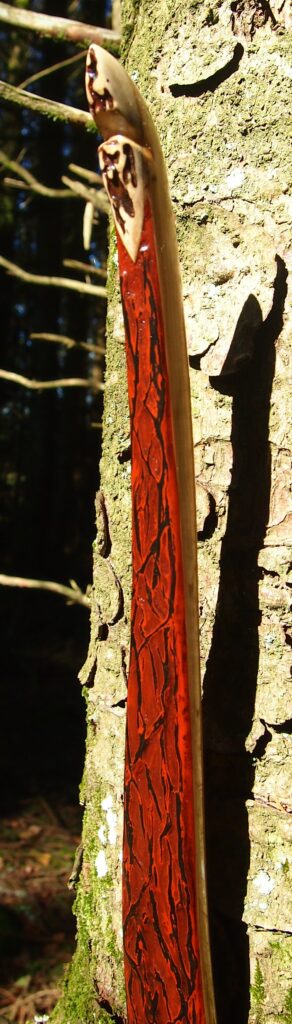
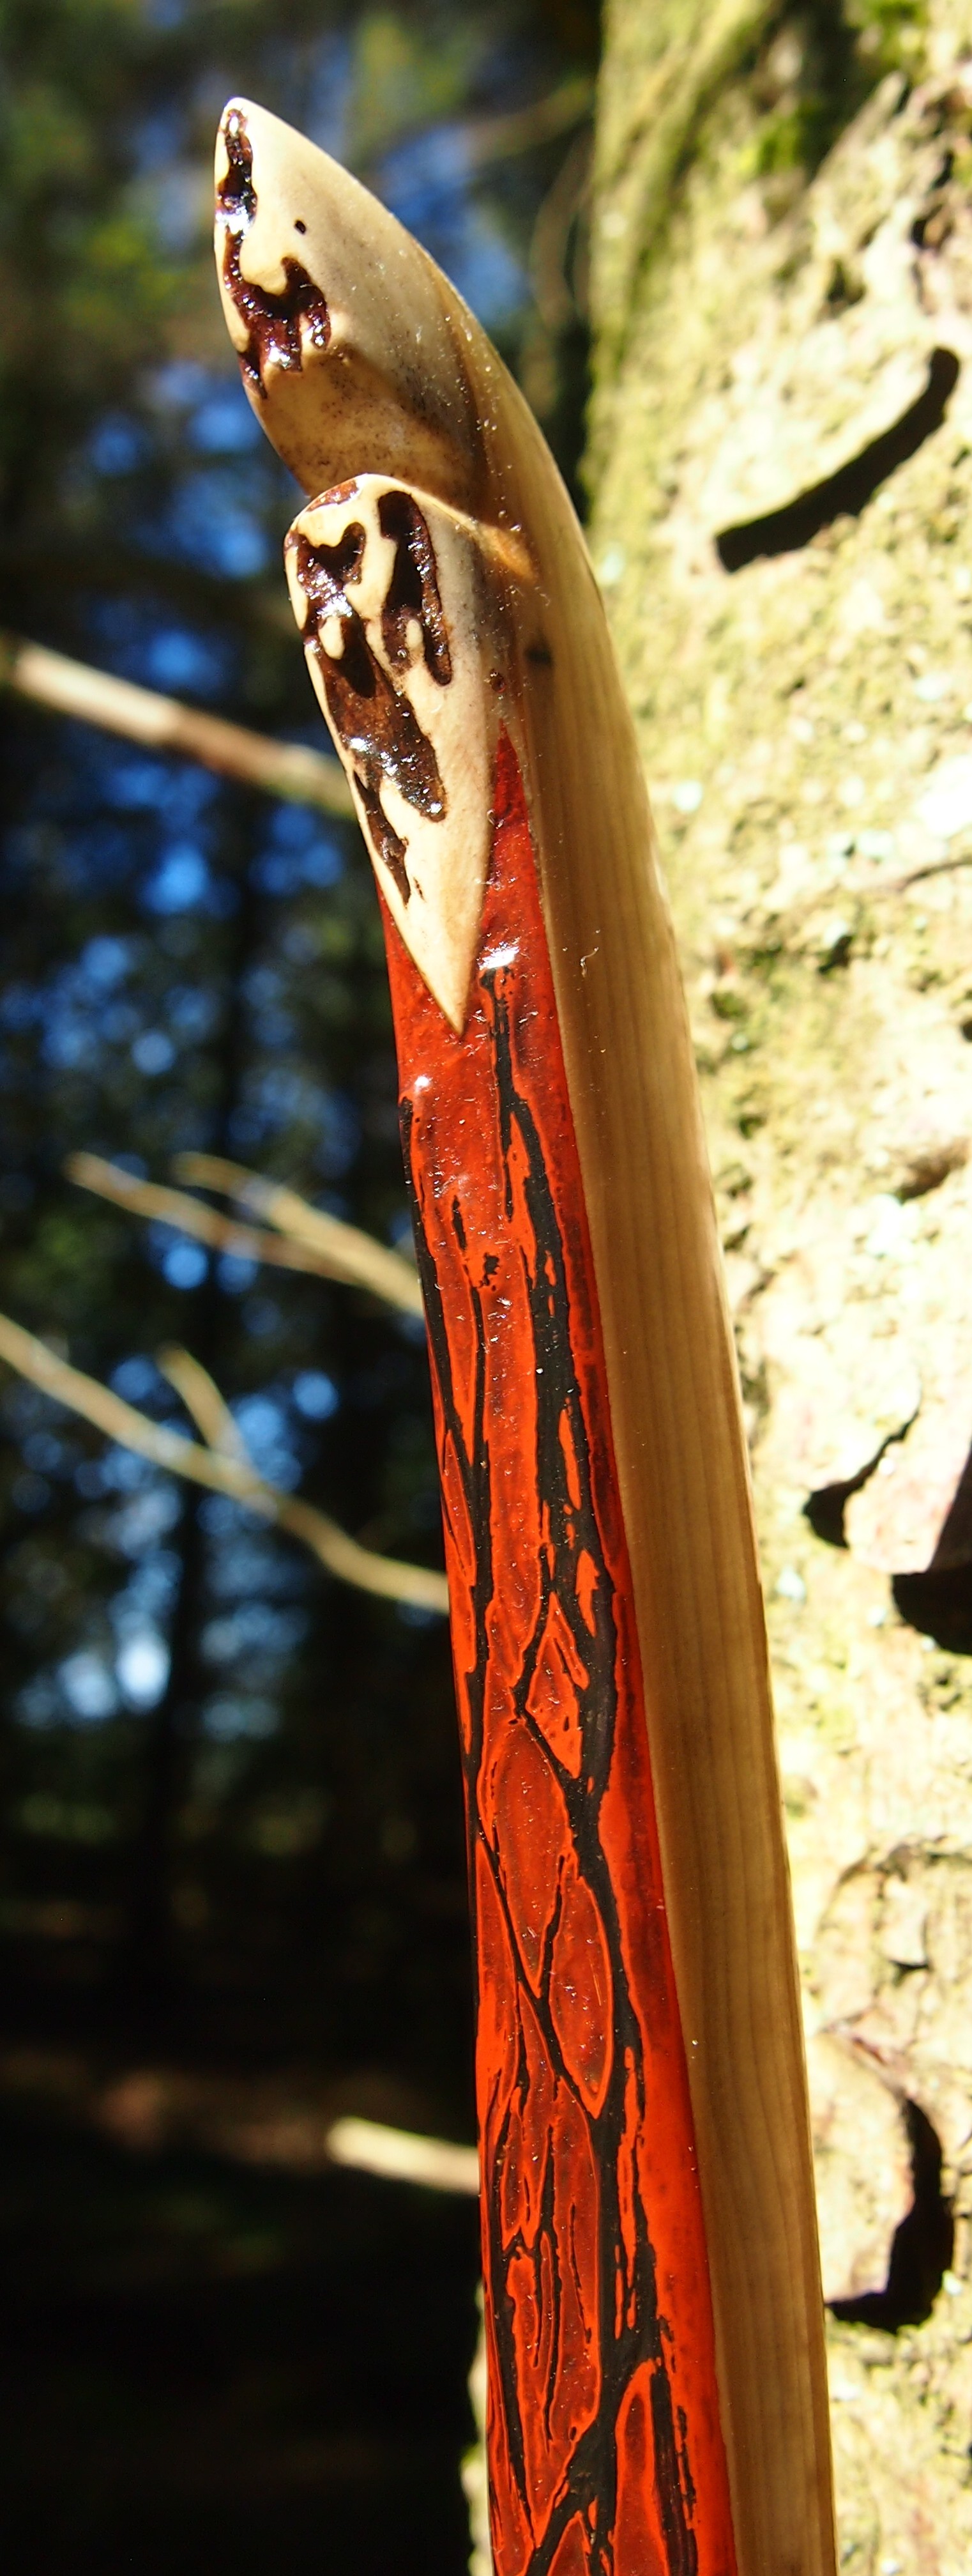
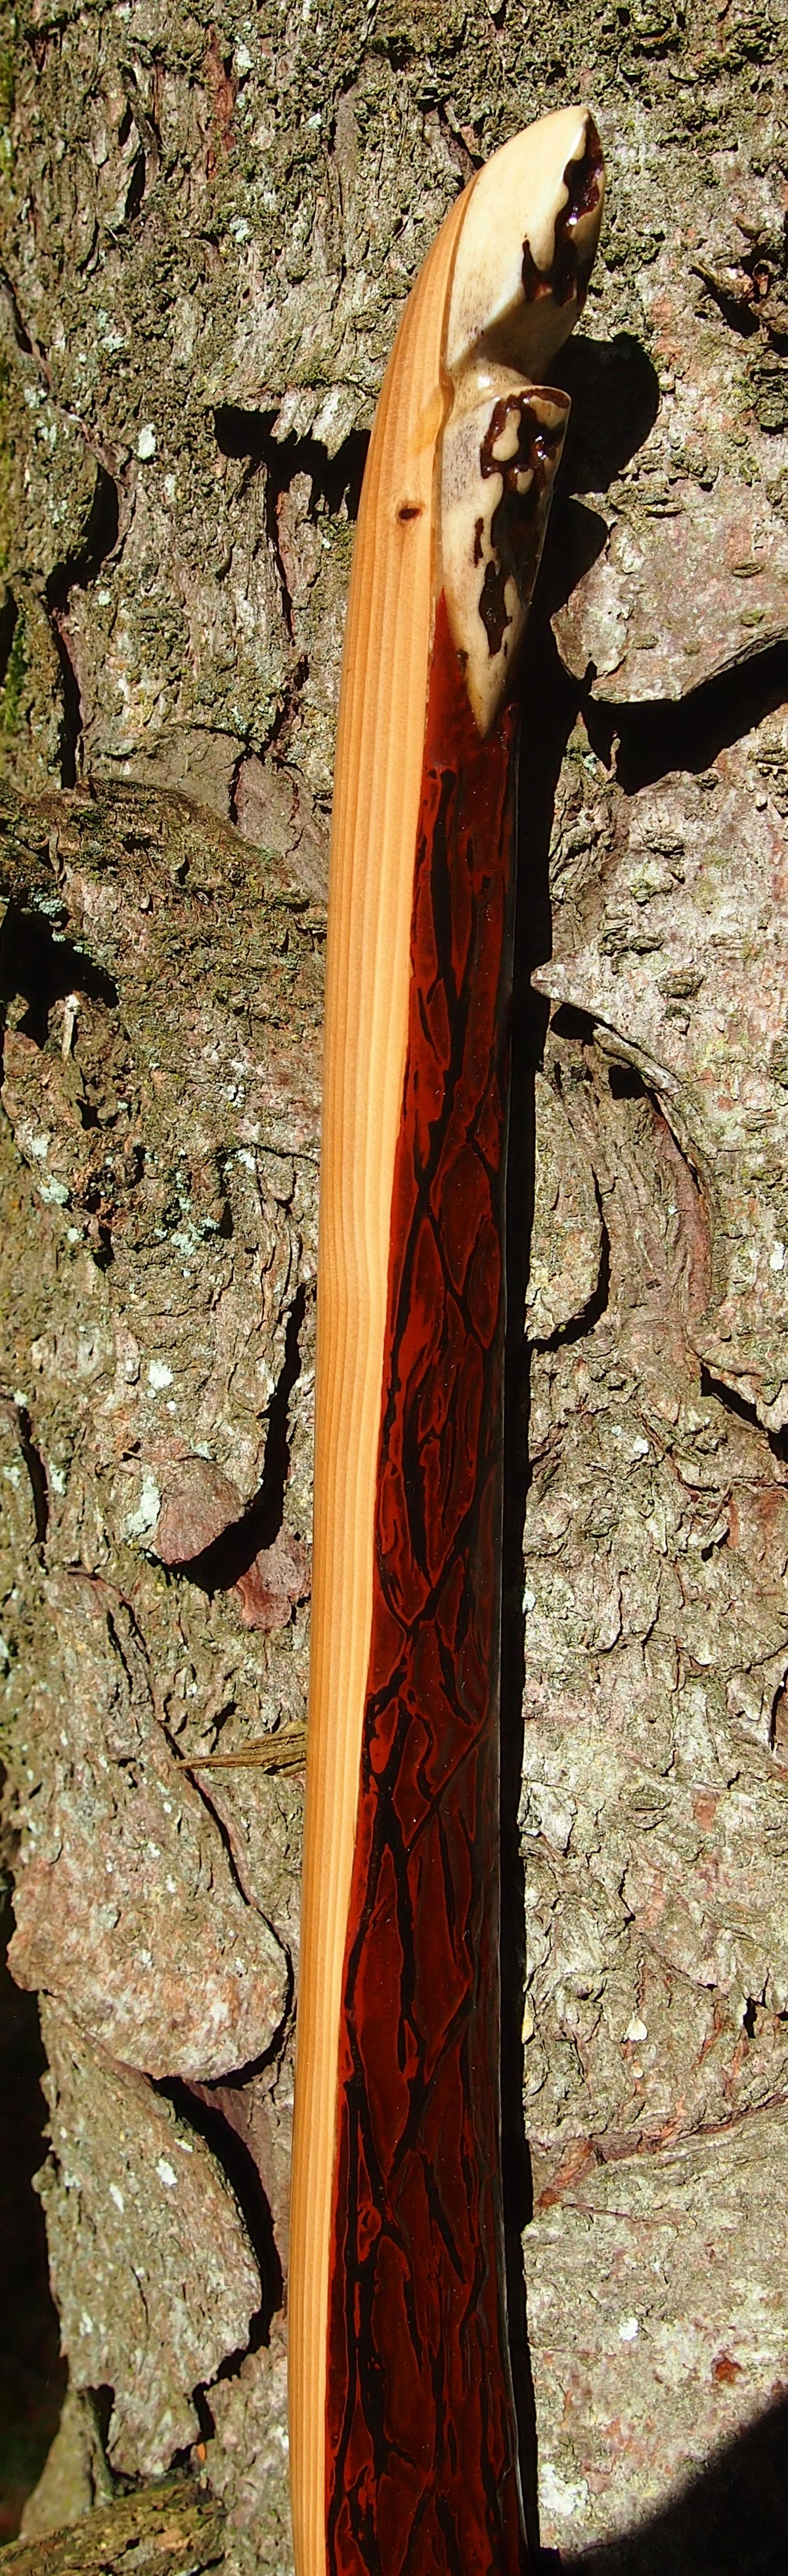
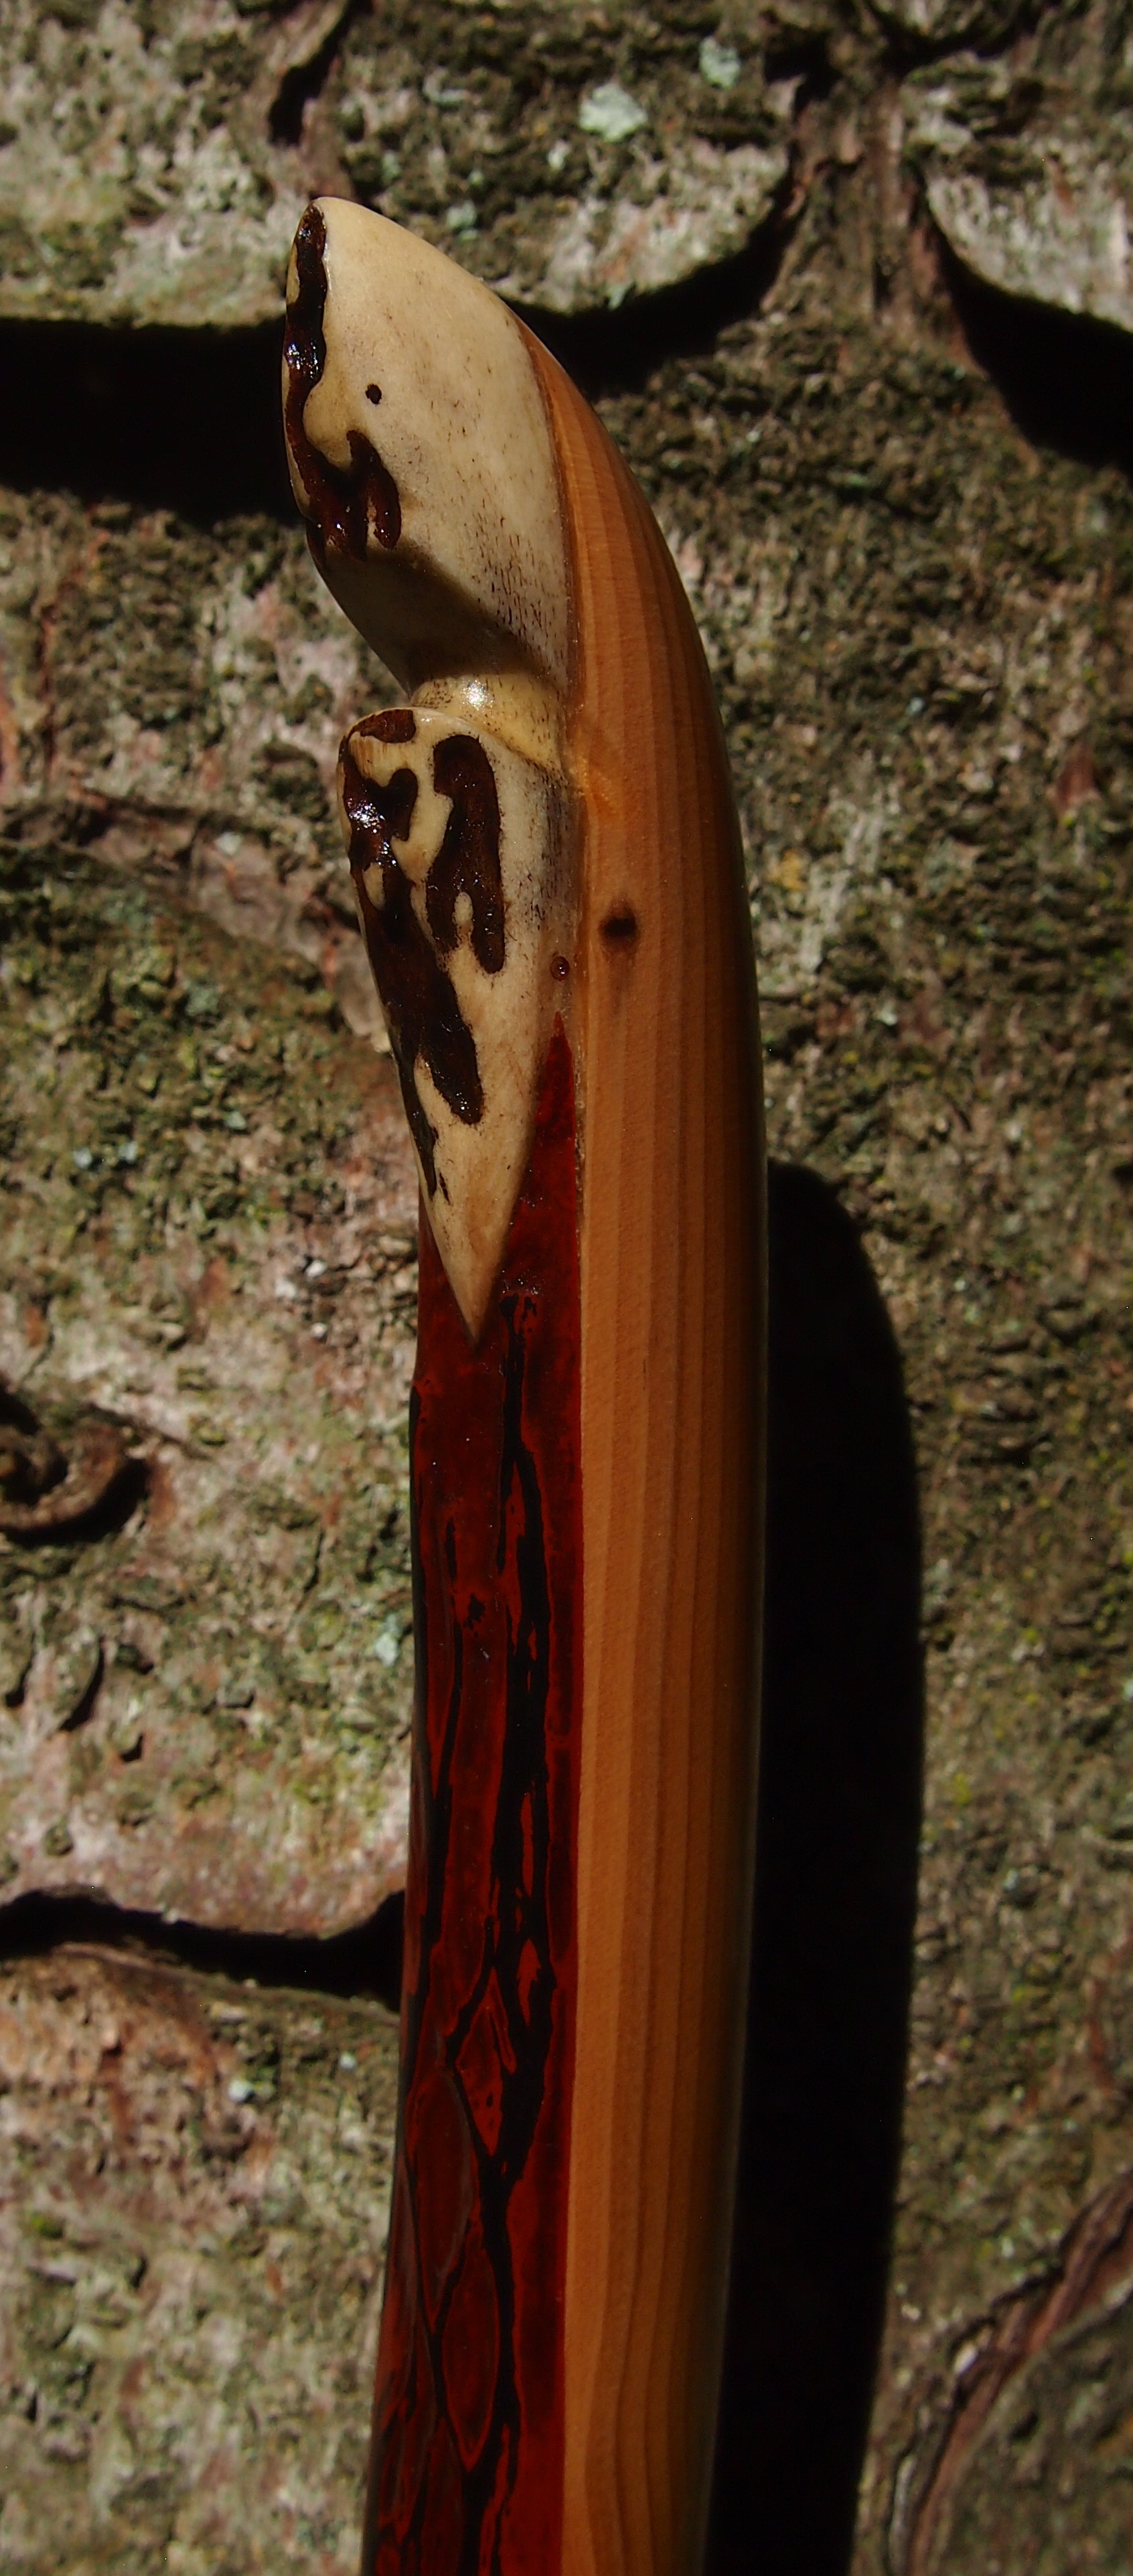
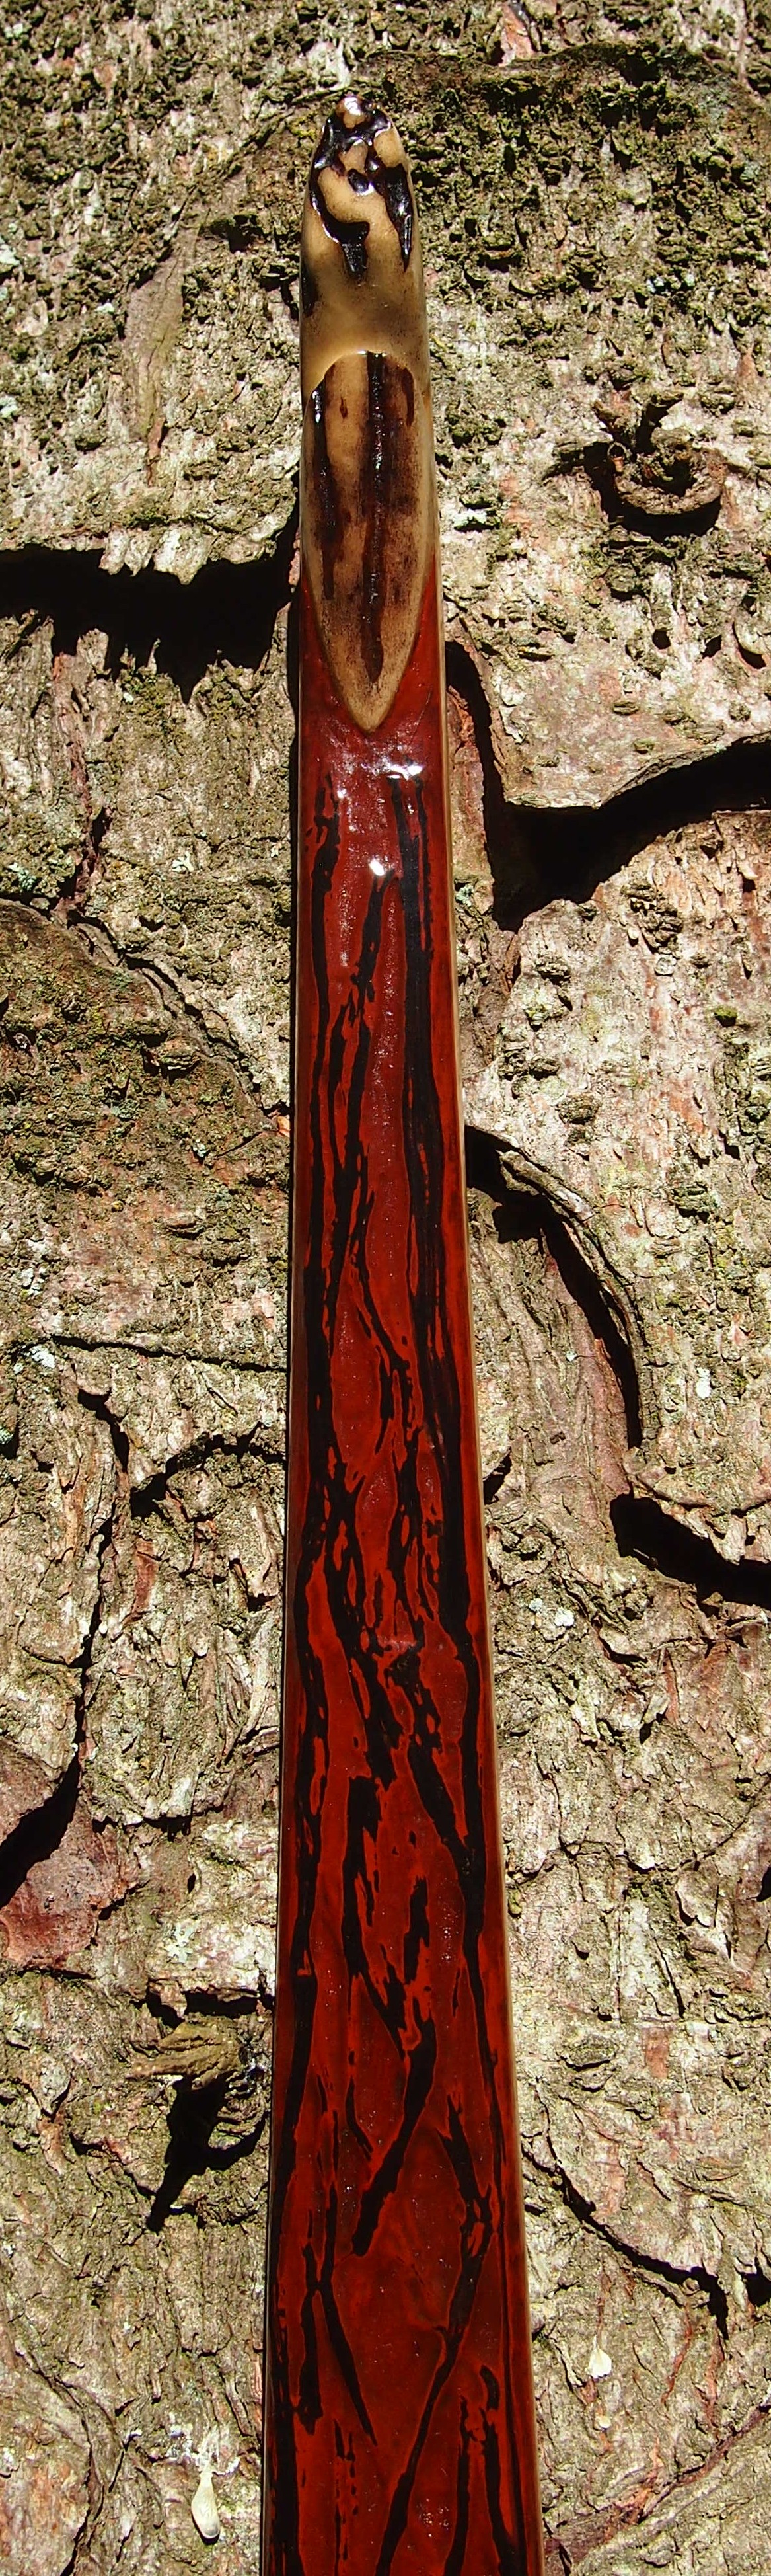
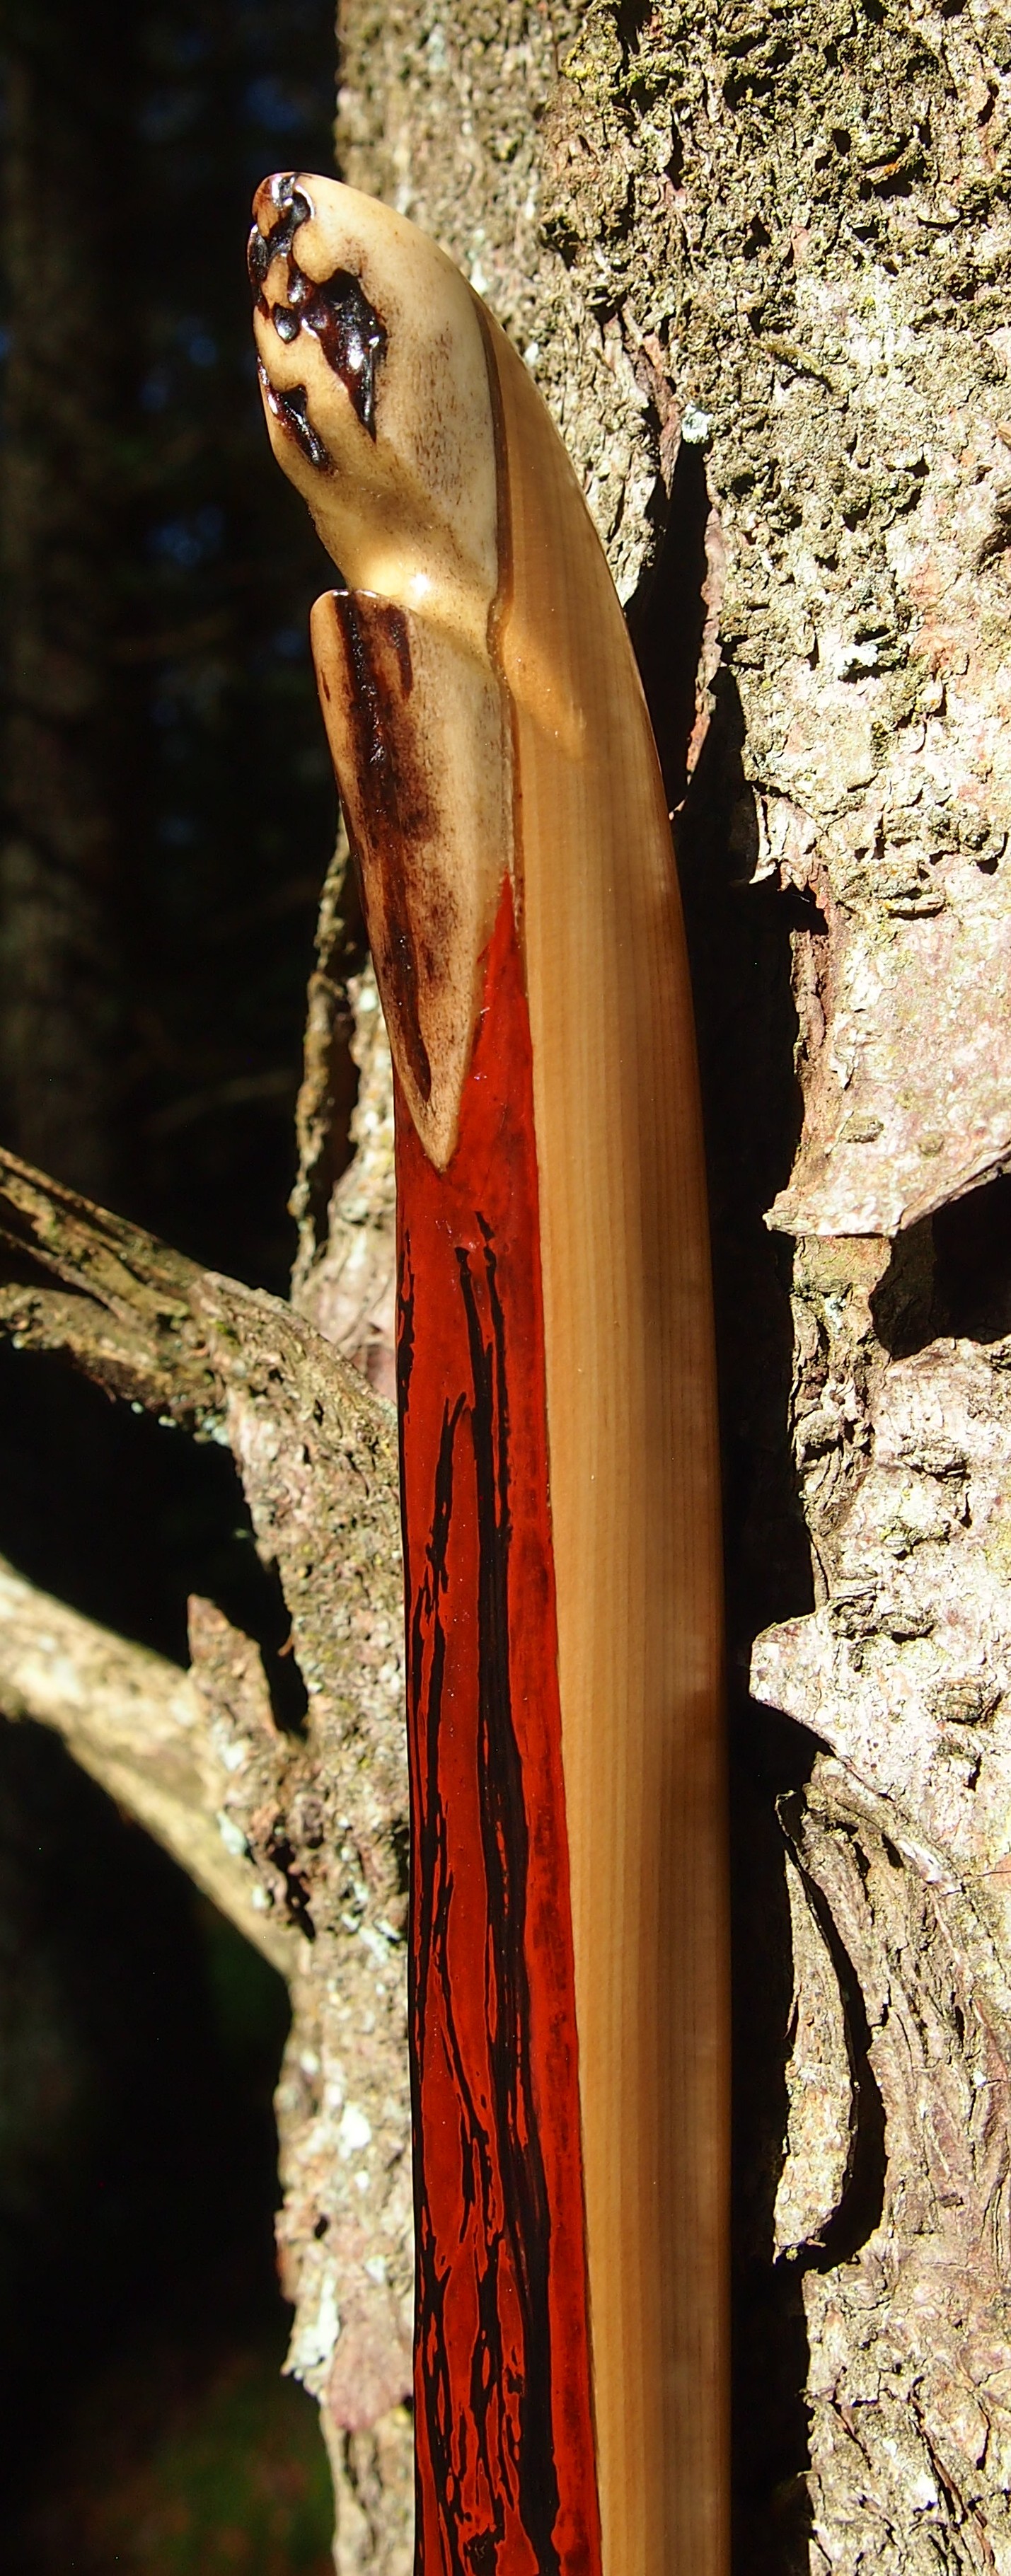
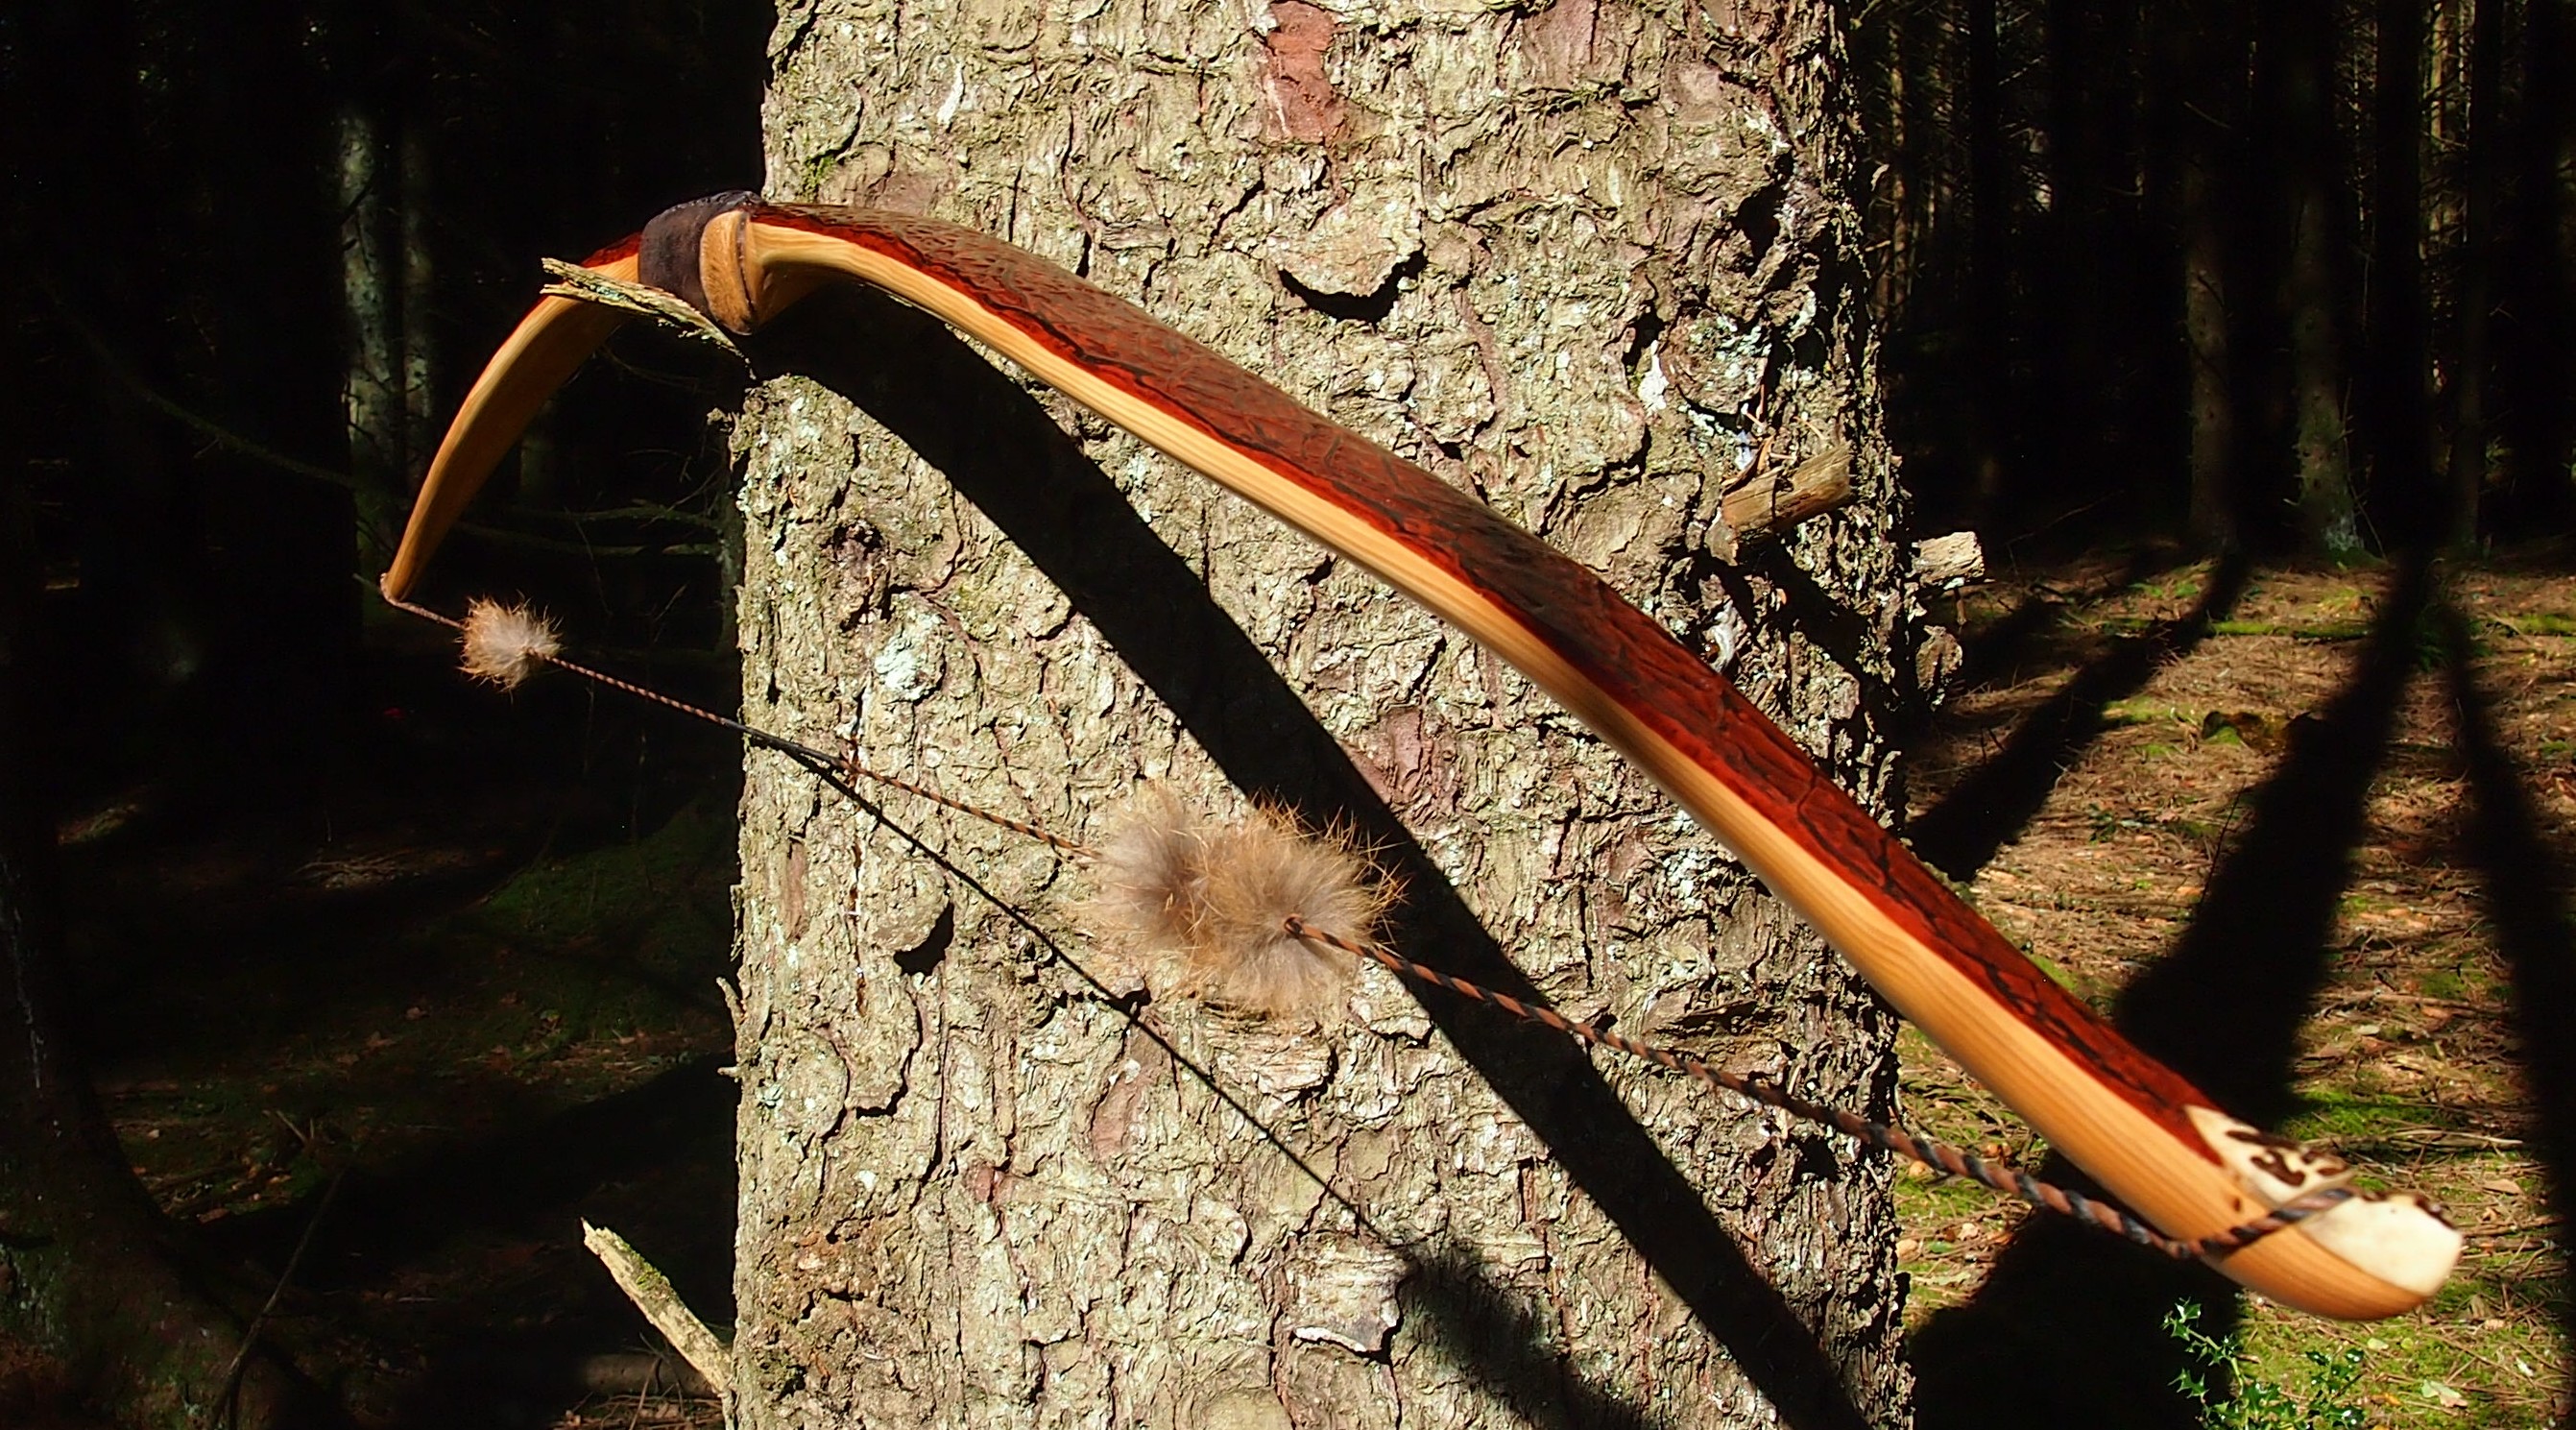
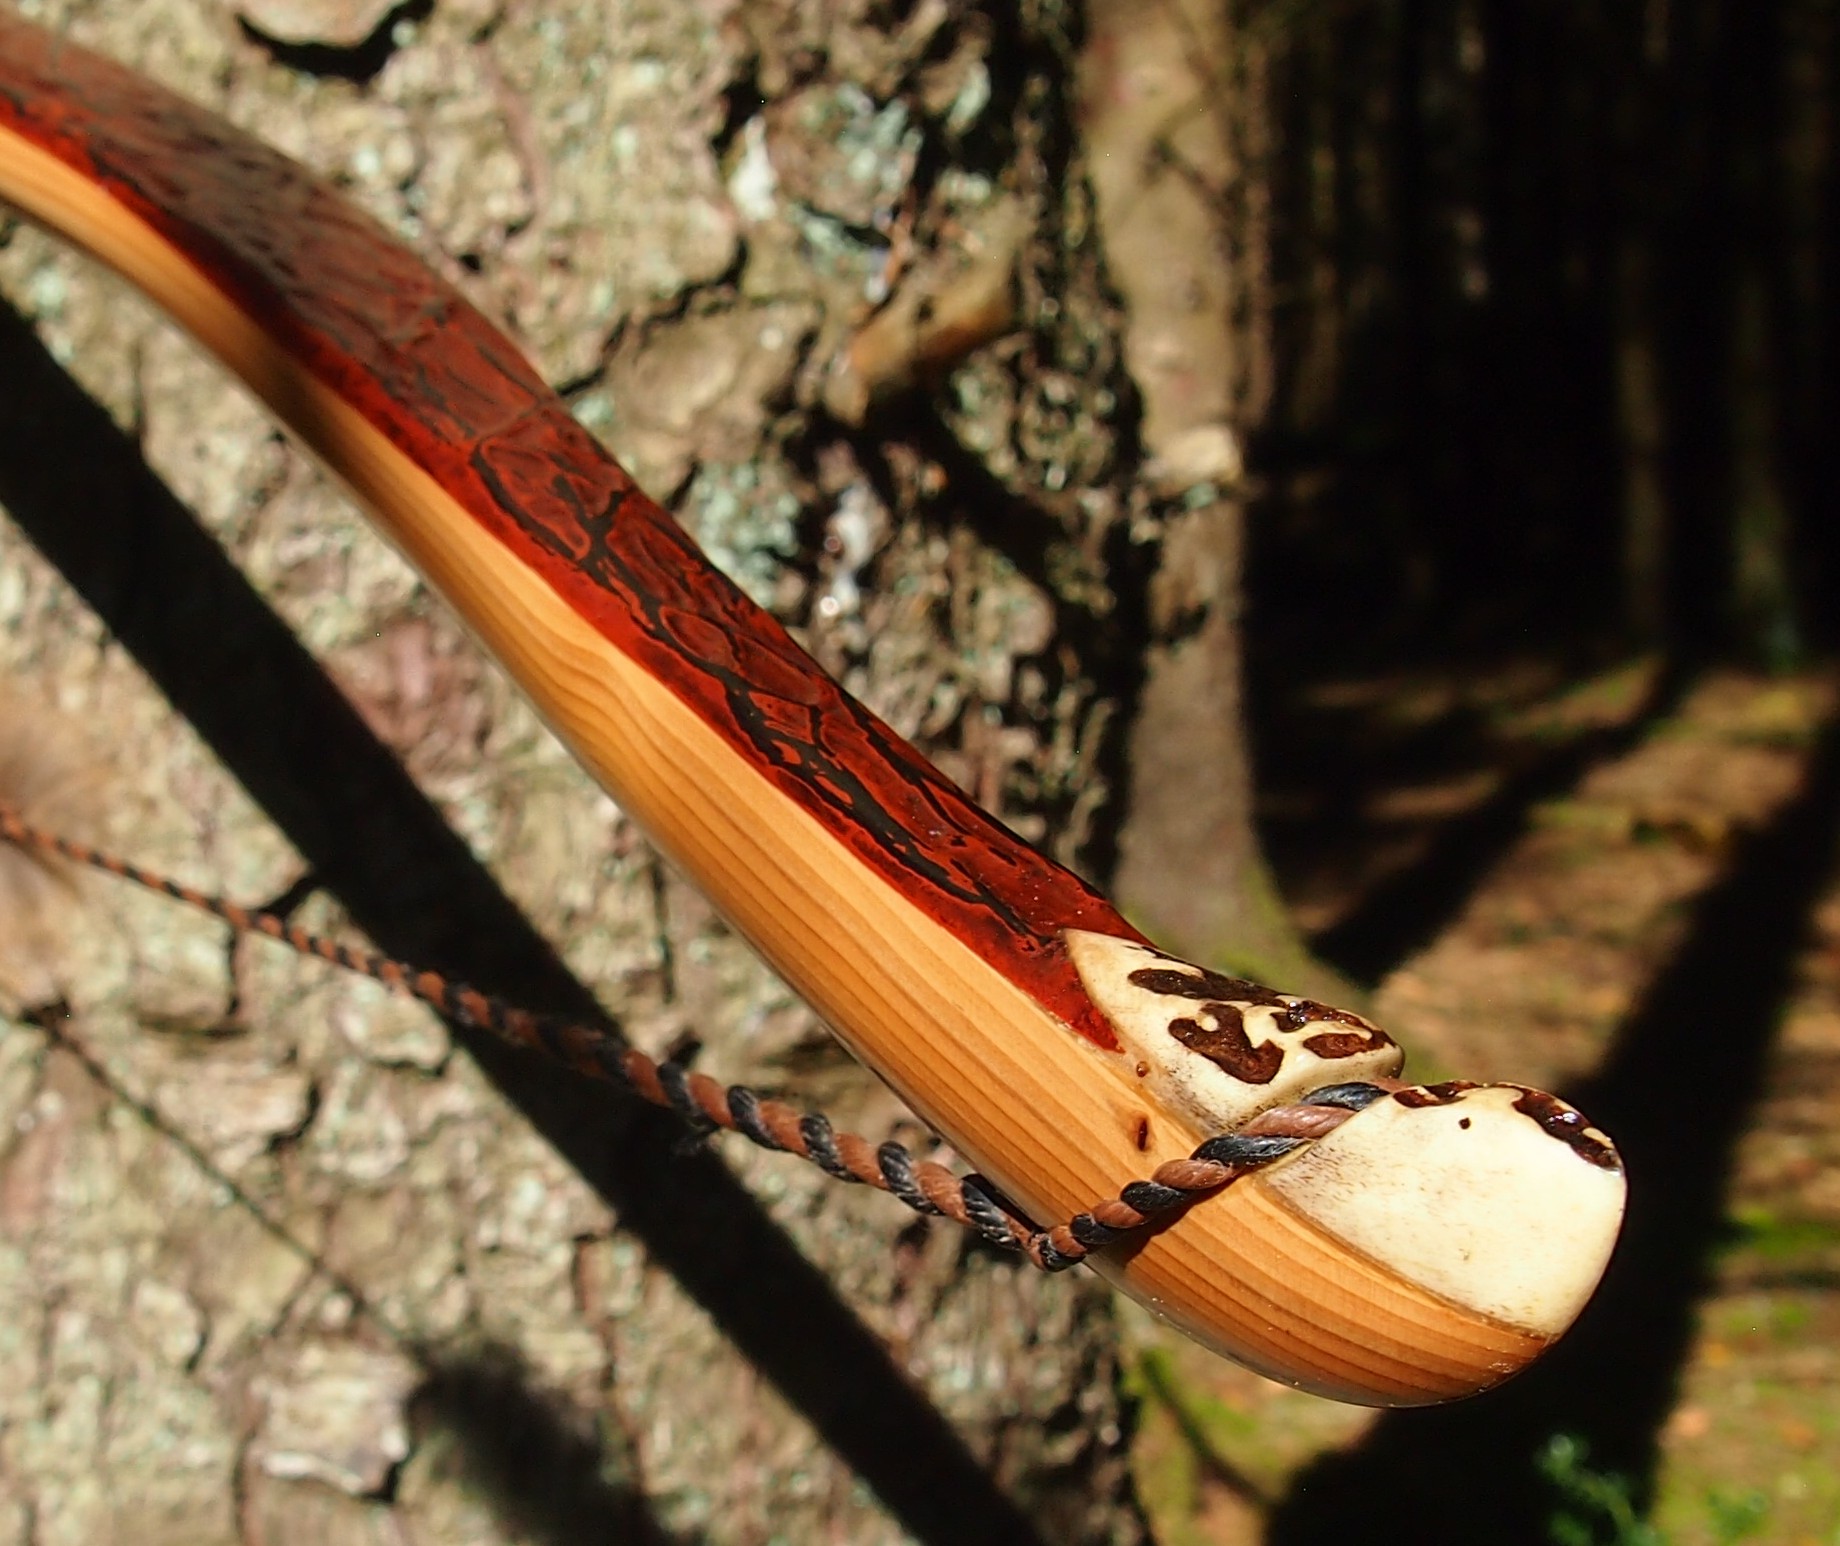
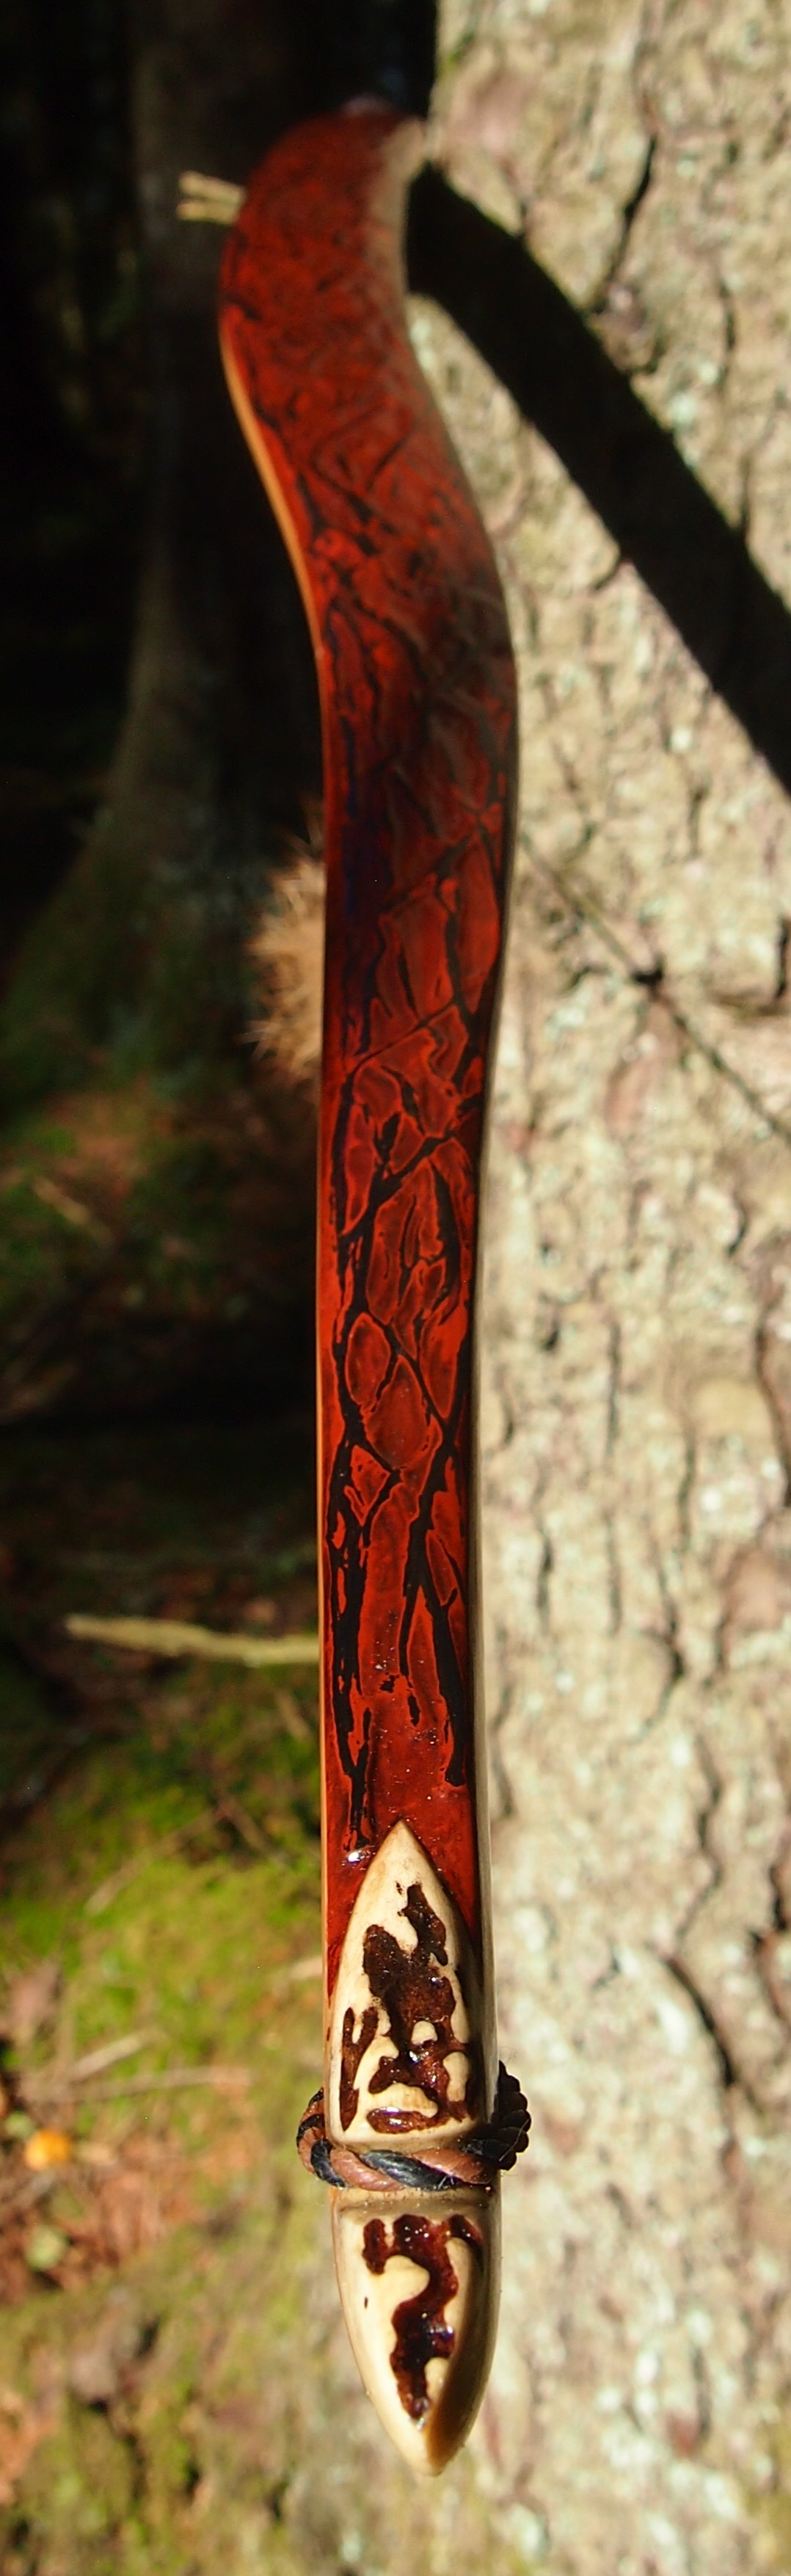
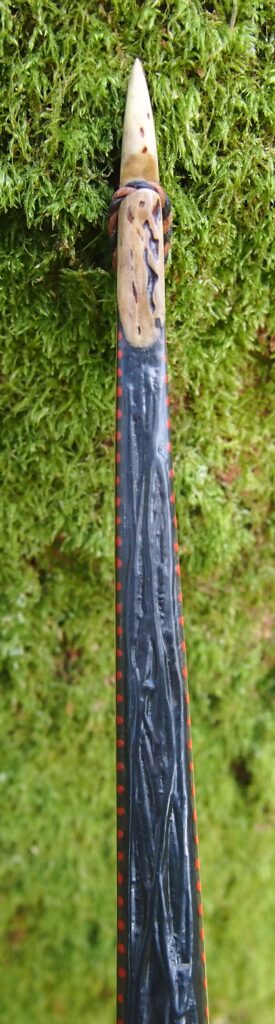
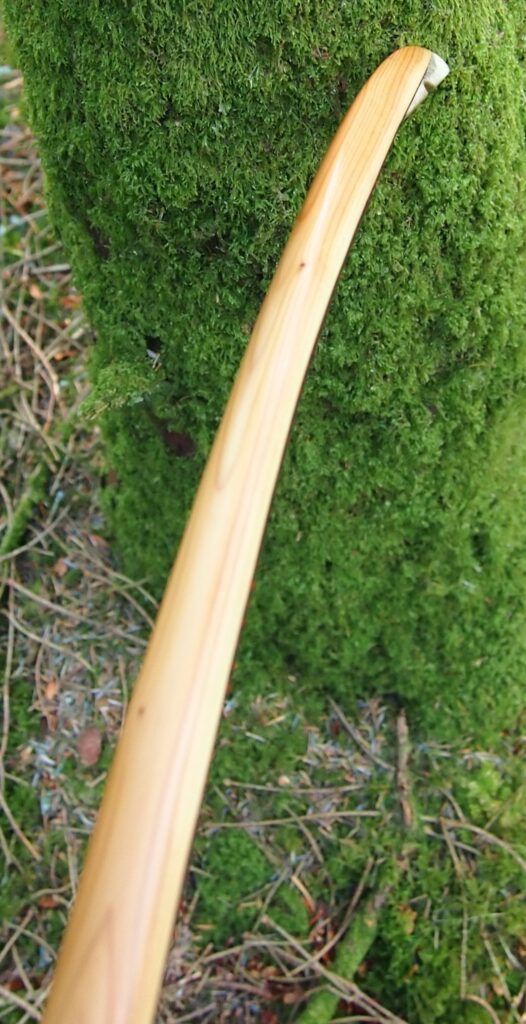
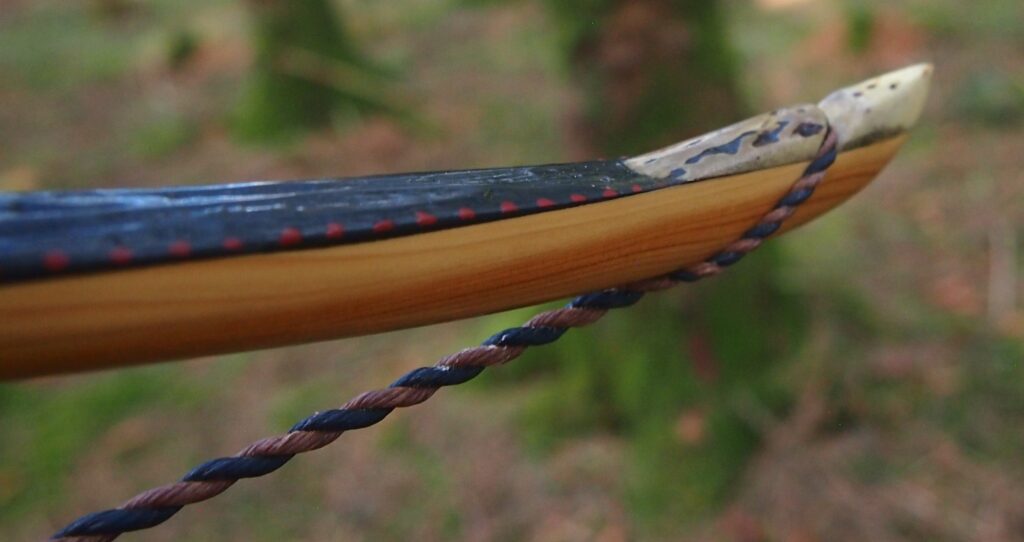
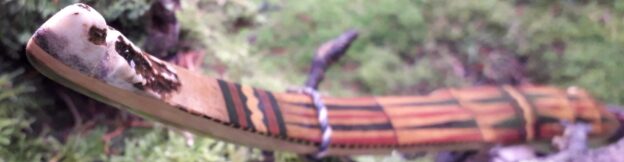
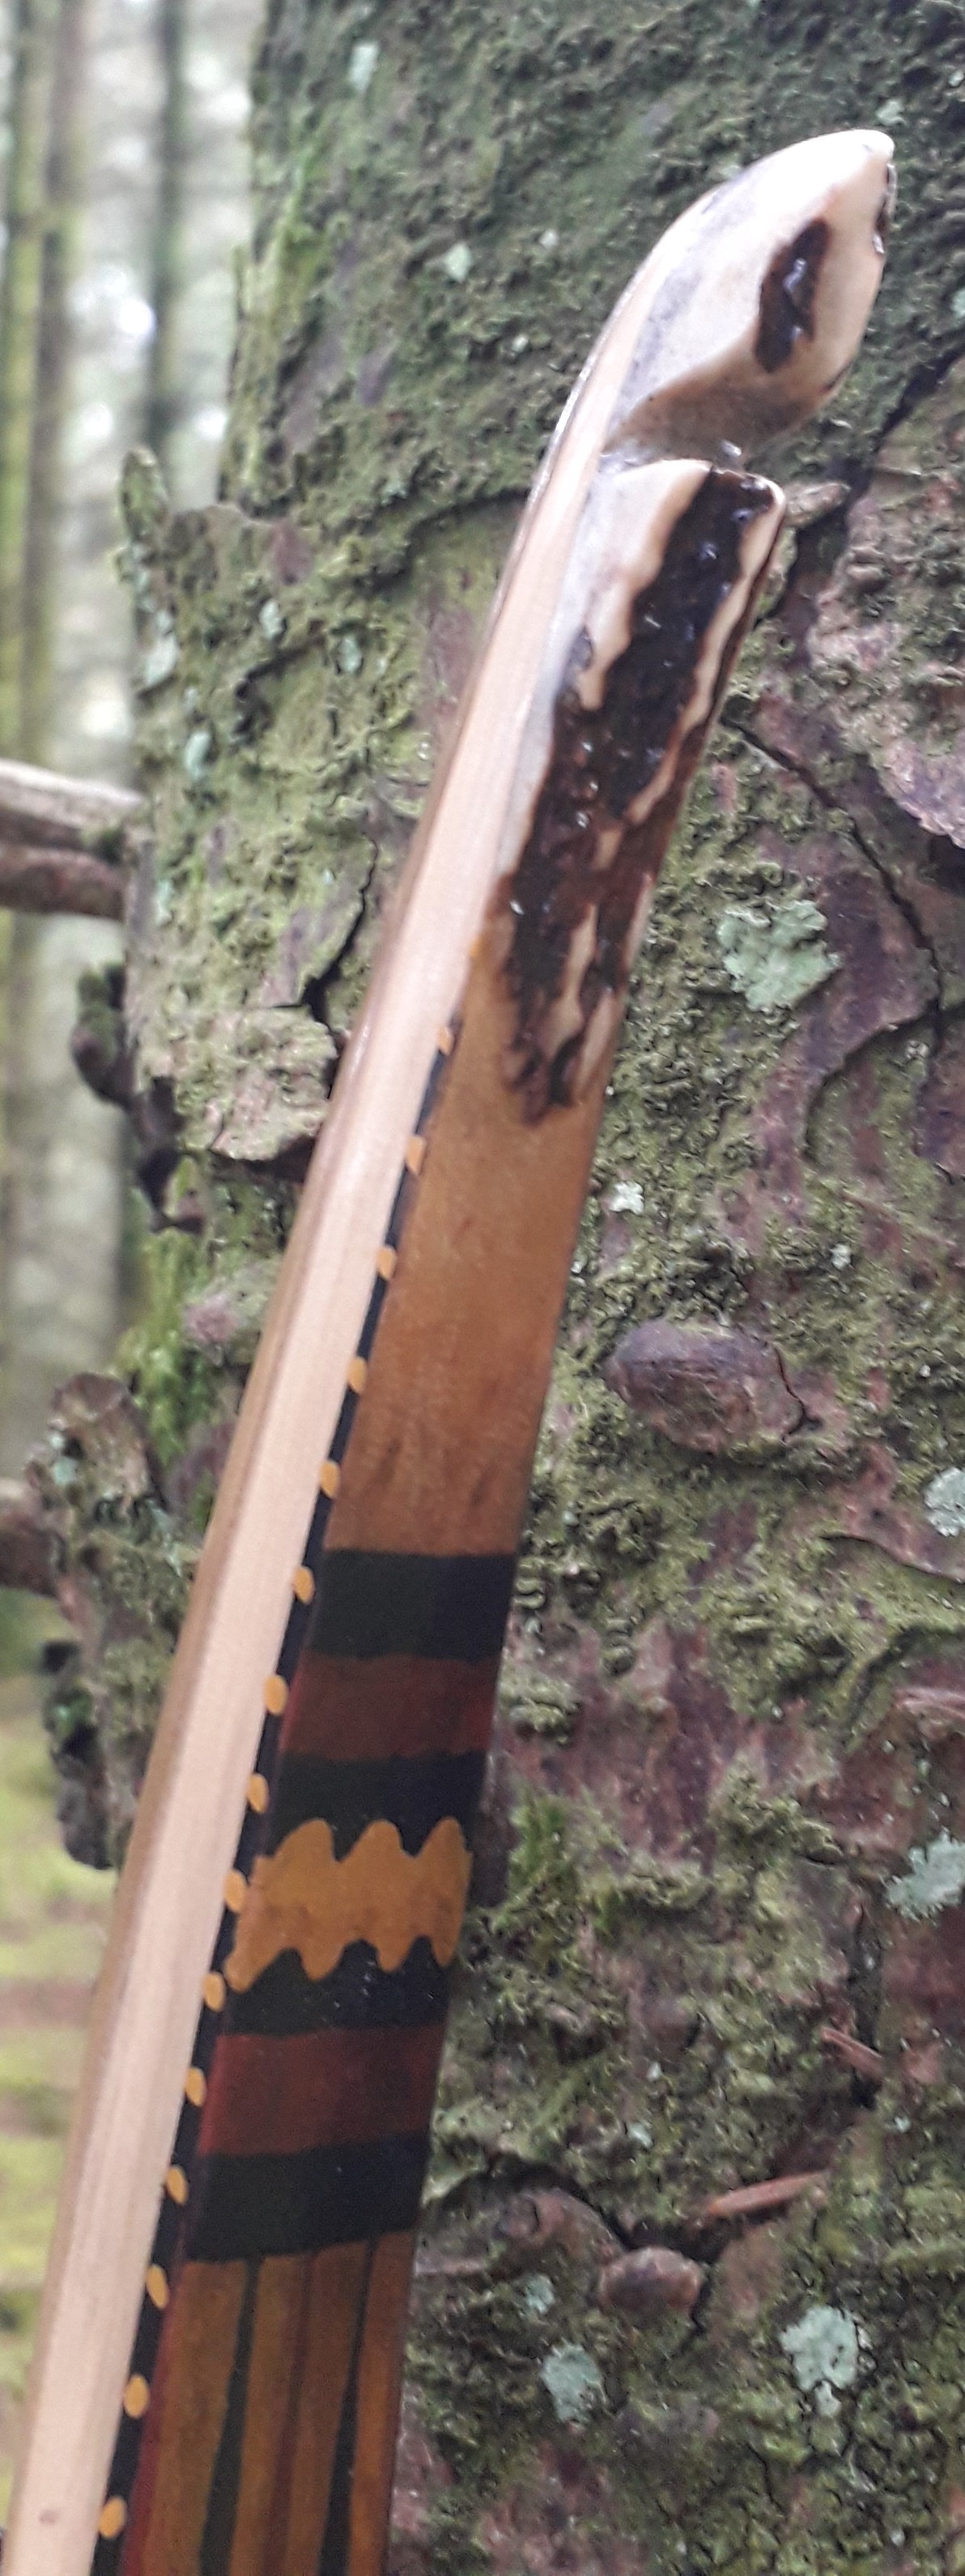
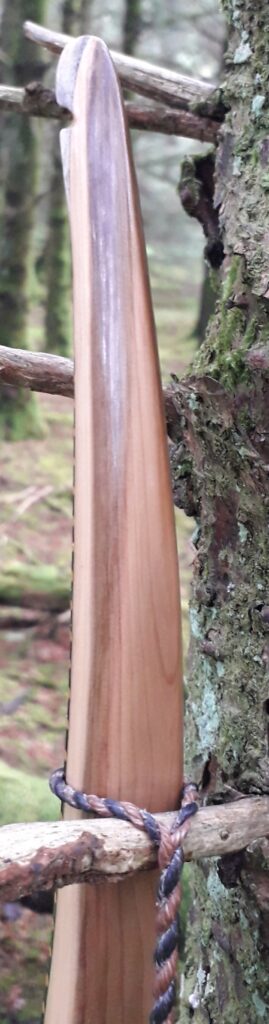
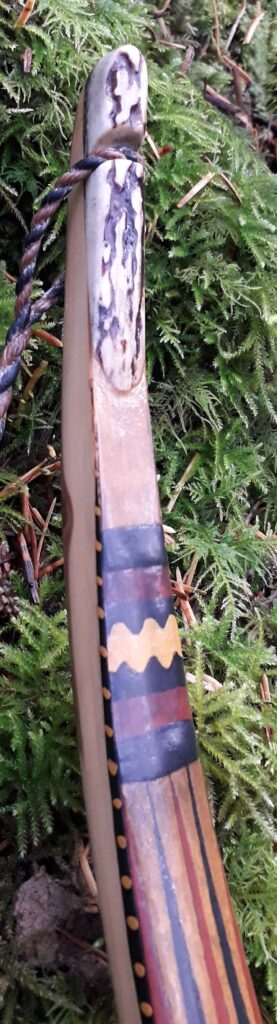
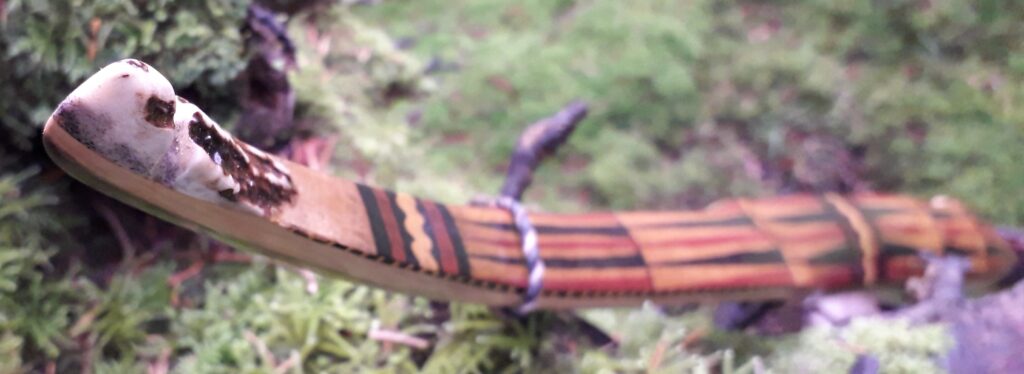
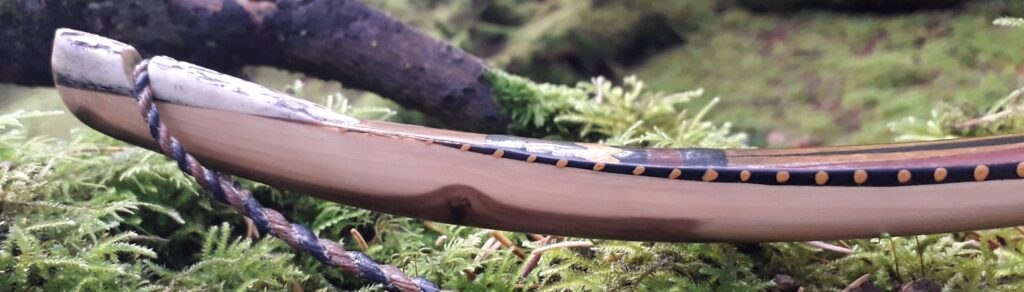
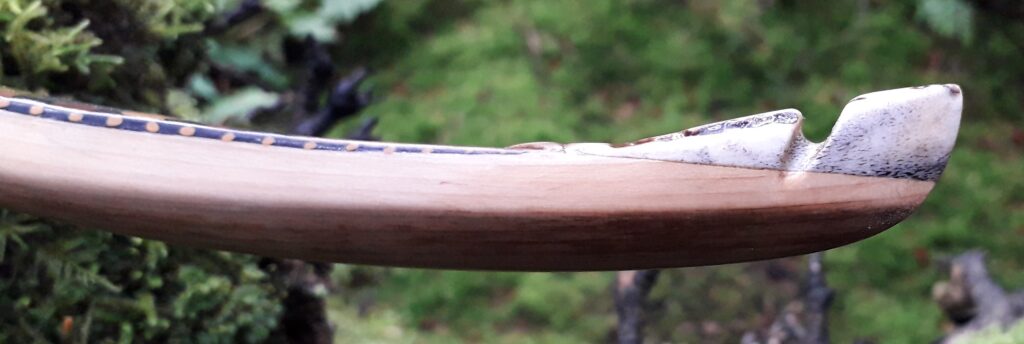
This new narrower face profile in the outer thirds was achieved without running the risk of losing the static nature of the tips as I’d left the tips plenty deep enough in thickness to resist any bending. And fine tips of course need overlays to protect them adequately, so I opted to fit some lovely red deer antler overlays shaped to compliment the now adjusted and refined grace and flow of the outer limbs.
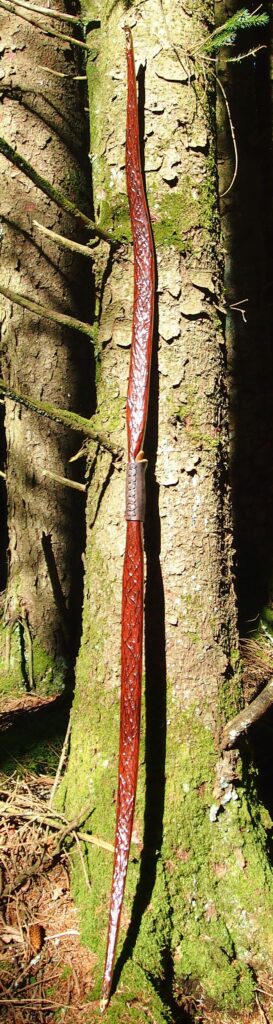
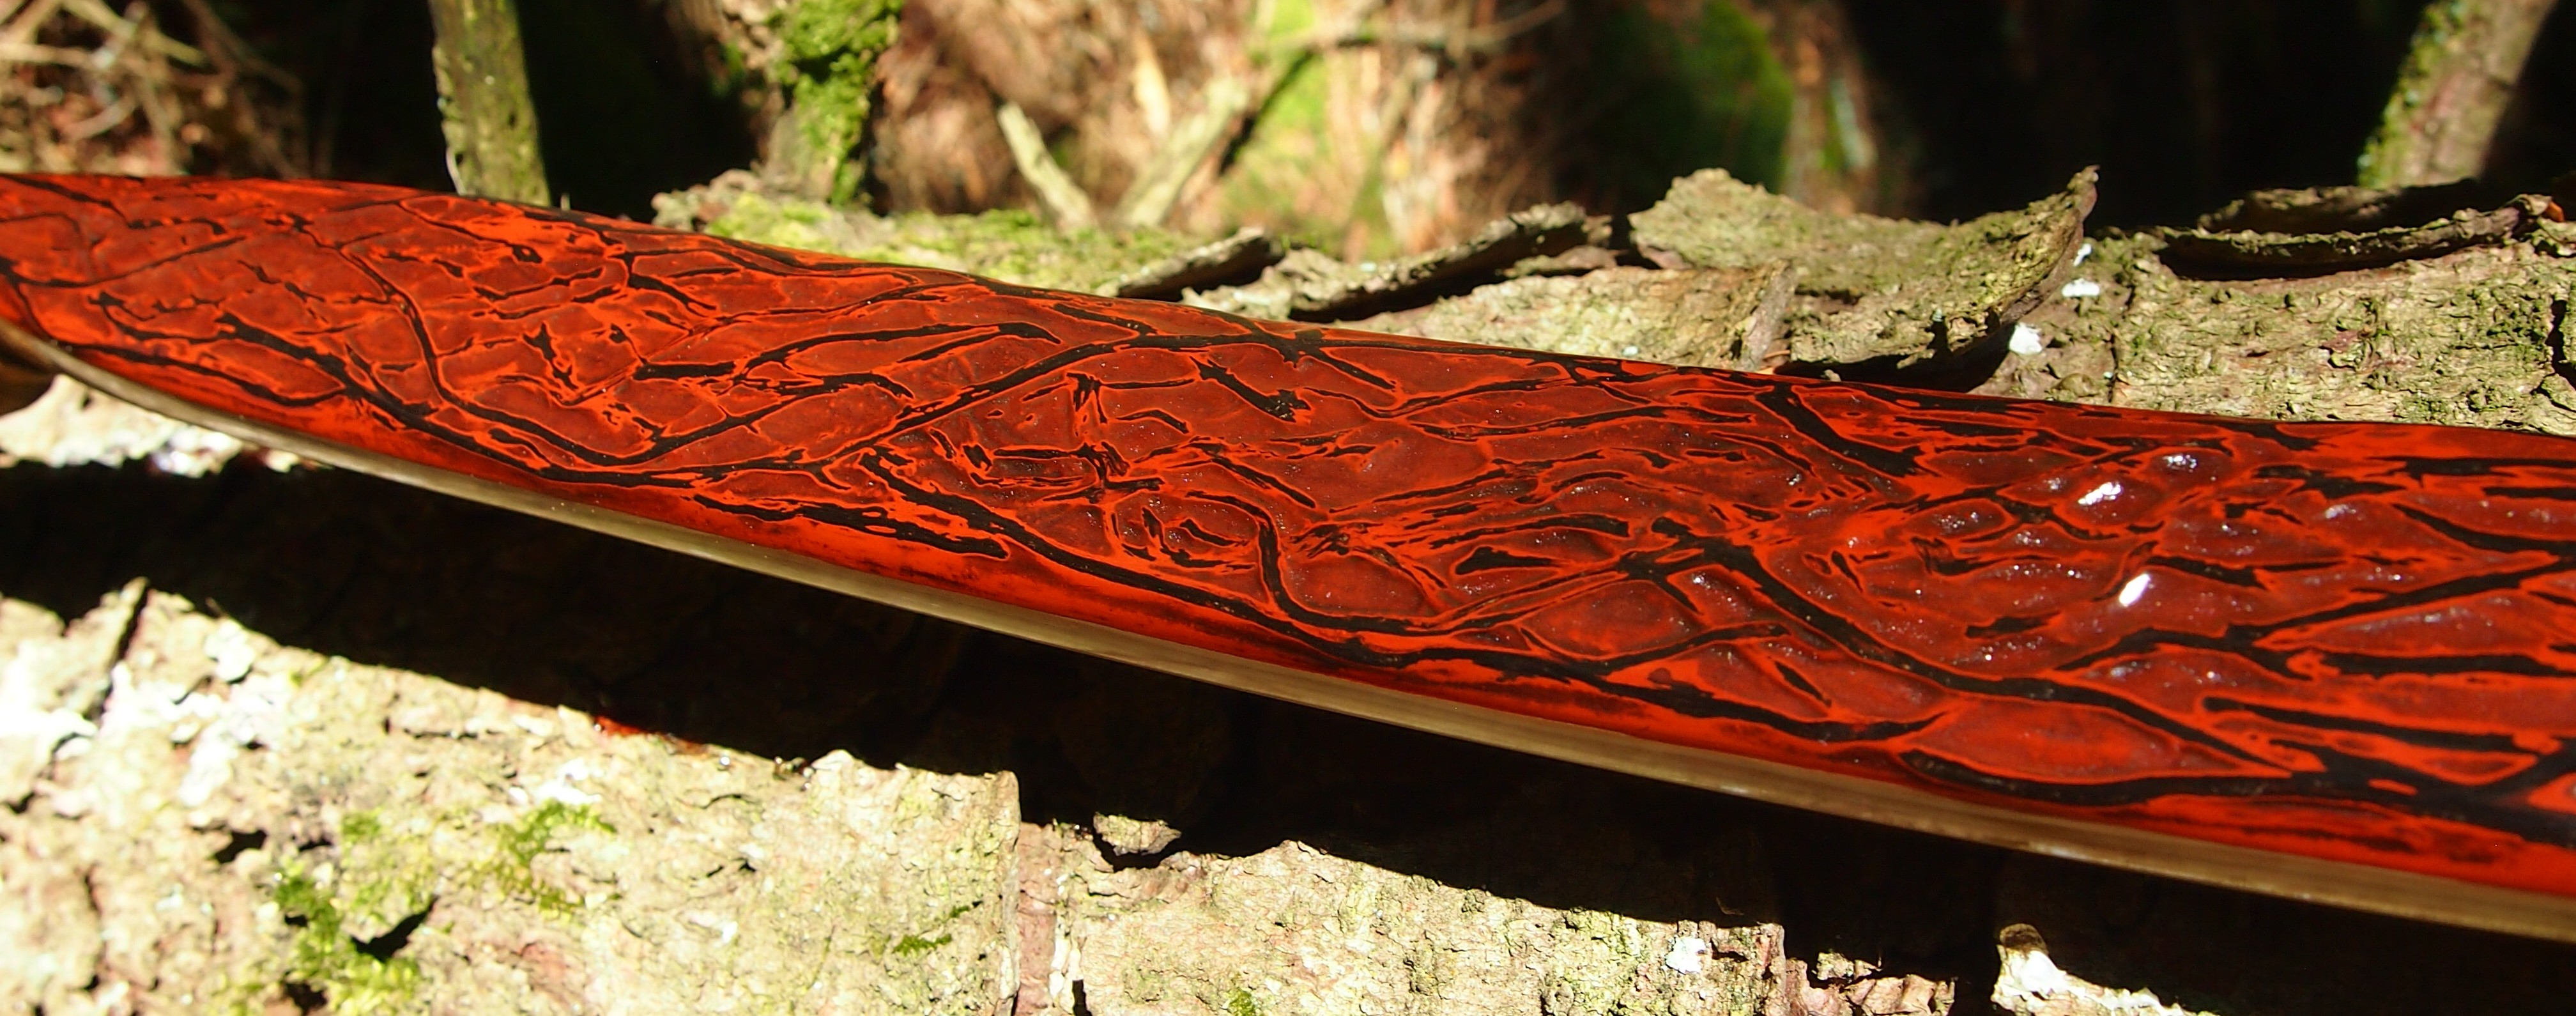
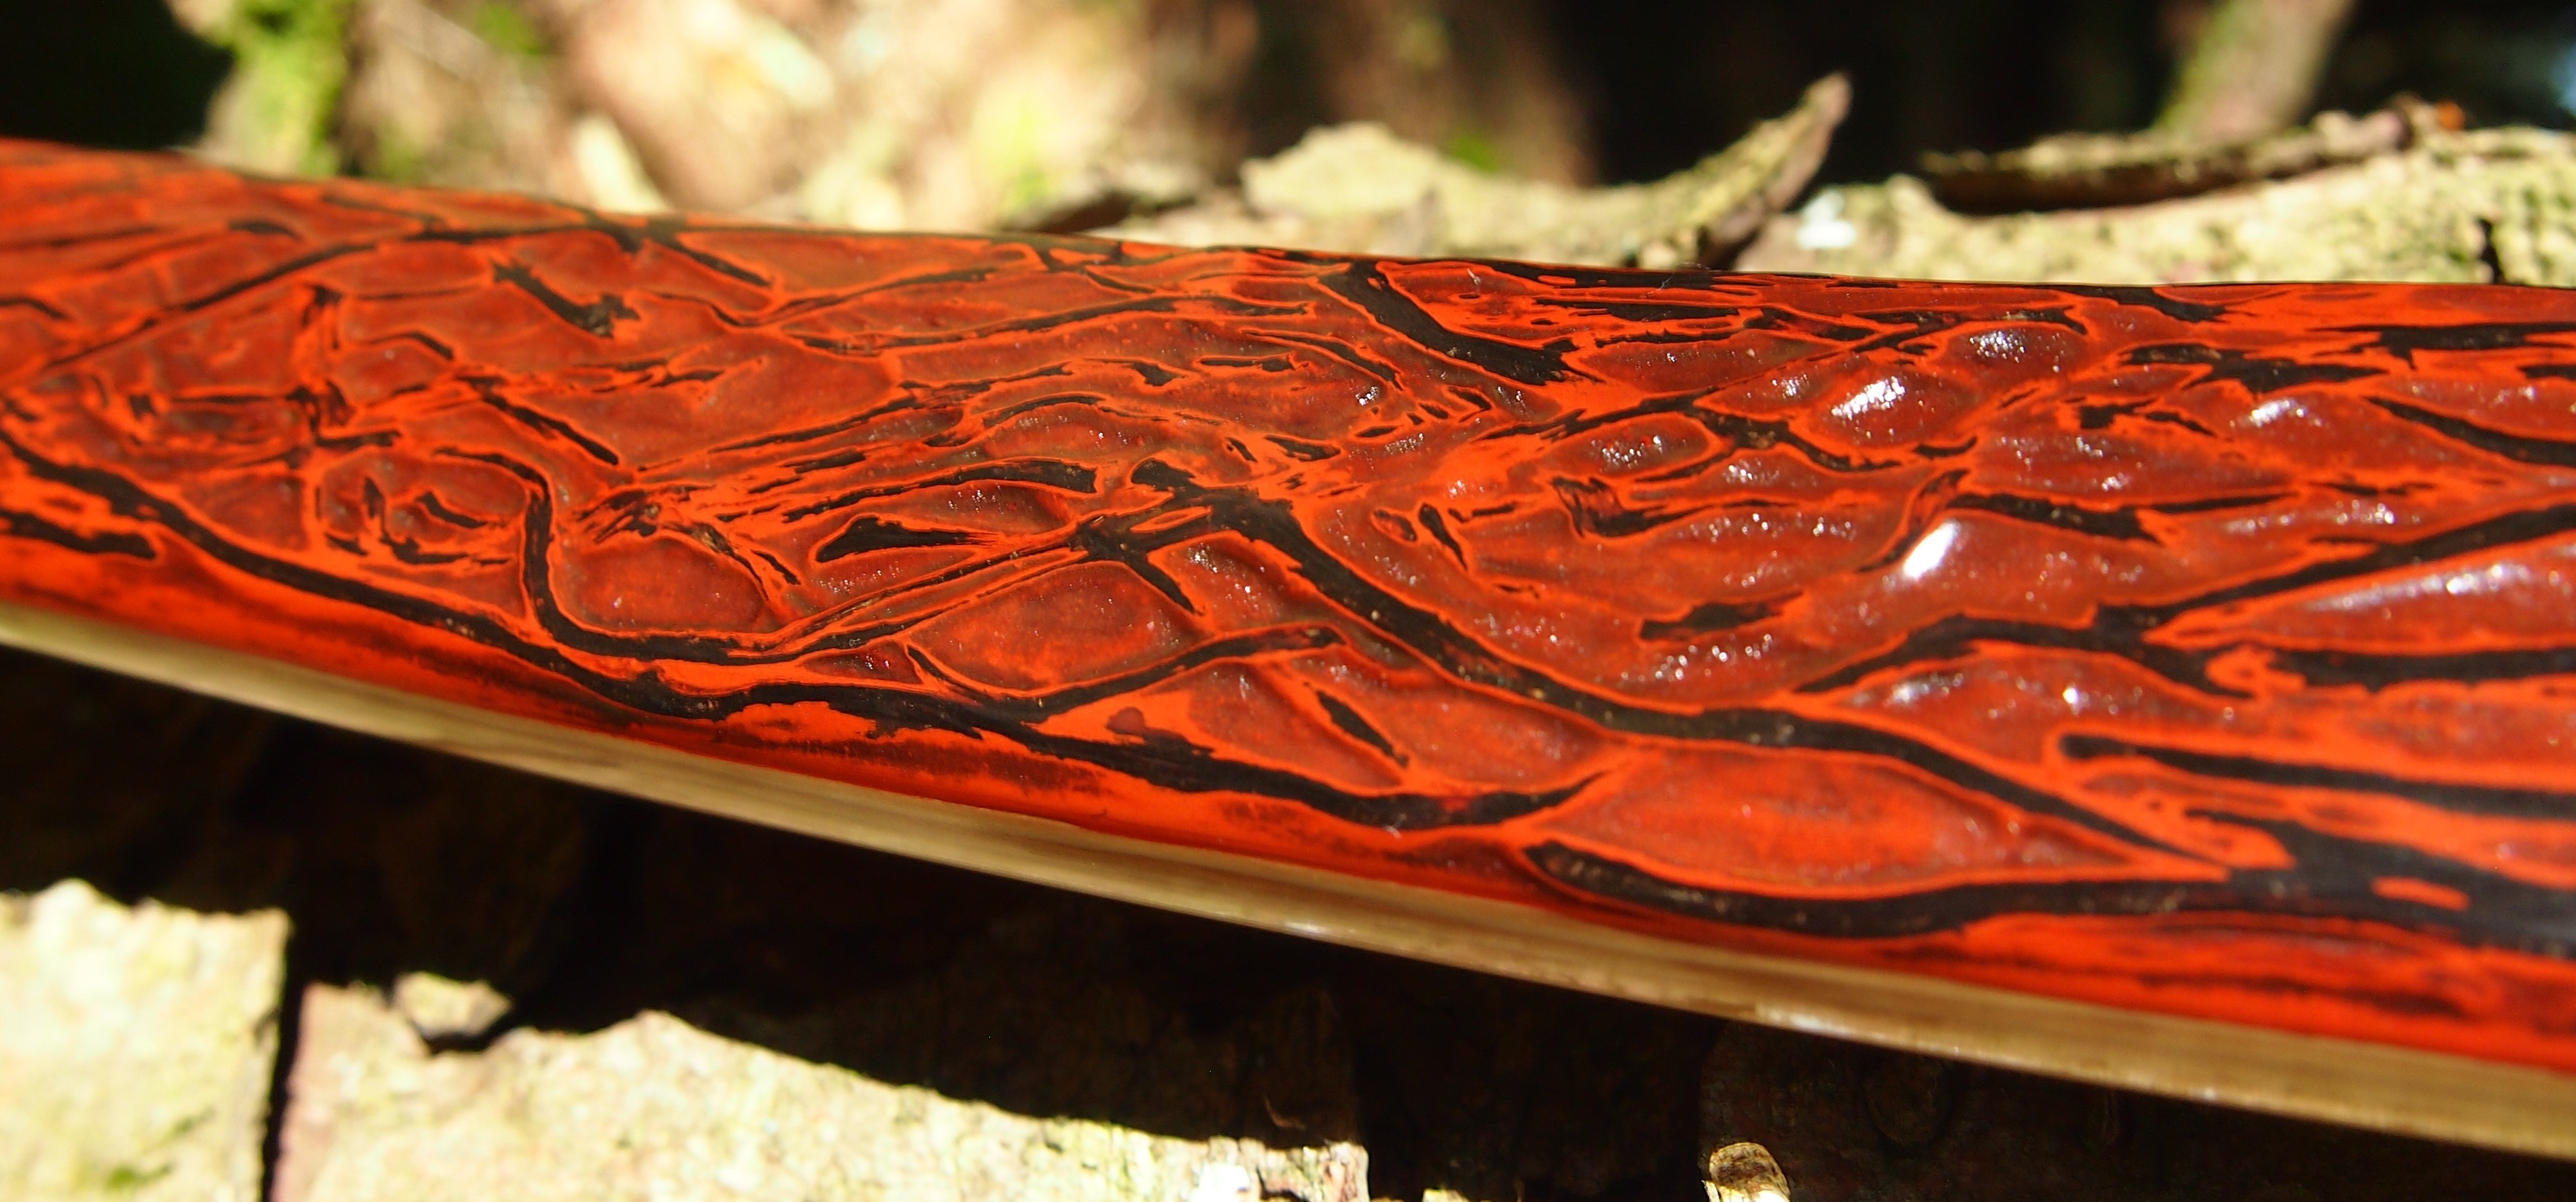
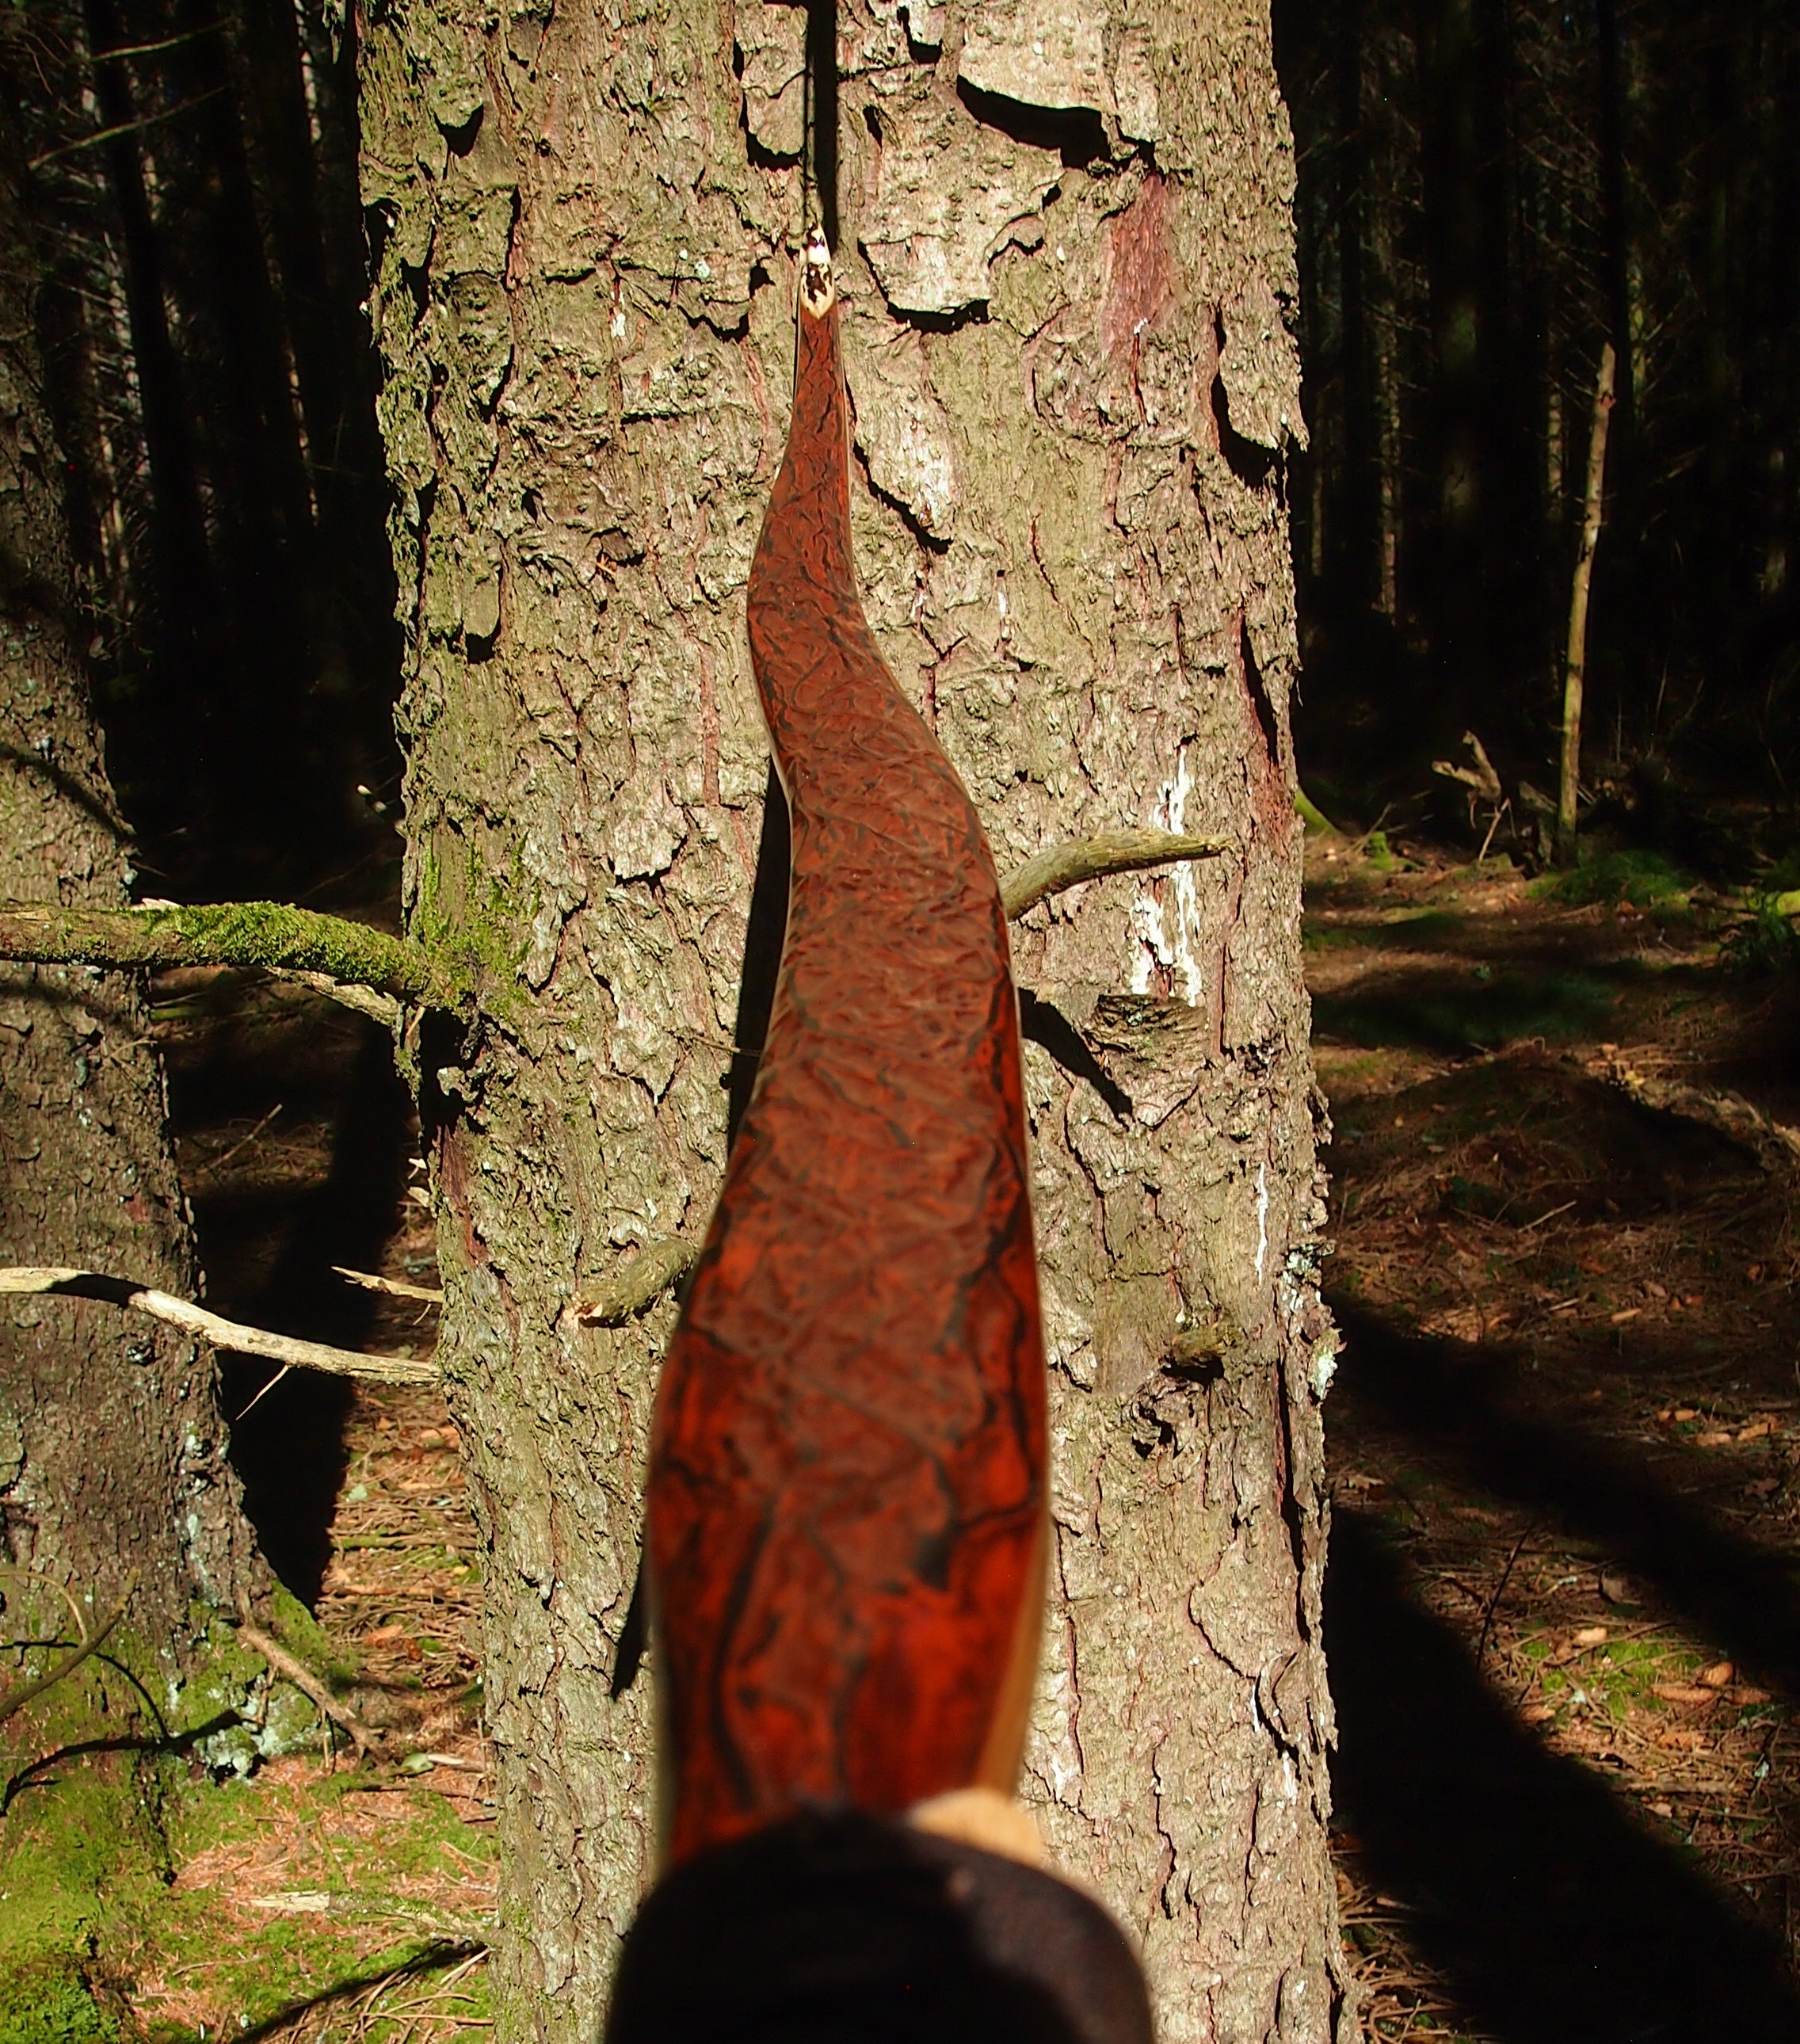
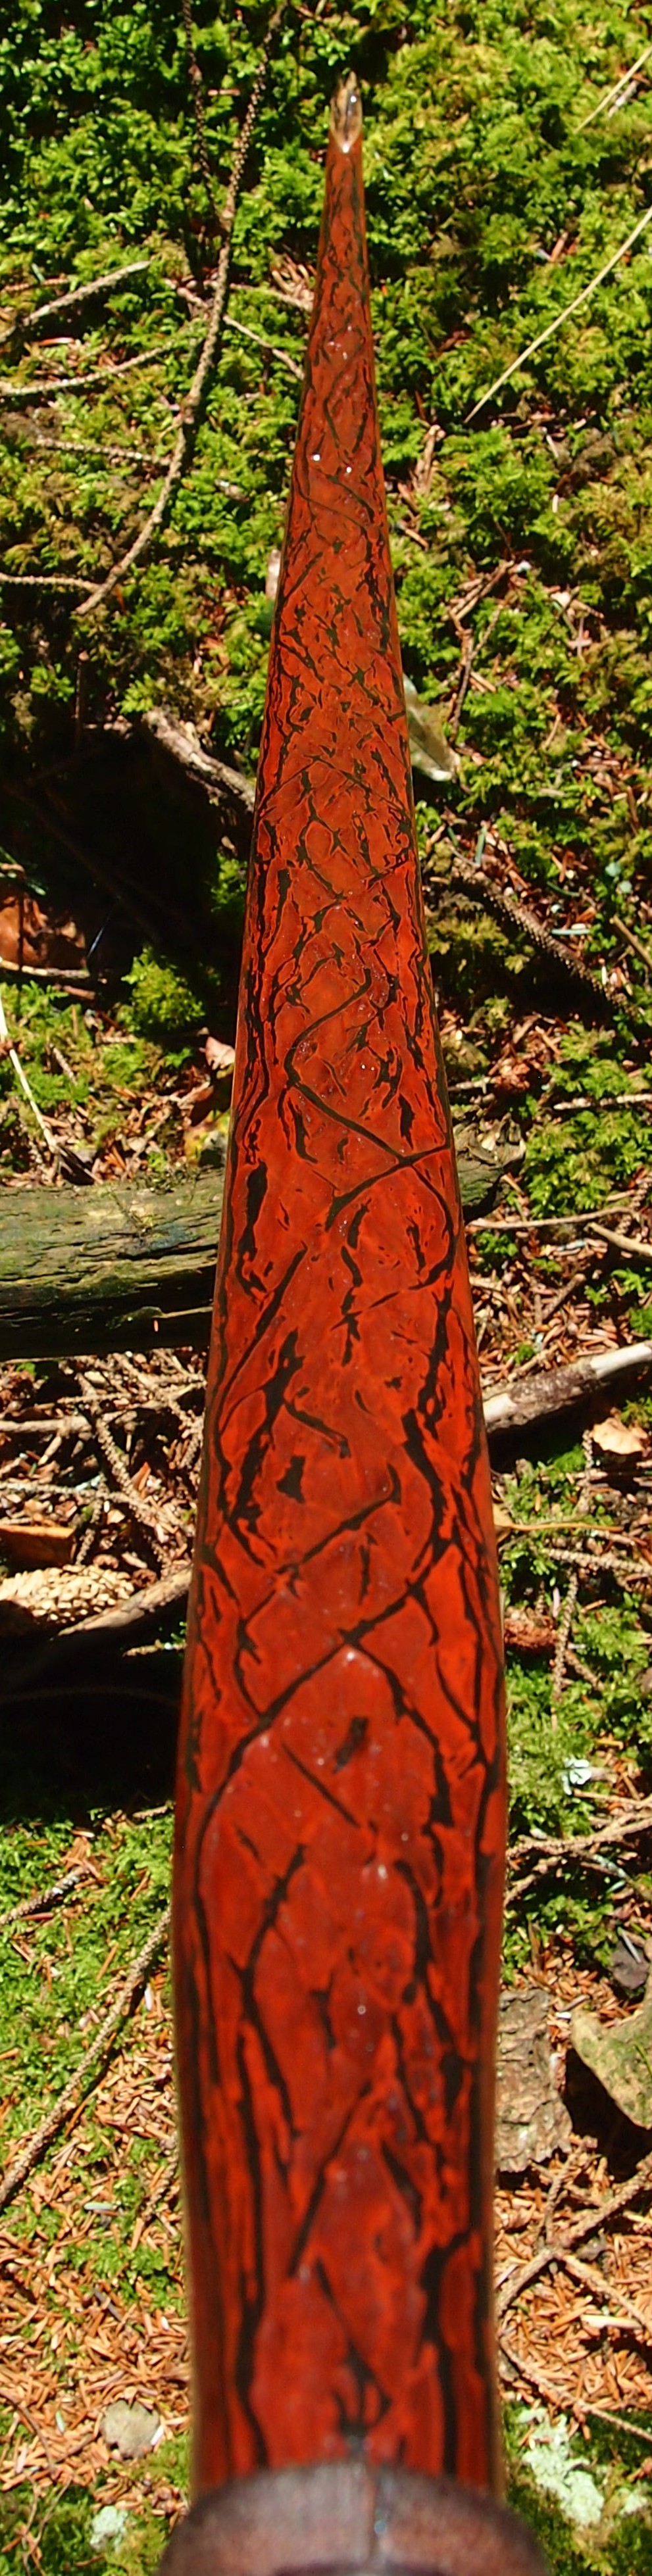
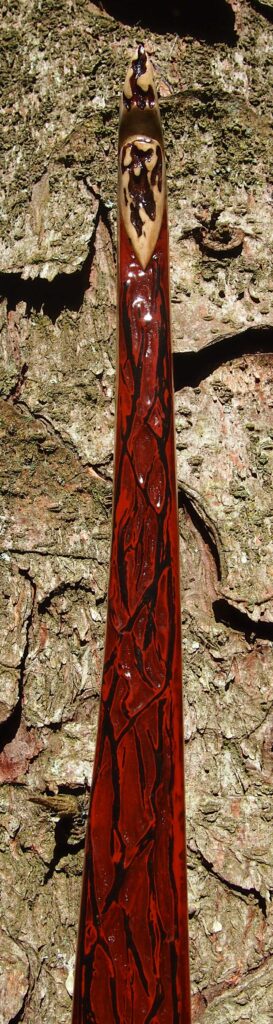
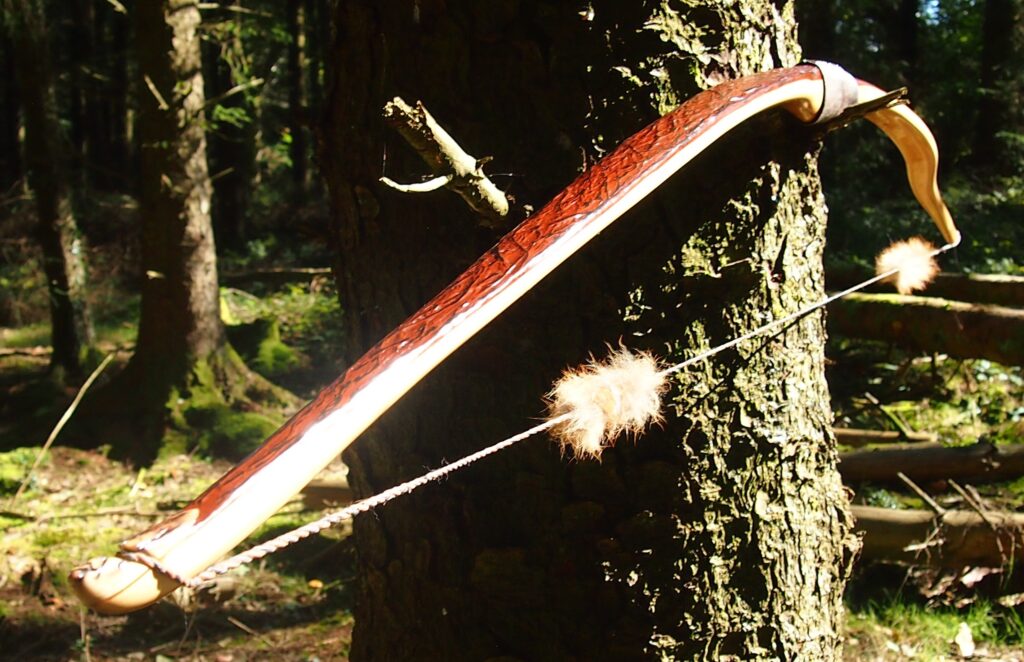
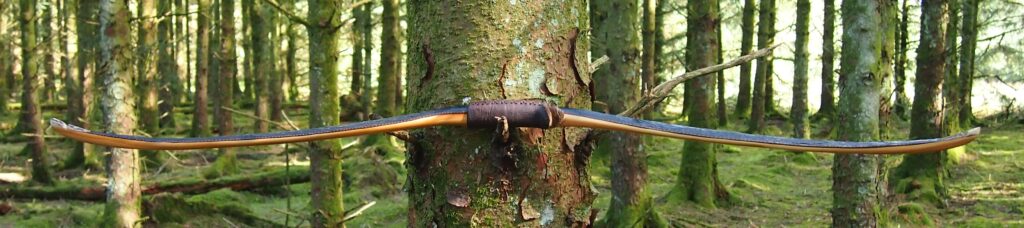
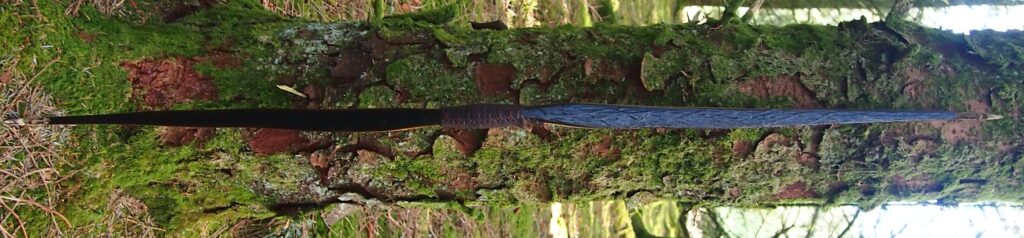
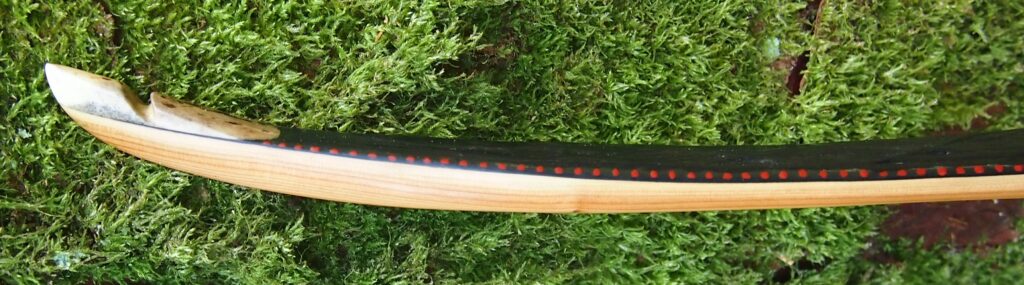
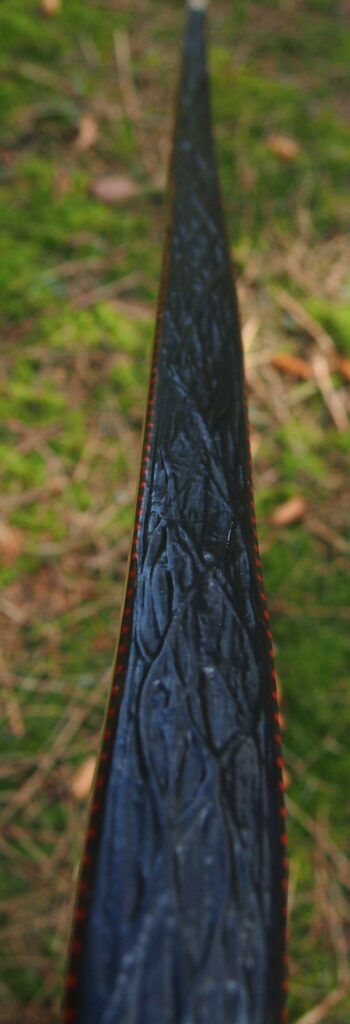
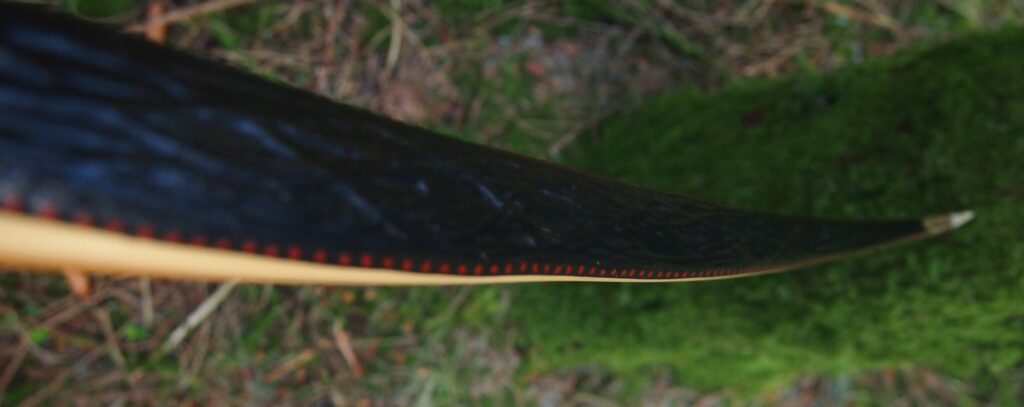
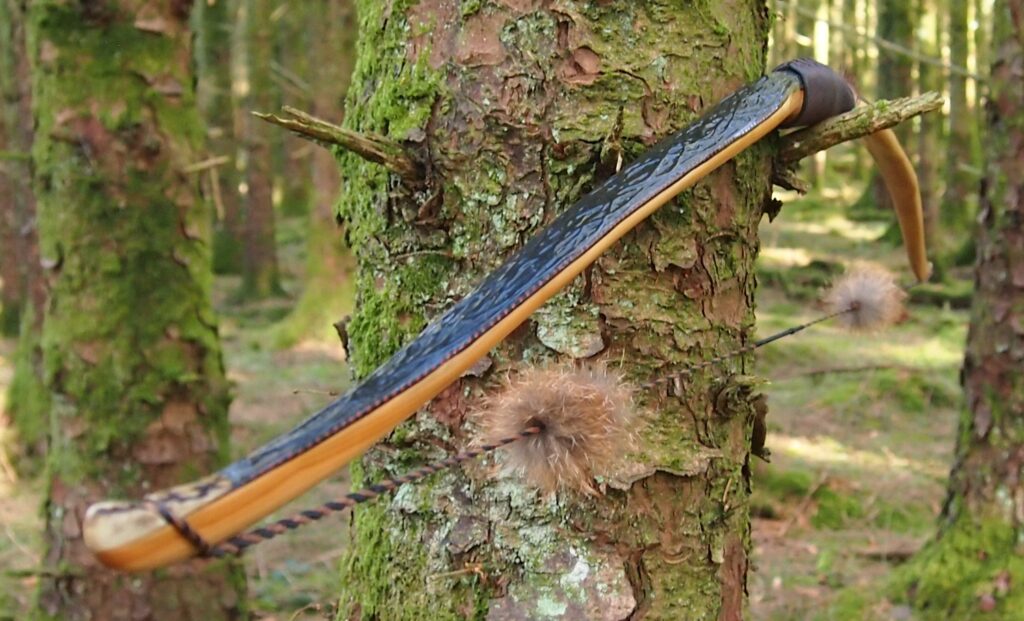
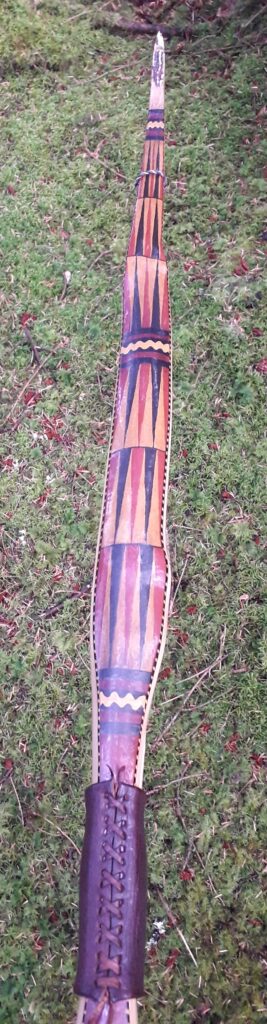
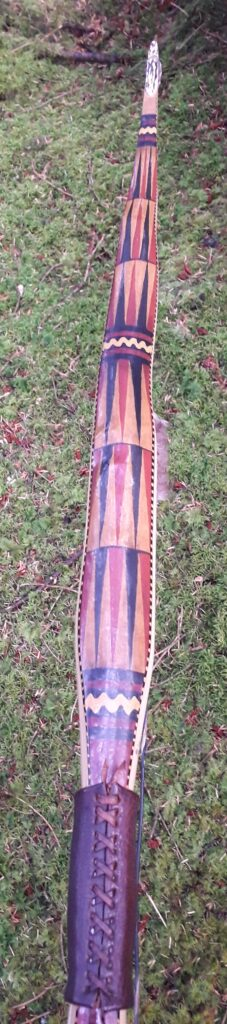
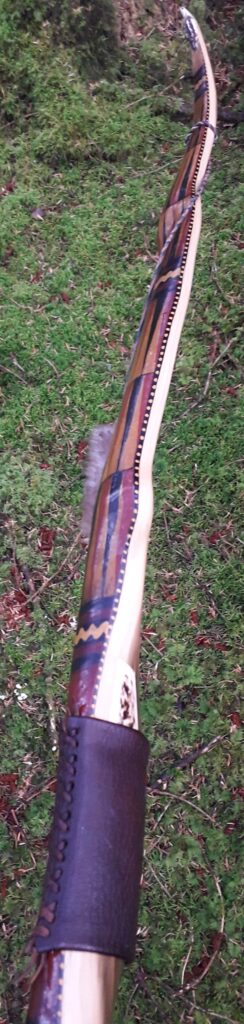
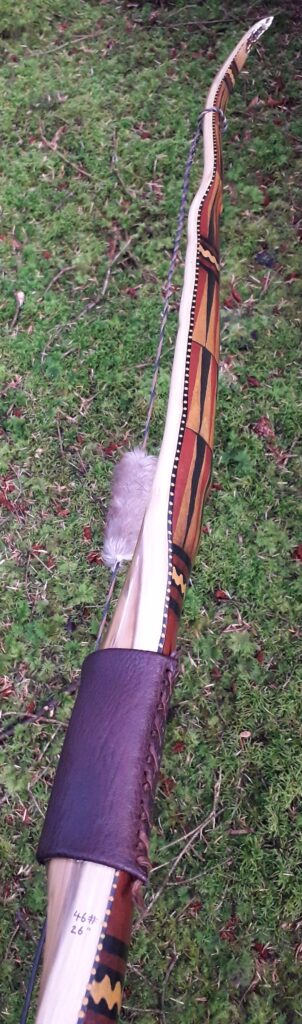
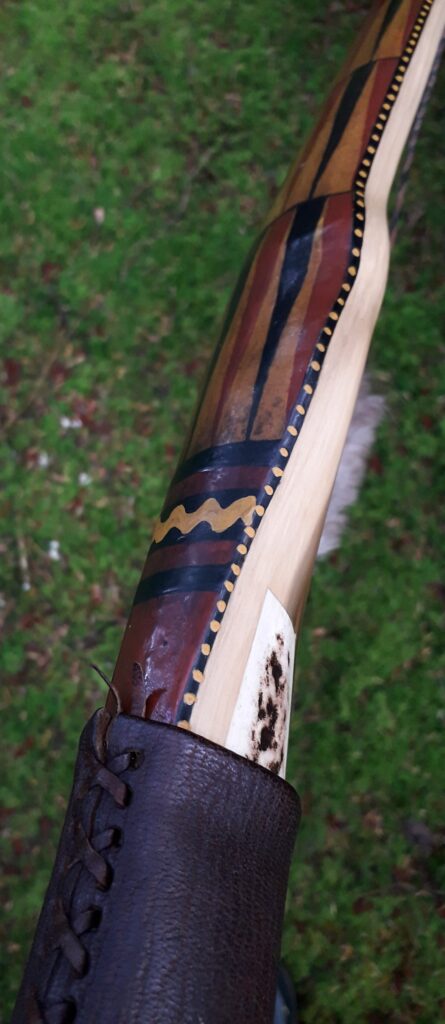
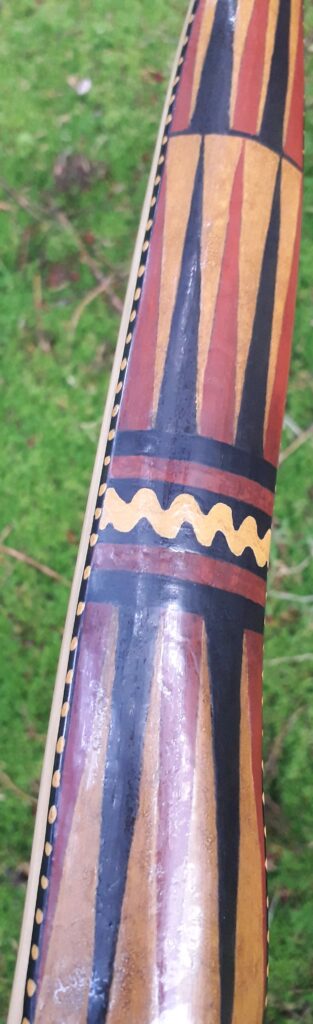
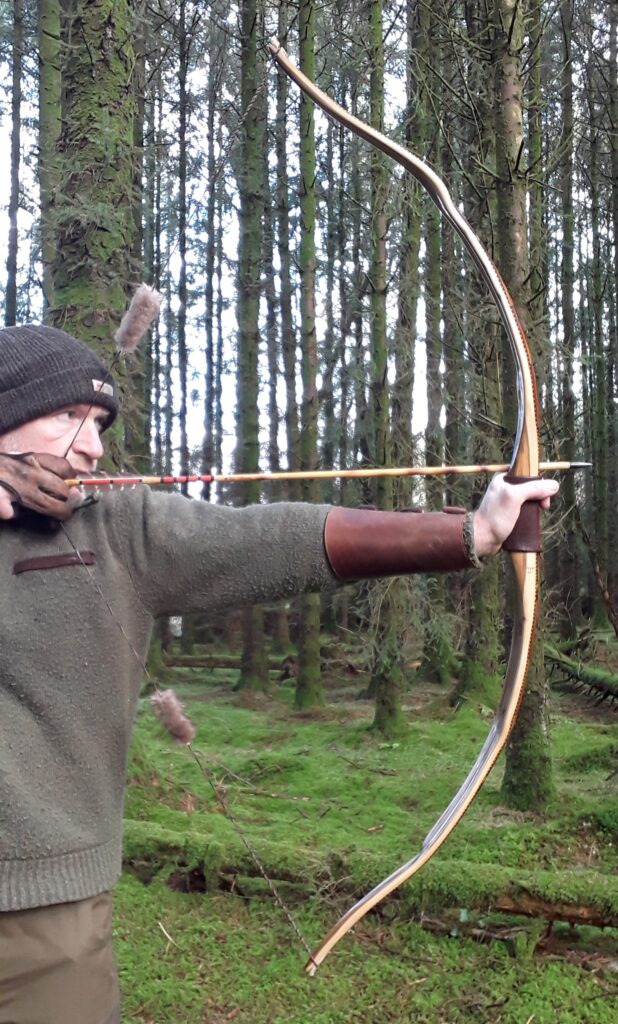
To decorate the bows back I fancied trying something a bit different. I’d been inspired recently by a pile of old beech logs which were full of that beautiful “spelted” black creeping web like fungal mycelia. I wanted to re create this creeping black fungal “mycelial” pattern and texture on one of my sinew backed bows, but using sinew threads dyed black to represent the mycelial component, set amongst a background of contrasting colour to represent the “growing medium”.
The primary colour I’d chosen to compliment the black of the sinew mycelia was a really nice dark red which I could create using a mix of my local iron oxide and carboniferous earth pigment. This combination of earth pigments creates that dark red blood colour, akin to what you’d find dried onto your sword after a busy day slaying a bunch of zombies! 🤣Perfect!
So I added a thin surface layer of new sinew threads to the already cured, established sinew backing. These new sinew threads however had previously been soaked in spruce bark tannin solution rather than plain water in order to hydrate them. And once fully hydrated with tannin they were then added to a little iron chloride solution which I make myself from wire wool and white vinegar. The chemical reaction which takes place between the tannin and the iron chloride resulted in the sinew threads instantly turning a stunning jet black colour.
These jet black sinew threads could then be glued onto the plain established sinew backing layer in a web like weaving pattern, just like those black fungal mycelia veins weave through a hunk of spelted beech wood.
Once these black weaving sinew threads were fully dry, I then painted the whole back with my dark red earth pigment paint mix. This dark red layer was then followed by a coating of concentrated spruce bark tannin solution to provide a slight chestnut brown overlay to the dark red paint below it.
Once it was all dry I then scraped through the chestnut tannin stain, and the dark red paint below that to expose the jet black sinew threads on all the high spots. This left the low spots red and tan coloured, and all the high sinew spots presenting as inky black veins weaving up and down the entire length of the the limbs. I was really pleased with how it came out and I intend to finish several more sinew back bow this same way, but with a variety of different colours and shades.
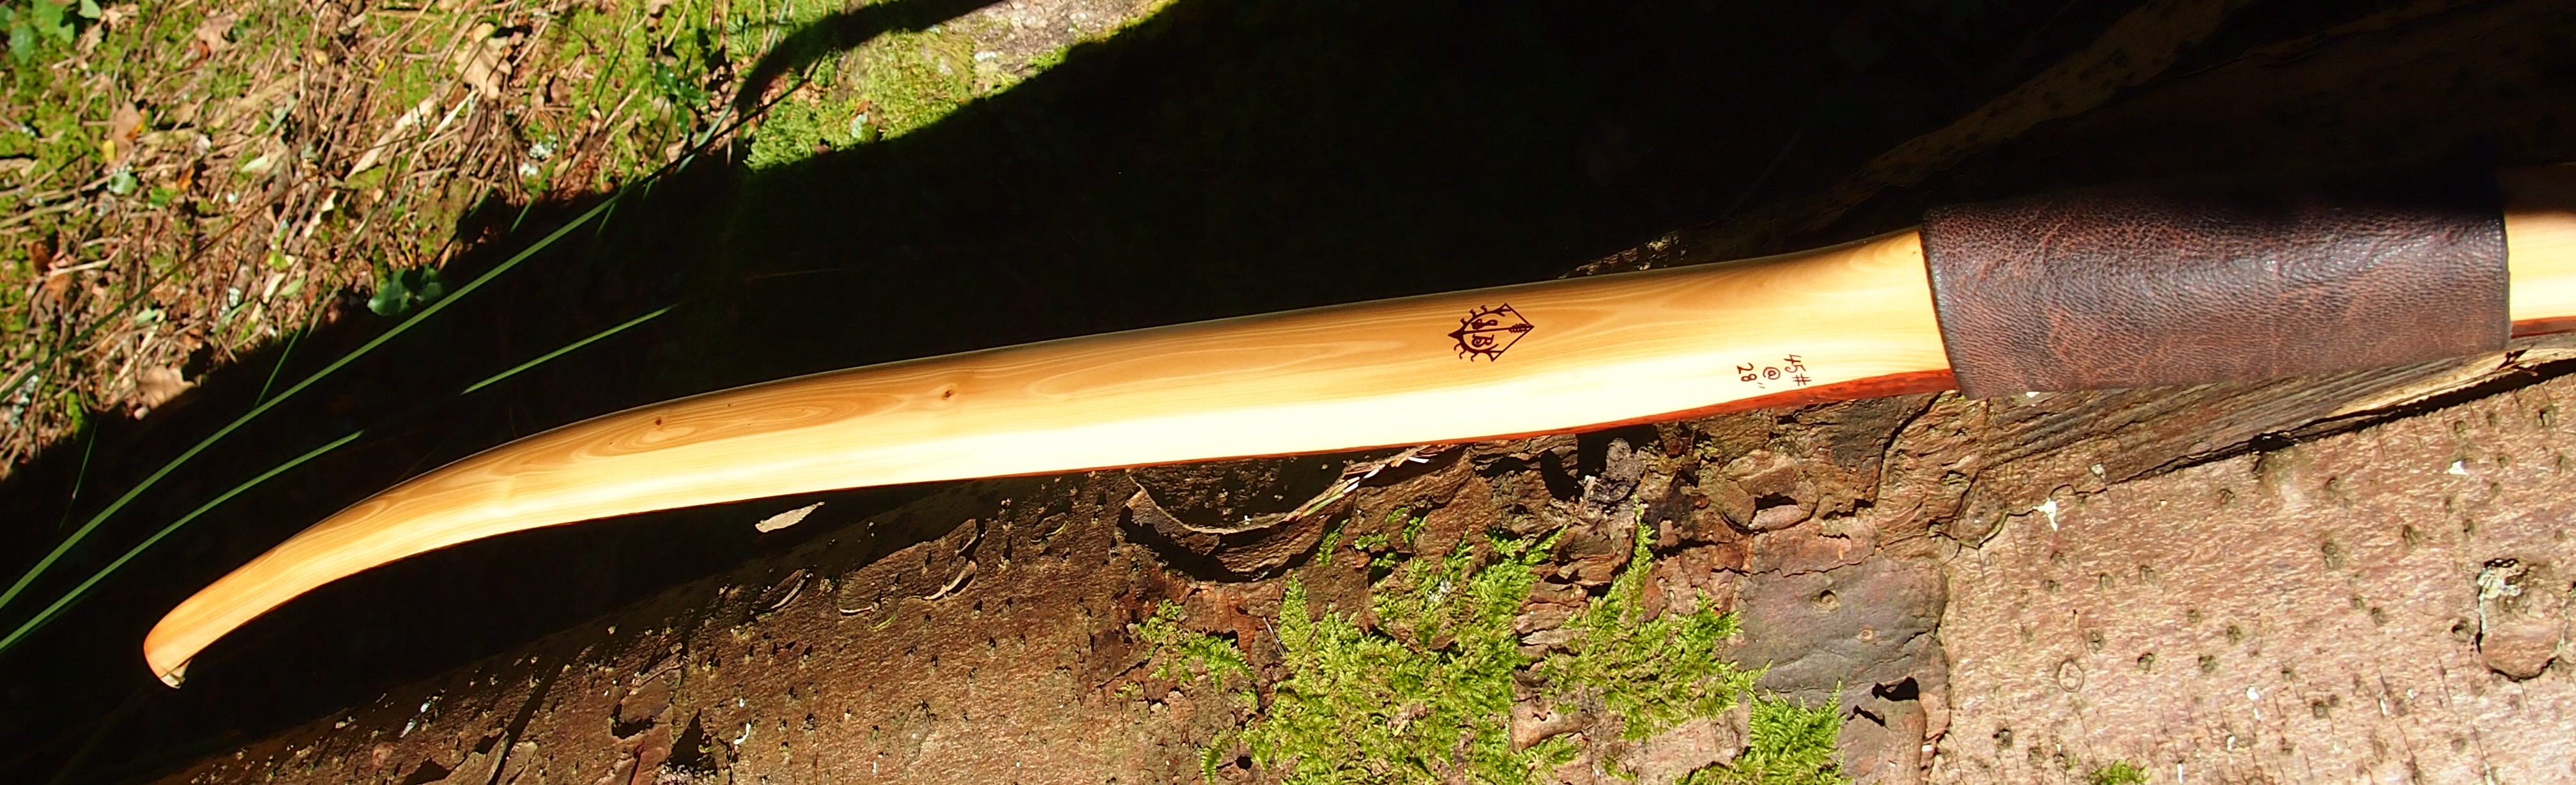
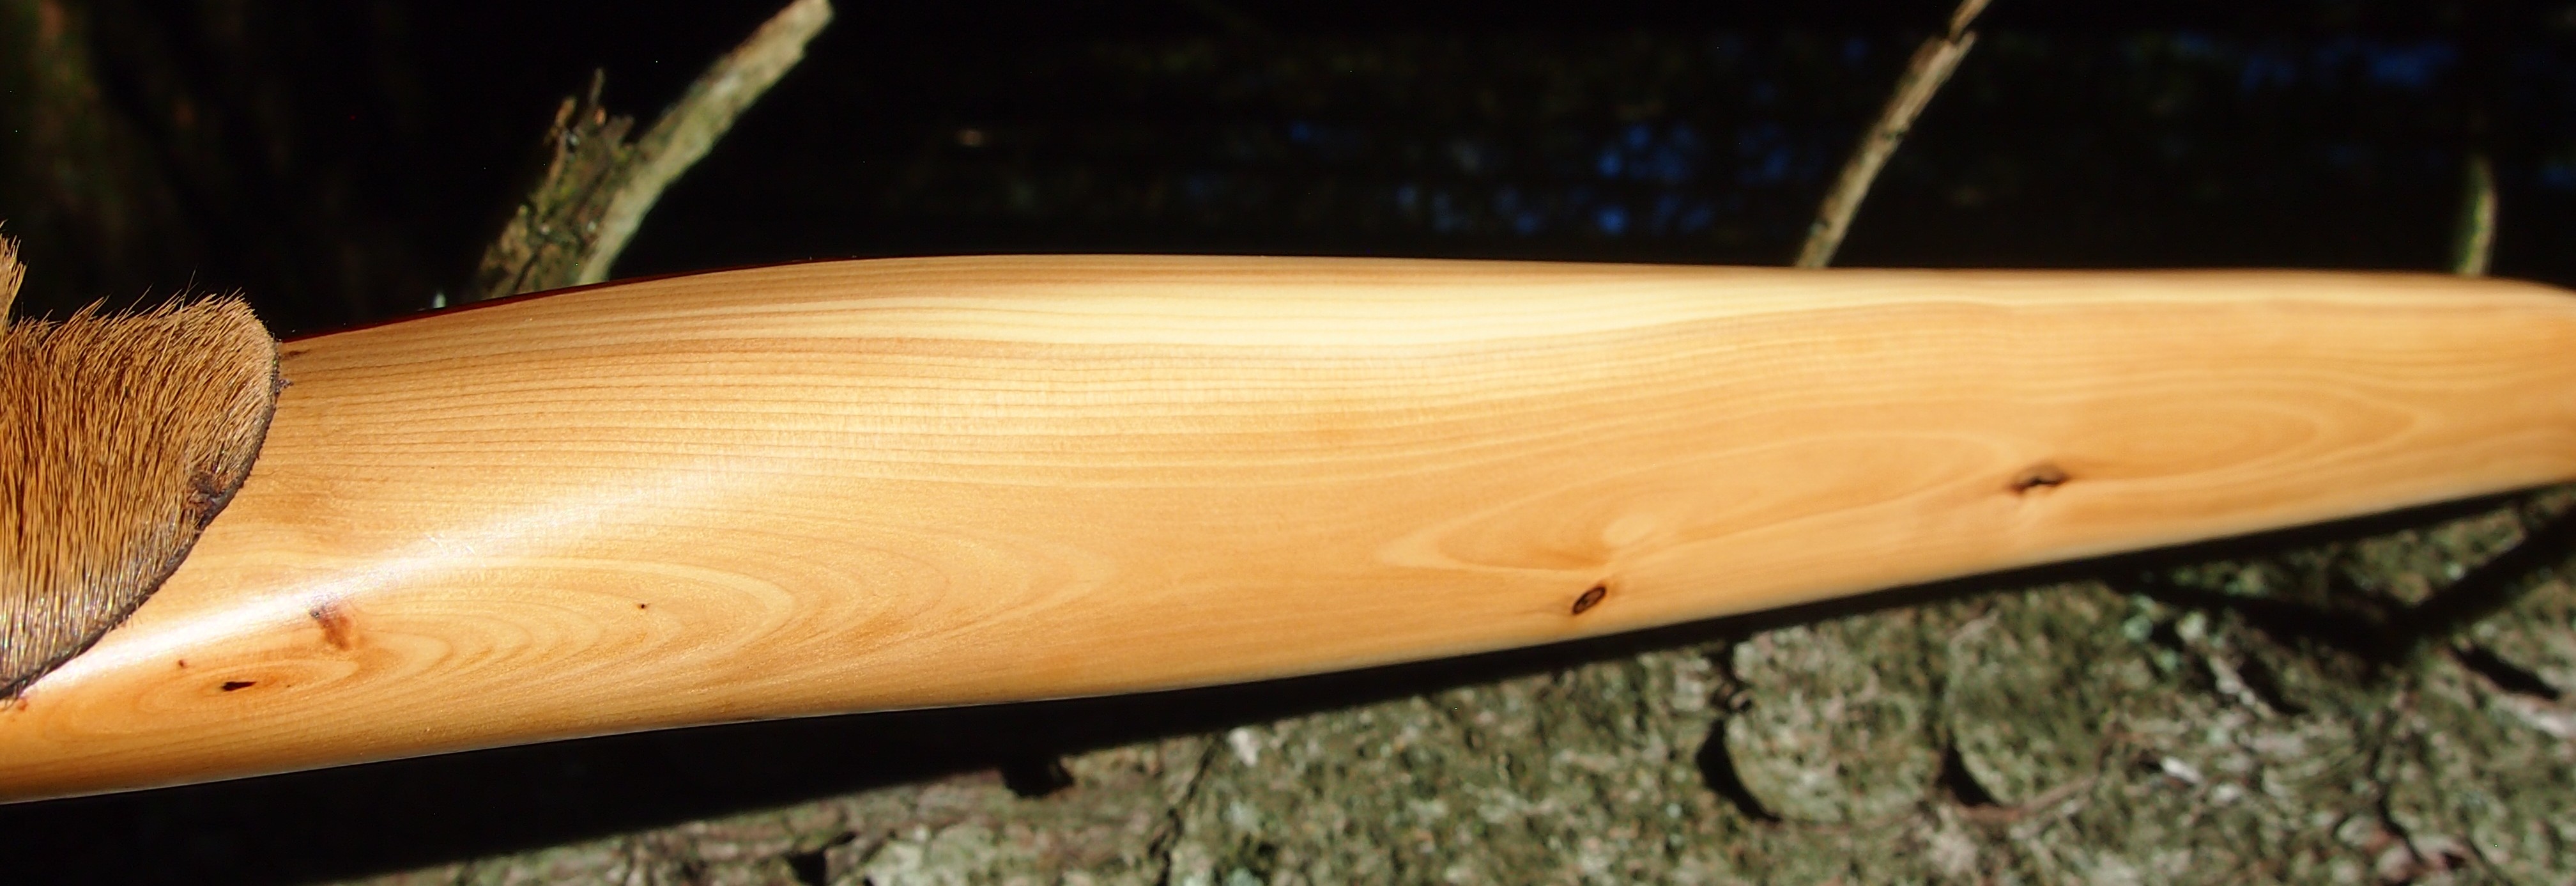
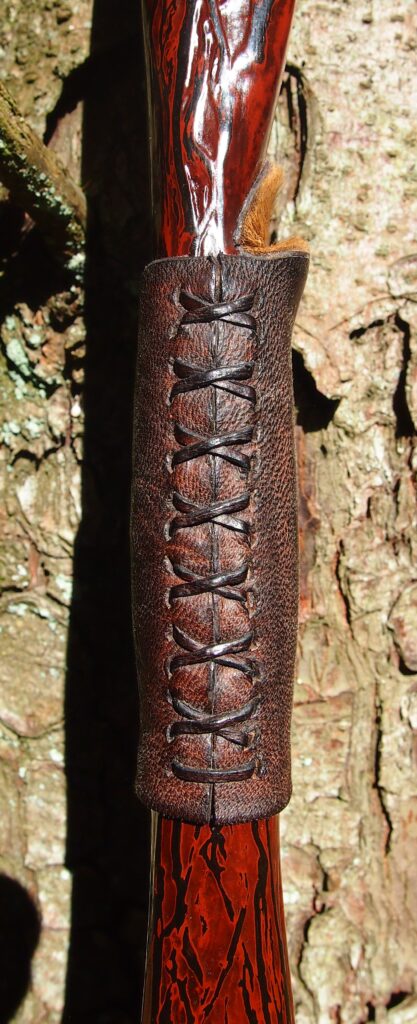
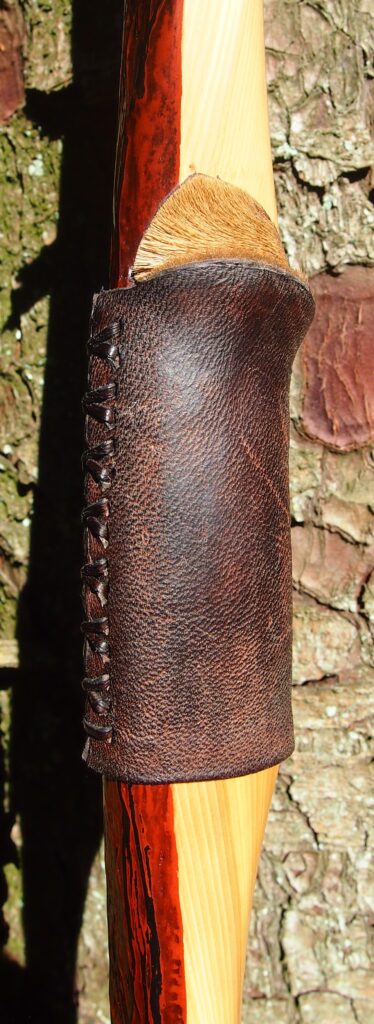
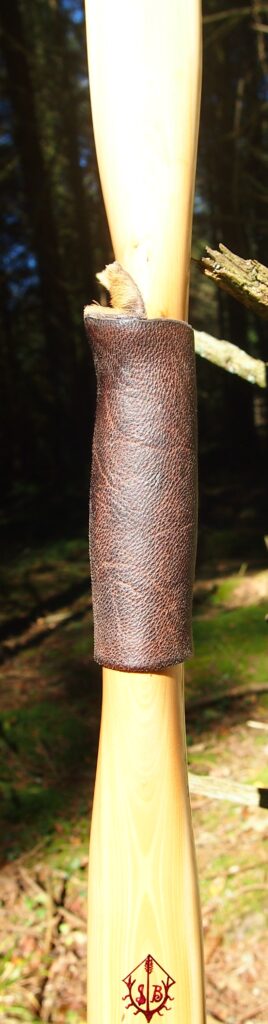
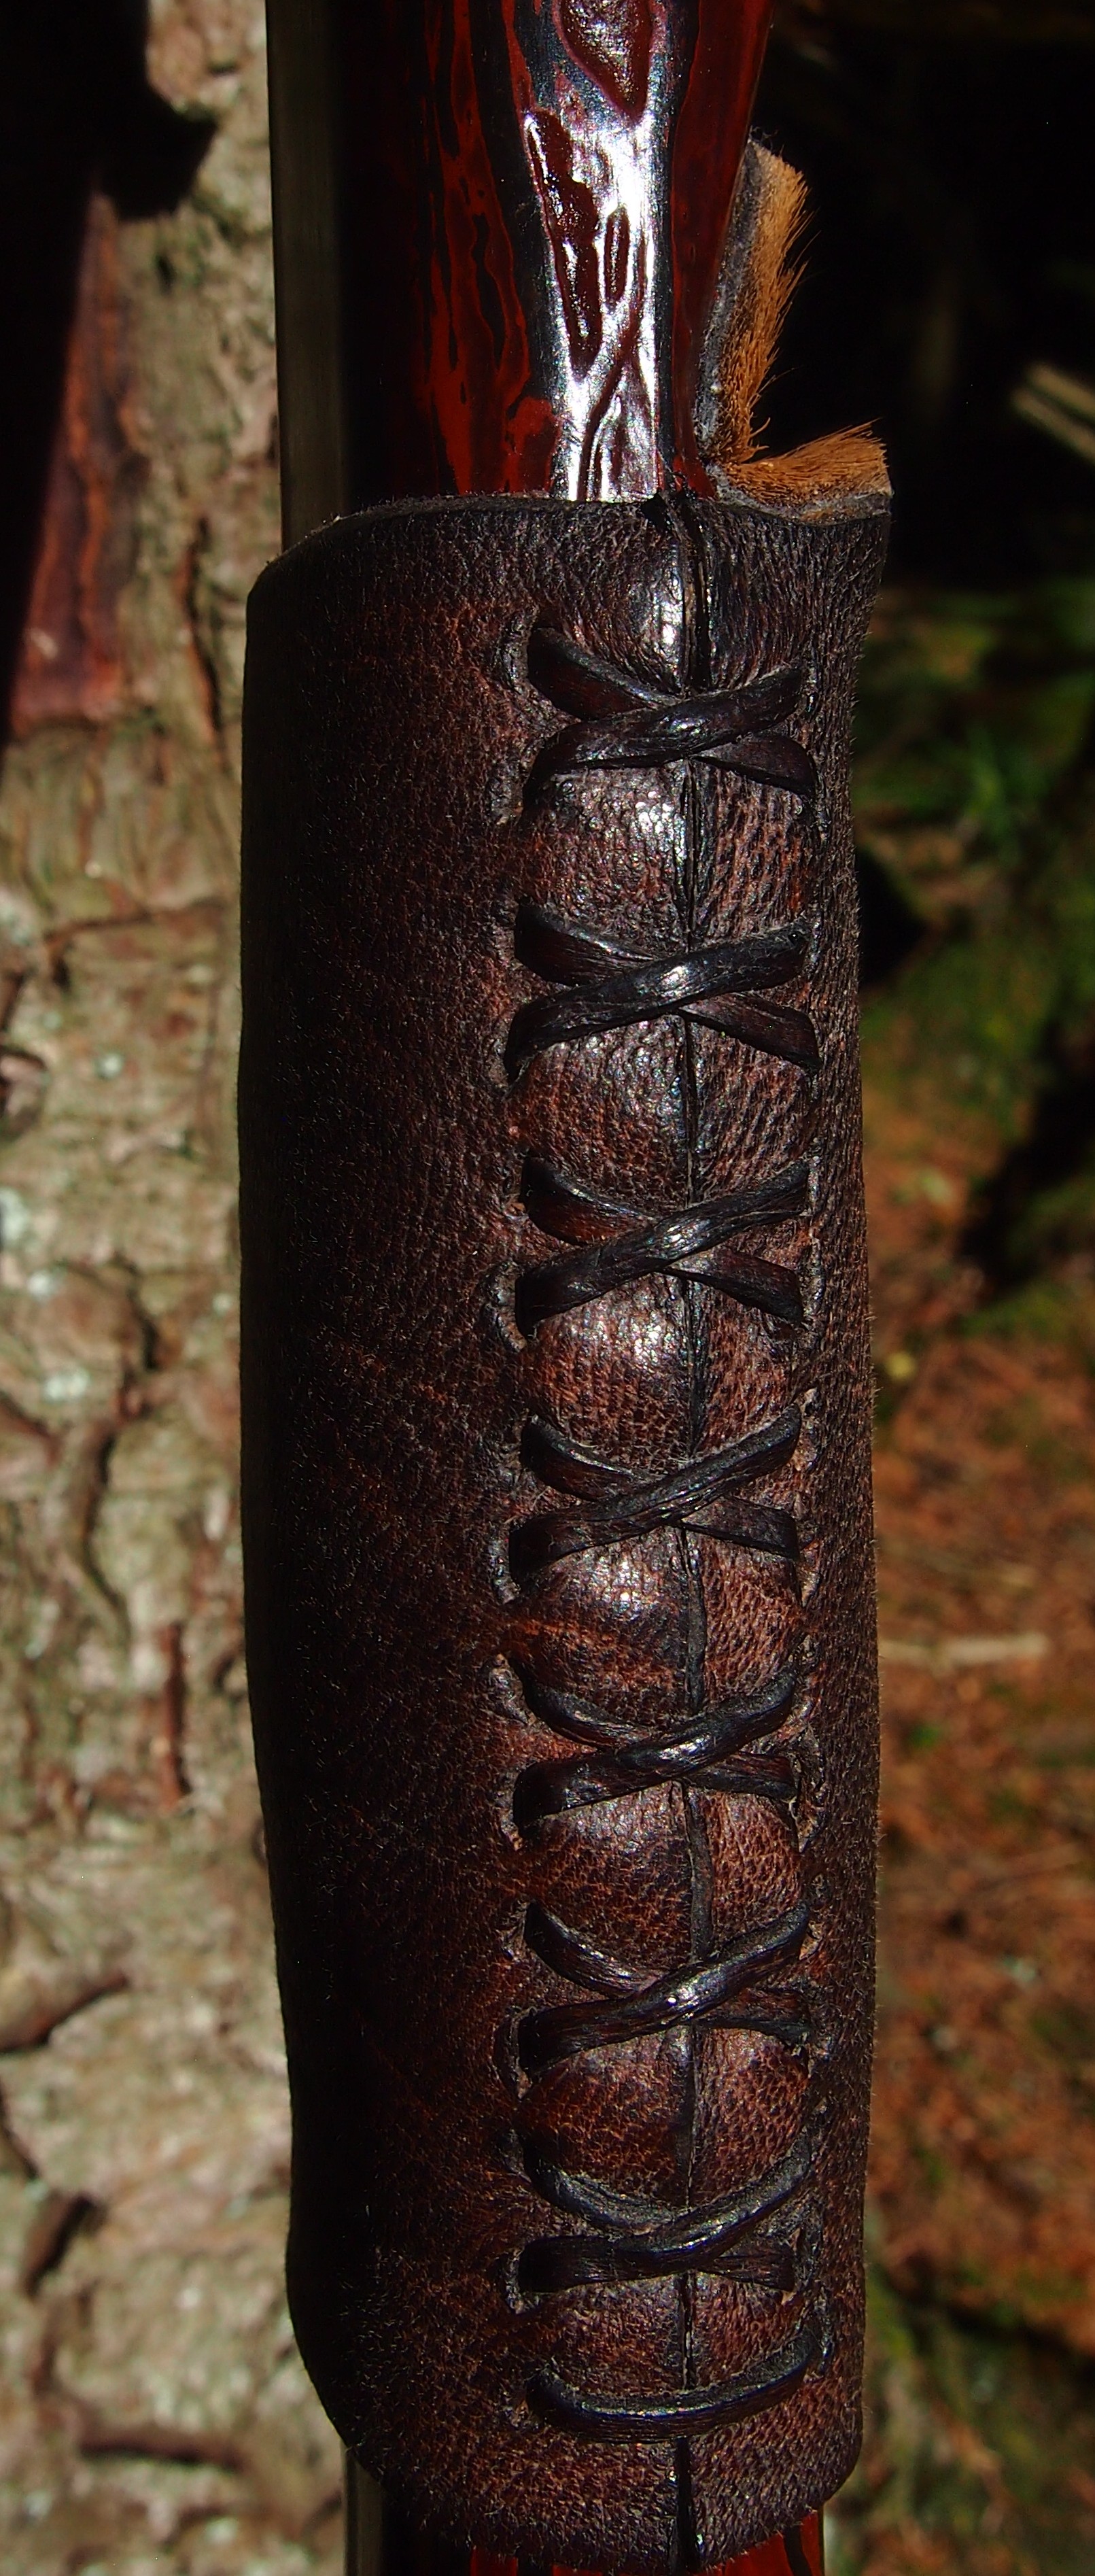
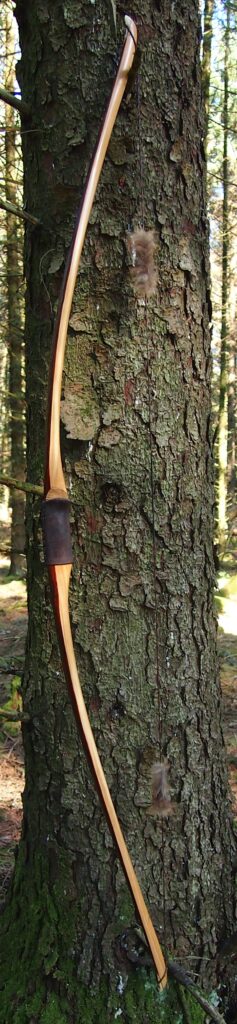
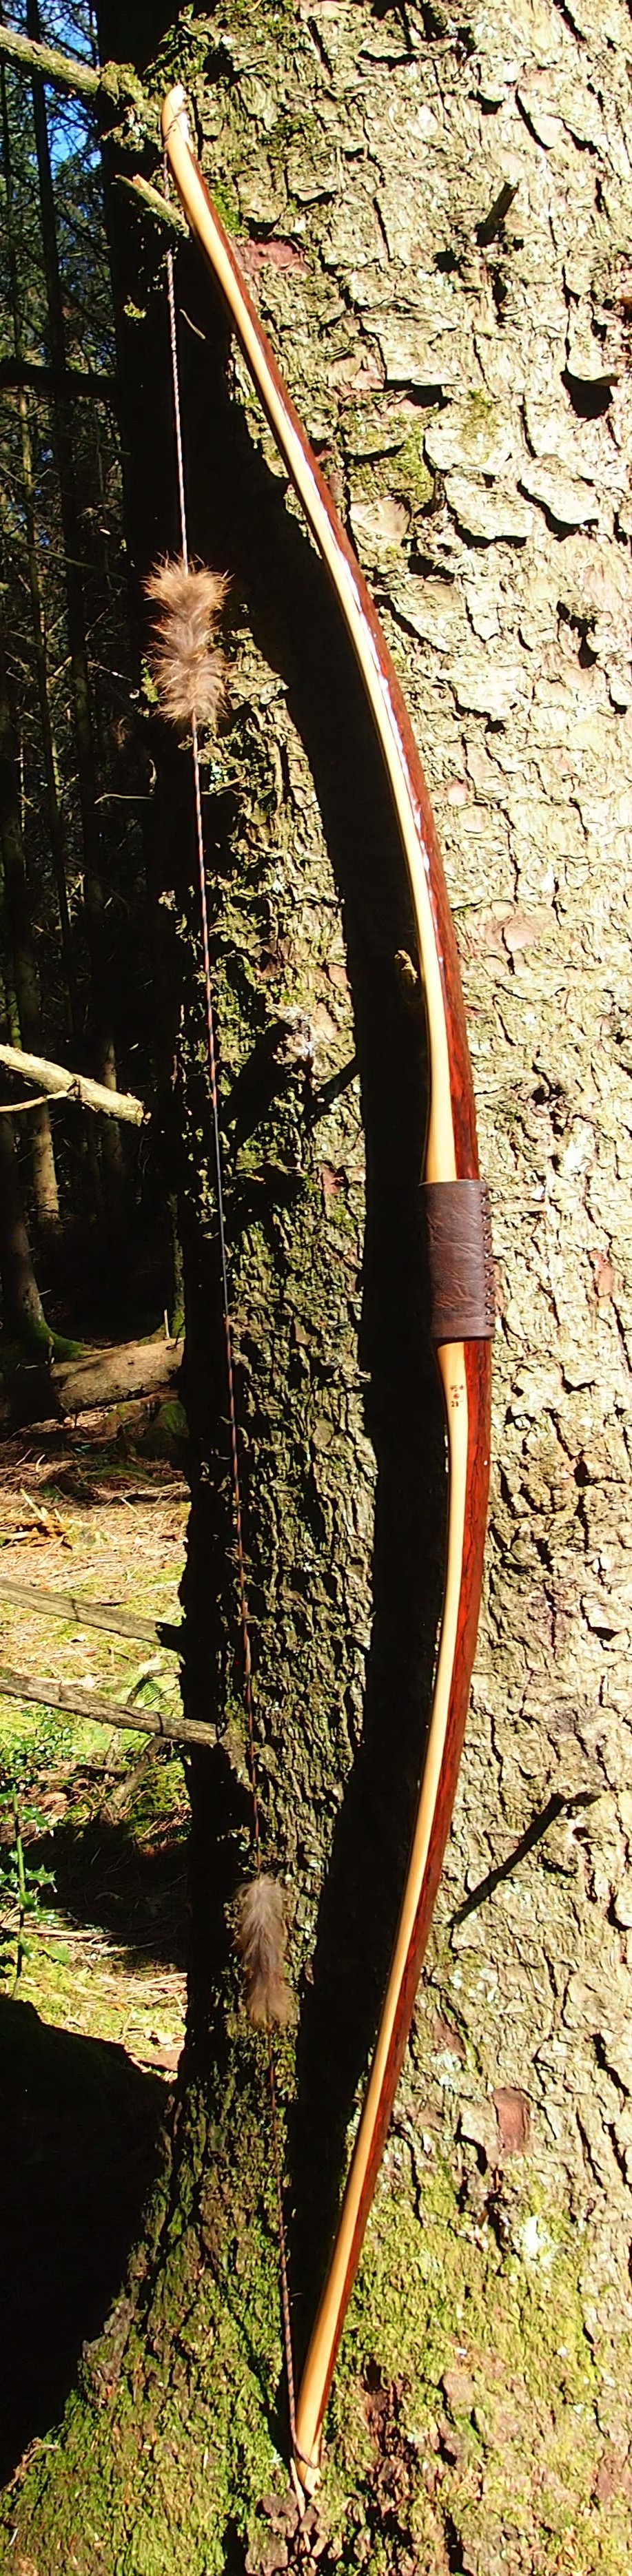
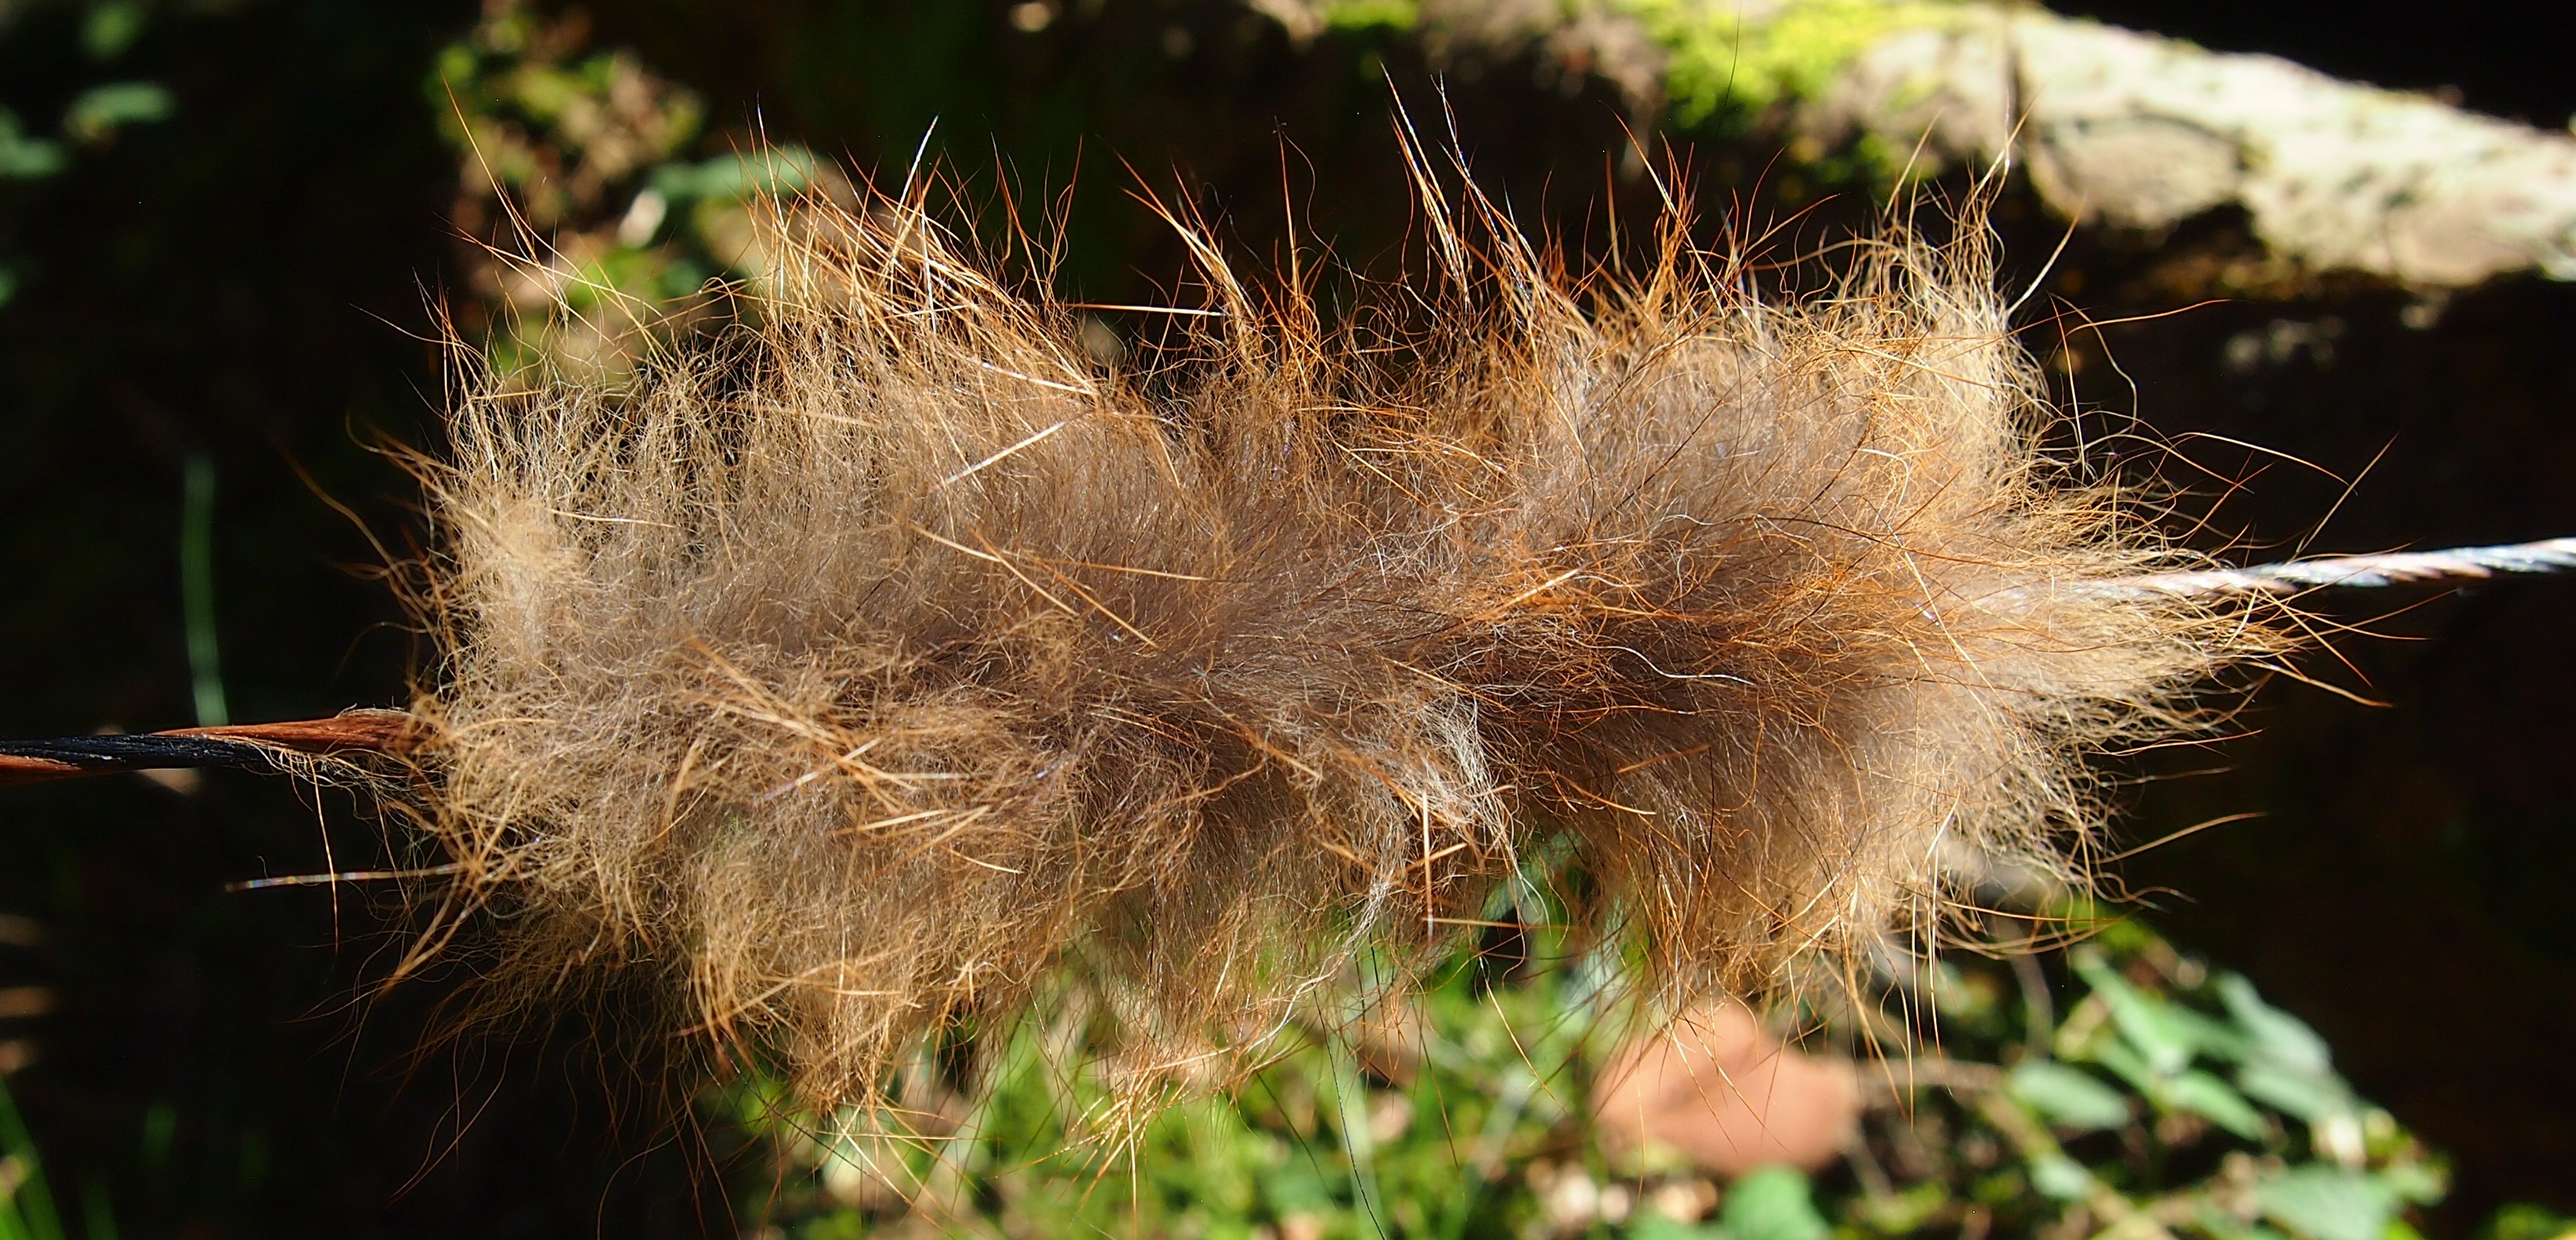
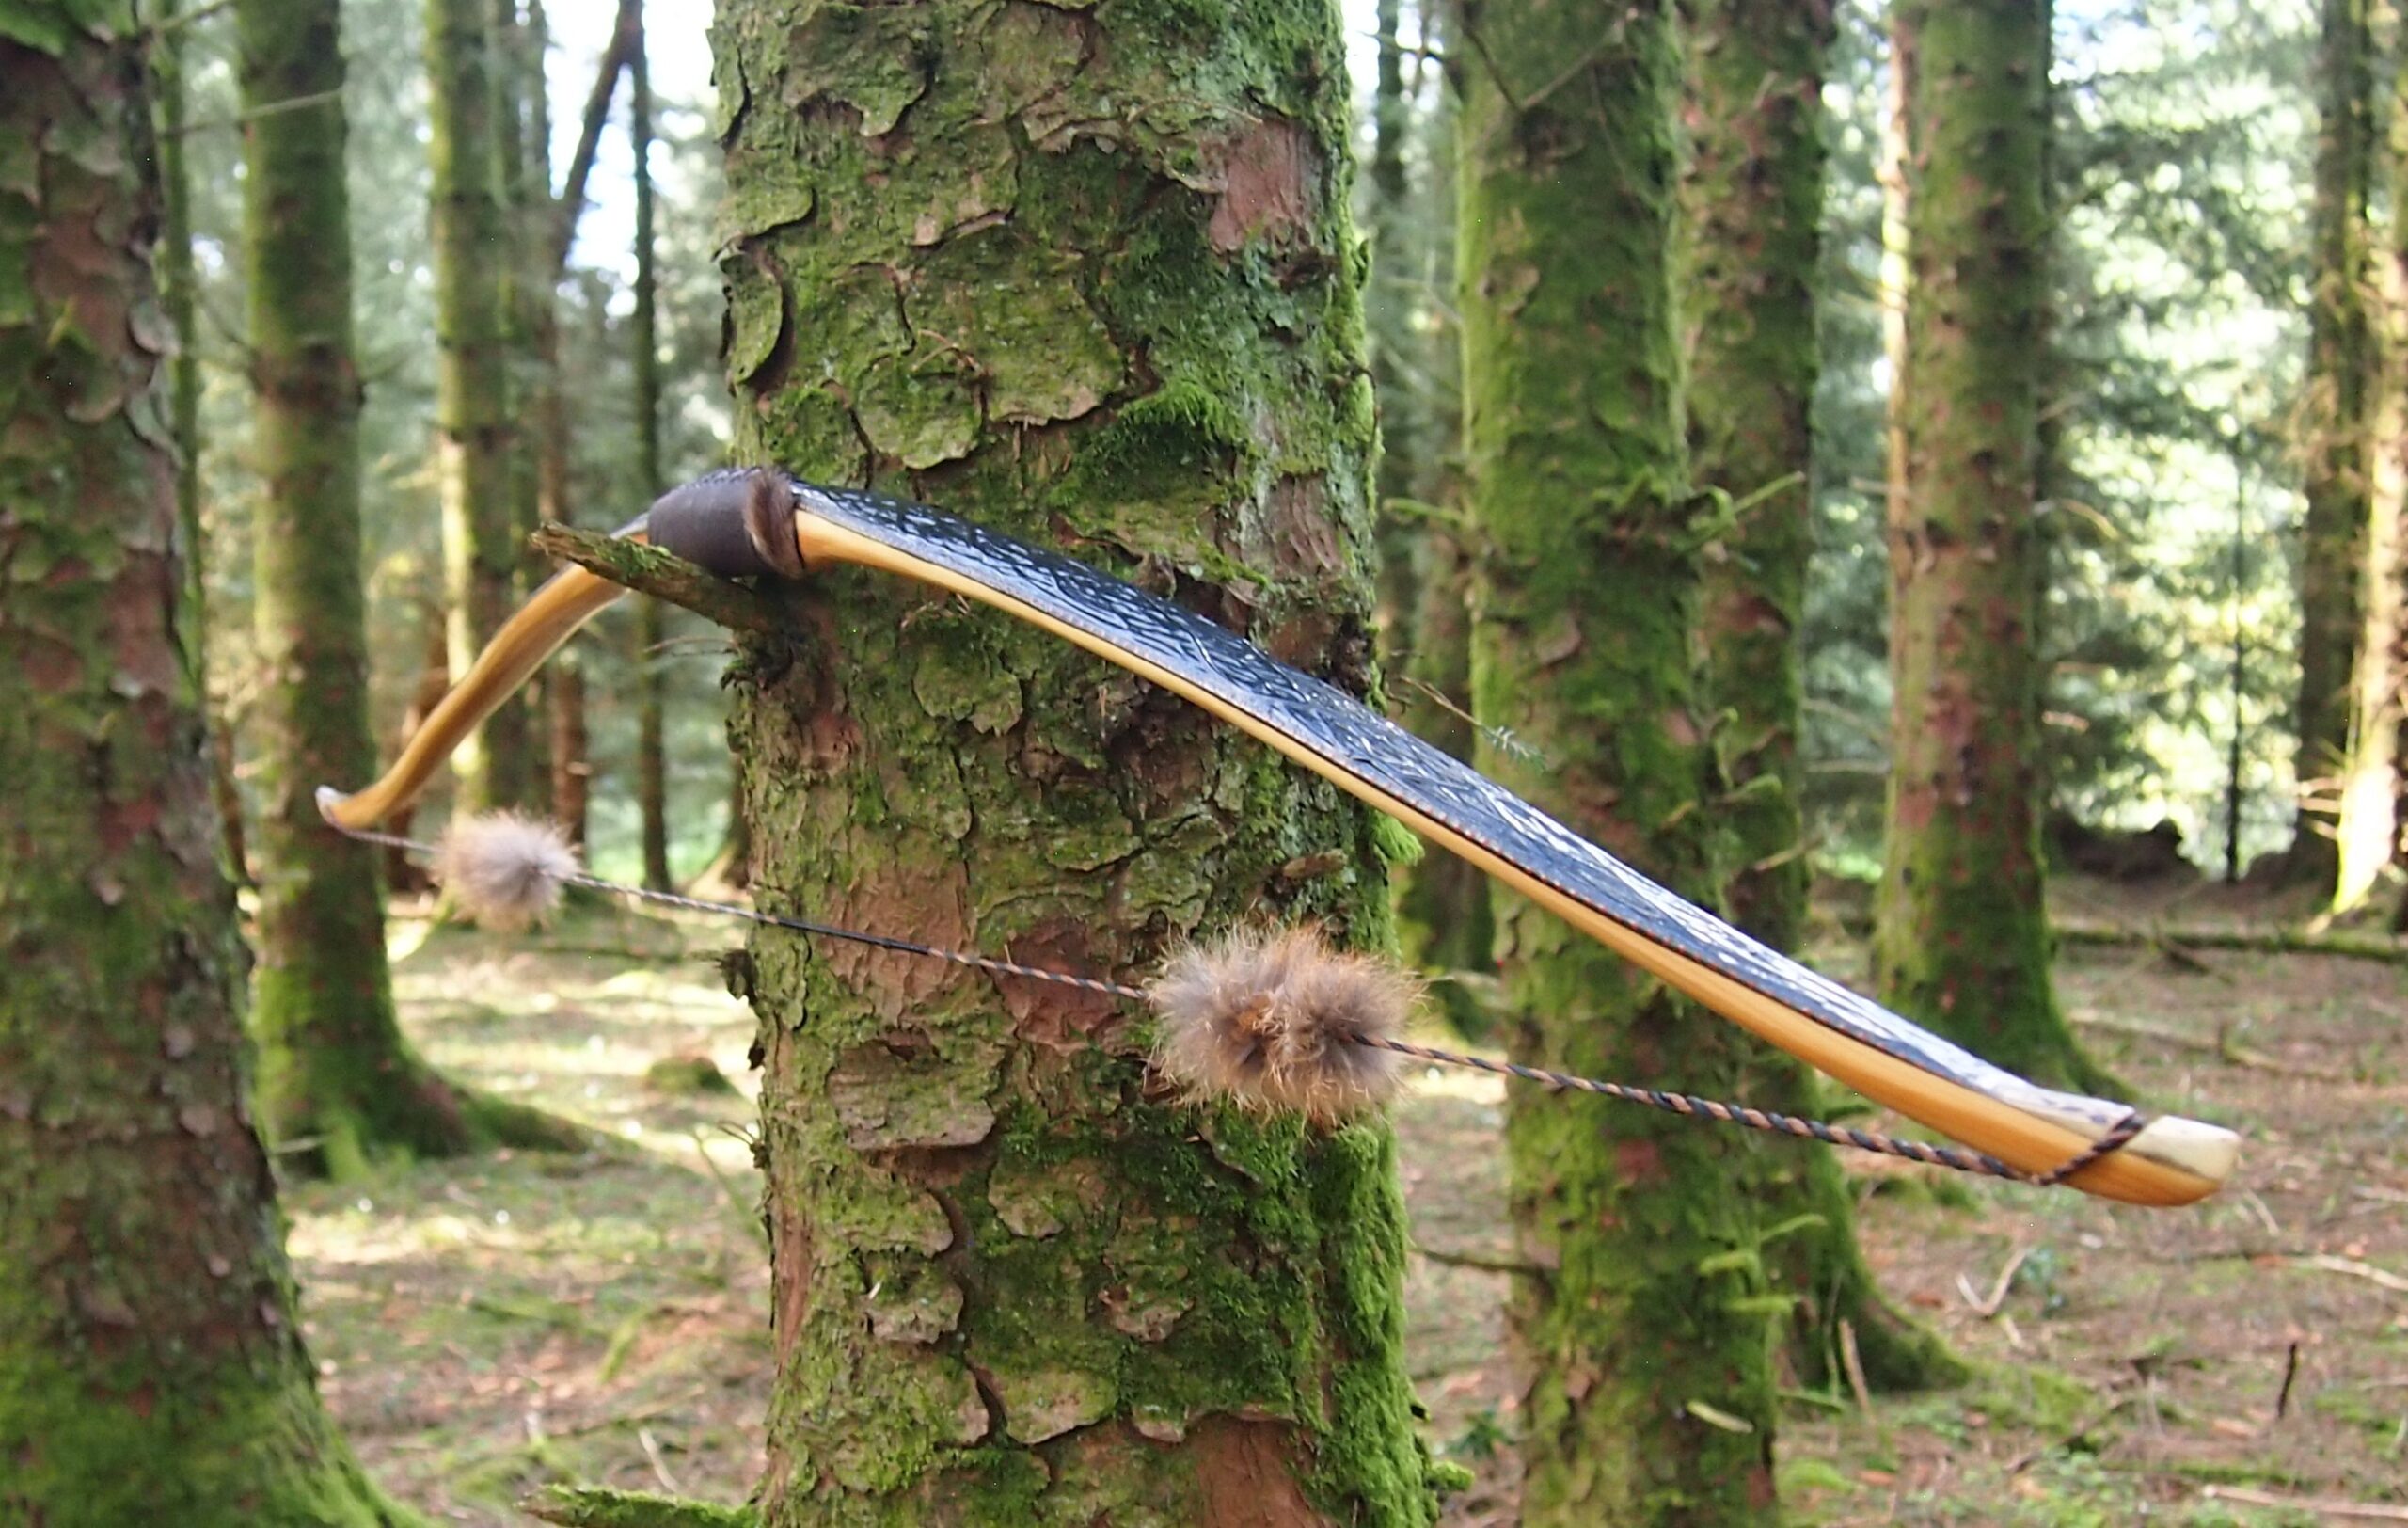
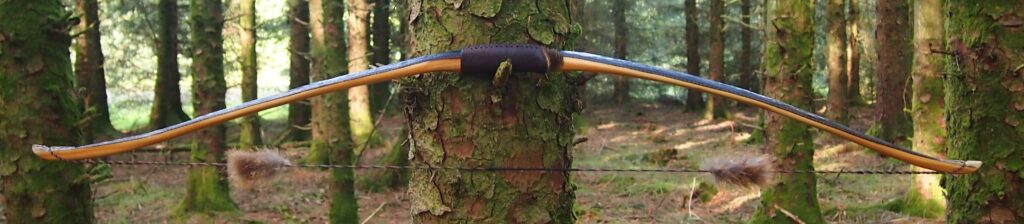
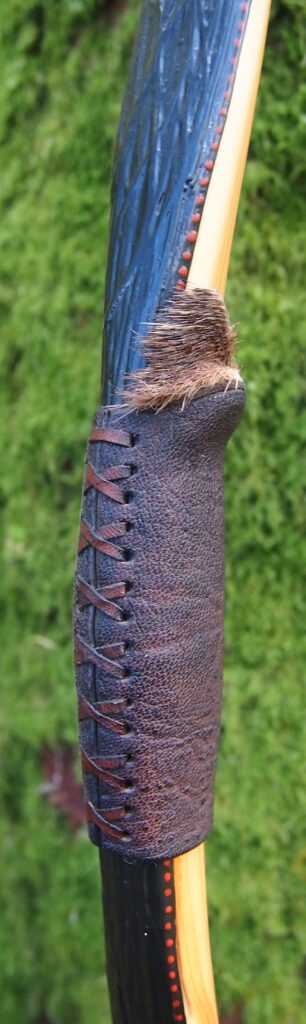
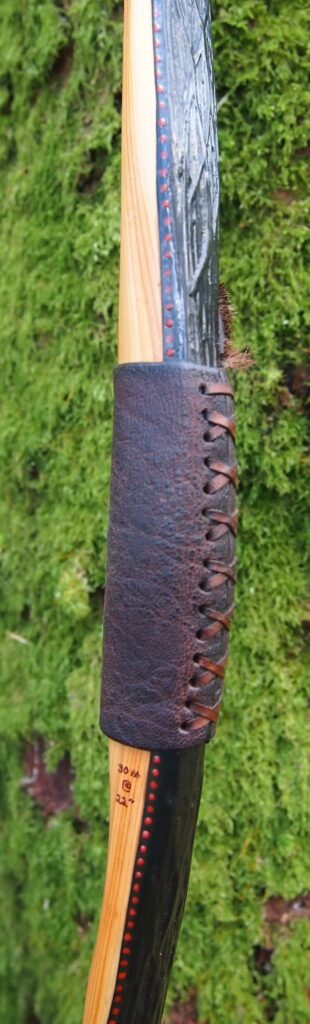
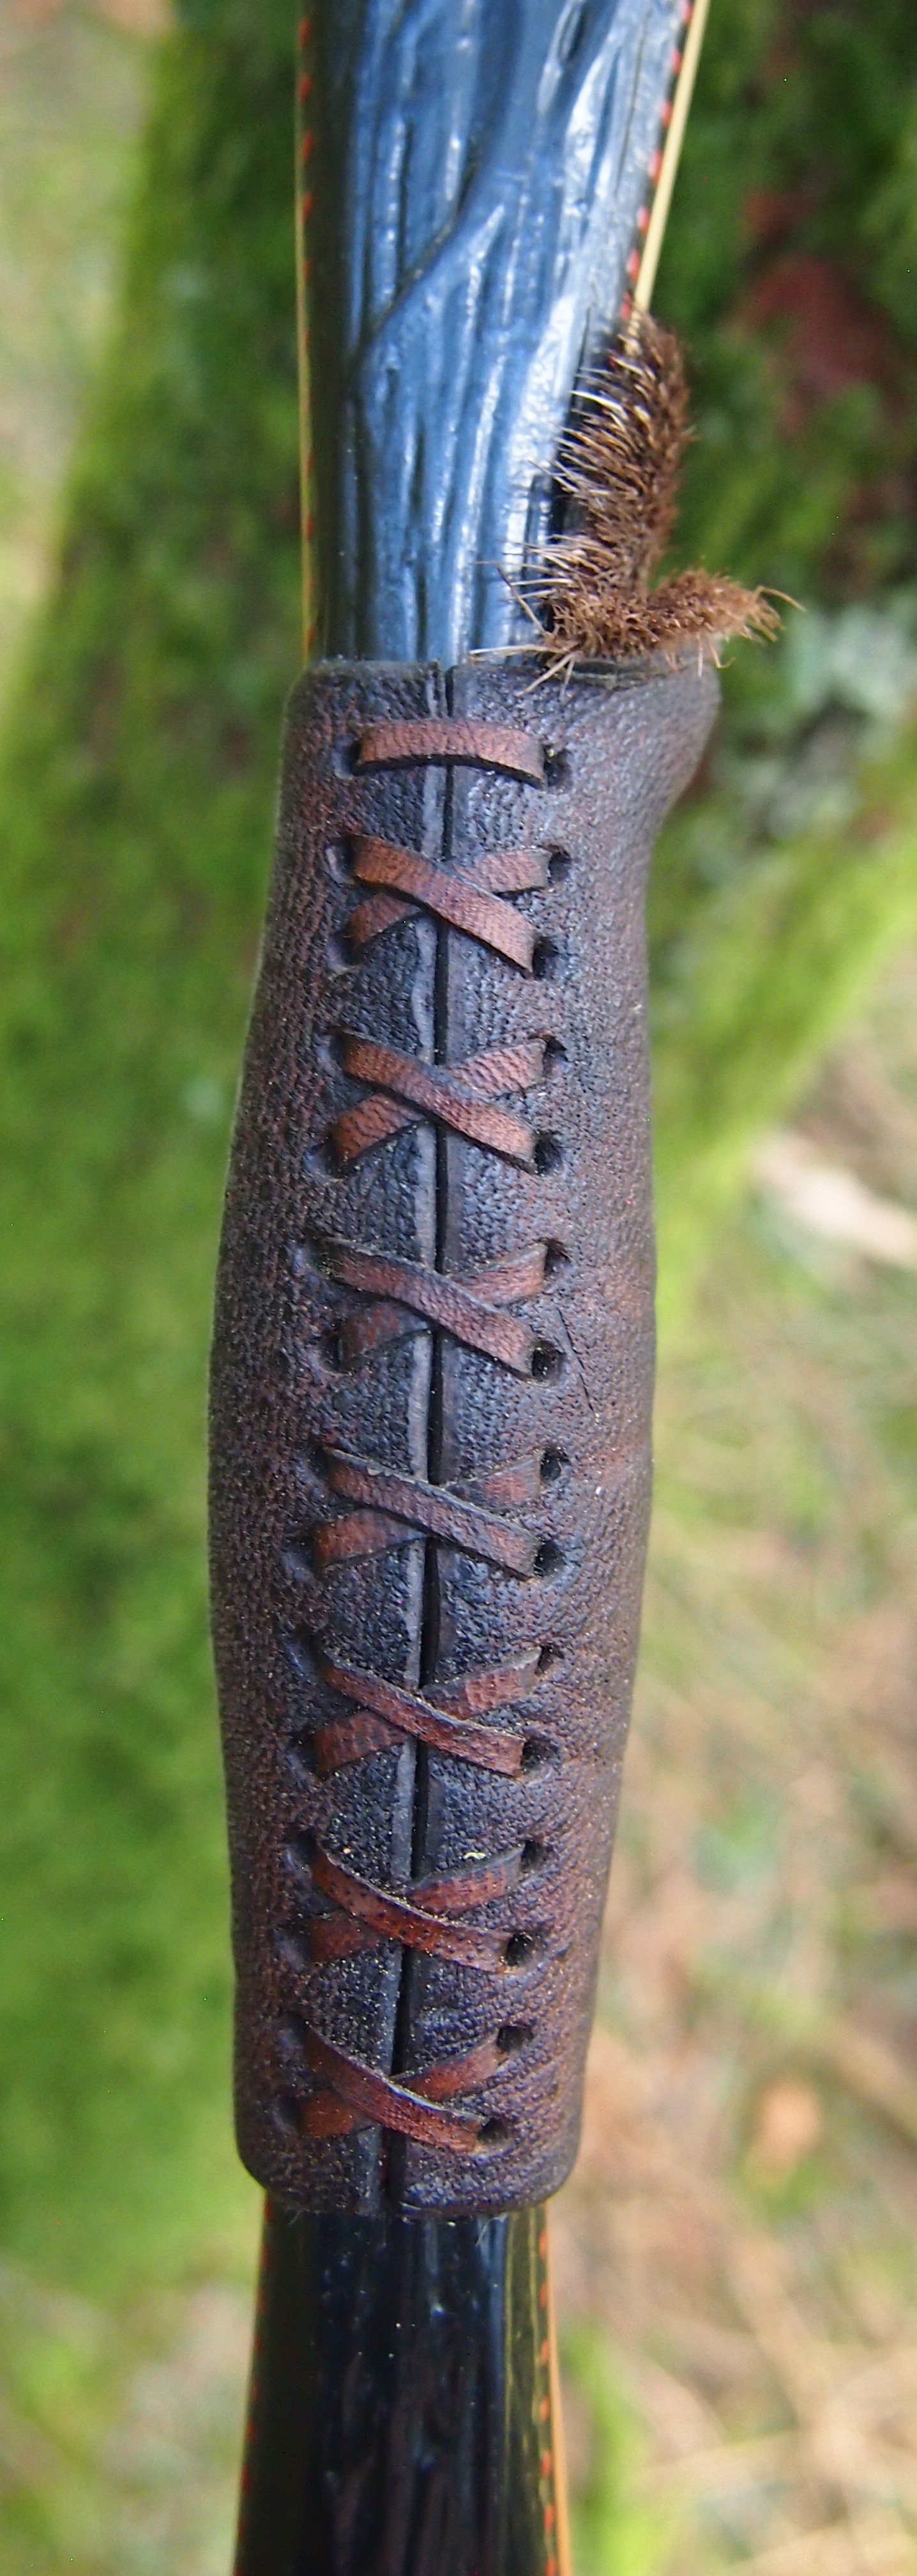
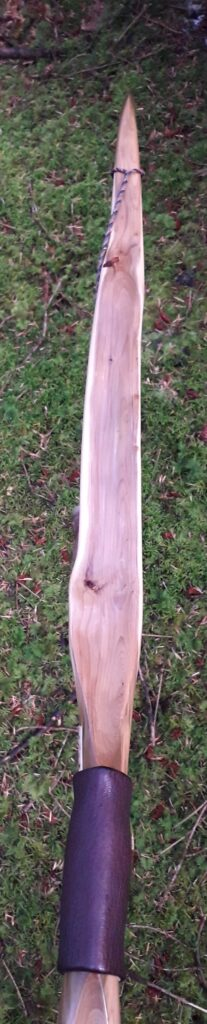
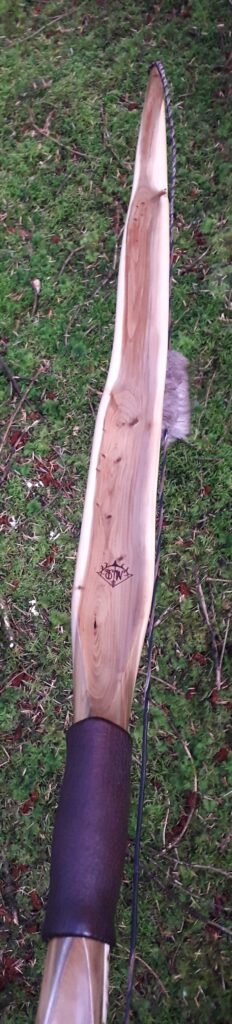
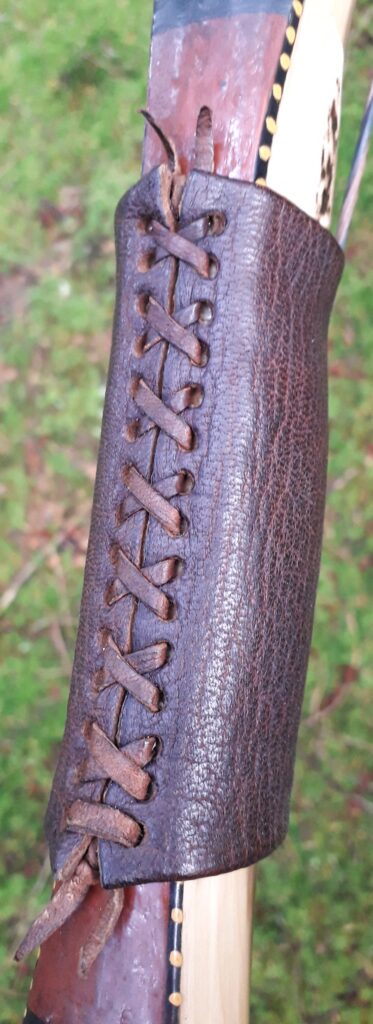
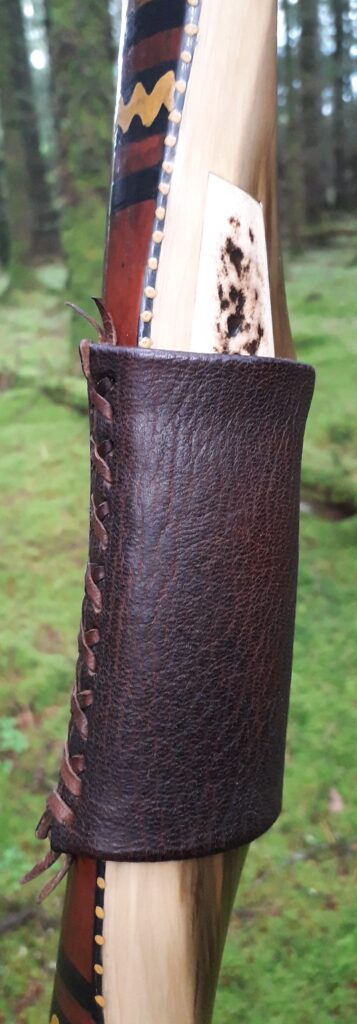
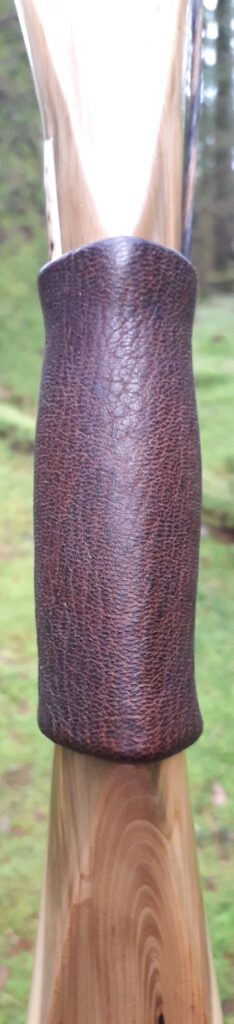
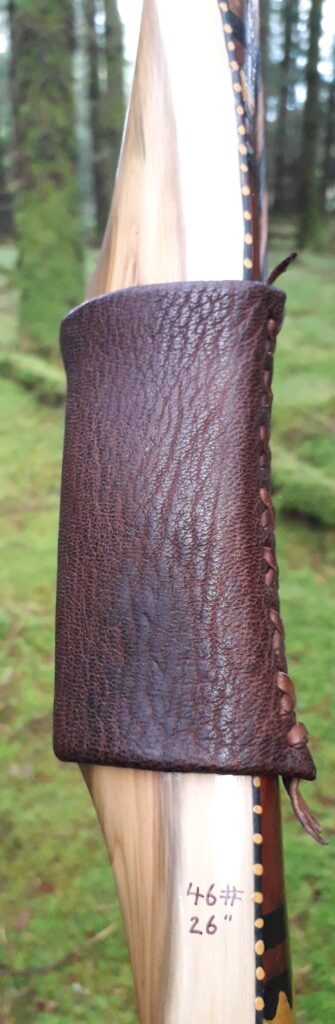
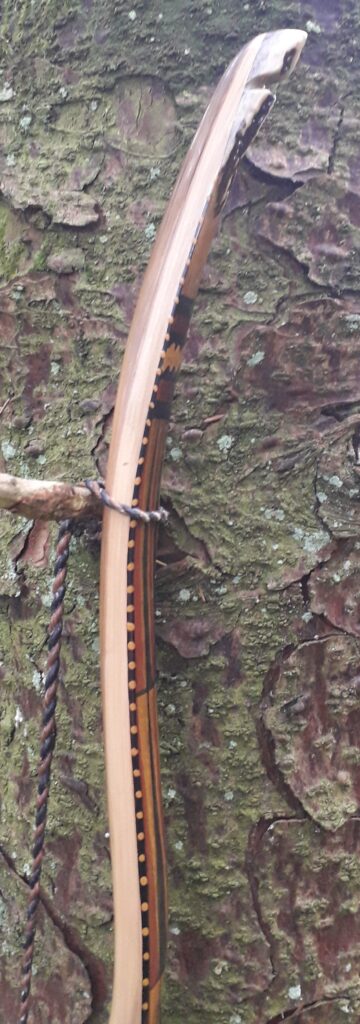
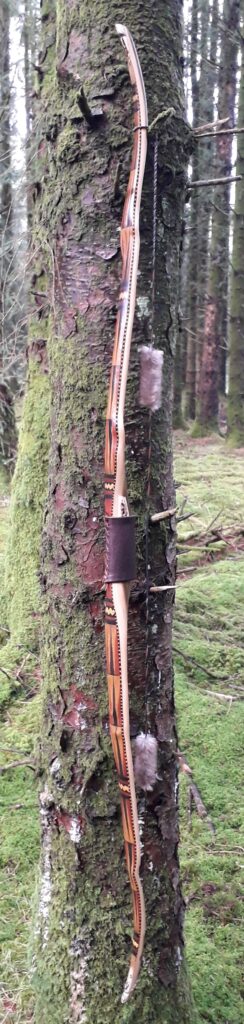
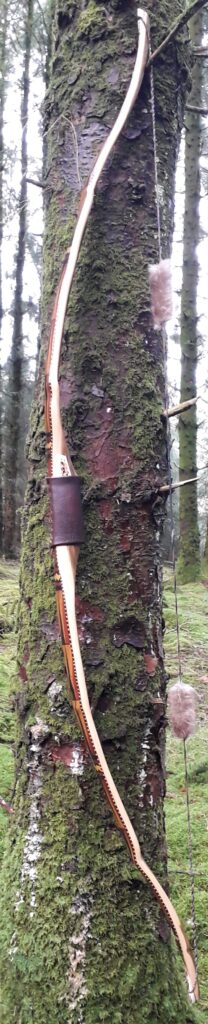
Once the back was all finished and the overlays/wood was all sanded up, I sealed her up with shellac. And after polishing her up she was treated to a nice satin beeswax/linseed paste wax finish. For the handle I fitted a lovely piece of my own home produced bark tanned roe deer leather stitched up with the same leather cut thin for lacing. And the arrow pass/shelf were both fitted with a couple of pieces of my bark tanned hair on roe deer shin leather.
I love the shape and finish of this bow and really enjoyed shooting her. She does not stack one bit, and despite all that reflex she is easy to string and silky smooth to draw. There is a slight kick upon release due to the high limb mass previously mentioned, but I got used to it after a couple of arrows and didn’t even notice it once I’d altered my grip a bit.
I found this bow very comfortable to hold at full draw, so was able to take a little more time shooting my full shot cycle. Subsequently I was able to shoot this bow with great accuracy over and over again. Across the chrono she was also performing how I’d expect too, sending a 400 grain arrow at around 150 FPS, which is what I’d expect from a 45lb primitive bow.
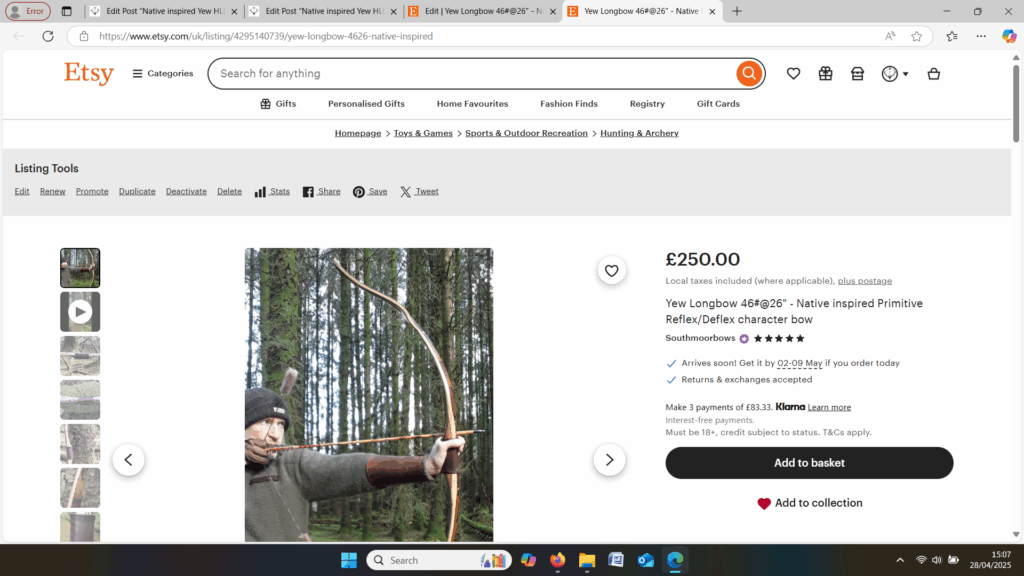
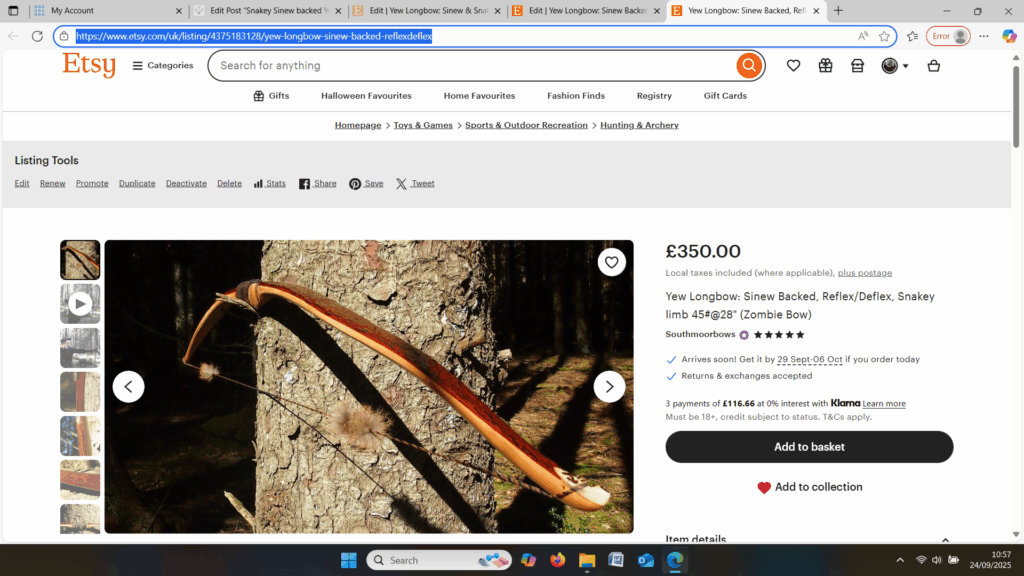
So here she is. I hope you enjoy the look as much as I do, and please feel free to leave a comment below telling me what you think. This bow is now available to purchase in my ETSY shop here:
https://www.etsy.com/uk/listing/4375183128/yew-longbow-sinew-backed-reflexdeflex
Alternatively you can contact me directly through the Southmoor Bows contact page here: https://southmoorbows.com/contact/
Specifics are as follows:
Draw Weight: 45lbs at 28”
Mass: 995 grams
Length NTN: ” (symmetrical limb layout)
Width: 1 9/16″” at widest part
Tips: last 8” static reflexed, 1/2” wide
Back: Flat: Pyramidal face profile
Belly Profile: Working limb sections rounded D shaped, transitioning at the tips to a ridged cross section.
Tiller: Elliptical. 1/4” positive
Brace height: 5.5″