Trying to get your hands on osage staves in the UK is hard these days, which is a real shame as osage is one of my favourite bow woods, second only to yew (due to sentimental value mainly). I bought this particular osage stave from Anthony Hickman over in Texas who has an Etsy shop which can be found here: HickmanCreationsShop – Etsy UK
Anthony sometimes has some nice osage staves in his shop for a reasonable price (by todays standards anyway!) And the stave which this bow was built from caught my eye as being worth the near $100 price tag. I could see from the photos from this staves shop listing that the growth ring thickness (and the composition of late wood to early wood) was very good, and that this stave carried no propeller twist or potentially problematic knots/splits etc.
At 62″ long, this stave was a little shorter than I’d ideally have liked, however I would struggle to get a longer stave shipped out to the UK without incurring a massive increase in shipping costs. So after a bit of consultation with Anthony, he managed to secure a not too absurd shipping price, so I decided to pull the trigger on this stave feeling pretty sure it would make for a very nice bow. And I’m glad I did!
So total cost including shipping, this stave came in just a whisker under $200, which is an awful lot of money for a hunk of timber, but unfortunately this is just the going rate nowadays for osage shipped to the UK!
The stave arrived on my door step in only 12 days which was bloody good these days. And after a thorough inspection of it, I was happy with what I’d received. Since the stave had the felling date written on the end grain, I knew that this stave was still fairly green. So I was a little worried that drying checks might have formed during transit from the states.
But I couldn’t see any signs of drying checks, other than what was obviously already present on the sapwood. And Anthony had made me aware of these sapwood cracks before I bought it. Since all the sap was destined to come off, the sapwood checking didn’t concern me at all, as more often than not, the cracks rarely ever continues deep into the heartwood.
Osage heartwood can check quite badly if dried too fast though, so I immediately painted the staves ends and the sapwood surface with TBiii, before putting it aside in my spare room to dry out for another 6 months. I kept weighing it each week so I could see when the weight loss would plateau and finally cease altogether. That way I would know when the stave was dry enough to start working on.
And by the early part of the summer of 2024, the weight lost had completely stopped, and I finally felt confident that I could begin sapwood removal and general roughing out, without running the risk of incurring drying checks from the rapid loss of any remaining moisture.
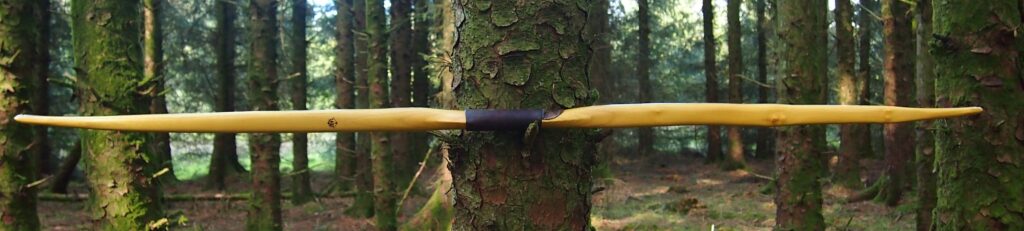
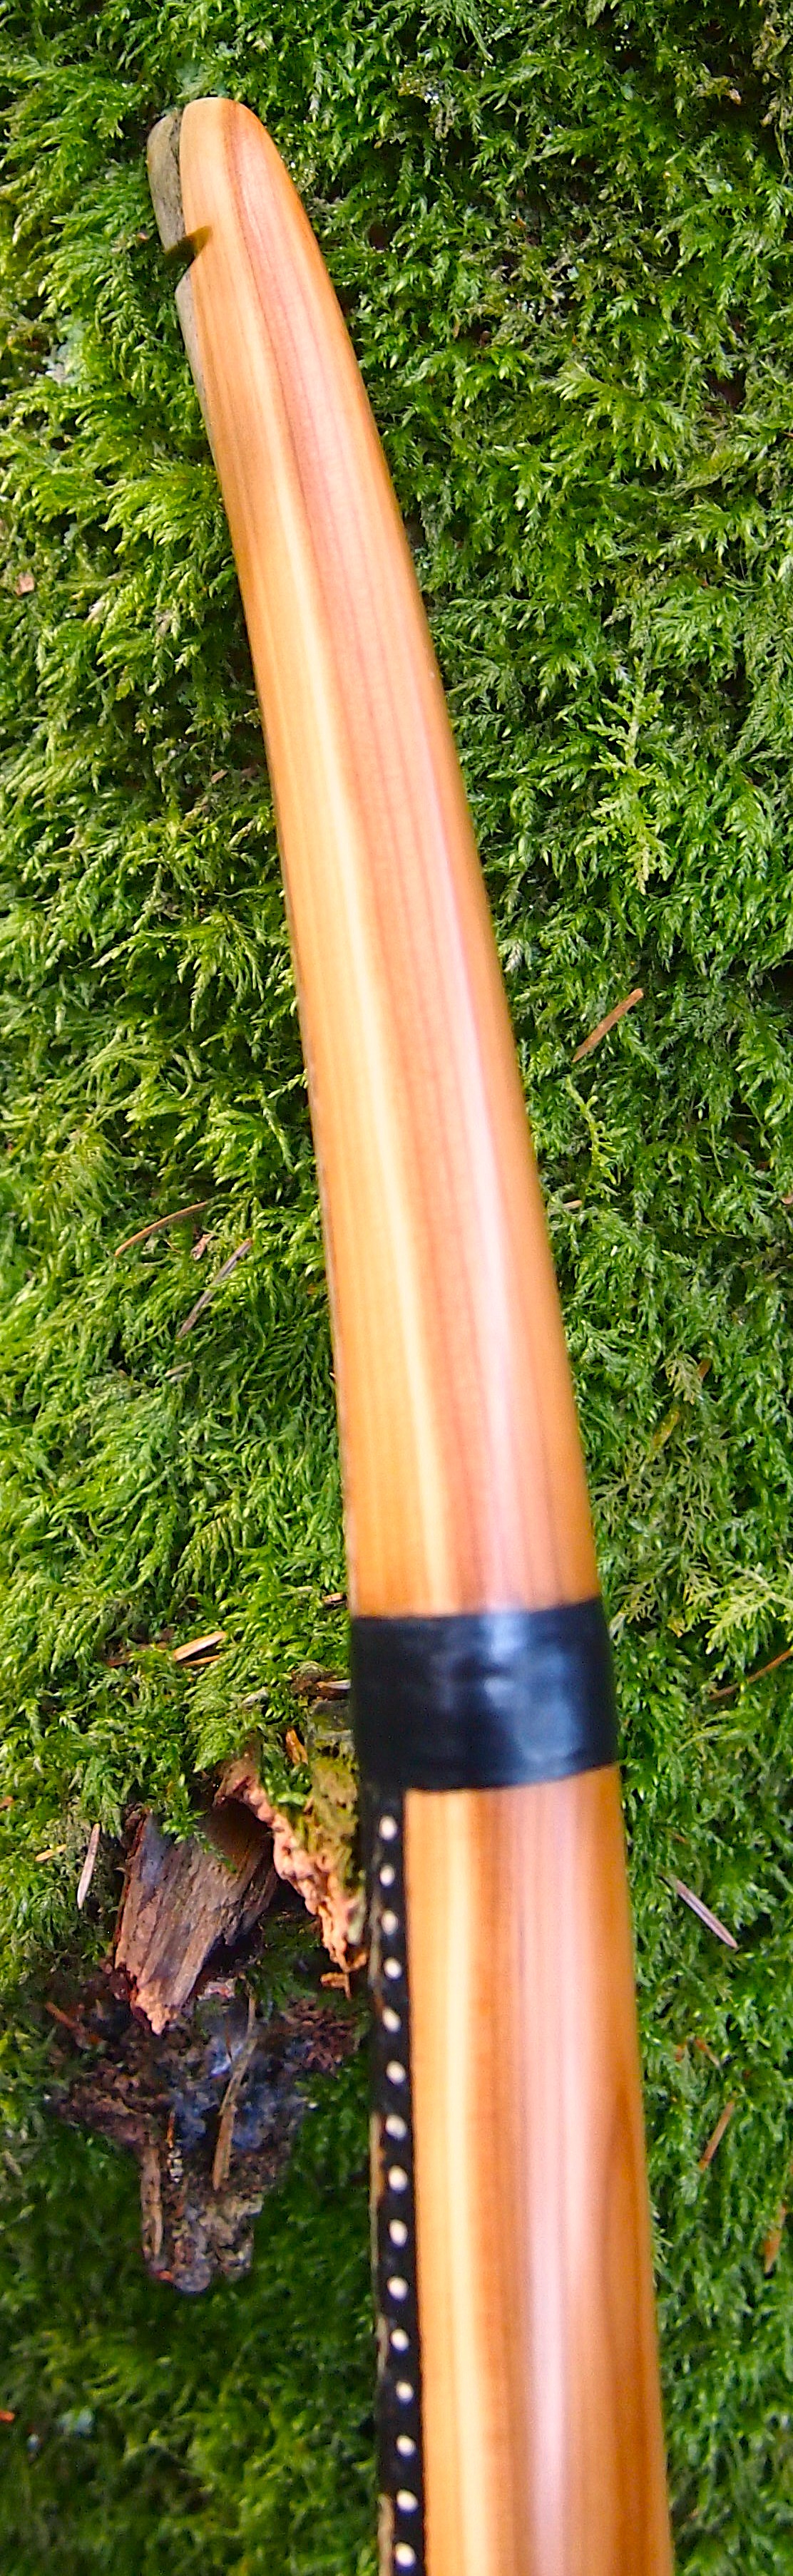
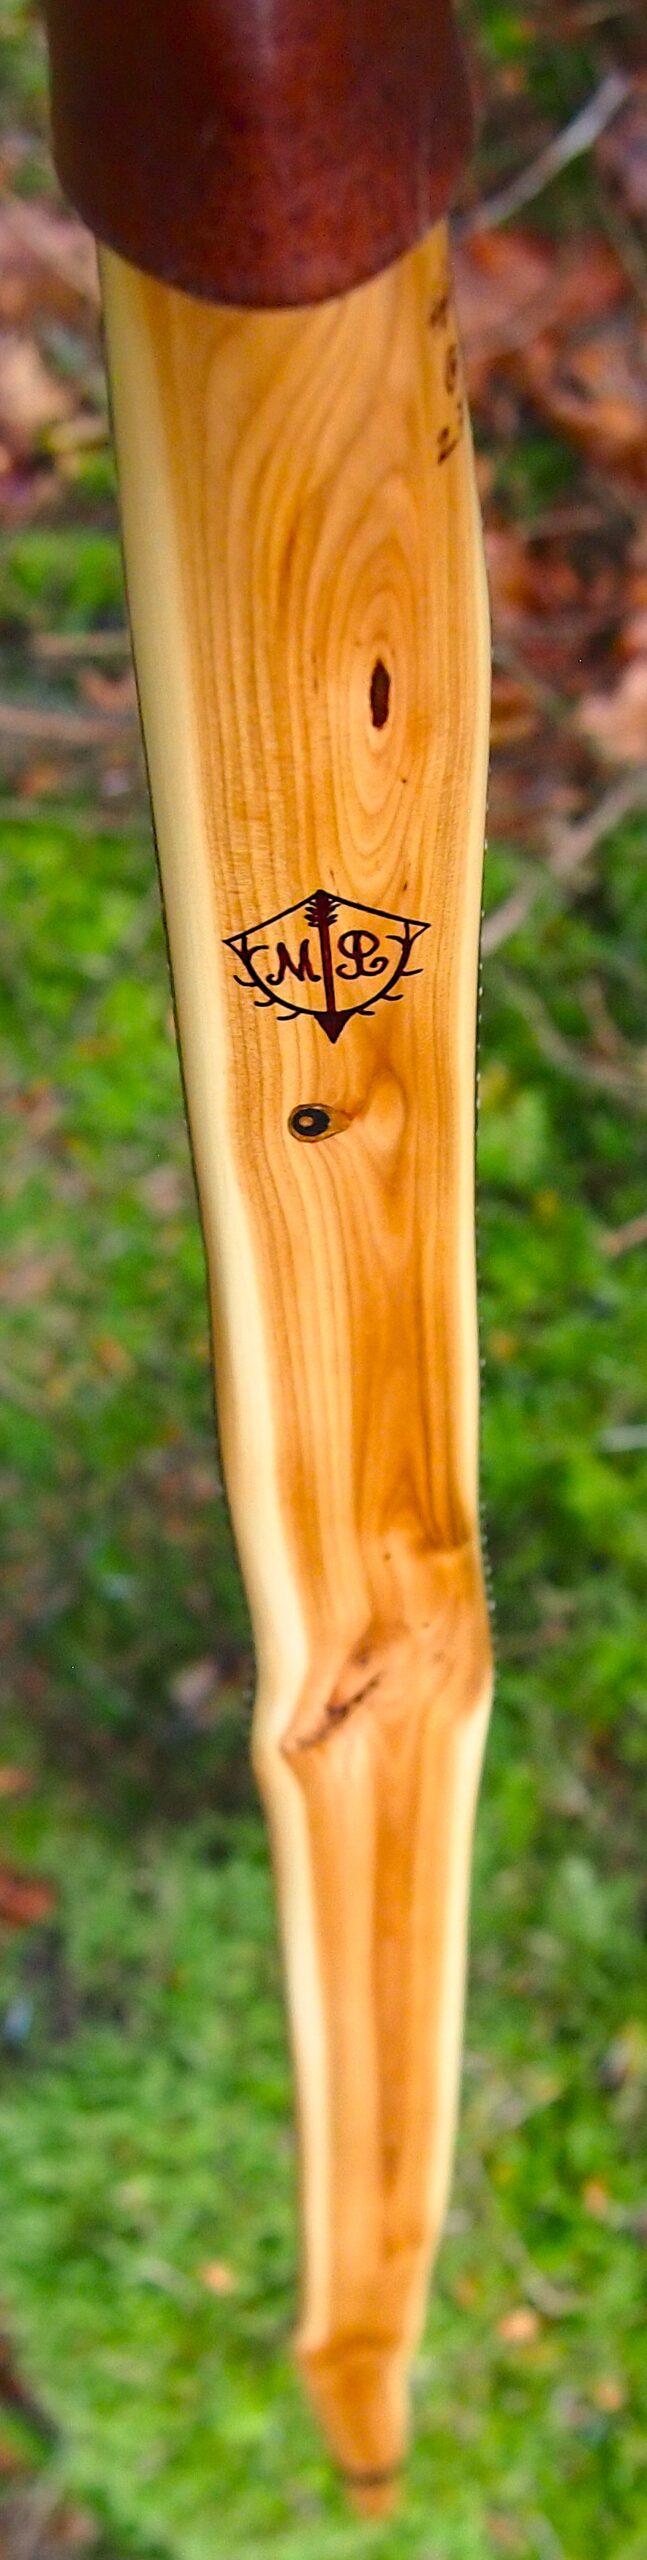
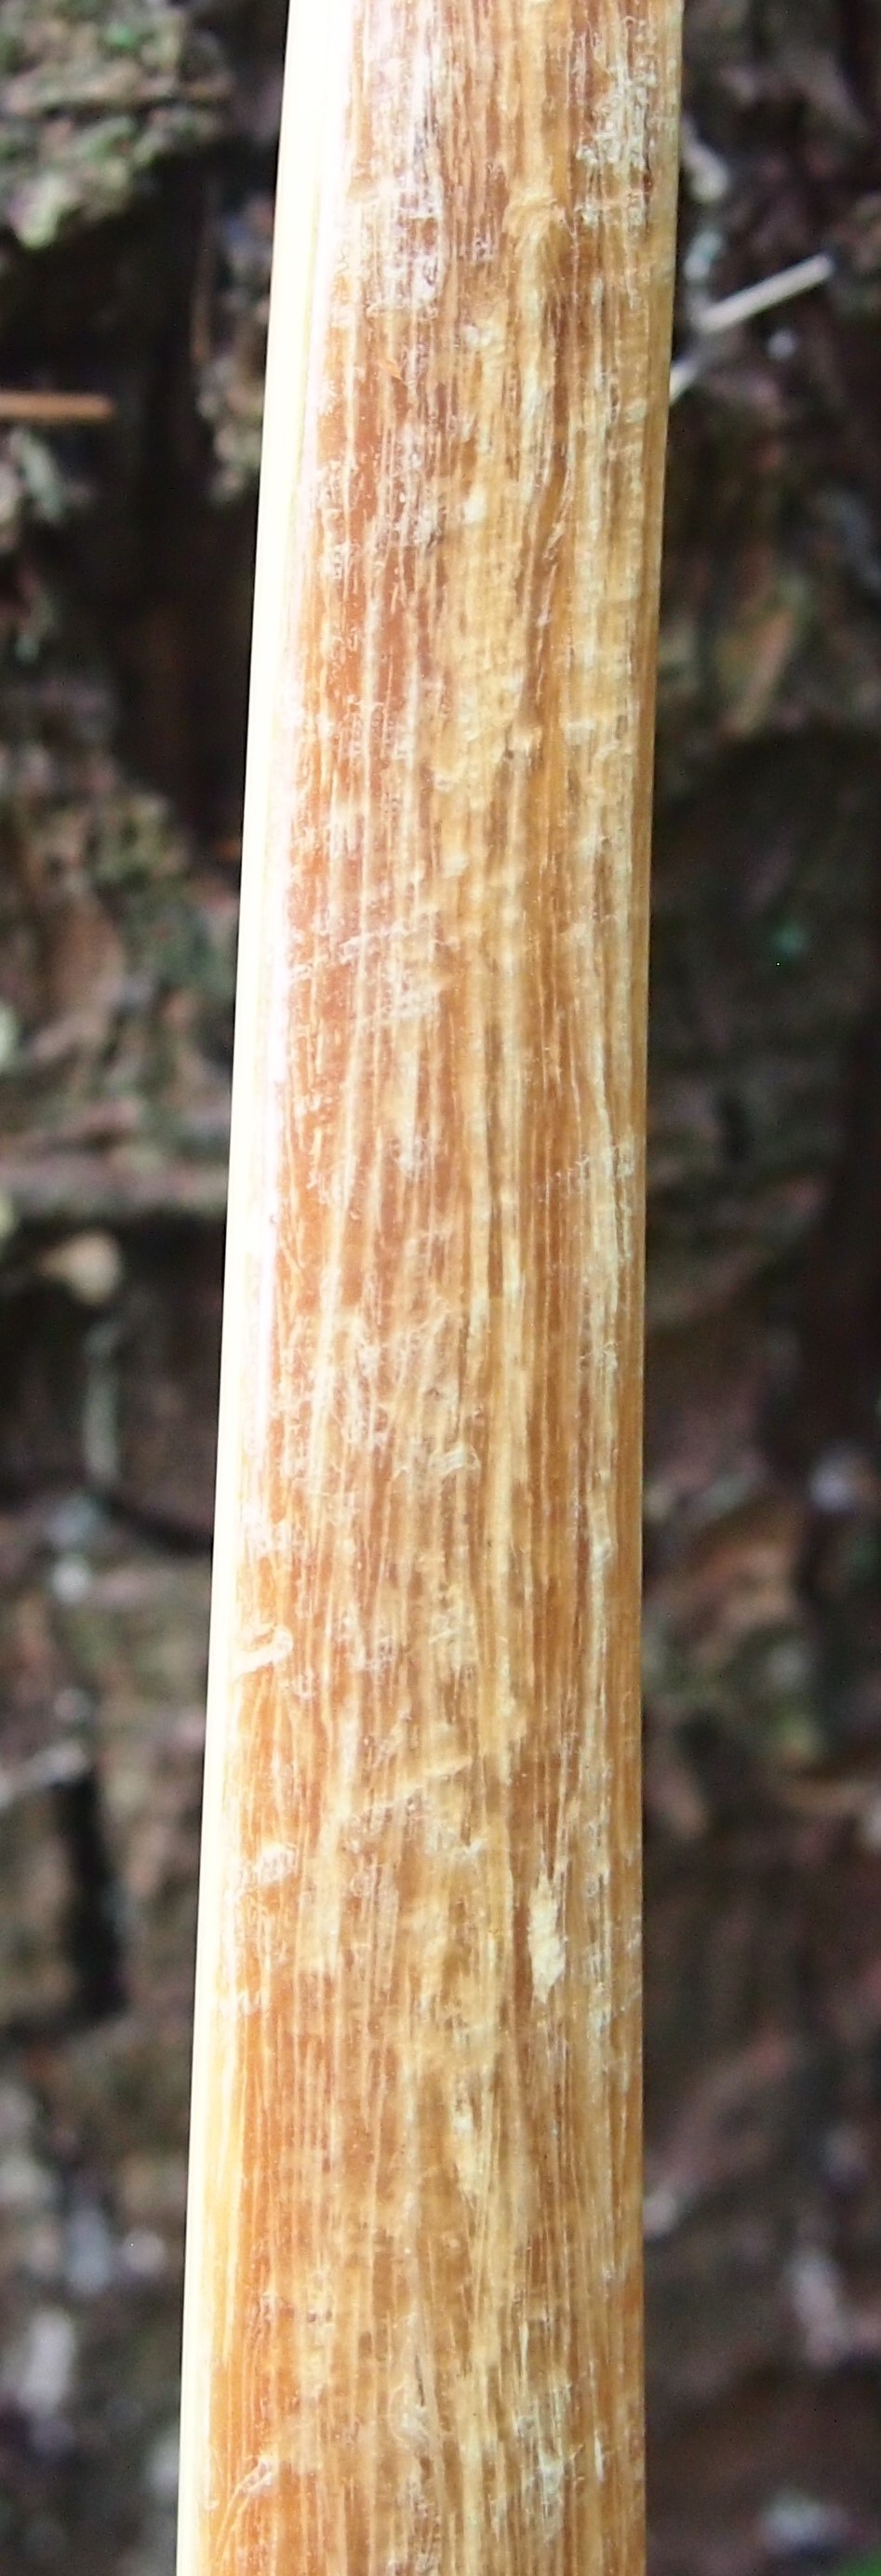
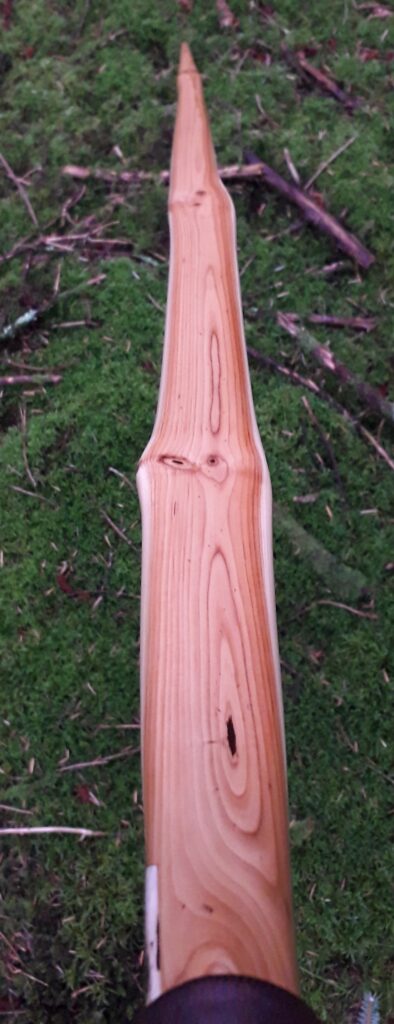
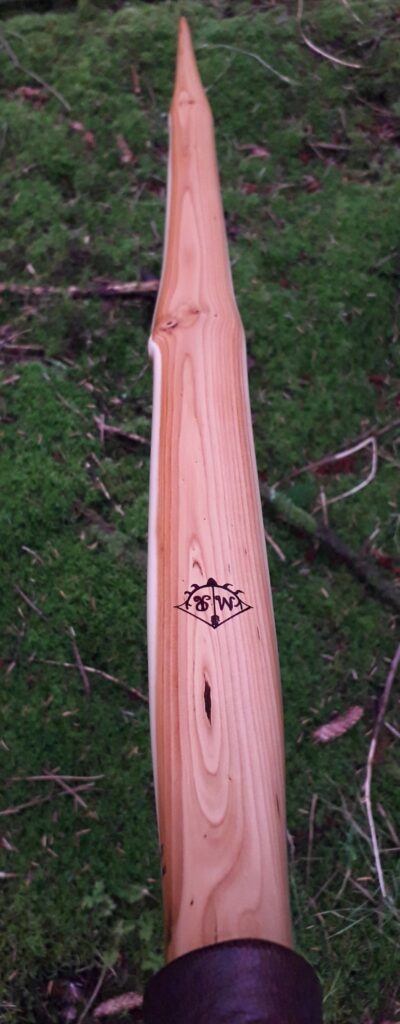
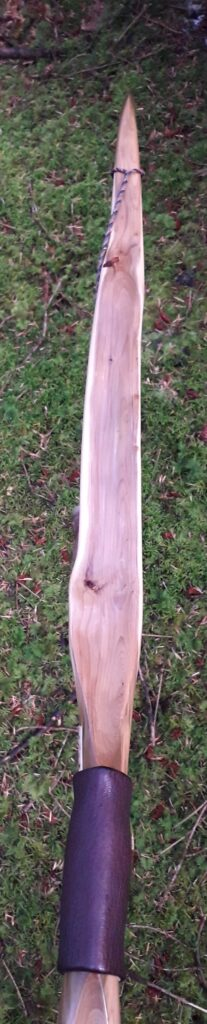
The sapwood came off nice and easy and chasing a decent latewood ring on the back was made simple by the fact that the first ring directly under the sapwood was perfect in it’s composition by being nice and thick, so I chased this faultless first ring and made that ring the back of the bow.
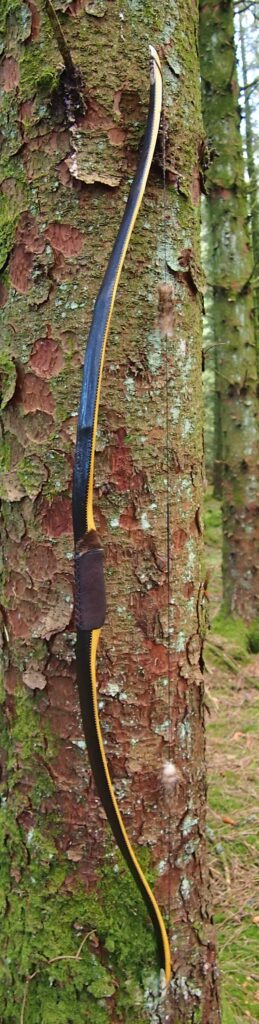
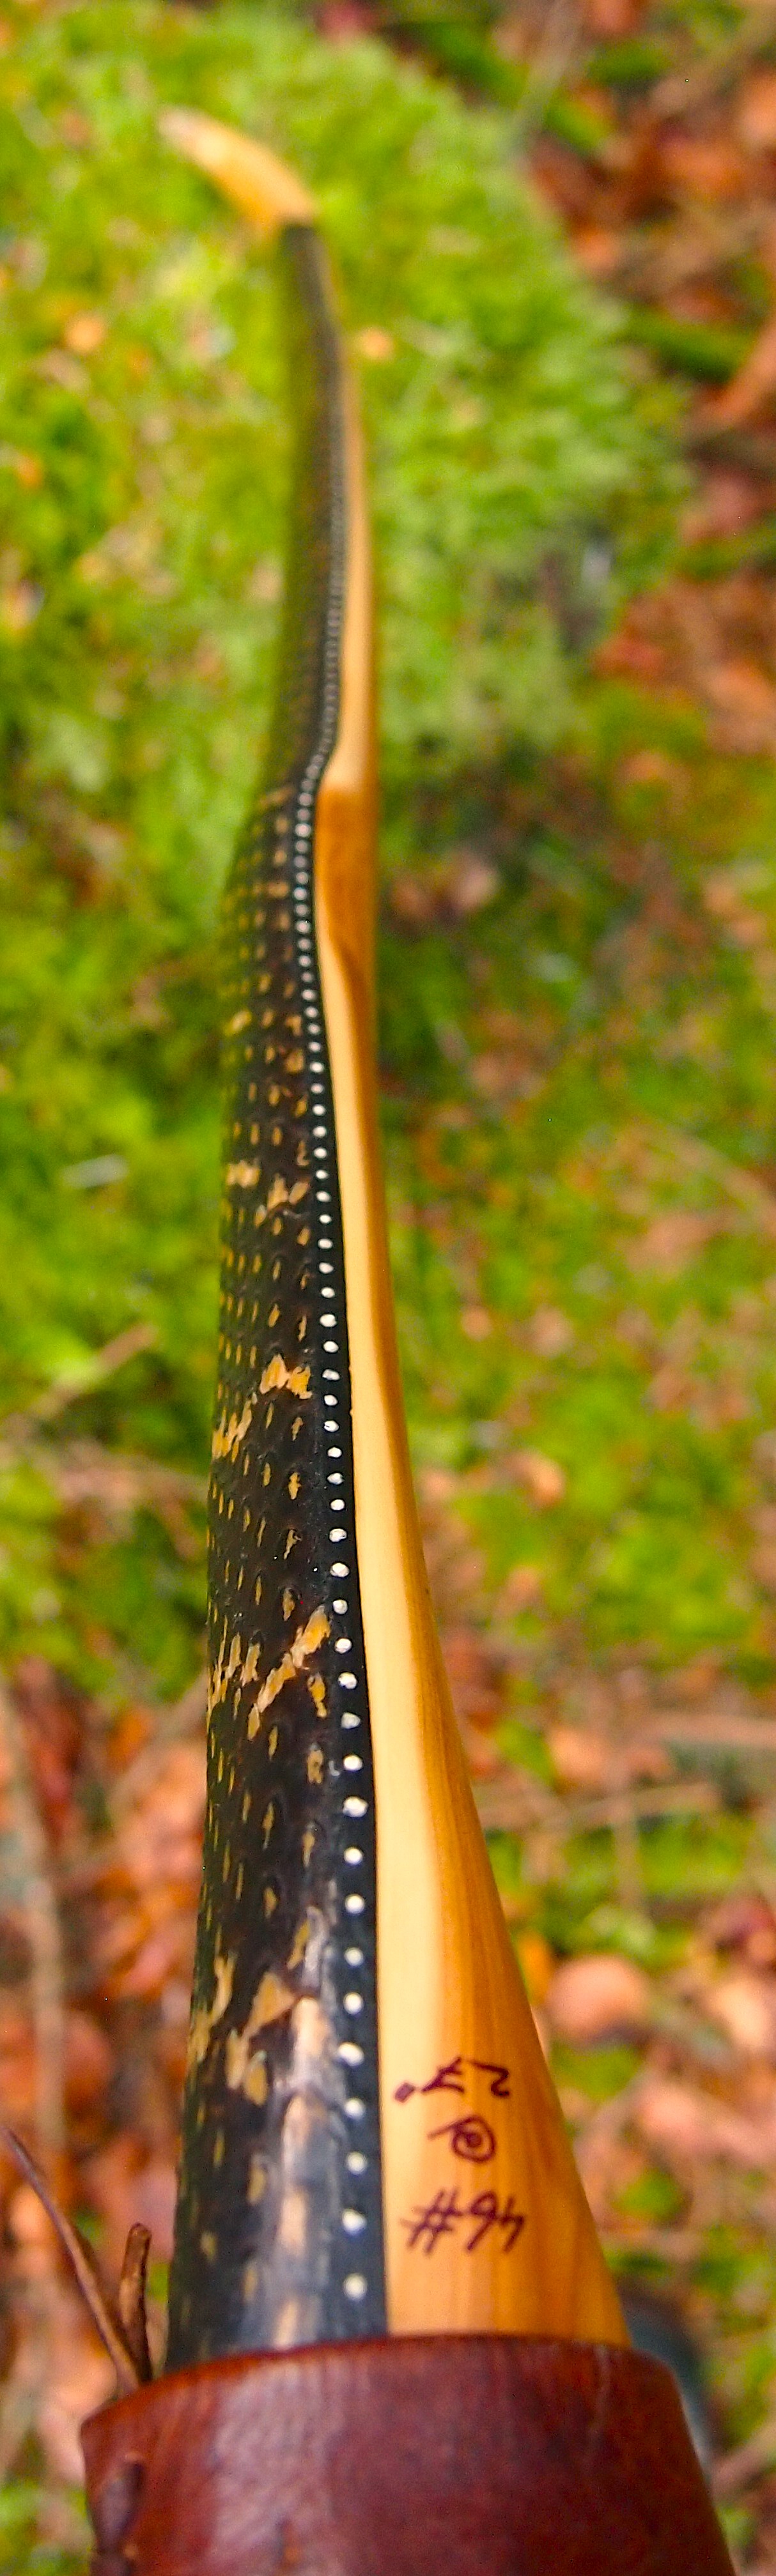
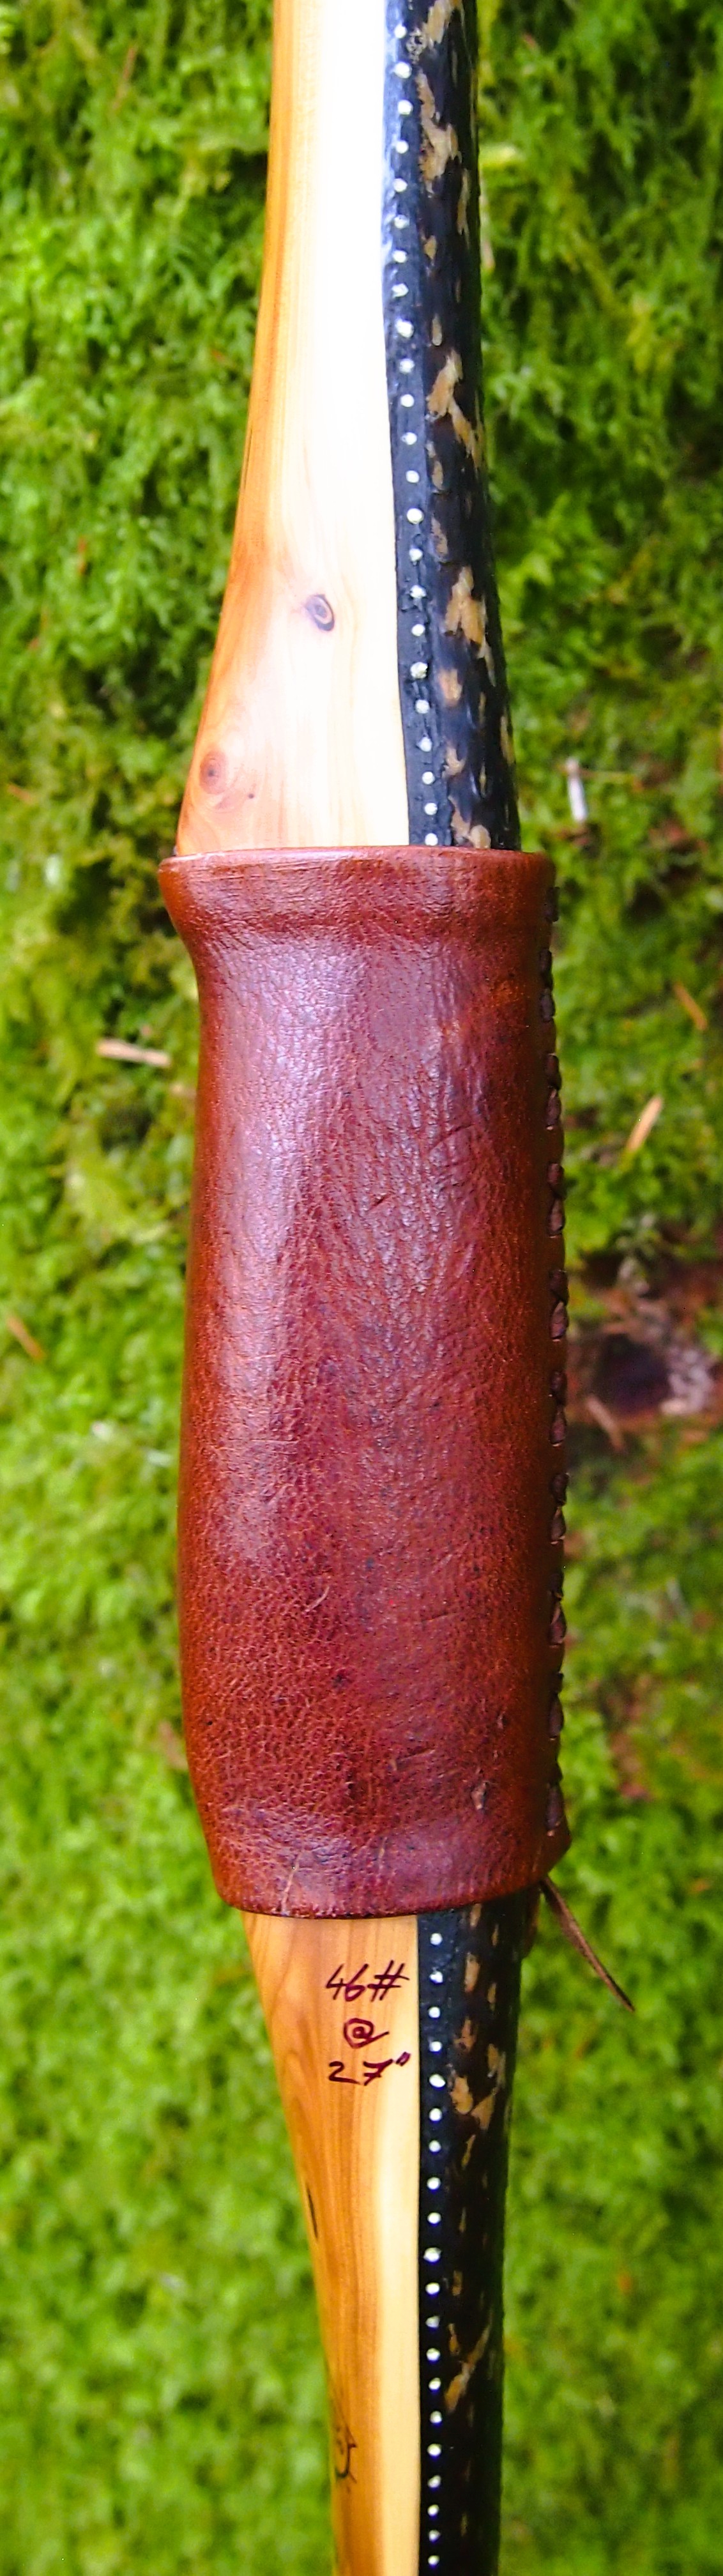
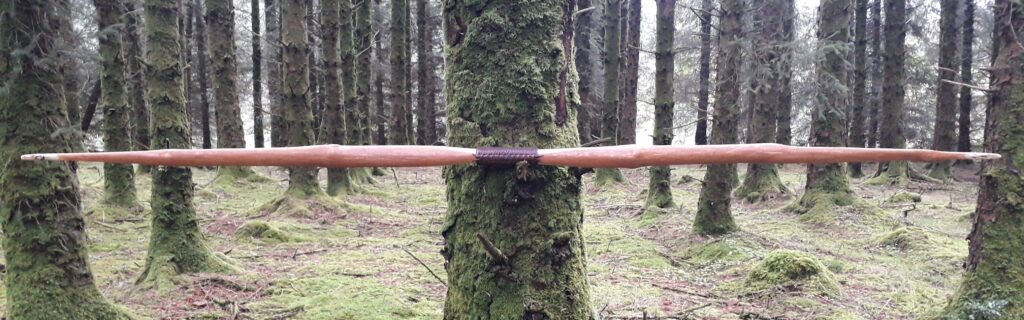
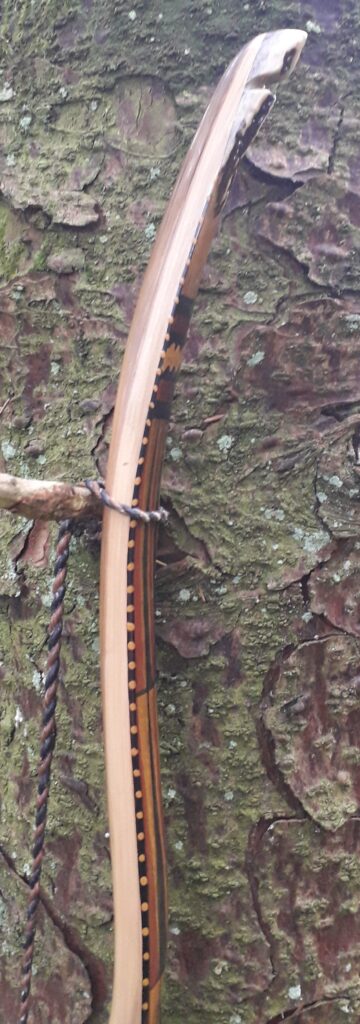
Now I had to think about design. This bow was destined to finish out at 60″ nock to nock, so being a bit on the short side, I needed to consider incorporating some design features to maximise draw length potential, without over stressing the limbs. Ideally this bow would go back to 27″, but I’d have to wait and see.
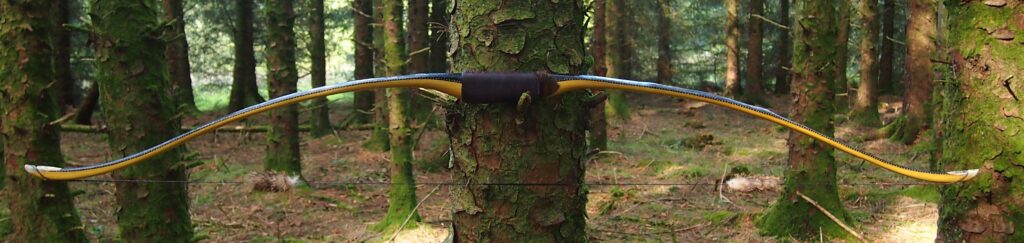
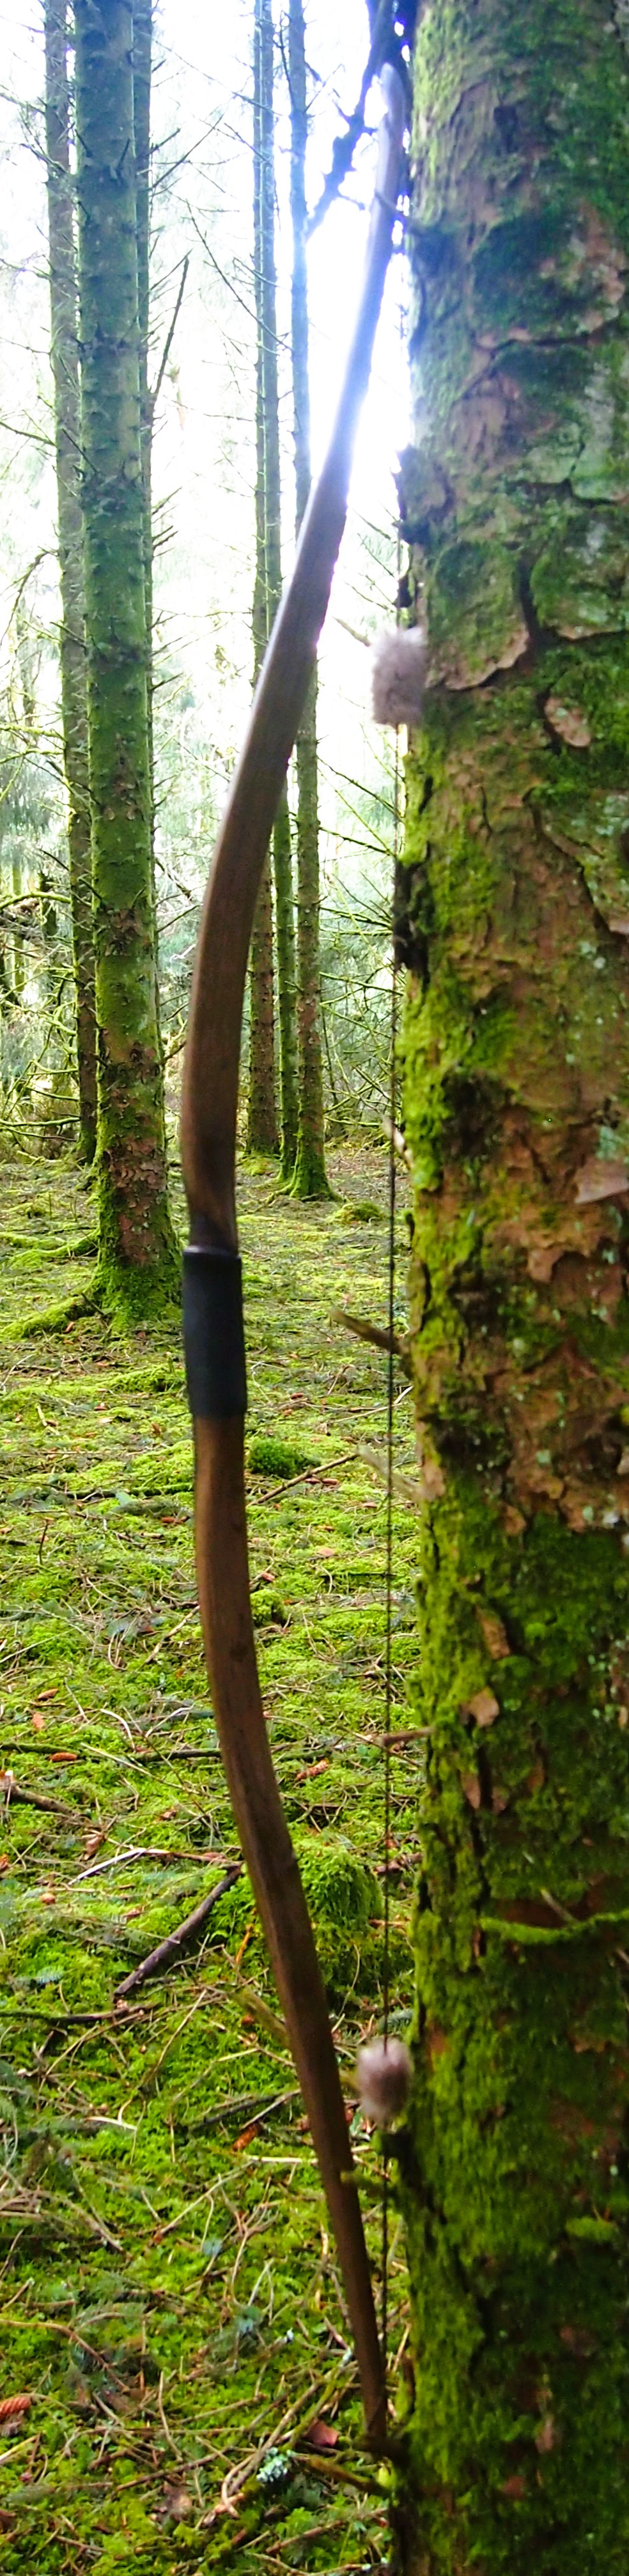
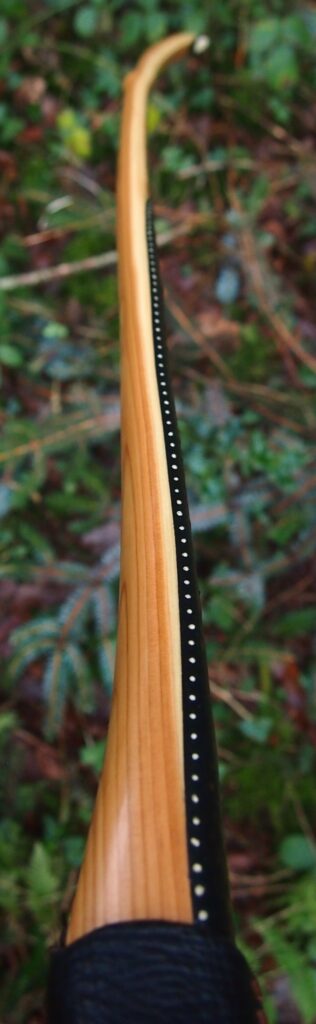
A 60″ bow drawn beyond 24″ will experience some “stacking” towards the end of the draw cycle unless some reflex is incorporated into the tips. So I planned to flick the tips on this stave, but not enough to be able to call it a recurve.
But flicking the tips alone would add at least 3-4″ of overall back set to this stave since the back of this stave was essentially dead straight. That much overall back set would definitely create the potential for overstressing the limbs of a bow this short, since the working sections of the limbs would only incorporate a max of 20-22″ of each limb.
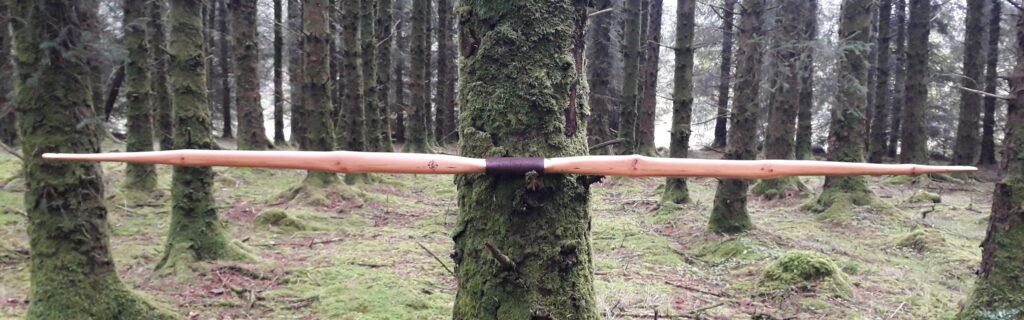
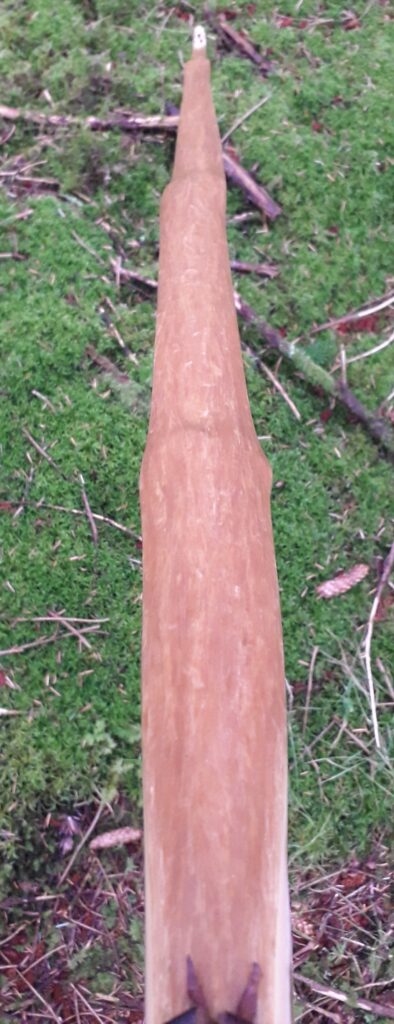
So to counter the back set created by flicking the tips, I decided to deflex the 3″ fades either side of the 4″ stiff handle. Ordinarily I would have steamed the desired deflex into the centre of the handle, but I could see a couple of tiny drying checks on the belly side of the roughed out handle section, which would most likely have opened out considerably if I had attempted to steam bend the deflex into the handle.
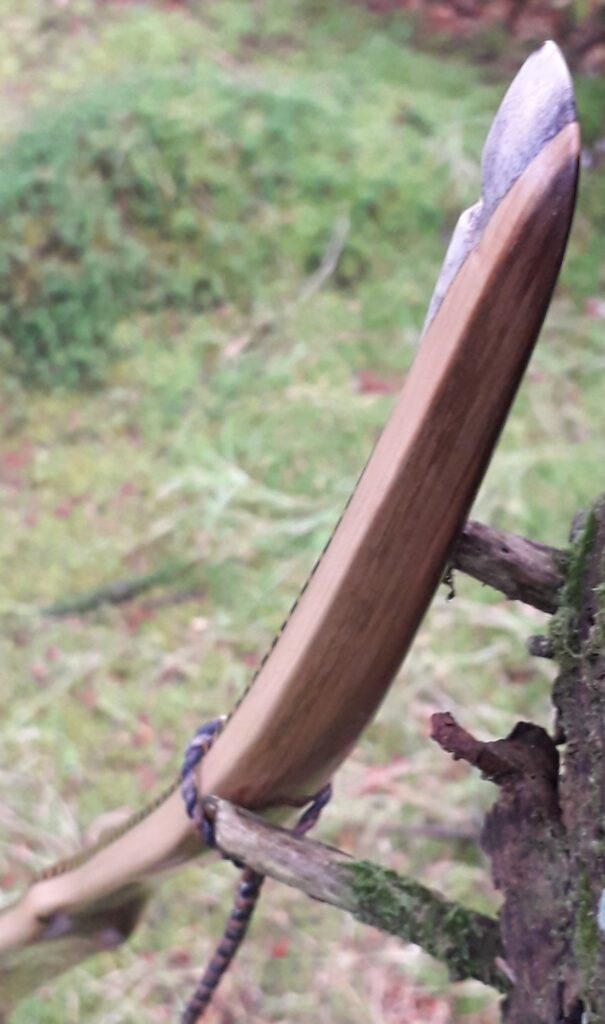
The fades however appeared free of drying checks, so with the help of the heat gun, a shaping form, and a pile of G clamps, I pulled enough deflex into both fades to cancel out most (but not all) of the reflex, which I had now steamed into the last 8″ of the tips. After subtracting the deflex in the fades from the reflex in the tips, I was now left with around 1-2″ of overall back set. Much more realistic!
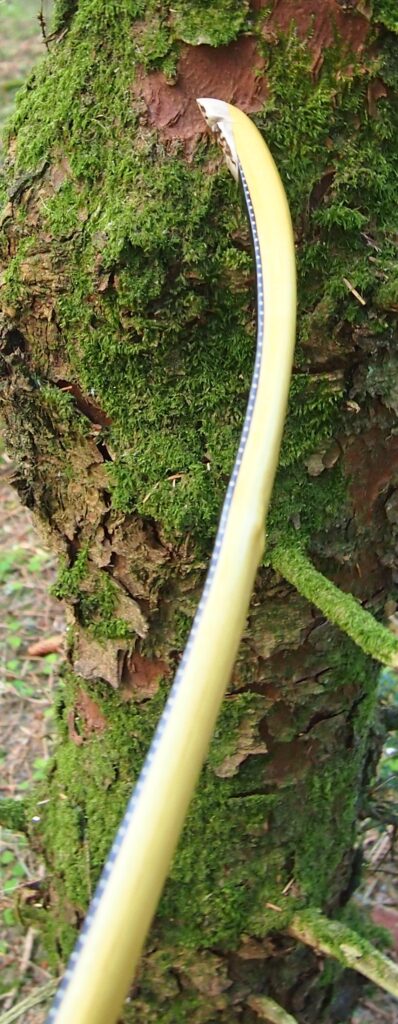
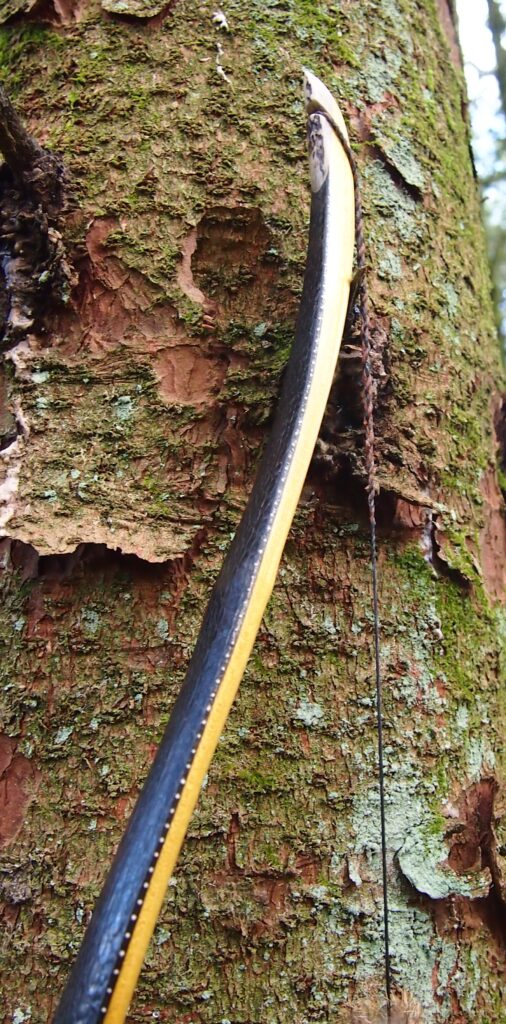
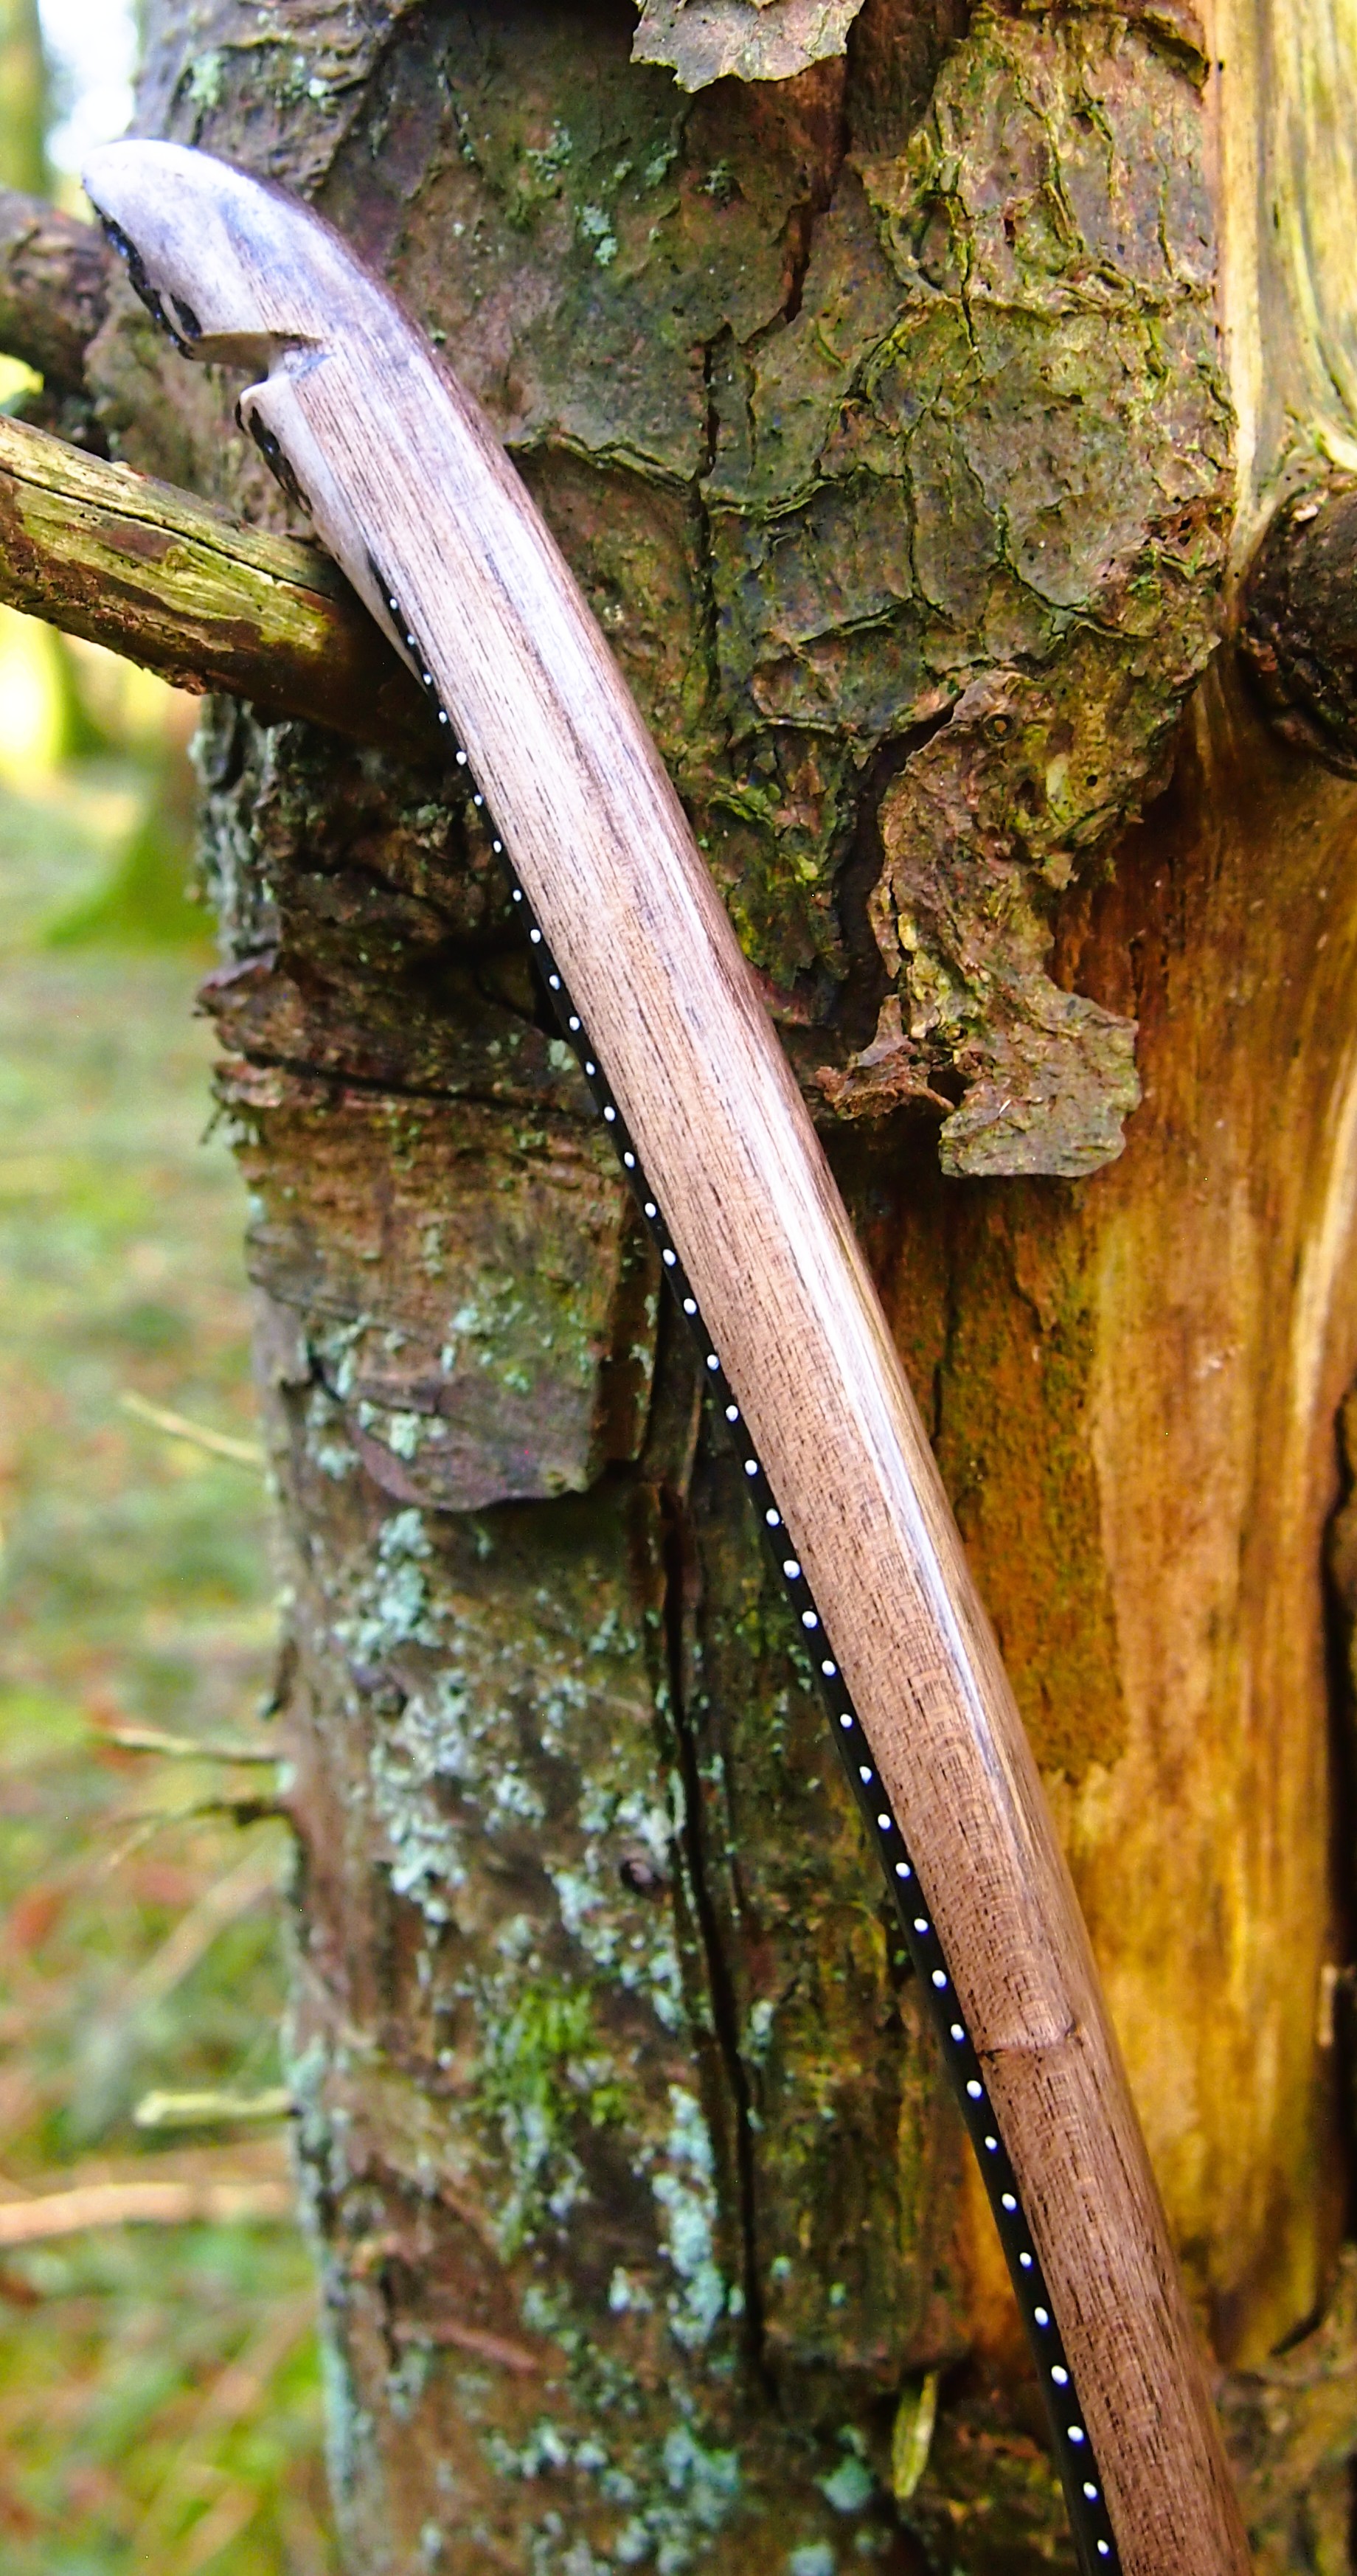
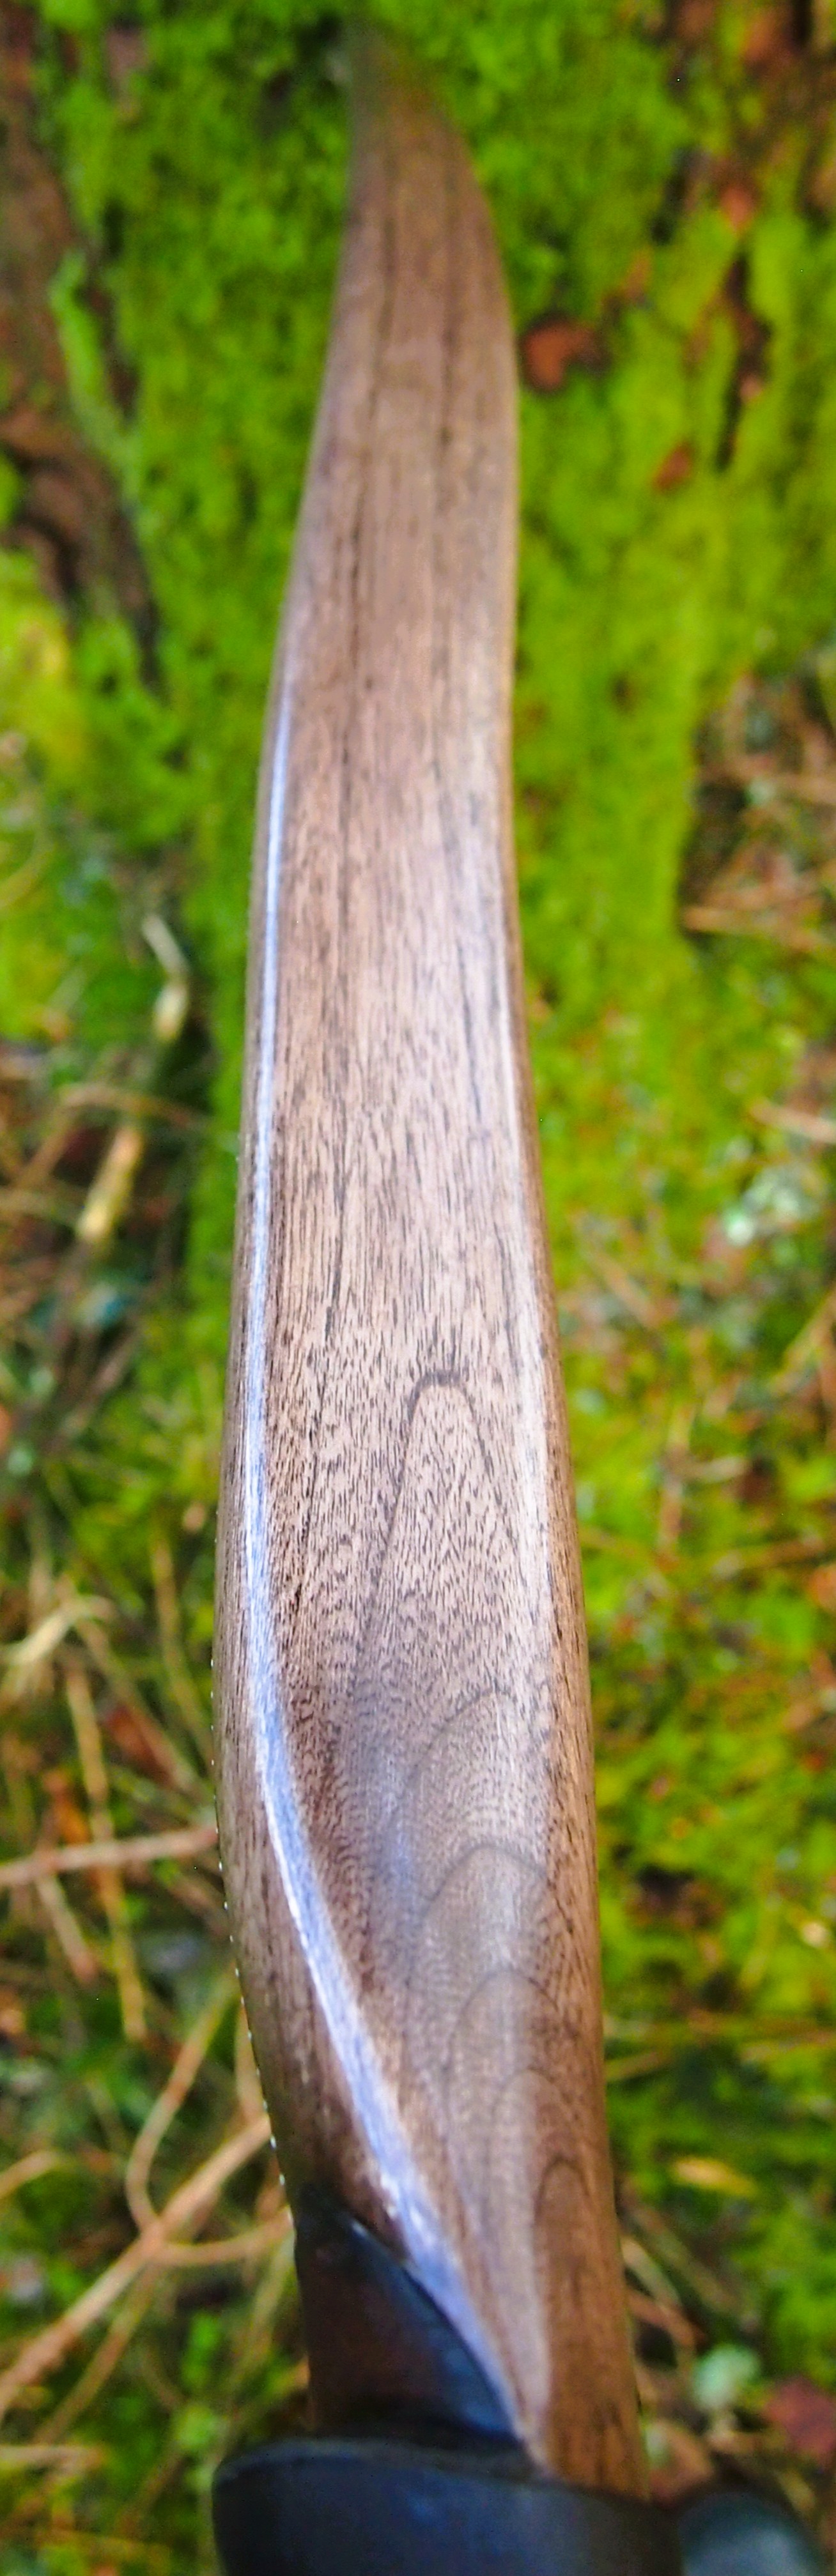
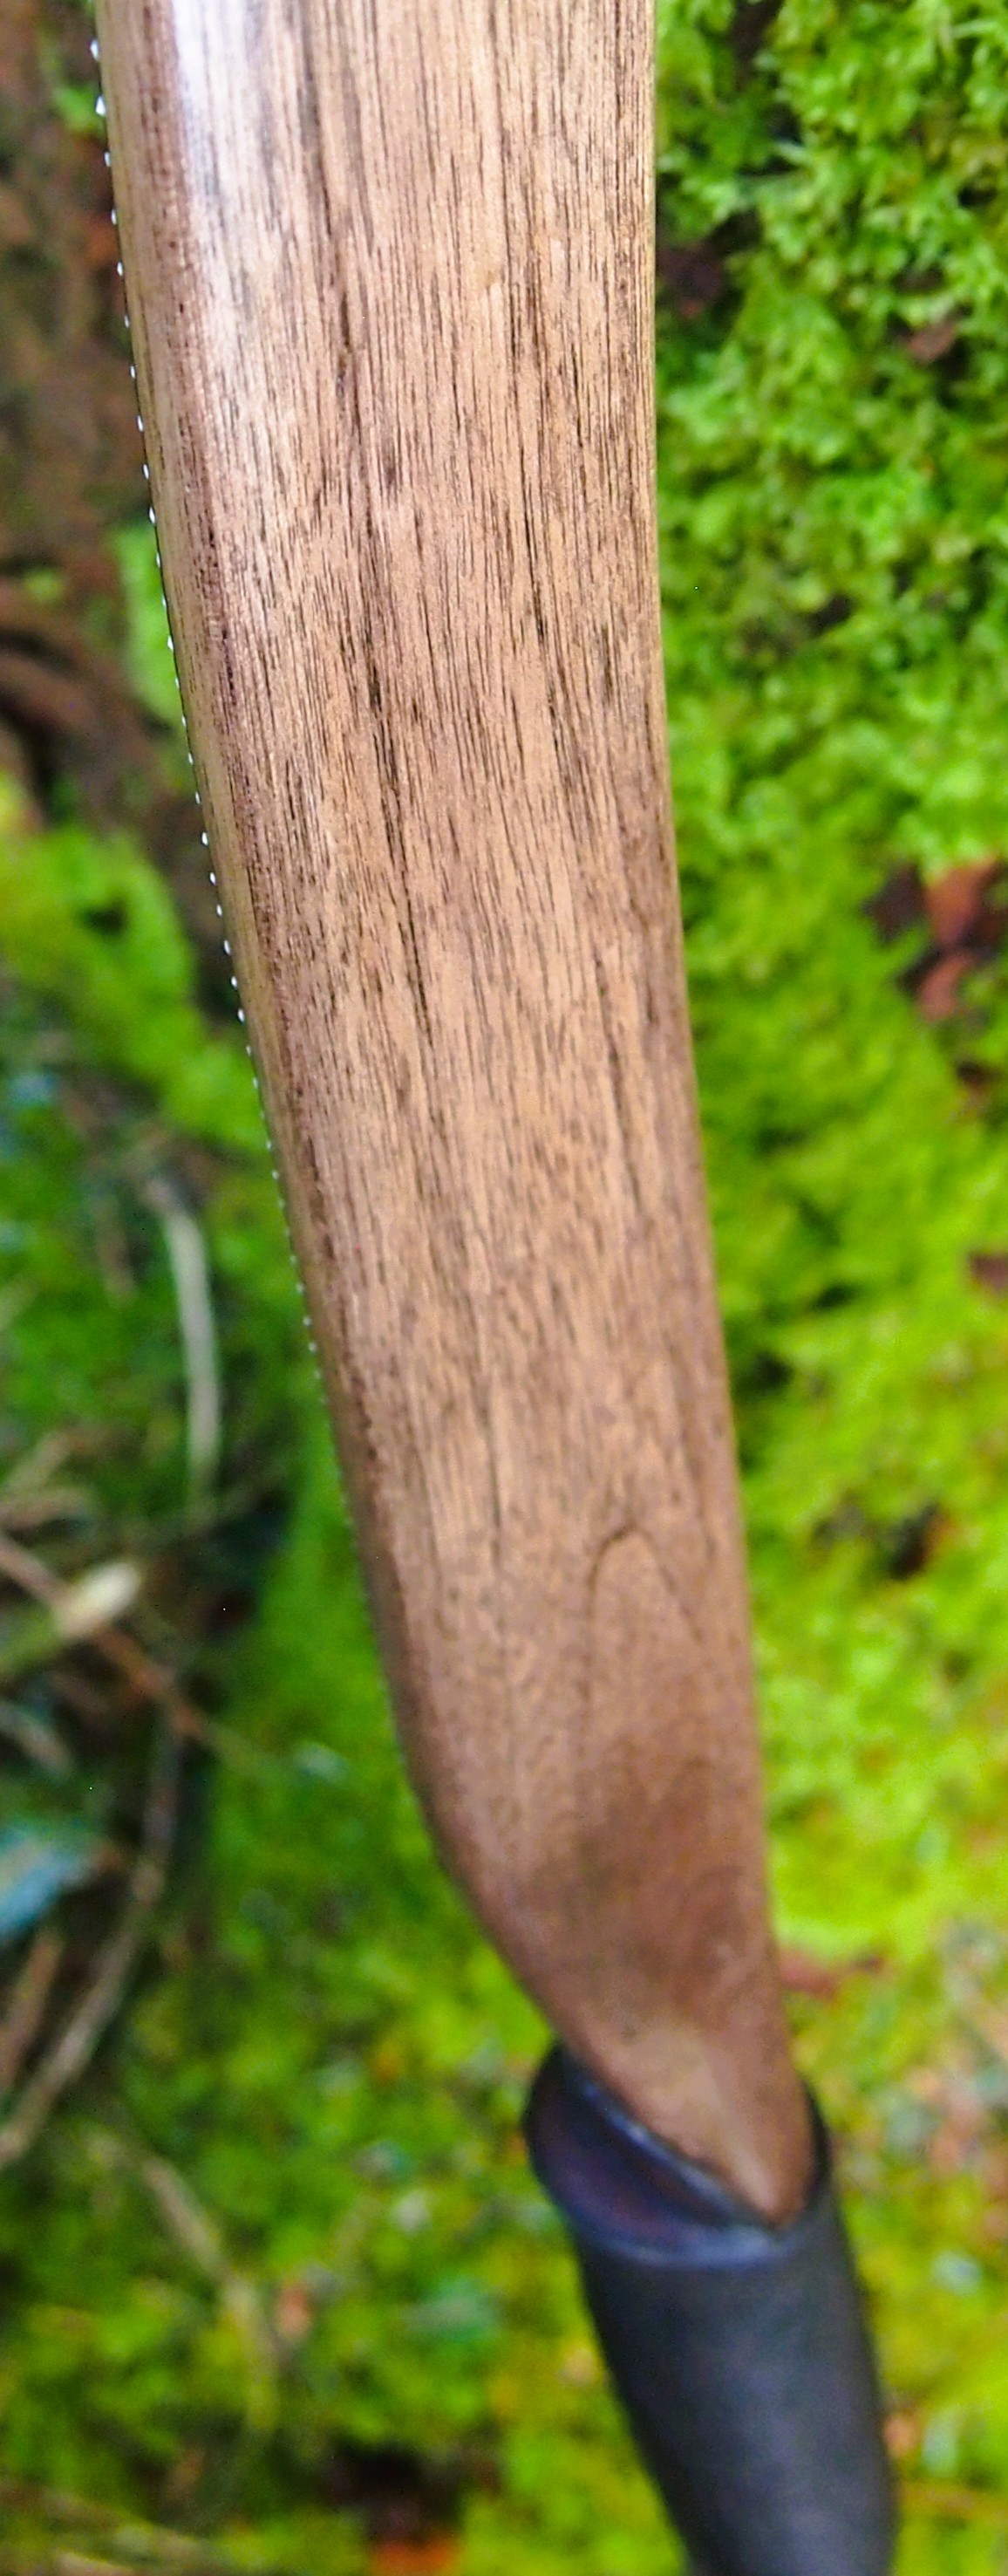
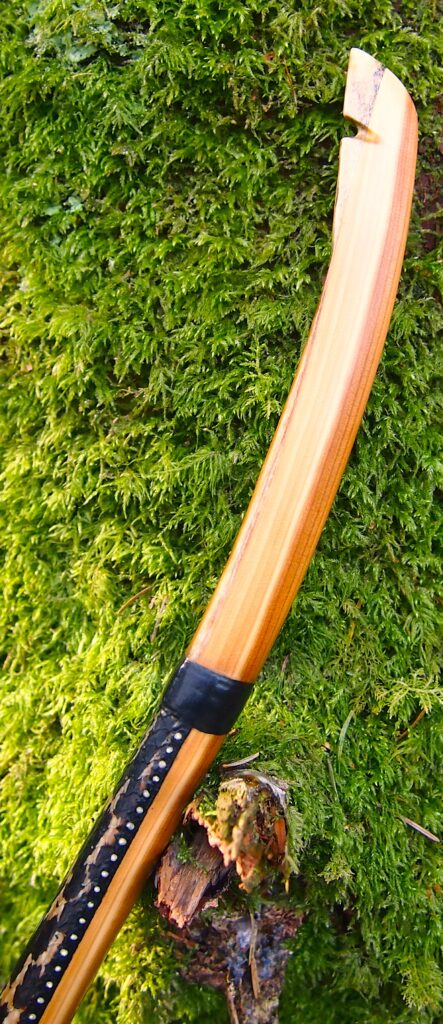
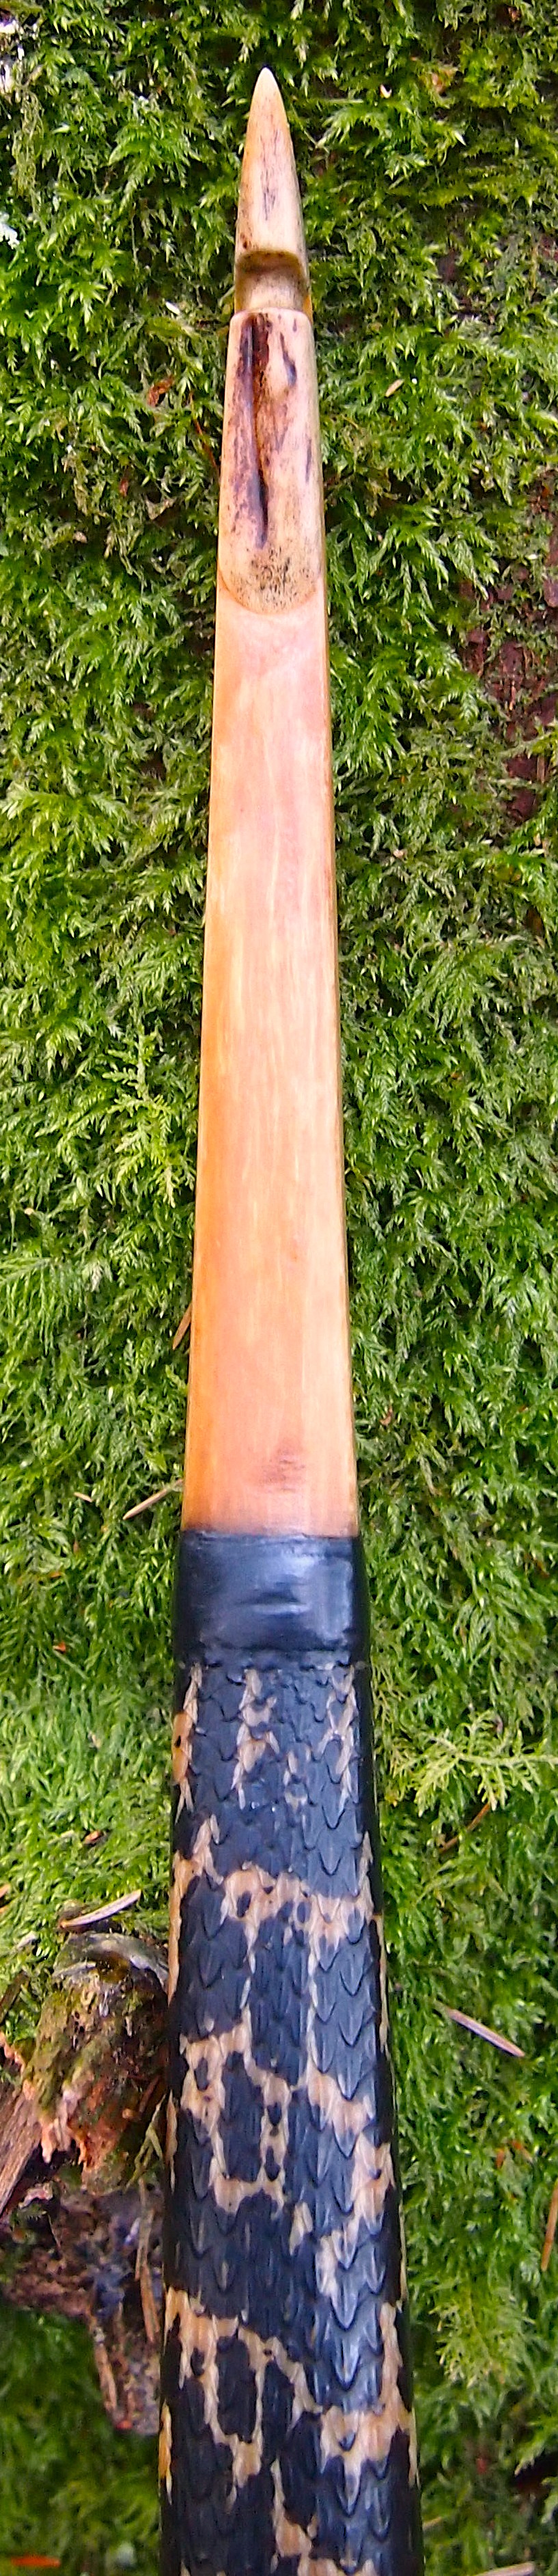
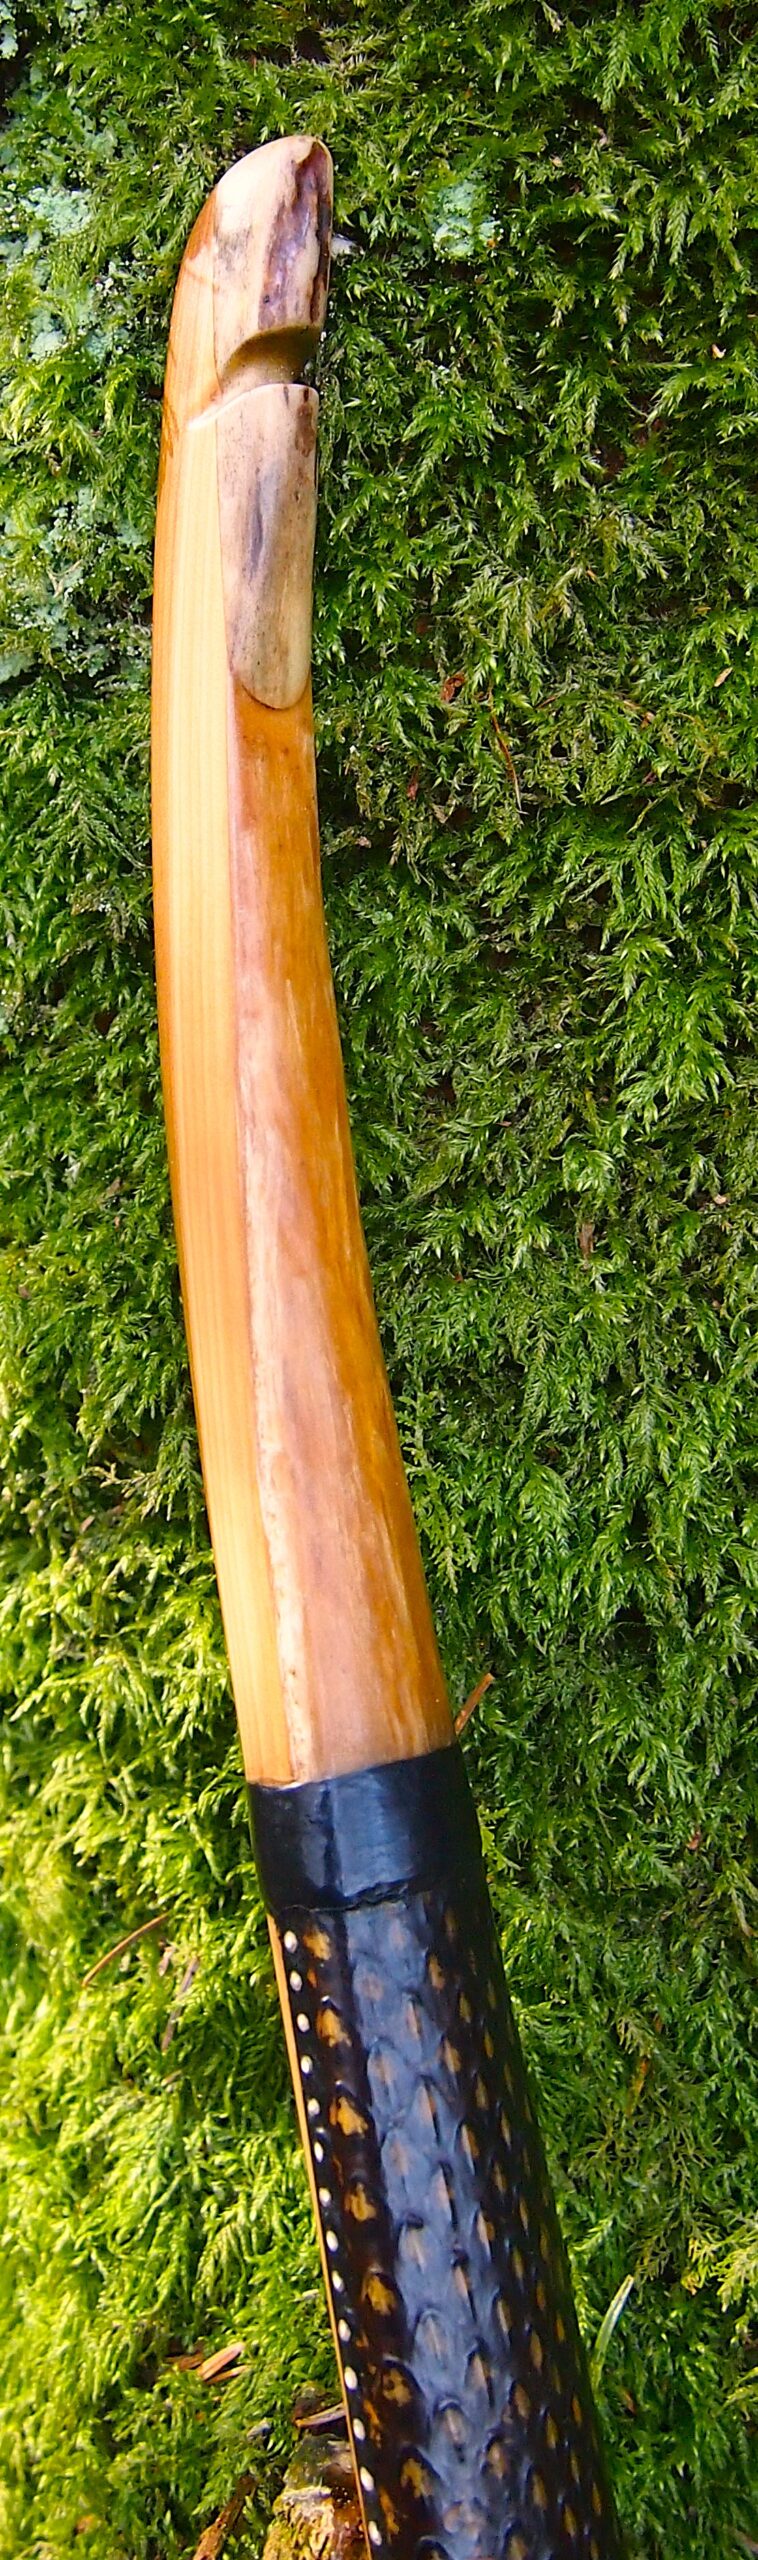
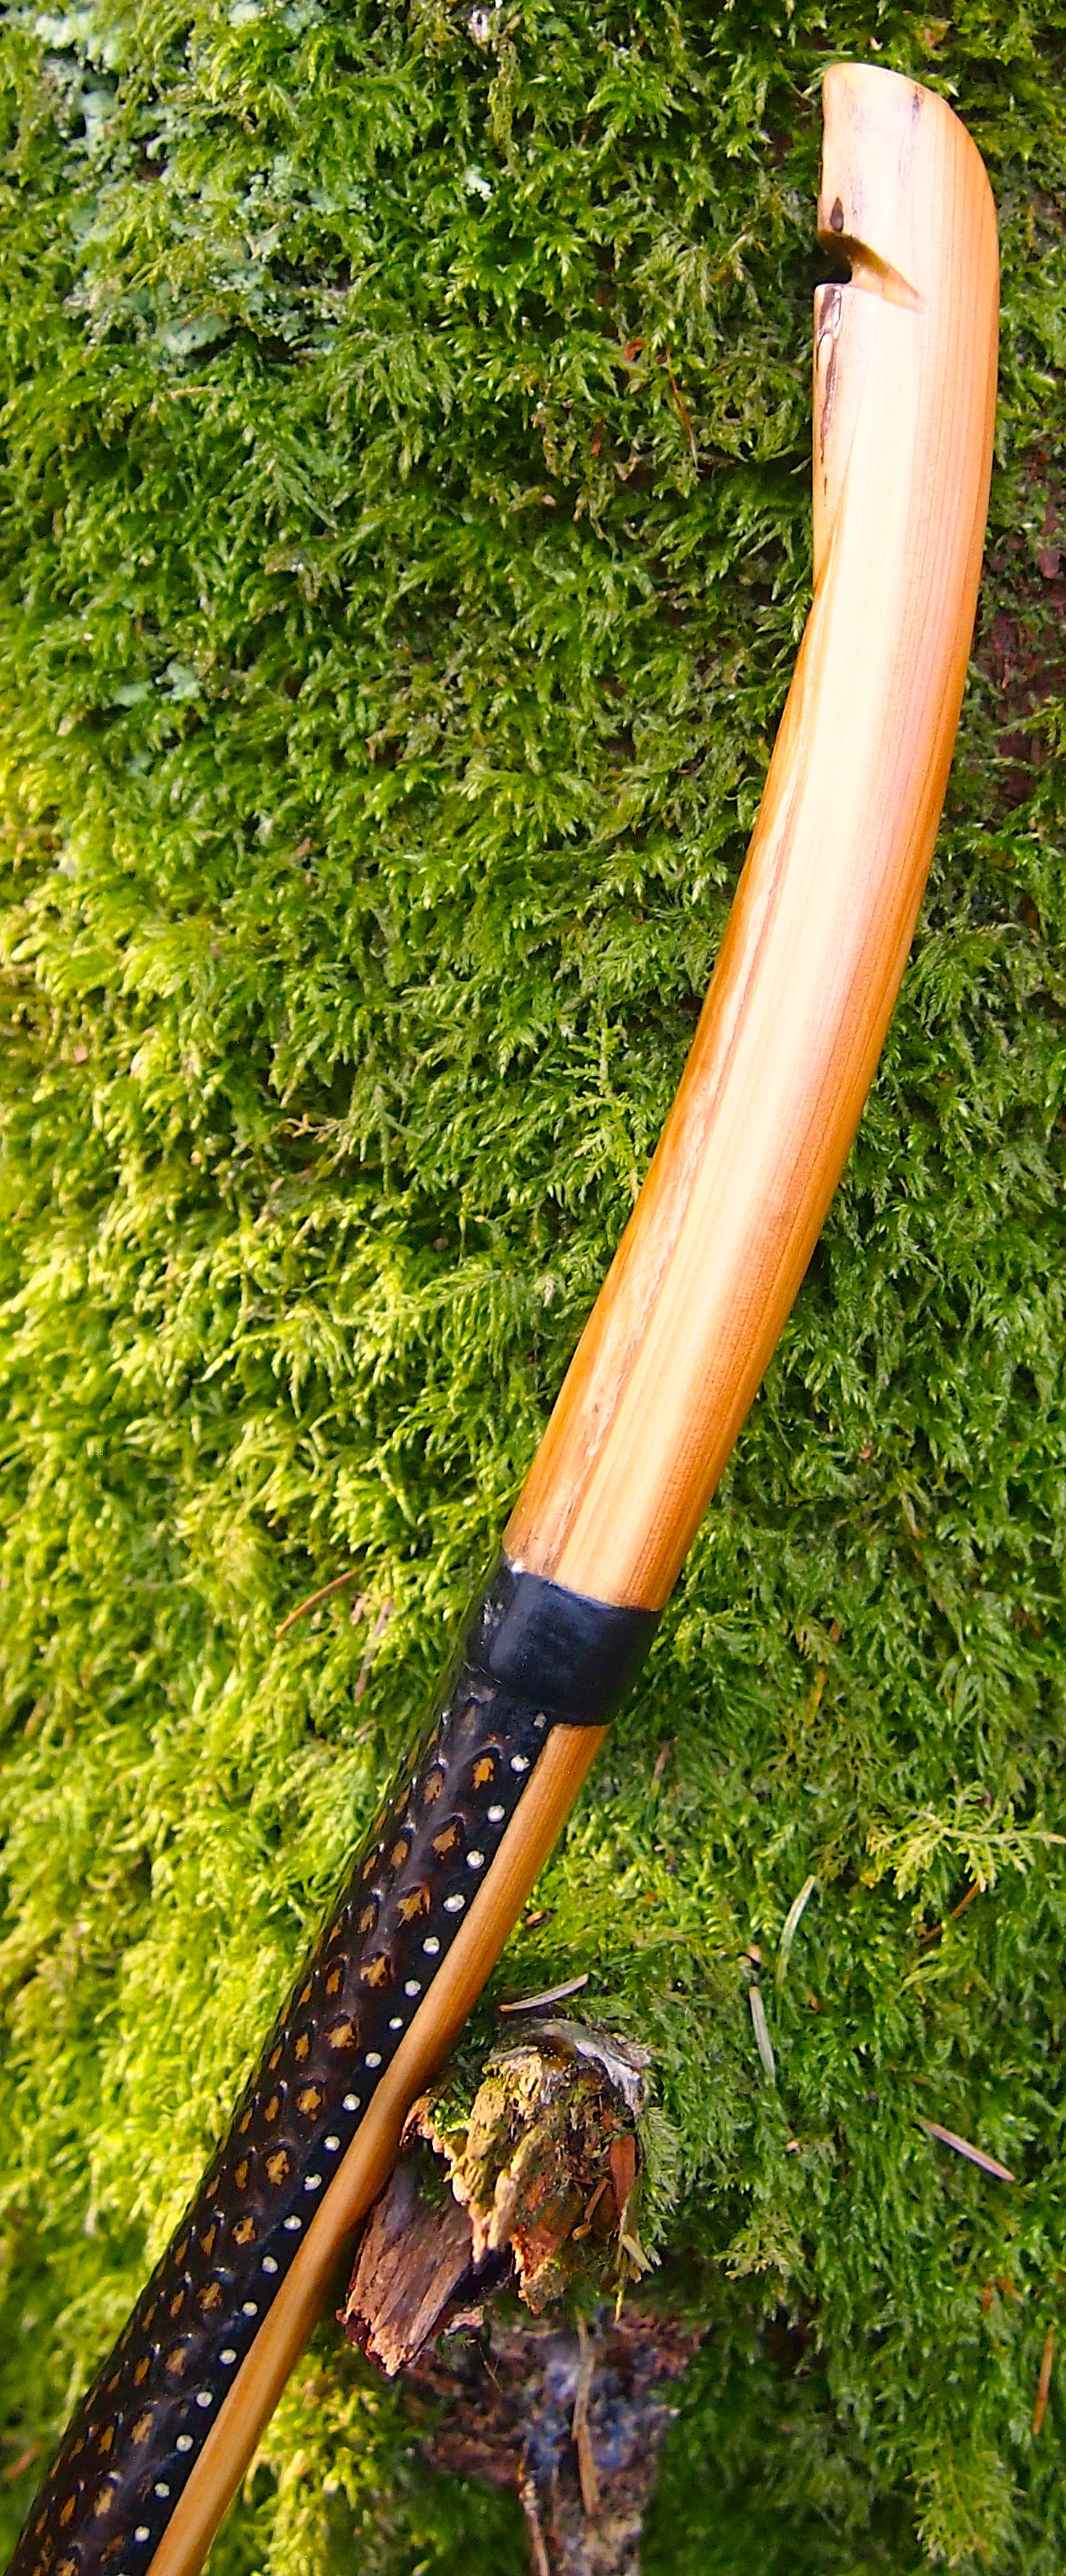
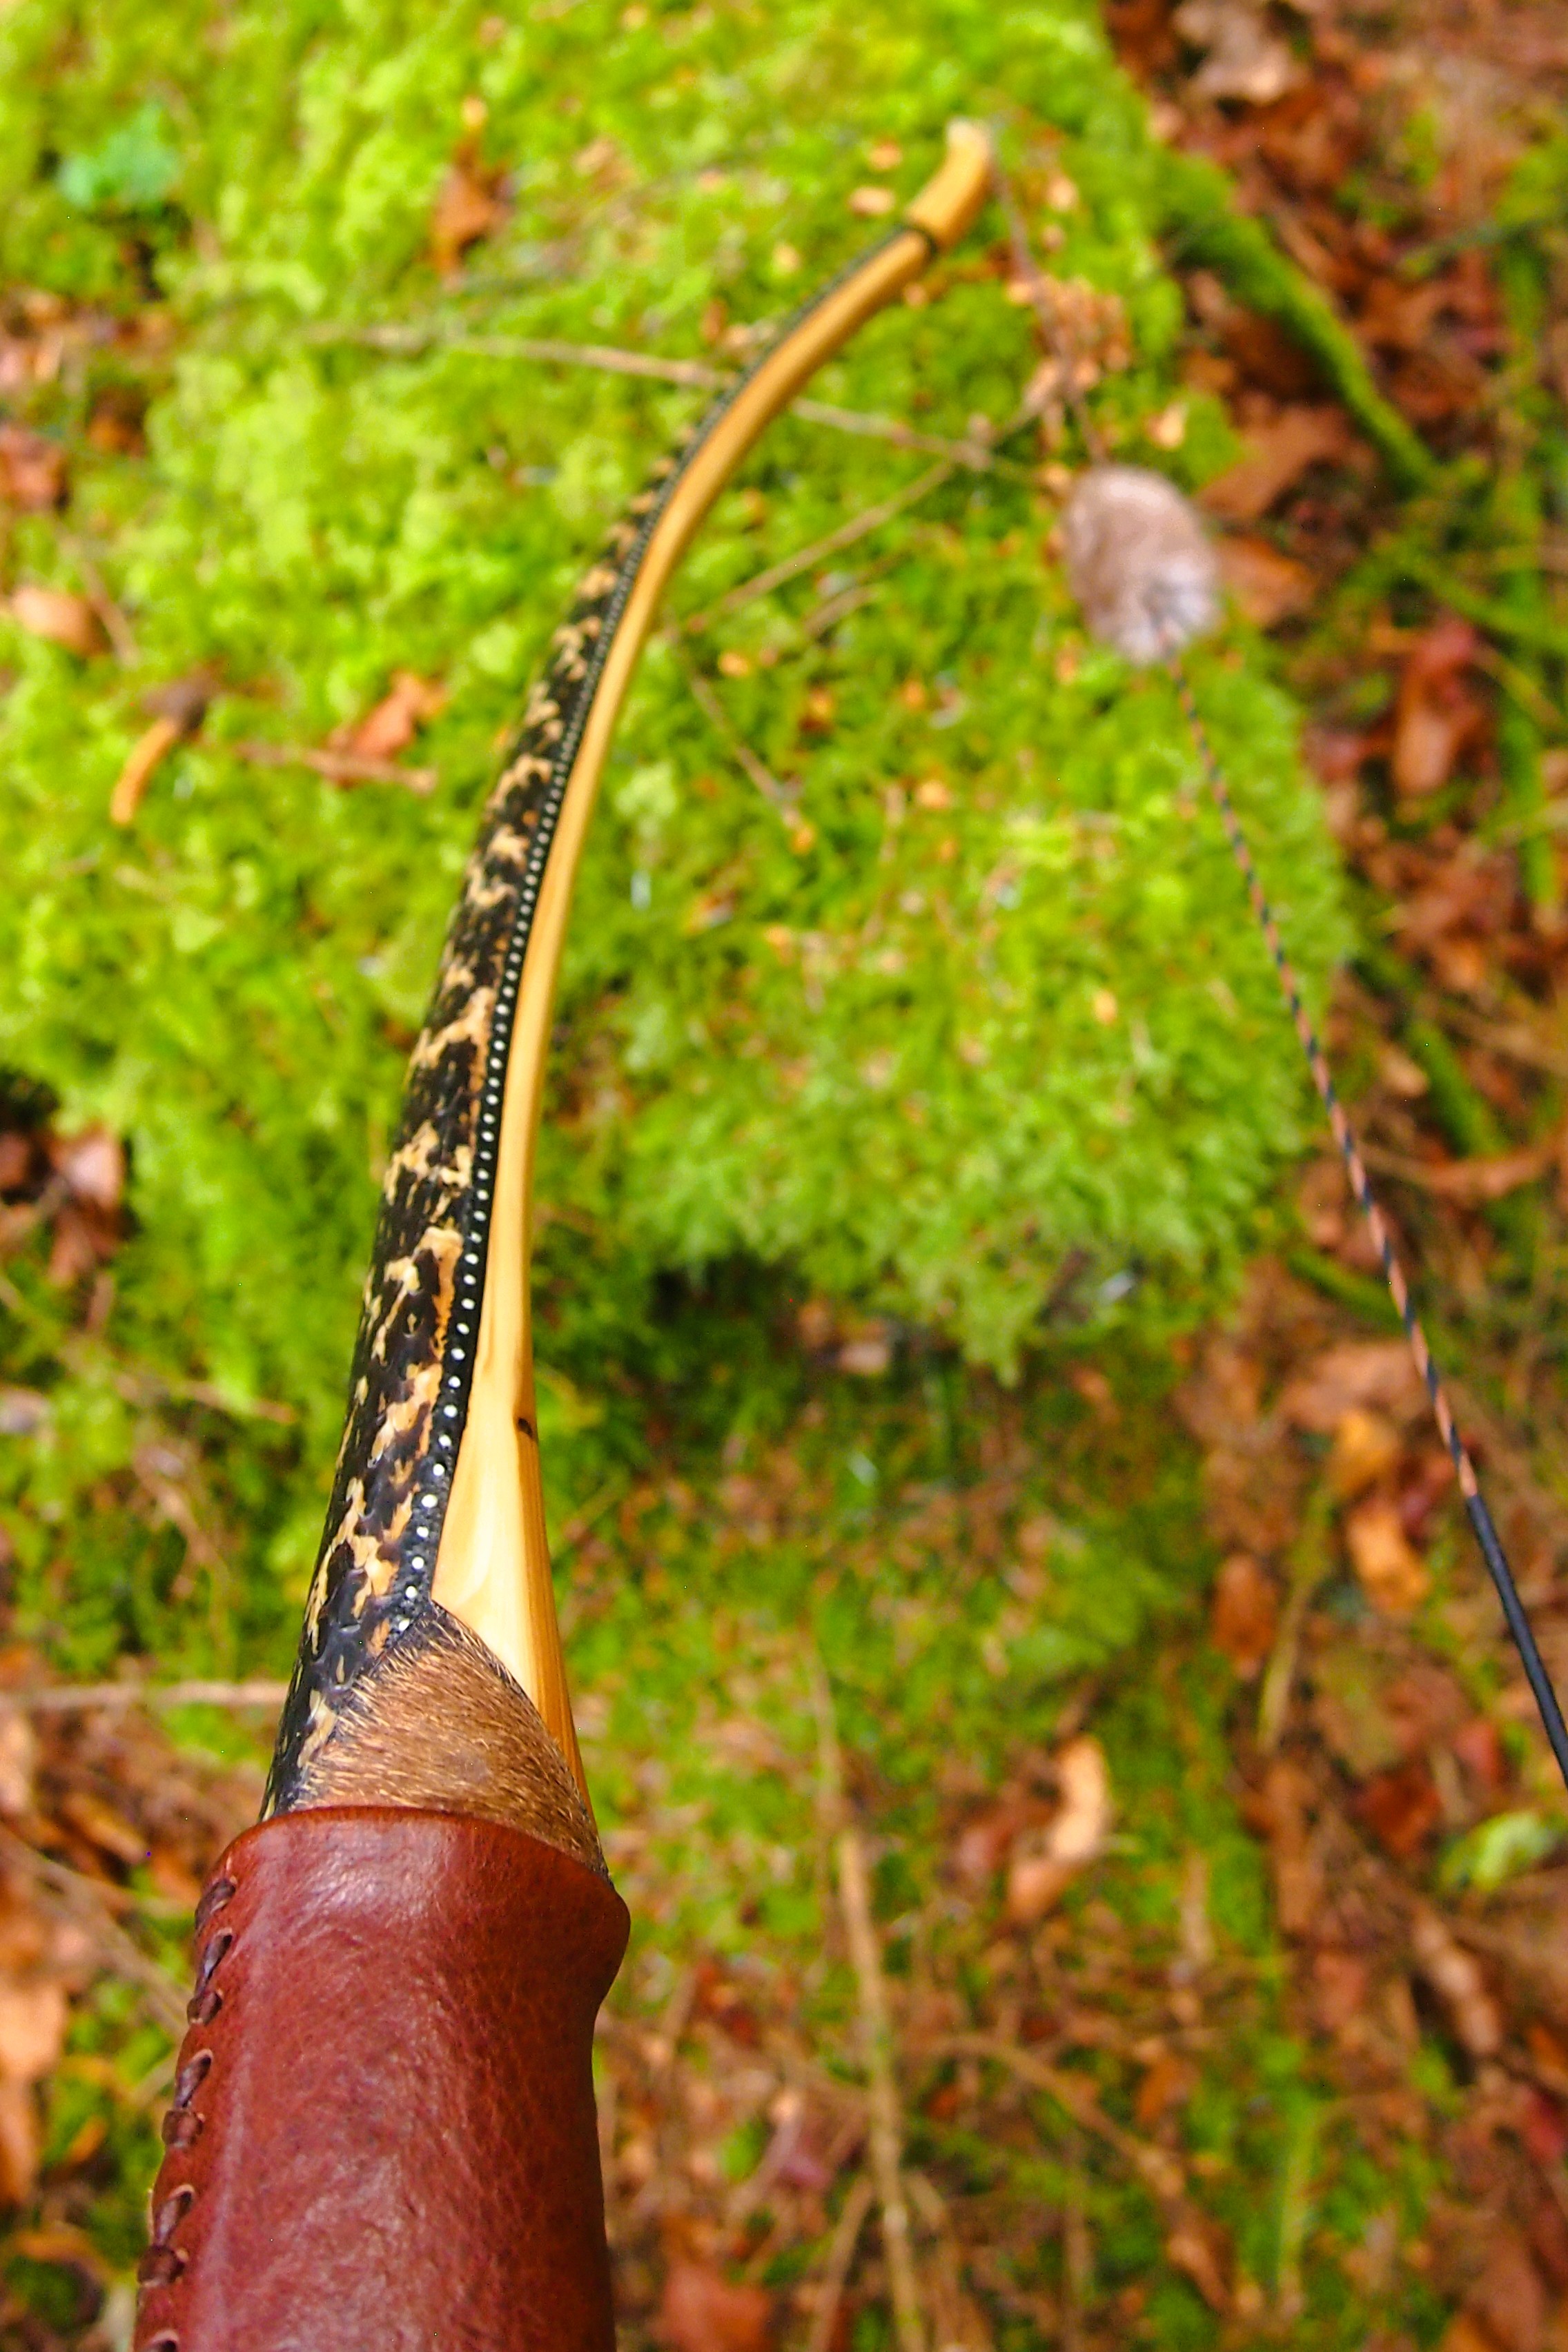
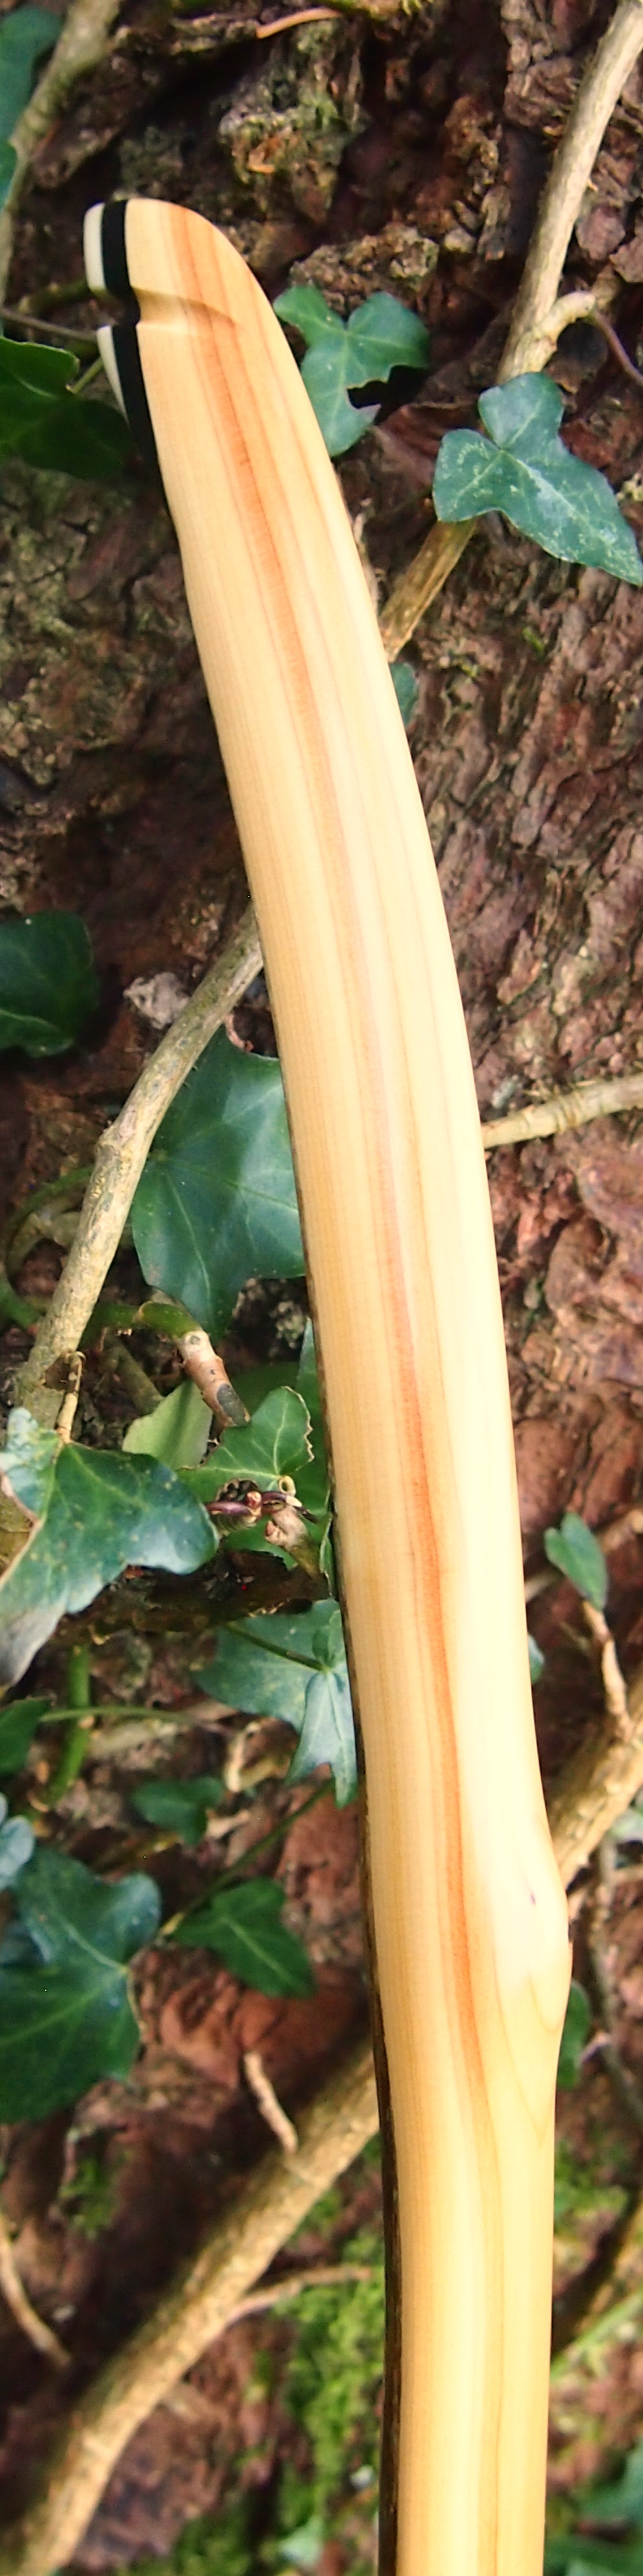
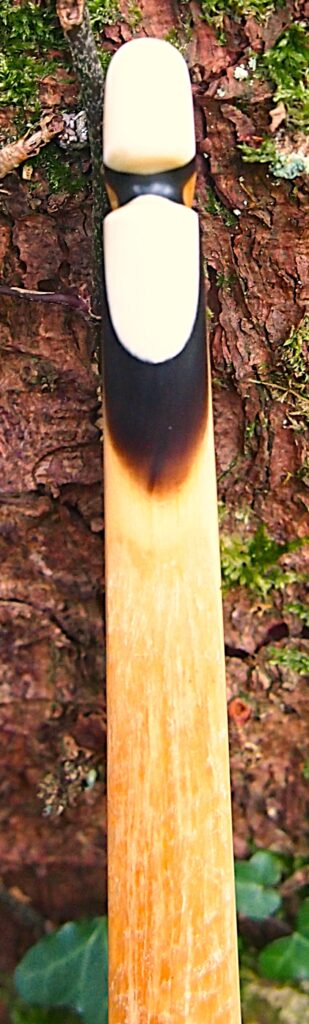
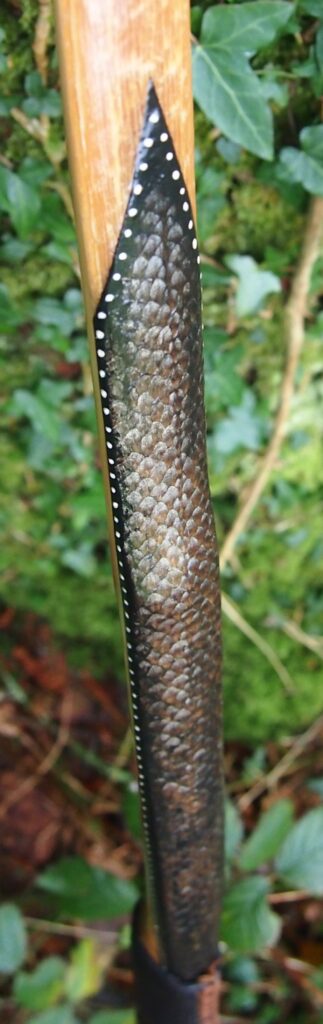
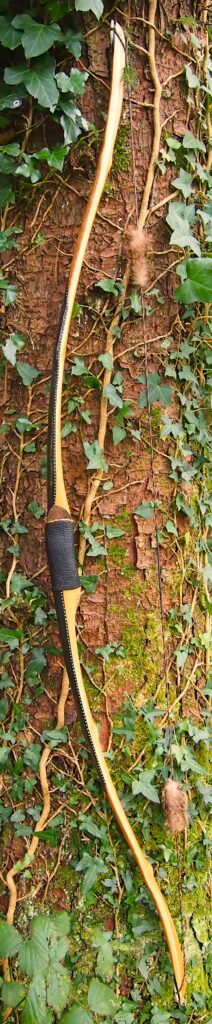
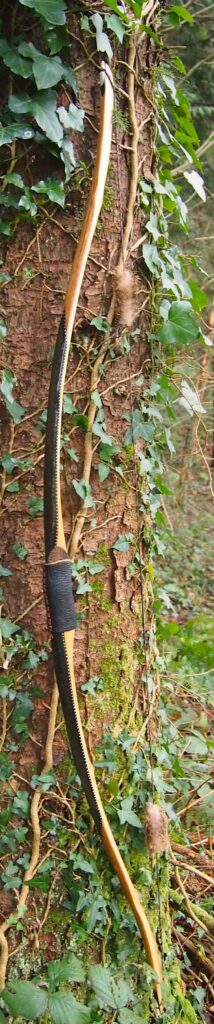
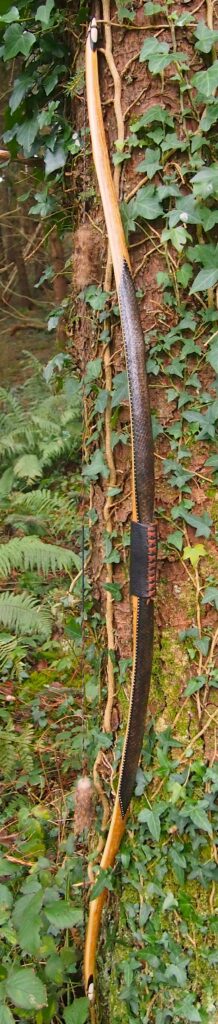
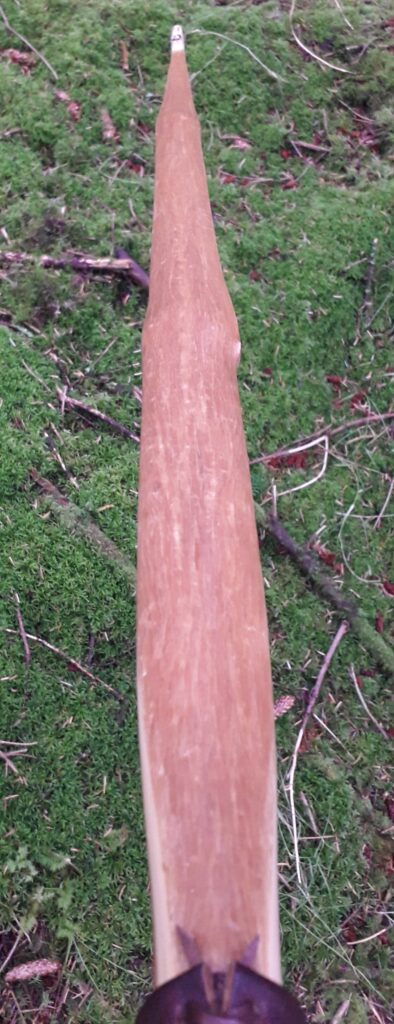
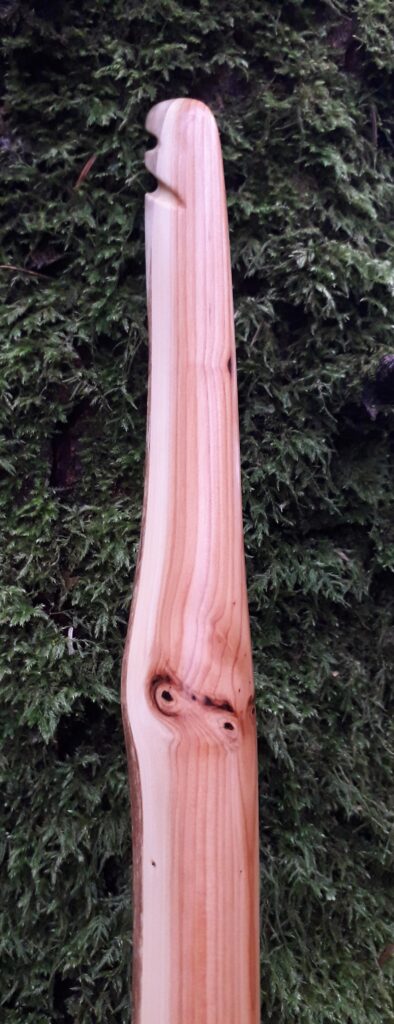
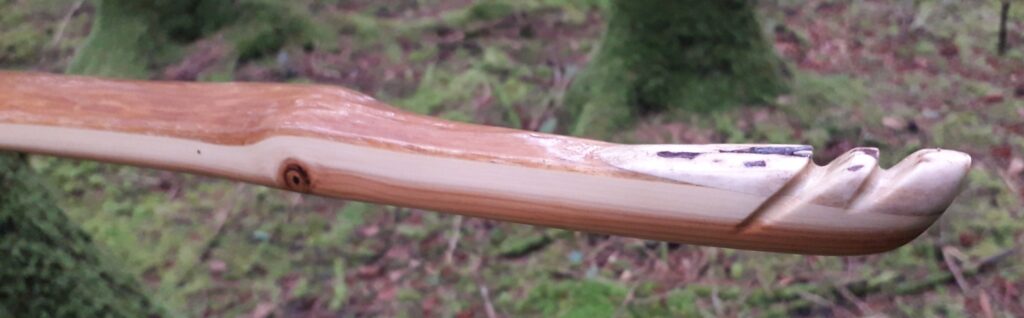
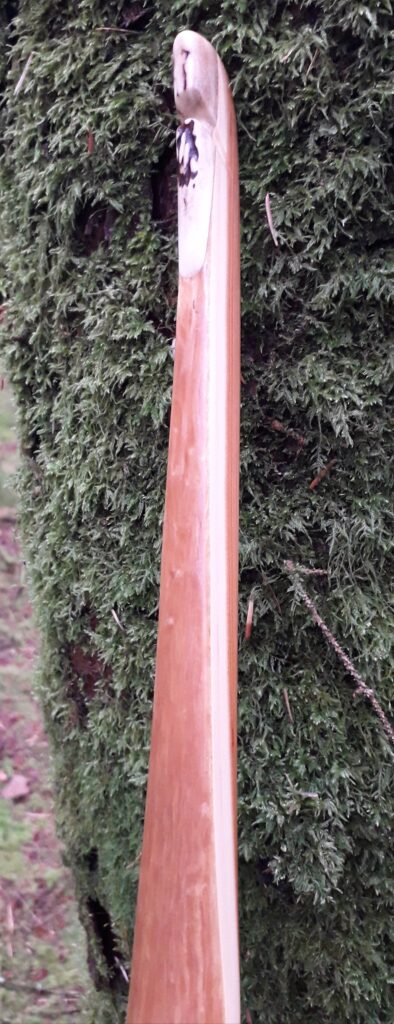
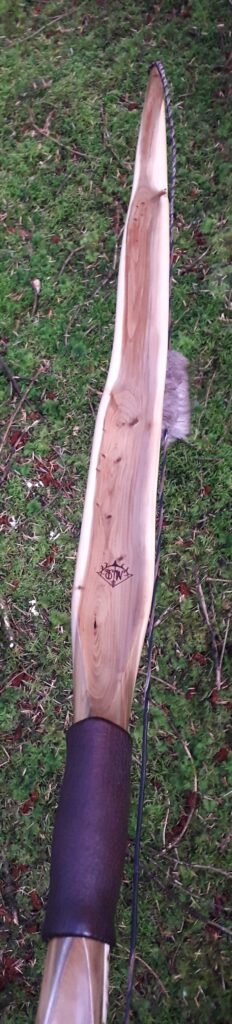
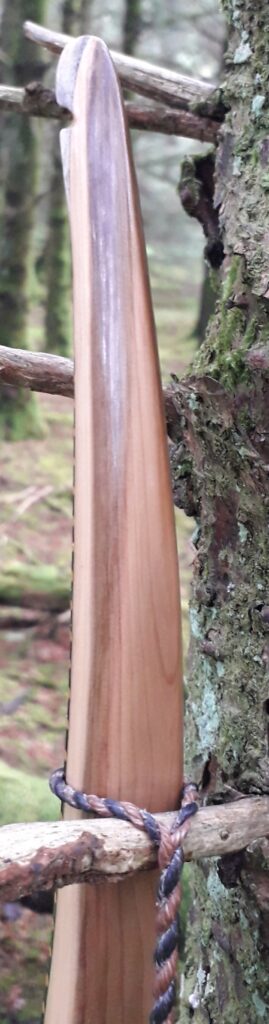
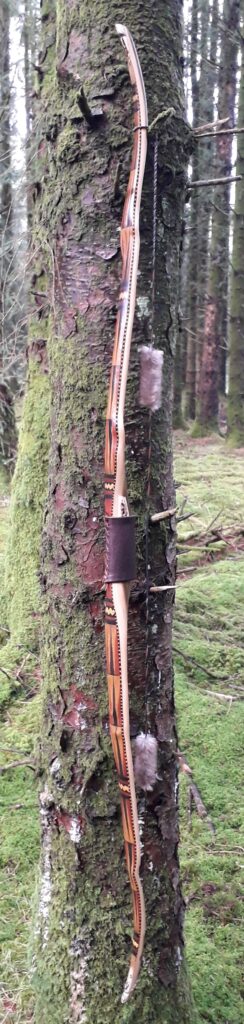
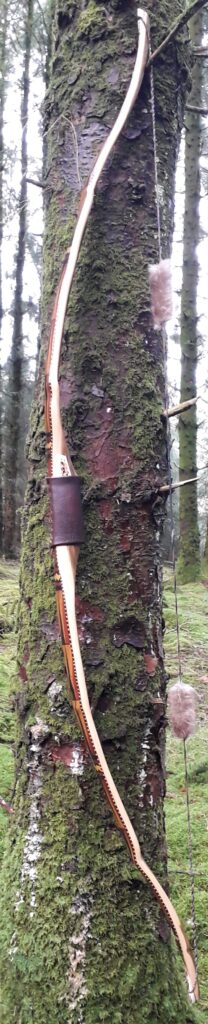
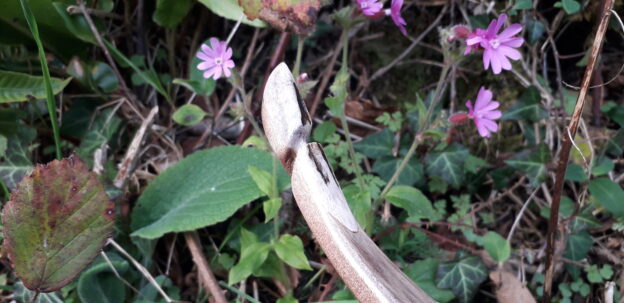
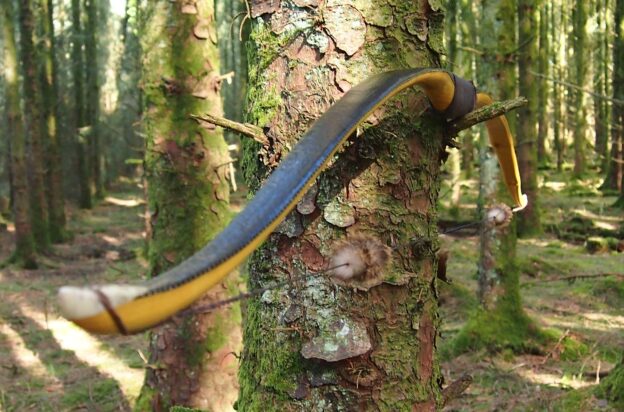
I opted for a simple slender pyramidal face profile on this bow, as this design works very well for woods like osage and yew. Since osage (like yew) is so strong in compression, I didn’t feel the need to go super wide with the limbs, so opted for limbs around 1 1/2″ wide at the widest section just outside of the fades, tapering down to 1/2″ tips (which I would leave static for the last 4″ in order to resist the reflex being pulled out of the tips over time with heavy use).
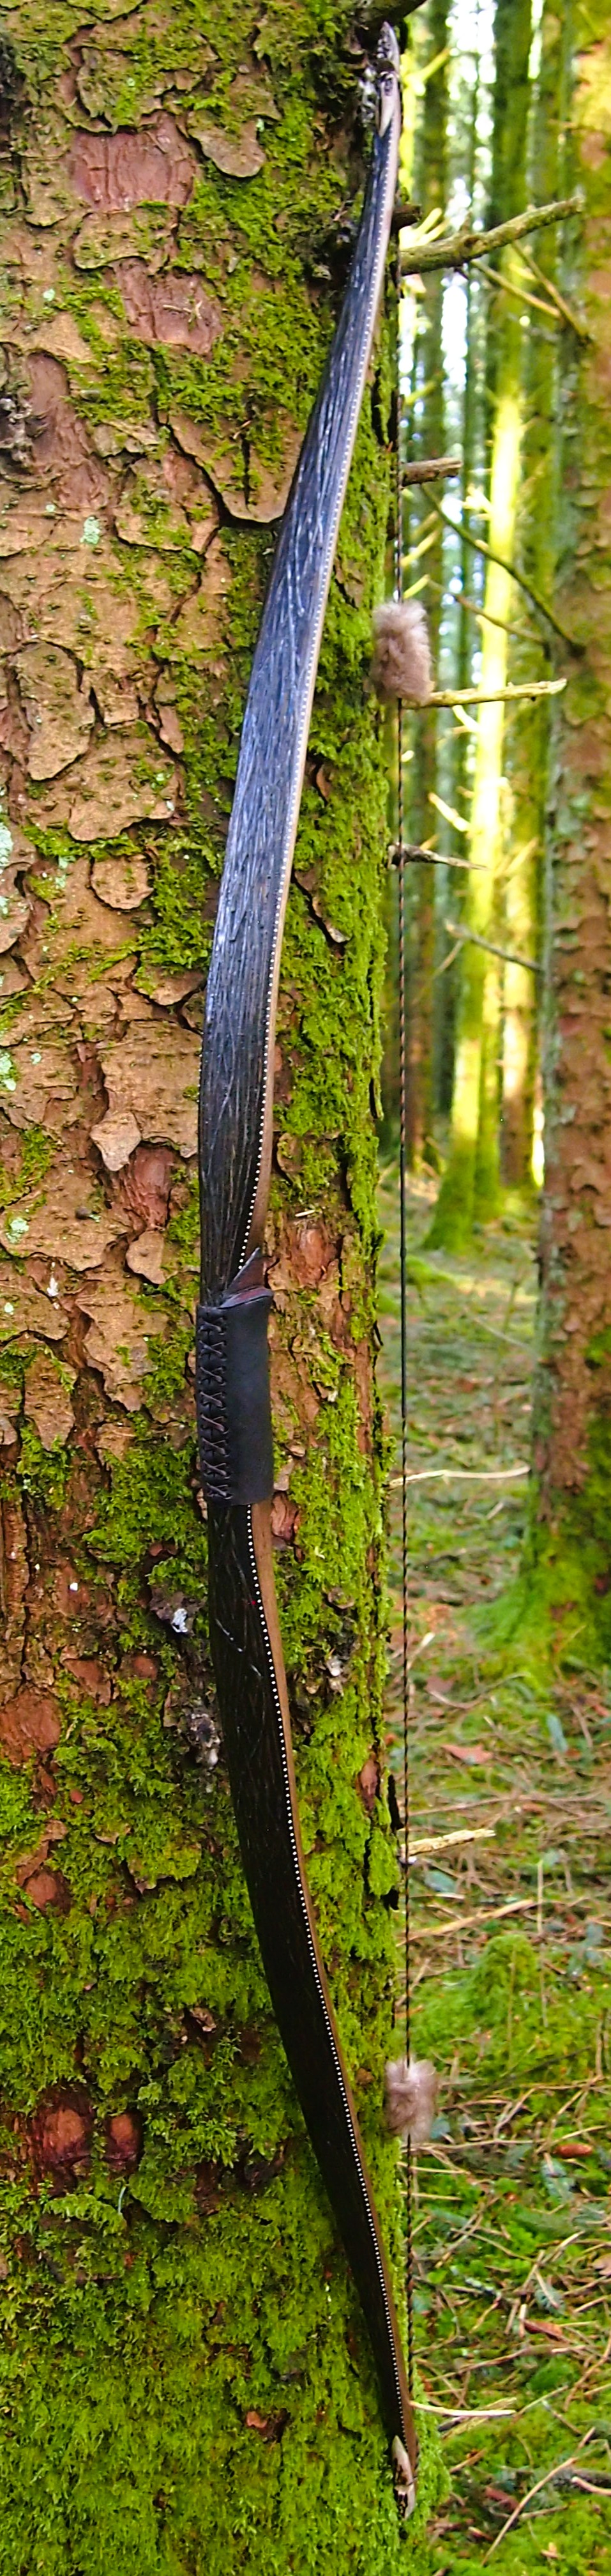
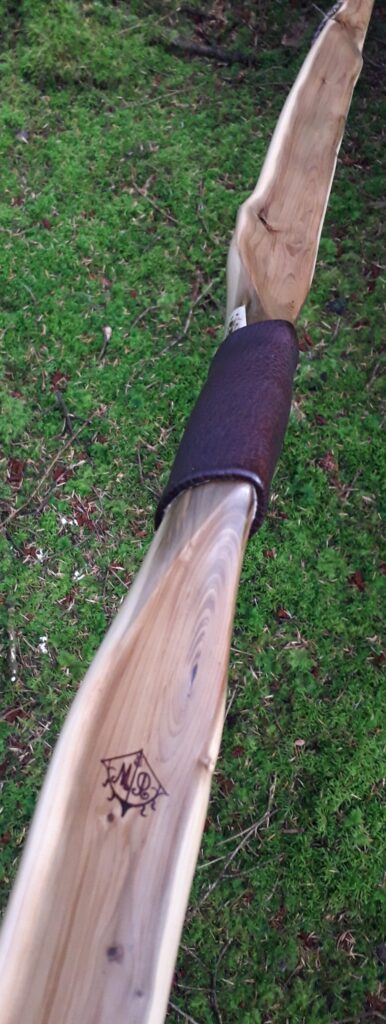
The handle section in the roughed out state was nice and deep, even once the bulk of the splintery rubbish had been removed from the belly side. So at 2″ thick, I decided to keep the handle a little deeper than I normally do. This would also enable me to retain nice deep fades too, so I fancied shaping them up to a nice crisp sharp ridge to create a nice aesthetic leading into the handle section.
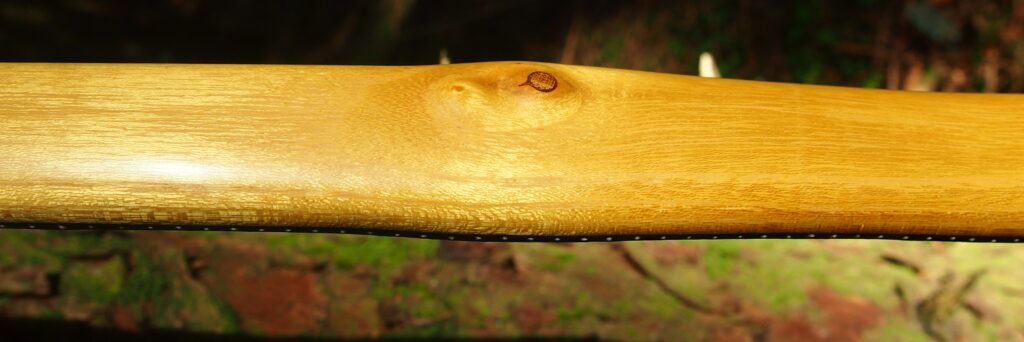
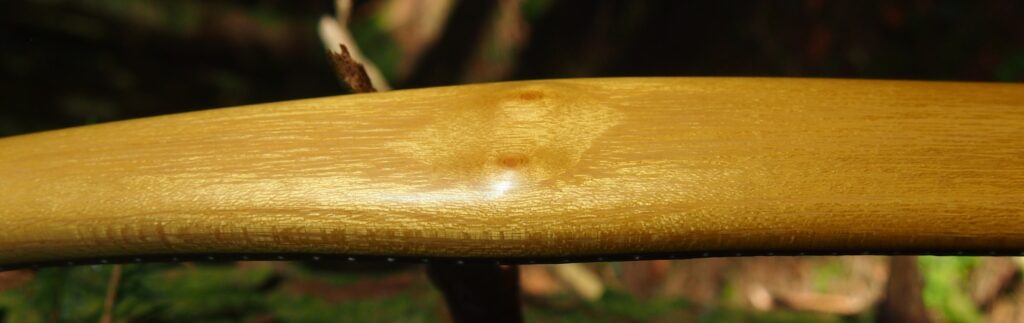
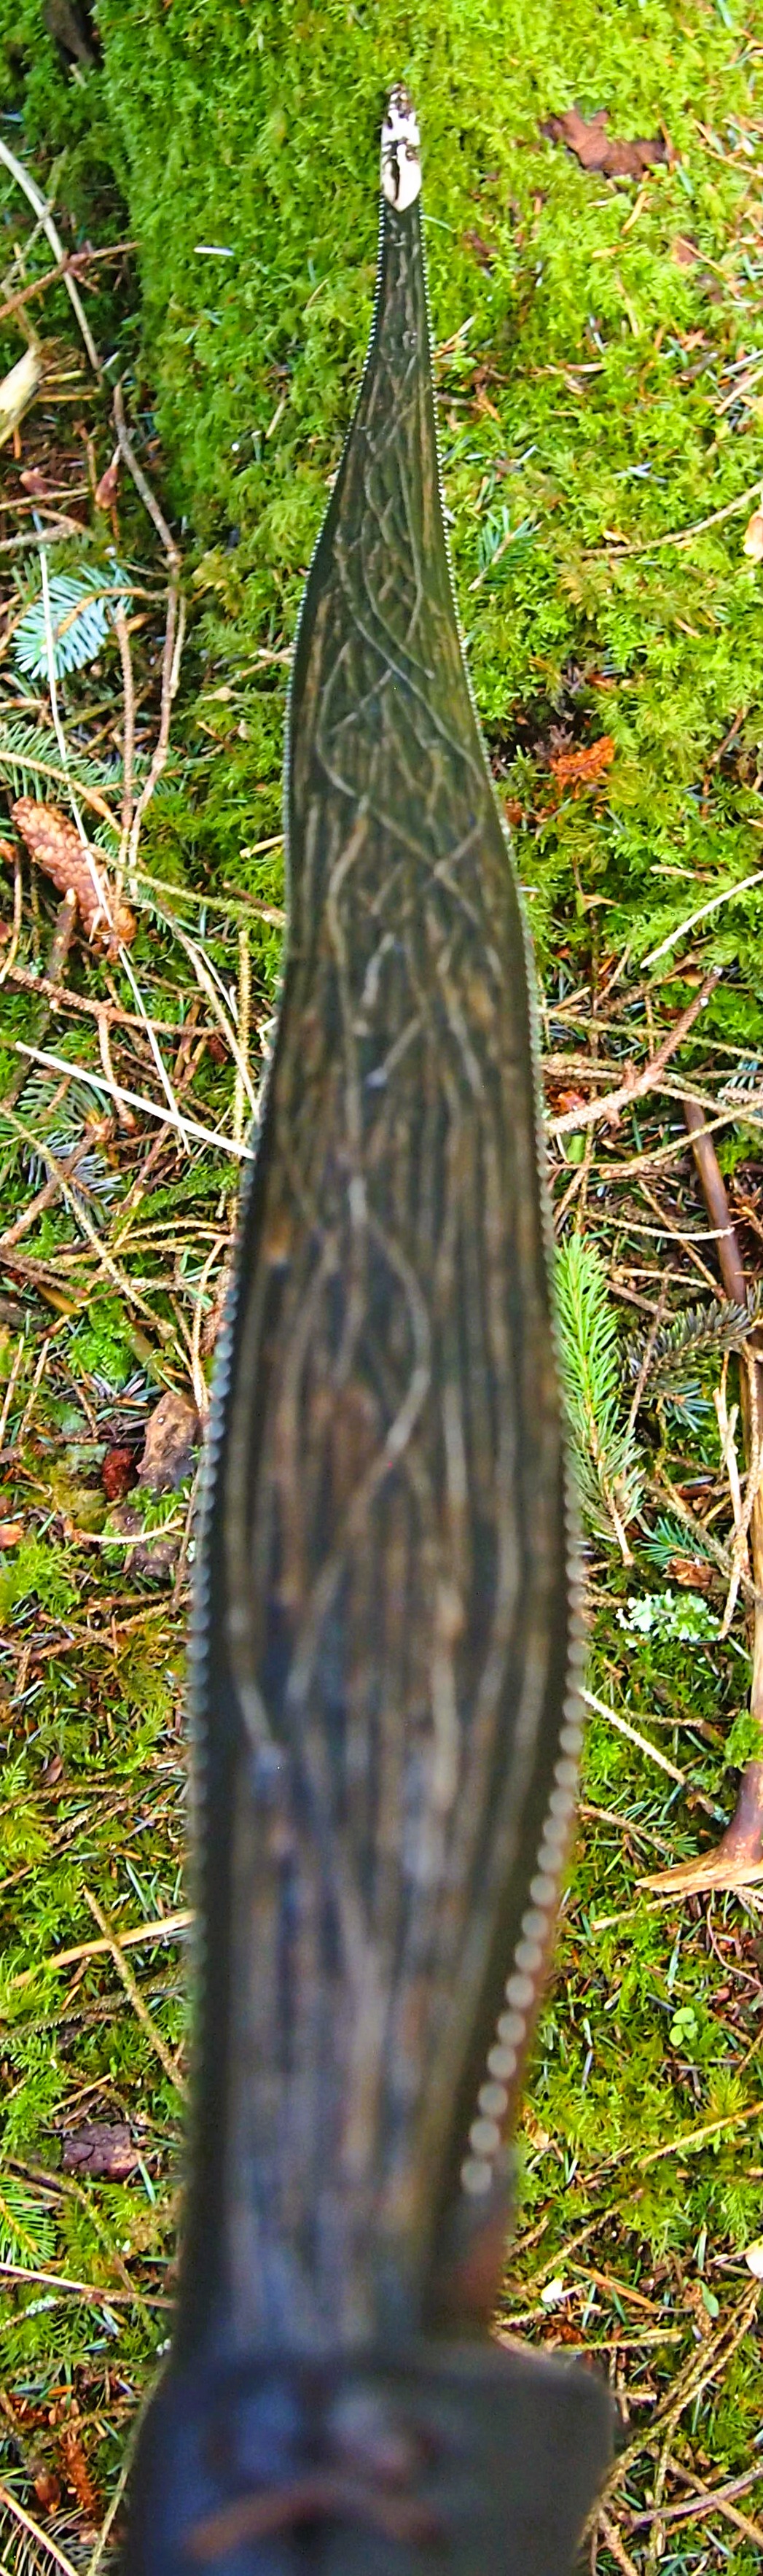
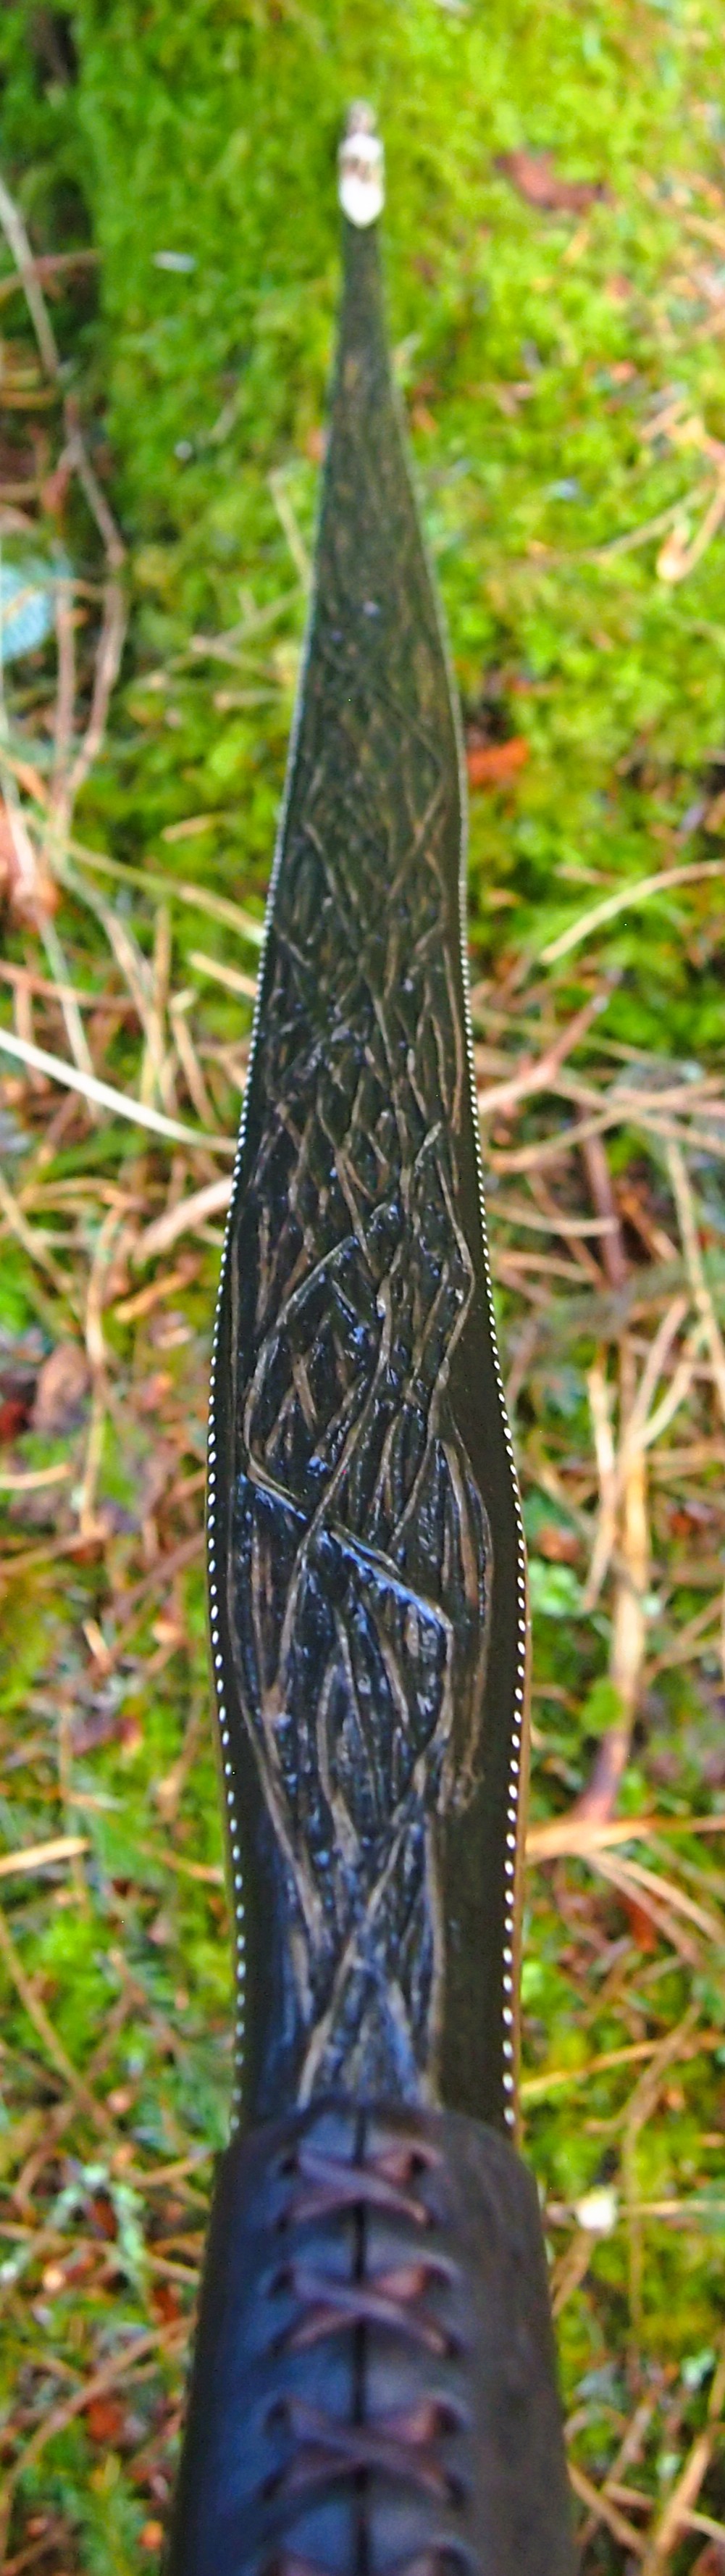
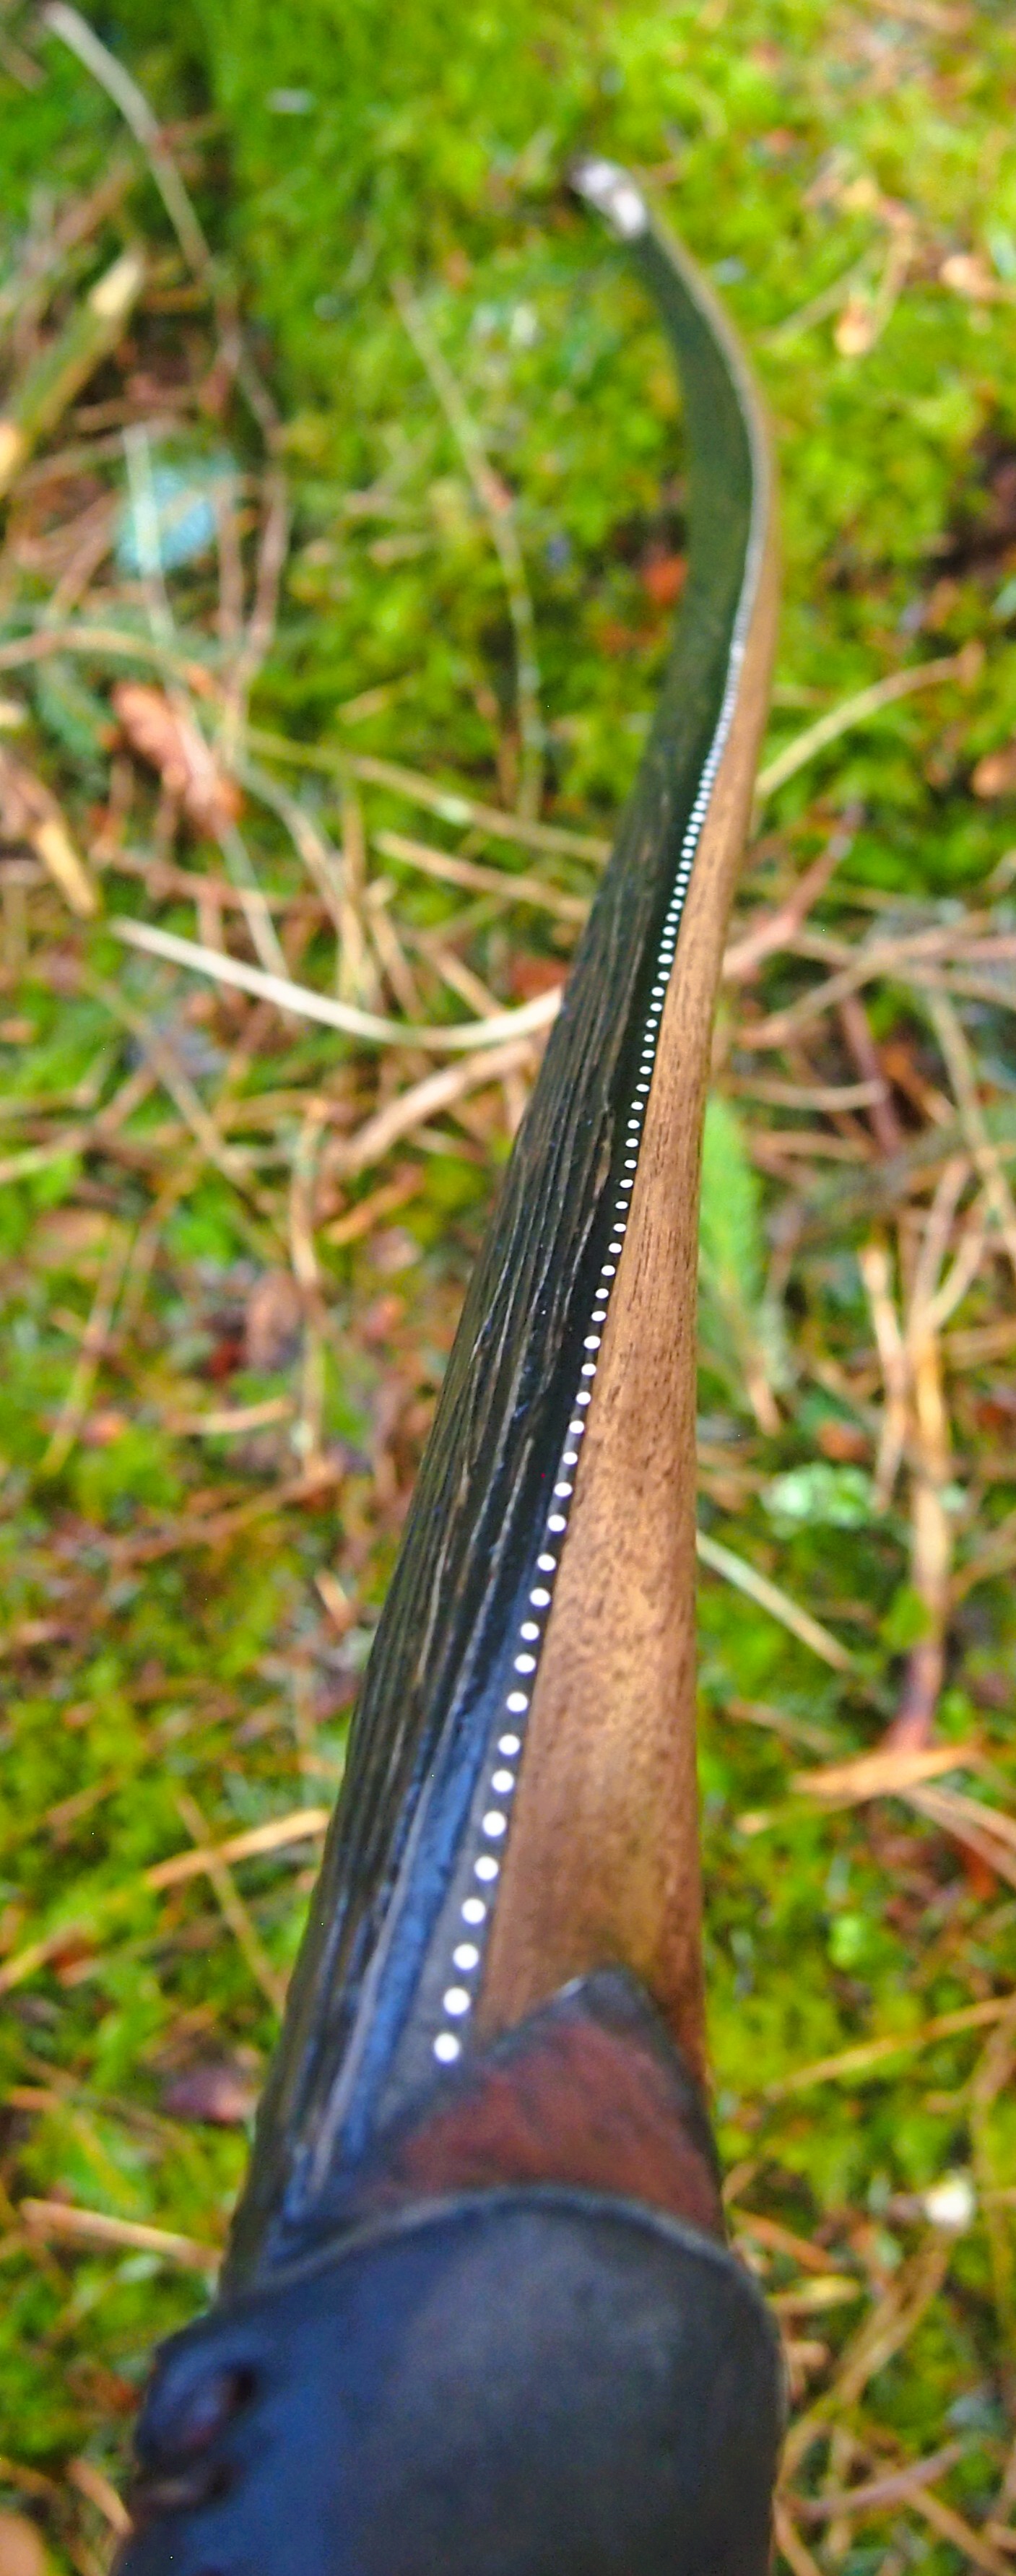
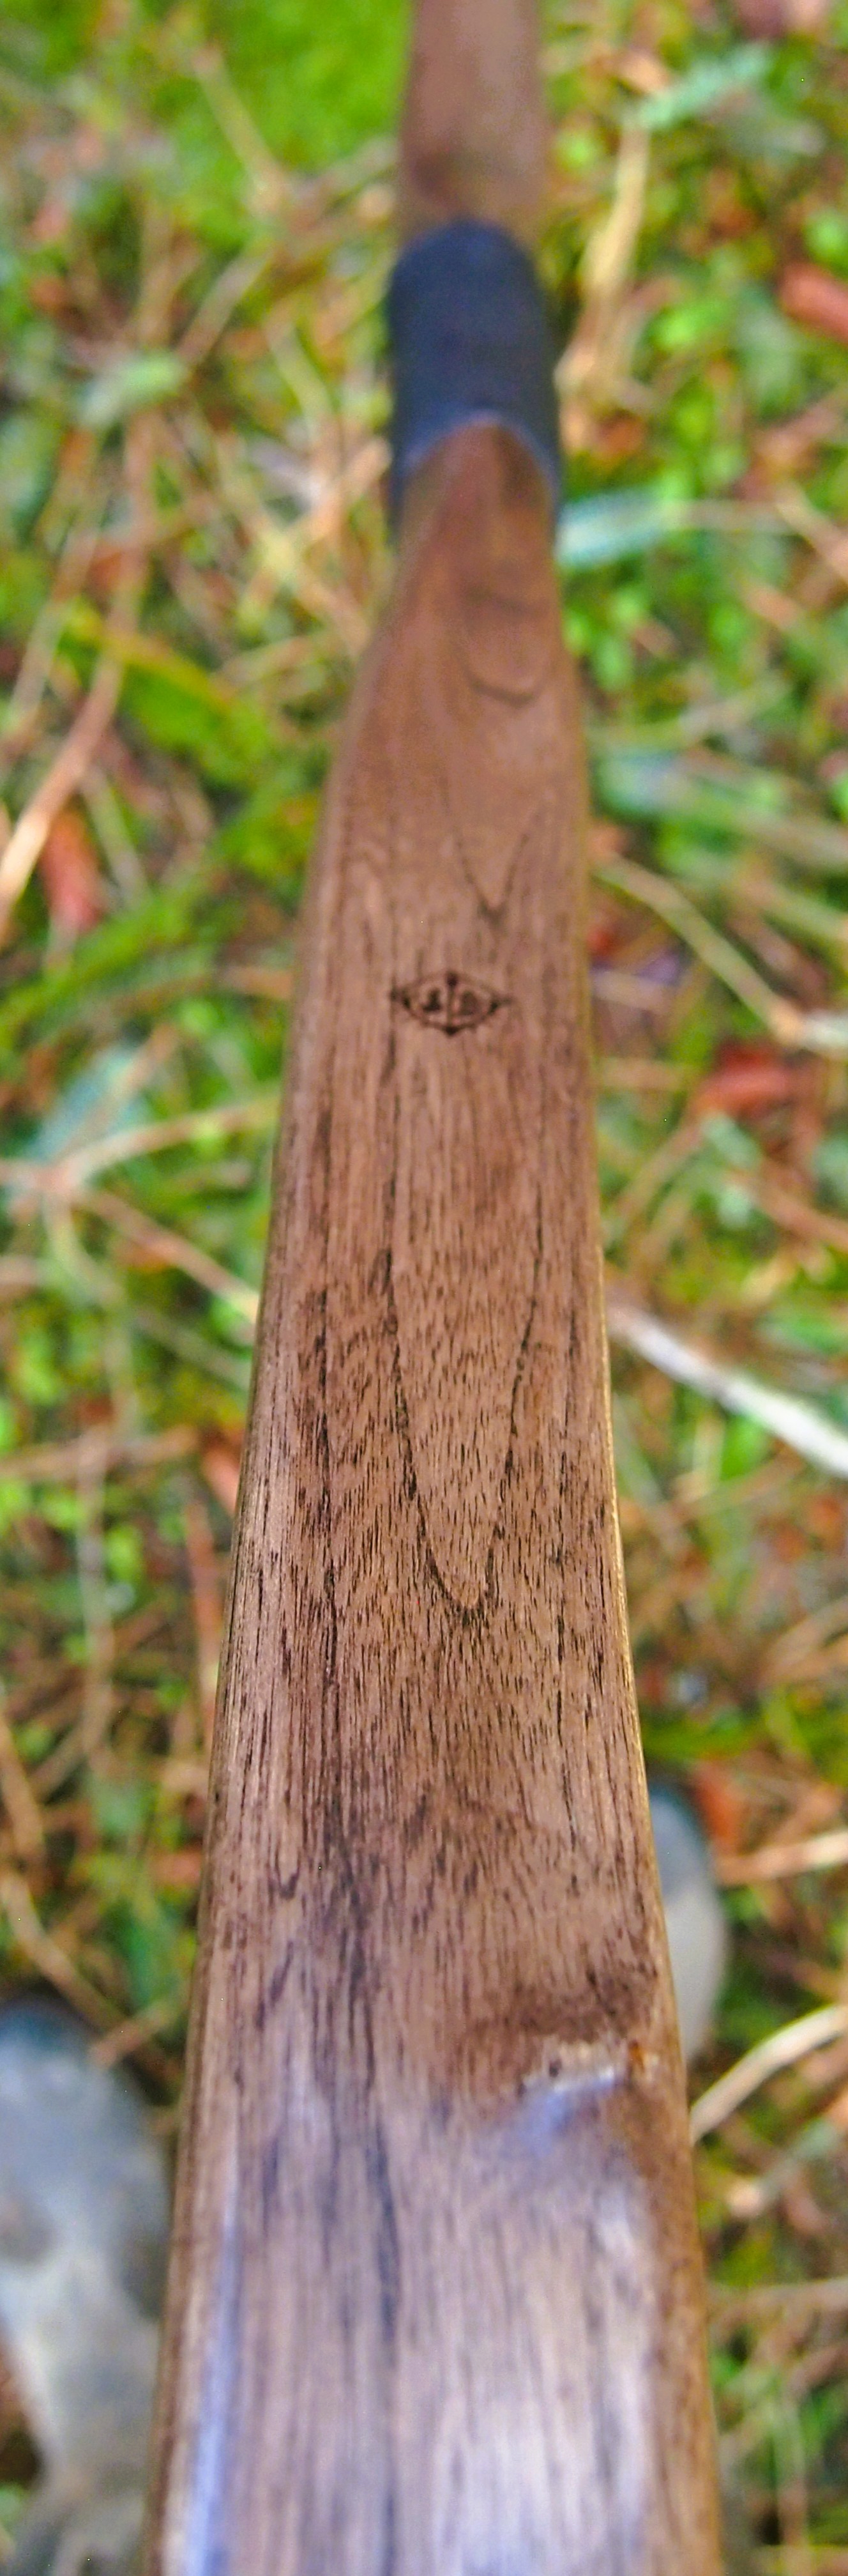
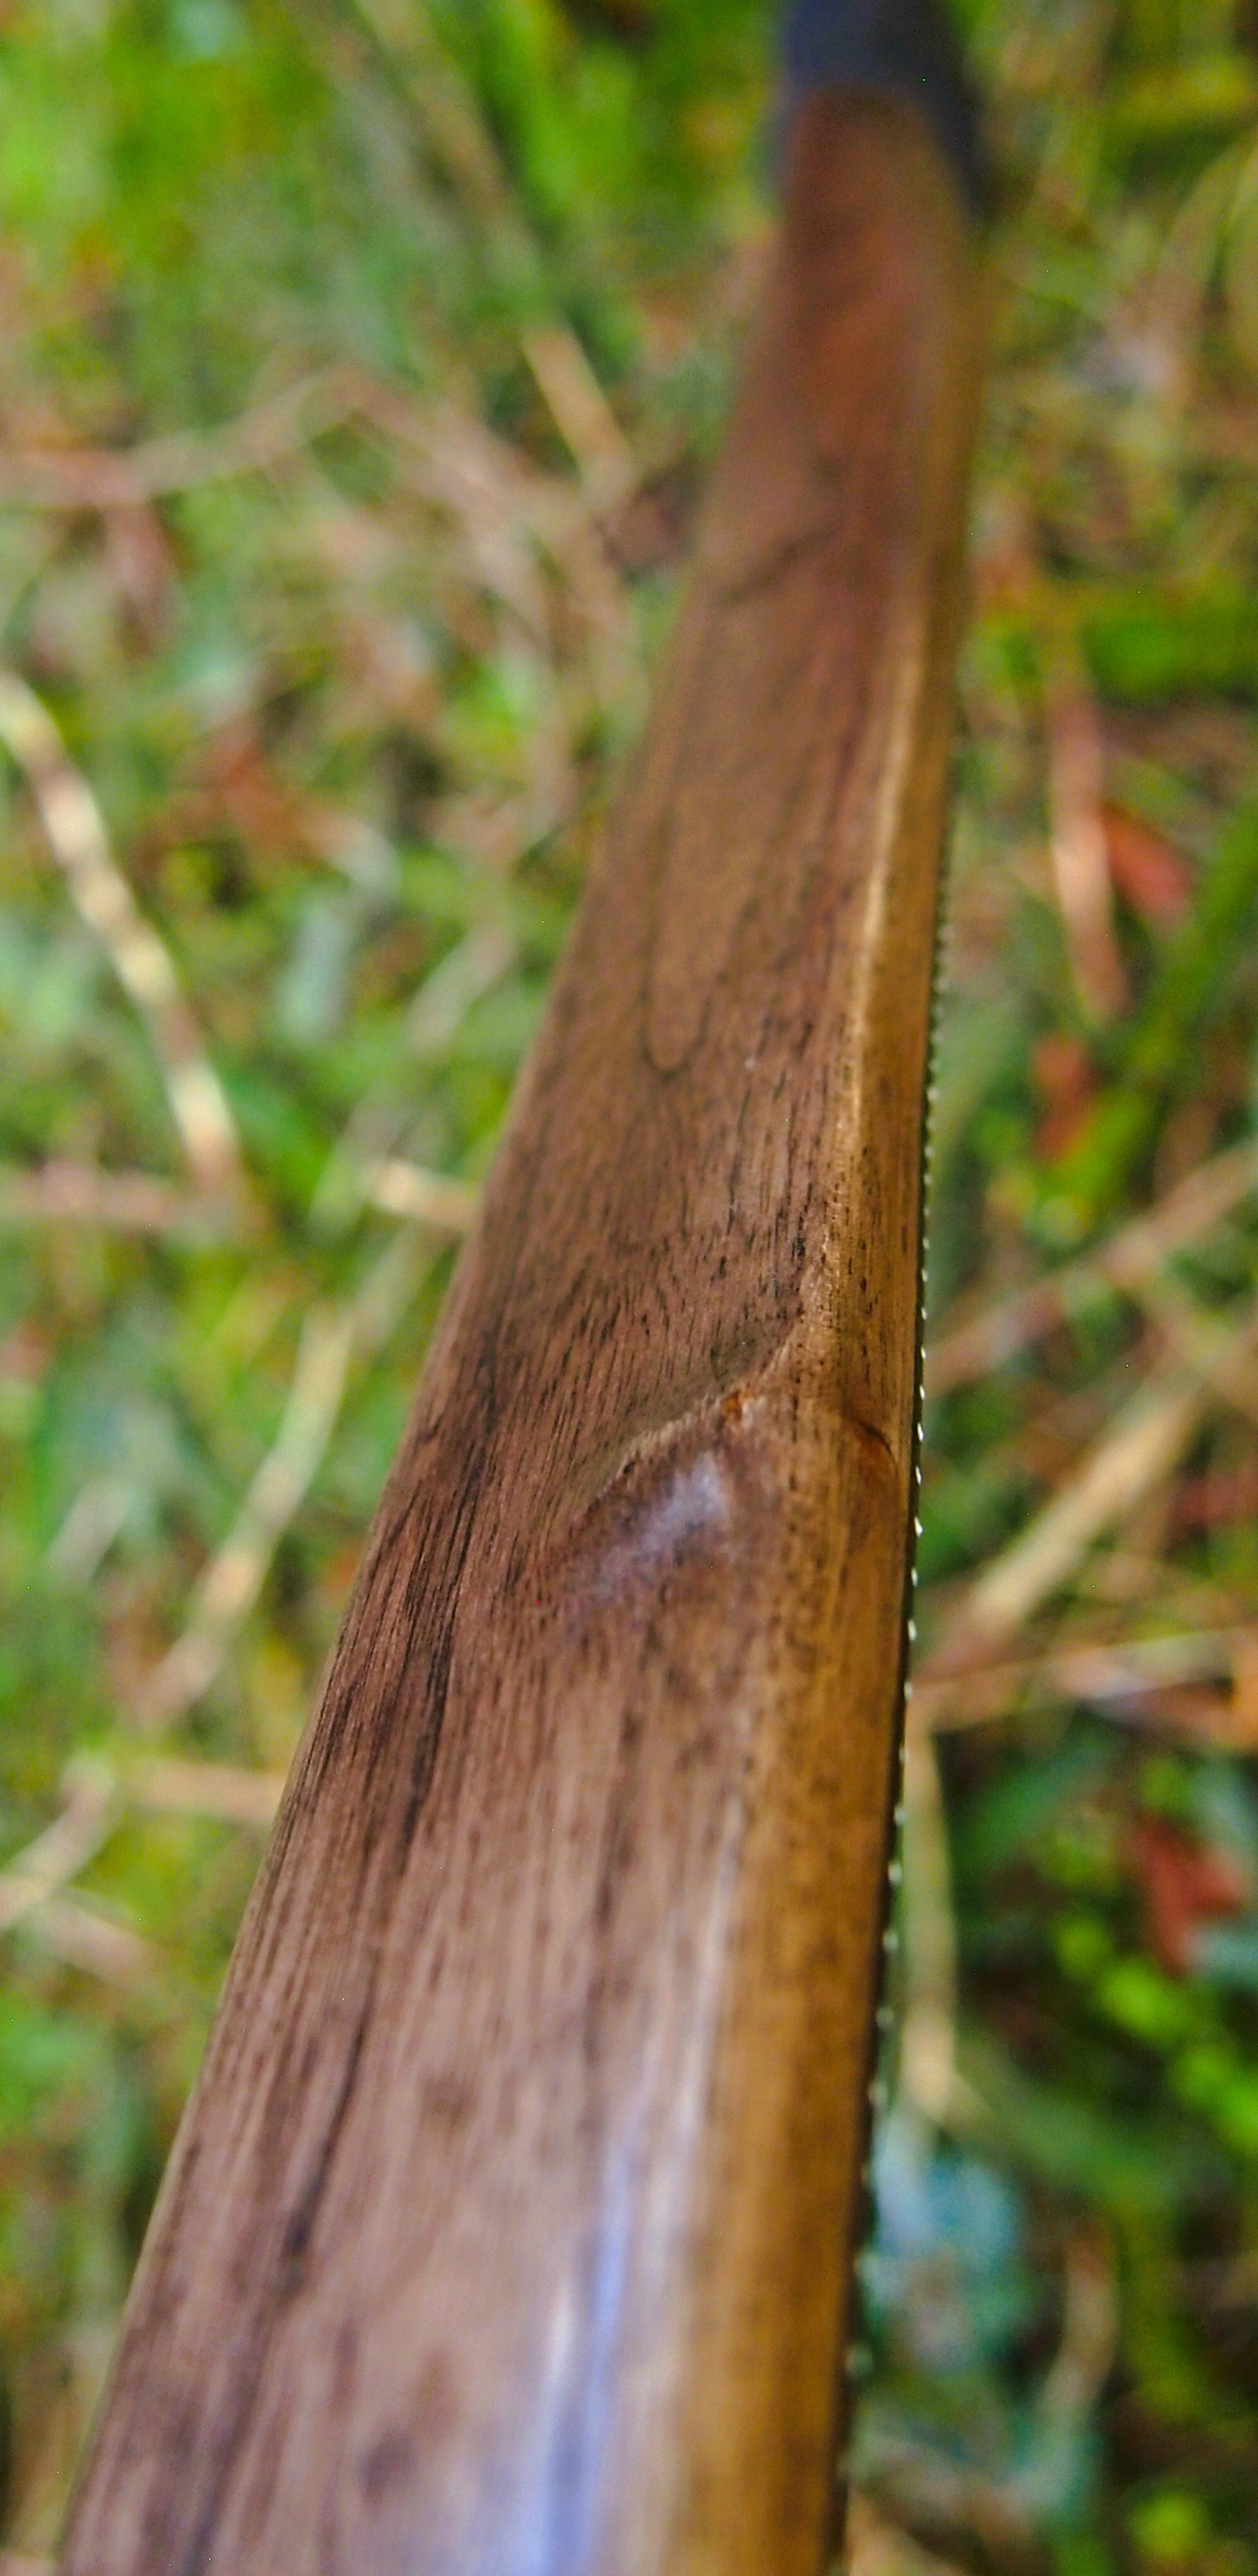
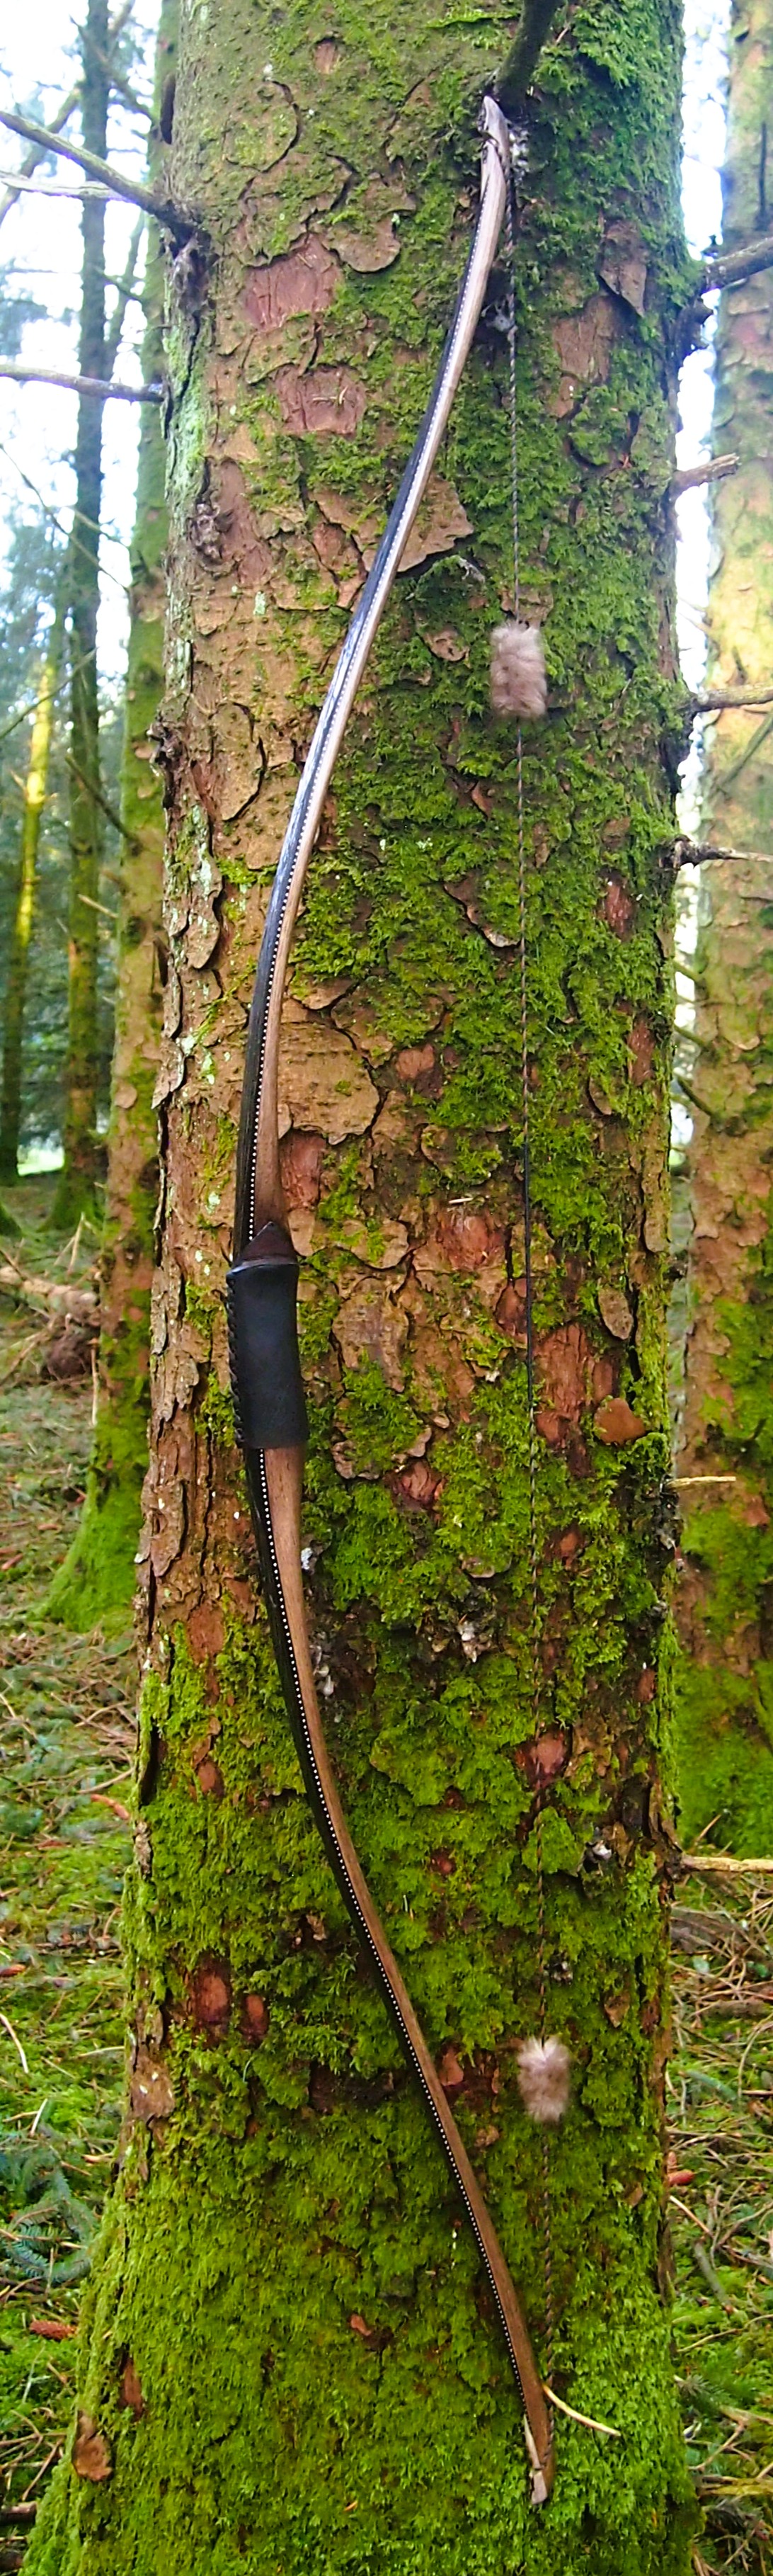
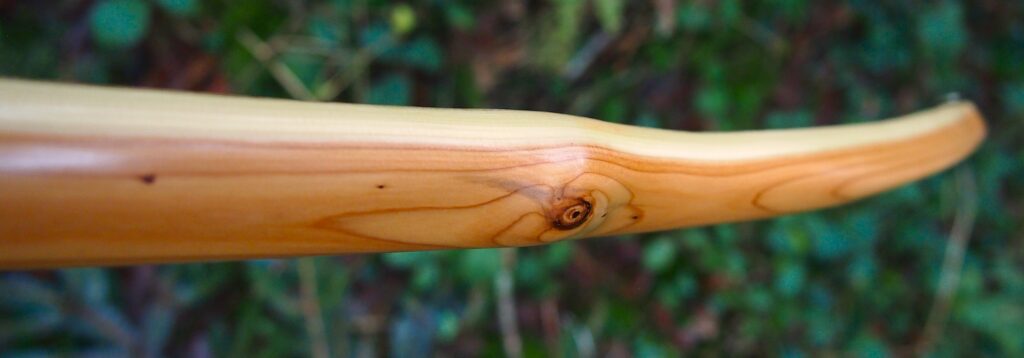
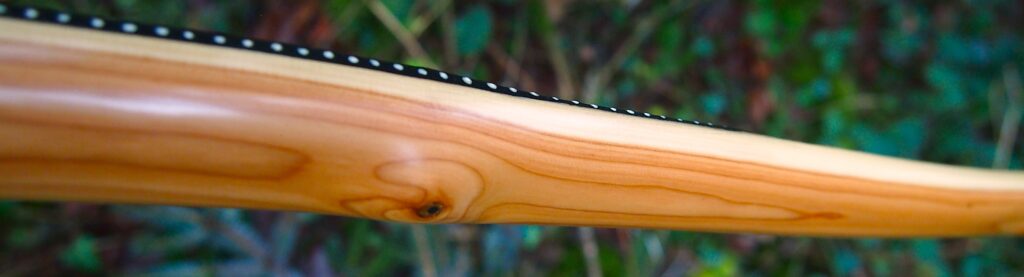
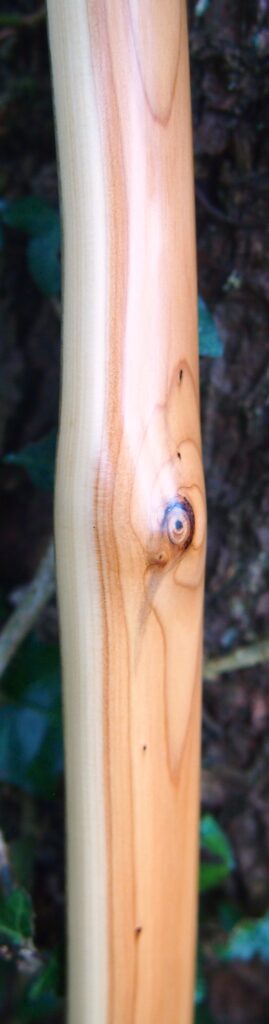
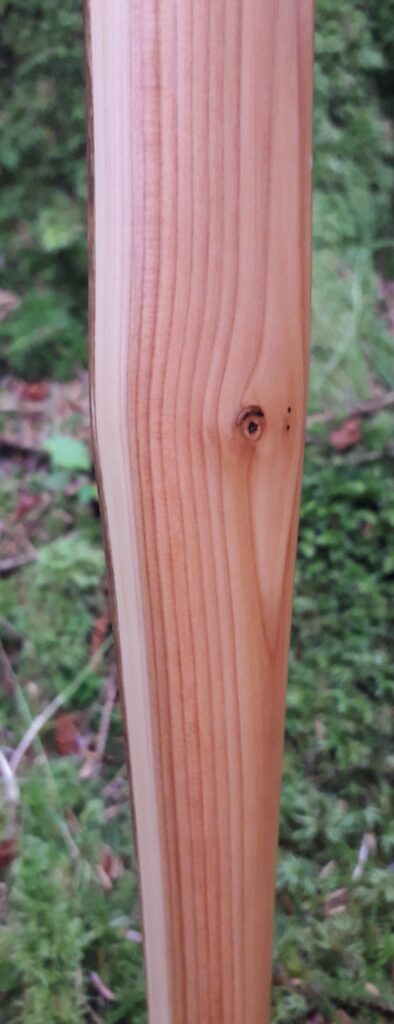
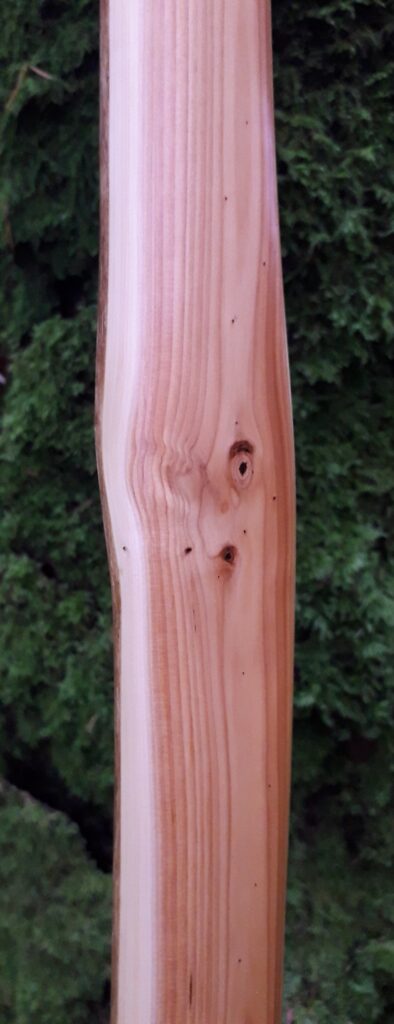
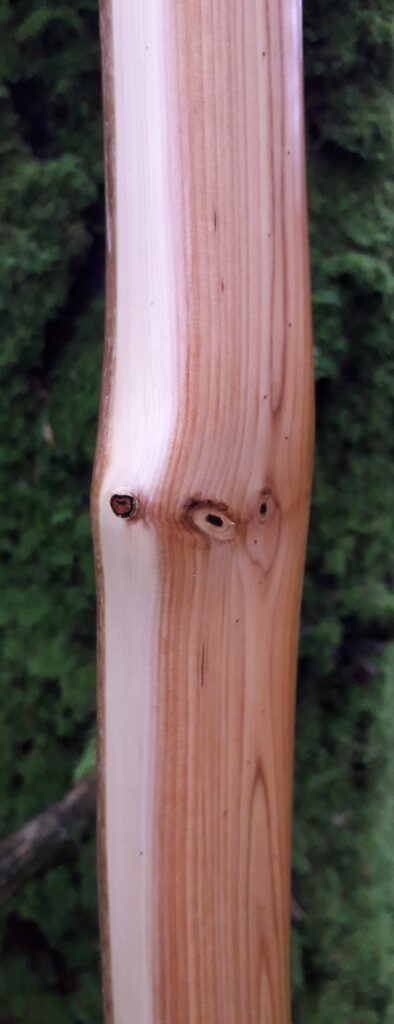
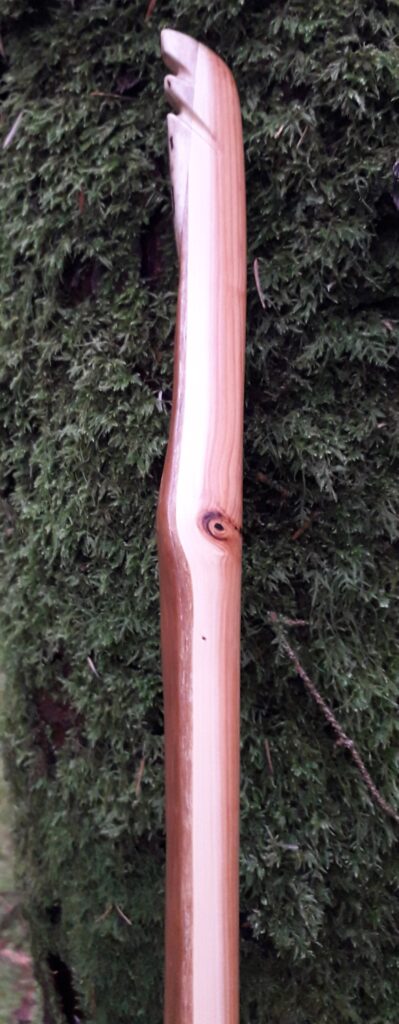
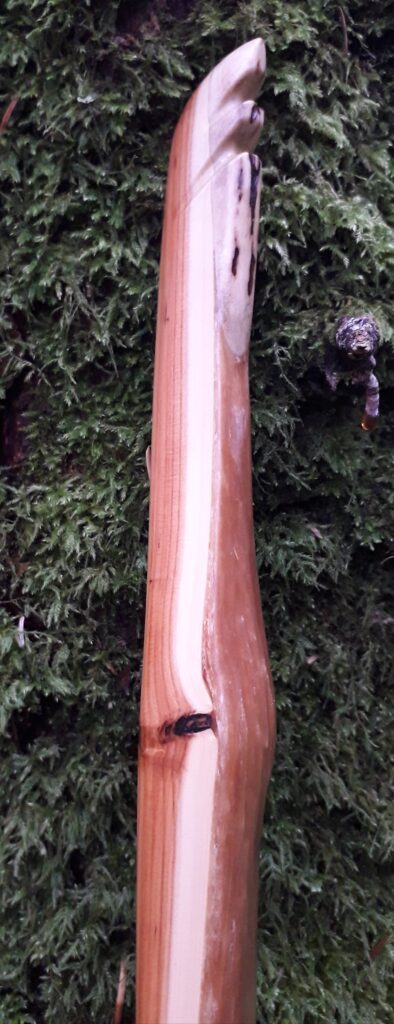
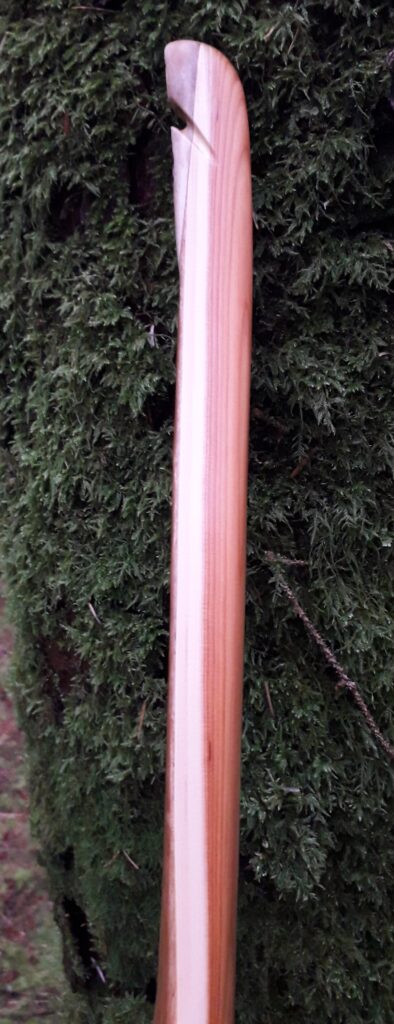
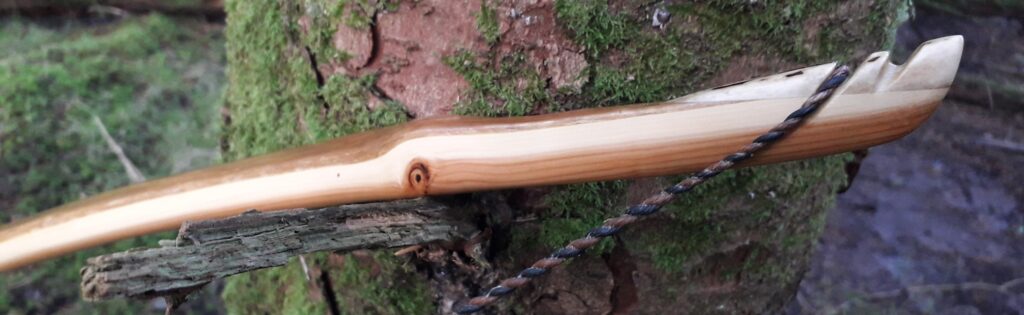
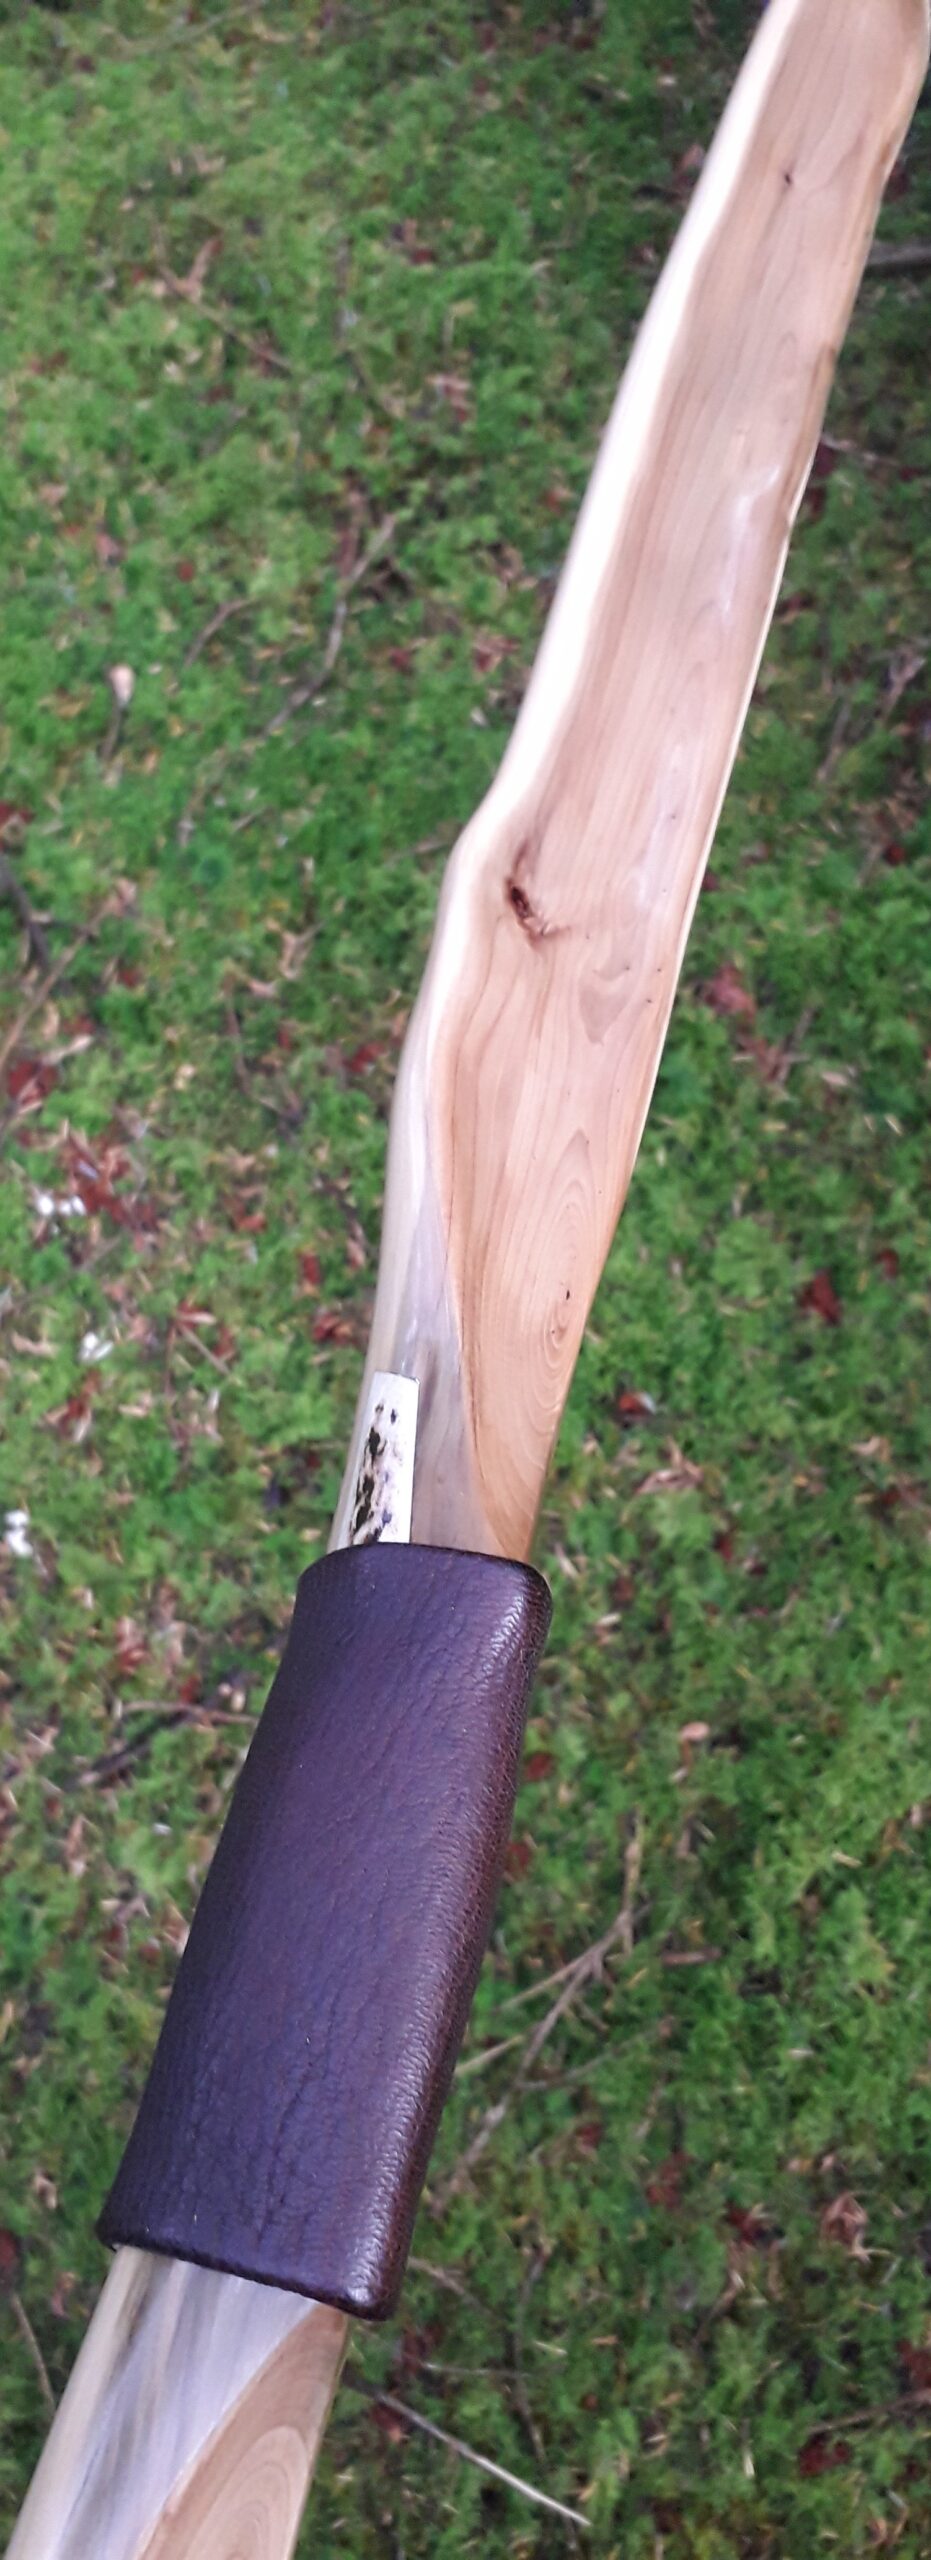
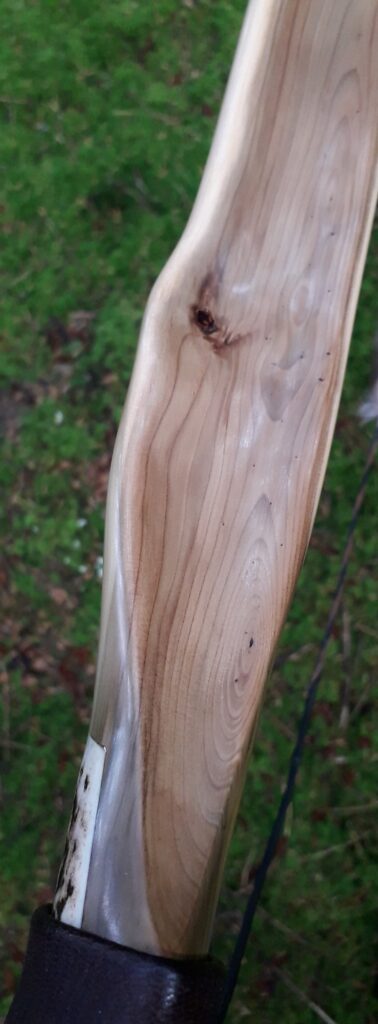
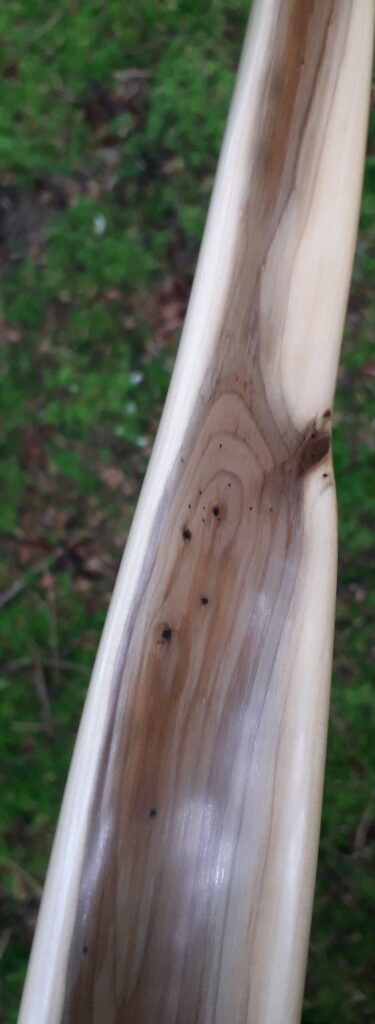
In terms of character, this stave had one simple clean and featureless limb, and one limb featuring a small hollow knot (which I pegged), plus four small pin knots aranged in pairs in two different locations. This limb also had a small amount of lateral wave to the grain, which presented some nice edge contour to the face profile of this particular limb.
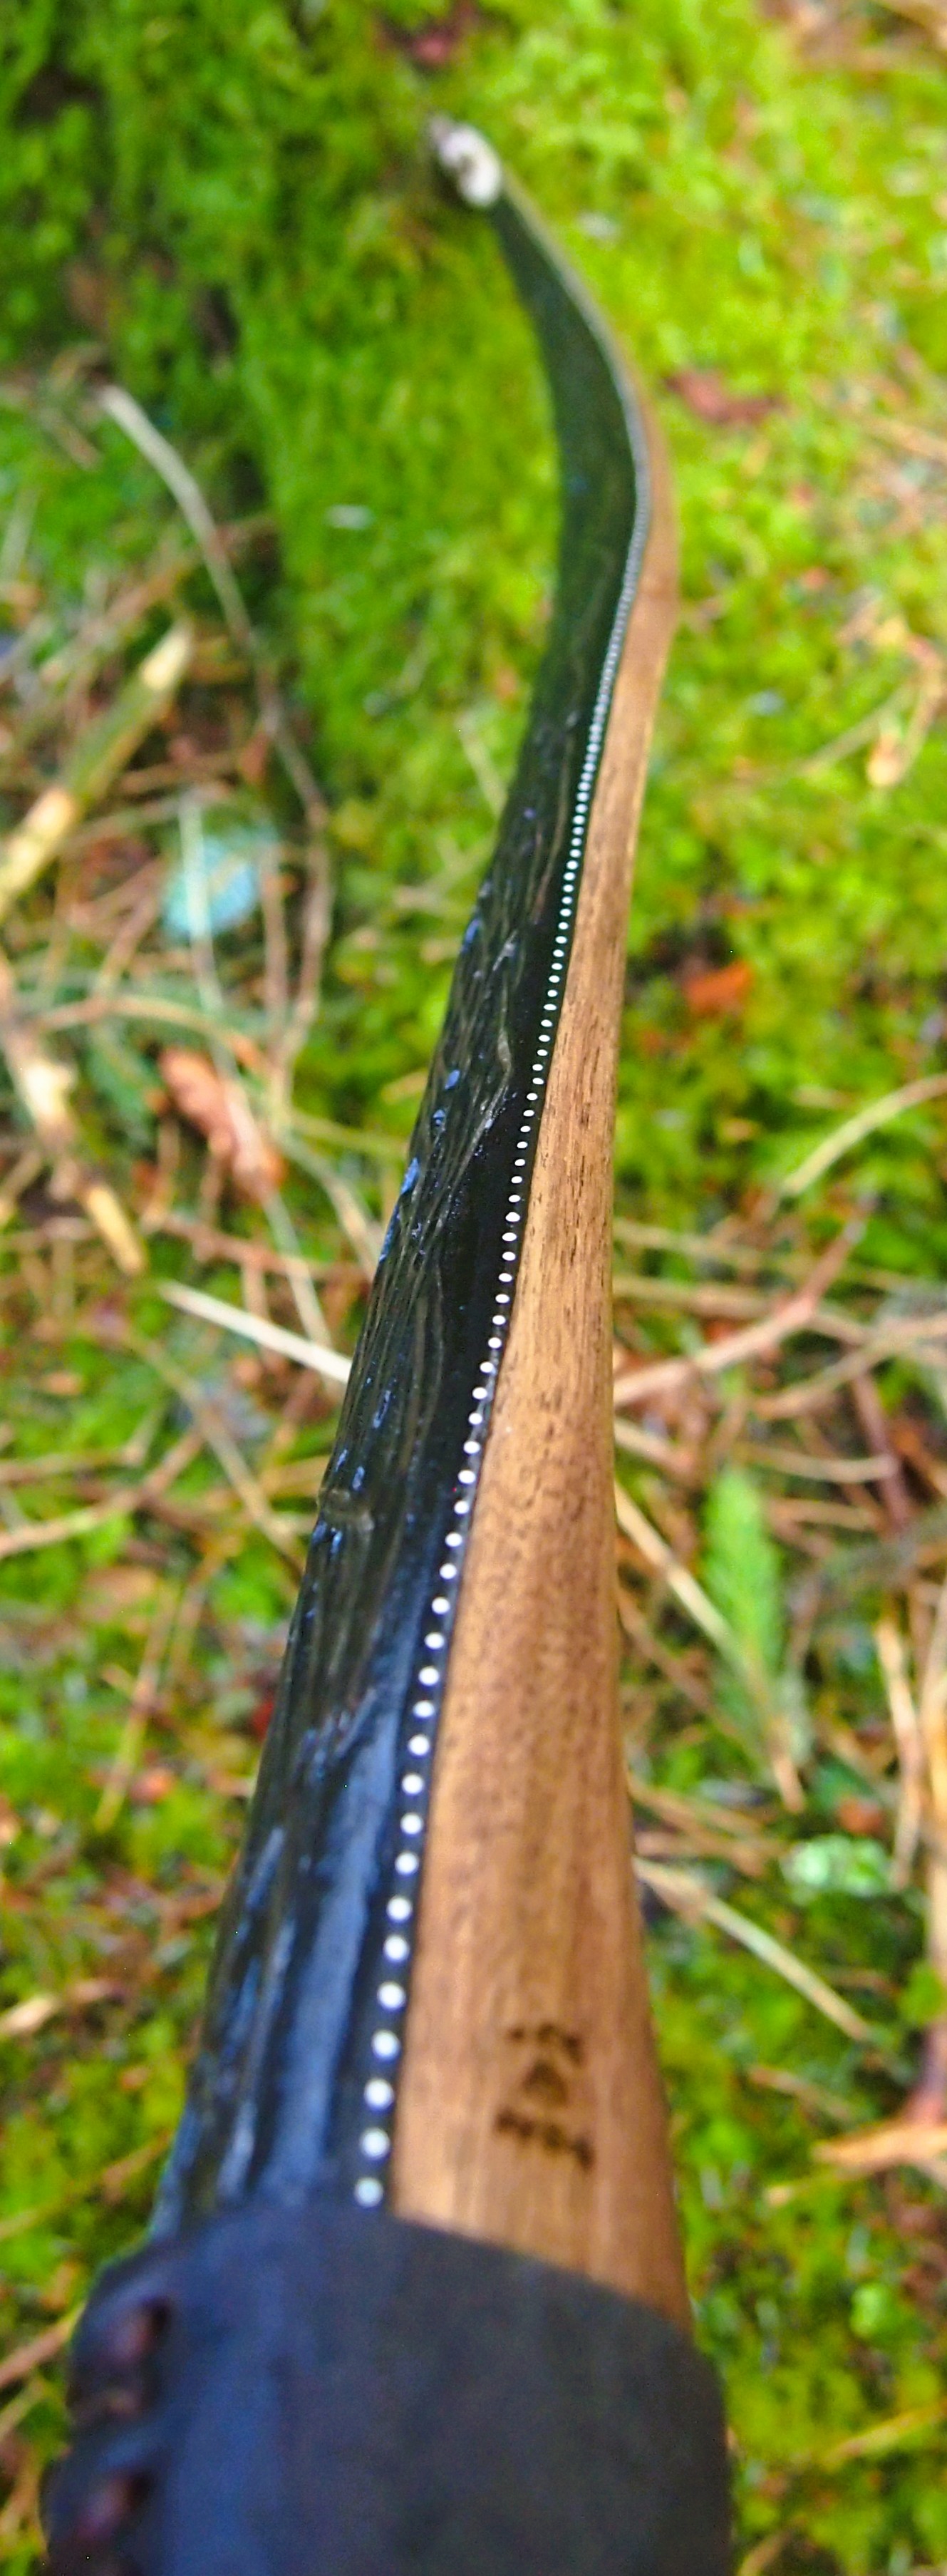
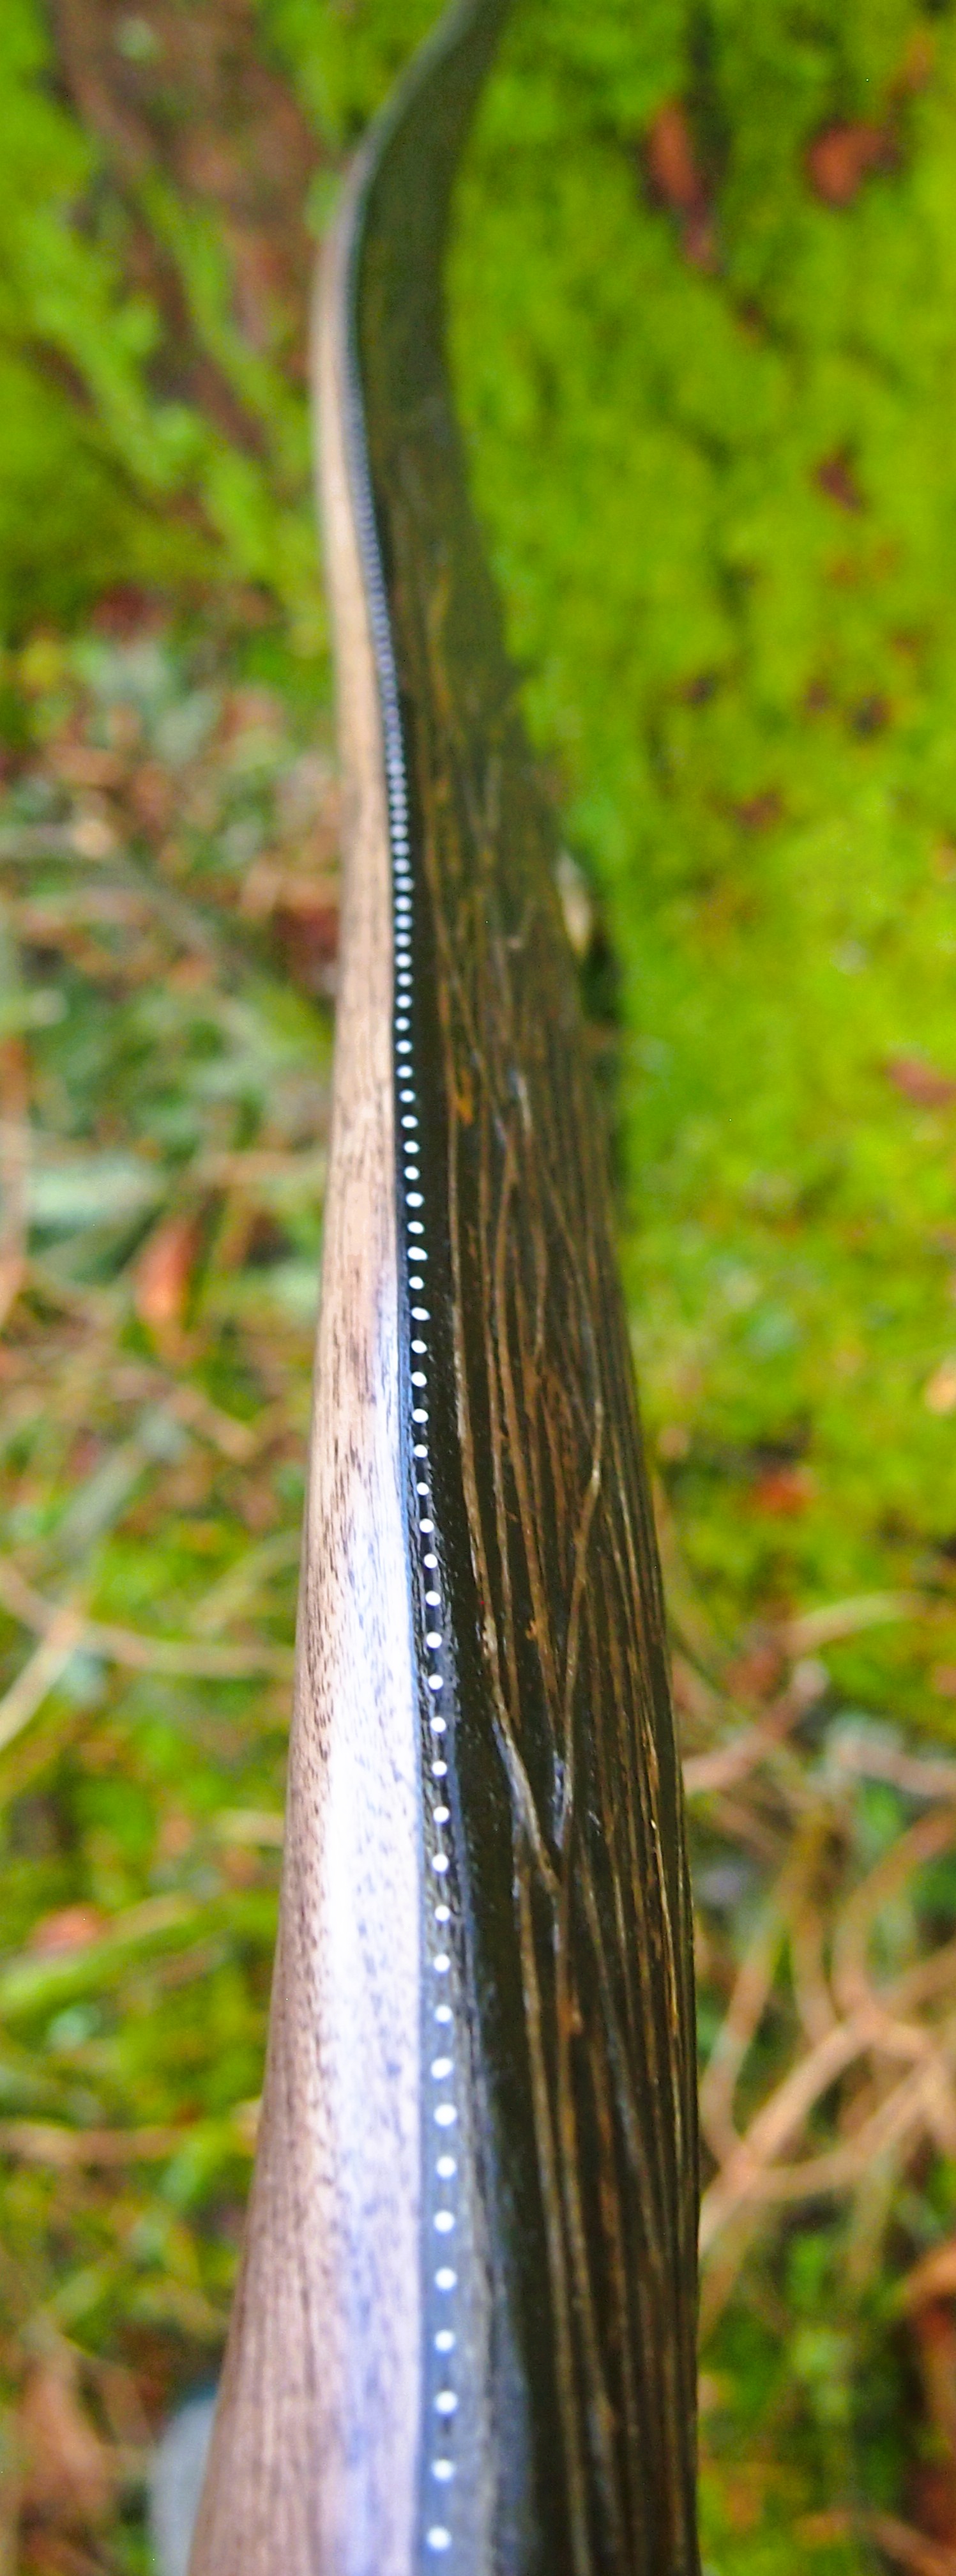
This limb also had the remnants of an old impact scar which must have occurred whilst the tree was still living. This old scar presented throughout the entire width and thickness of the stave, including the sapwood, and appeared as a pretty cool looking lighter coloured diagonal line of grain about 4mm wide running across and through the entire width and thickness of the outer third of the top limb.
This kind of impact injury to a living tree is usually as a result of another tree falling, or being felled into it. The tree heals rapidly by reinforcing the cells within the injured section with additional lignin and other strengthening compounds.
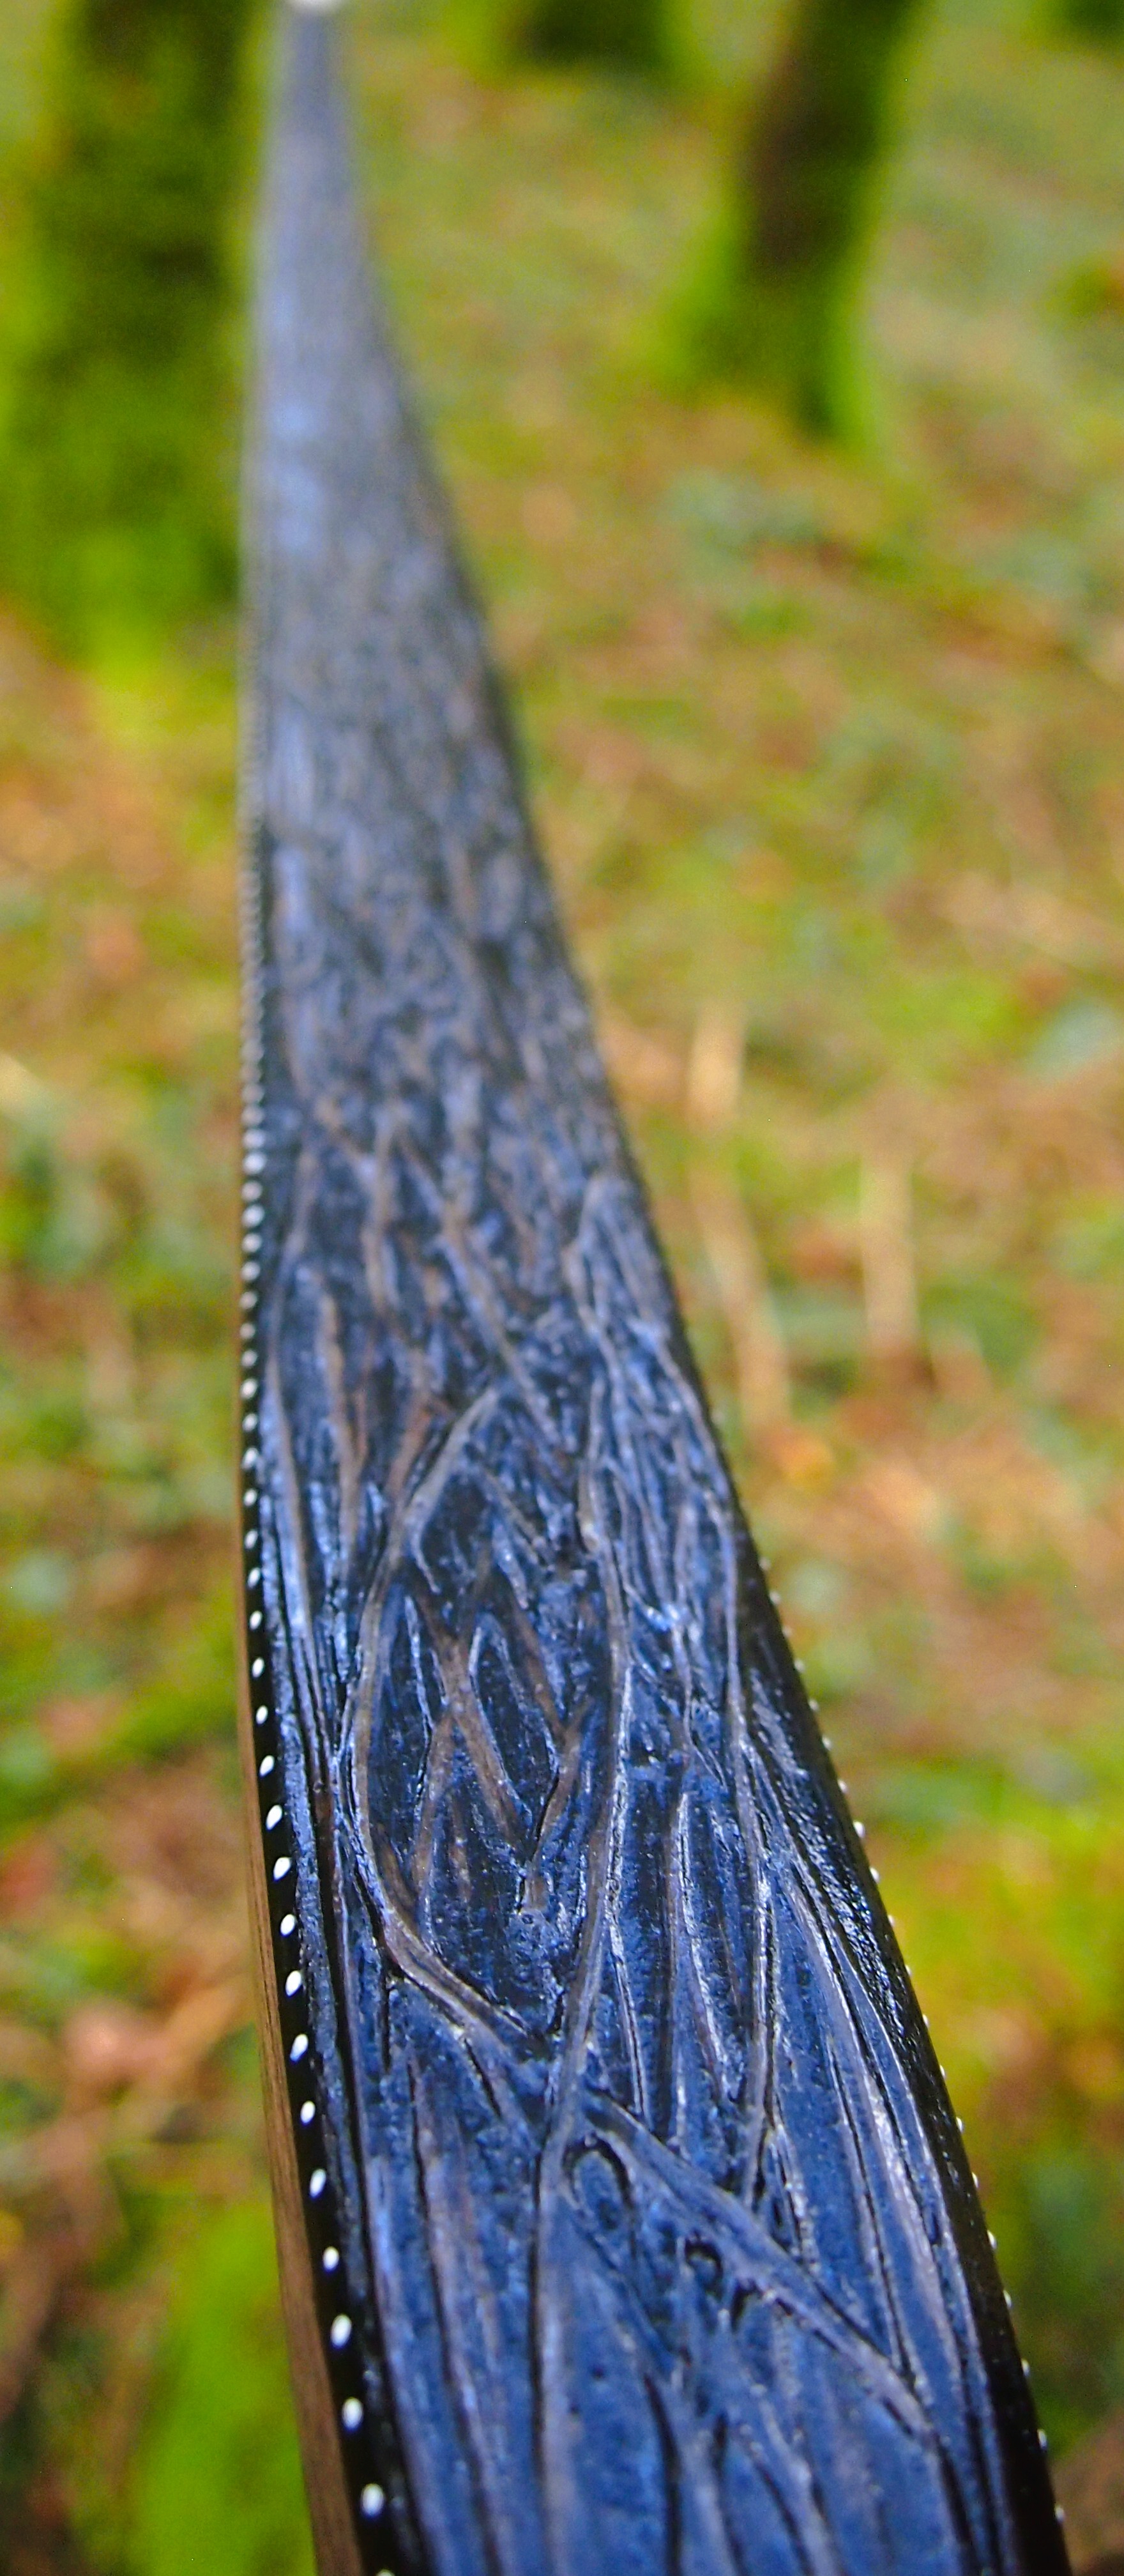
This healing process creates dense and interesting grain changes, which not only look nice, but are also denser and therefore stronger in both compression and tension than when compared to the surrounding uninjured wood. As such, these healed wound scars can be left within the working sections of a bow limb without any fear of weakness. In fact these sections are stronger than the rest of the limb.
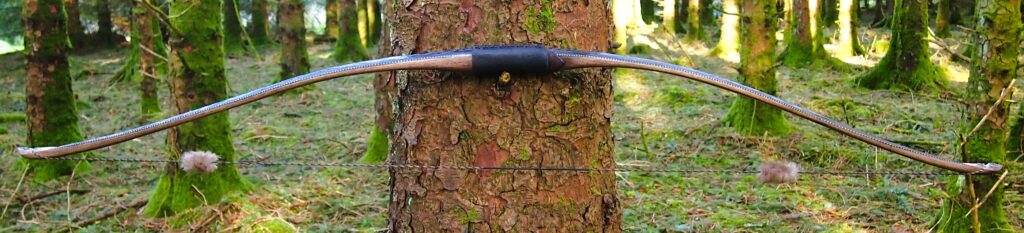
As this limb clearly held all the character, I opted to make it the top limb which places most of the character closer to eye level. And since this bow was going to be asymmetrical, this more characterful limb was going to be 2″ longer than the more plain (but likely stronger overall) bottom limb. Since bottom limbs tend to take more stress over the years of shooting and stringing, they benefit from any additional design decisions which ensure optimal strength in this limb.
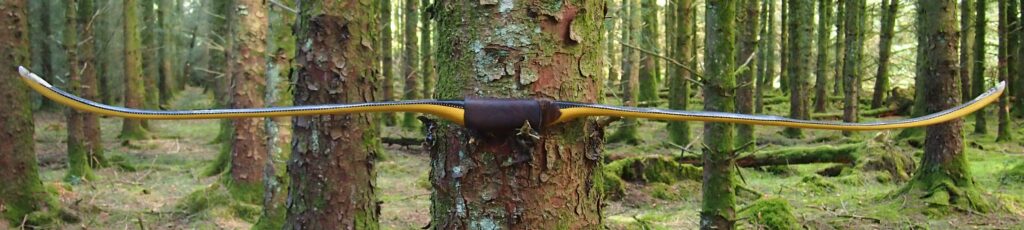
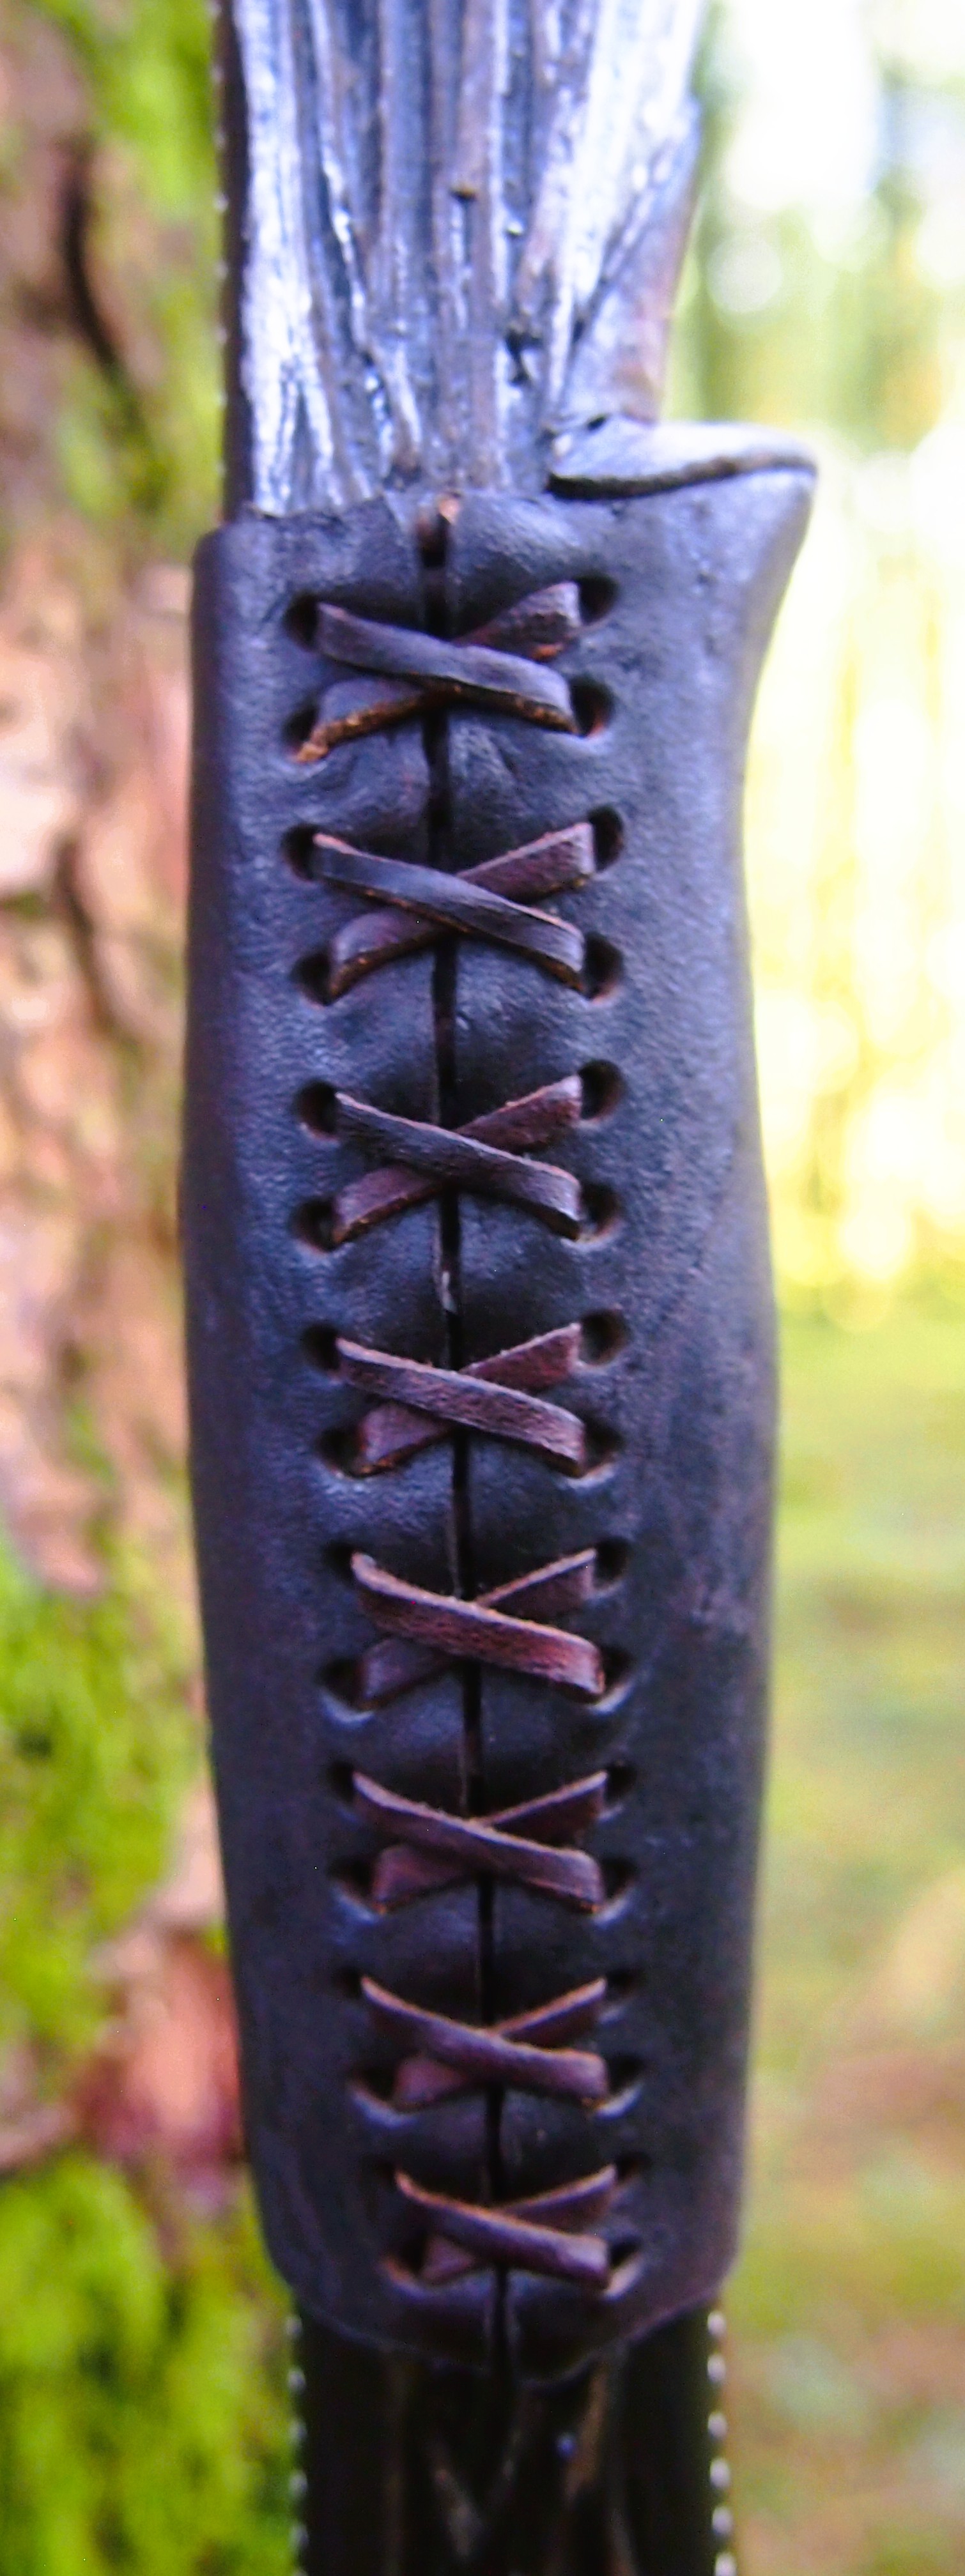
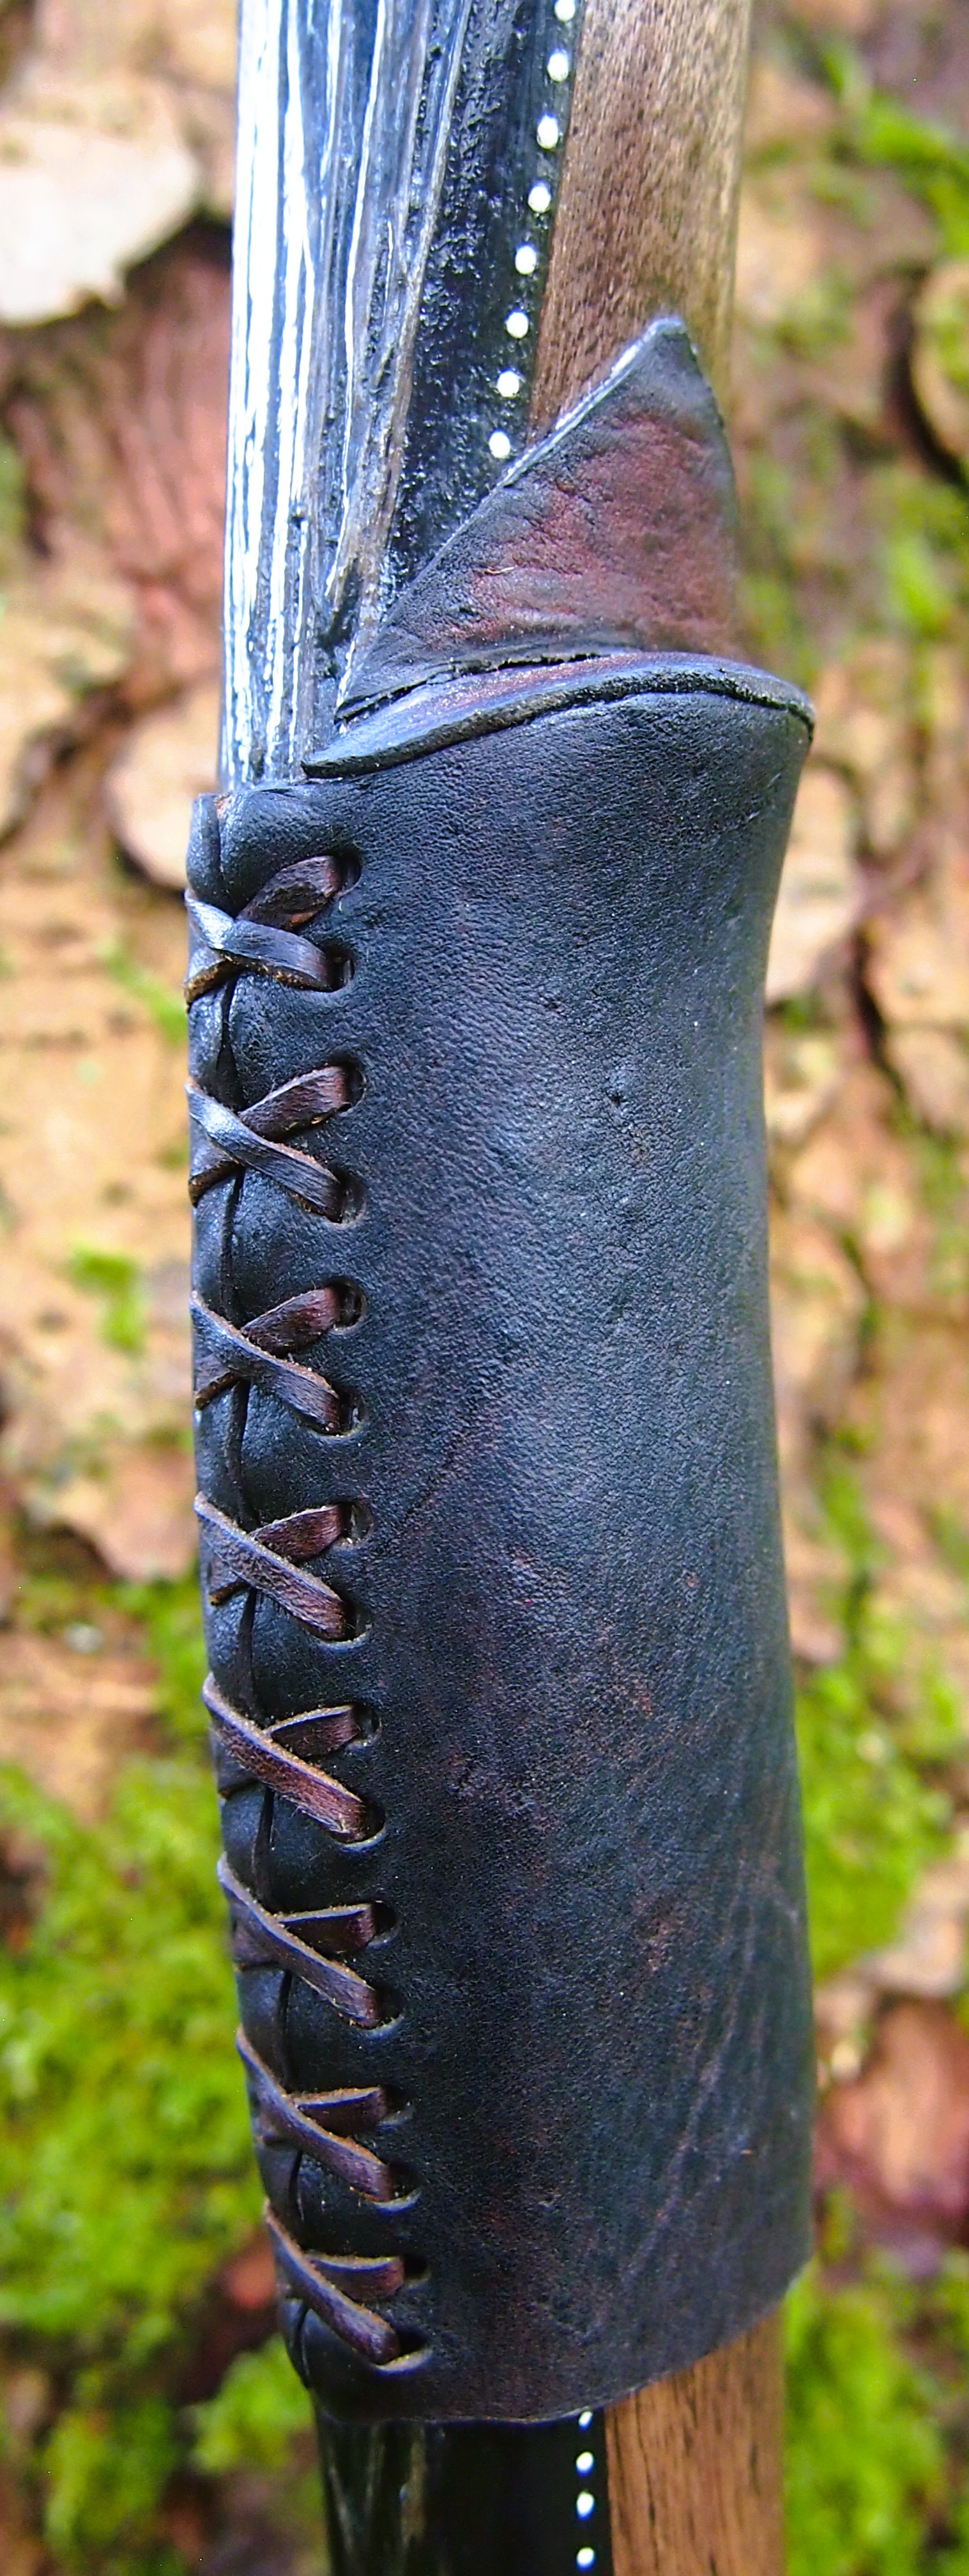
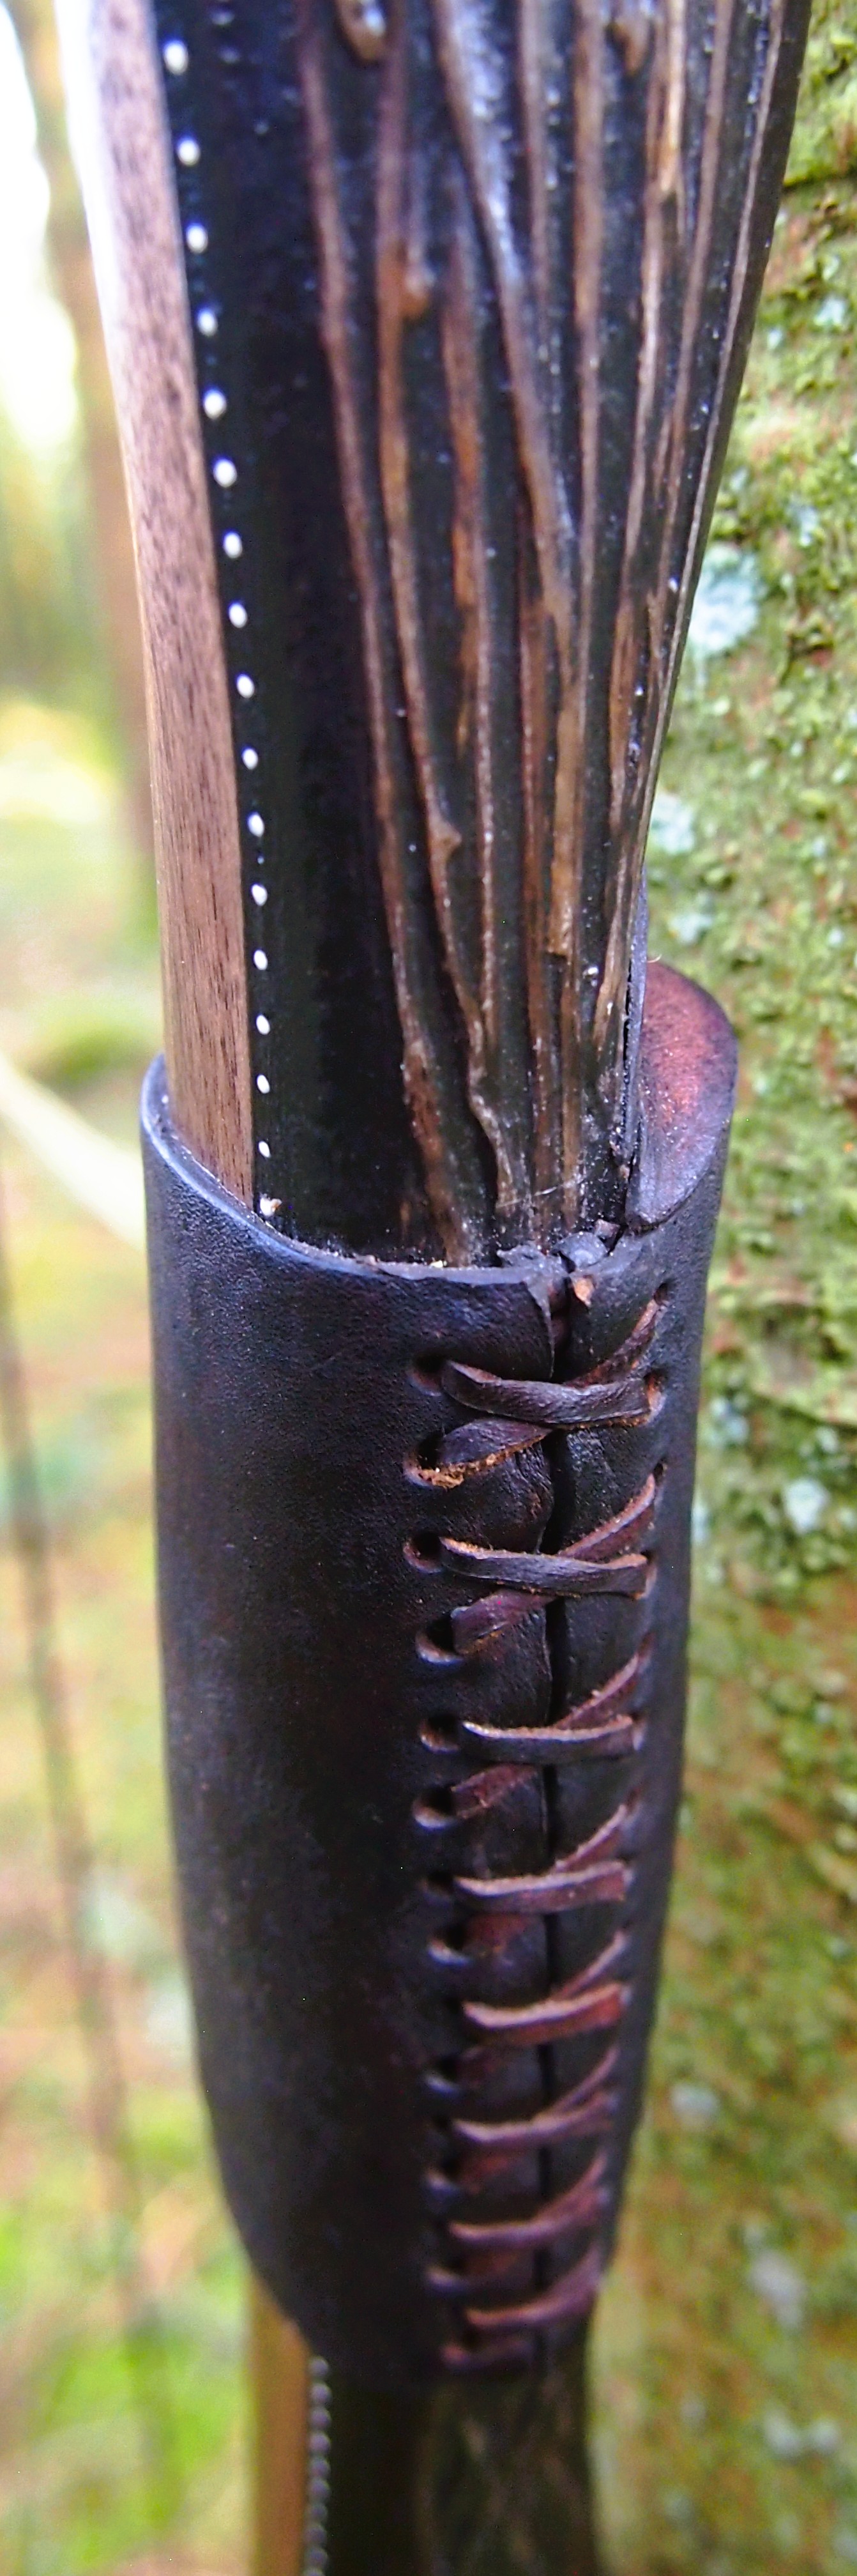
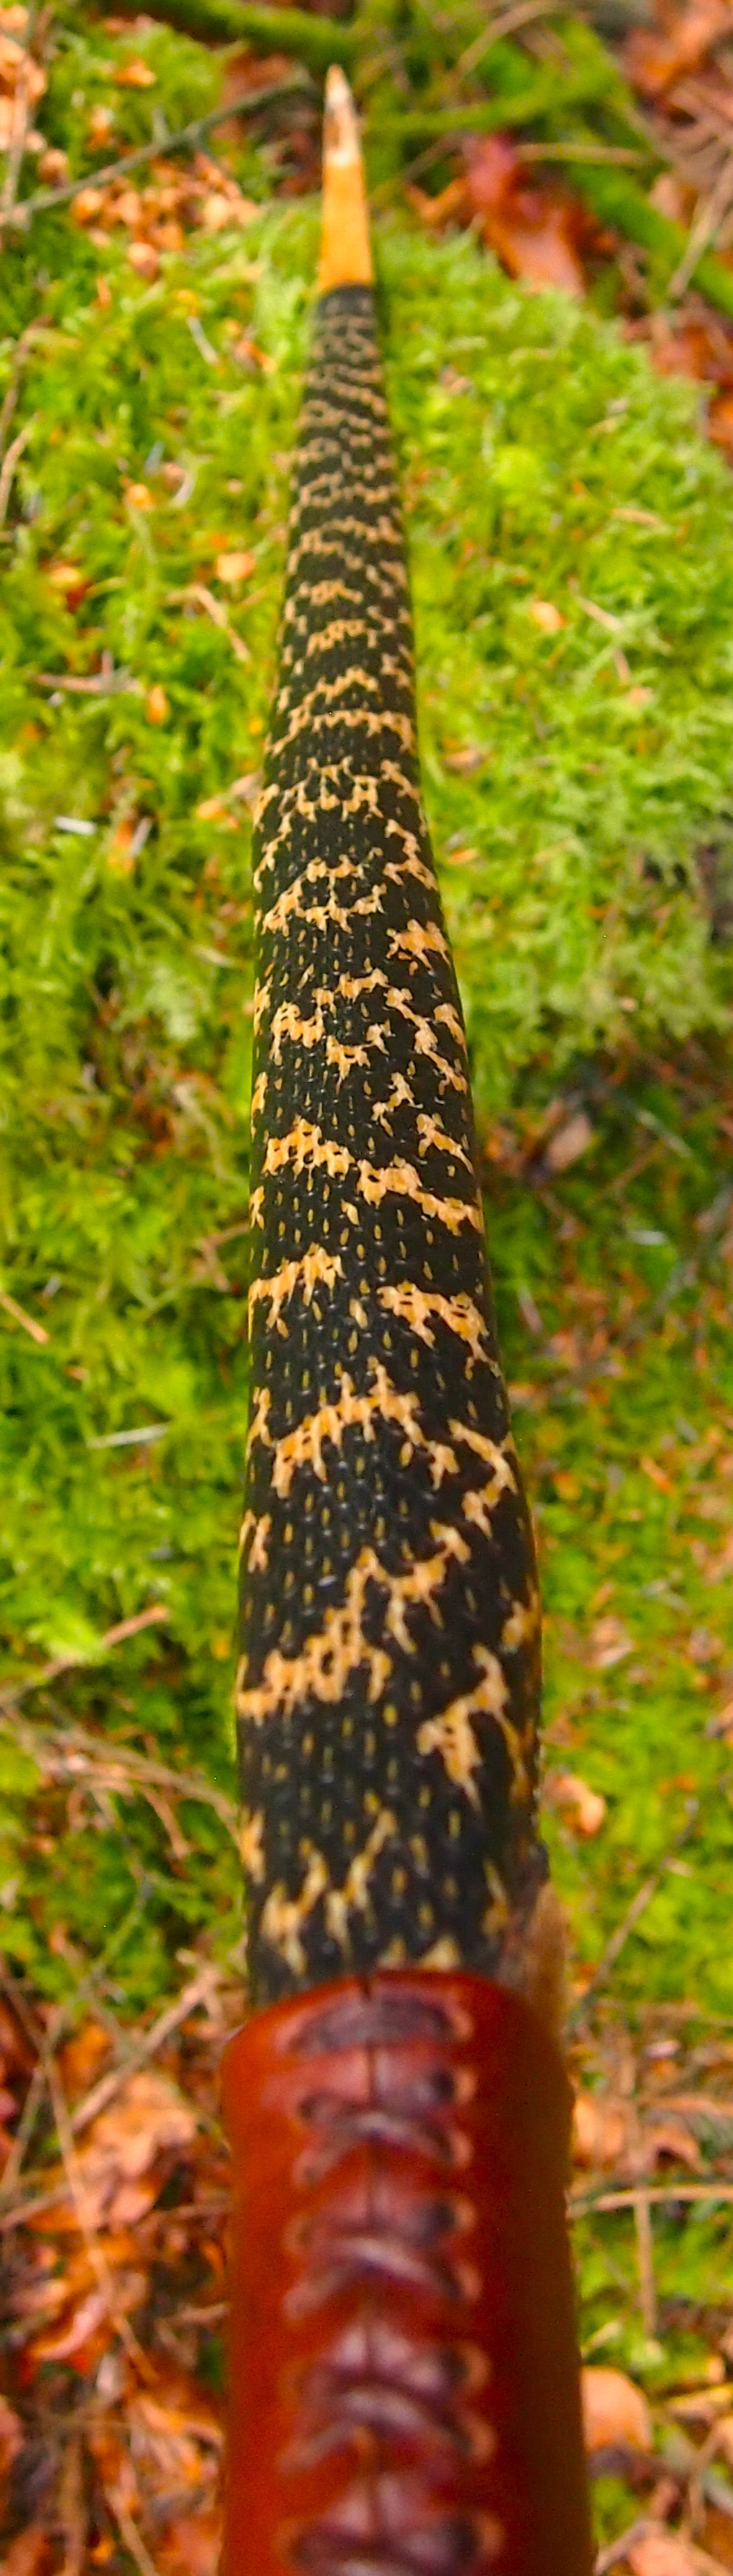
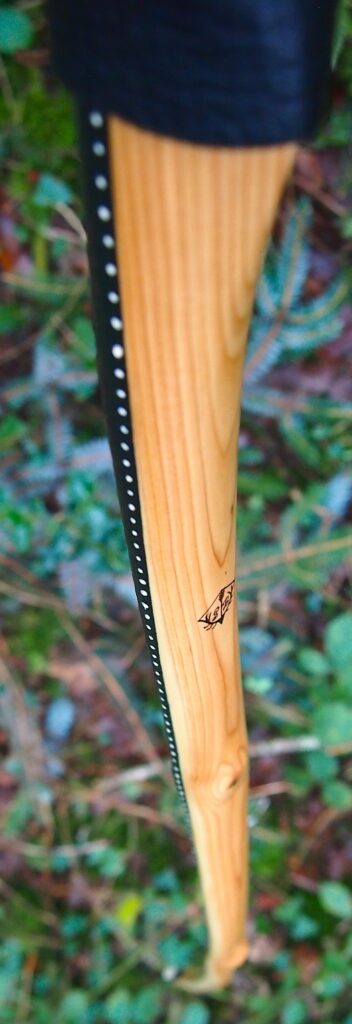
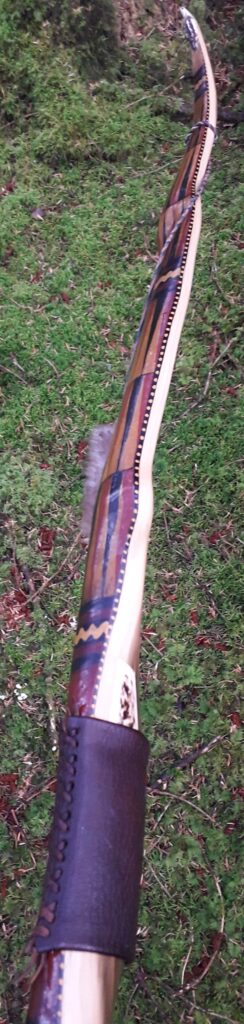
Since this bow was a little shorter than I’d have preferred, I decided to sinew back it. This would add significant durability to the bow, and it would also significantly reduce the amount of set which such a short bow would ordinarily take when being drawn back beyond 26″. I also consistently find that sinew backed bows retain their zip much better as the years roll by too, (so long as they are stored and cared for properly!)
So once the shape was roughed out and the back was suitably prepared, roughed up and sized ready for sinew backing, I added 3oz of processed wild English Red deer leg tendon sinew to the back of the stave with my own home produced hide glue made from cooked down red deer rawhide and sinew scraps. After sinew backing was complete, I then wrapping the stave up with bandages and put it away in a cool dry spot to cure for another 6 months.
By the beginning of this year (2025) the stave was dug out of hibernation for an inspection and I was pleased to see that the sinew was now fully cured. An additional 1″ of backset had been drawn into the stave as the sinew had shrunk down, so the overall backset was now almost back to where it was before I deflexed the fades.
This is very normal for sinew backed staves and I felt confident that after tillering, this extra 1″ of back set would likely fall out leaving something close to a more suitable1-2″ backset. And sure enough, after tillering to 27″, the stave was now back to around 2″ overall backset. Perfect!
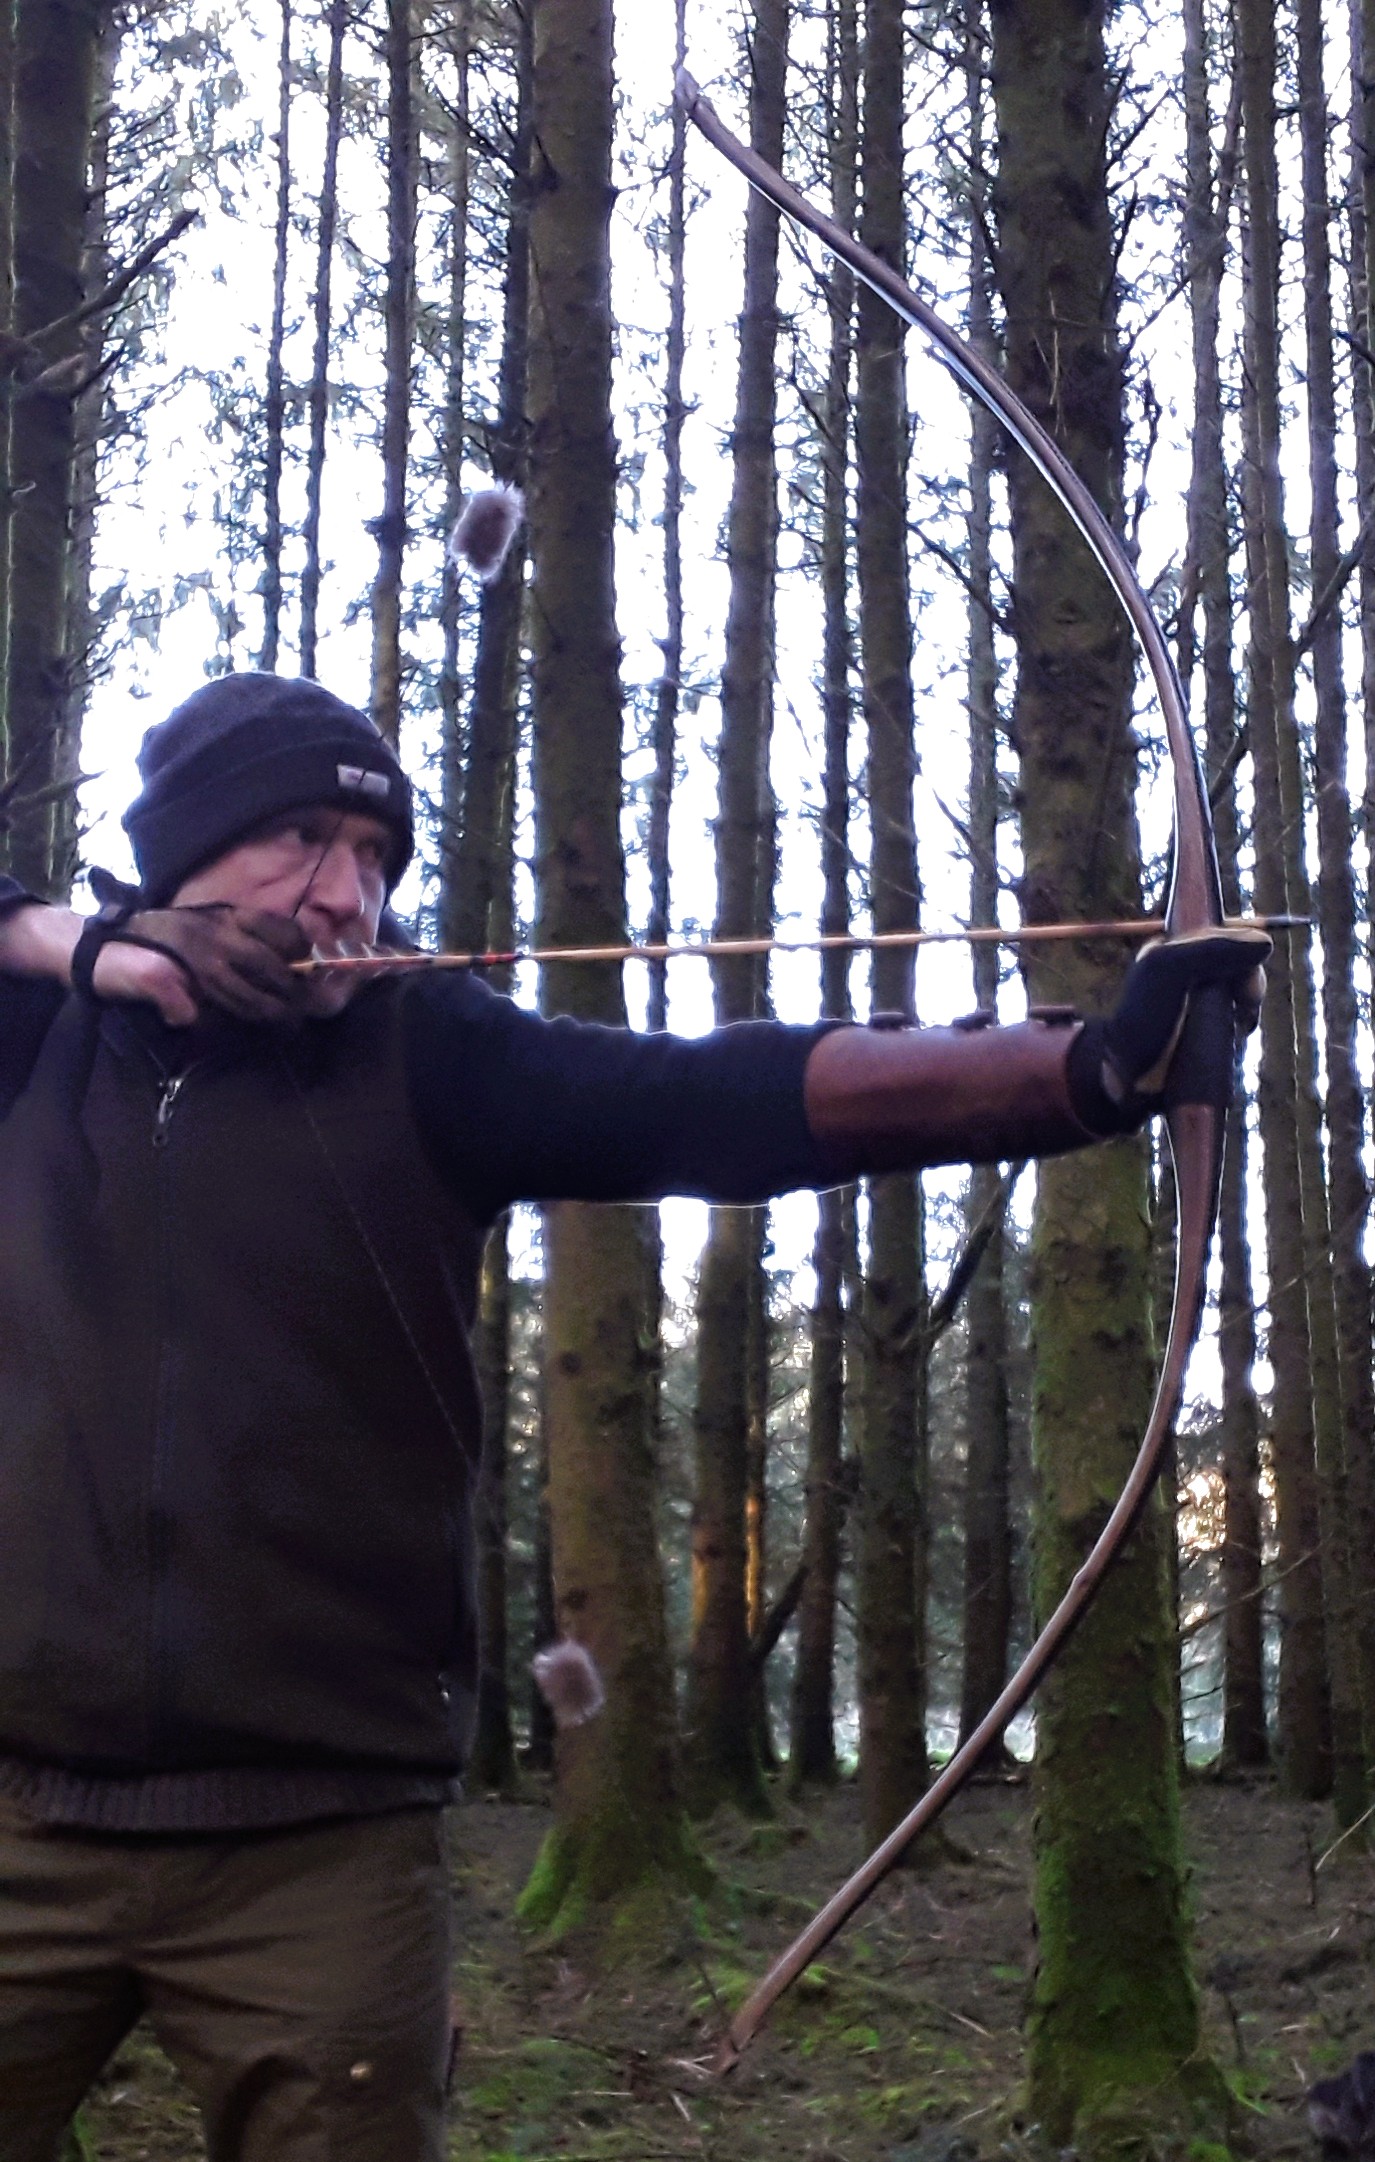
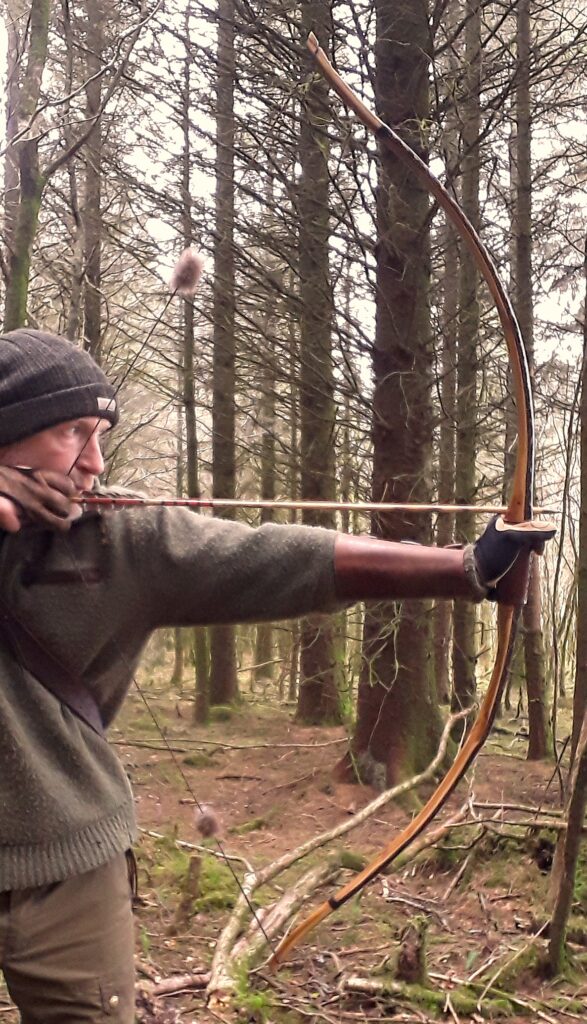
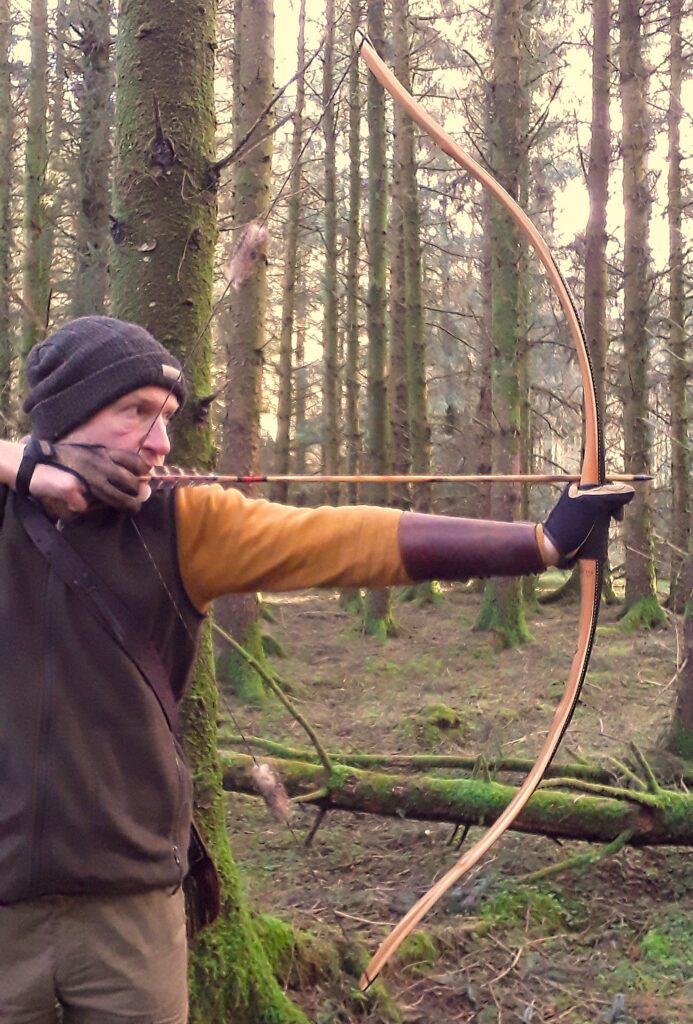
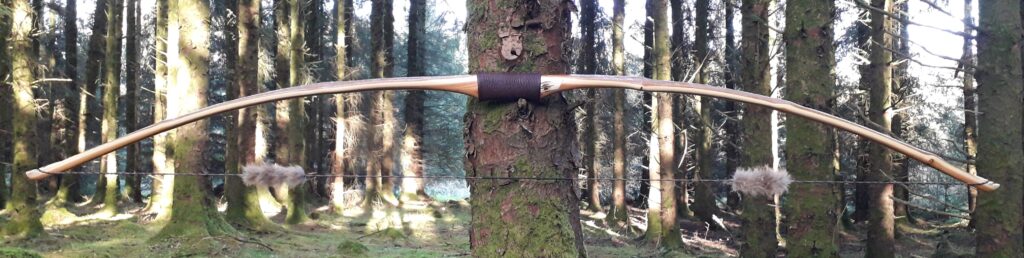
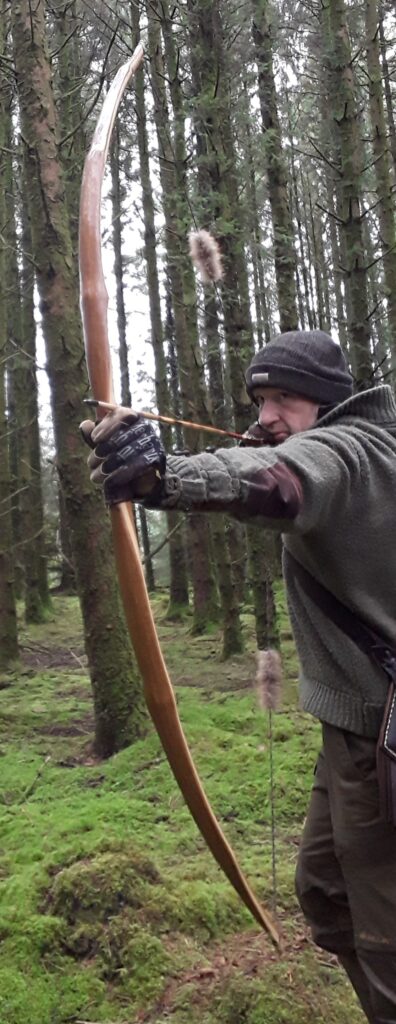
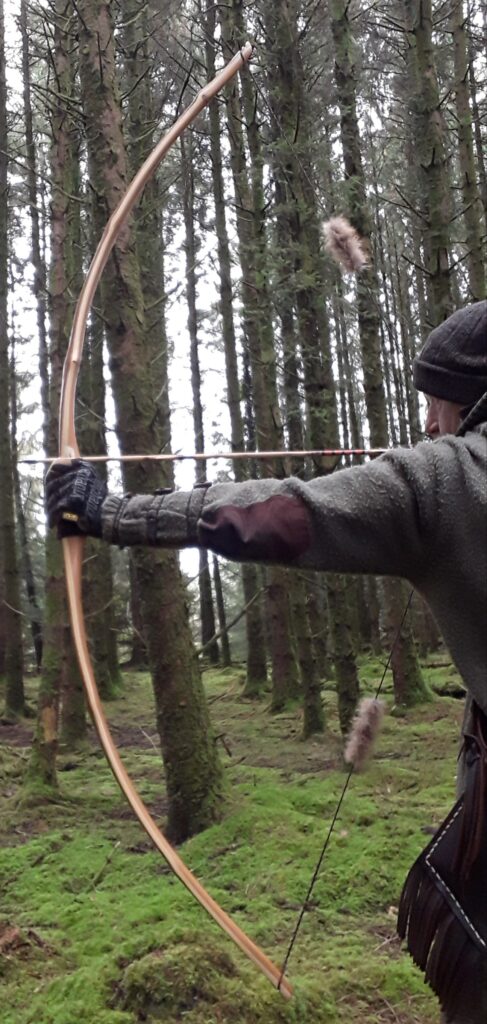
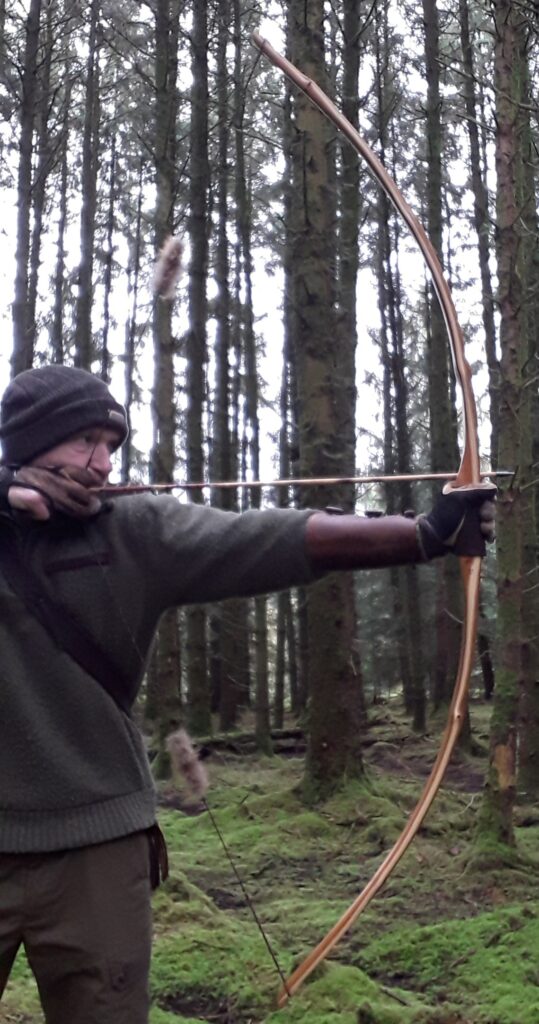
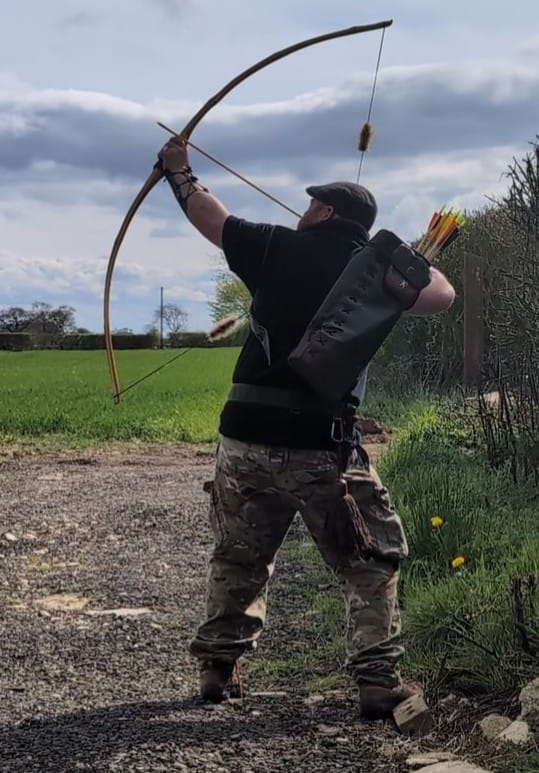
After a good bit of early shooting in and a little fine tuning of the tiller, the bow seemed to settle into and hold the 1/8″ positive tiller really well. She was turning out to be a nice quiet snappy shooter, and a very enjoyable bow to accompany me about the woods stump shooting for a few weeks. not only did she not kick at all, but pound for pound, I recon this bow is possibly one of the fastest shooting bows I’d ever made.
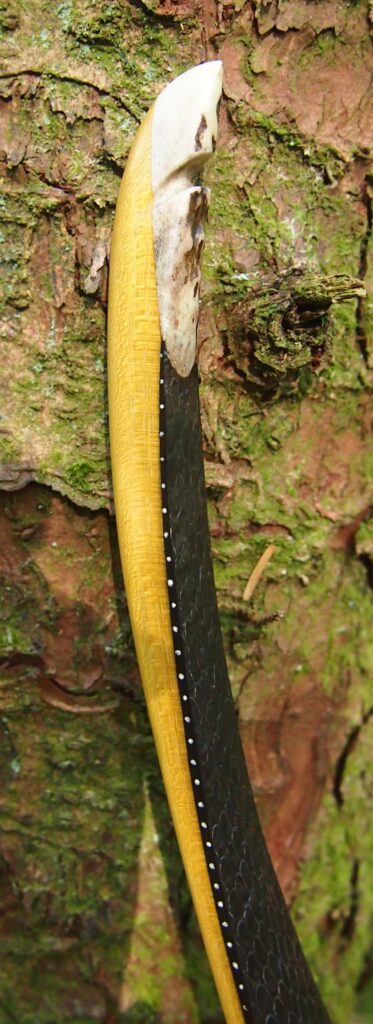
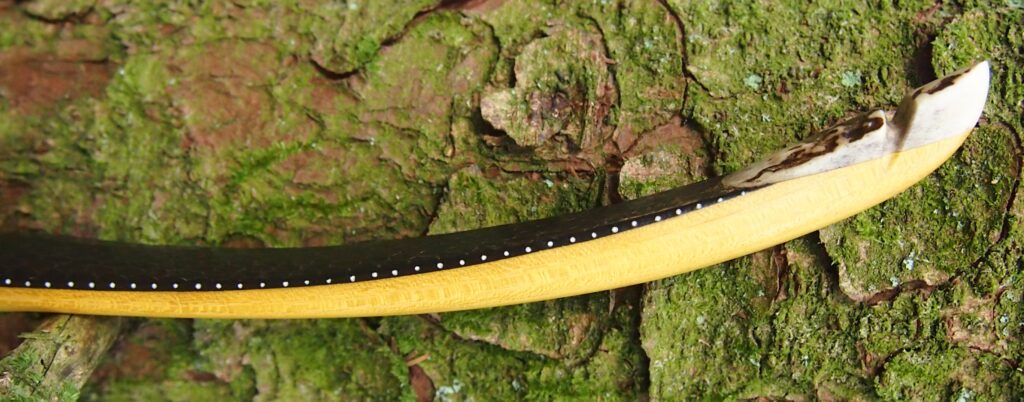
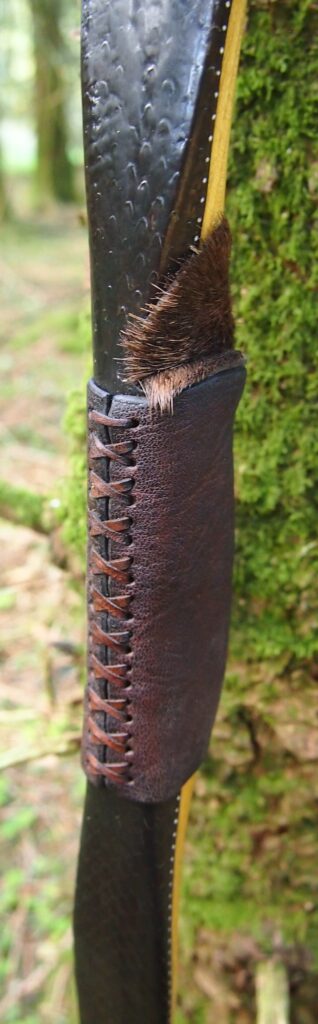
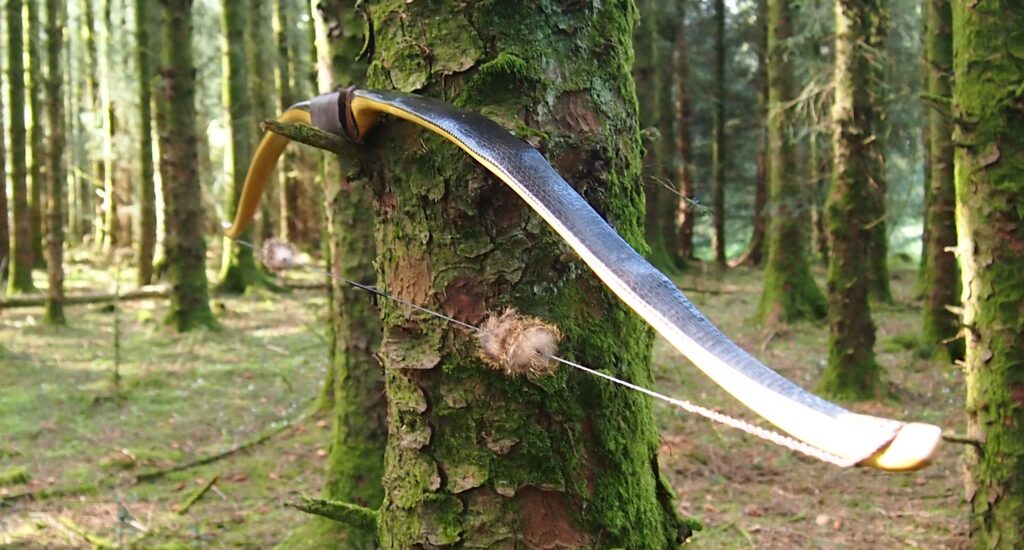
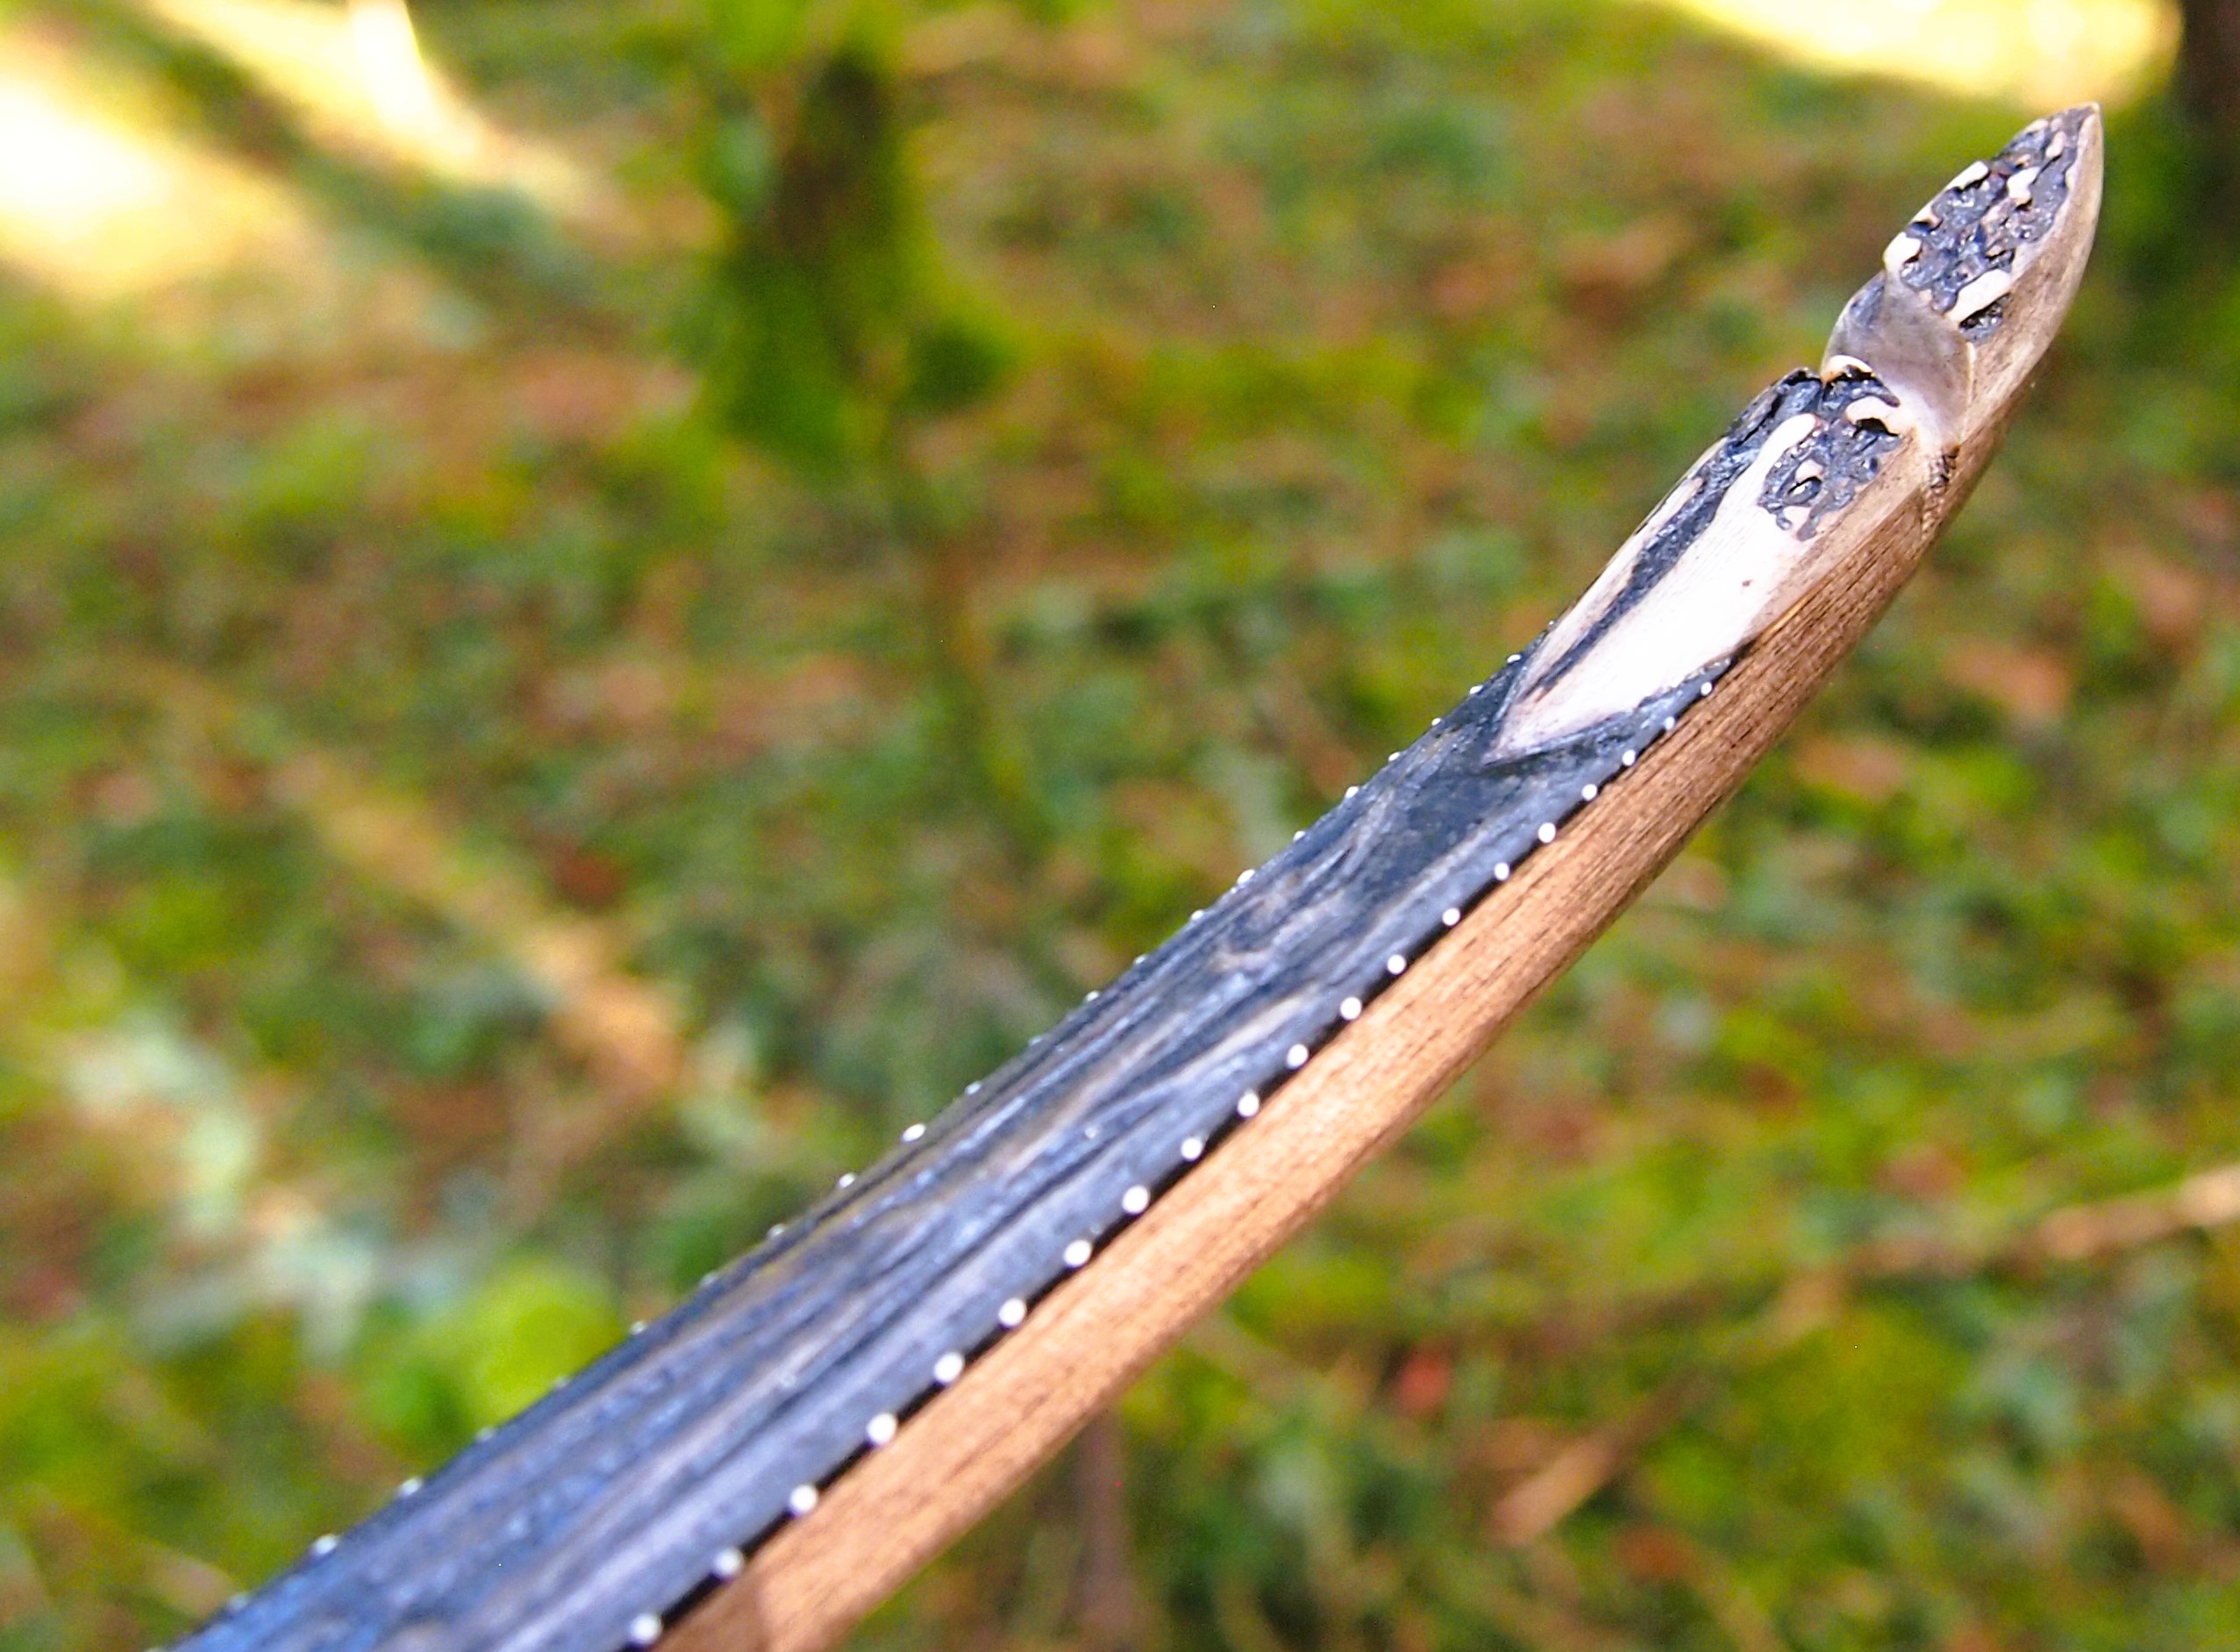
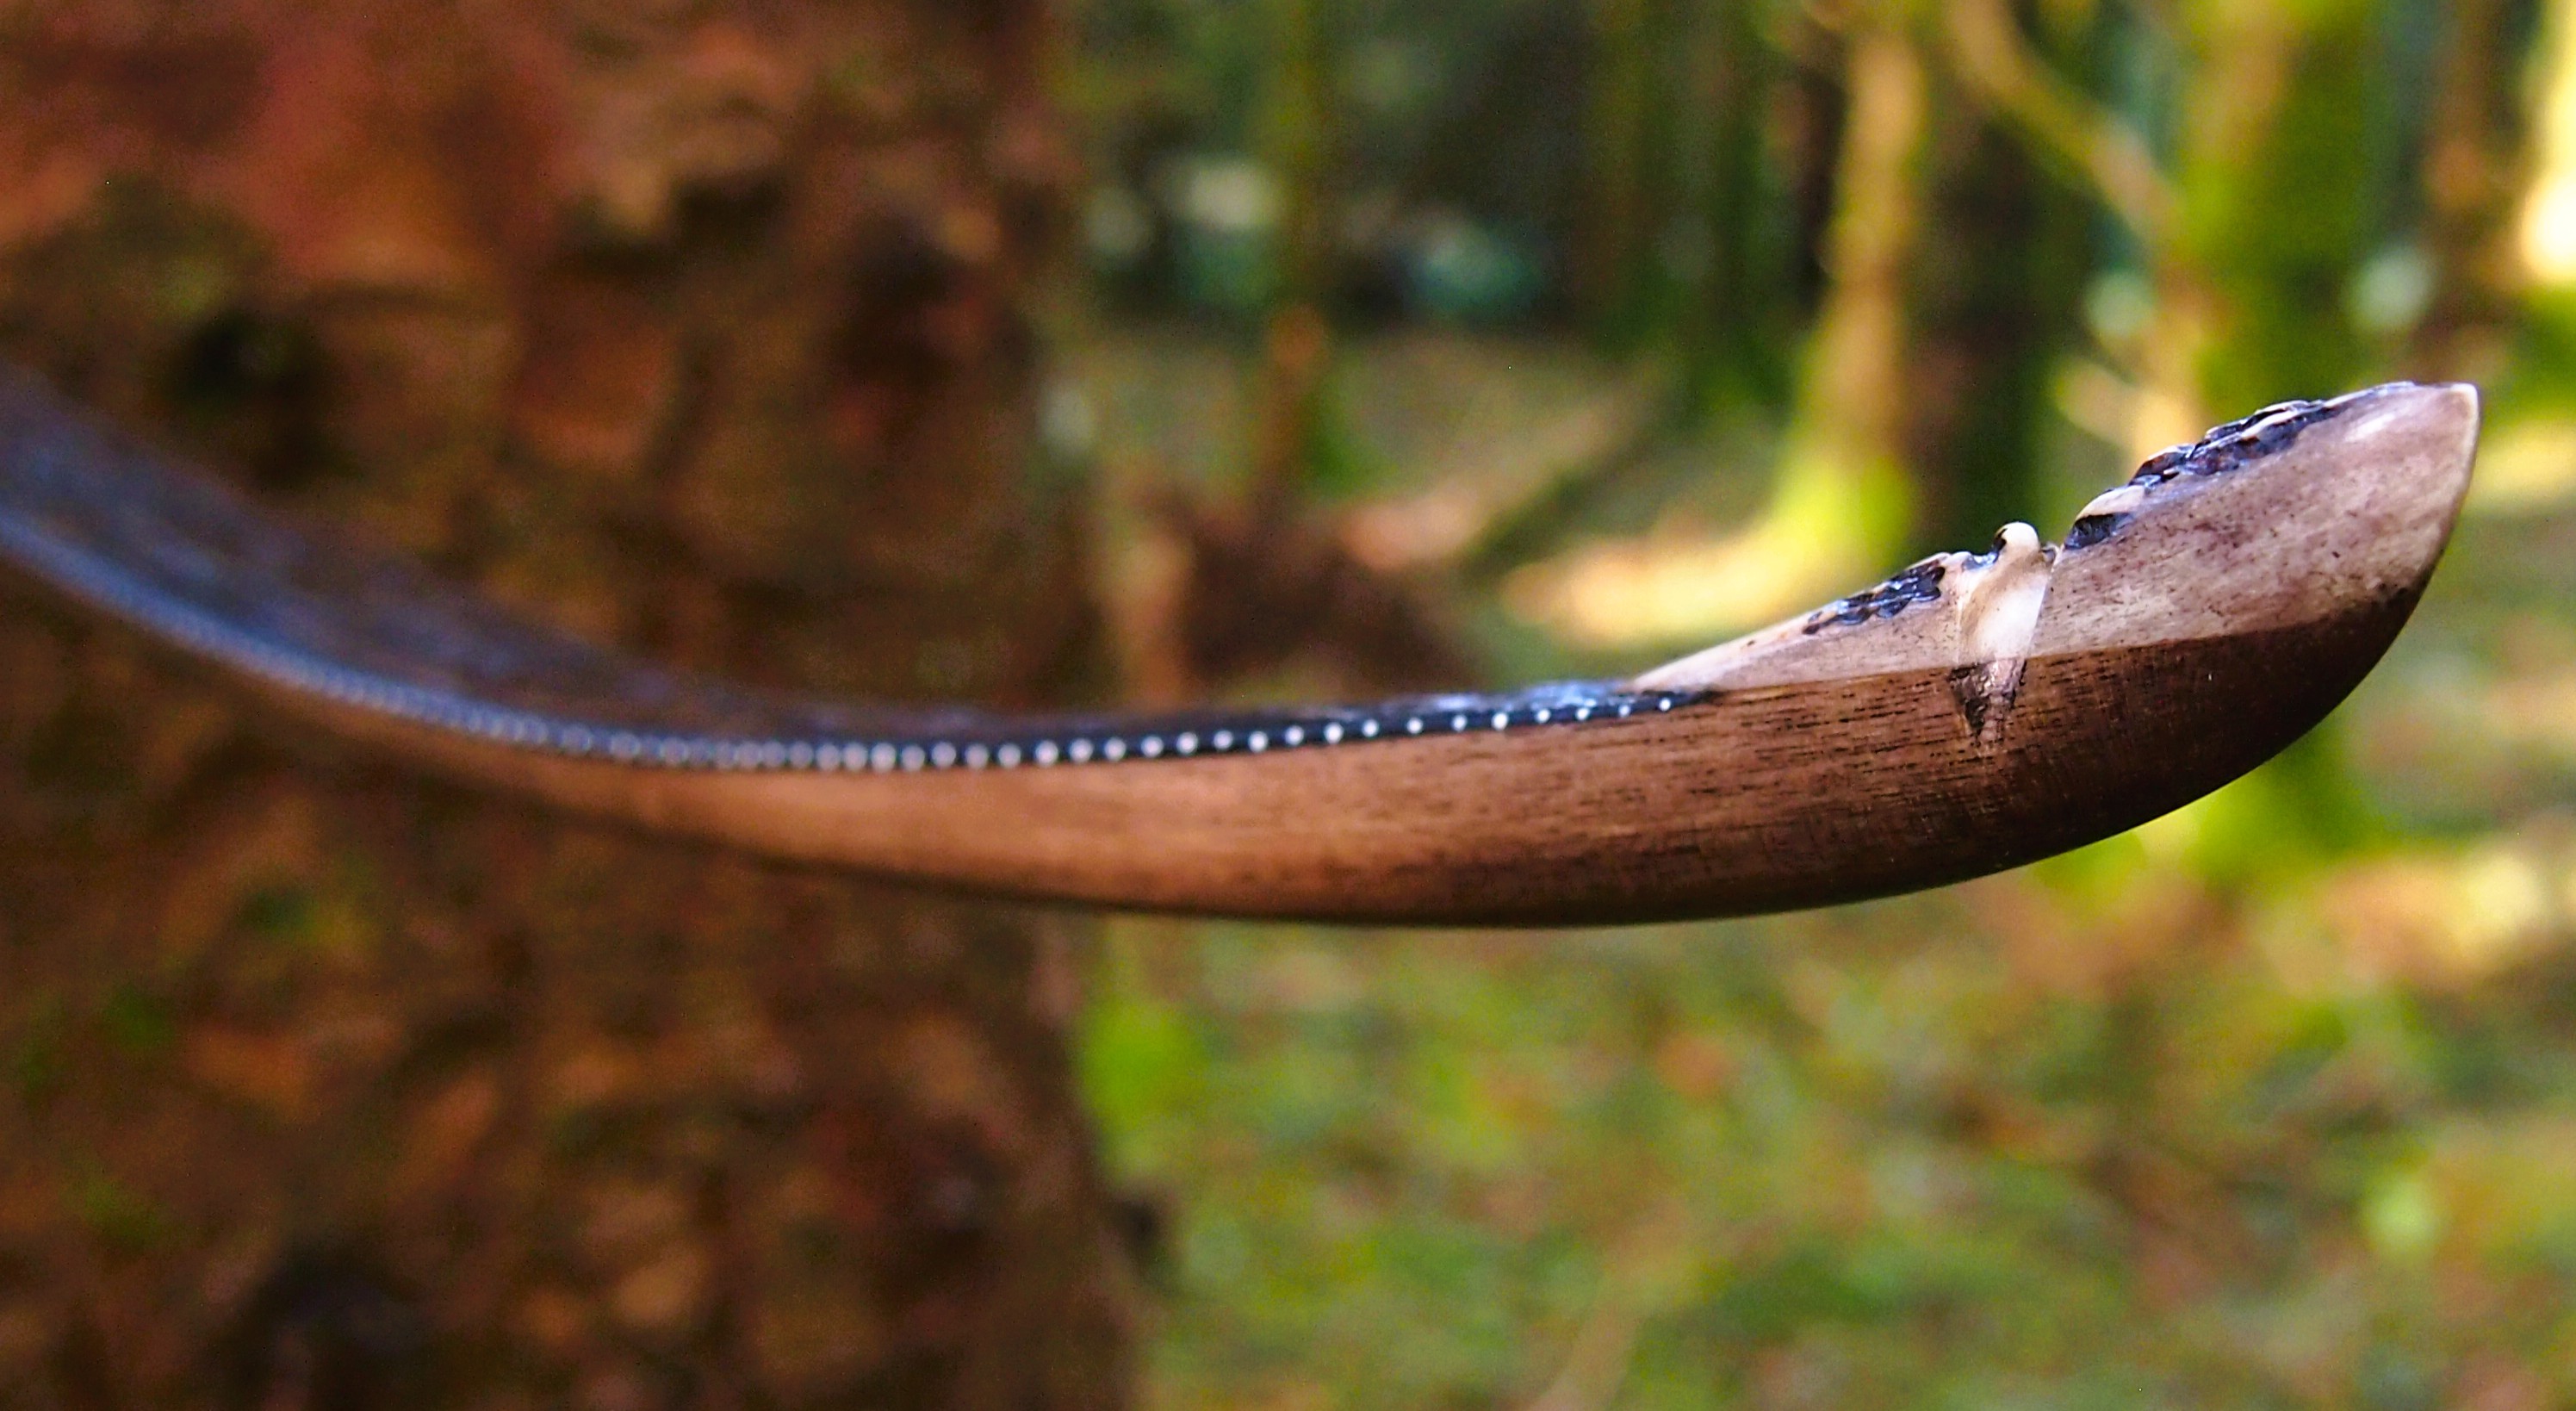
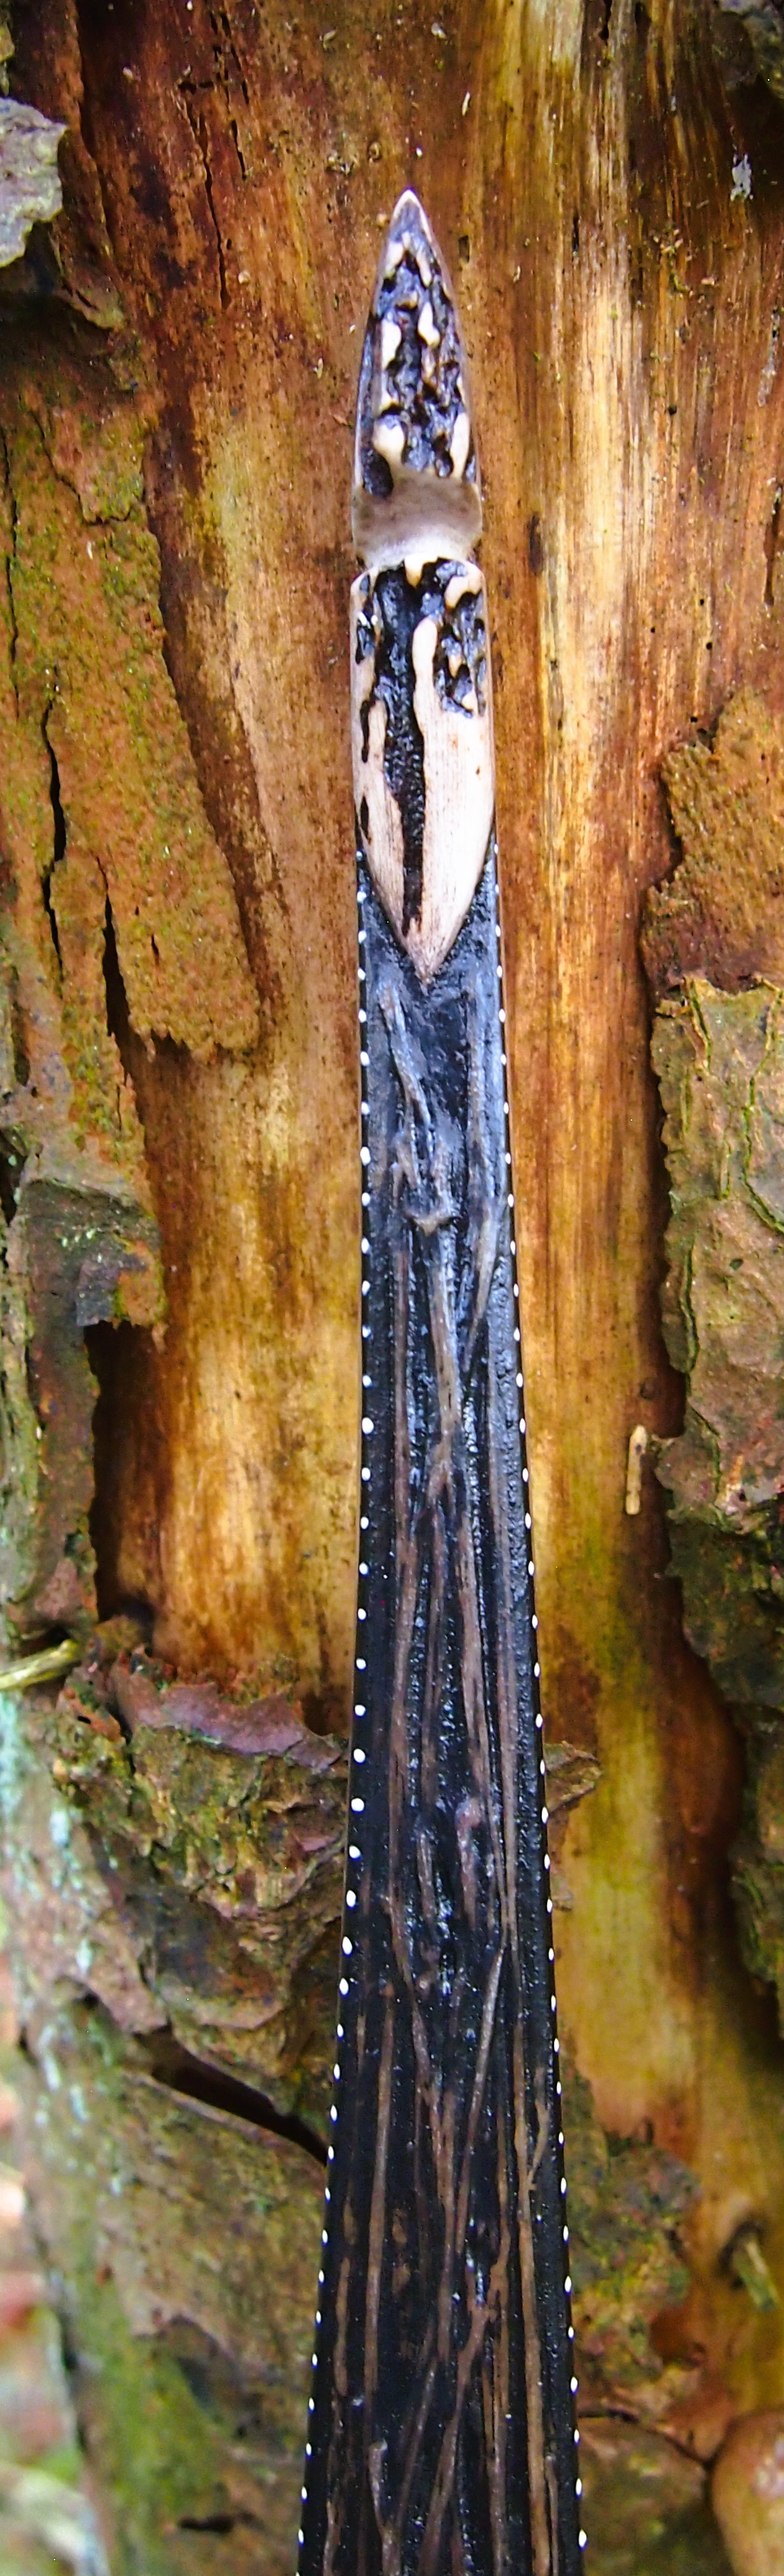
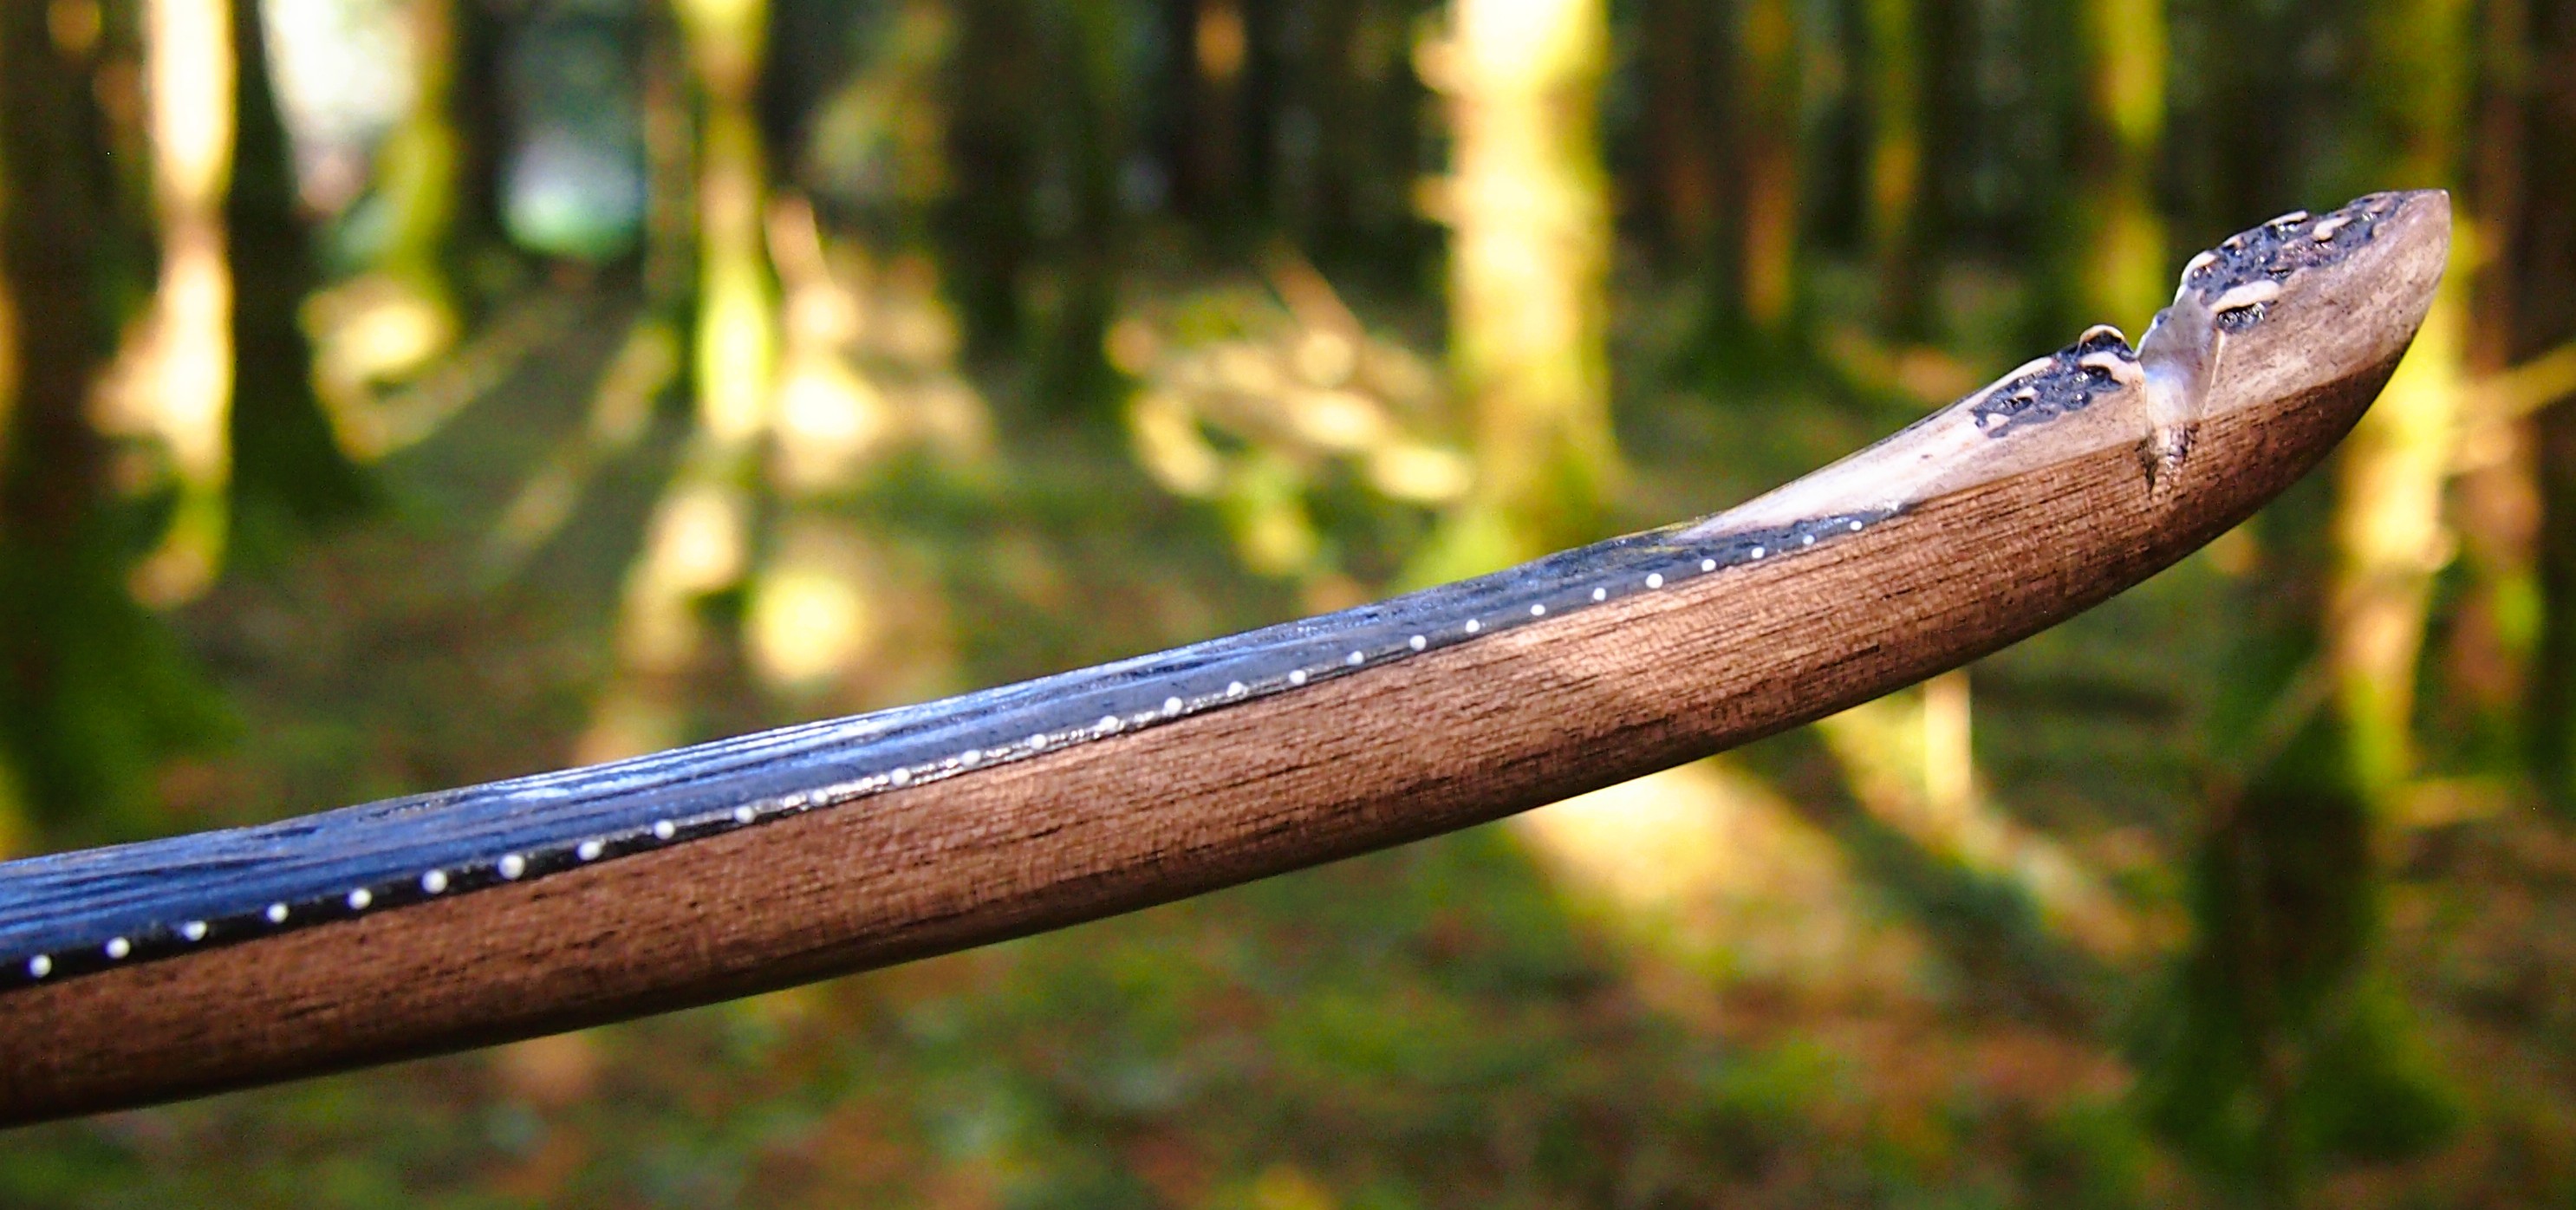
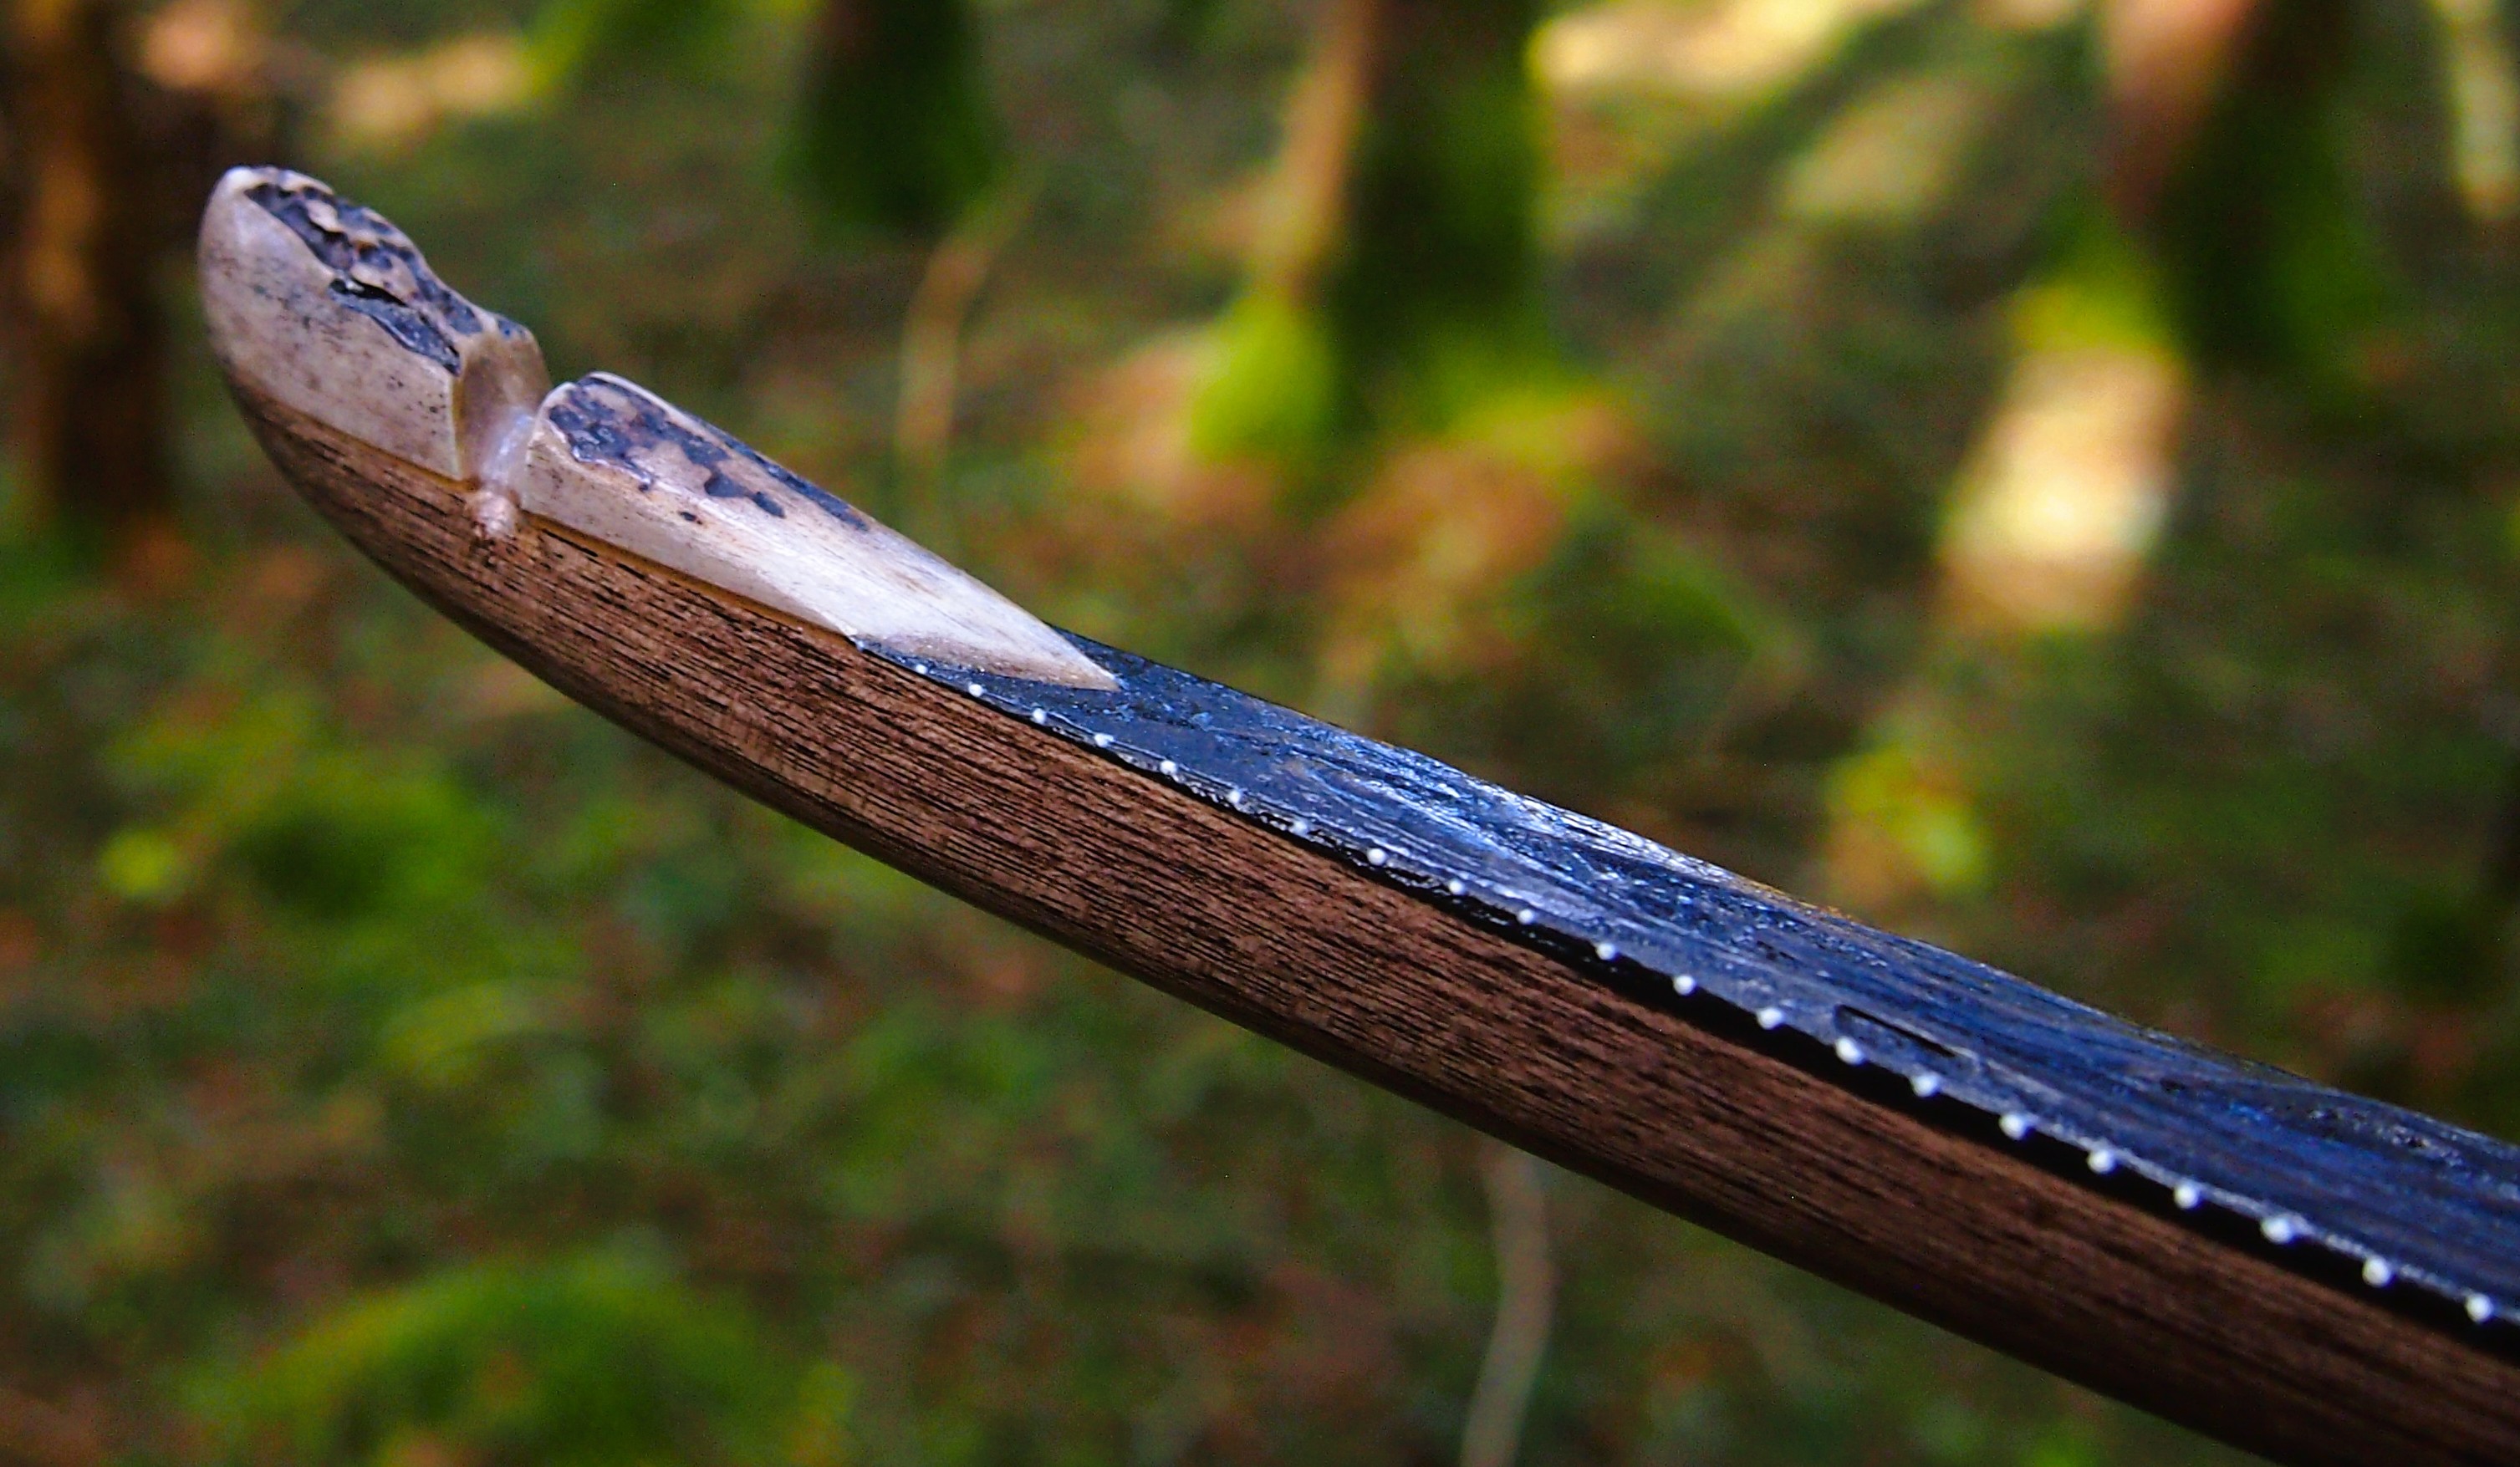
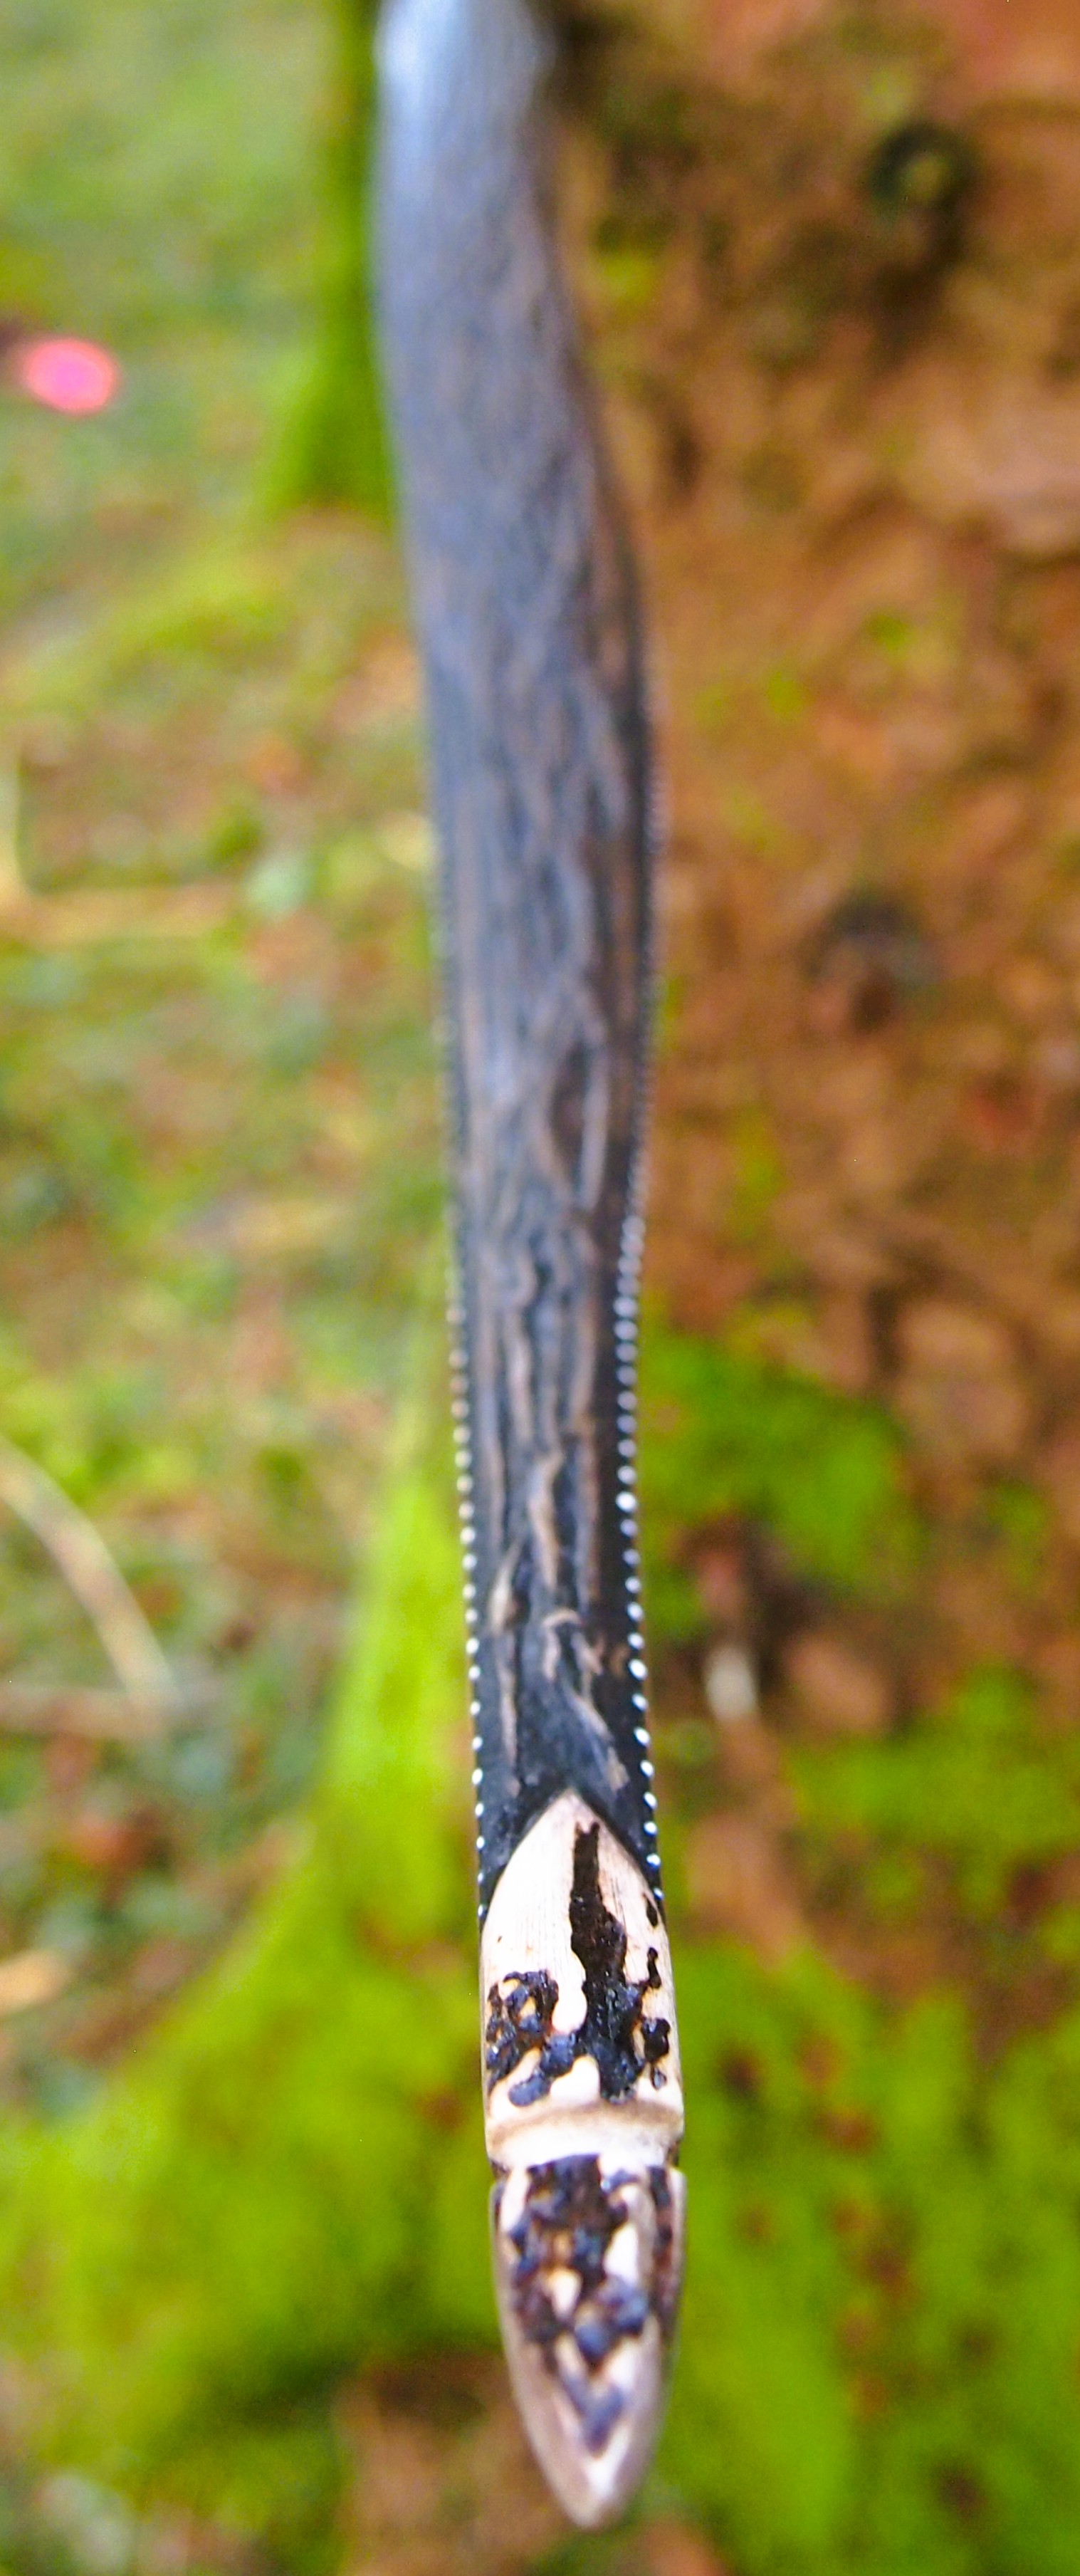
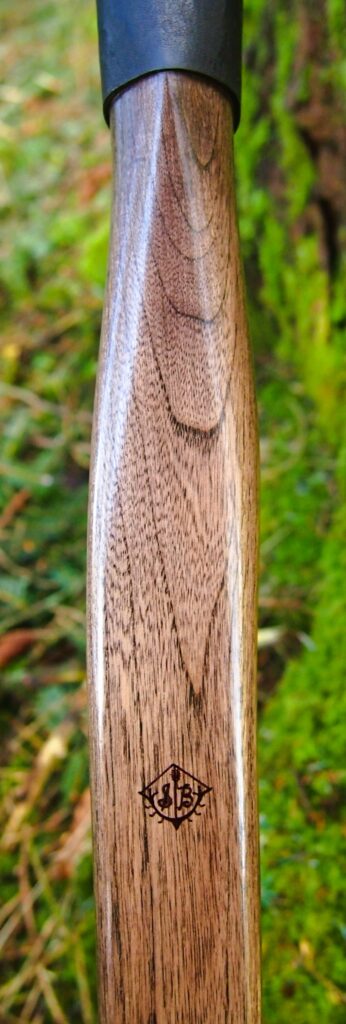
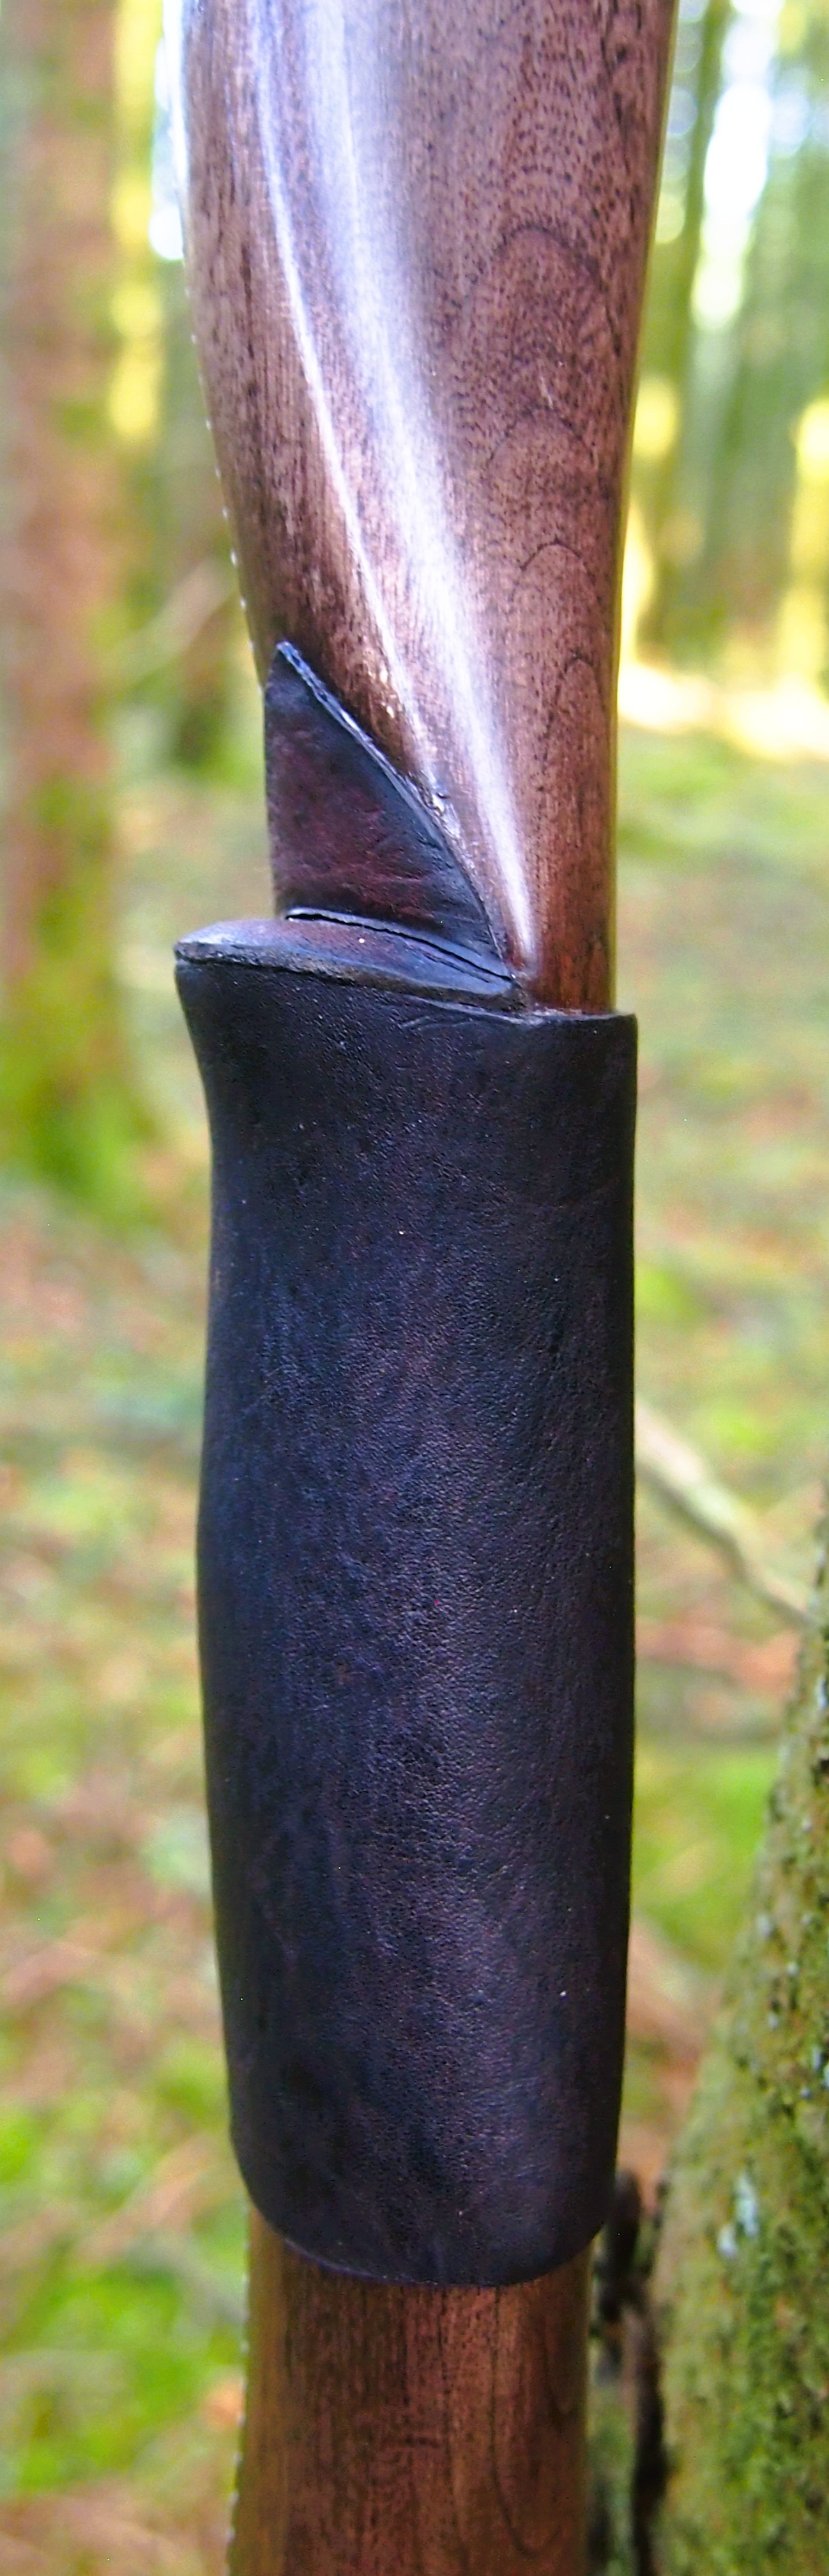
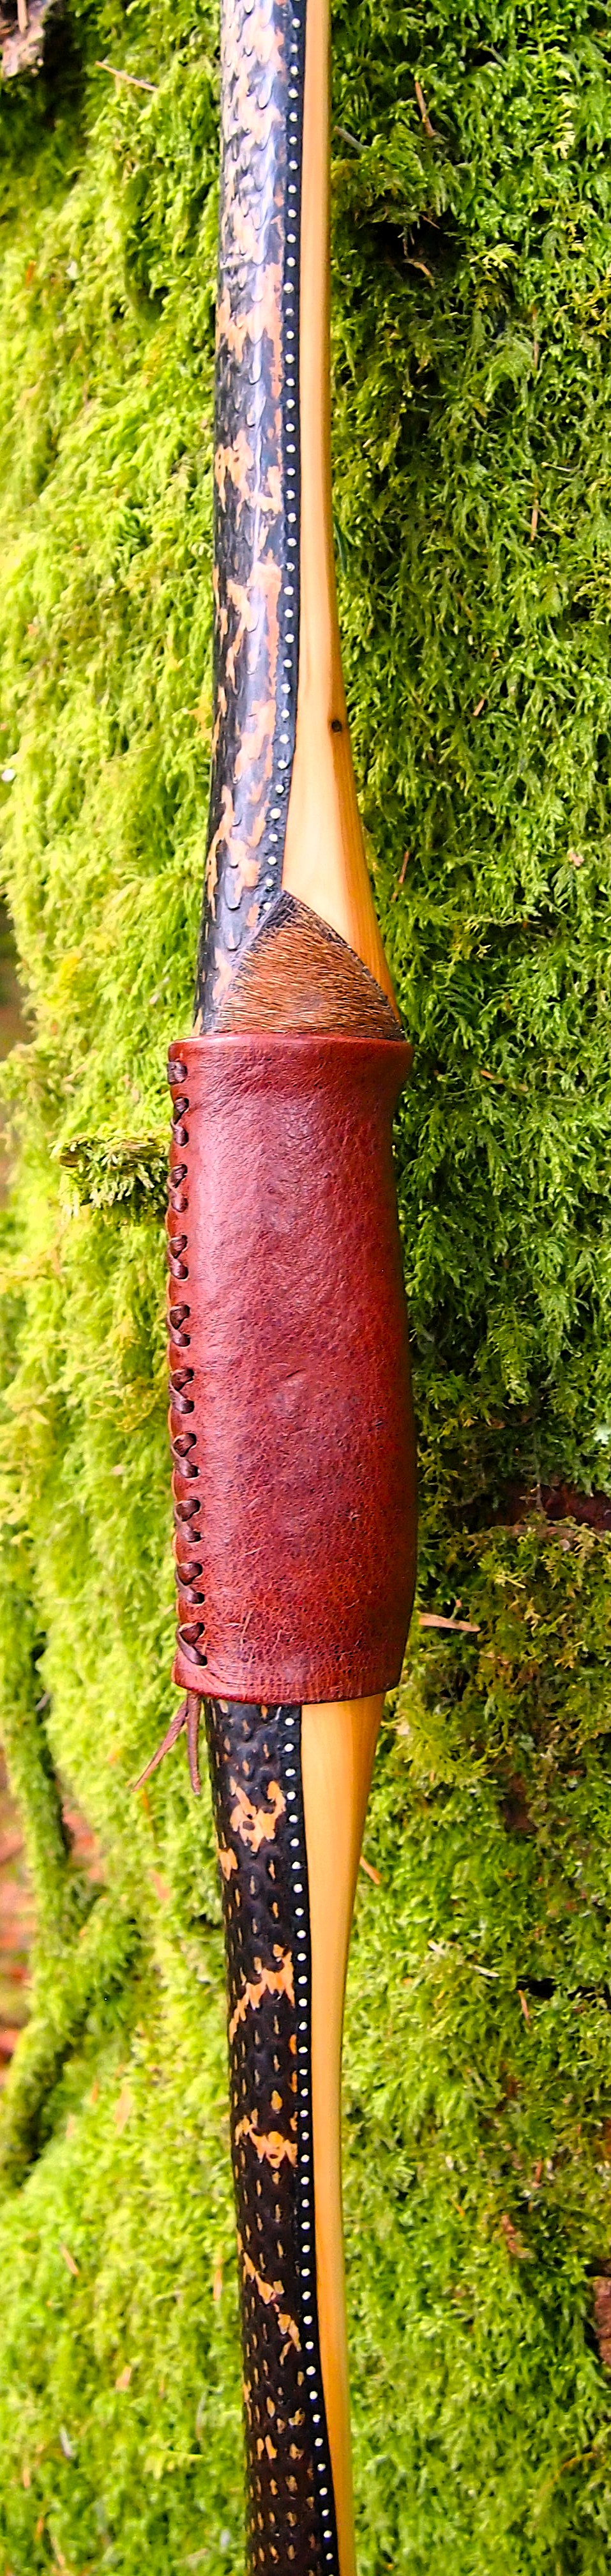
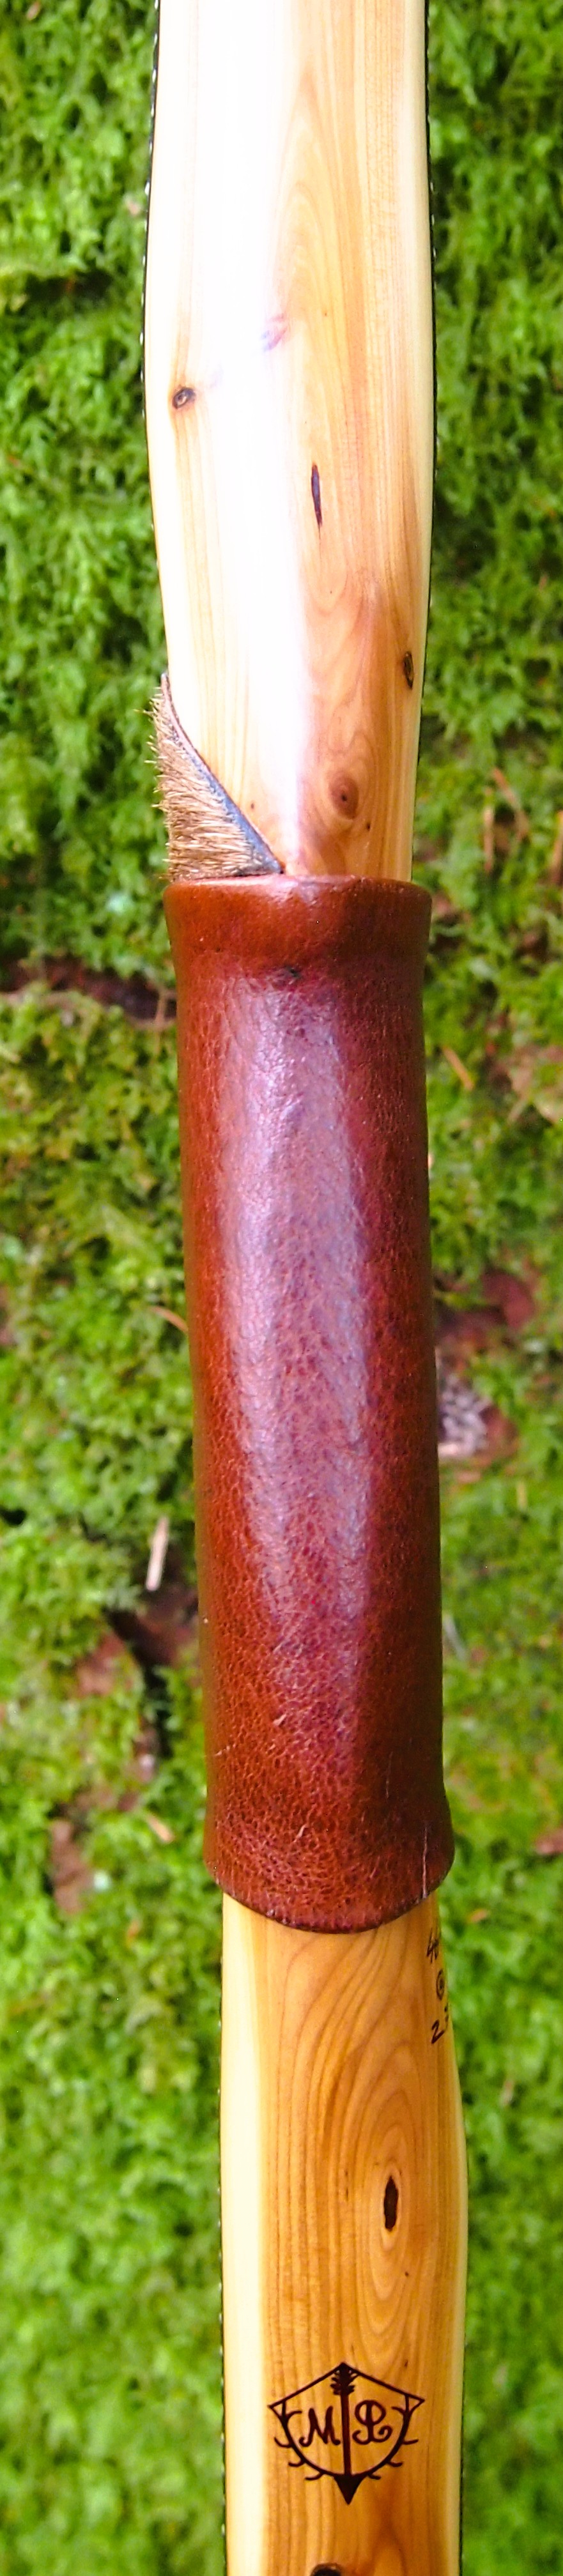
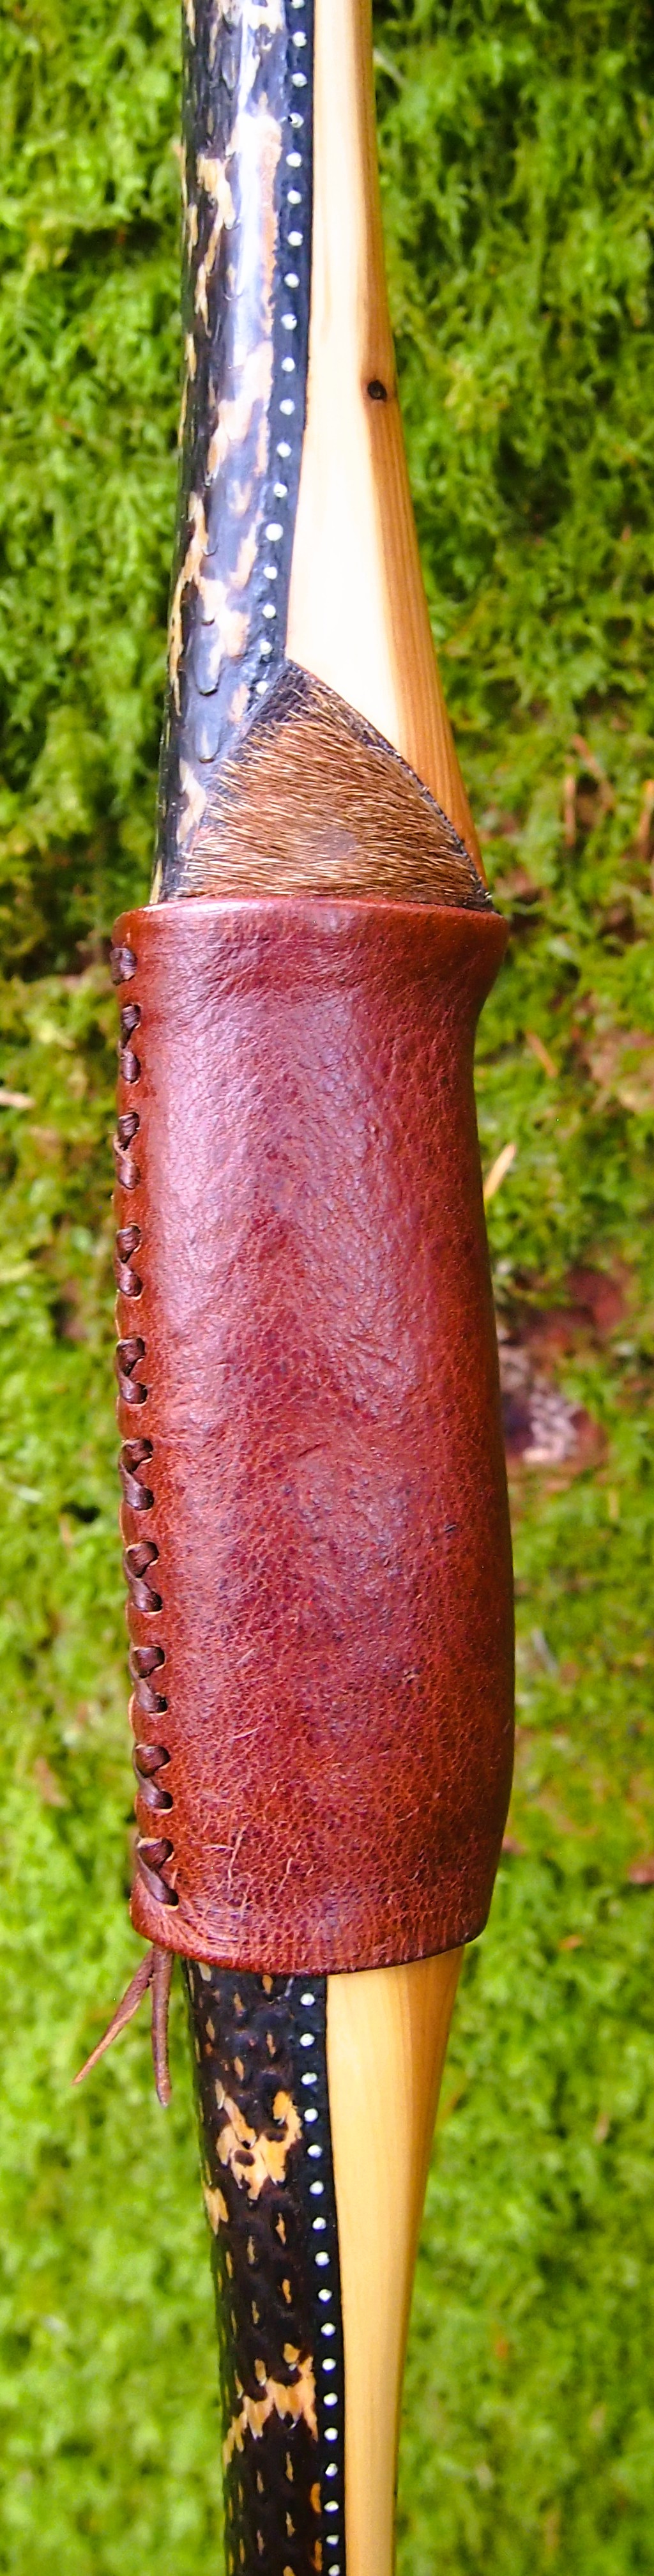
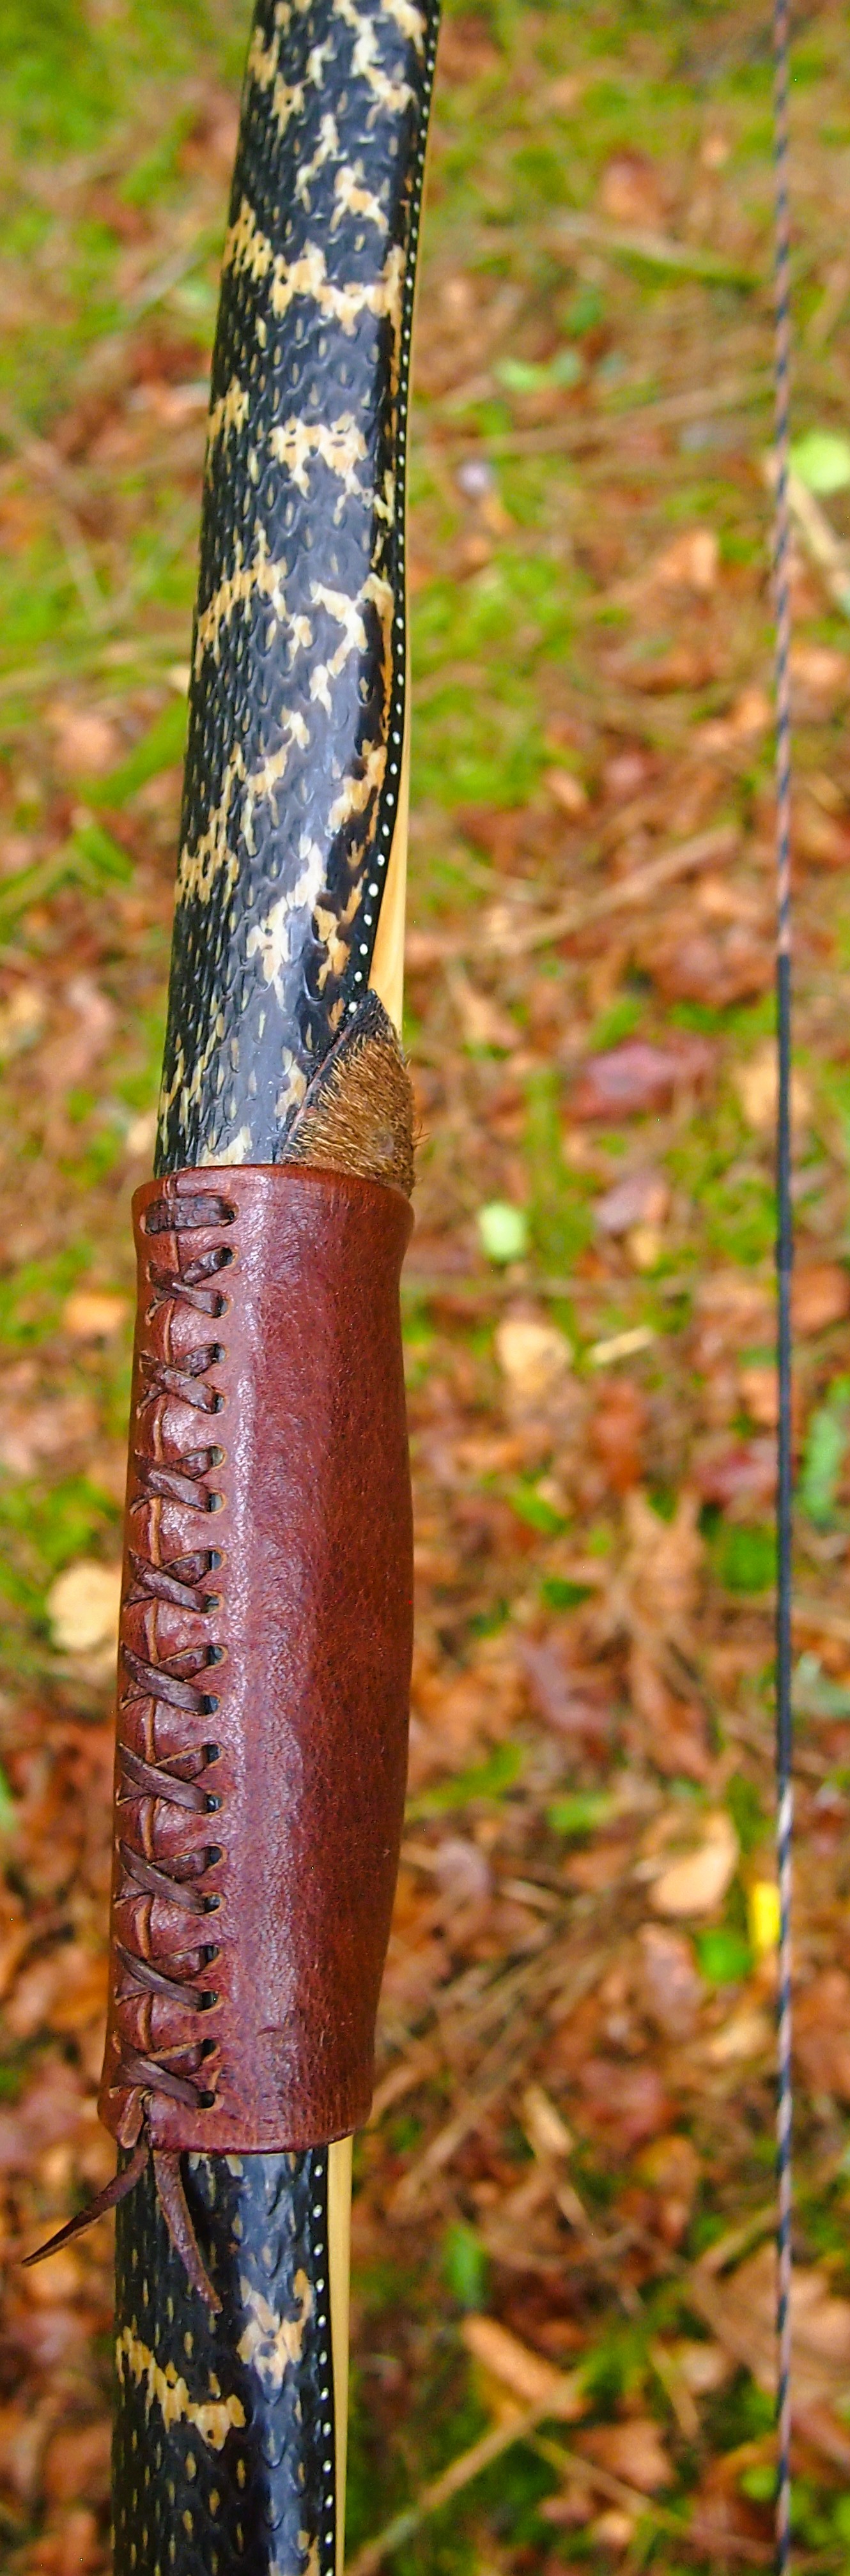
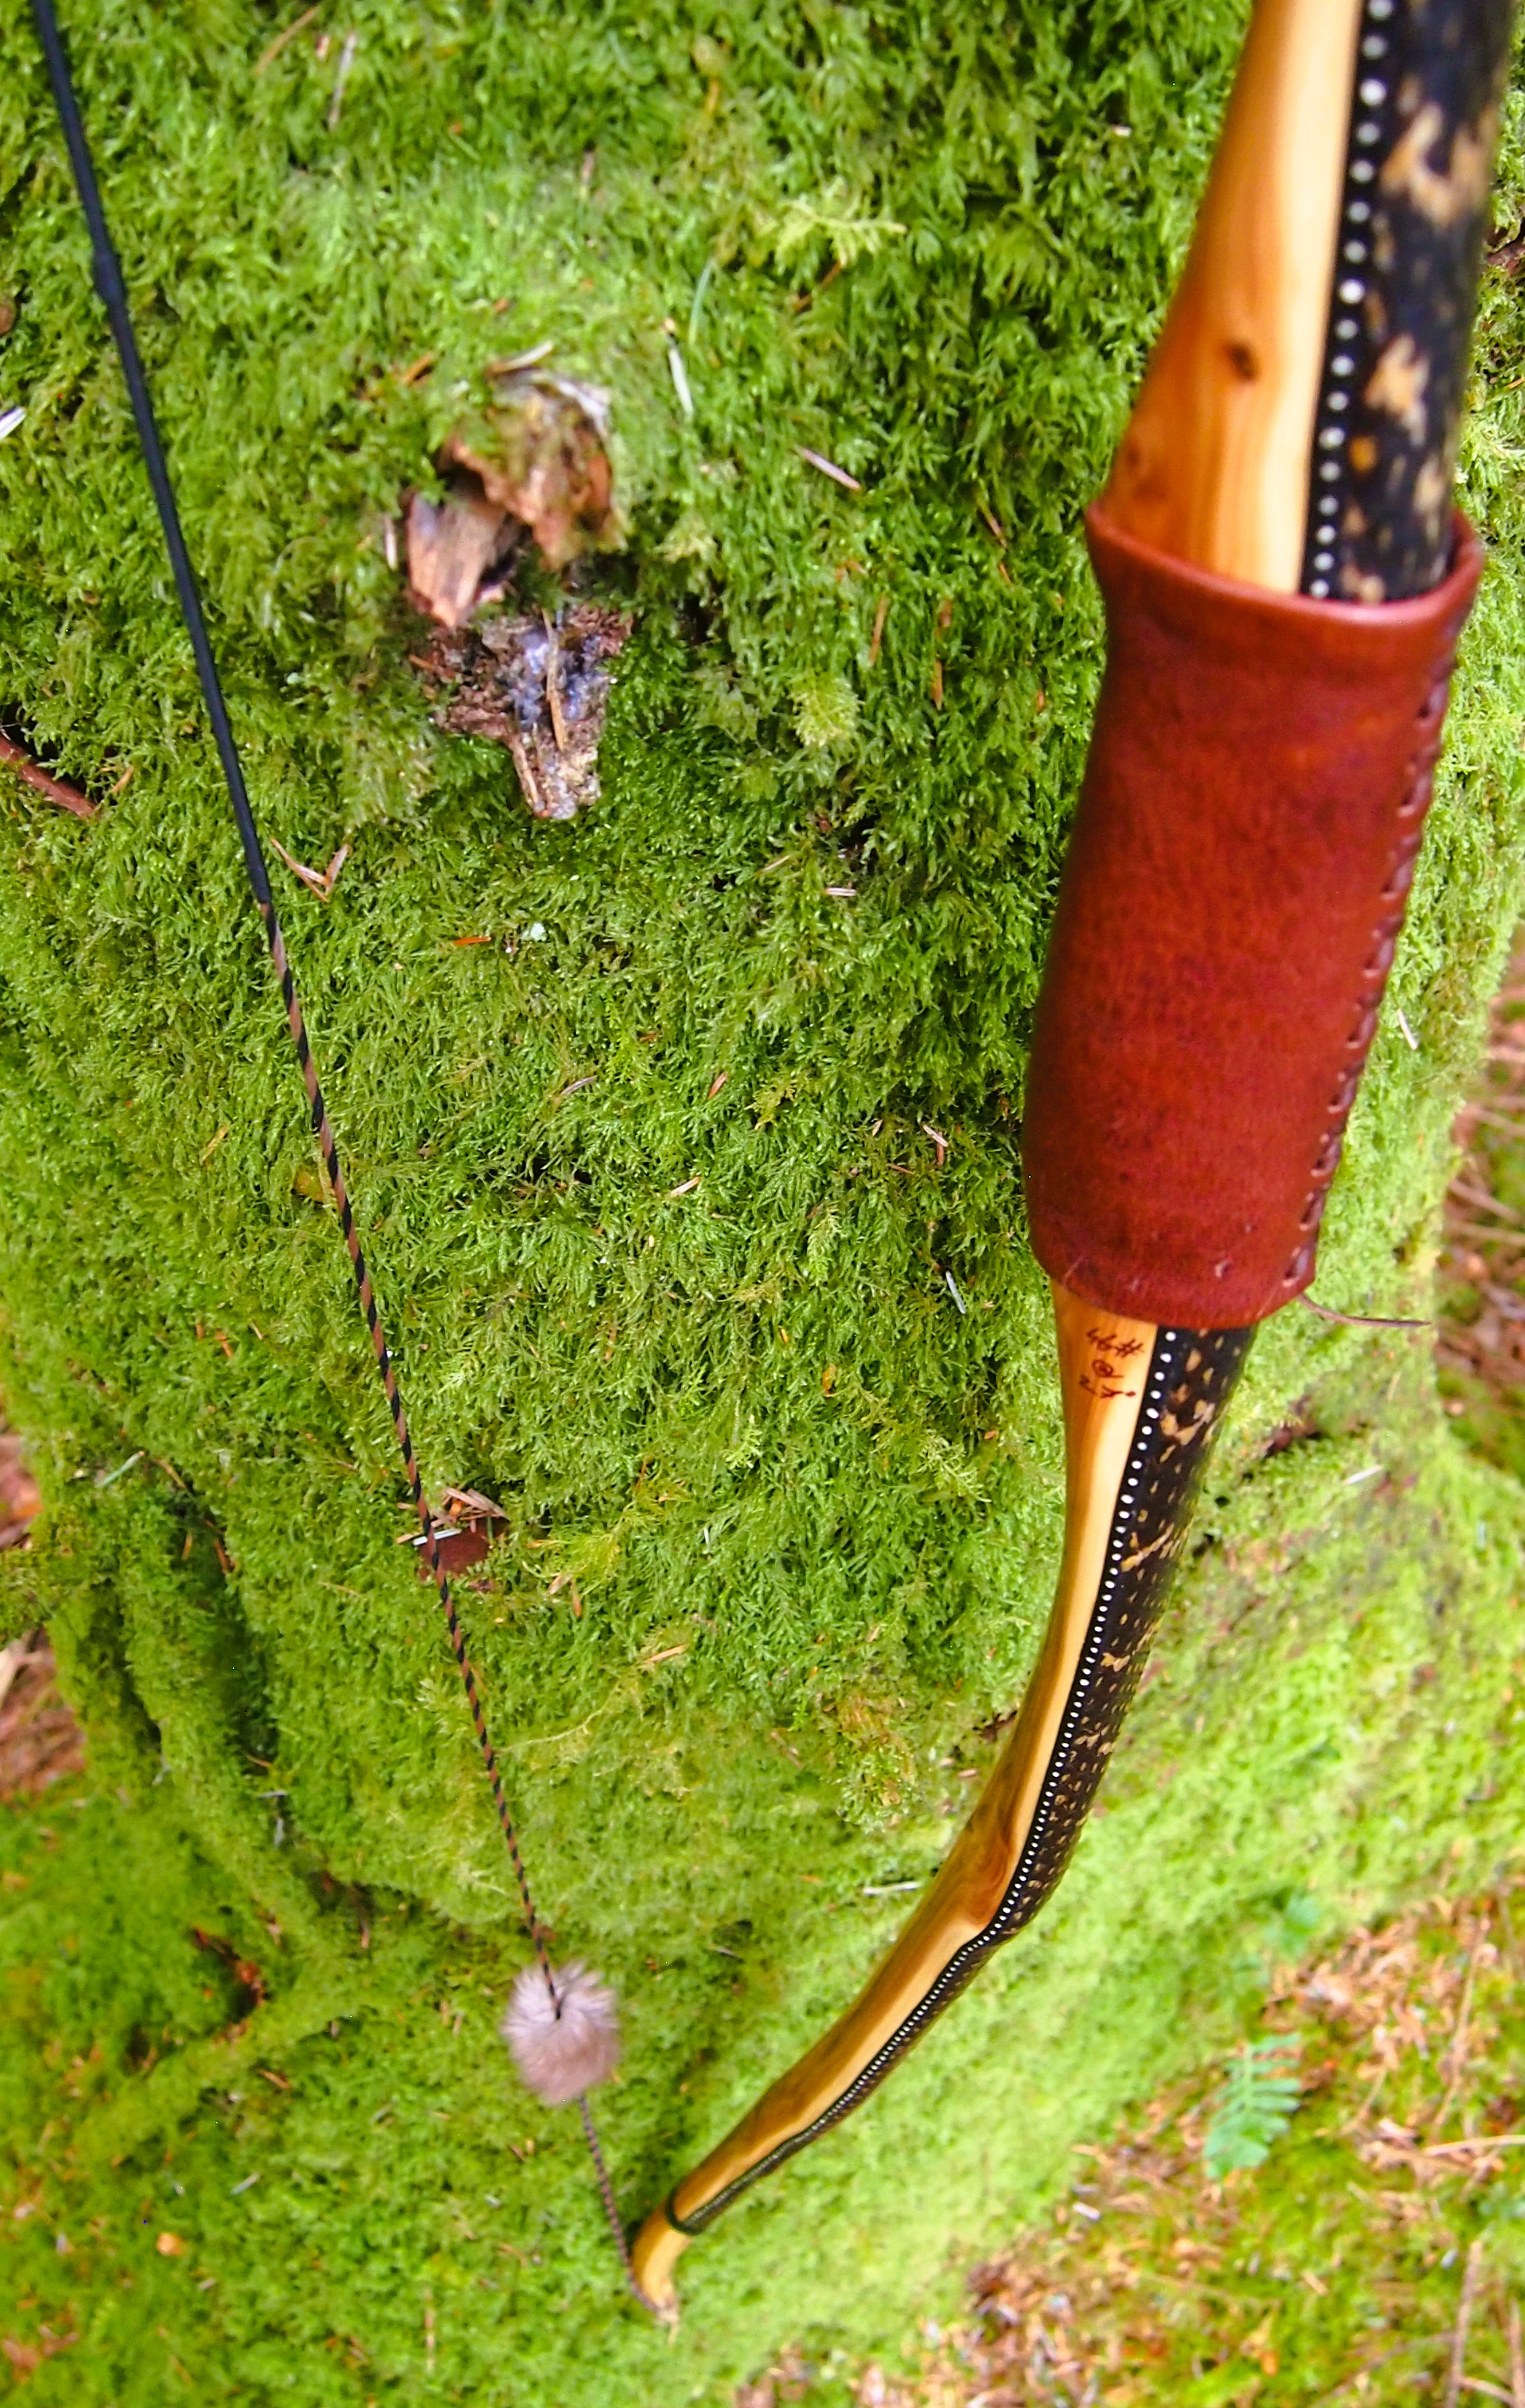
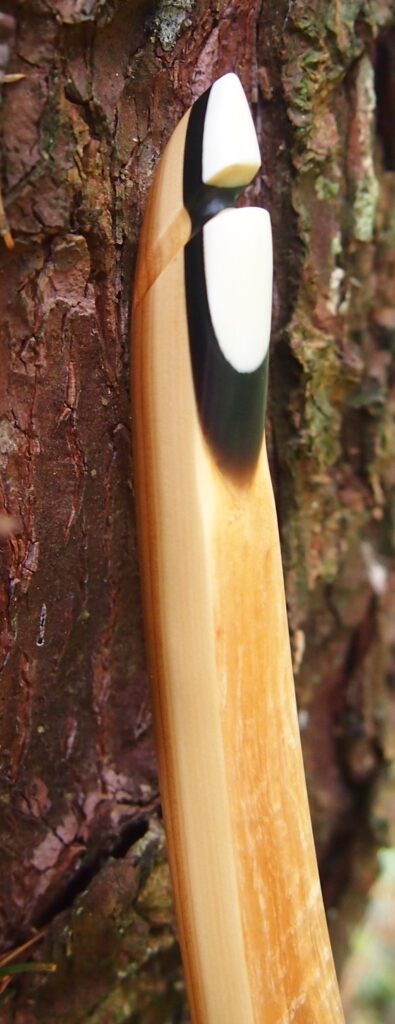
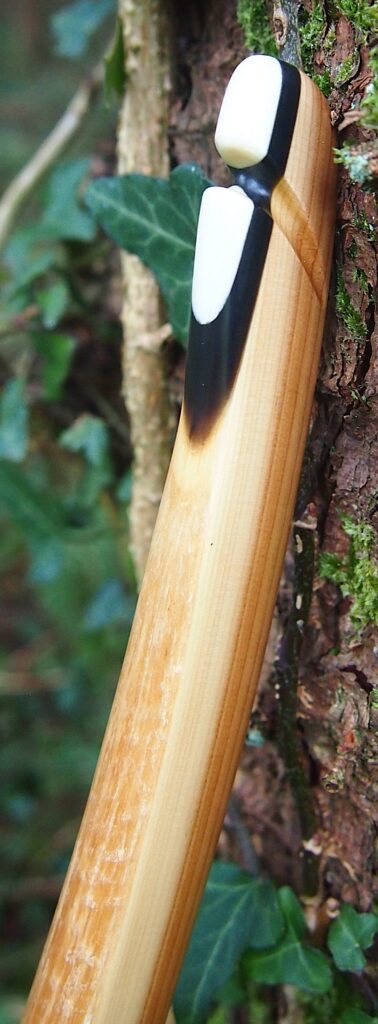
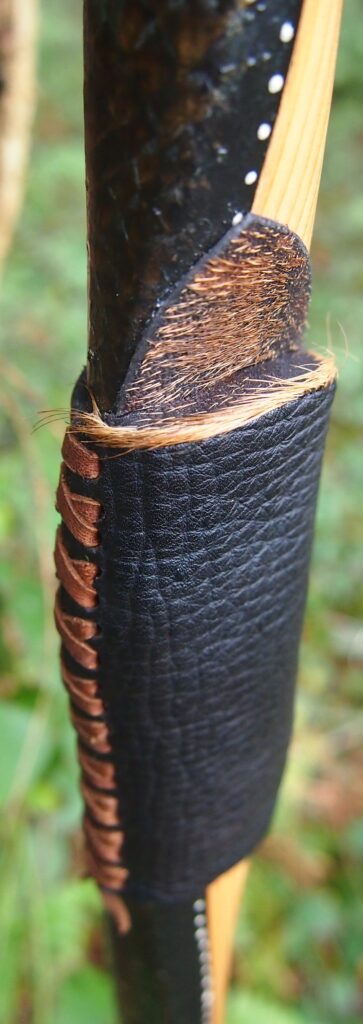
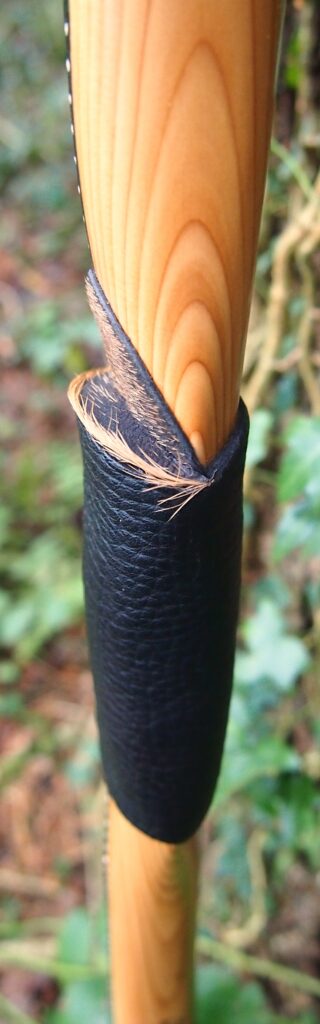
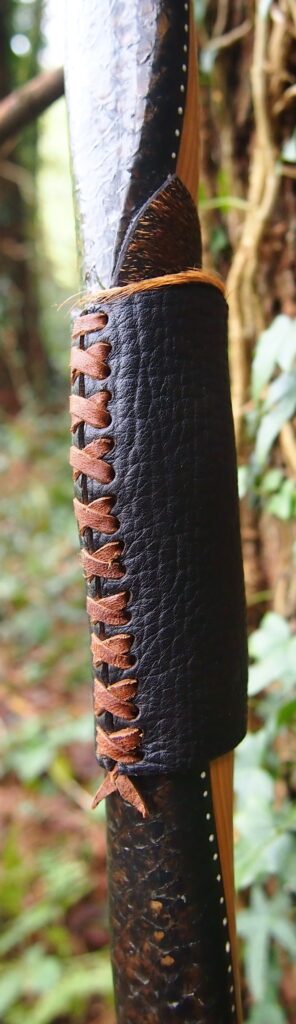
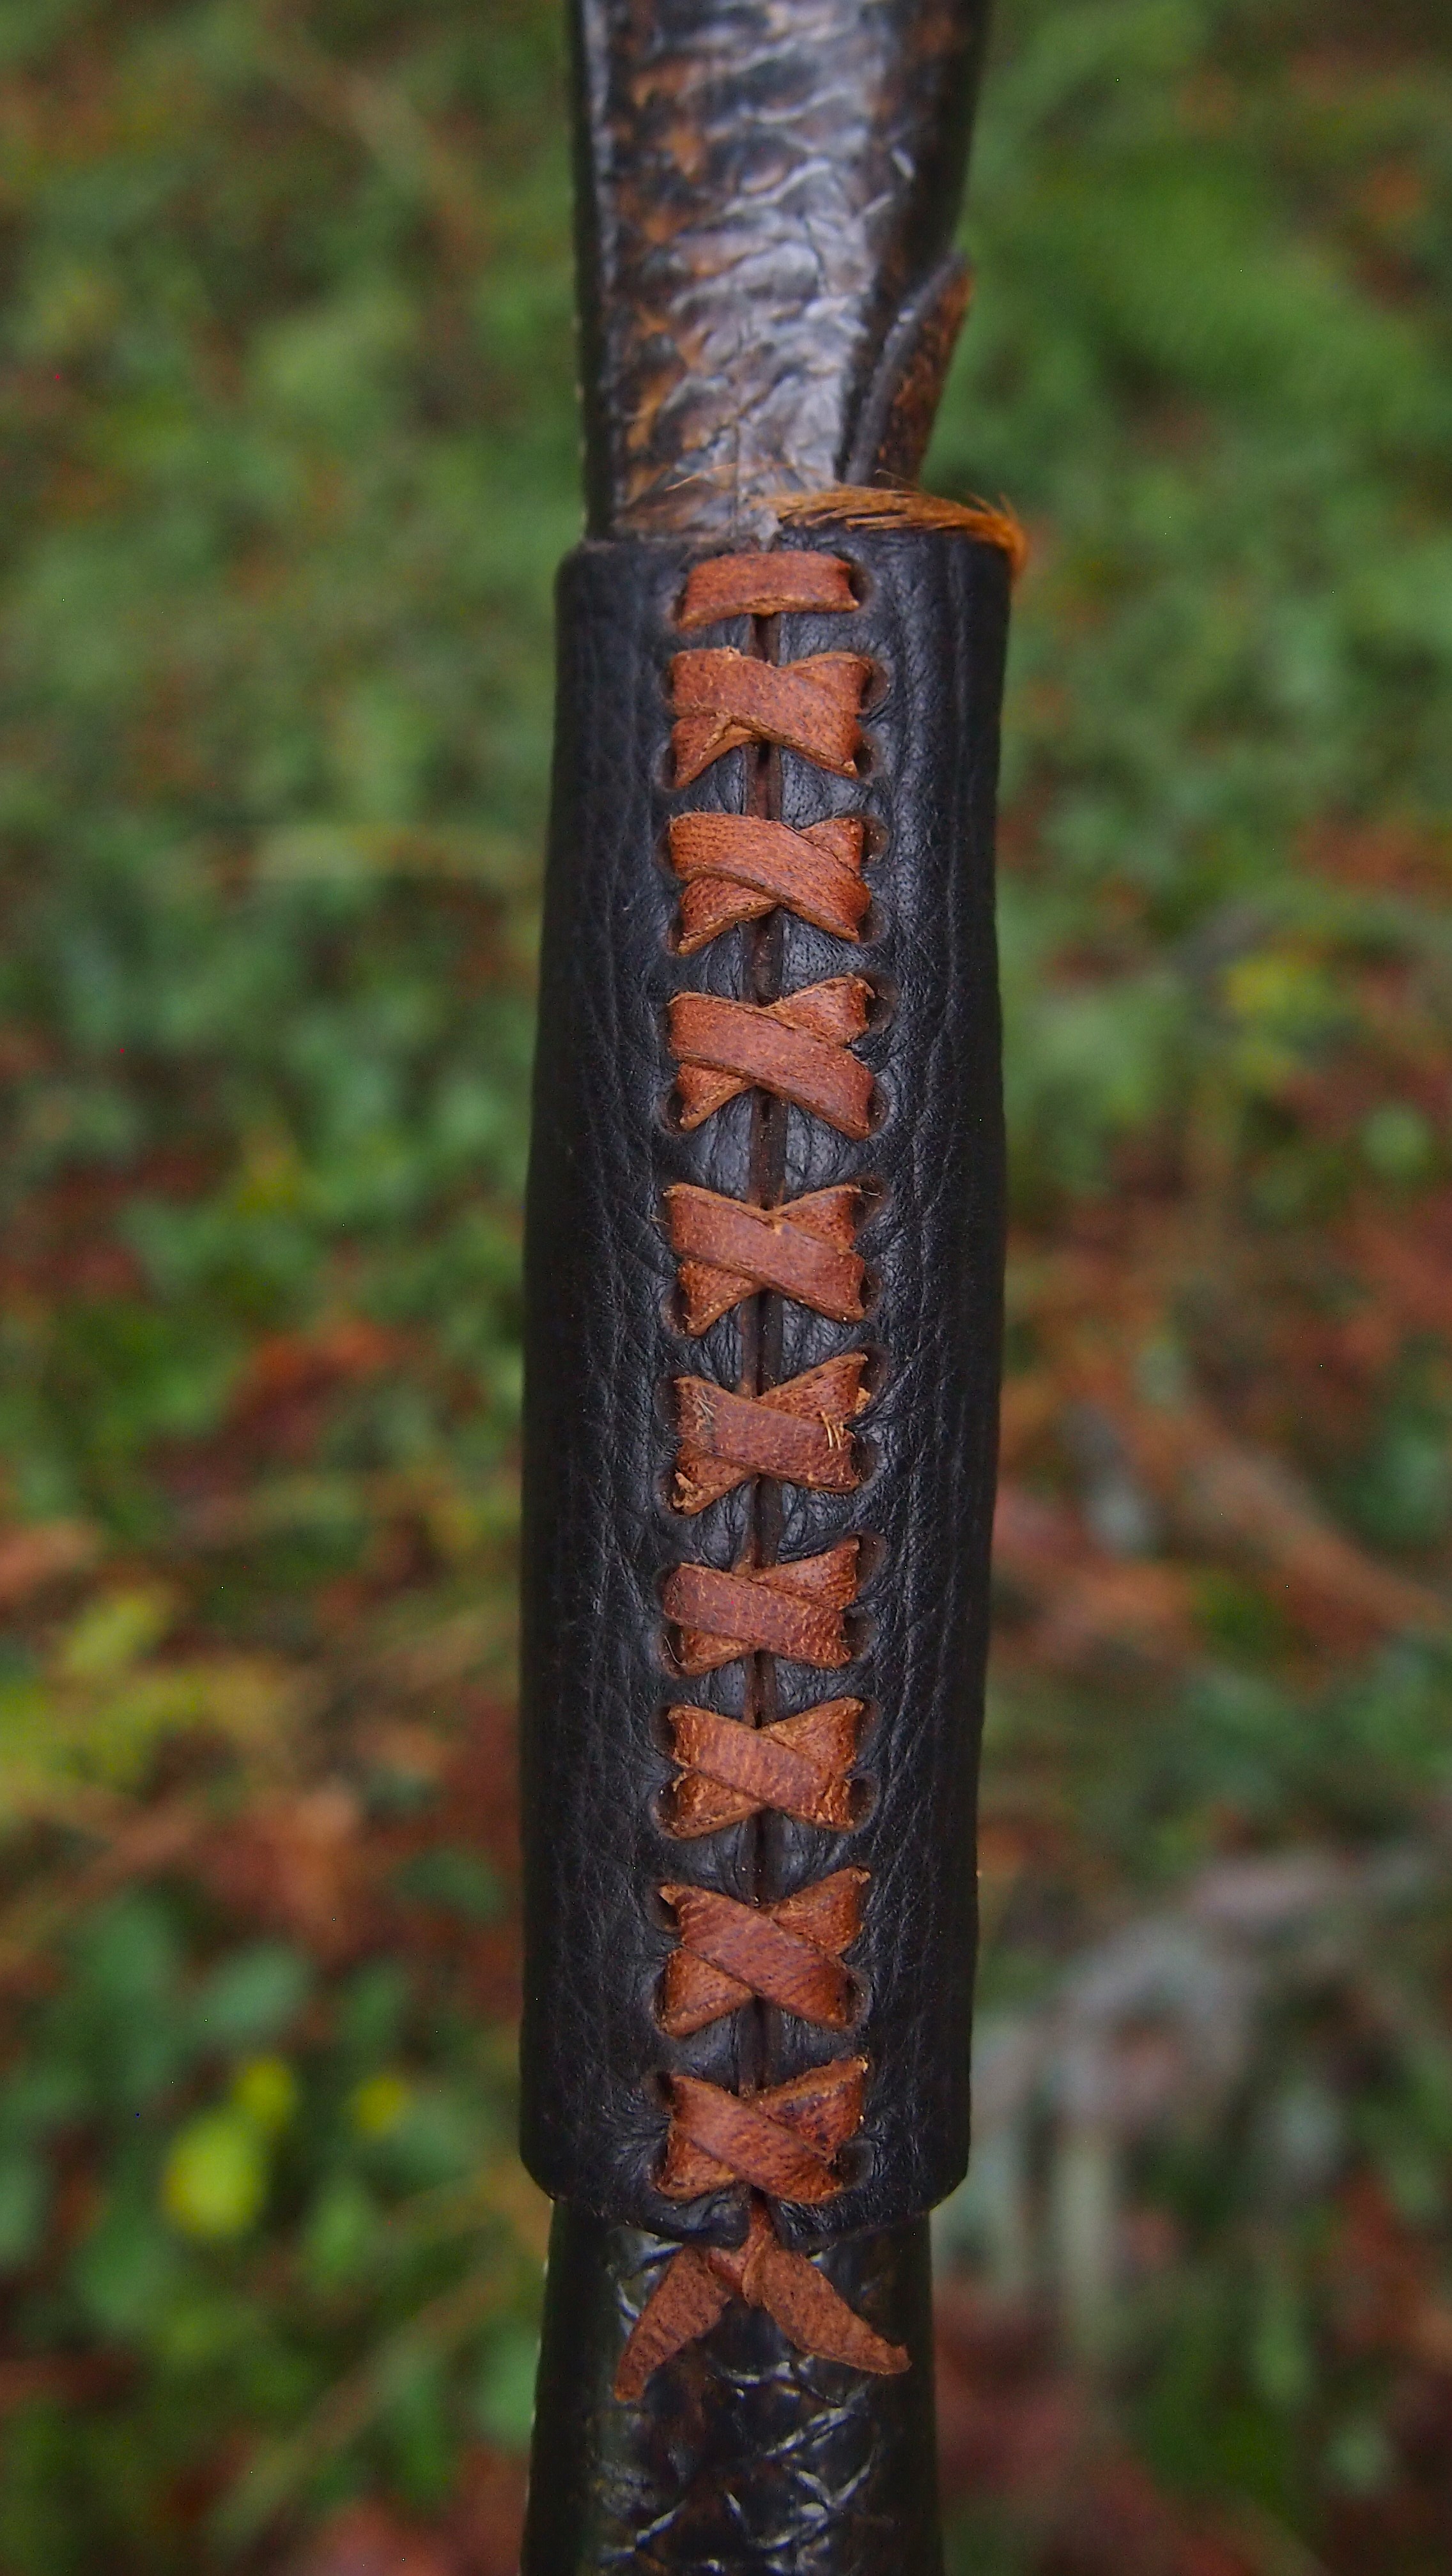
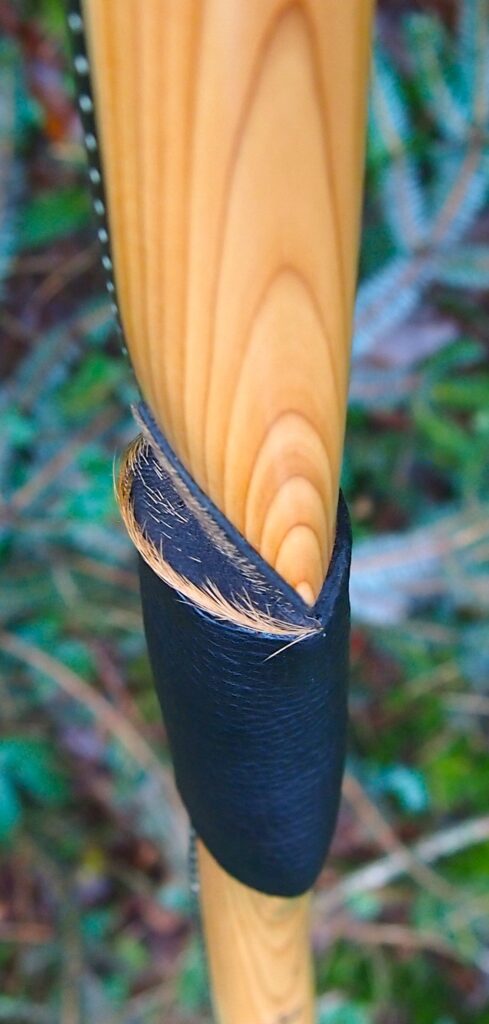
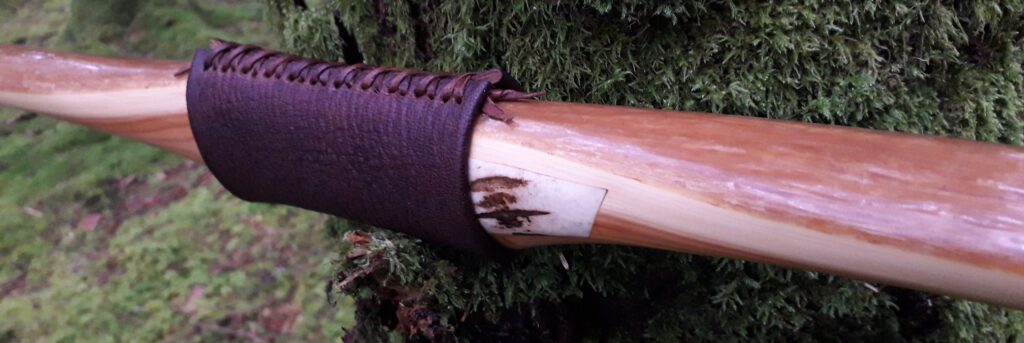
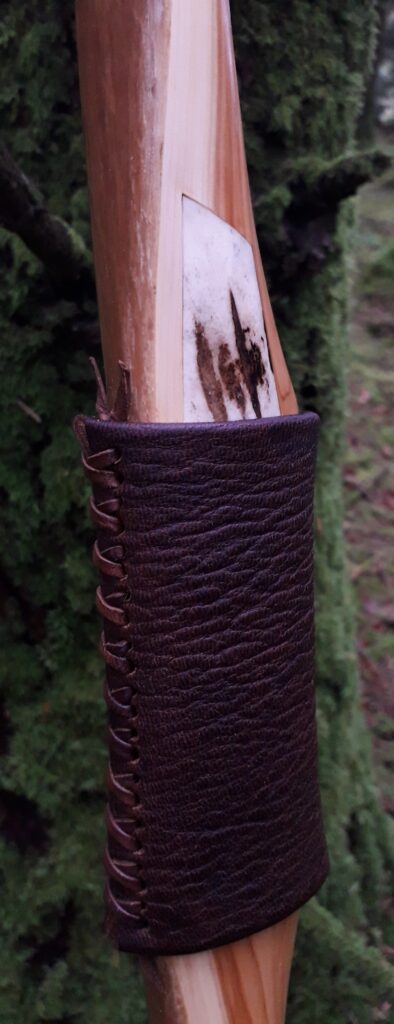
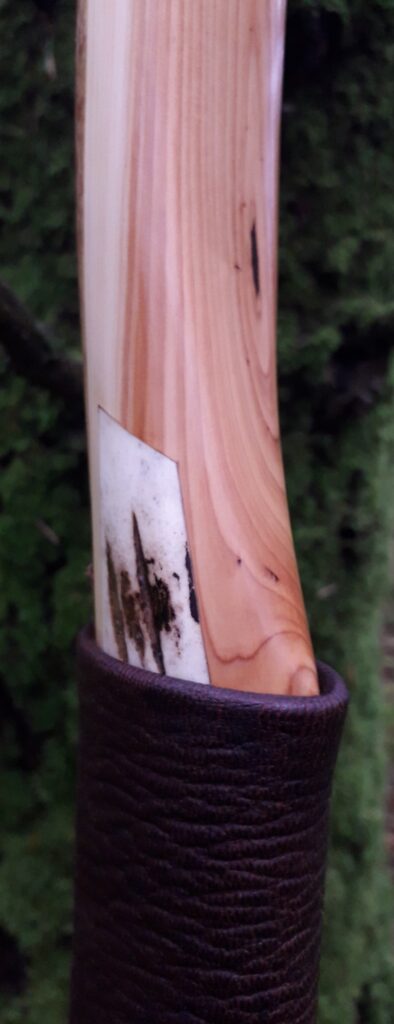
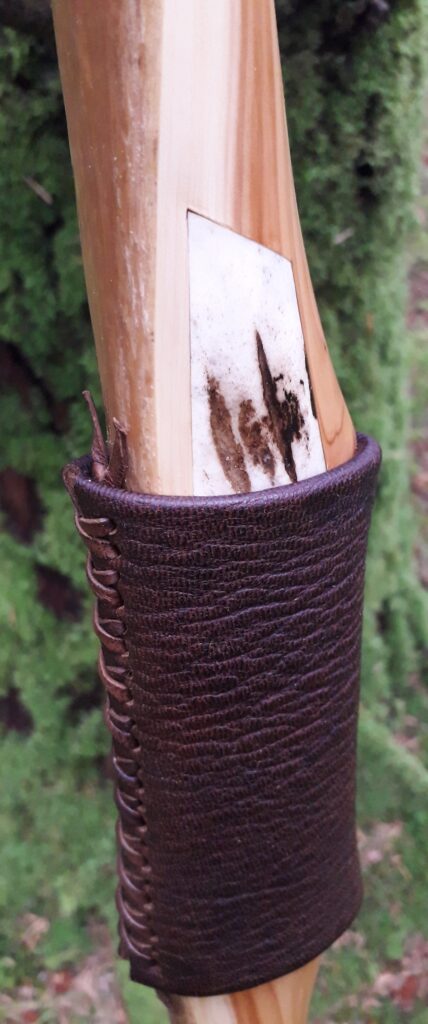
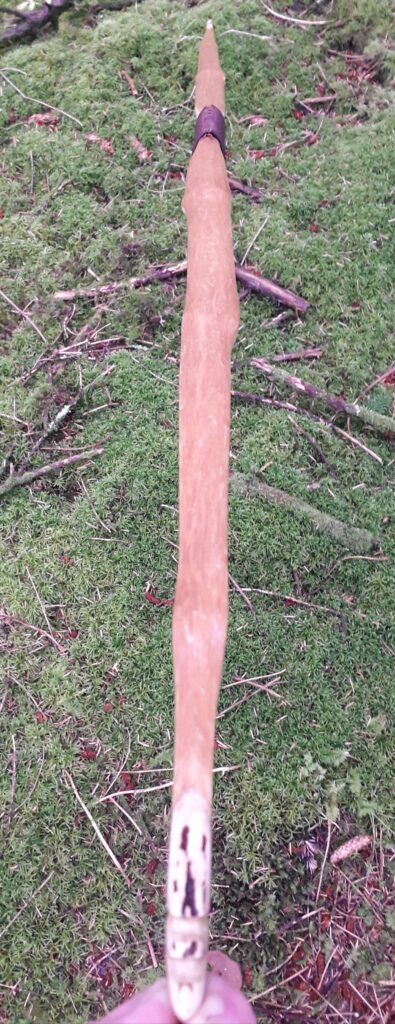
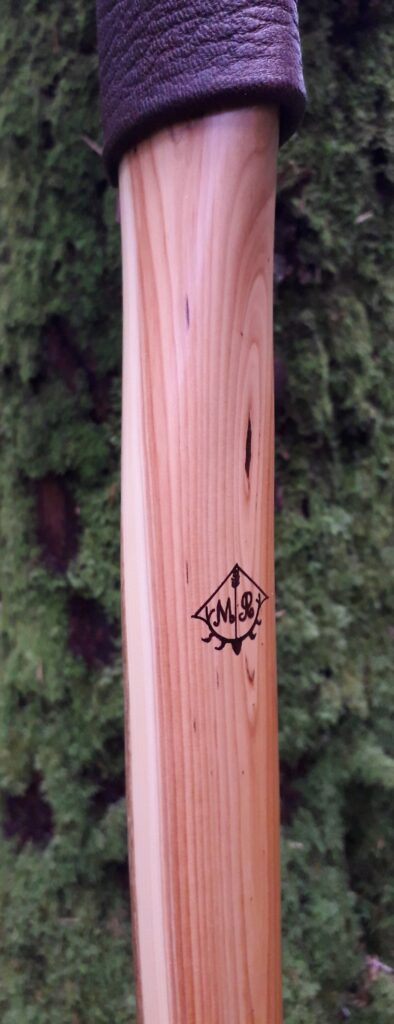
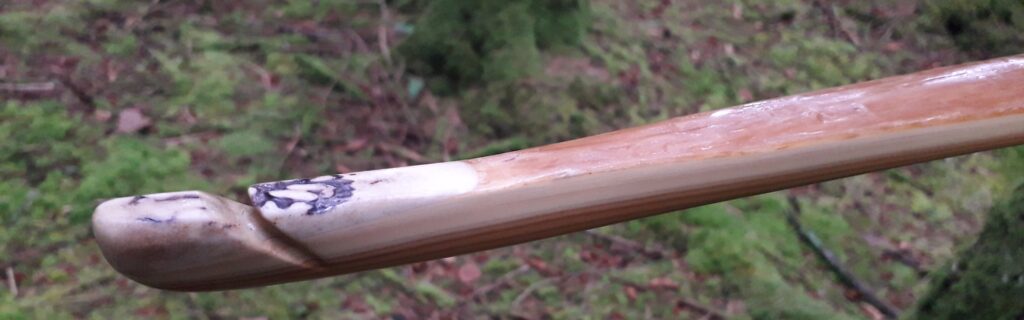
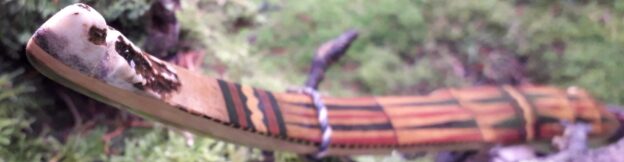
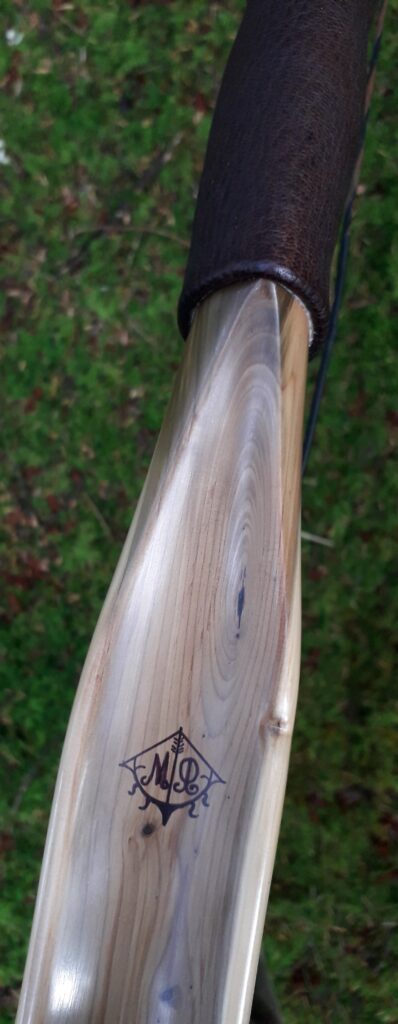
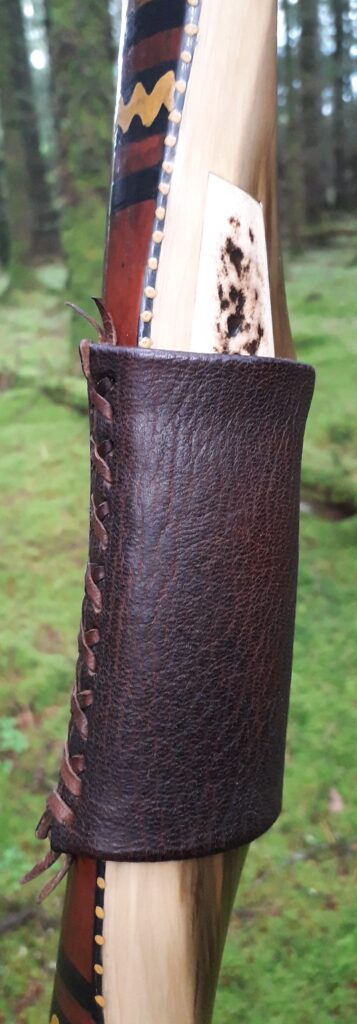
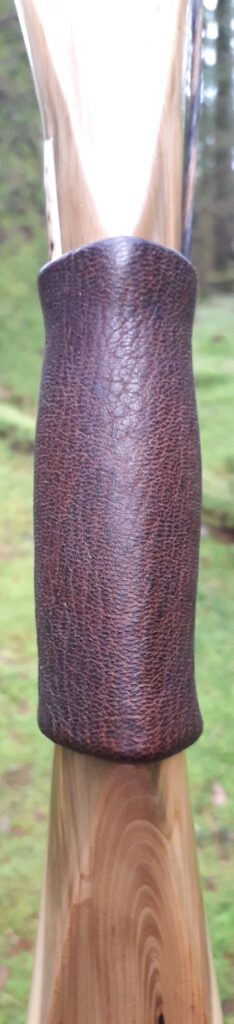
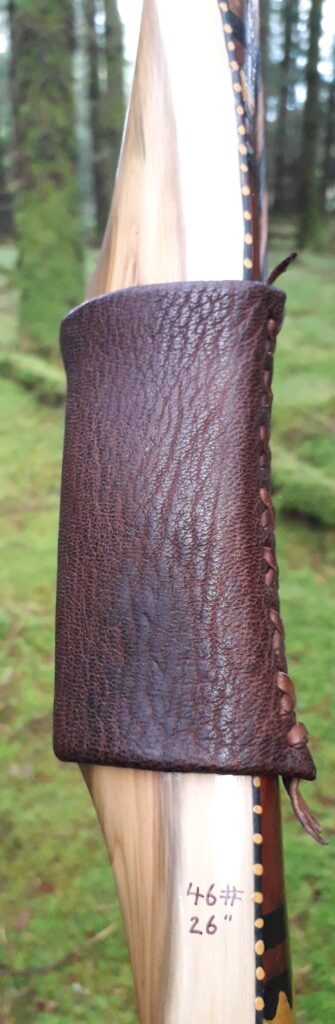
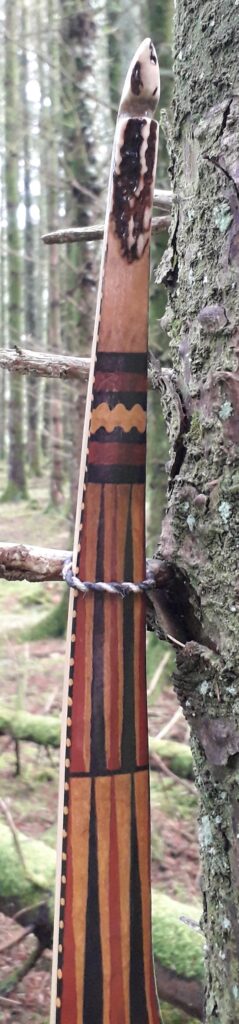
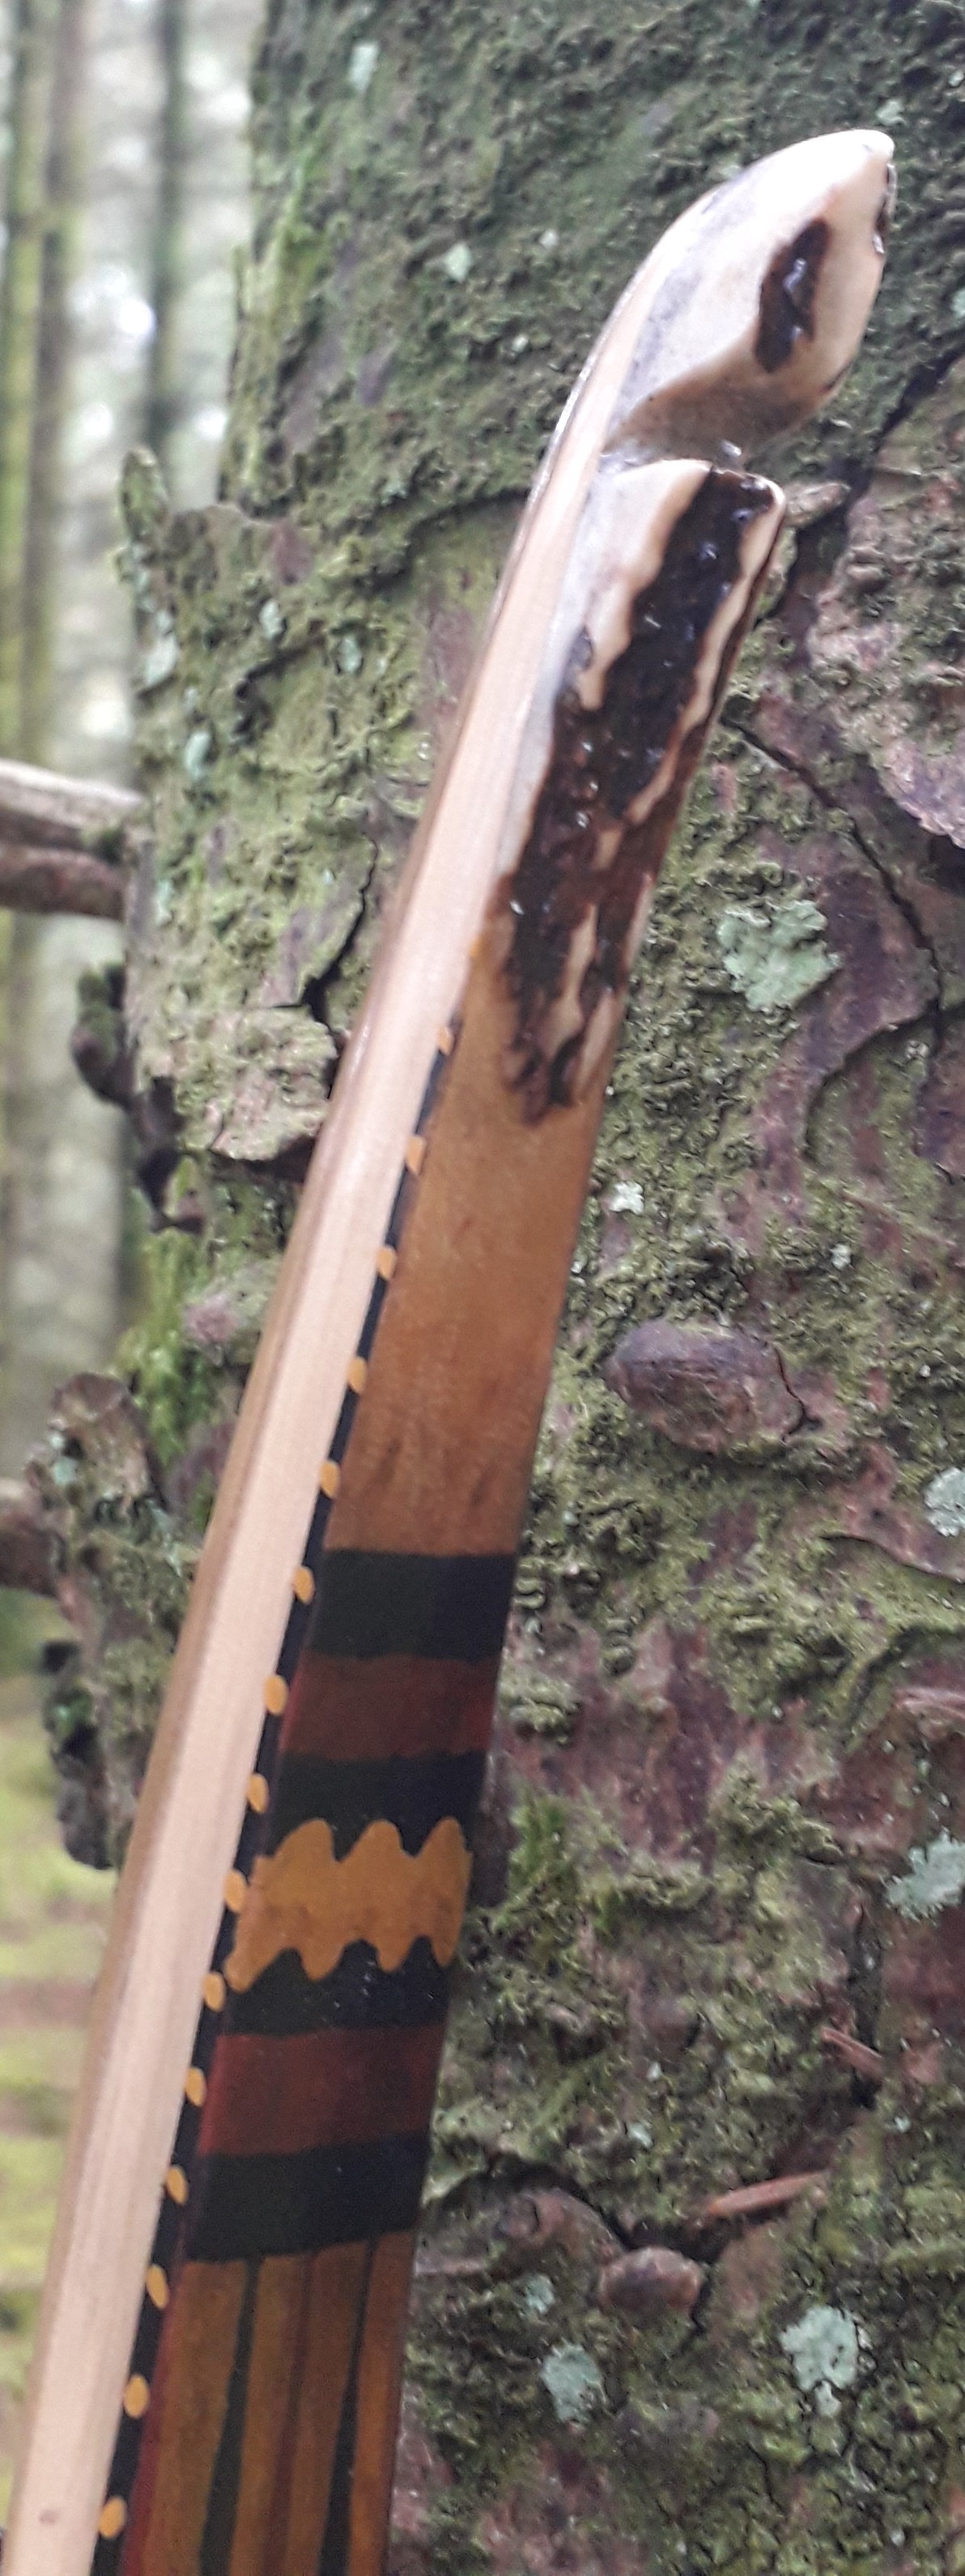
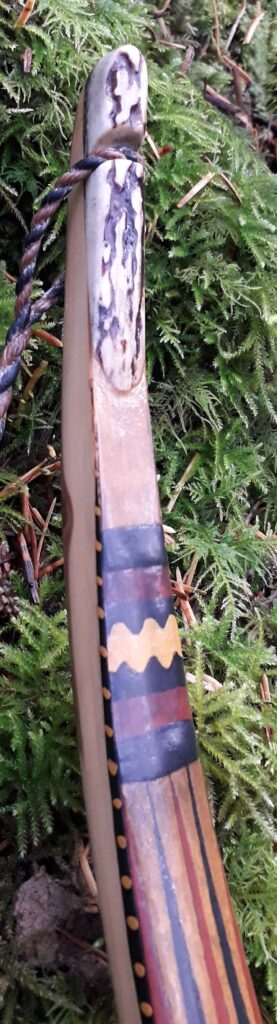
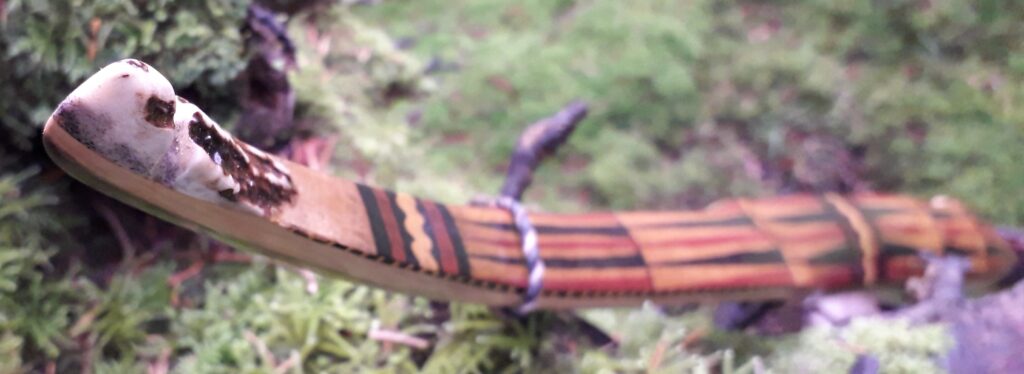
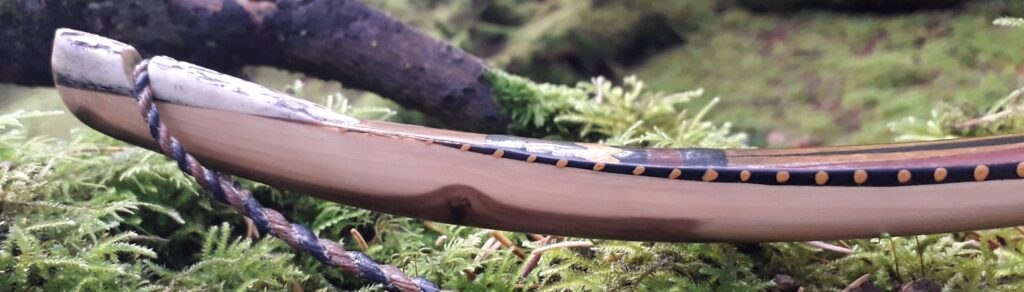
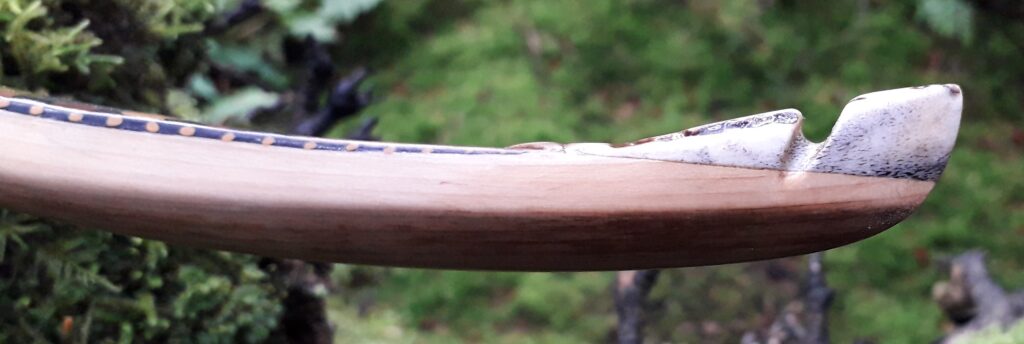
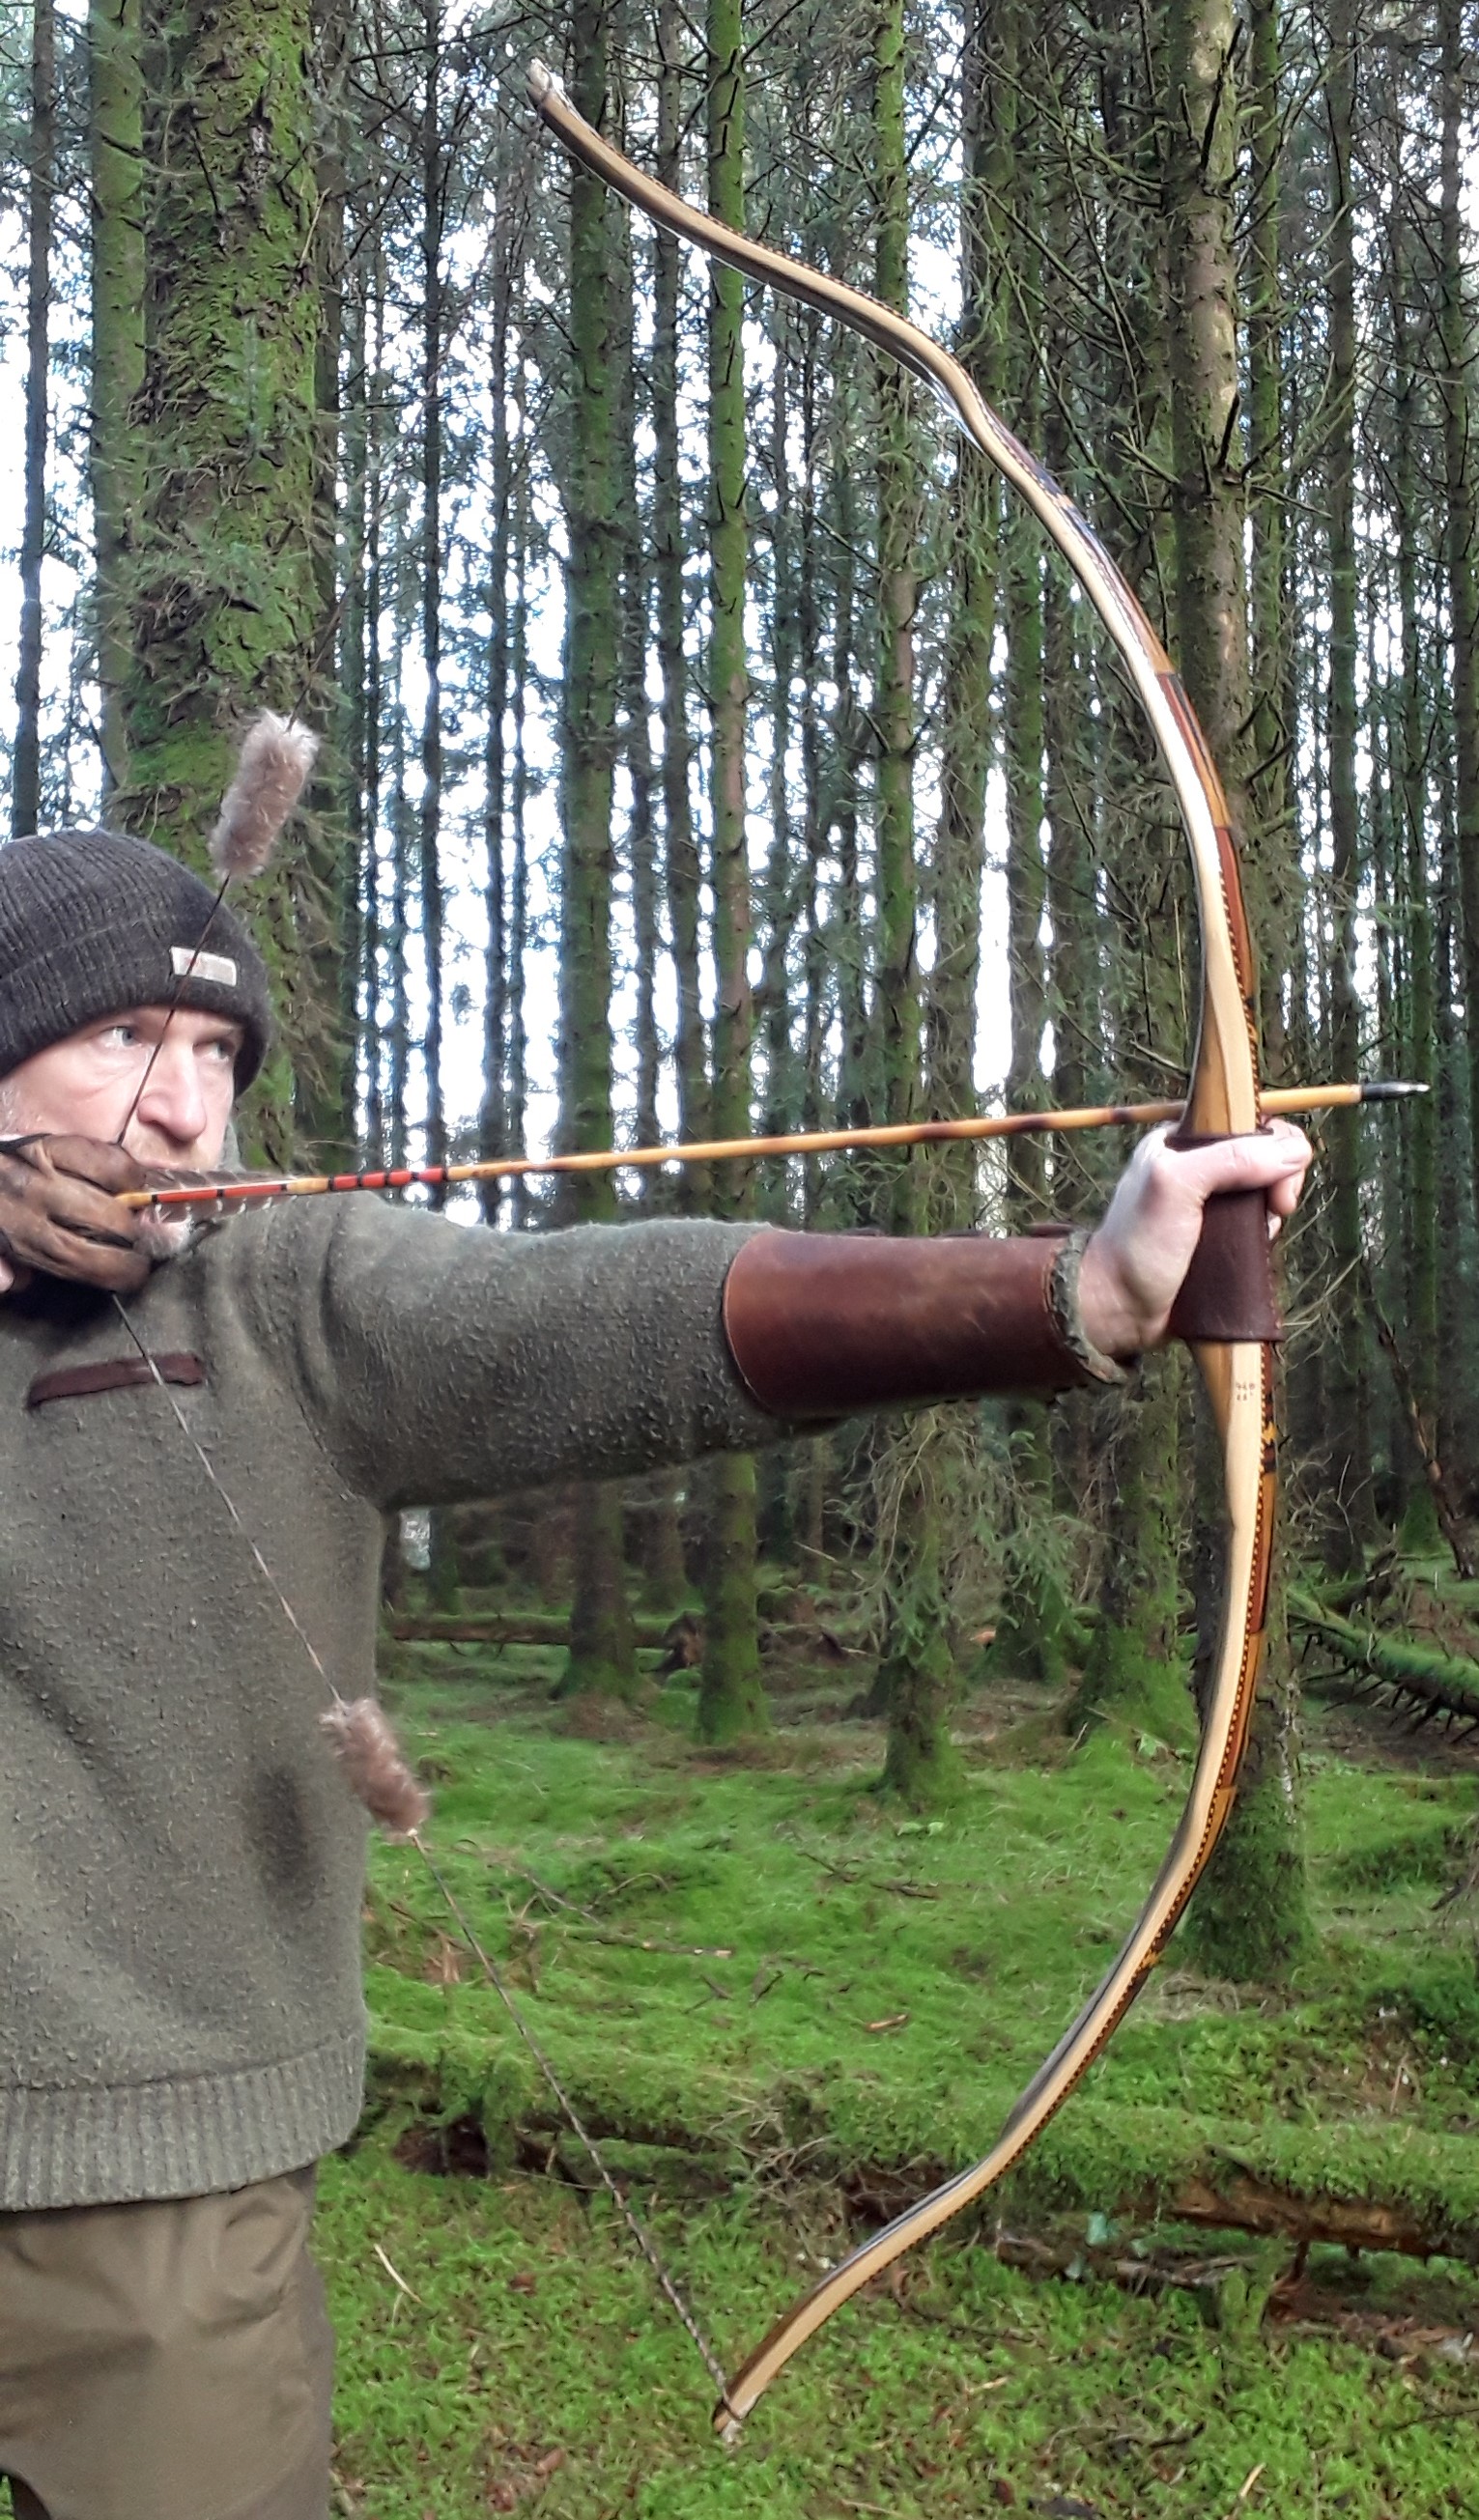
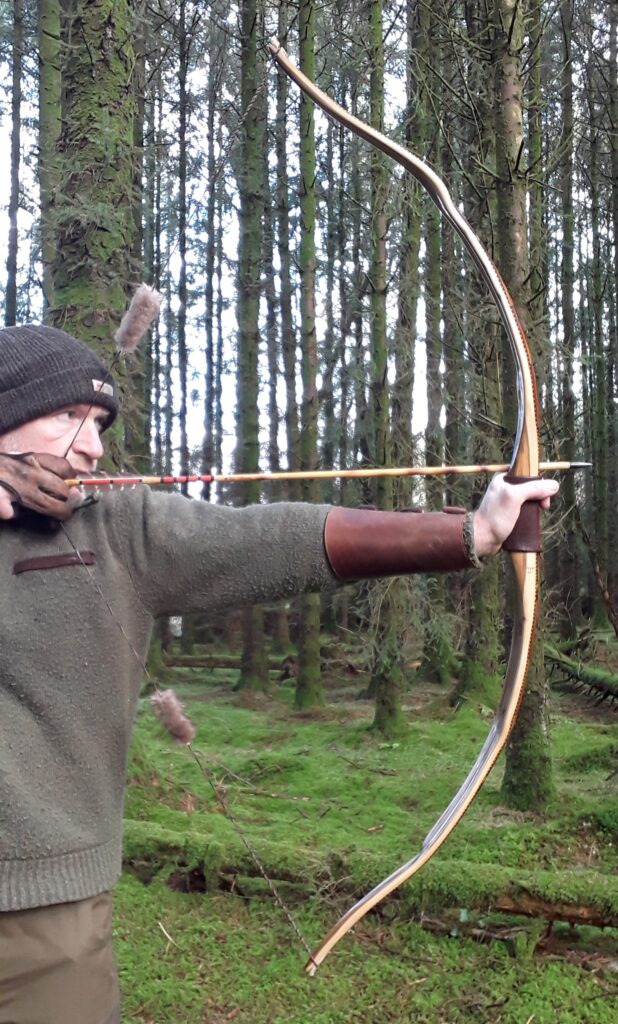
Now to finish her up I decided to cut an arrow shelf into the handle as I personally love an arrow shelf and knew it would enhance the pointability of this bow significantly. And for the tips I went for wild red deer antler overlays.
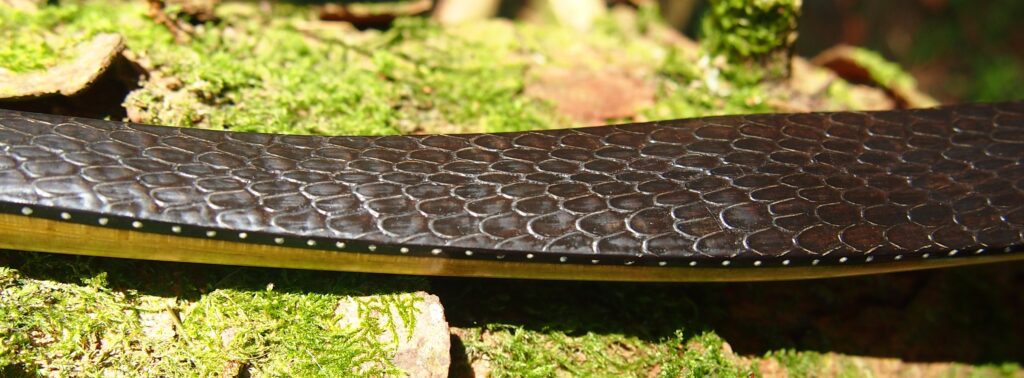
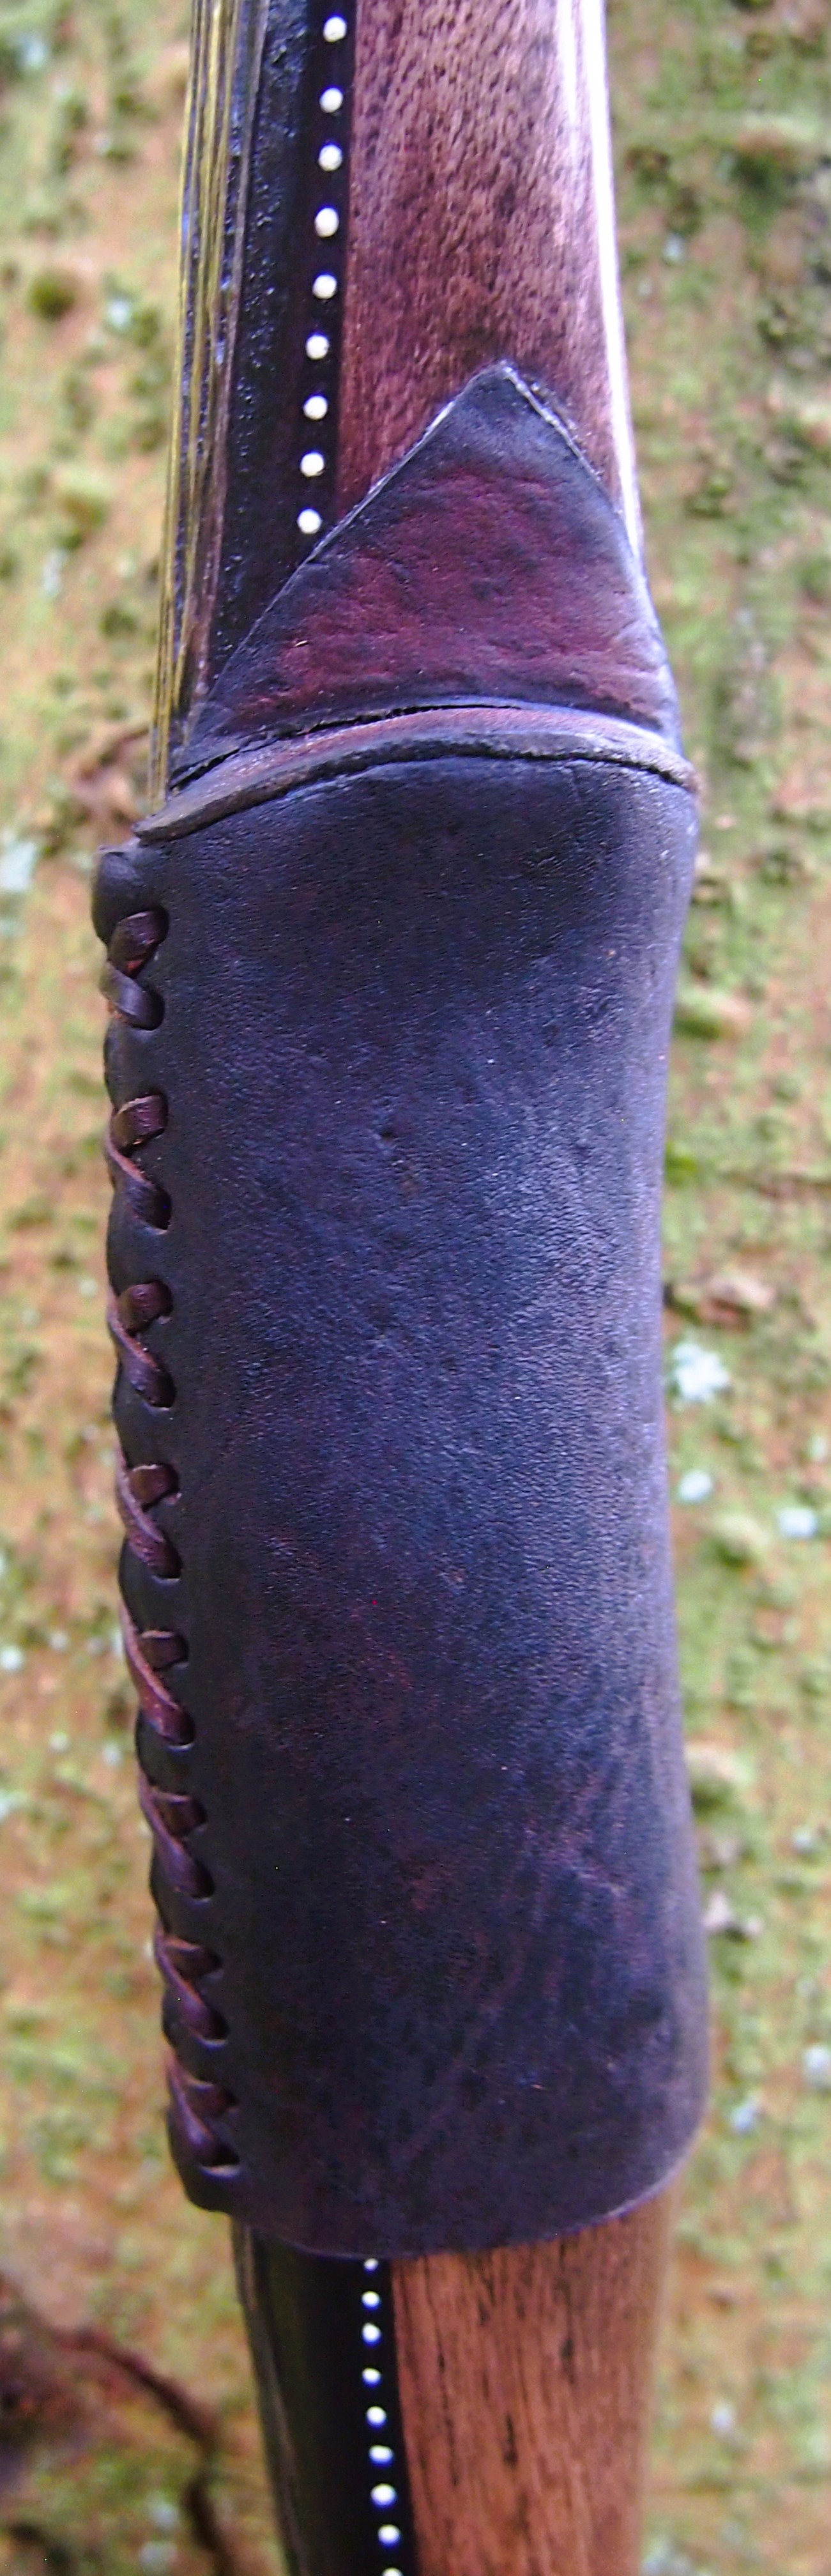
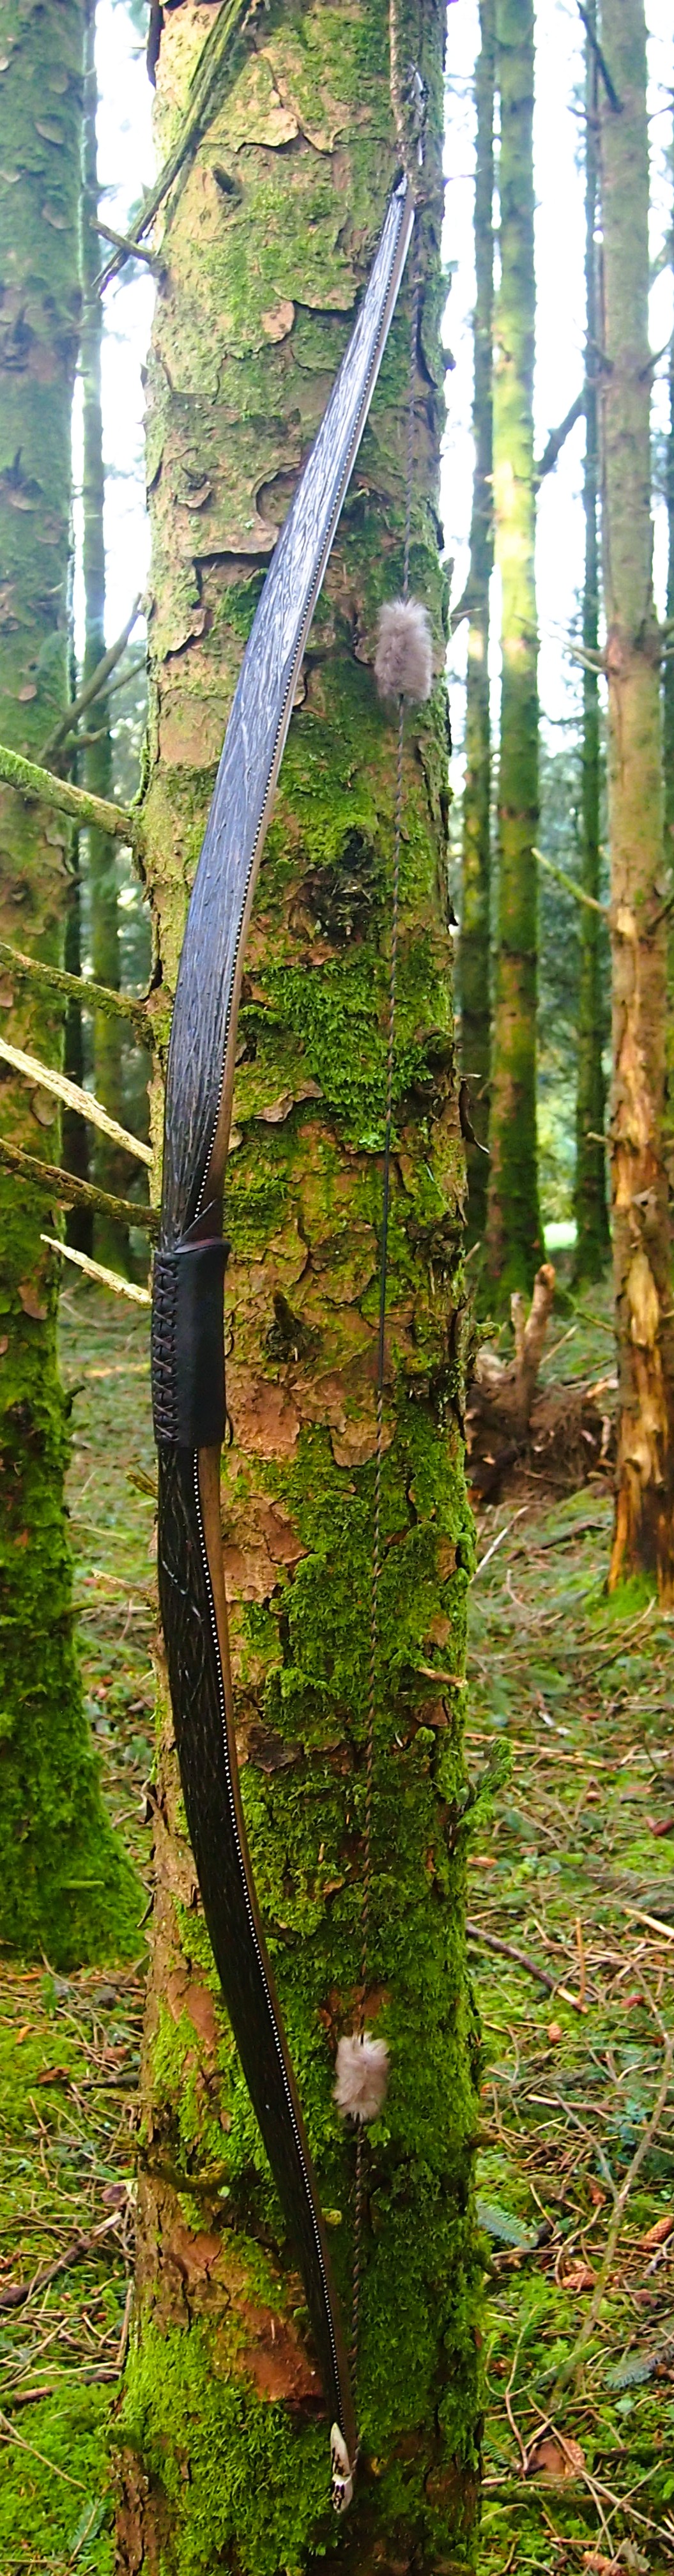
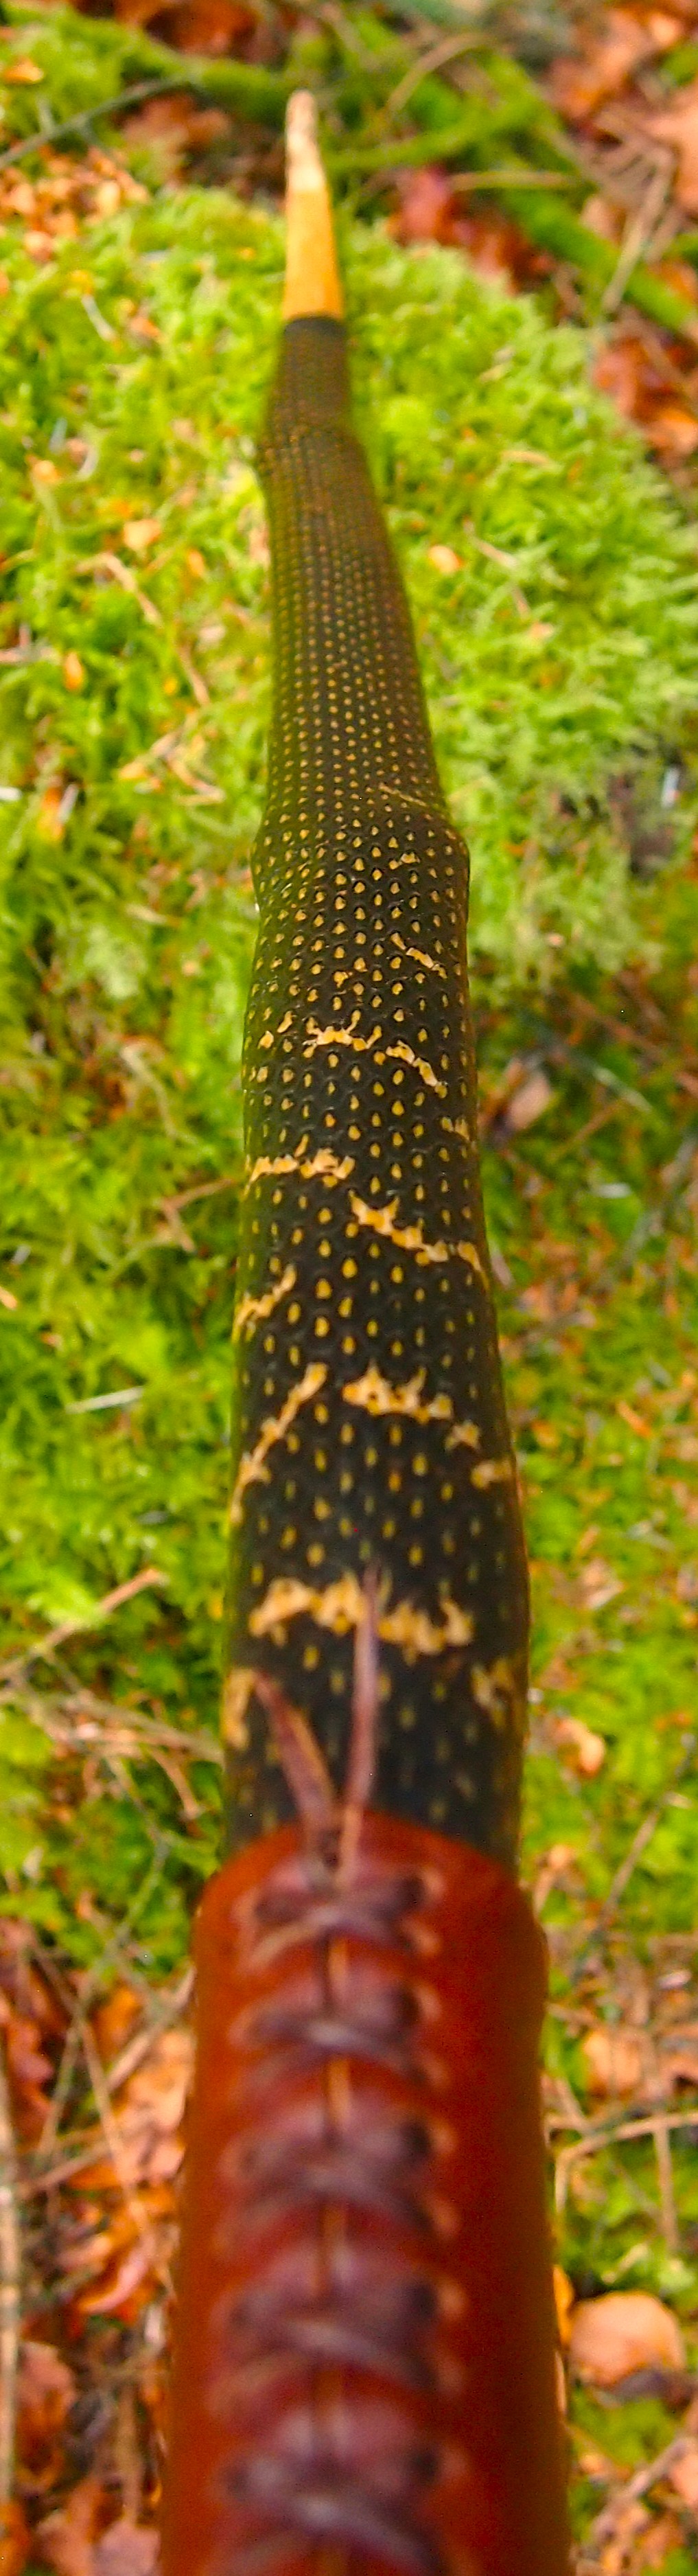
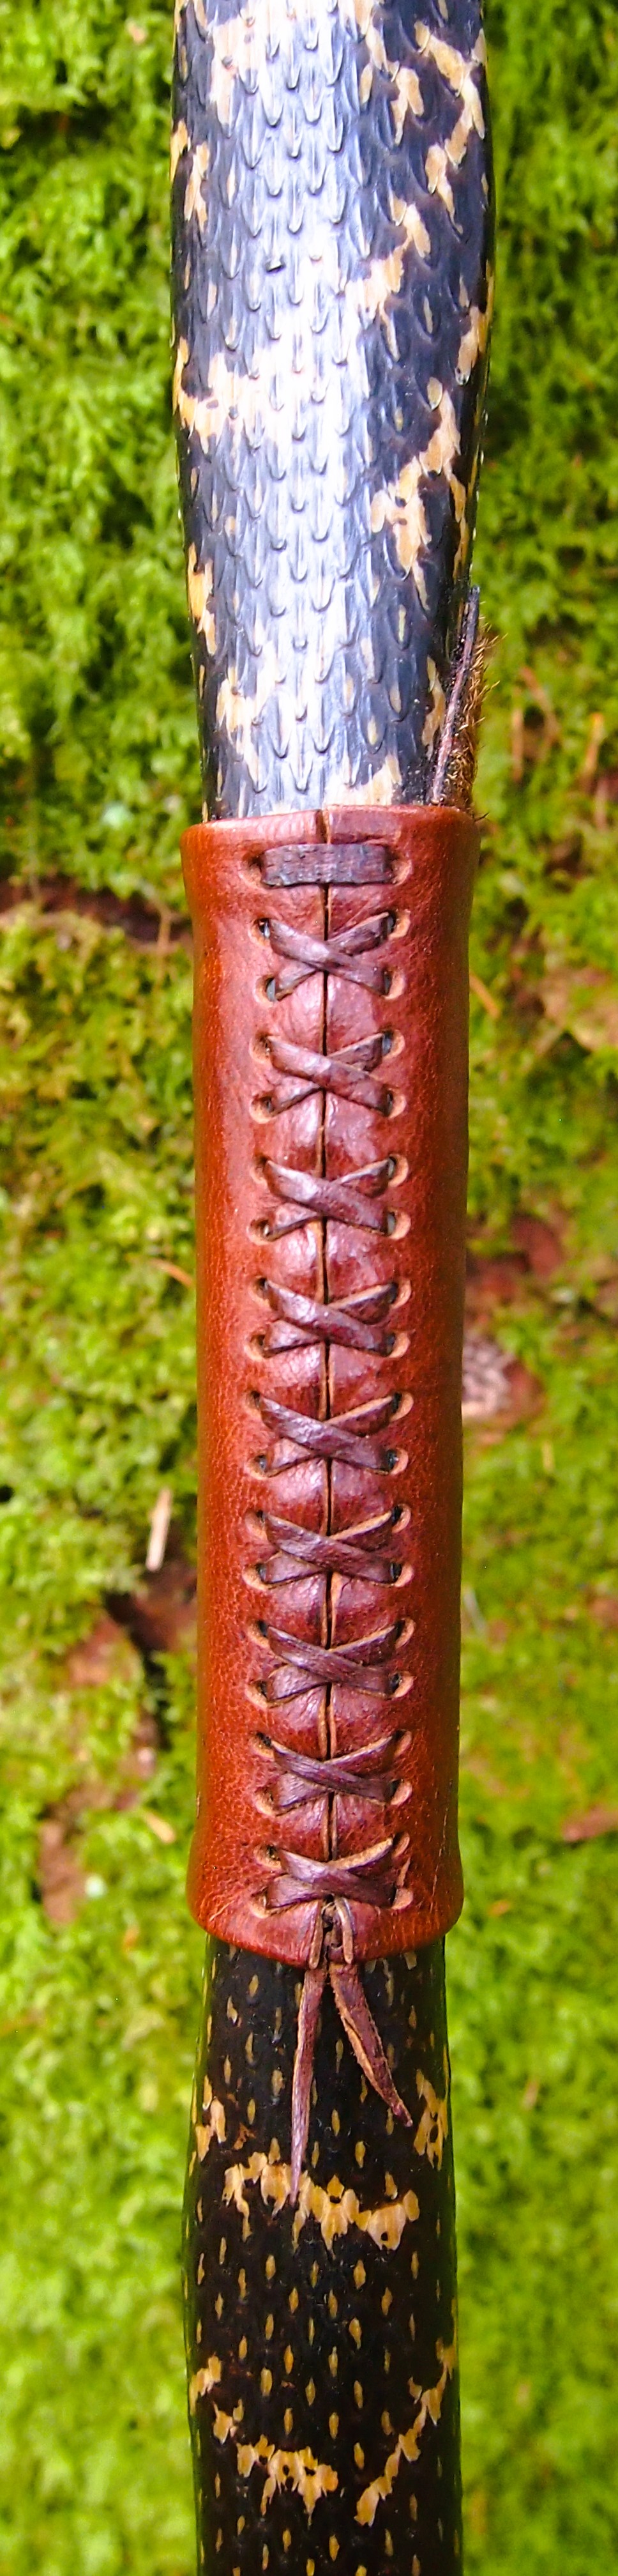
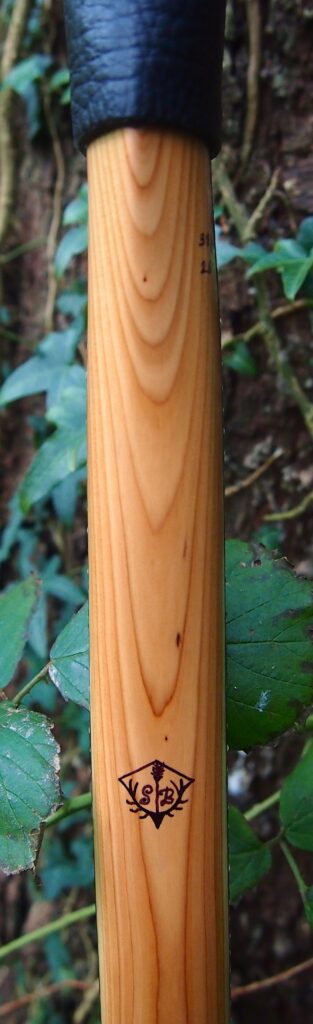
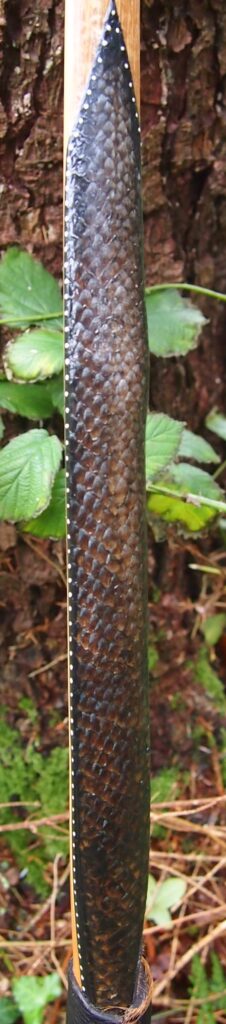
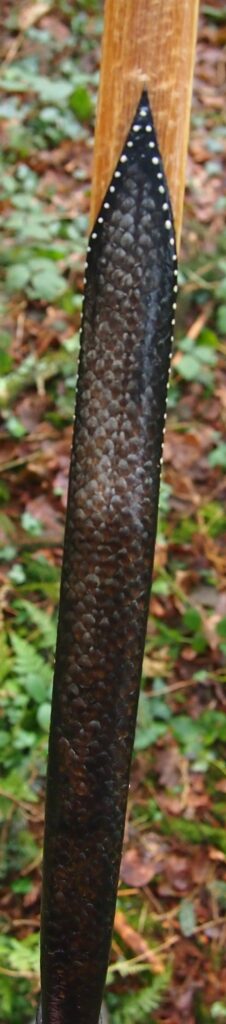
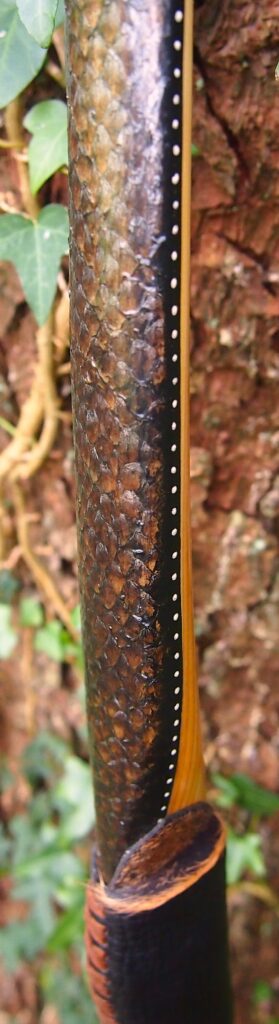
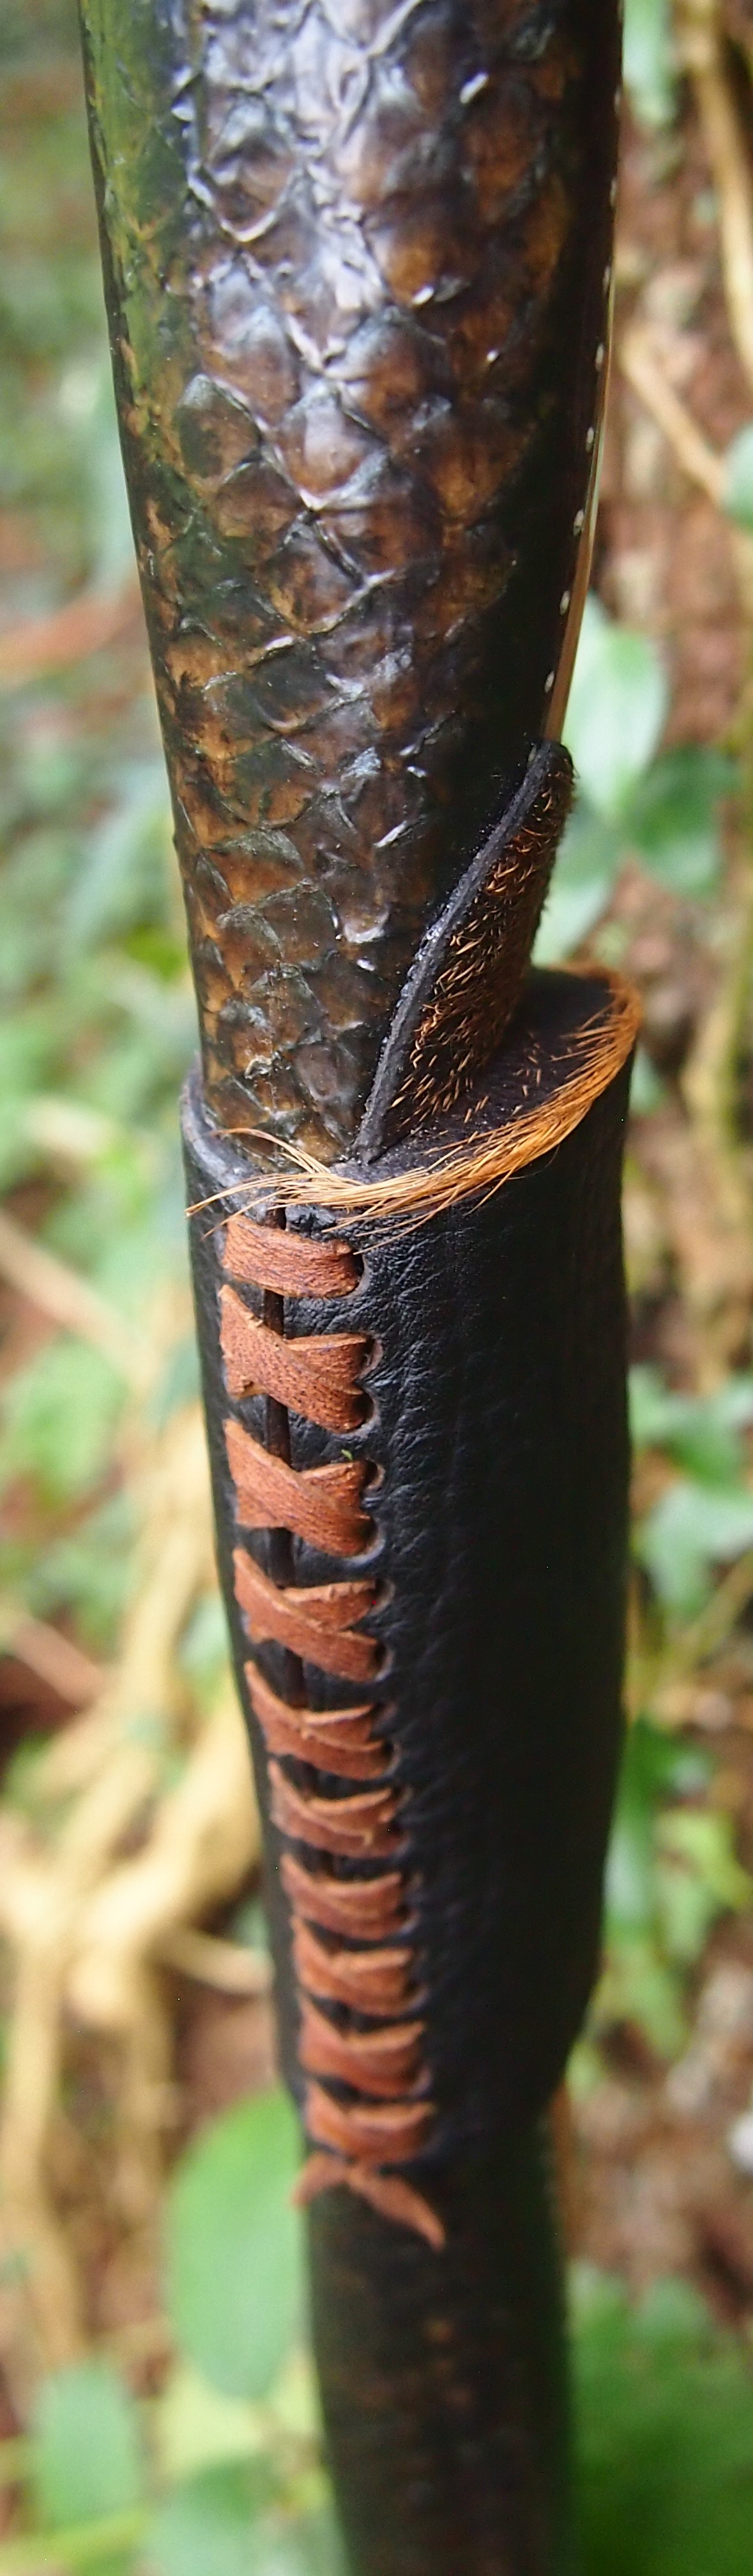
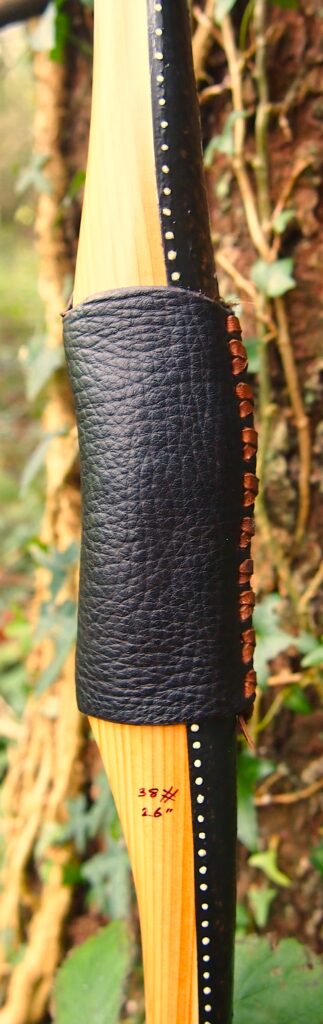
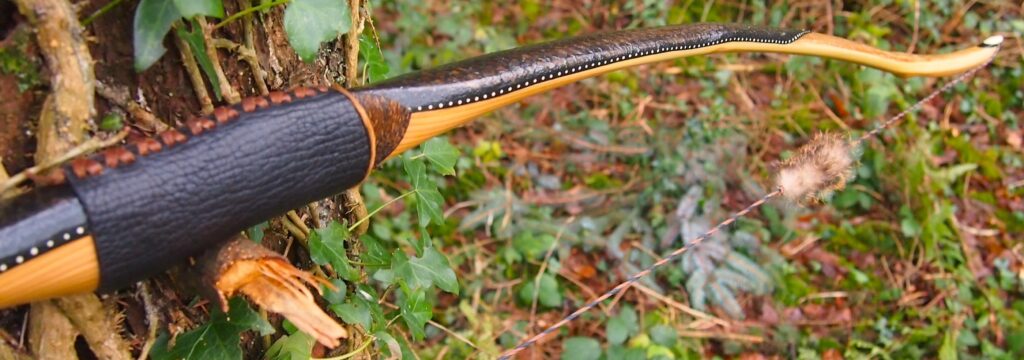
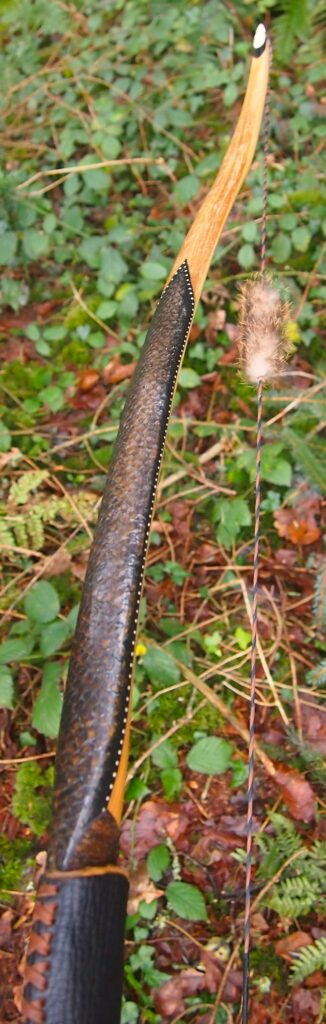
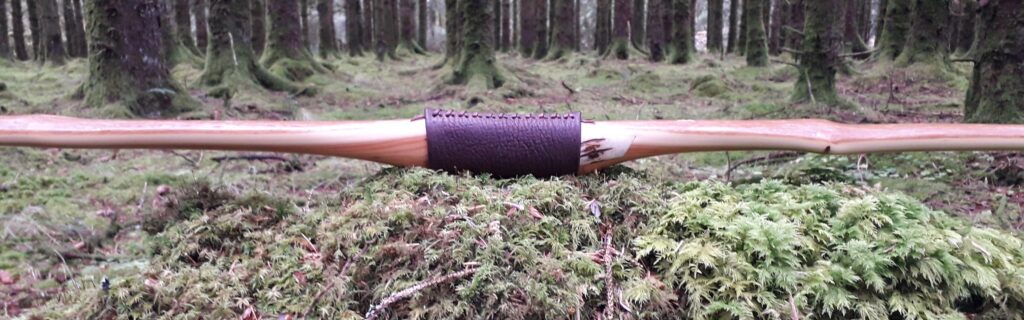
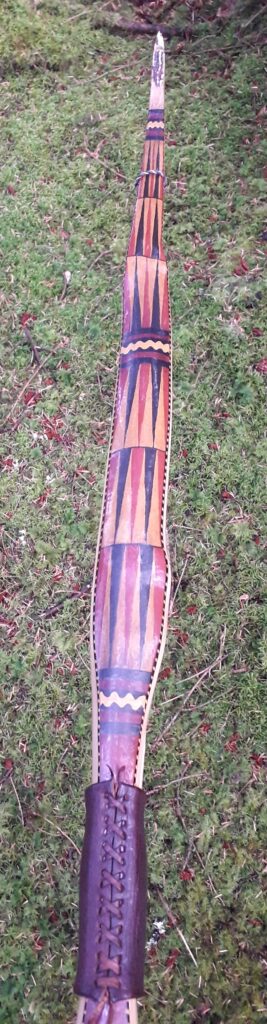
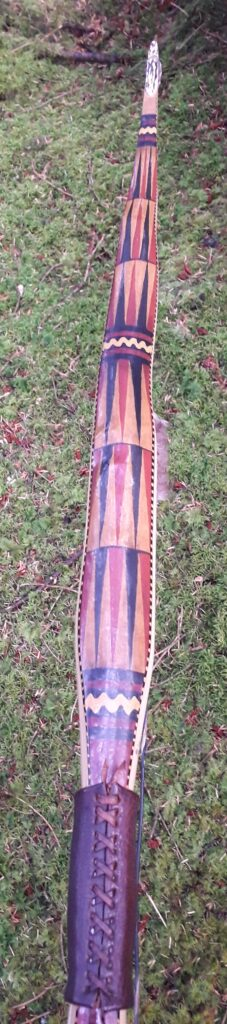
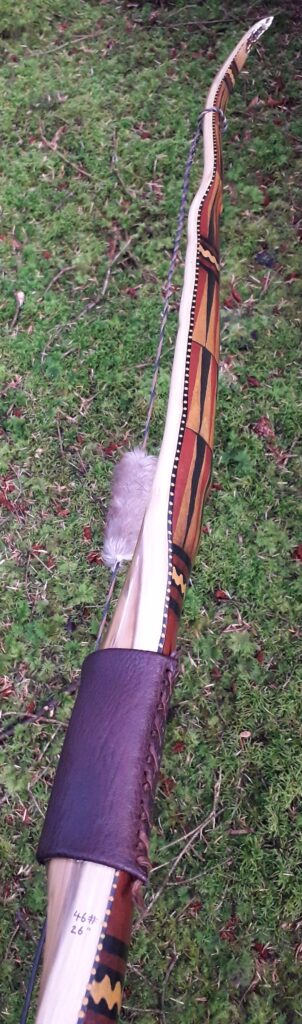
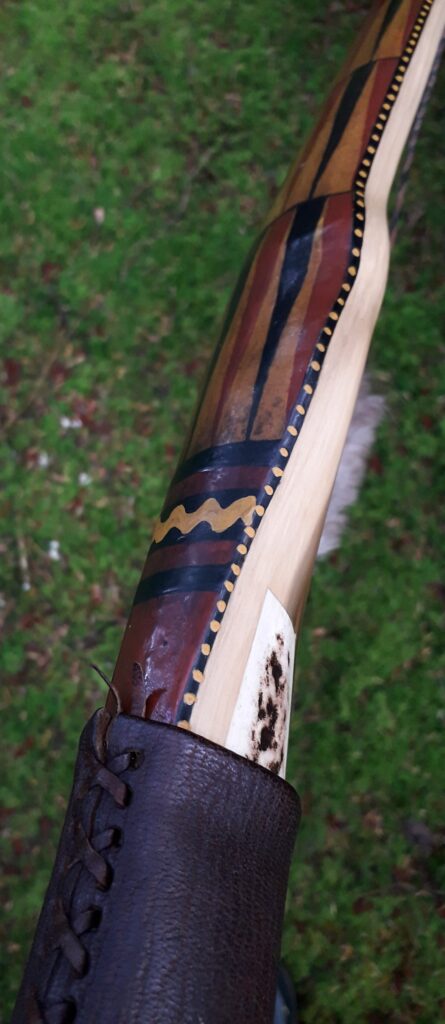
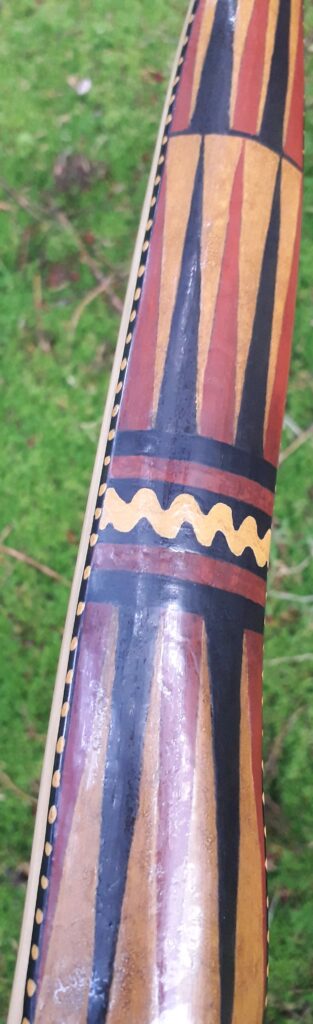
Whilst the sinew backing on this bow provided great functionality, it did look a bit plain, so I decided to cover up the rather bland looking sinew with a couple of nice dark brown/purple cobra skins I’d had lying around for ages. The edges of the skins where then sealed and decorated with white dots made from ground deer bone dust mixed with glue and applied with a sharpened stick. I find that this edge work really helps to make the skins pop.
For the handle I ended up contouring the back of the grip to create a very slight pistol grip with the dip pulled up nice and tight to the arrow shelf so as to keep the arrow as close as possible to the top of the index finger of the bow hand. I really find that this little detail allows me to shoot a bow instinctively with considerably more accuracy through enhanced pointability.
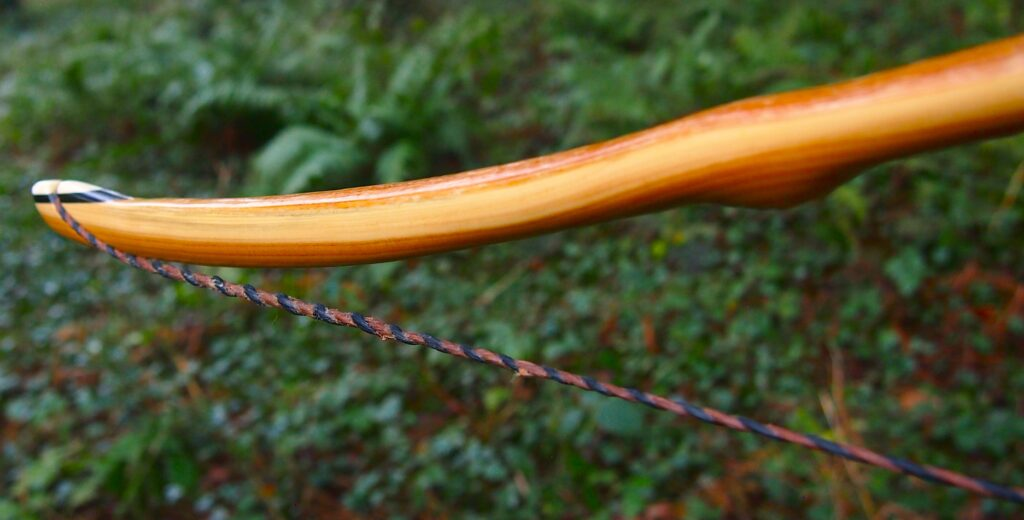
After sanding I sealed her up with 8 coats of danish oil. Then the final extra fine sand and pumice polish was finished off with my favourite home constructed linseed oil/bees wax paste wax polish, setting her up for a nice deep satin look to compliment those snake skins and the wonderful golden yellow of the osage heartwood.
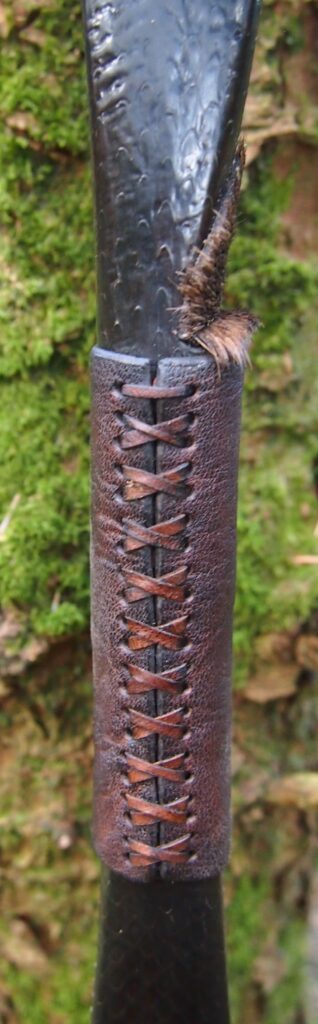
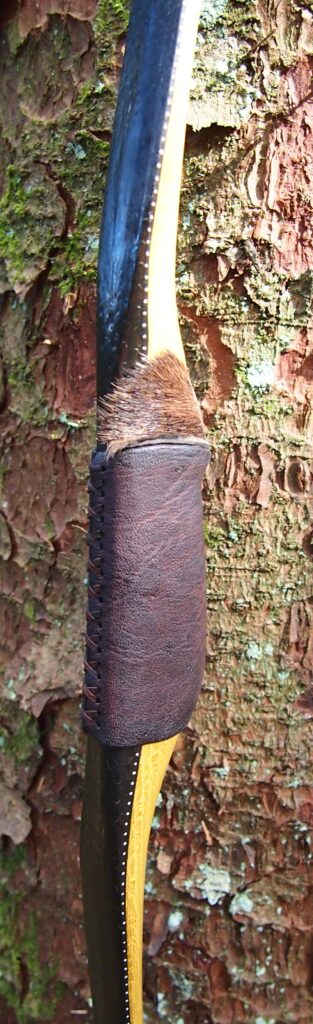
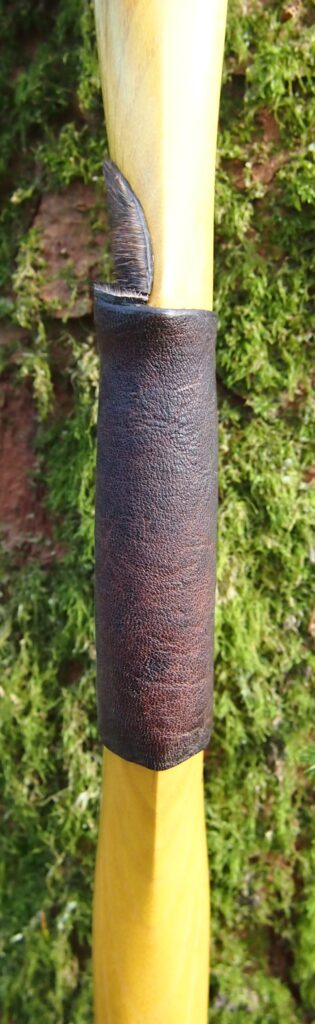
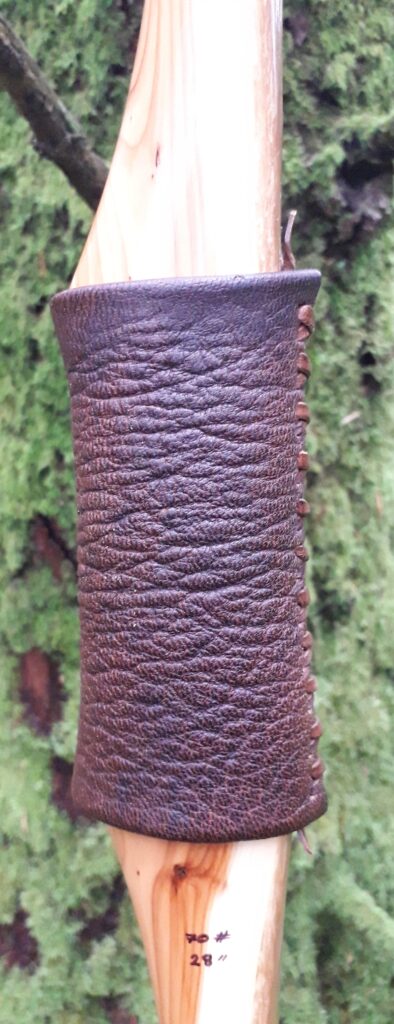
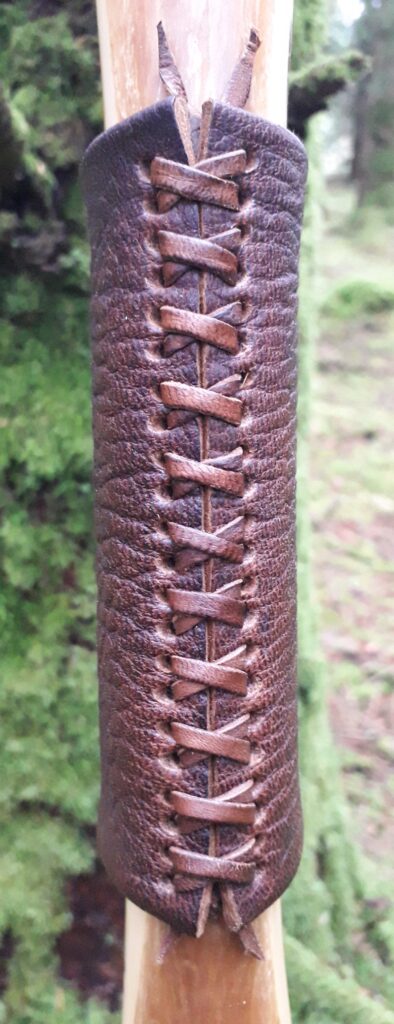
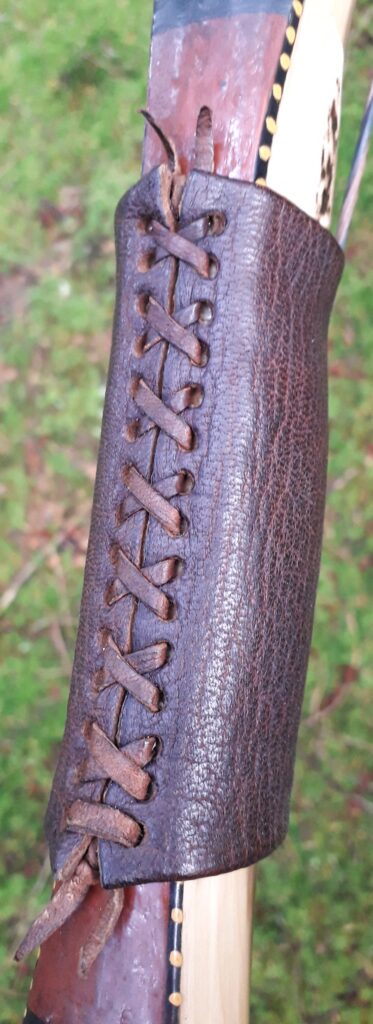
For the grip I found a nice rustic piece of home produced bark tanned red deer leather laced up with some roe deer leather thong. And for the arrow pass/shelf I fitted a couple of nice pieces of natural coloured hair on bark tanned red deer shin leather. Which is a better looking wild and rustic version of the commercially available “calf hair” leather the archery suppliers sell!
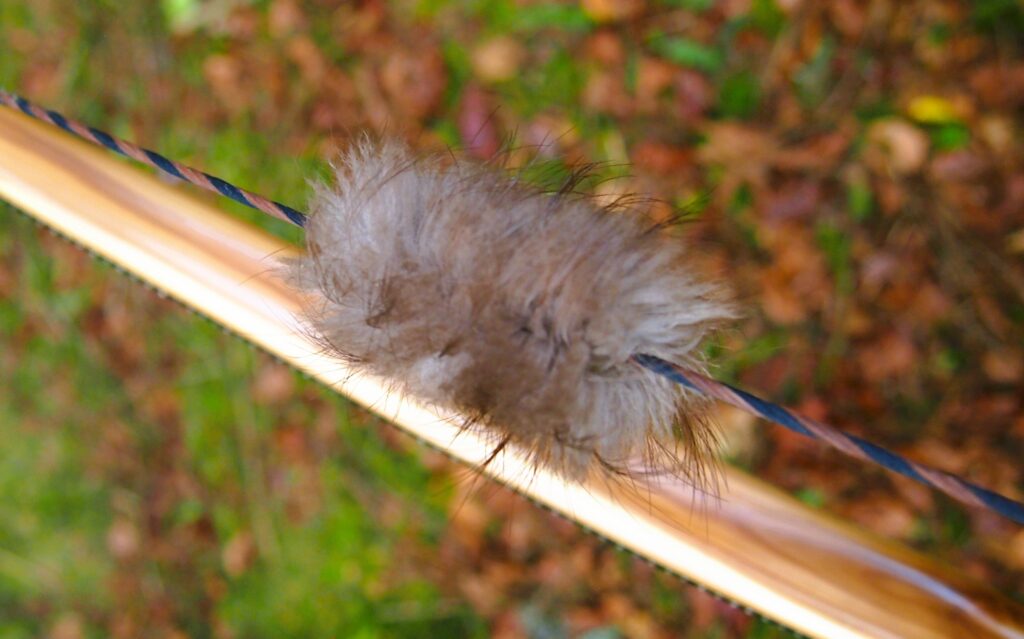
Fitted with a custom built ultra low diameter fast flight sting, I put a dozen or so 50# 550grain doug fir arrows over the chrono to see how she performed. The chrono recorded an average arrow speed of 168 FPS, which is about what I’d expected given how spicy she felt when first shooting her it. Easily capable of being classified as a “hunting bow” and very accurate and enjoyable to shoot split fingers and instinctive.
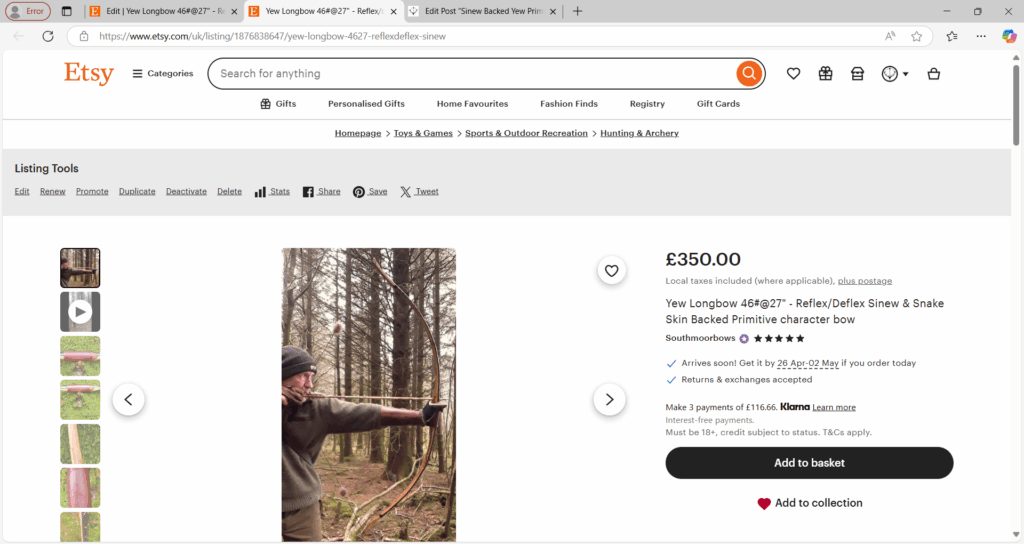
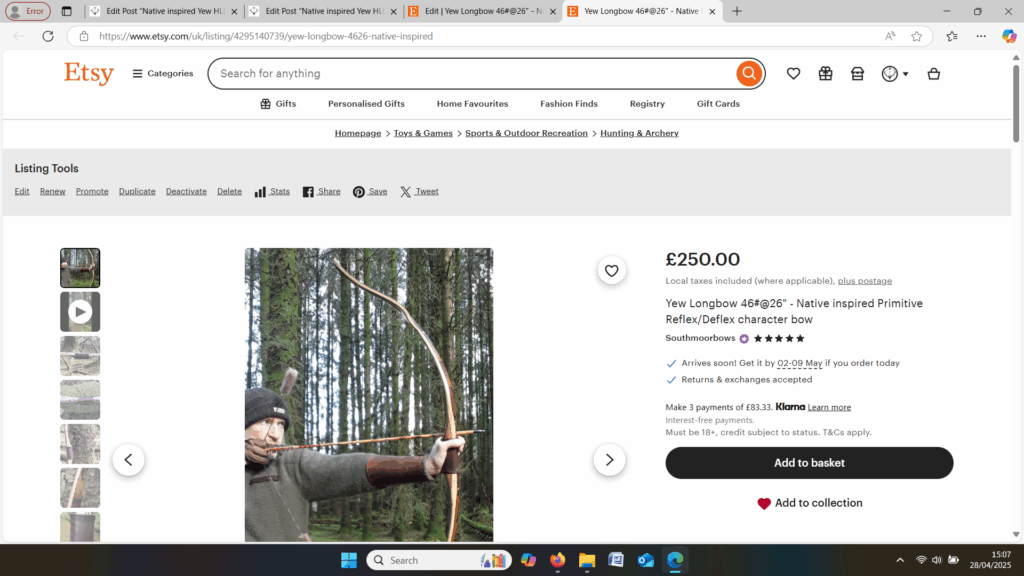
This bow is now available to purchase through the Southmoor Bows Etsy Shop, listing available here:
If you have any questions, feel free to contact me either here, or through the shop!
Here are her stats, hope you like the photos and video!
Draw Weight: 52lbs at 27”
Mass: 650 grams
Length NTN: 60” (asymmetrical limb layout)
Width: 1 7/16″” at widest part
Tips: last 4” static reflexed, 1/2” wide
Back: Crowned with undulations. : Pyramidal face profile
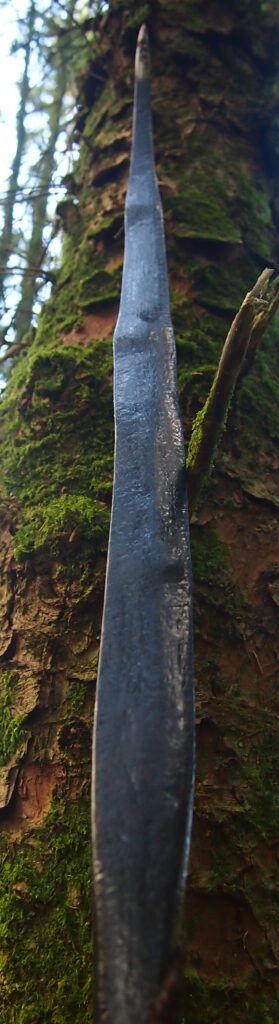
Belly Profile: Working limb sections rounded D shaped, transitioning at the tips to a ridged cross section.
Tiller: Eliptical. 1/8” positive
Brace height: 5.5″