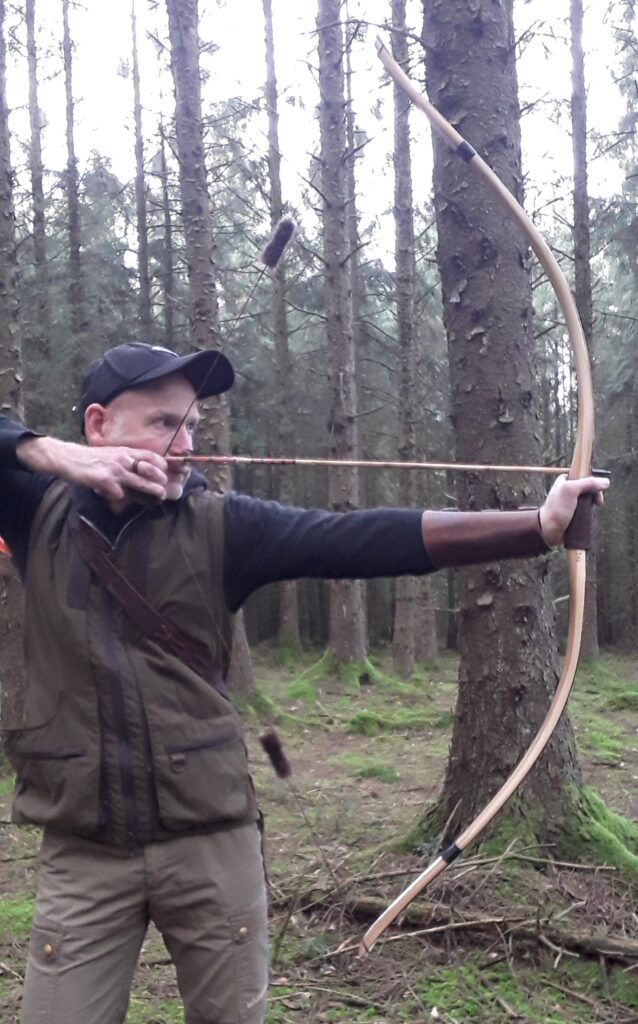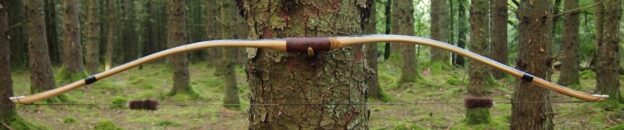
I’m not going to lie, this bow was one of the most challenging builds I’ve ever experienced. The stave which this bow was built from was an impulse buy off Ebay back in 2018. The listing pics showed a fairly clean looking vertically grown branch stave around 3-4″ in diameter and around 70″ long if I remember right.
And what was very obvious from the photos was the significant amount of snakiness through out the entire stave. I like snakey staves so I thought I’d give it a shot and pulled the trigger on it. And I think I only paid £80 for the stave including delivery, so a reasonable price for what looked like a nice, clean albeit “characteristic” stave. What a steal, right!?!
When it arrived however I was a bit disappointed to see a large drying check running most of the length through the stave, and this deep crack was right down the middle of the face that ideally I would have placed the bow I wanted to make within. The position and depth of the crack was going to require a totally different face to be used as the back of the bow, but this would mean a massive amount of uneven reflex and deflex would now have to be negotiated throughout both limb sections and the handle section in order to get this stave from log to bow.
The stave was sold as “seasoned” and looking at the crack it had acquired, it had probably been stored somewhere that caused it to lose too much moisture too quickly, probably outside in the sun. Even with some moisture already having been lost though, this stave was far from seasoned, and as soon as I started the work of debarking the newly chosen, less favourable face side, I could feel that I was working with wet wood, so I stopped working on this stave immediately, painted the stave ends with glue and parked it in the barn rafters to season properly. You get what you pay for I guess!
That stave got picked up, looked at and put back into the rafters more times than I care to remember. Each time I gave it a looking at, I just thought to myself, not today, and put it back in the rafters, opting to work on something easier instead. But then back in the autumn of last year I saw a YouTube short posted by a bowyer I admire and respect, who had just finished up a really nice snakey osage bow. That video caused me to go and have another look at that bloody awkward looking Ebay stave I’d been avoiding for several years. It’s amazing how motivational bow envy is isn’t it!
So I got the bark off the only side which could possibly produce a bow frow, and I drew some vague profile lines on it. And after 20 mins of band sawing away all the gash material, I was left with a very wiggly looking bow blank which would be my starting point.
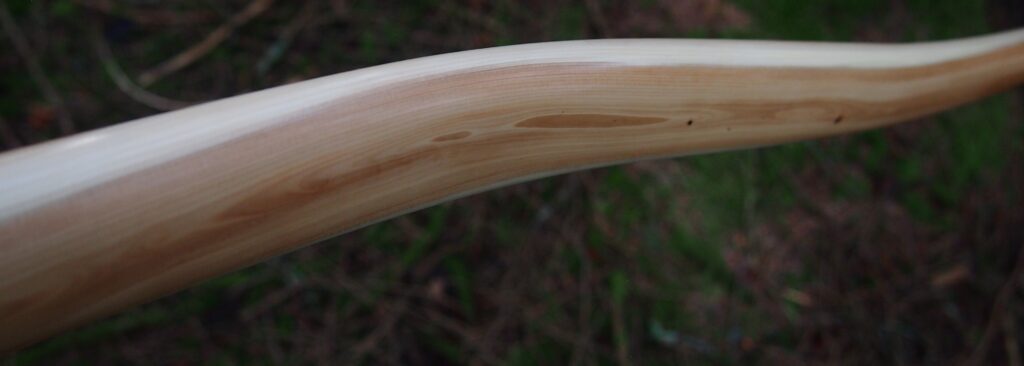
To be honest, once I was into this stave and could see all the lovely dense clean heartwood, I began to have a bit more faith in the prospect of this hunk of wood becoming a bow. Although if I’m honest, I was still struggling to see how I could shape it into something workable.
The main issue was the massive amount of reflex right were the handle needed to be. I’m talking around 30 degrees of deflexion between the ends of what would be the fades. If this reflex was in a limb then I’d probably be able to steam it out easily, as the mass in the limbs is nothing crazy. But the handle section on a bow intended to be stiff would require not only steam, it would also need a considerable amount of faith in the good lord to straighten out!
Since I’d convinced myself that I had nothing to lose, I set up the wall paper steamer in an attempt to get the whole bow blank cooking, which in itself was a nightmare as this blank was so crooked that it would not fit inside my regular 6″ wide steel tube because of all the twists and turns that the stave carried. So I ended up having to use three short 4″ diameter stainless steel tube off cuts all sleaved over the blank in various locations and foil wrapped together at the joins to keep the steam in.
I gave the blank an hour and a half of steaming then pulled her out and began frantically bending and clamping it to a straight piece of 4″X2″. The idea here was to just try and get the blank somewhat straight in the riser section so that I could at least have somewhere to start out from.
After a couple of days with the bow blank left clamped to the form, I carefully unclamped it expecting it to spring back to it’s original shape, however I was pleasantly surprised to see that the riser section, whilst by no means straight, was now at least much less reflexed. And the limbs, whilst still snaking off all over the place, where at least now roughly in line with the handle. Because before steaming, the tip alignment was out by about 6 inches!
Even with all this success though, I still had a bow blank with a fair bit of reflex in the handle section, plus a top limb with a fair serving of deflex in the inner third. The bottom limb had a lot of reflex in the outer third too, plus a massive side cast coming right out of the fade. Lots more work to do before I could get this blank even close to being able to take a string.
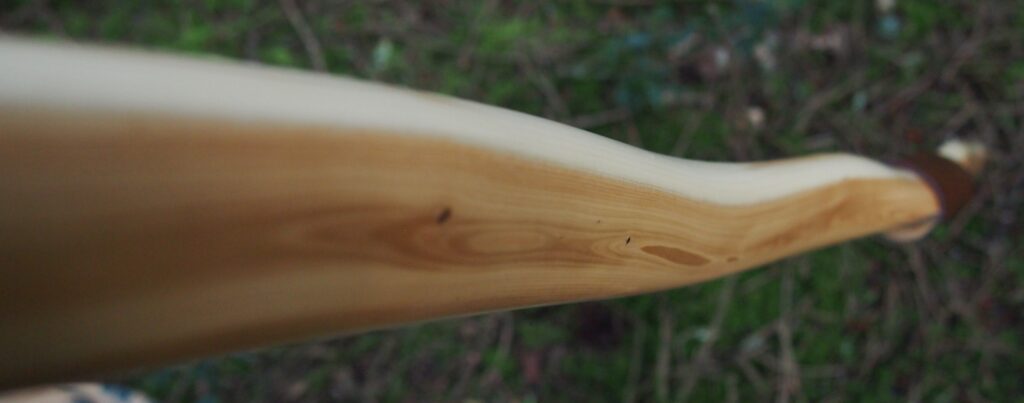
So I pondered over side profiles and thought I’d try and use the natural reflex/deflex shape to my advantage. And the only way I could incorporate the natural side profile wiggle would be to keep a bit of the reflex in the handle, but off set it by accepting the deflex in the inner third of the top limb. But of course in order to balance the top limb with the bottom limb, I would have to add deflex to the inner third of the bottom limb too. This looked like it would work out fine though as the bottom limb already had quite a lot of reflex in the outer third, which would have to be copied across to the outer third of the top limb in order to get both limb looking as symmetrical as possible prior to beginning the tillering process.
Lots more bending and straightening ensued shortly after. All of which was done with the heat gun. Now I don’t currently have a 5 curve form to fix bow blanks to for the purposes of shaping, so I had to use three different sections of various R&D forms which I do already have. Not a five minute job!
In fact, I lost track of the amount of times I took this blank to one of my formers to try and bend or balance out all the wiggles and bends, reflex and deflex. Quite honestly it was both frustration and exhausting work which took place over many weeks. And just when I thought things where looking aligned and balance, the blank would move back out of place and I’d be chasing it back to it’s intended position once again.
I don’t think I’ve ever been so close to writing off a yew blank as clean and beautiful as this one before, but this blank was stressing me out big time. Yew, especially the dense springy stuff like this was, can be an absolute pain in the backside to convince to stay put after a heat treatment. And any bowyer worth his salt will confirm that repeated heating can cause it’s own array of problems, as repeated heating can easily result in hardening the wood to the point where it can become brittle. And that was exactly what caused my next problem.
The upper outer third just did not want to achieve the amount of reflex that the outer third of the bottom limb held naturally. So I just kept heating and bending that top tip over and over again in an attempt to get it to mirror the bottom limb tip. And just as it looked like I might have achieved my goal, and just as I was tightening down the last few millimetres of reflex needed in that top limb tip, CRACK!
I could have cried, literally!
Searching frantically for where the sound came from, I was mortified to see a 4mm deep crack right across the belly about 6 inches down from the very tip. Hardly surprising really given how dry and tempered this already narrow section of timber now was after so many attempts to bend it into reflex.
The original plan with the tips on this particular build was to make the tips slim and narrow, but thick back to belly, so that they would be static in reflex, but with minimal mass. So in their current roughed out form they were about 3/4 inch thick belly to back. But that 4mm deep crack was about to see that this tip would now need to be dramatically reduced in thickness in order to remove every bit of the cracked and damage wood.
But I’d already narrowed these tips down quite a bit side to side so by removing the cracked portion of wood on the belly side, I’d be left with 1/2 inch thick and 1/2 inch wide tips which simply would not be able to support the load of the intended draw weight of this bow without running the risk of whipping the tips and simultaneously losing all the reflex I needed to balance both limbs out.
What to do. After digging into that crack with the draw knife and rasp I was relieved to see that I was able to remove all traces of it. So now I paused to contemplate options. The only real action that I could imagine resolving the issue completely would be to apply a robust lamination to the belly of the now much thinner tip. This would support the new reduced thickness profile.
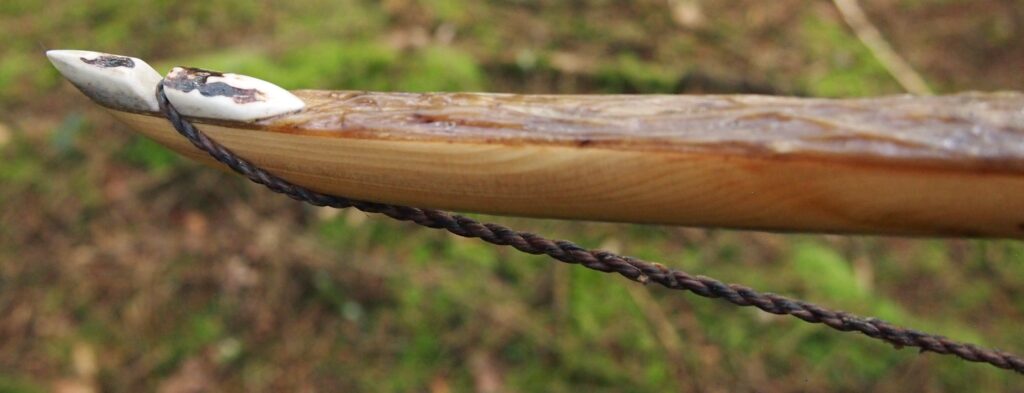
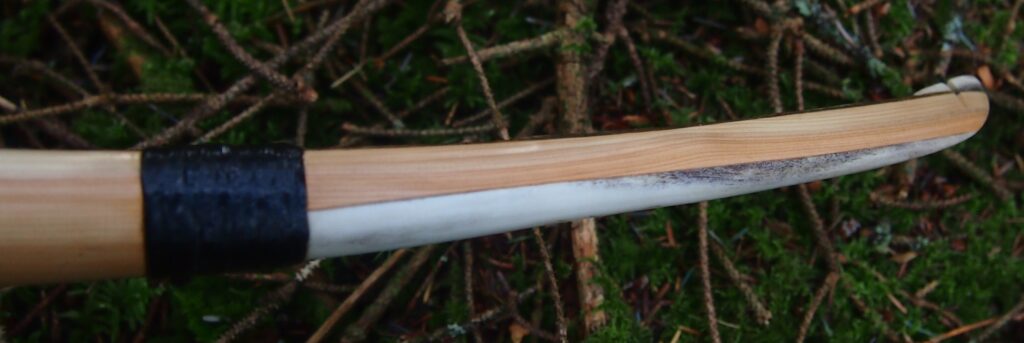
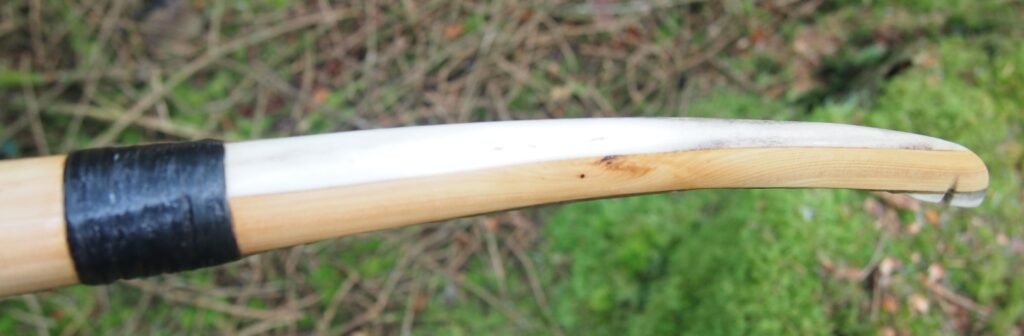
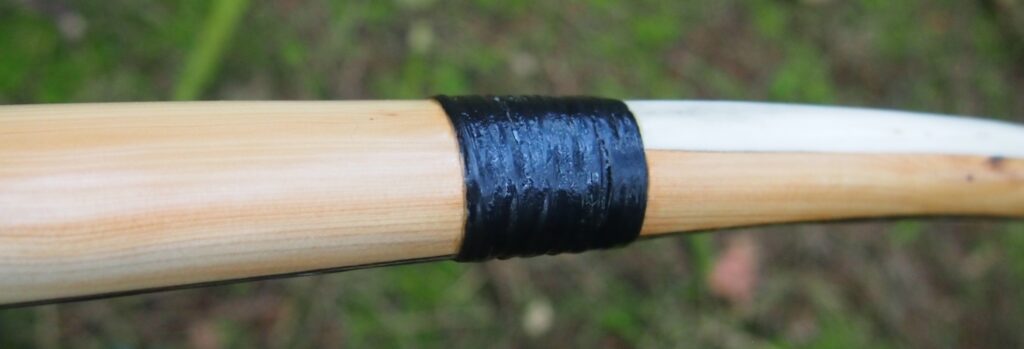
But with what should I laminate the tip with? What about deer antler!? You see antler is a great belly material. Antler is crazy strong in compression and looks far better than just sticking a strip of wood on top as a regular belly lam.
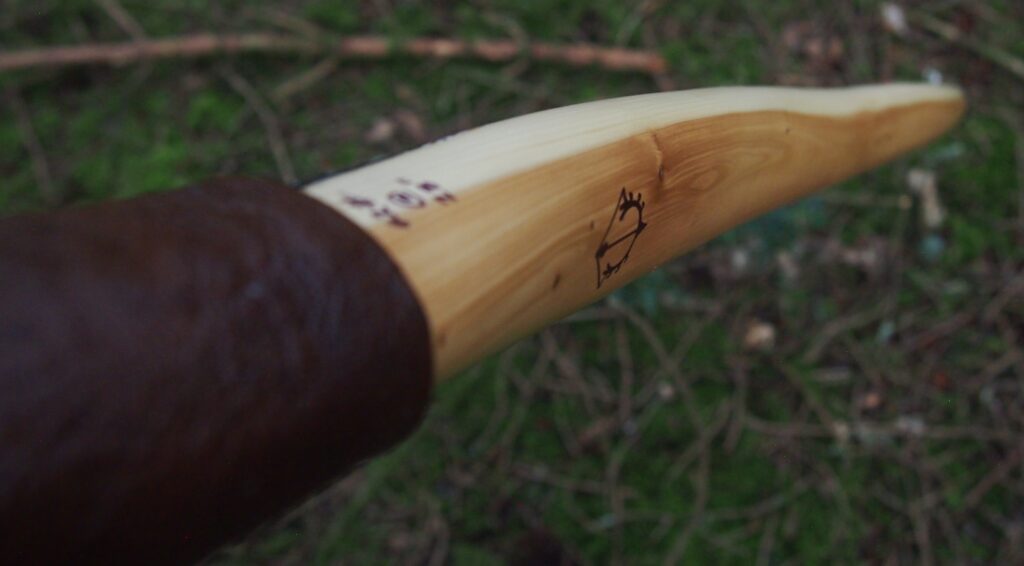
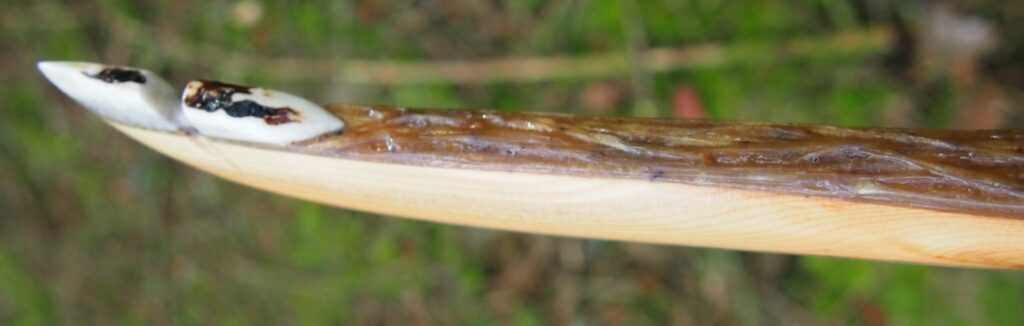
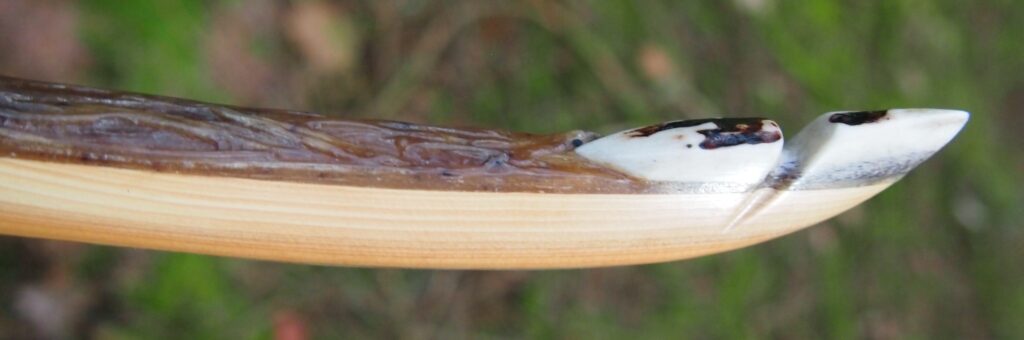
So after finding a couple of bits of suitable red deer antler which came from a stag I shot back in 2014, I shaped up a pair of tip belly lams which were then fixed tightly into position with EA40 epoxy. Whilst the tips were glued up to there antler lams, I had the whole bow set up on a rather complicated jig set up to maintain constant pressure between the lams, the stave tips and the reflex form, all whilst simultaneously maintaining the correct alignment through the handle section.
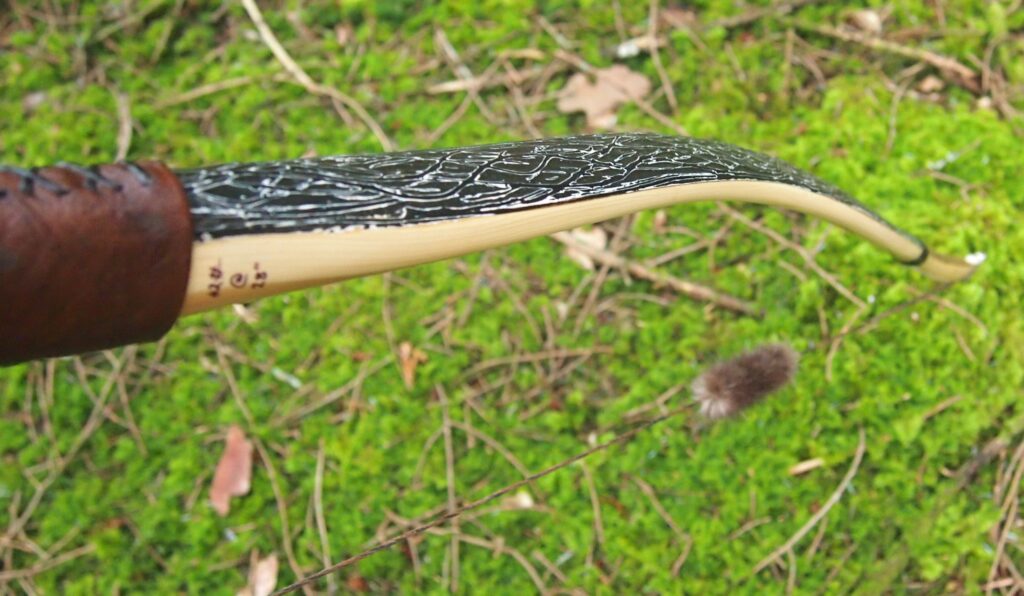
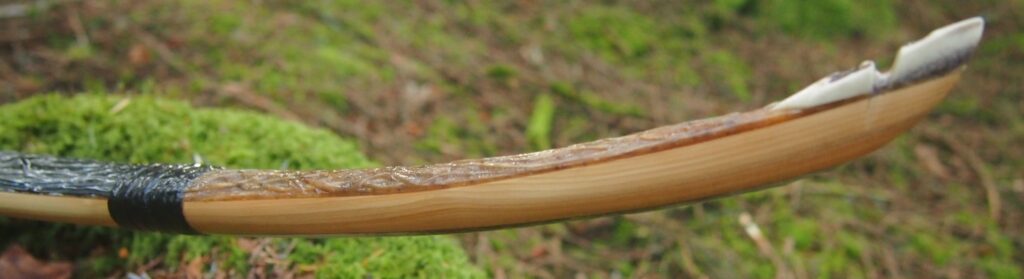
After 24 hours for the epoxy to cure out, I took the stave out of the jig for inspection. Success! Not only did the glue up work perfectly maintaining a really nice tight glue line, but the reflex that I was so desperately chasing was now locked in forever. The lamination effect is great for holding shapes into wood to the point that the tips were now not only looking perfectly balanced, but they were also now much much stronger than they would have been composed of just wood alone.
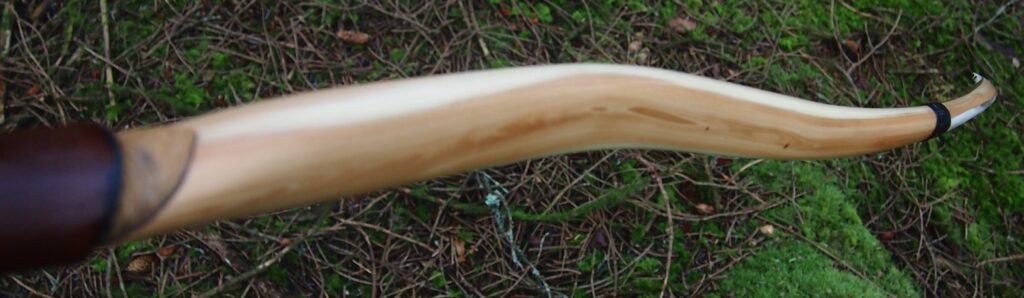
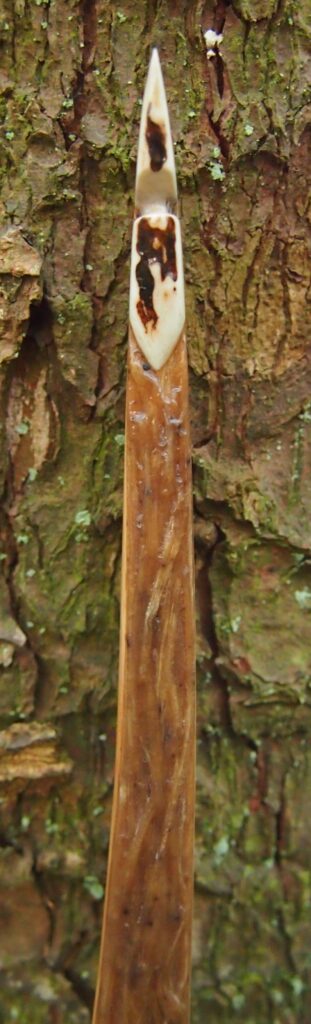
After a bit of shaping up I couldn’t help but admire the way the antler and wood looked together too. I always think that laminating a strip of wood onto a bow sometimes looks like an attempt to hide a bodged job, but the contrast between the wood and the antler on these tips looks very intentional and if anything, it actually improved the existing natural aesthetic of what was starting to look like a really beautiful bow.
And because a thin antler lams weigh less than the thicker wood that would have been needed to provide the same strength and support, the overall mass of the tips had now been reduced by adding the antler lams, thus maximising the efficiency of this bow even further. In fact the tips of this build are probably some of the finest but also strongest I’ve ever crafted.
Now I had balanced reflexed tips, I could balance out the deflex in both inner thirds of the working sections of the limbs. Again the heat gun let me slowly close in on the right shape and within a few more heat gun sessions I had this stave looking like it would take a pull from a long string.
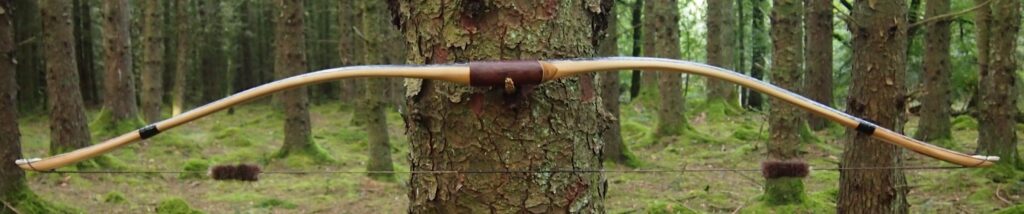
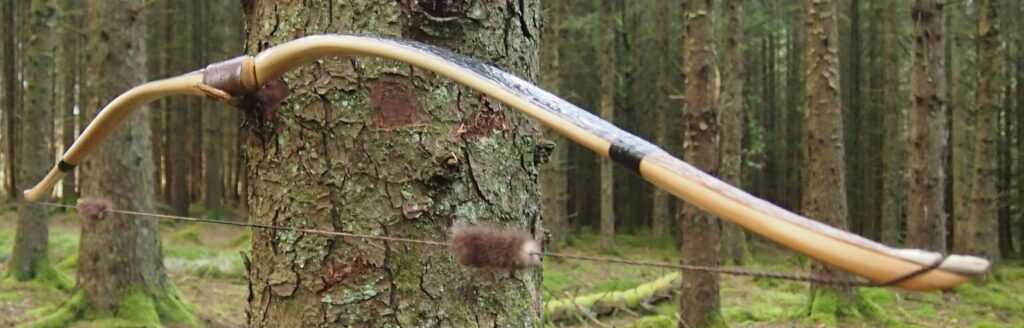
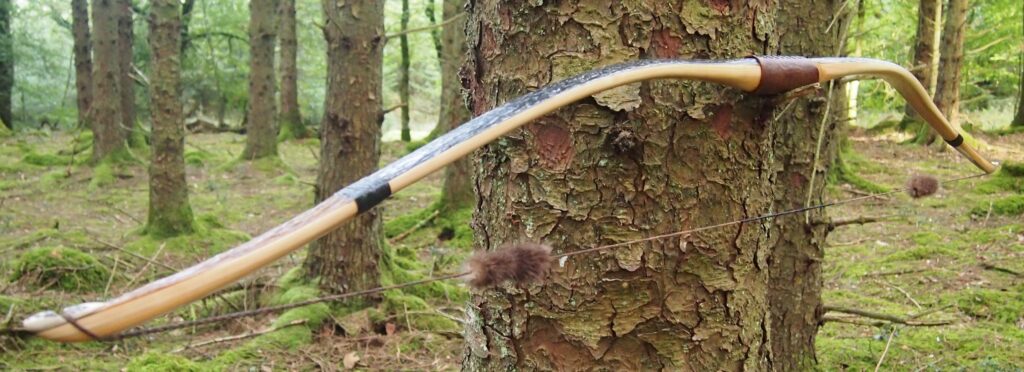
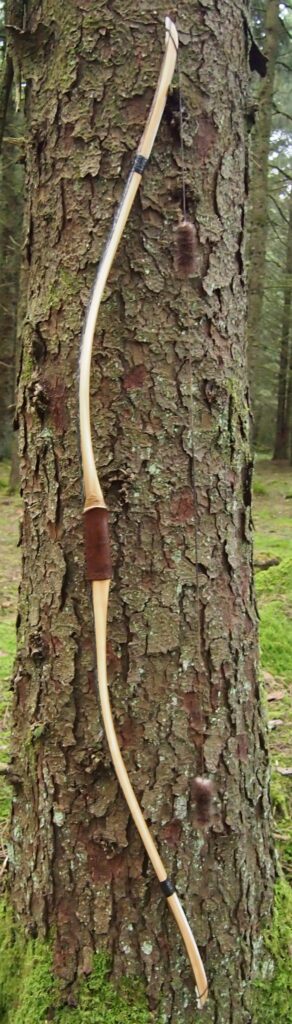
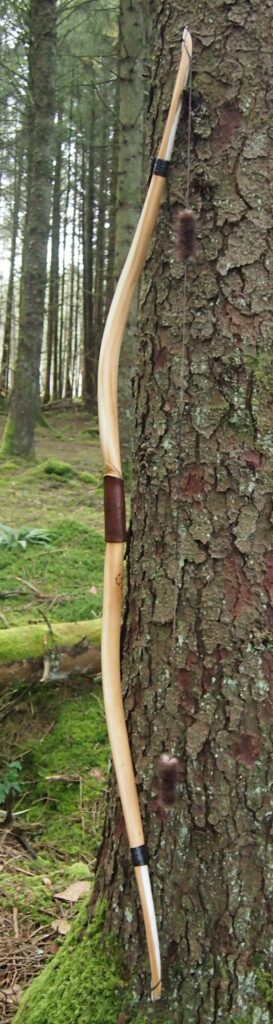
Once up on the tiller tree I had to admire the 5 curve shape of the stave. And after the first few pulls on the long string and a bit of tiller balancing she was at brace height in no time. What a lovely shape I thought, not just at brace but also as I started to draw her down further and further. She looked like a long bow for sure, but with a hint of the Asiatic thrown in to the mix. I really really liked the way this bow was bending.
Once she was at full brace height and pulling down to about 22″ I decided to stop. I could finally image this bow making it into the shop now that I’d seen what sort of a bow this project was shaping up to, so since she was currently unbacked, I decided to bomb proof this build by sinew backing her before finishing the tillering. So on went the sinew and the 6 month wait ensued.
As is usually the case, the now cured out sinew draw about a inch and a half of additional reflex into the bow. Plus the sinew added a fair bit of undesirable draw weight. So the rest of the tillering was mainly concerned with getting the poundage back down to what sells best (40-45#) Whilst keeping all the right bends in all the right places.
Once down to 26″ I took her out in the yard for a spin. Very nice was the only expression I could think of. The low mass tips and the 5 curve profile made for a fast shooting smooth drawing bow with no stack and minimal kick. What a cracking little bow, and what a looker in terms of shape and wiggle. I should have mentioned that whilst I spent a ton of time trying to lock in on the desired side profile, the snakey face profile was maintained almost in it’s entirety, save for a few corrections for string alignment. she was turning out to be a pretty cool looking bow, and great fun to shoot too.
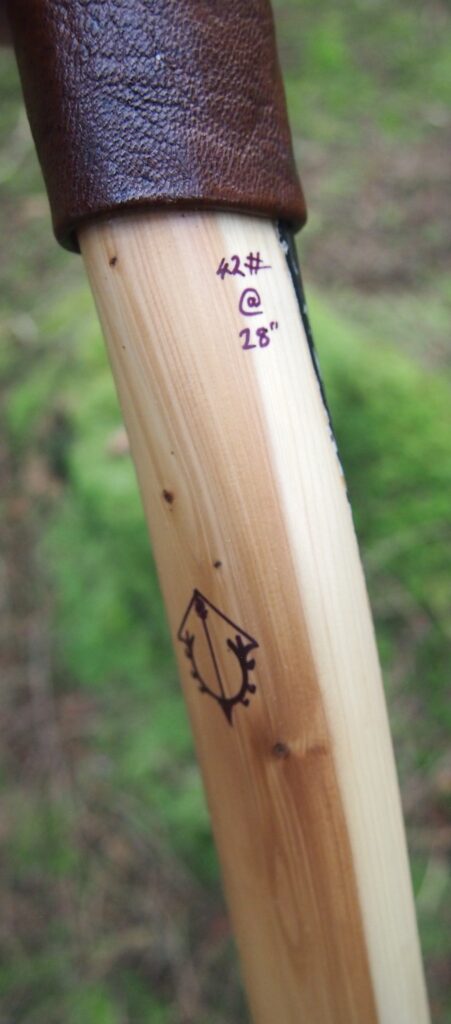
So after a couple weeks of shooting in, I checked the draw weight at 28″ and was happy to see she had settled into the 42# mark, which was about perfect. I reckon she shoots an arrow at a higher speed that normal for this poundage mind you, and I’d say she flings an arrow at the kind of pace you’d expect from a bow in the upper 40lbs range. She’s just a very efficient bow, especially when those light weight tip are being pushed along by that wonderfully elastic sinew which is like adding nitro to the last couple inches of the draw length.
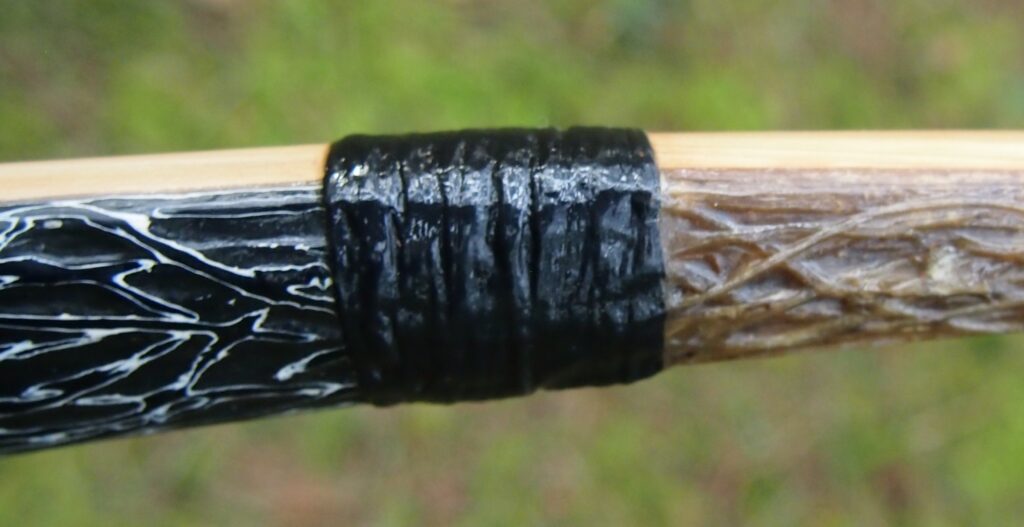
So to finish her up, I wanted to make absolutely sure that the antler lams on the tip bellies would never pull away from the wood under the compression that would inevitably be experienced at the transition from the plain wood belly to antler lam. So I decided to use some deer back strap sinew to wrap the first inch of the lams down tight. This last step was probably over kill but I figured that as this bow was going up for sale, I didn’t want her ever having to come back into the shop one day in the distant future requiring a patch up. So I lashed those antler lams down good and tight with a liberal wrapping of sinew, which in my opinion is natures answer to kevlar!
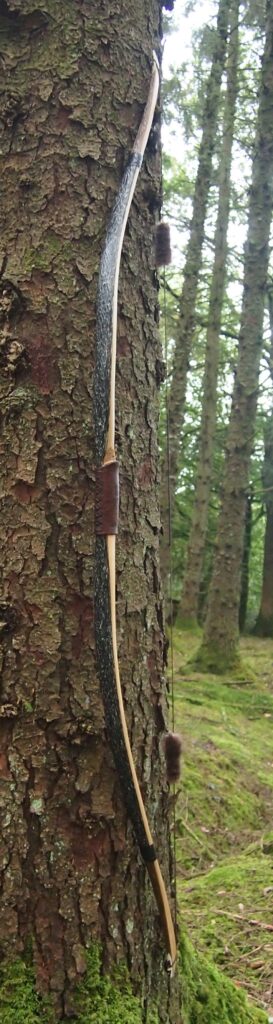
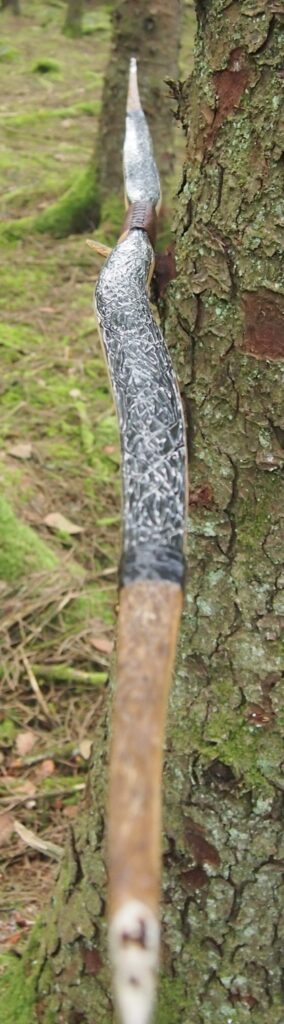
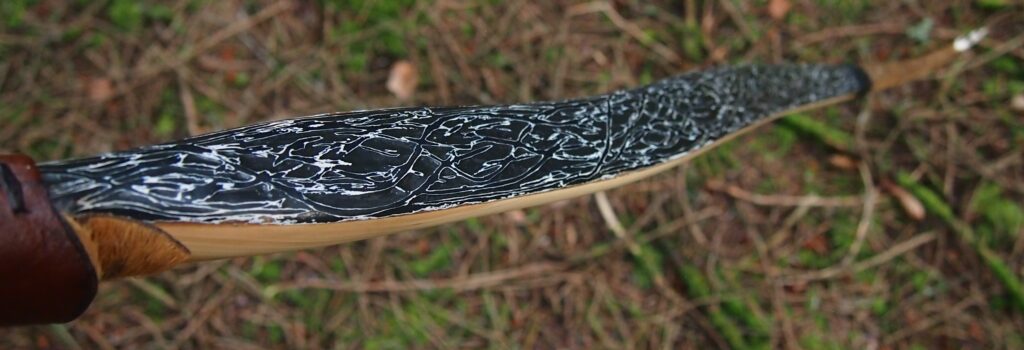
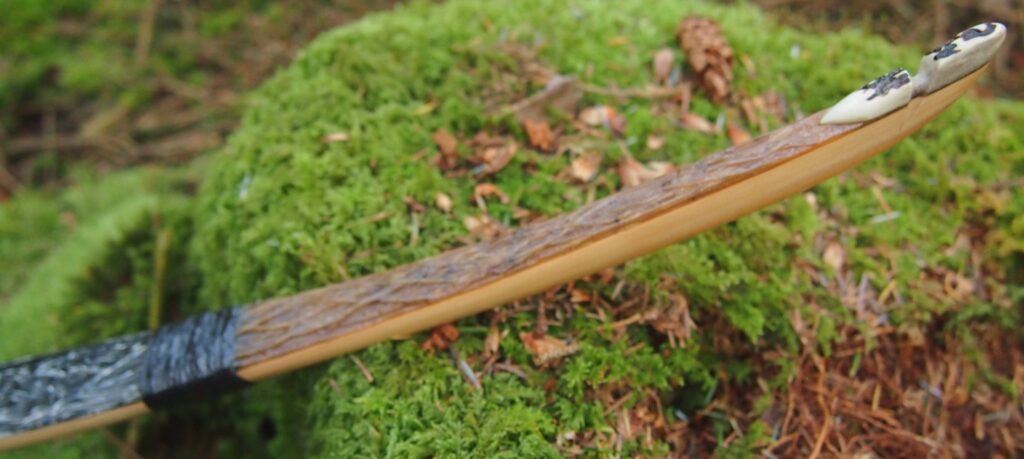
Whilst thinking how best to finish this bow I thought I’d further emphasis making a feature of the limb tips by keeping the sinew backing in its raw unpainted form between the sinew wrapping and the tip overlays. This would would help ensure that it would be plain for all to see that the sinew, the wood and the antler were composed in a tri lam formation which was both intentional, and contributed to the primitive and characterful aesthetic of this unique primitive style bow.
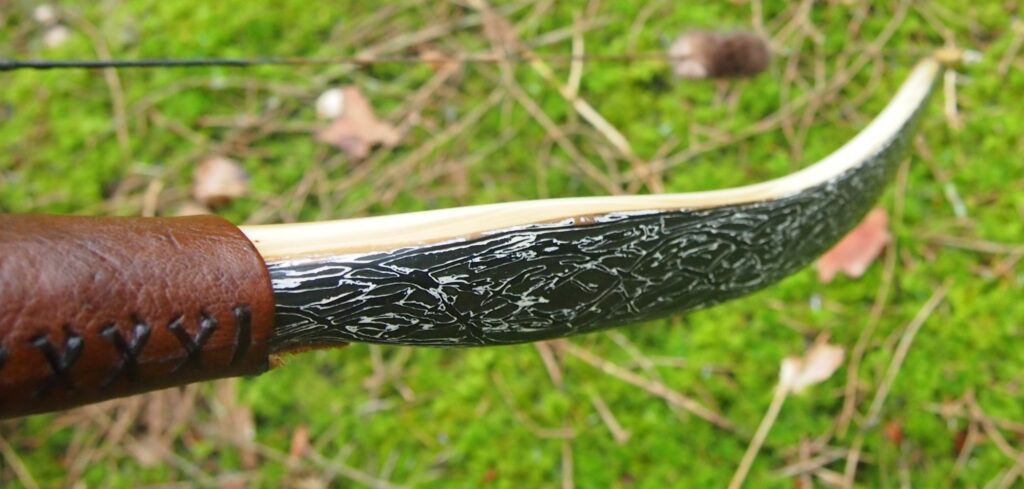
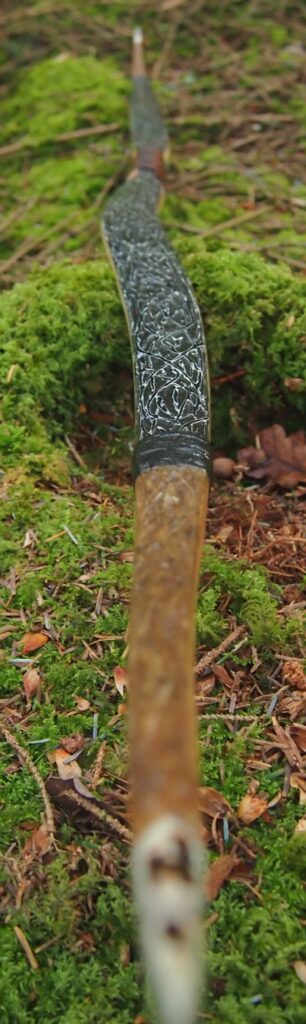
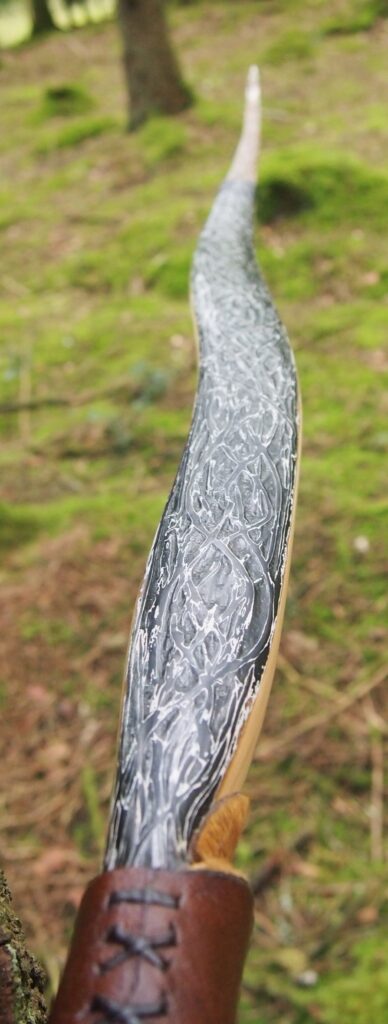
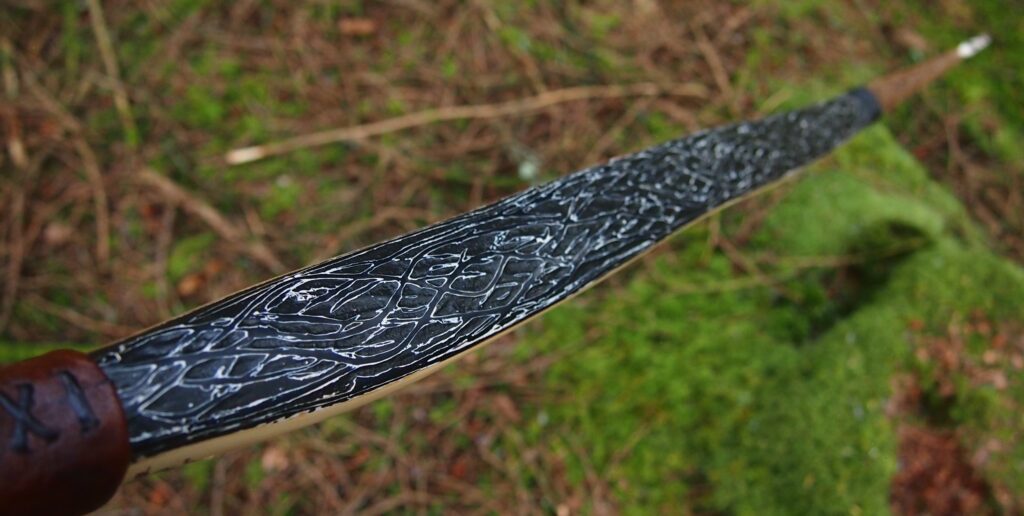
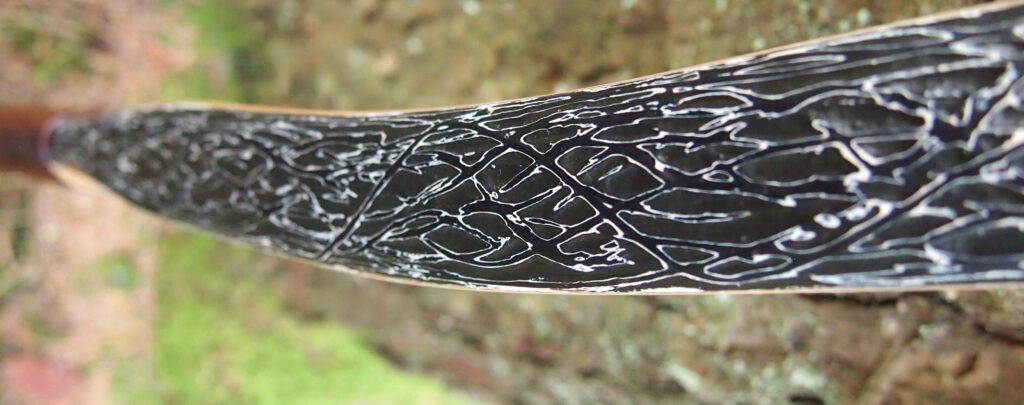
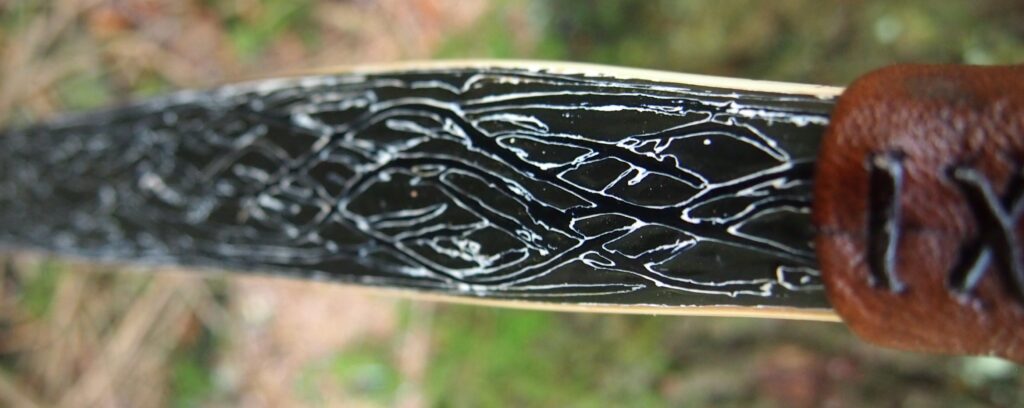
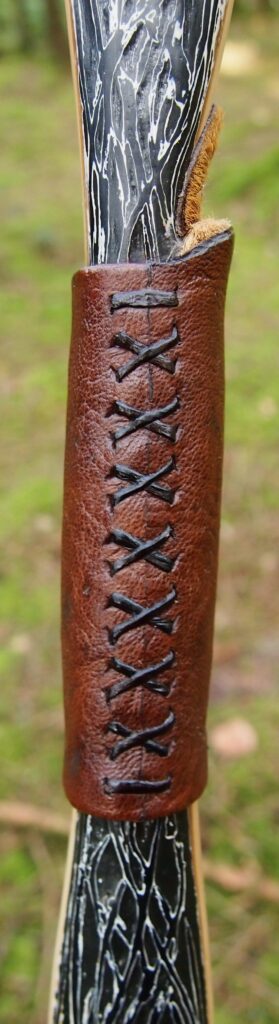
The rest of the working limbs wanted spicing up a little however. So to draw the eyes to all that wiggle and gorgeous yew heart wood, I opted to decorate the sinew backing in this section to create a fissured sinew texture in black and white. The black paint is my local Bideblack natural earth pigment, and the white is a mix of titanium oxide and TBIII. The very top “texture” layer of sinew fibres were also dyed black before being applied. The dying process included soaking the sinew fibres in bark tannin mixed with vinegar stain before gluing to the bow’s back with TBIII to ensure weather proofing.
I opted for tip overlays of antler since antler was already a feature of the tips by way of the antler belly lams. Plus I think antler looks really cool on super fine tips like these turned out to be.
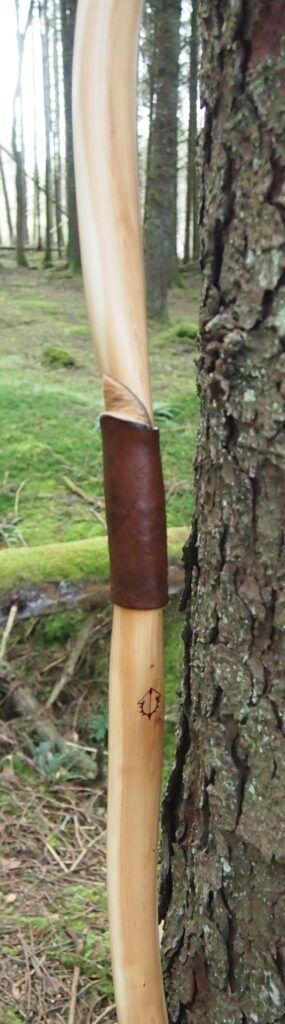
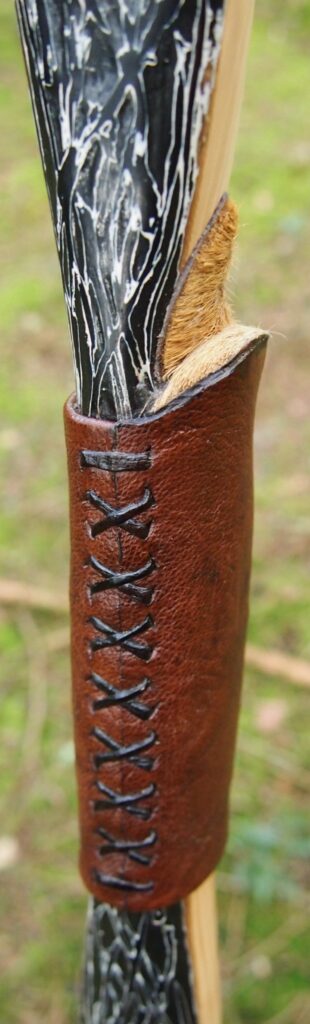
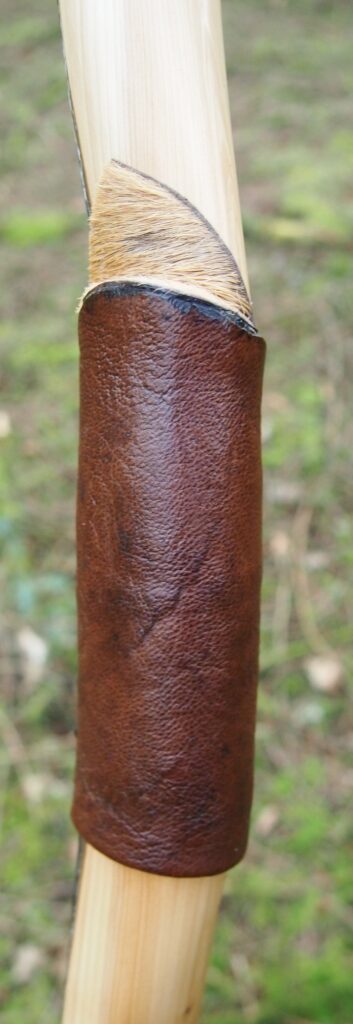
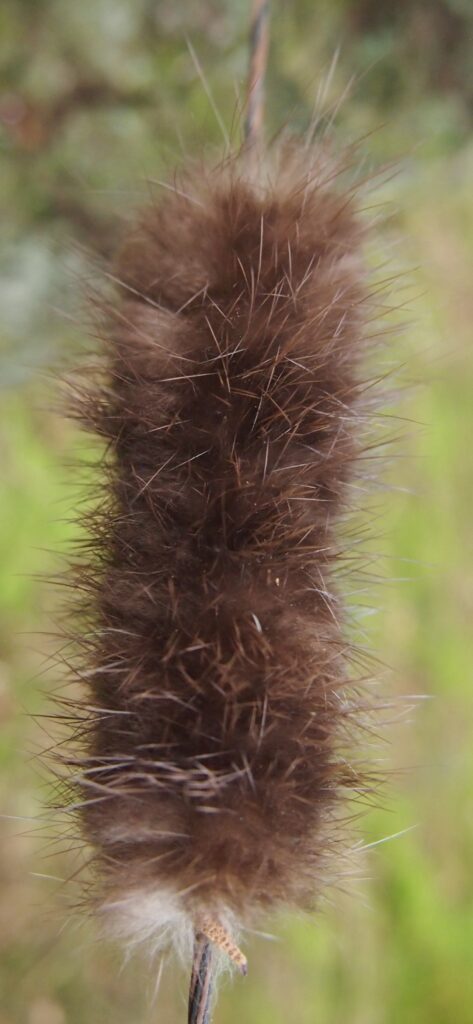
The handle with it’s slight remaining reflex got slightly shaped up to improve the ergonomics of the grip. And I cut in an arrow shelf to create a more centred shot bow. Then he grip was covered up with a nice piece of bark tanned deer leather laced up with more of the same. And the arrow shelf is protected with bark tanned red deer shin leather with the hair left on as it’s lovely and quiet to run arrows across at high speed.
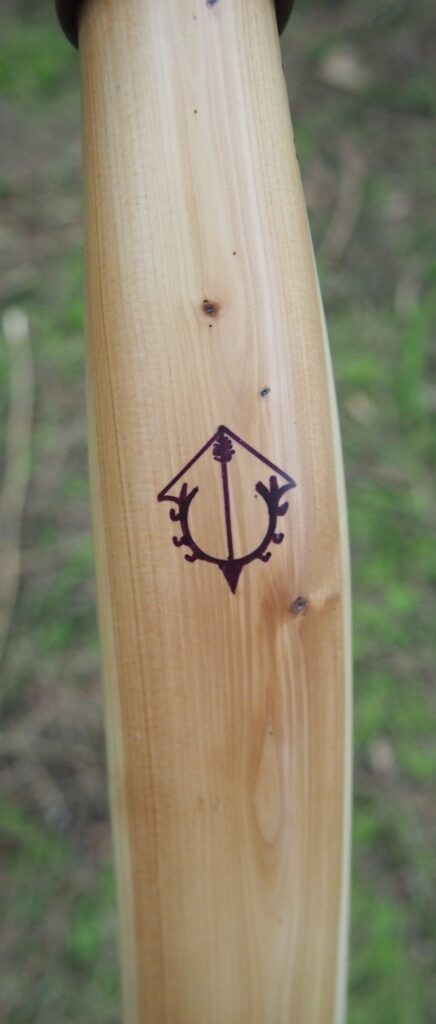
After sanding down to 0000 wire wool she got sealed up tight with a shellac base coat to make the gorgeous wood pop. The shellac primer was then followed up with a deep laquear top coat to provide weather proofing and a base to polish up with pumice followed by wax paste to achieve a gorgeous satin finish.
Whilst building this bow definitely took years off my life, I actually felt like she was a bit of a teacher to me. Staves like the one which was used to make this bow can make the most experienced of bowyers feel like a complete novice once again. And I most definitely got humbled by this build.
All in all though this project was a huge success which has inspired me to dig a bit more into both 5 curve designs and the addition of lamination techniques as an extra string to my bow (no pun intended!)
And here are her stats:
Draw Weight: 42lbs at 28”
Mass: 805 grams
Length NTN: 65” (symmetrical limb layout)
Width: 1 5/8″” at widest part
Tips: last 8” static reflexed, 7/16” wide
Back: Crowned. : Snakey pyramidal face profile
Belly Profile: Working limb sections rounded D shaped, transitioning at the tips to a ridged cross section.
Tiller: Eliptical. 1/4” positive
Brace height: 5.5″
I hope you enjoyed the build story and I sincerely hope you think she’s as beautiful as I do. Below are a bunch of pics of the finished bow and a vid of me sending a few arrows through her.
This bow is now available for purchase through our Etsy shop and can be found here:
Yew Longbow: Sinew Backed Yew Flat Bow 42#@28″ – Etsy UK
Please feel free to contact me with any questions, either through our contact page here: https://southmoorbows.com/contact/
Or through the Southmoor Bows Etsy shop: https://www.etsy.com/uk/messages/new?with_id=765805207&referring_id=4597916952&referring_type=listing&recipient_id=765805207&from_action=contact-seller
Thanks for looking!