Tag Archives: Heat Treated Belly

Elm HLD Heat Treated Rawhide Backed Longbow 58#@28″ (Bow No. 11)

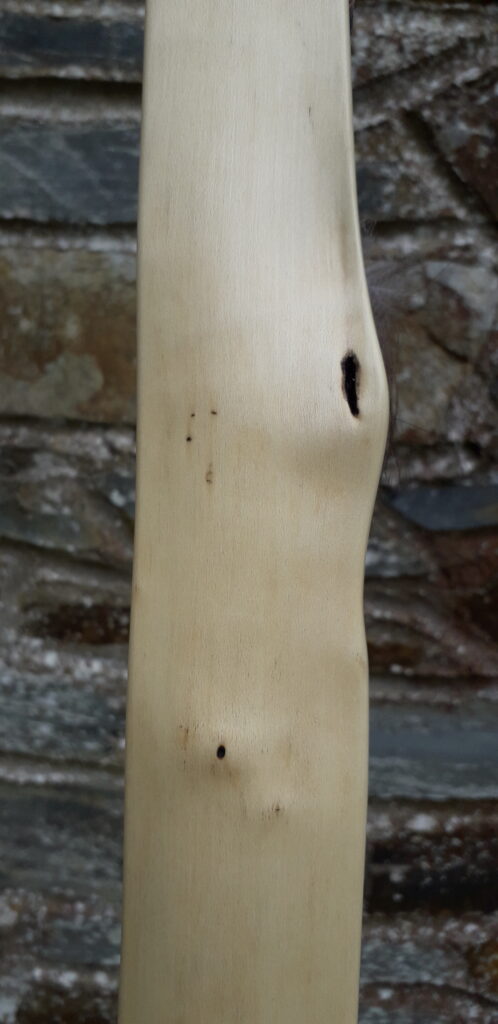
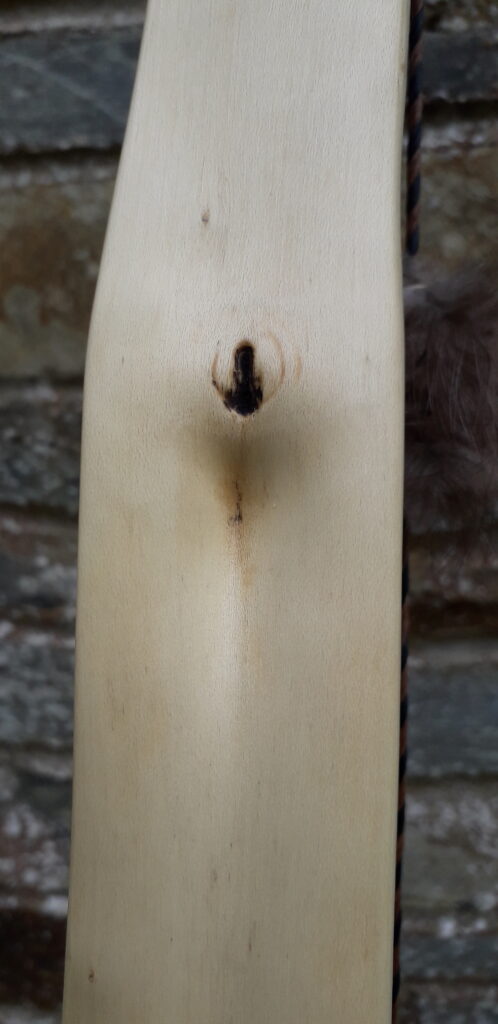
This bow came from a nice clean, straight, undamaged English Elm stave which I cut back in the winter. I roughed it out green and clamped it to a slightly reflexed form to force dry it over the wood burner for a week. I then took the roughed out stave off the form and left it hanging up in the ceiling above the wood burner for a month to dry to the point of no further weight loss.

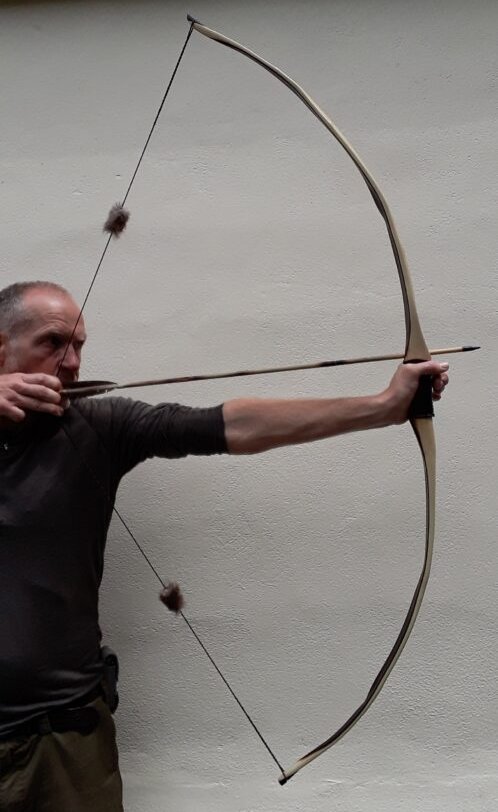
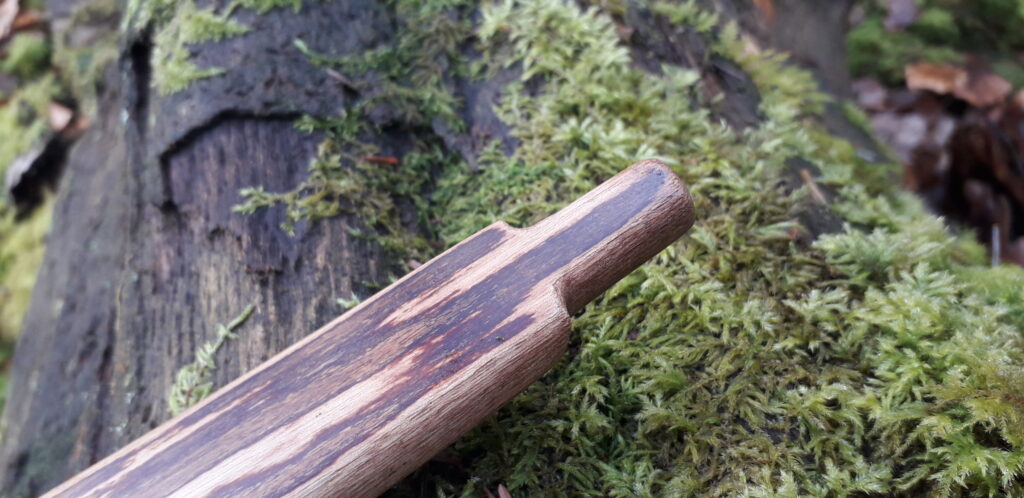
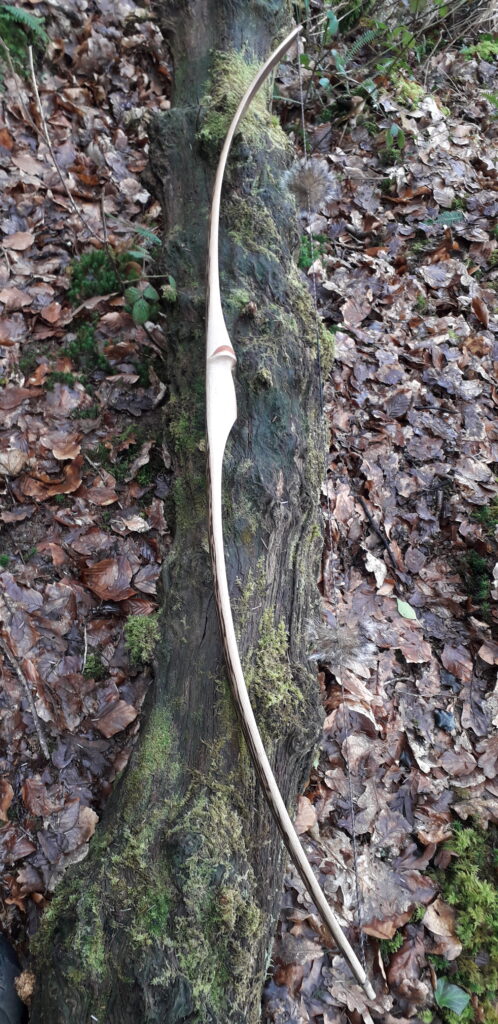
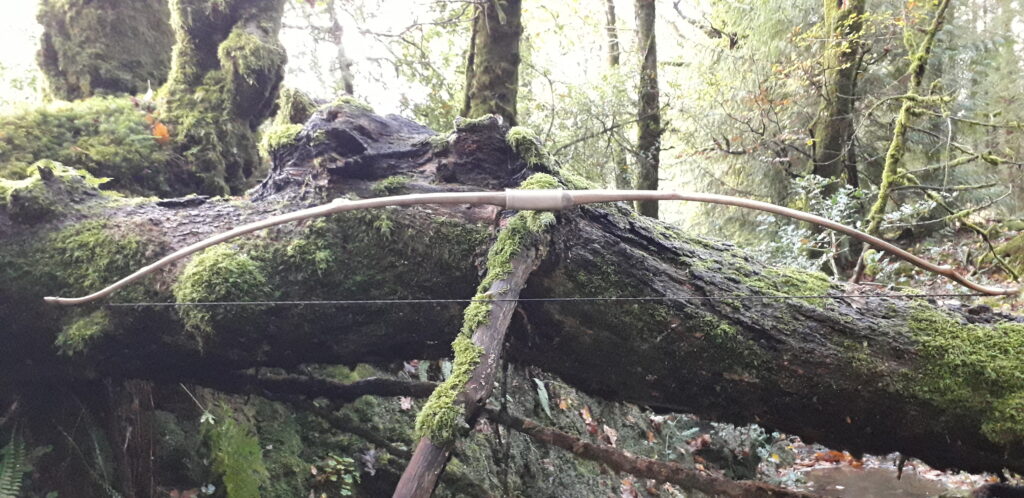
Once the stave was good and dry I chose a shape and profile (HLD pyramidal longbow with static tips) which suited the length and width of the stave (6ft X 3”). I then cleaned it up close to final dimensions and then floor tillered it. The shape looked good so I continued to tiller to brace then carried on down to 22”. I was gunning for a nice positive elliptical tiller and a final draw weight in the upper 50s as this bow was for someone who wanted a nice clean, simple, hunting weight primitive longbow.

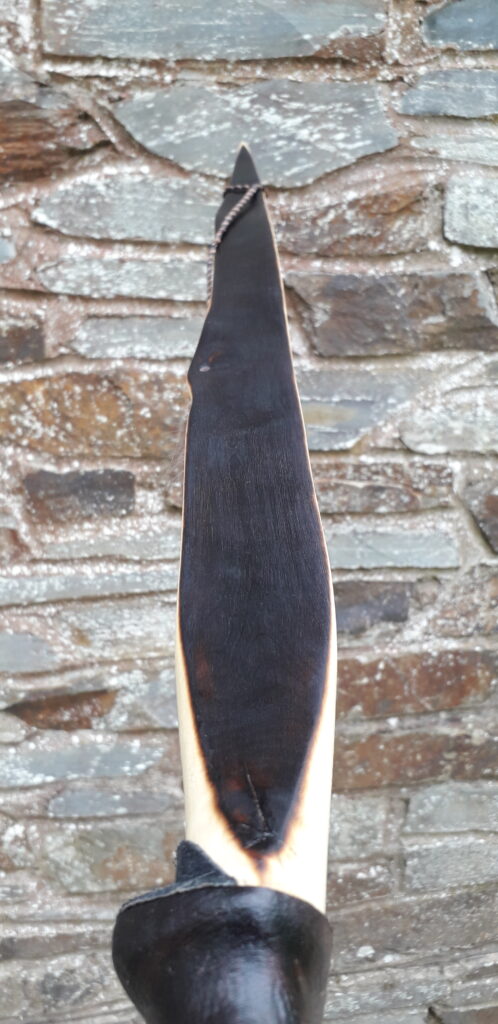
All looked good except for a little bit of propeller twist which was making its presence known, so I opted to straighten that out whilst heat treating the slightly dug out belly. So after fixing the stave to the form again and using clamps to pull out the propeller twist I set to cooking the belly.

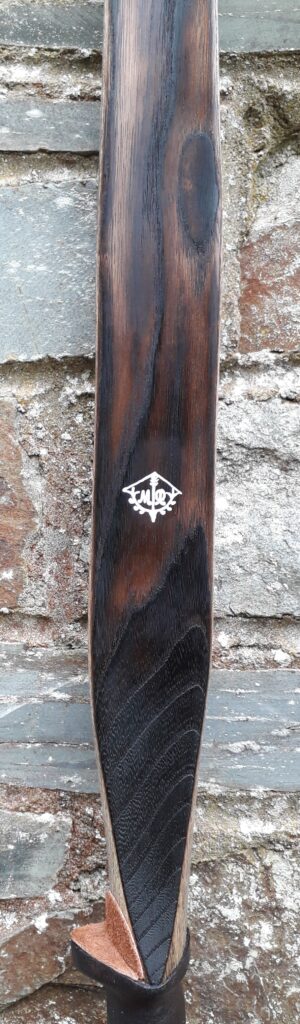
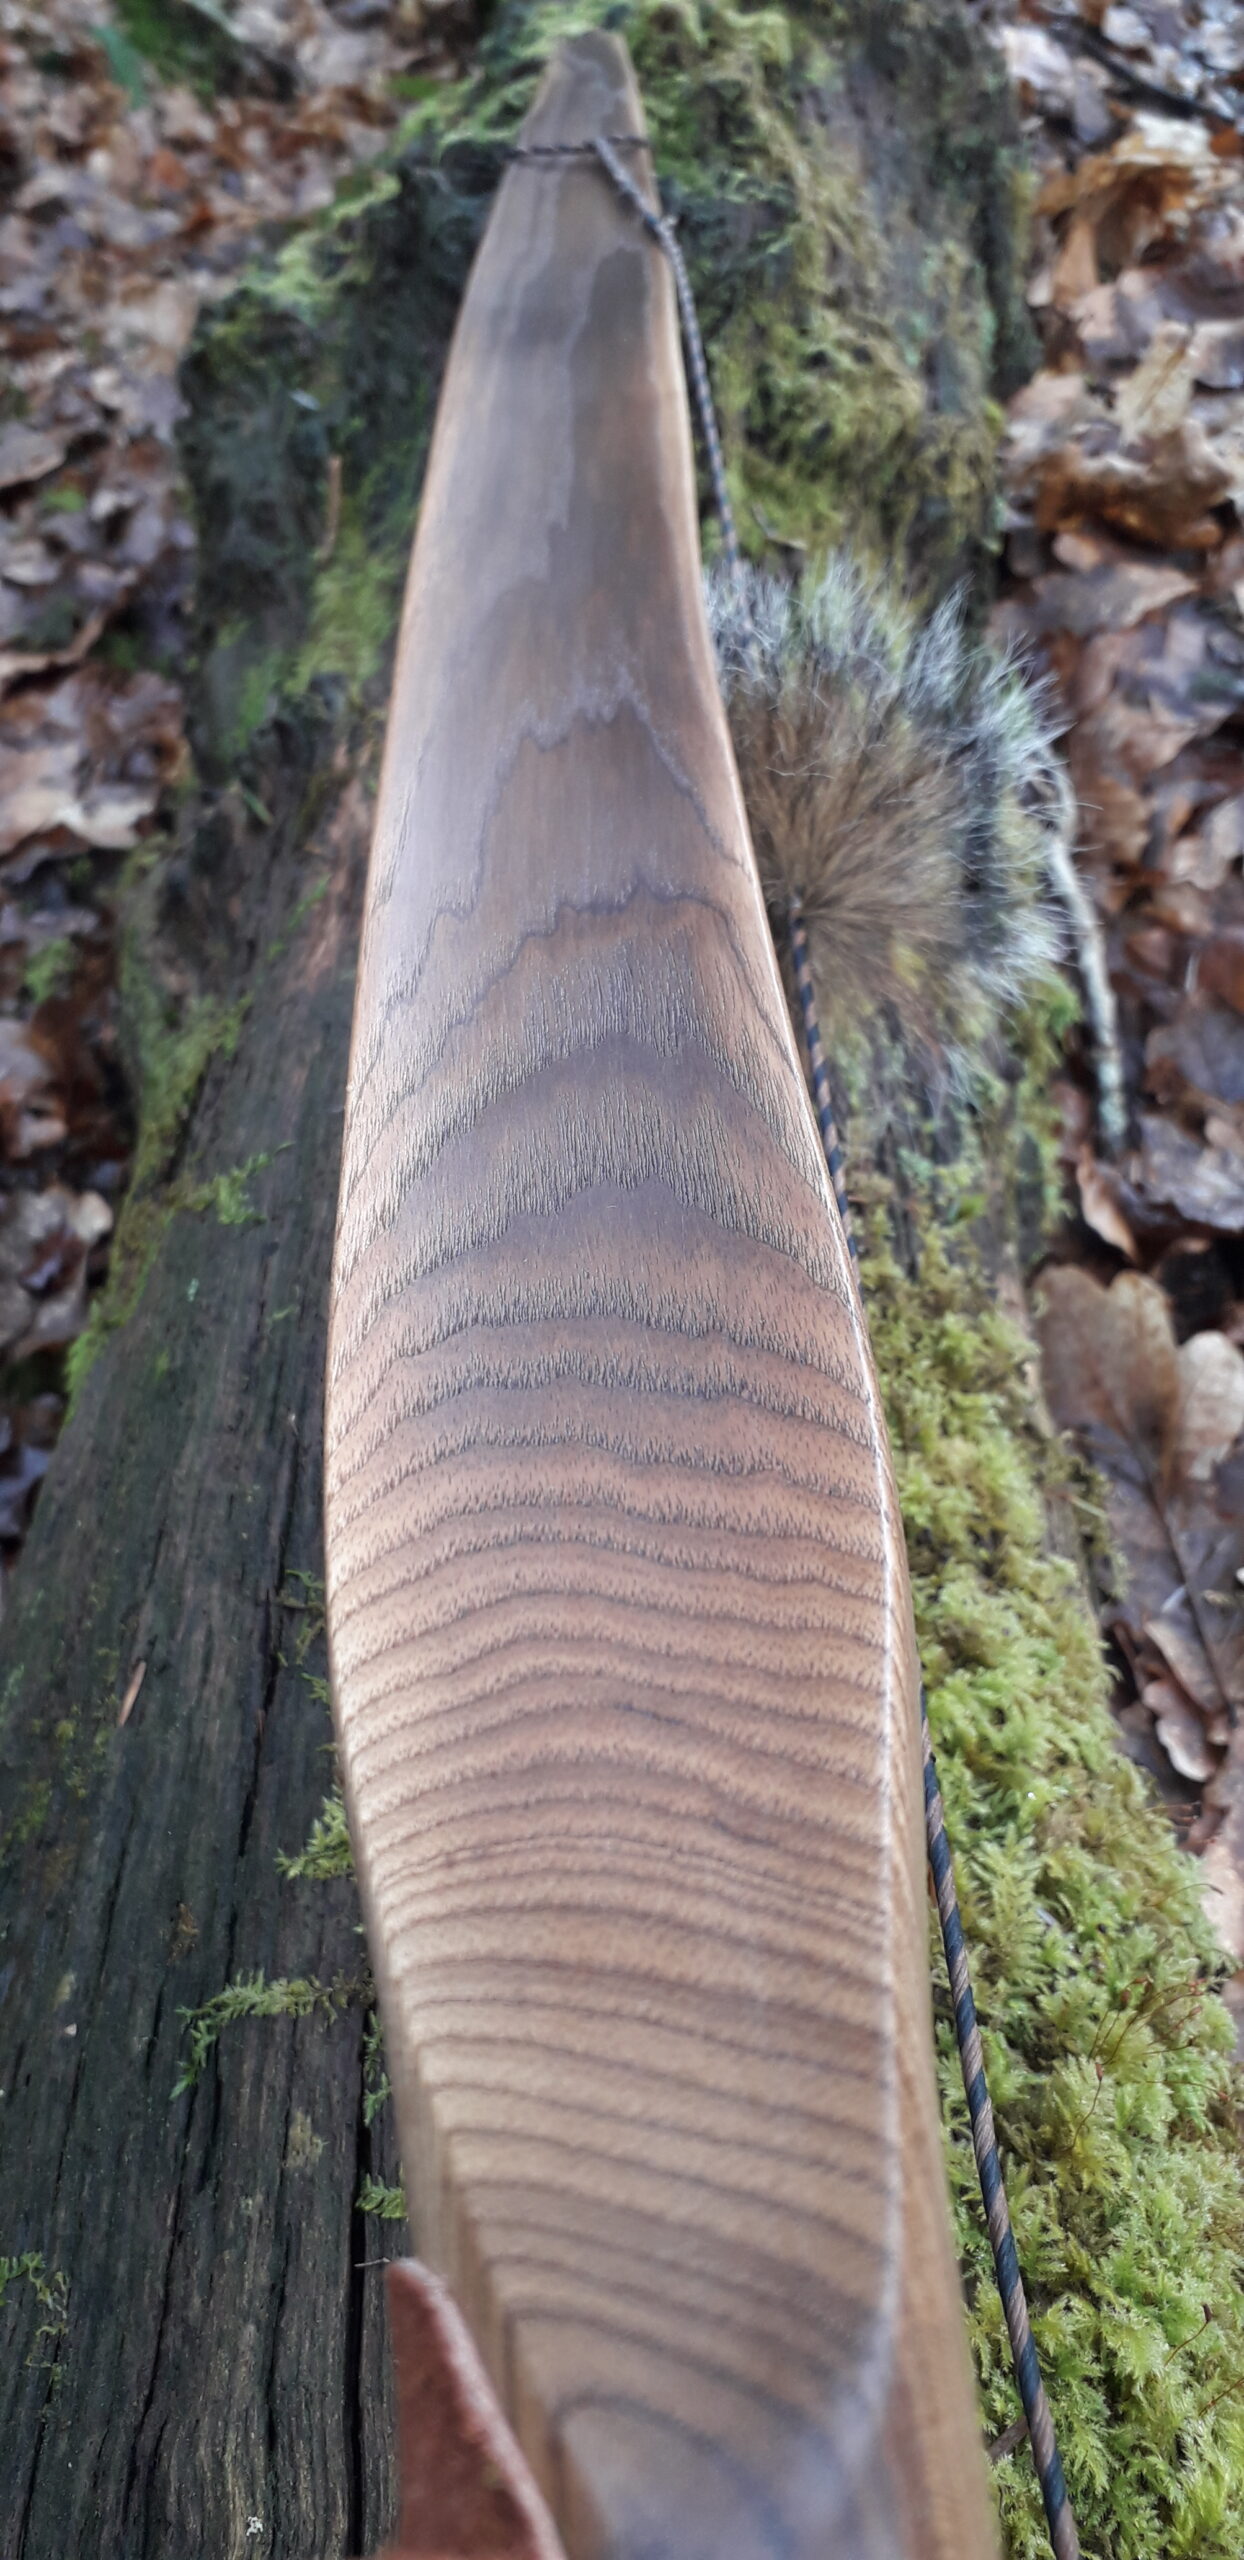
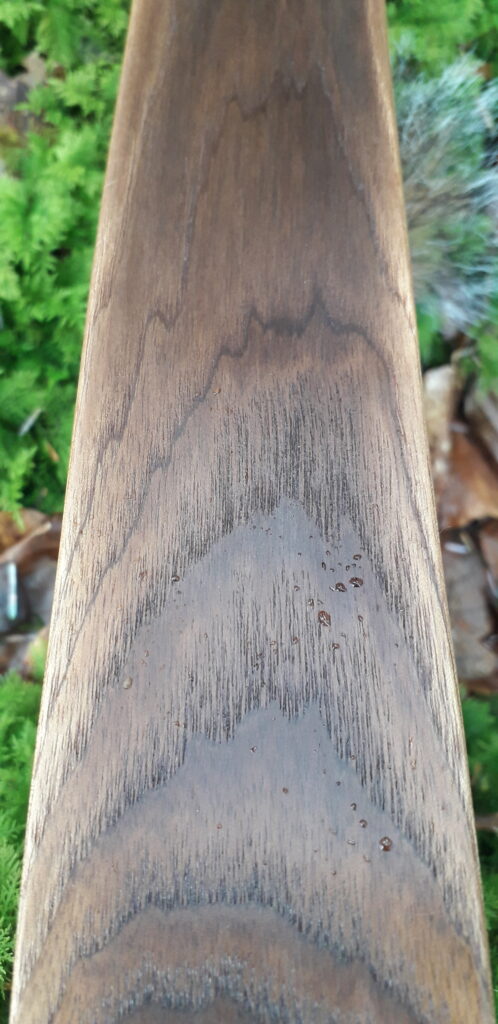
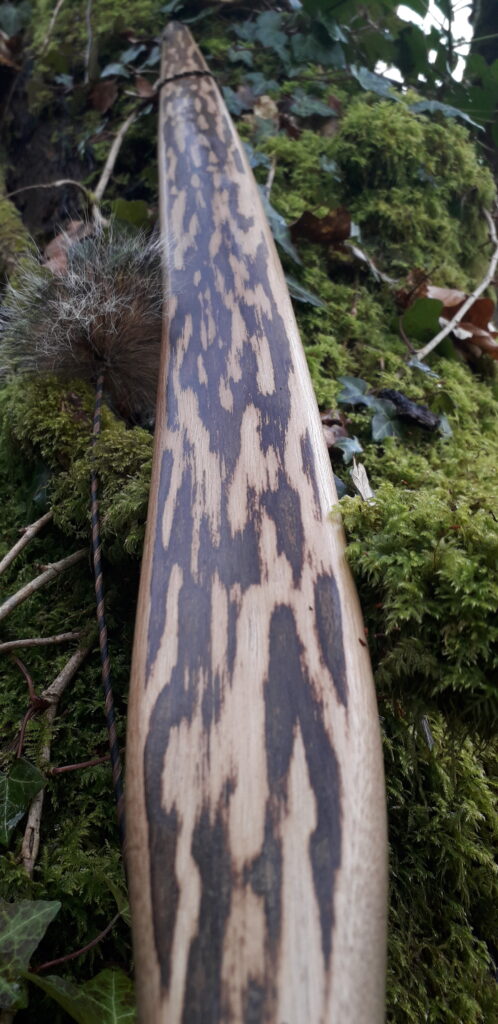
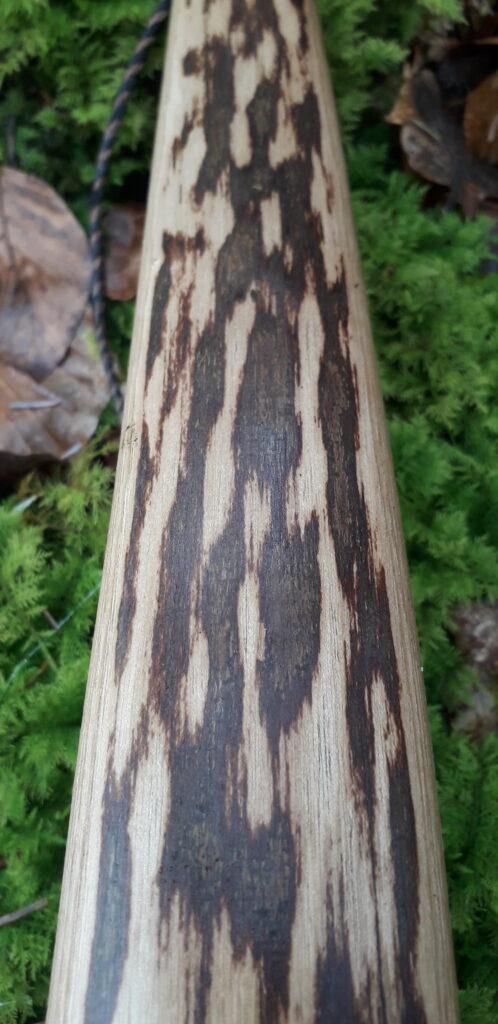
Half an hour with the blow torch got the belly nice and dark but without any cracks. I’ve learned over the years that properly dried whitewood staves wont check as easily when heat treated as those which are still holding 10% or more moisture. This stave was down to about 6% moisture content so I could get away with using the heavy heat application which comes with using a blow torch to heat treat the belly of a bow. Give it a try and you’ll see what I mean.

After a day to cool and reacclimatise, I checked the tiller again. The heat treating had banged on some weight and gotten rid of the propeller twist nicely. The stave was now holding about an inch and a half of reflex too. After tillering down to 26” I was getting 63ish lbs so I decided to shoot in the last 2 inches and see if the positive tiller would stick.

A few days slinging stump heads in the woods gave me chance to really shoot her in. All looked good however the tiller was now looking a bit too neutral and since this bow is symmetrical and the guy this bow is going to shoots split fingers, I opted to take some more wood off the top limb to regain that positive tiller.

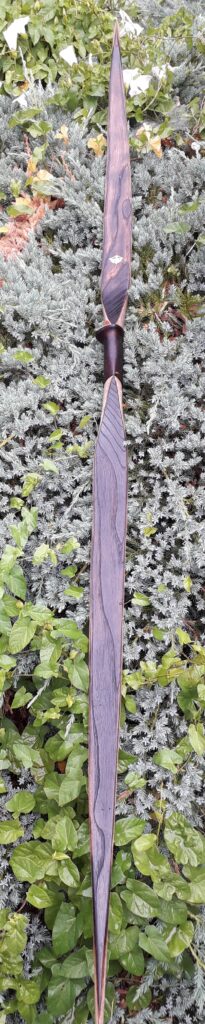
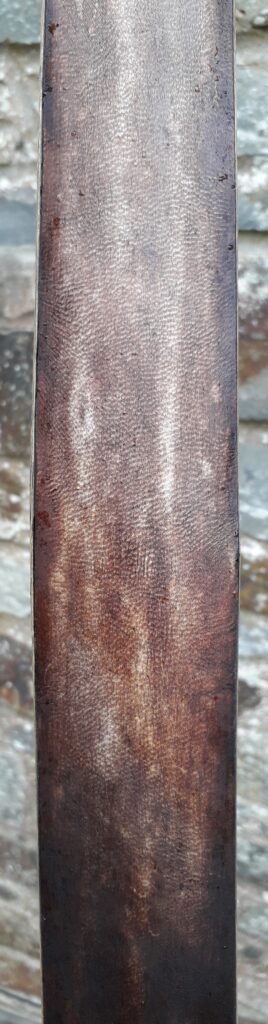
With everything looking nice, I set about rawhide backing this bow to add some extra durability. As much as I love self bows, the simple reality is that one ding in the wrong place, (especially on the back and sides, or worse still back corners) and a bow could easily be compromised. I like the protection that properly made and fitted deer rawhide gives to the back of a stave bow.

I back many of the bows which are going to end up in the hands of other people as I know how rough others can be with bows.  On this particular bow I opted to use some really nice thin wild red deer rawhide which I produce from deer that I’ve hunted over the winter. I process this rawhide the traditional way which ensures that it remains good and thin but incredibly strong. I sell this rawhide for a very reasonable price in my ETSY shop: Southmoorbows – Etsy UK. You can buy it here: One Matching Pair of Wild Deer Rawhide Strips – Etsy UK

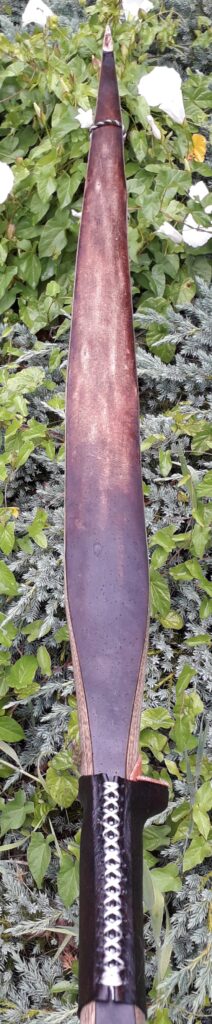
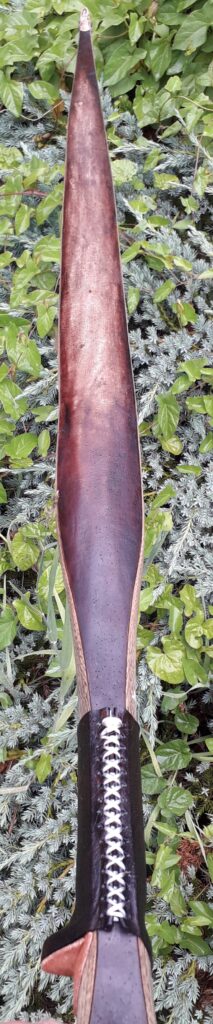
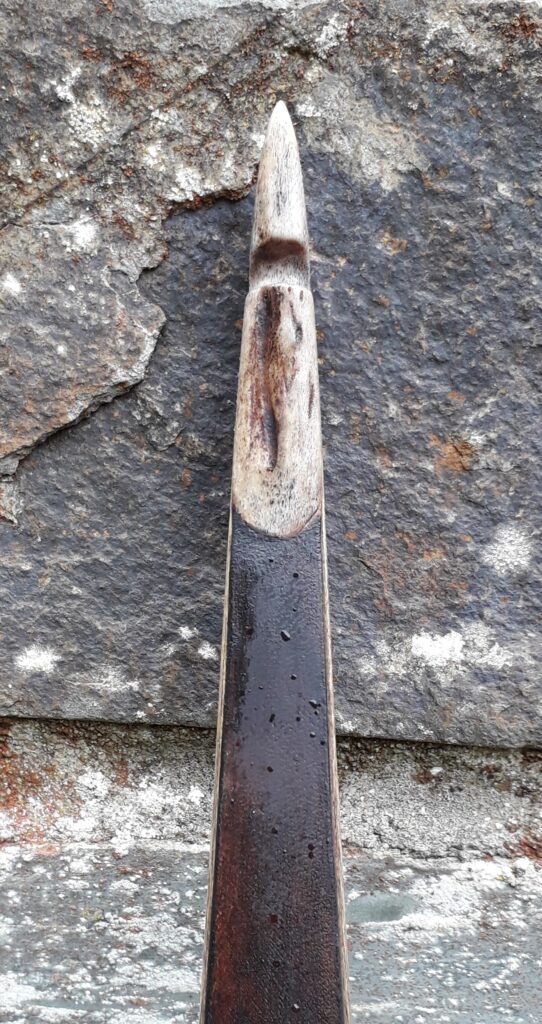
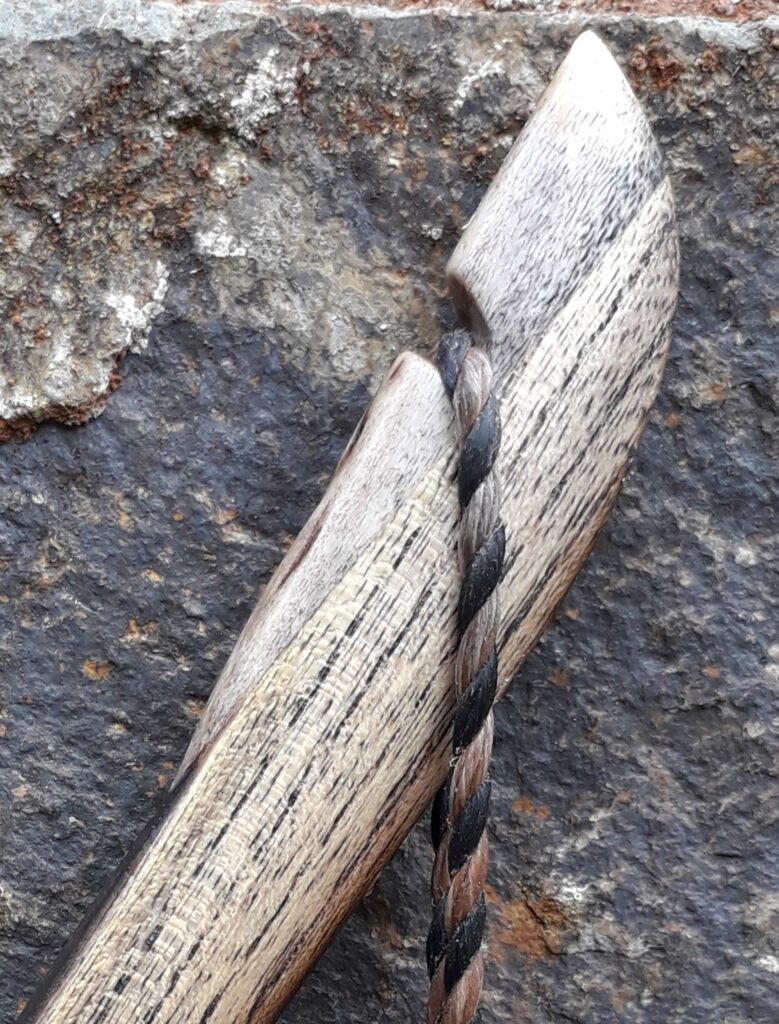
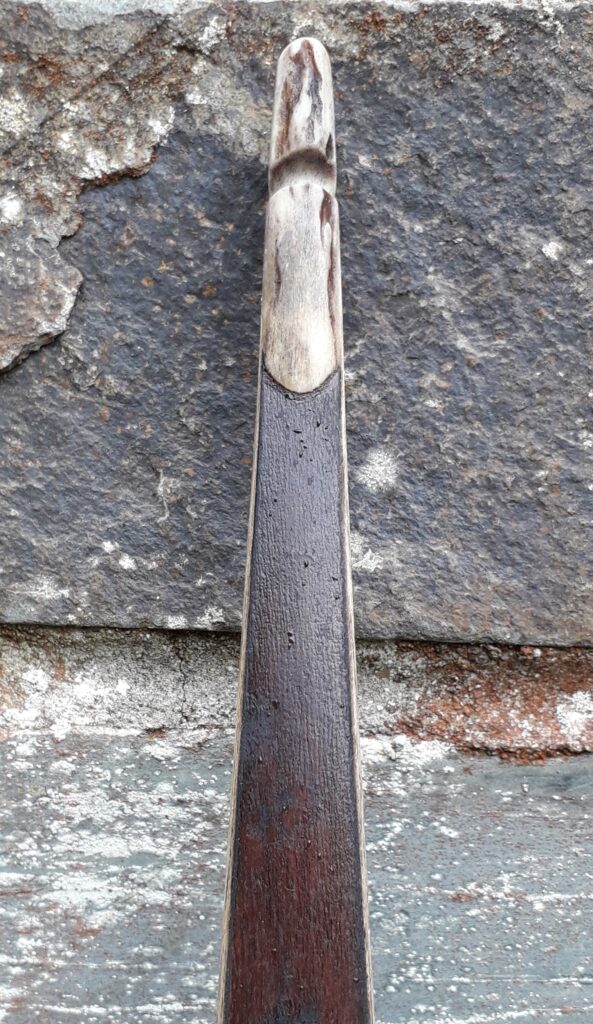
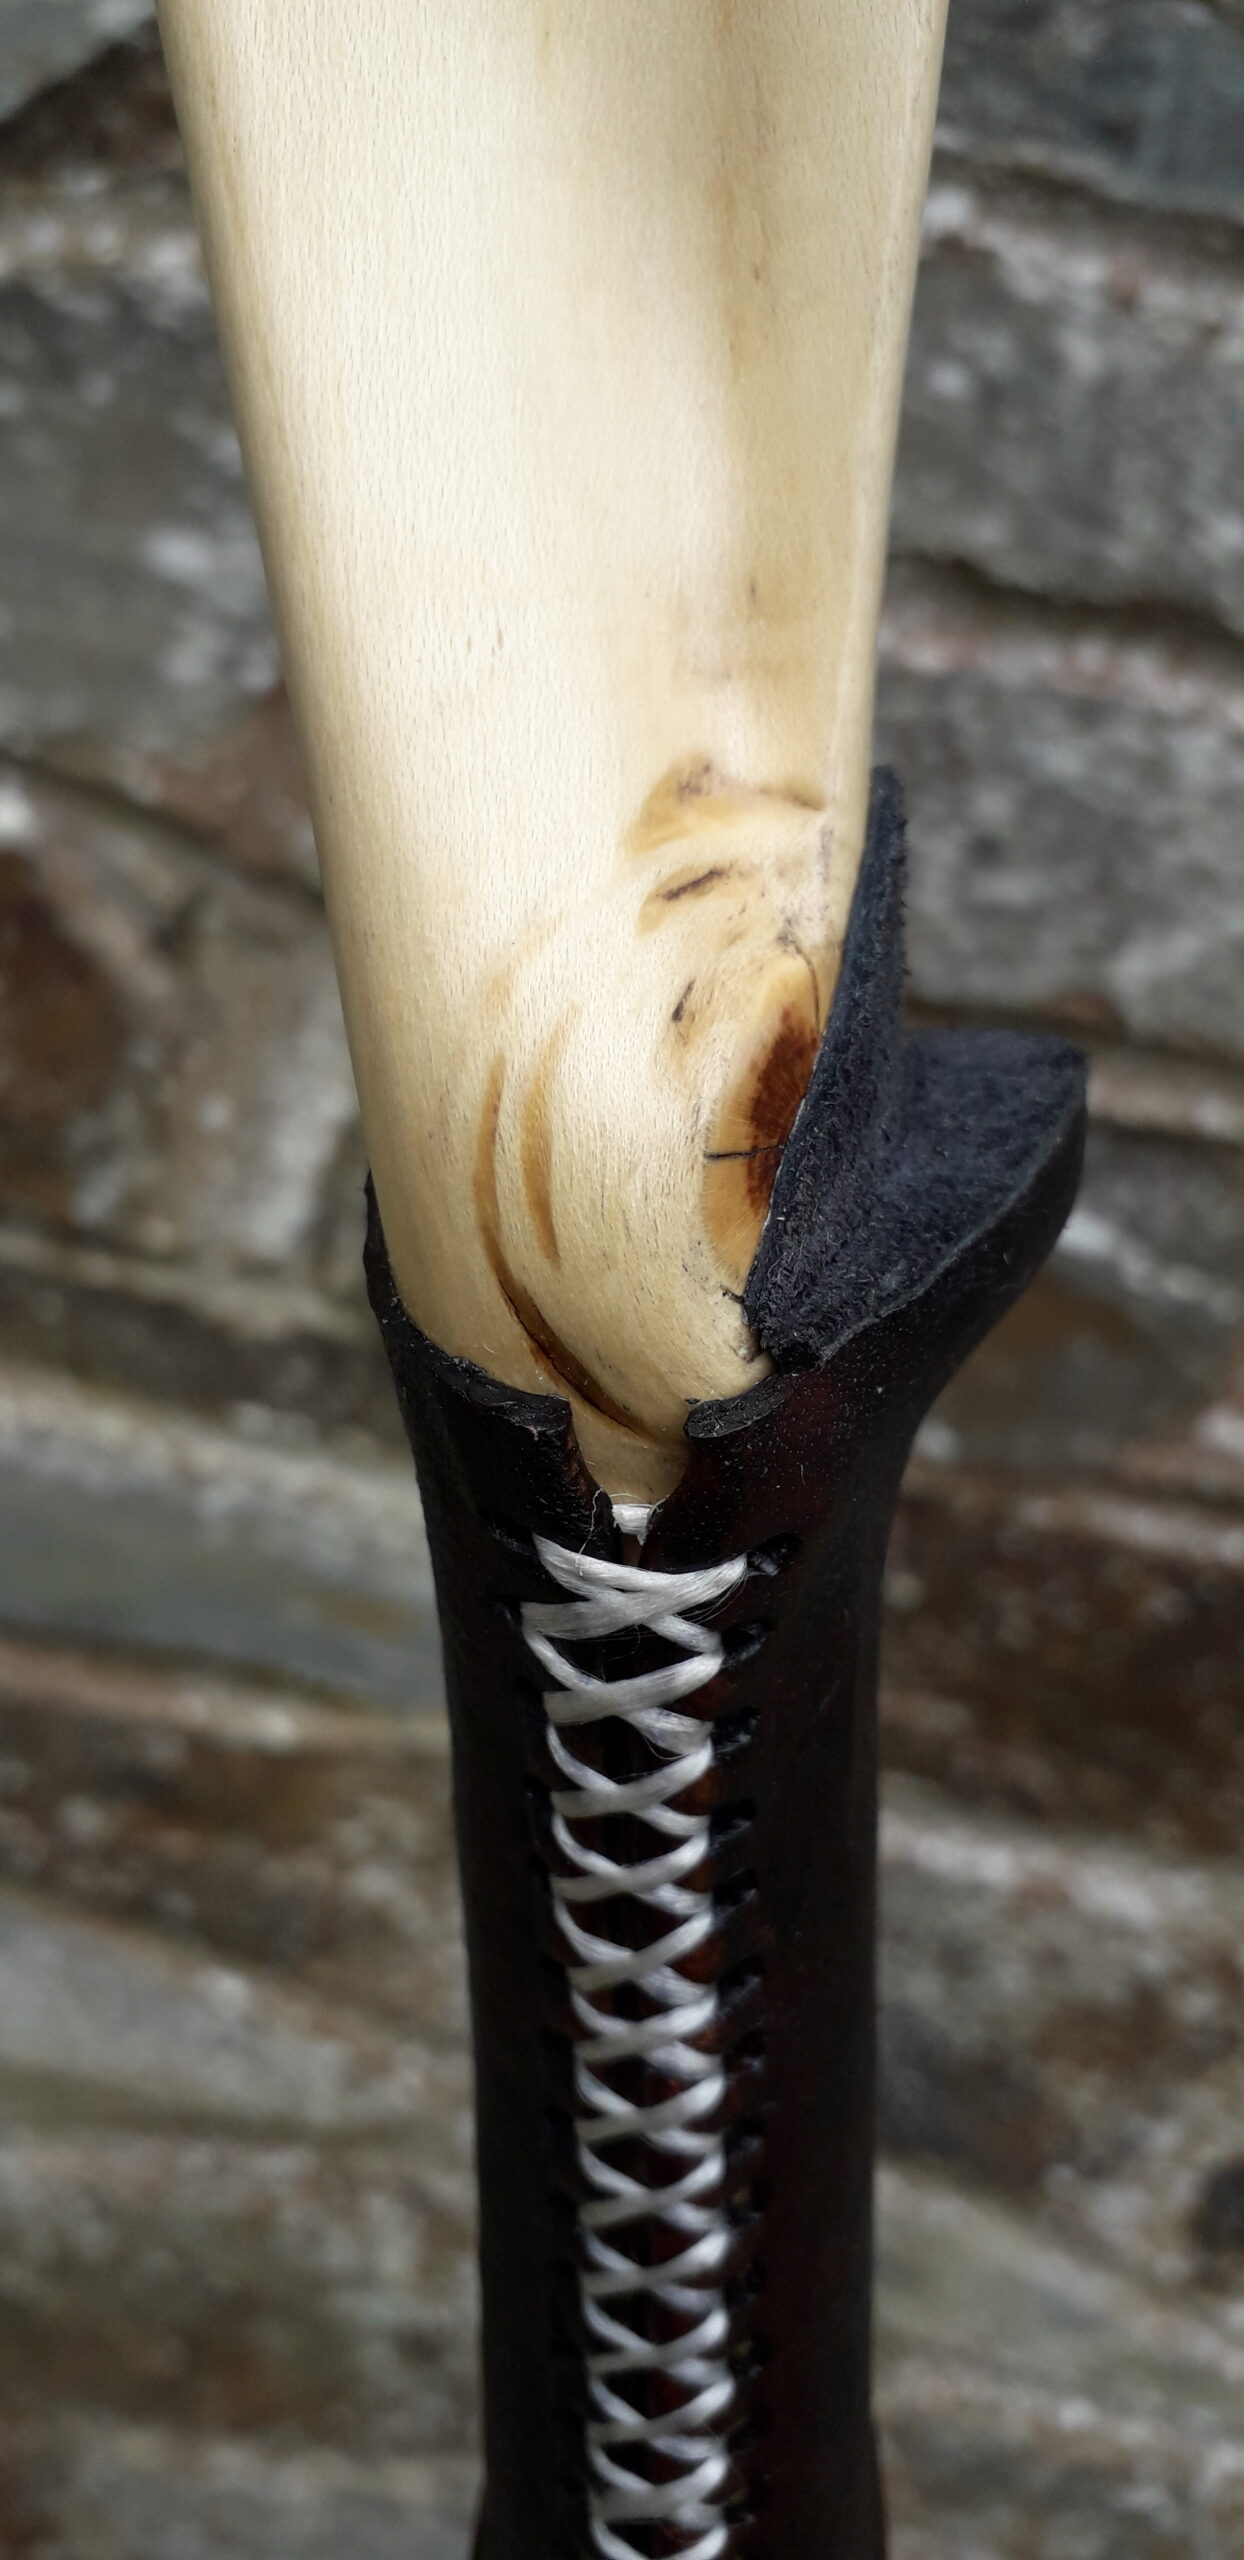
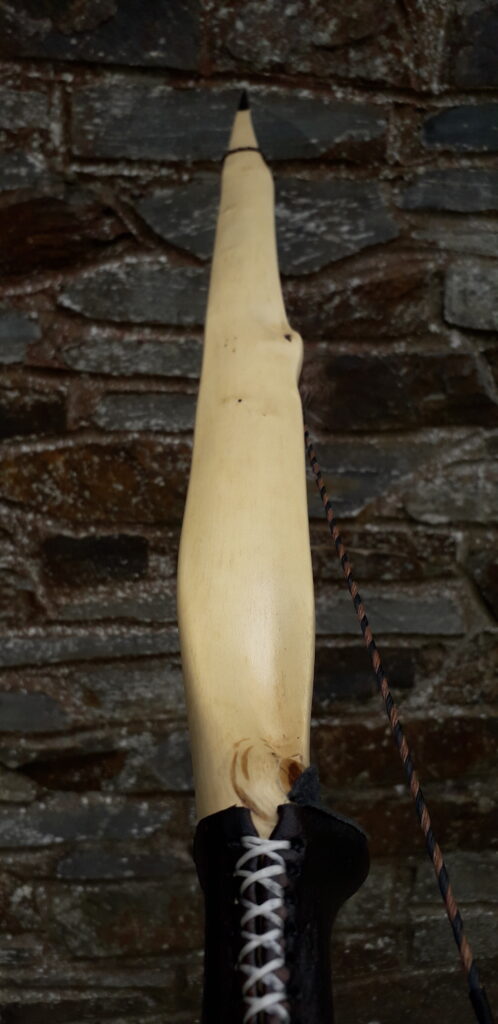
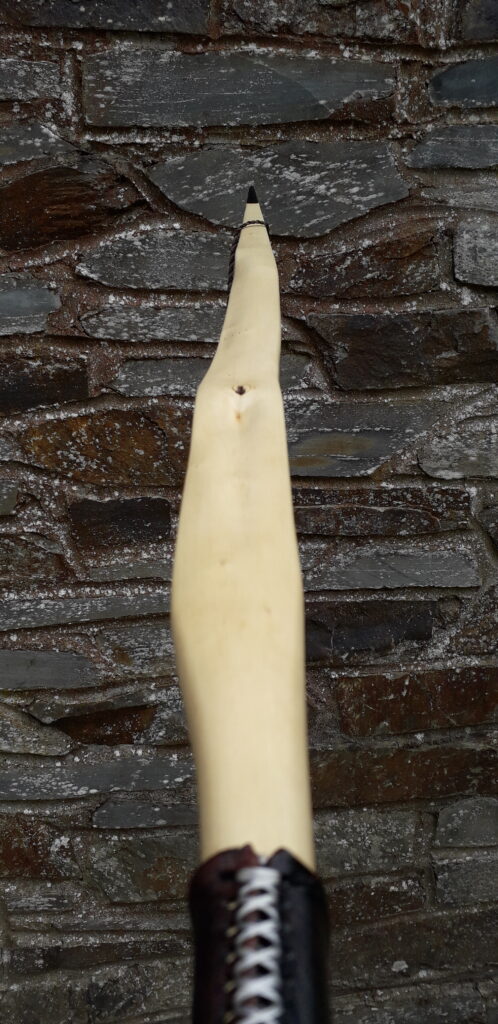
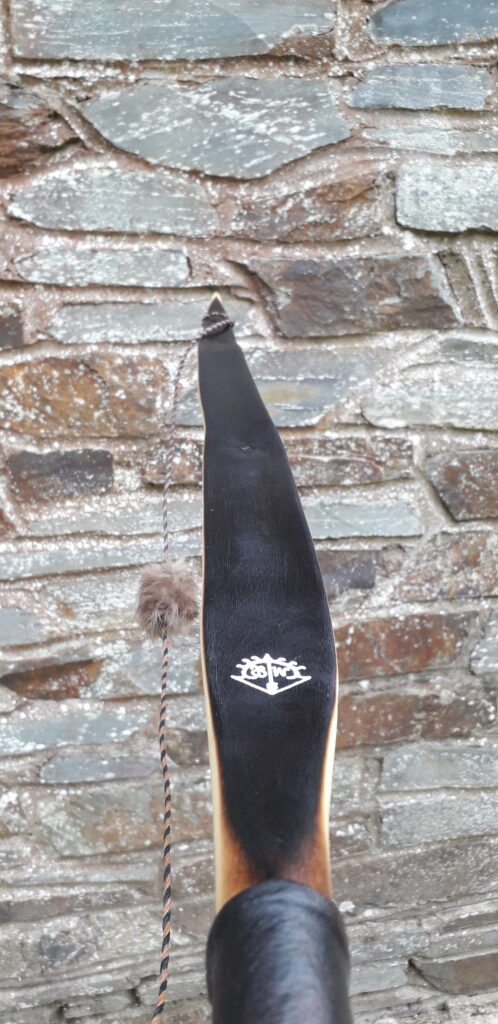
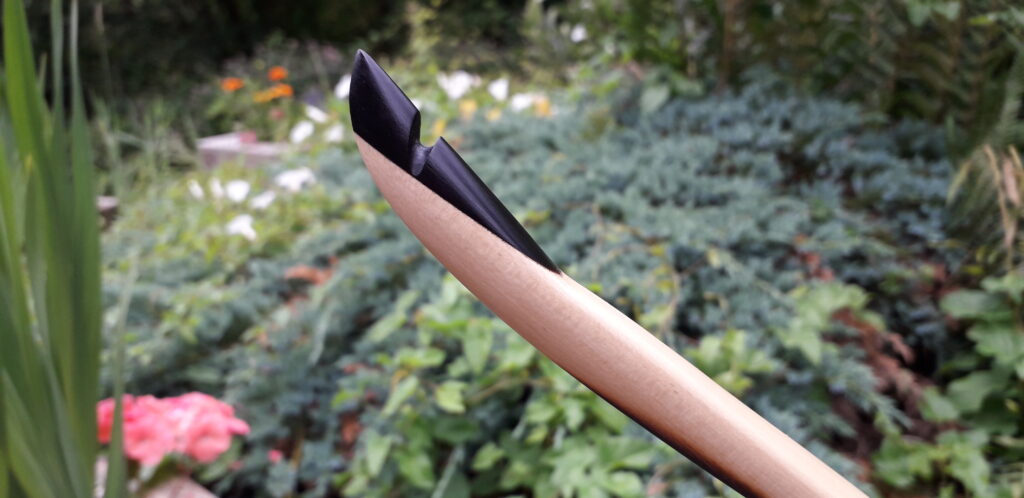
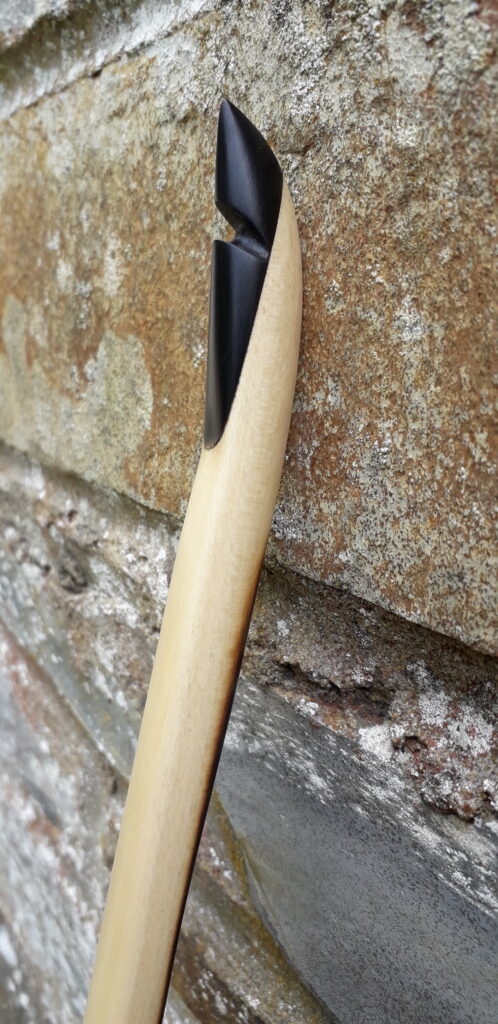
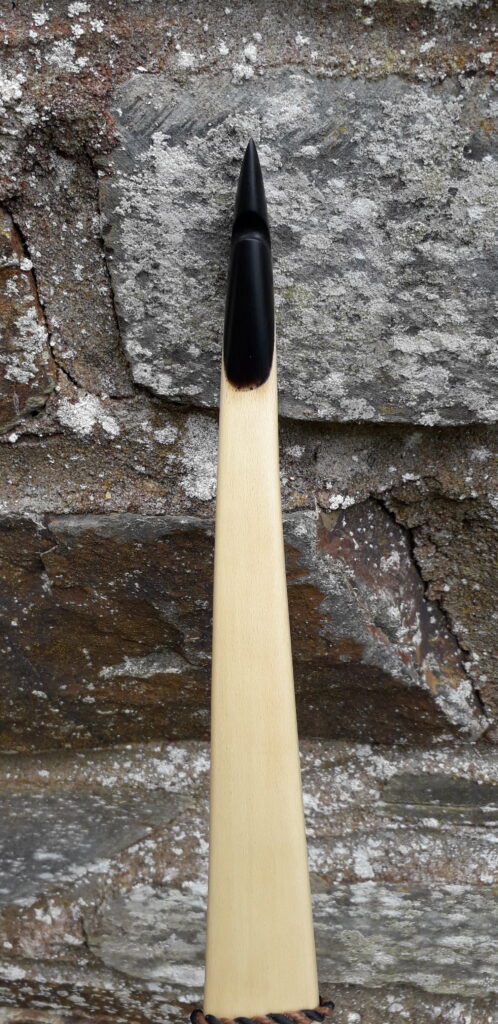
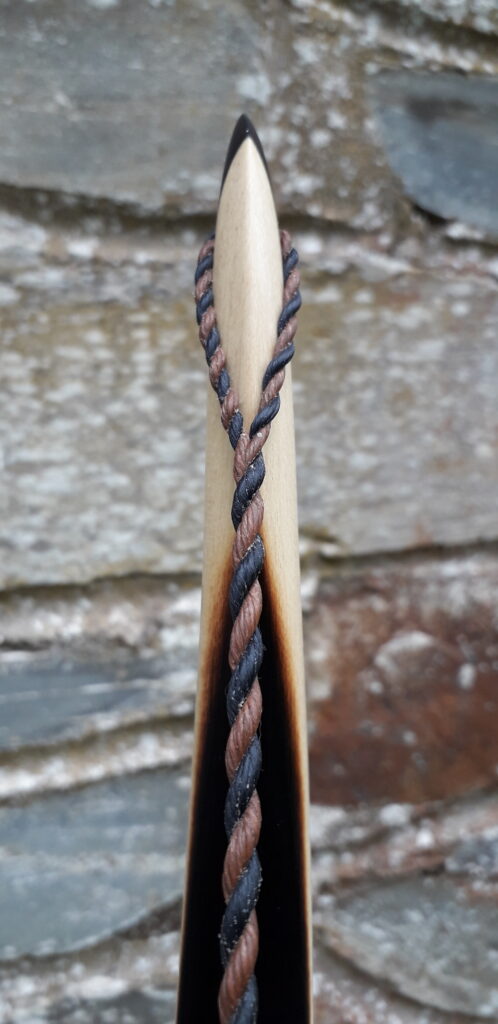
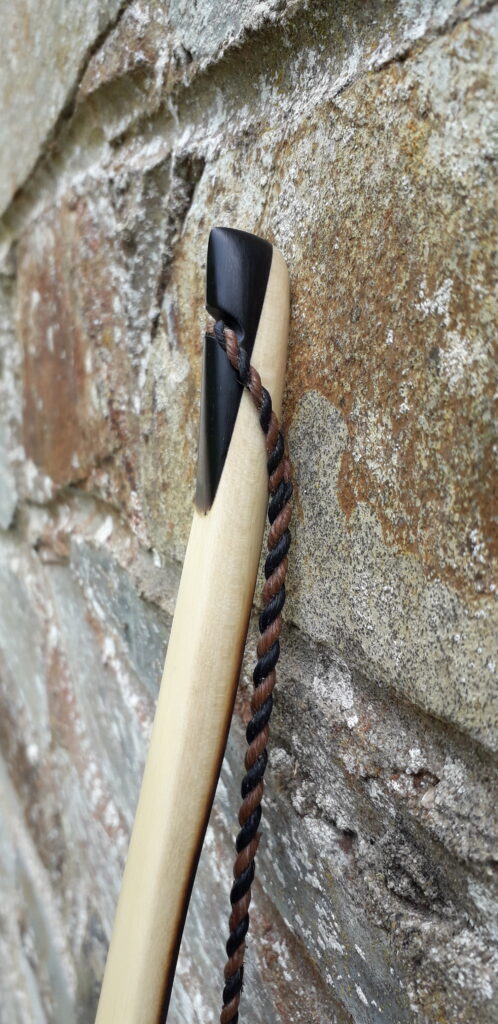
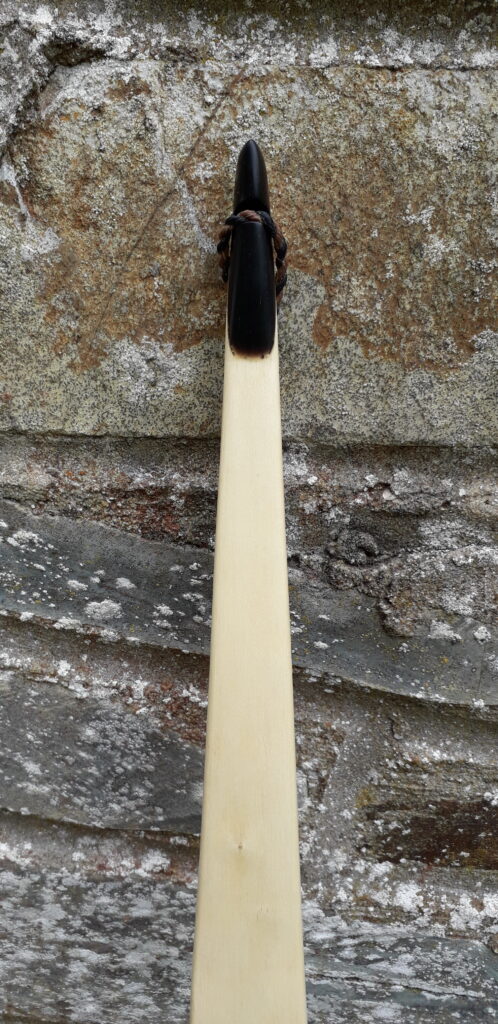
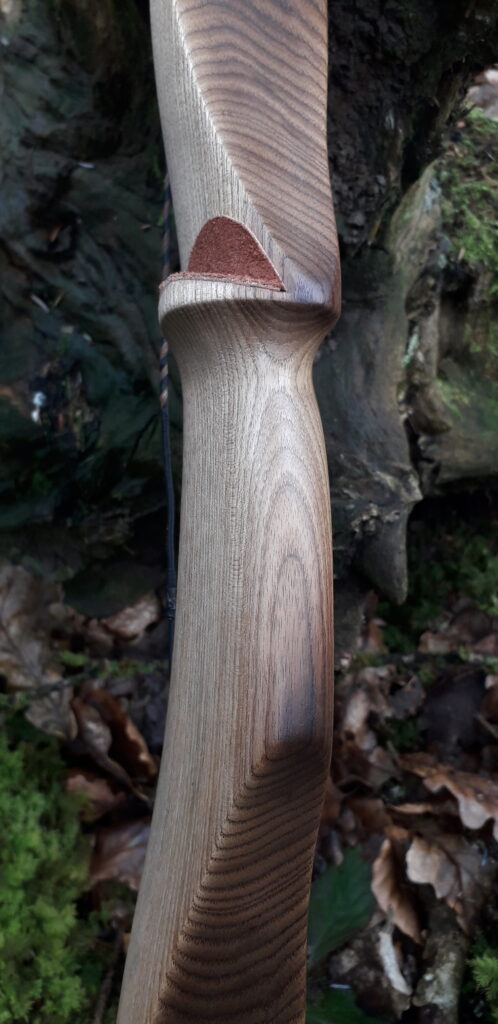
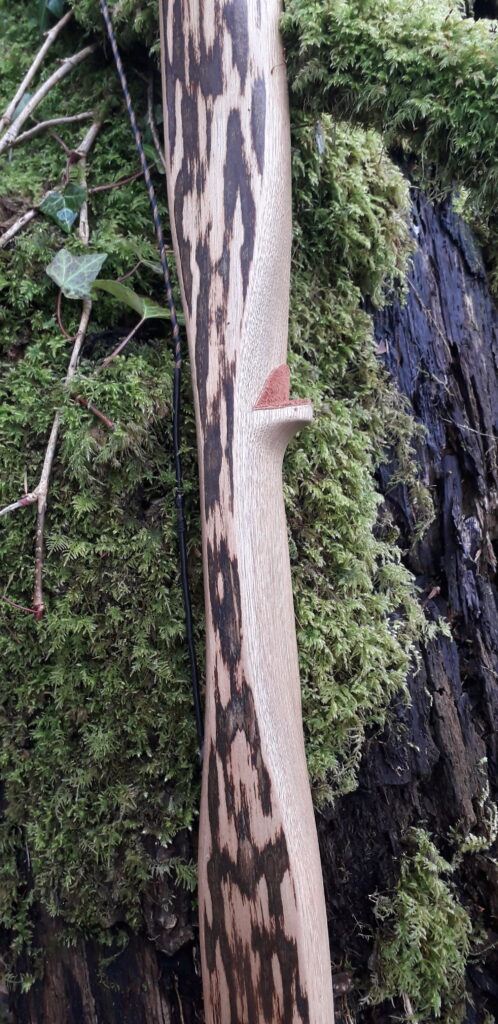
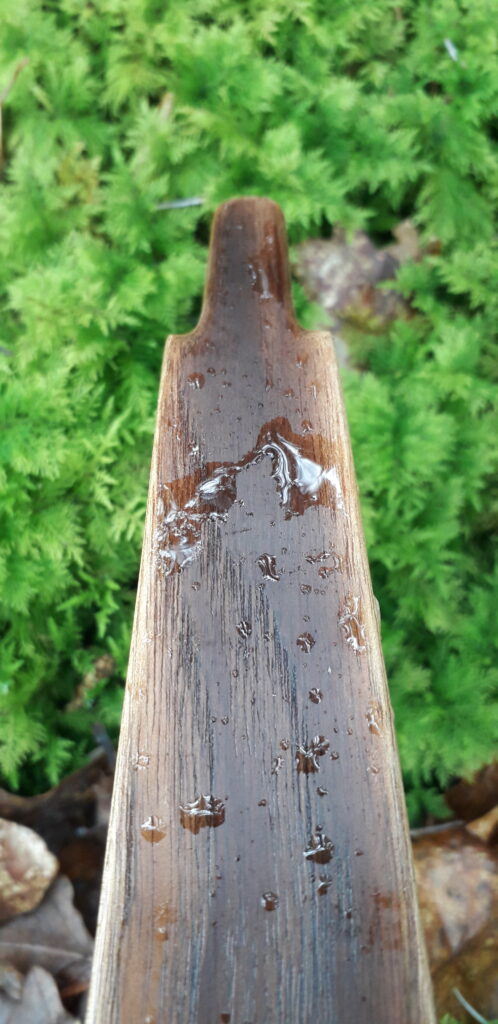
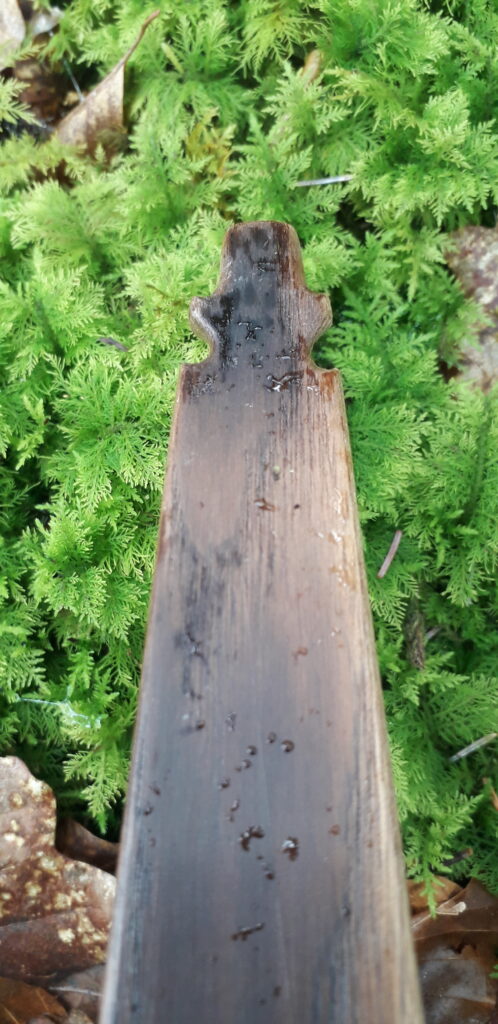
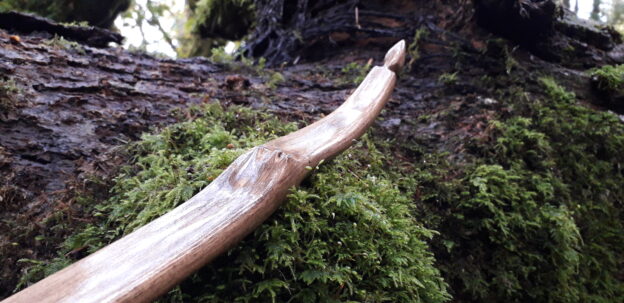
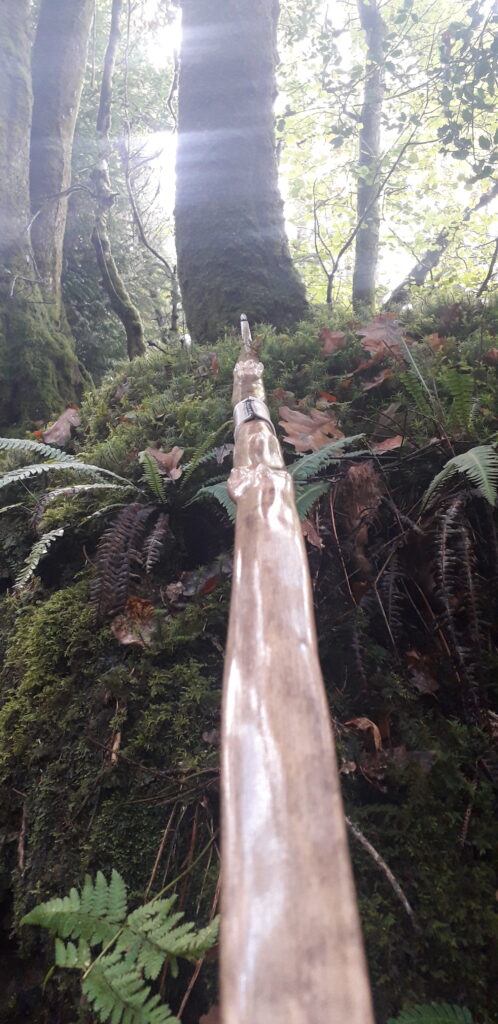
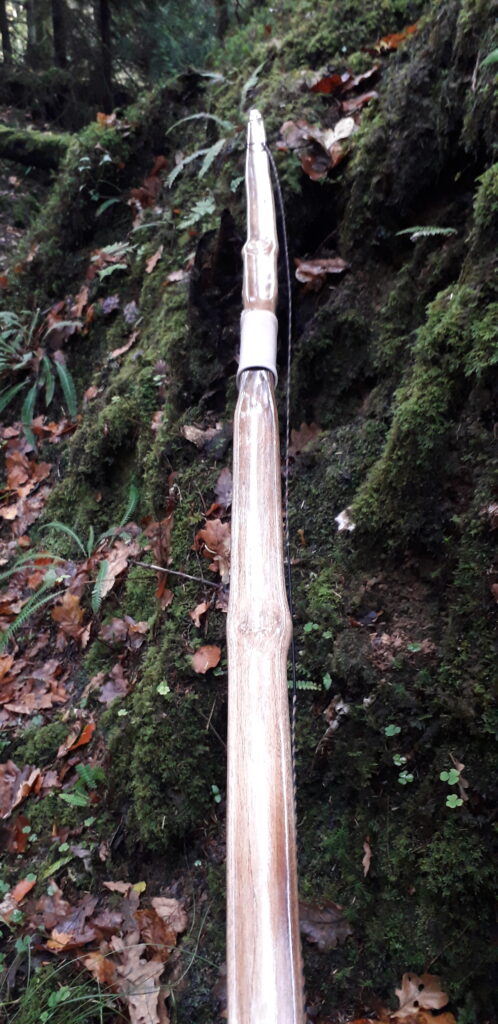
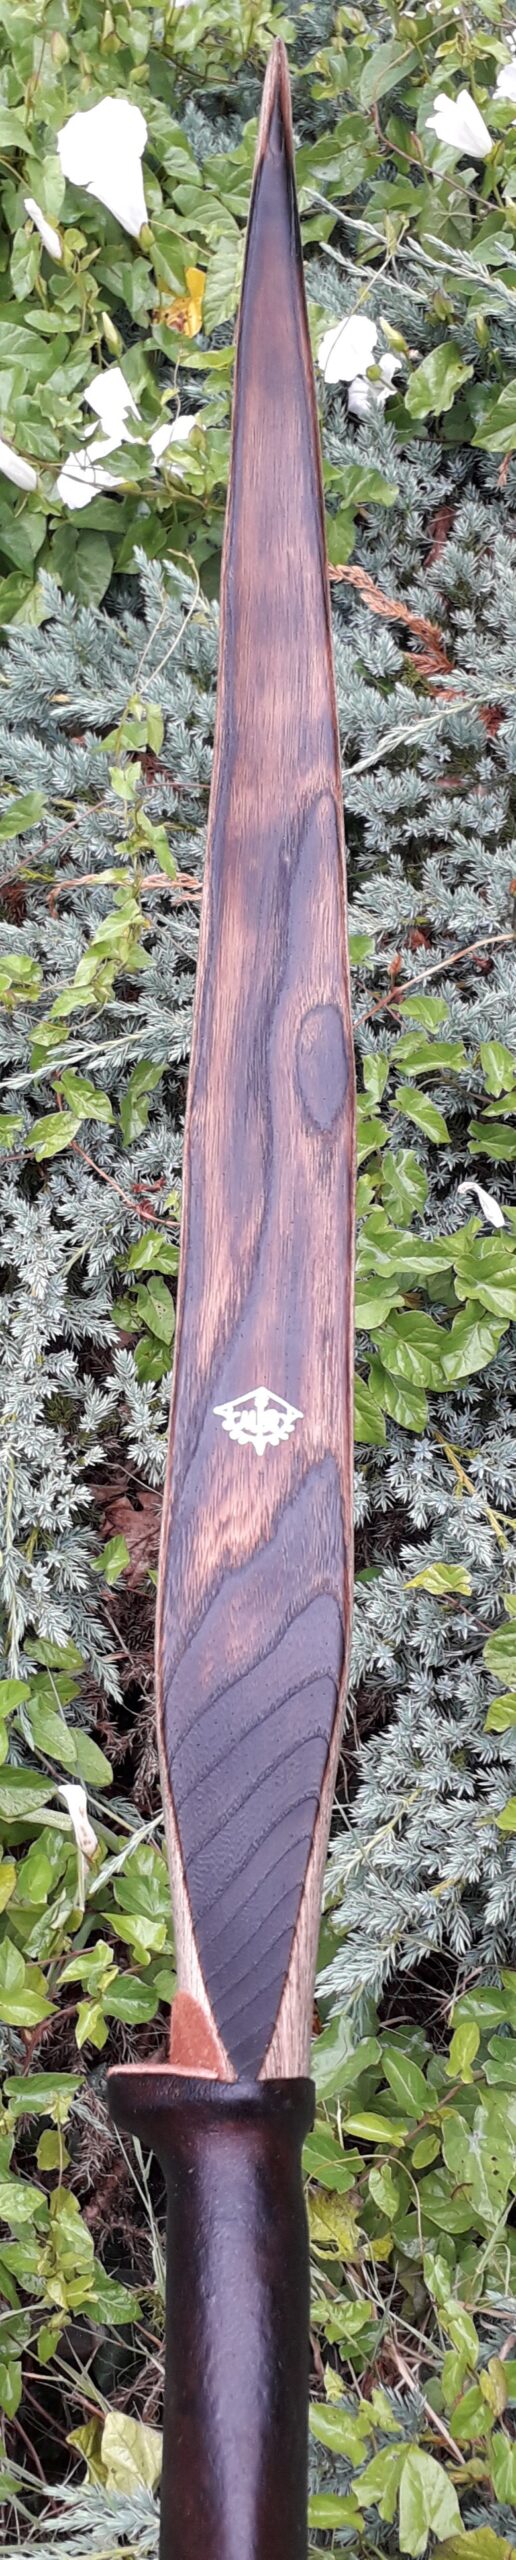
After a couple of days for the titebond III  and rawhide to dry thoroughly, I set about trimming the rawhide and fitting some really nice Red Deer antler tip overlay (which you can buy here: Wild English Red Deer Antler Whole Coronets 3.5 Long – Etsy UK)

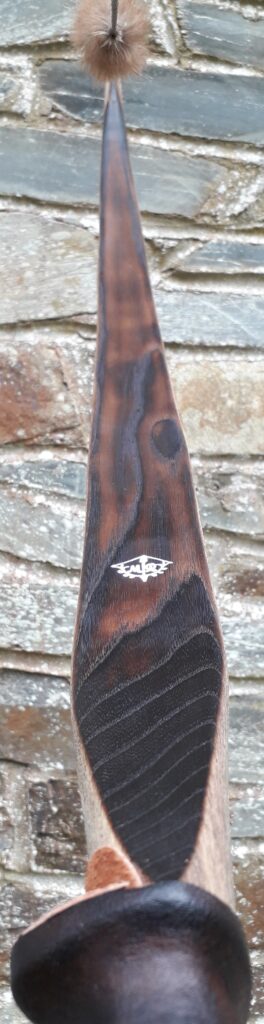
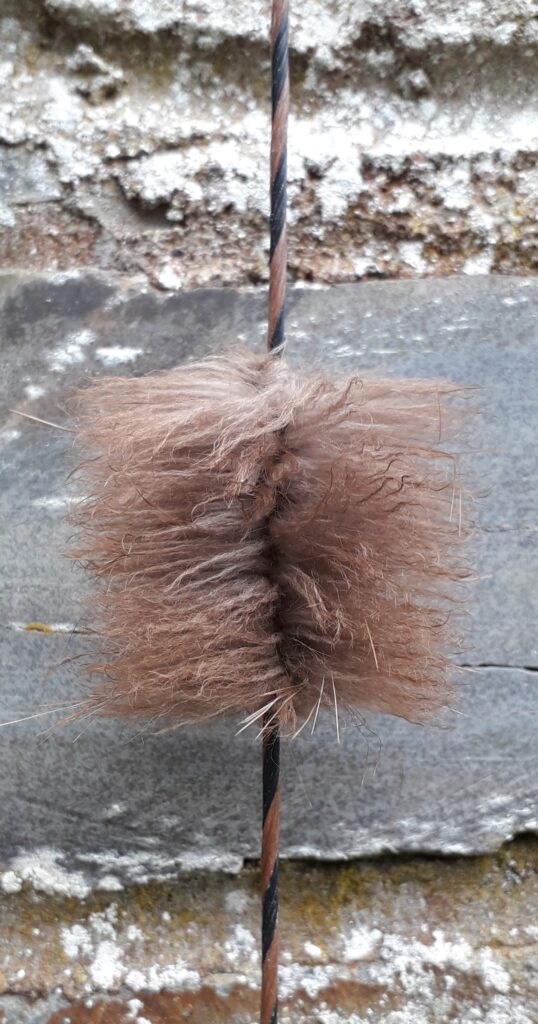
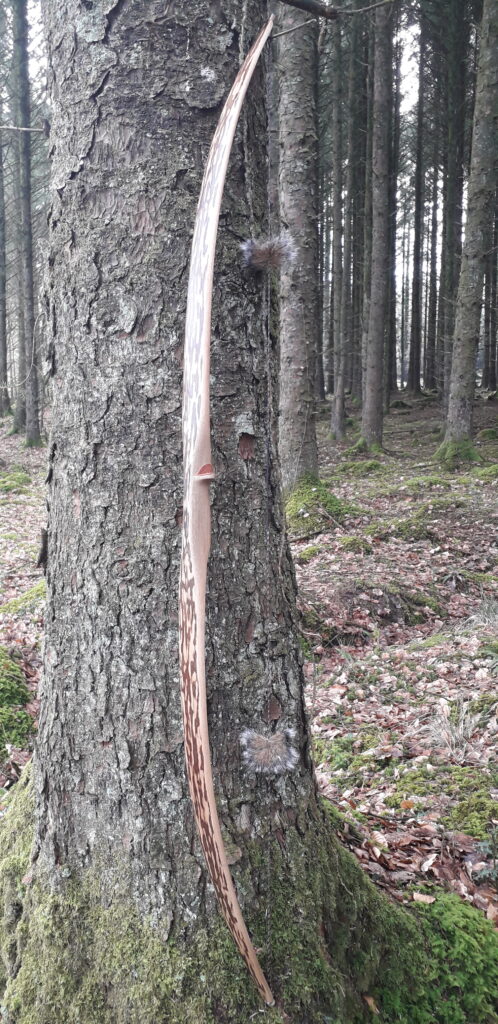
After sanding the whole bow down and polishing her up with wire wool, I stained the wood with an alcohol based black wood stain. The rawhide got treated to a coat of leather dye which once dry was wire wool scrubbed in the mid limb section to give it an aged and worn appearance.

 All the final scrapping and sanding to finish brought the weigh down to 59lbs at 28”. A further few shooting in sessions saw the weight settle in to 58lb at 28”. This was about perfect.

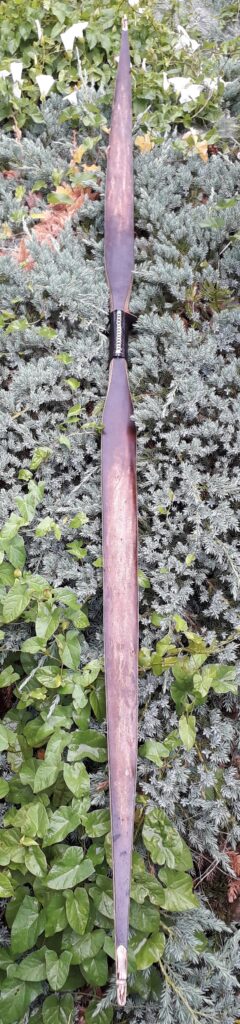
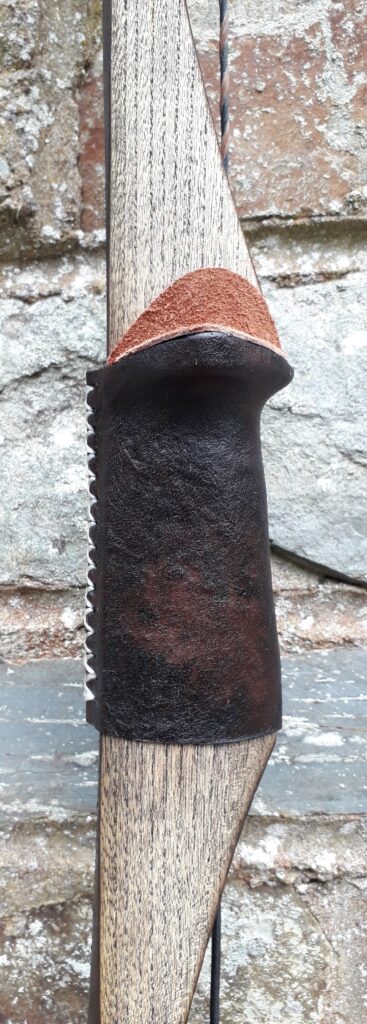
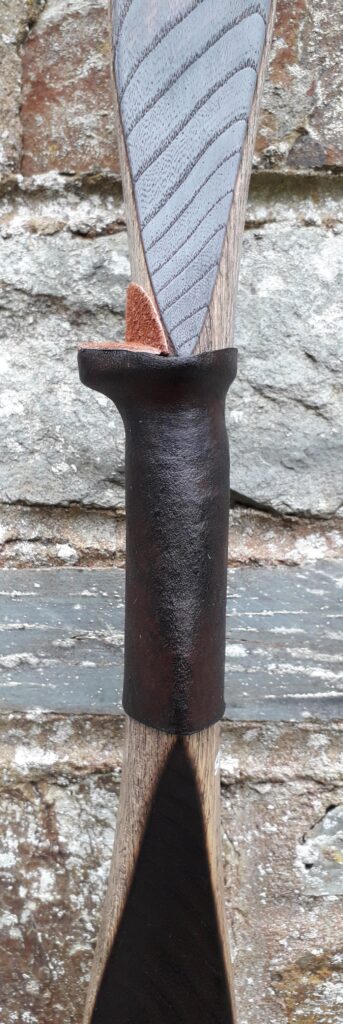
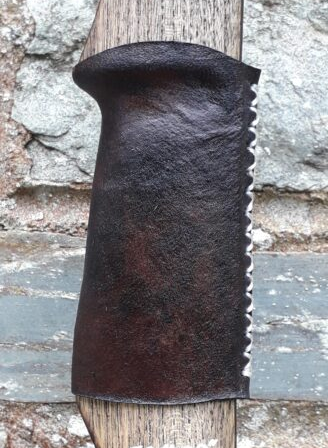
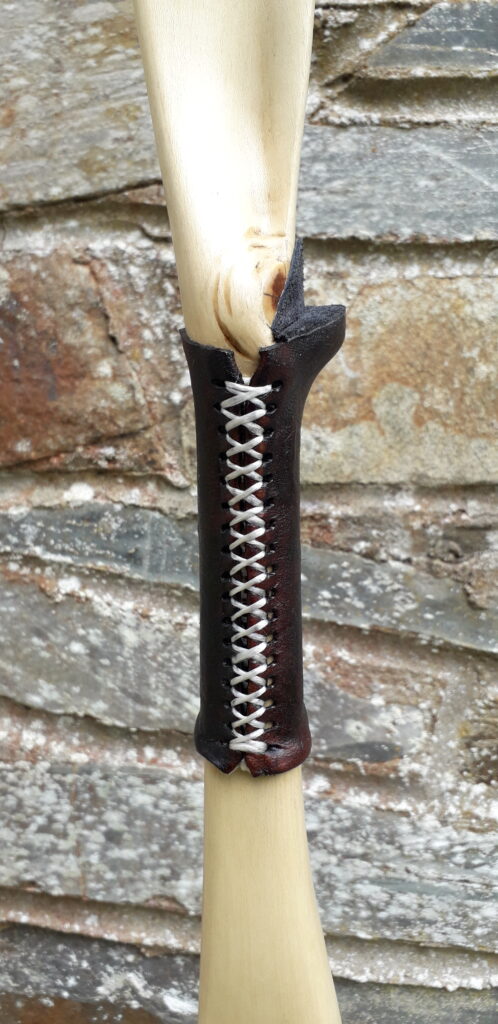
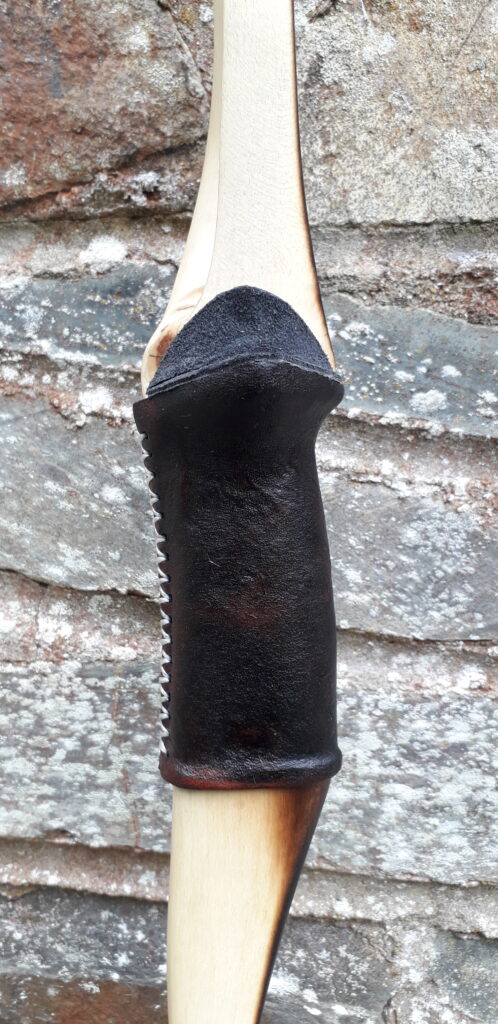
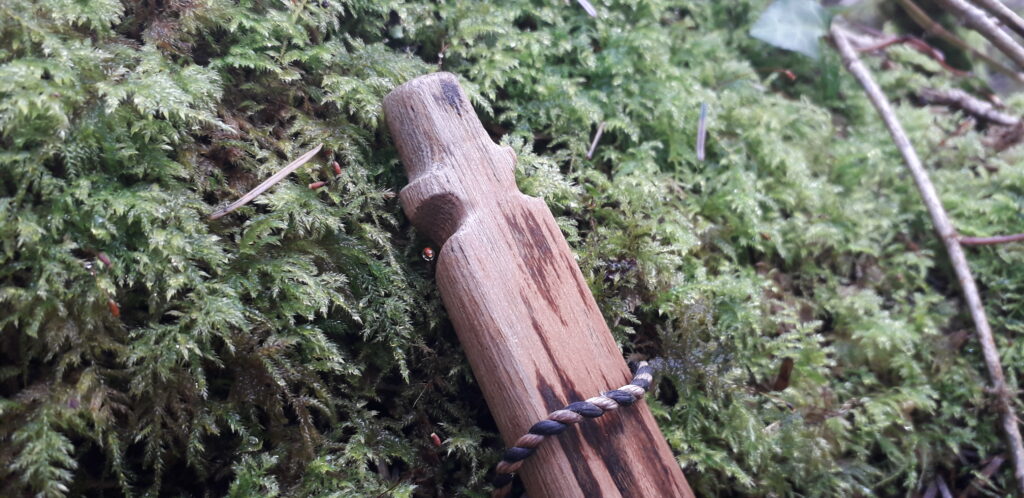
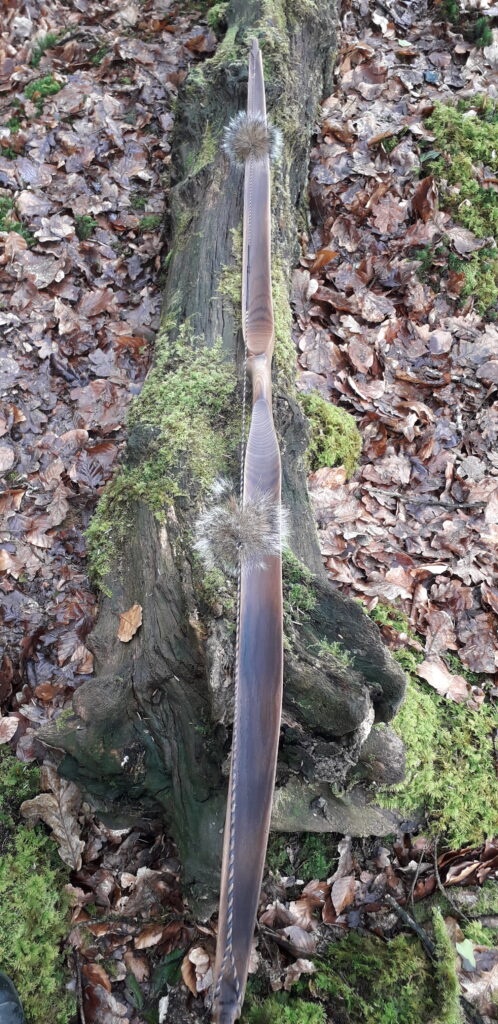
On went a piece of my own home produced, lovely, thick wild red deer neck rawhide for a handle covering (which you can buy here: 5 X 6 Wild Red Deer Rawhide Piece 0.4 1mm Thick – Etsy UK). This rawhide handle covering got a coat of leather stain too. The handle and the bow itself were then both treated to half a dozen coats of tung oil over the next couple of weeks to seal her up good and tight.

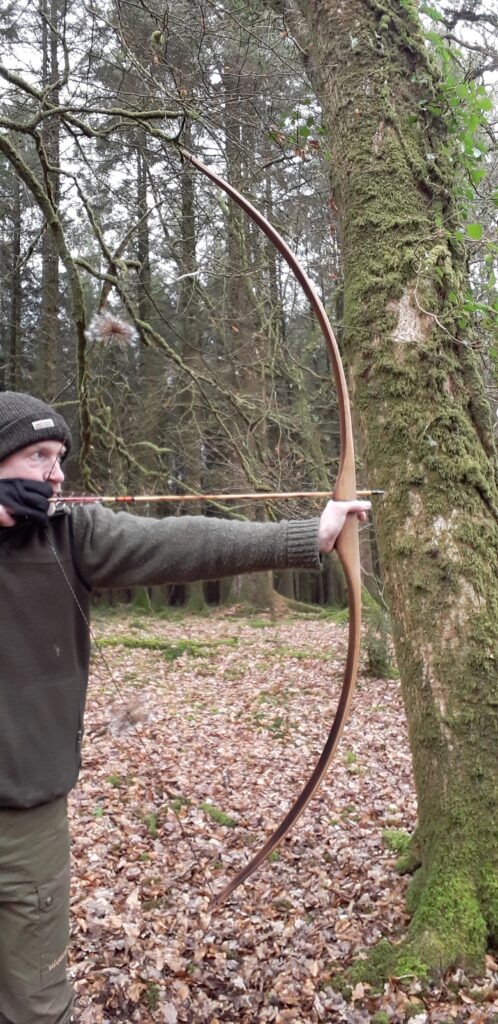
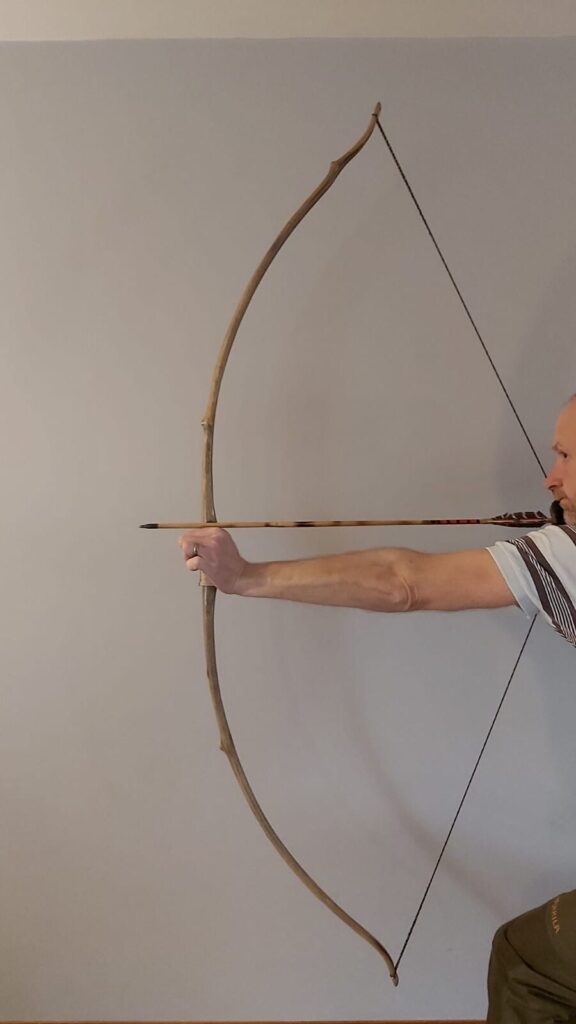
Whilst this bow is a bit on the heavy side for me personally, the guy who received this bow loved it. It is indeed a punchy bow with no noticeable hand shock, and very quiet too. It would make a really great hunting bow.

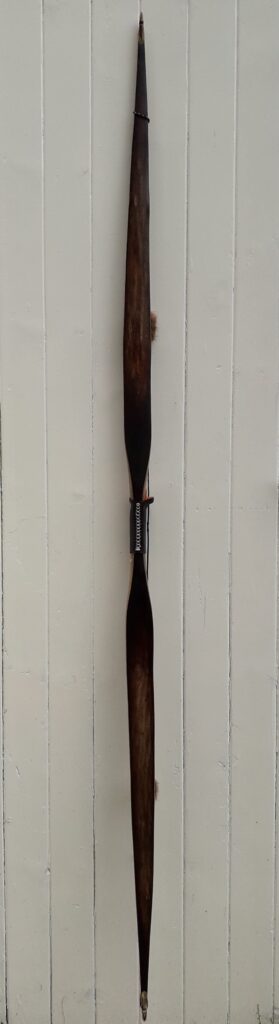
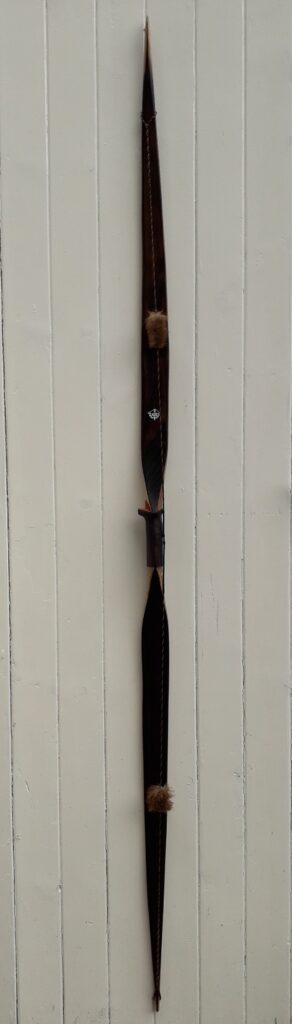
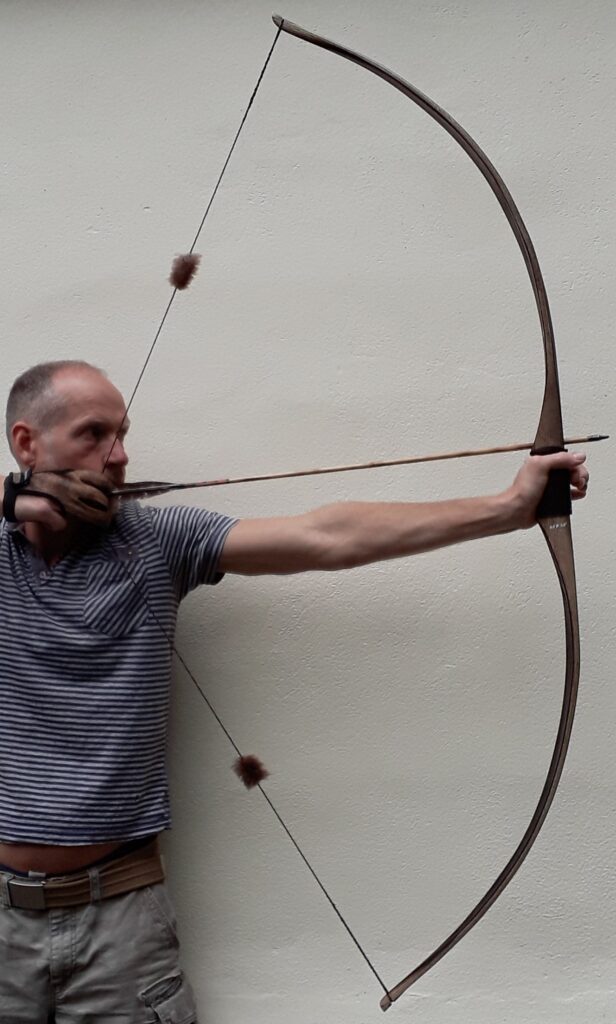
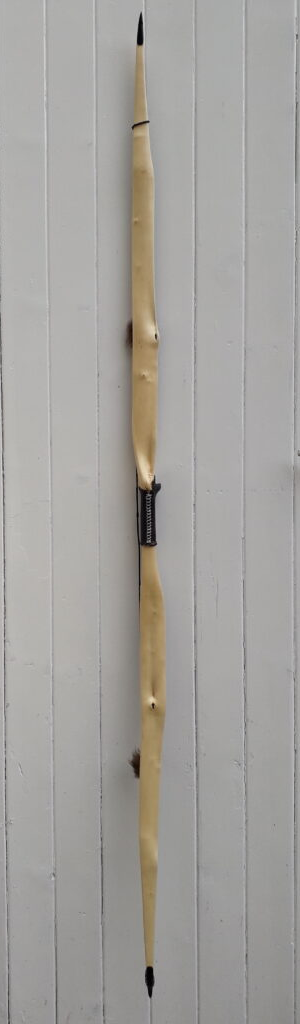
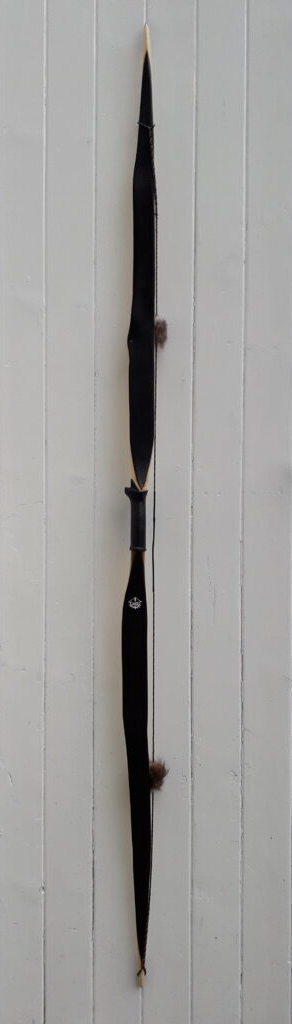
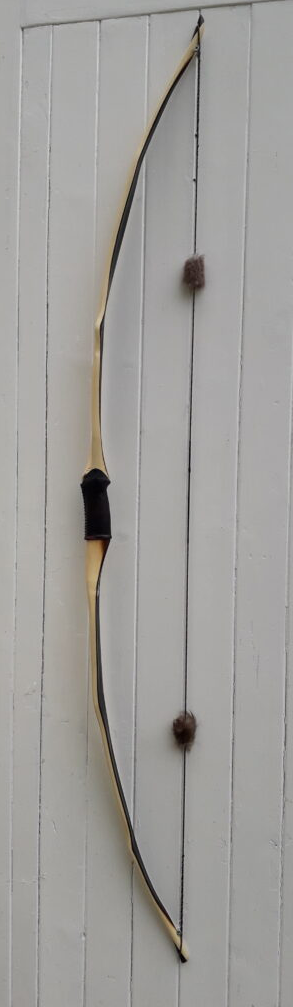
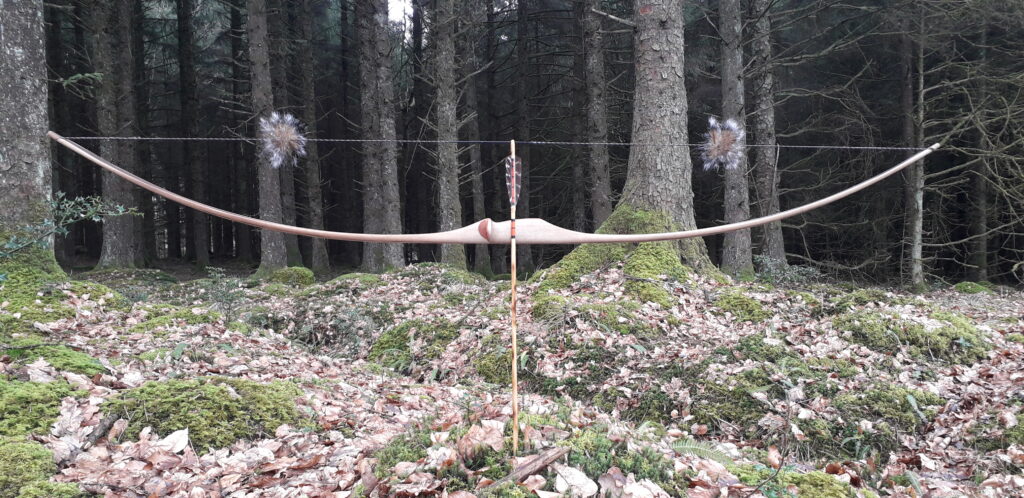
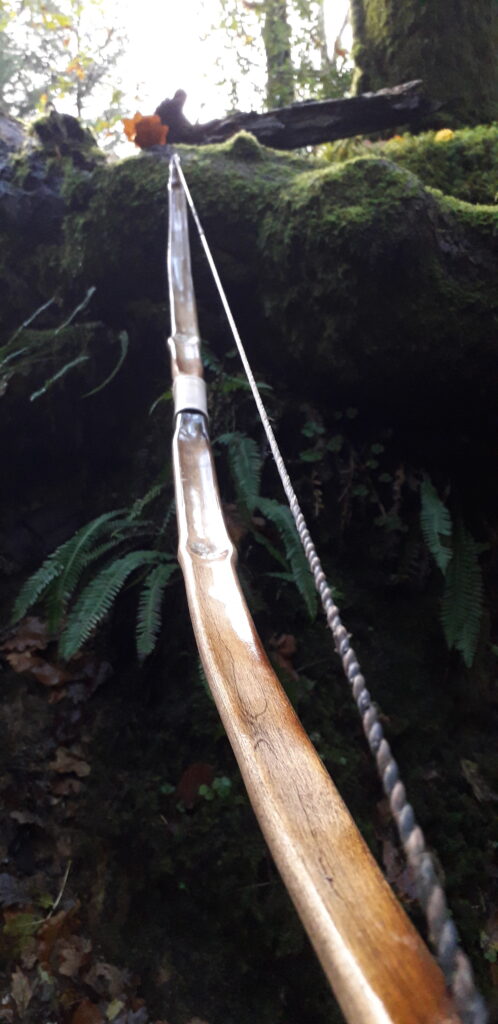
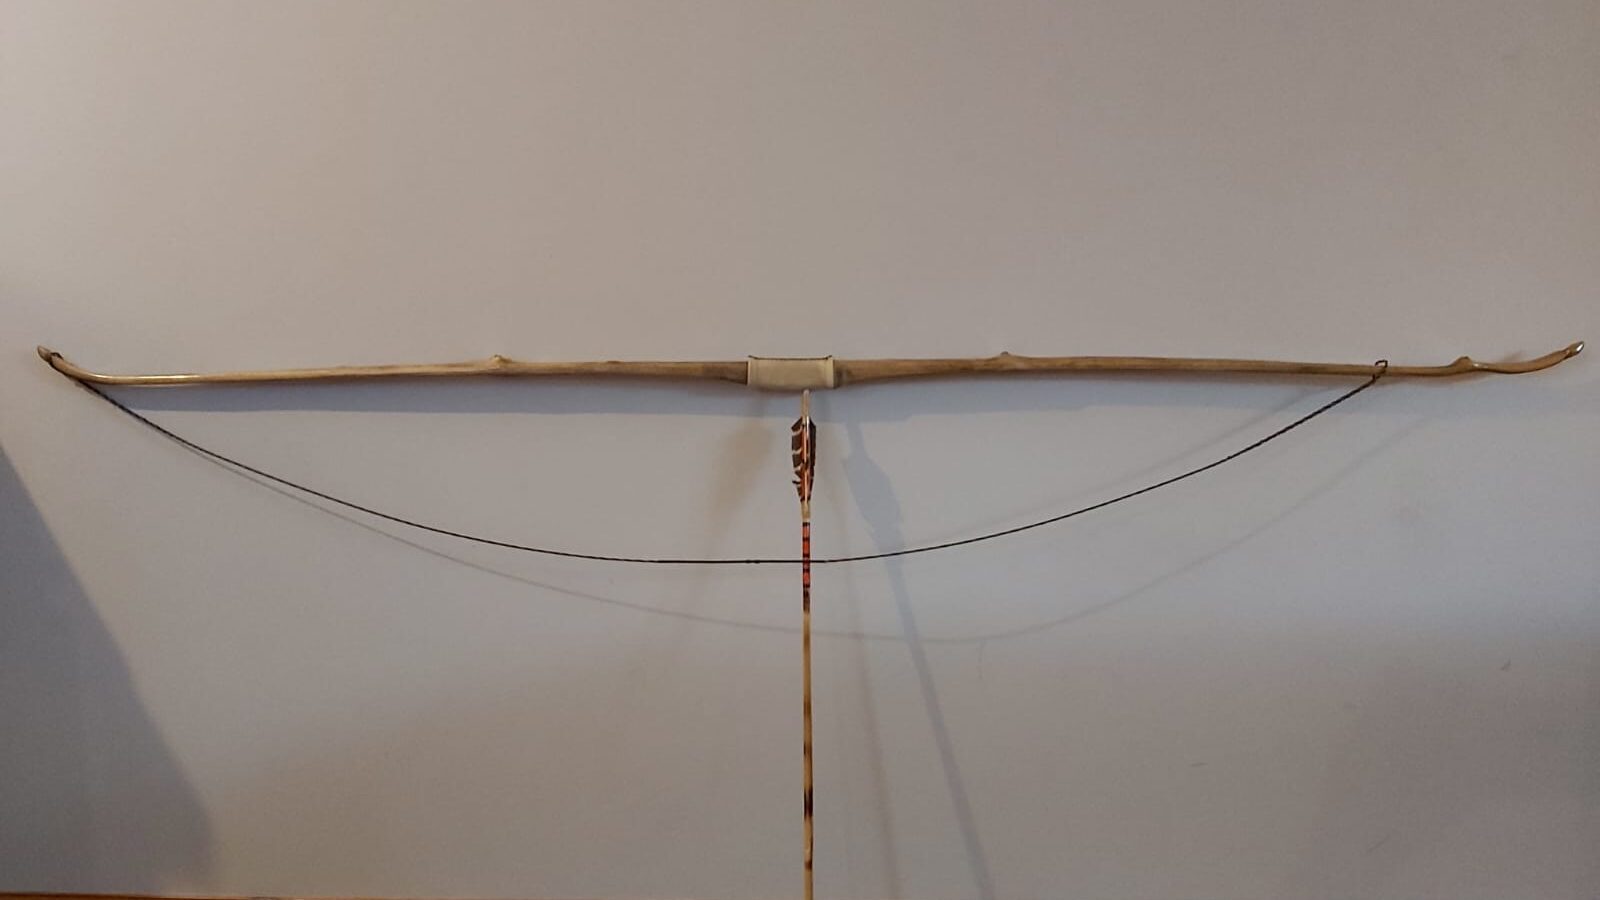
Here are the stats and pics. Hope you like!

Mass: 678 grams

Length NTN: 67”

Width: 1 7/8” at widest

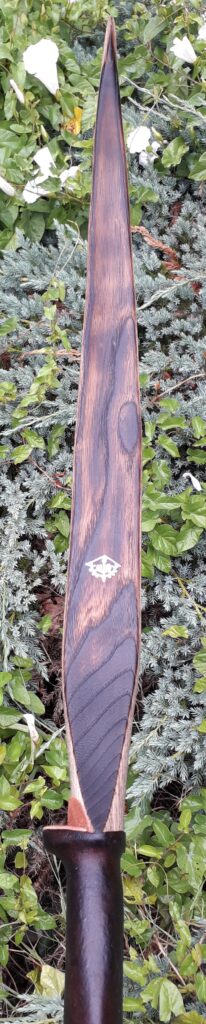
Tips: 5” static 3/8” wide

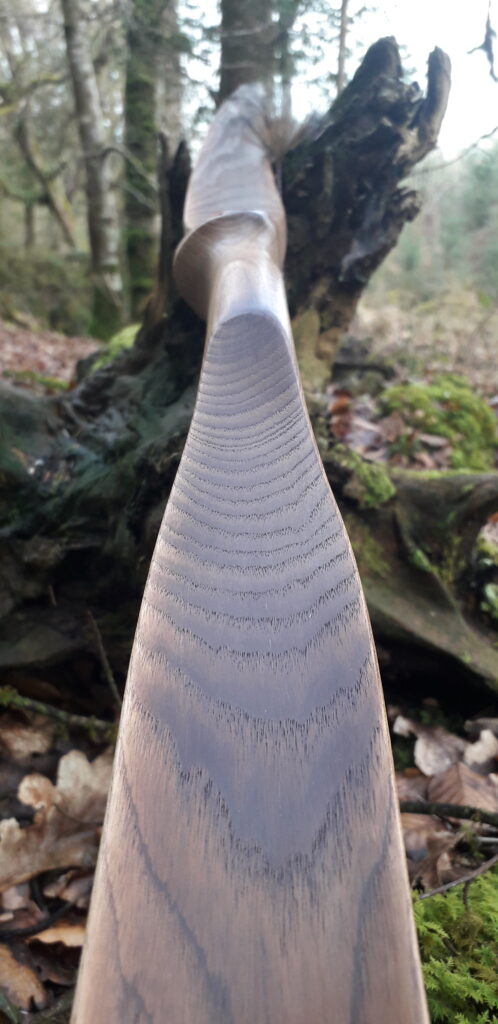
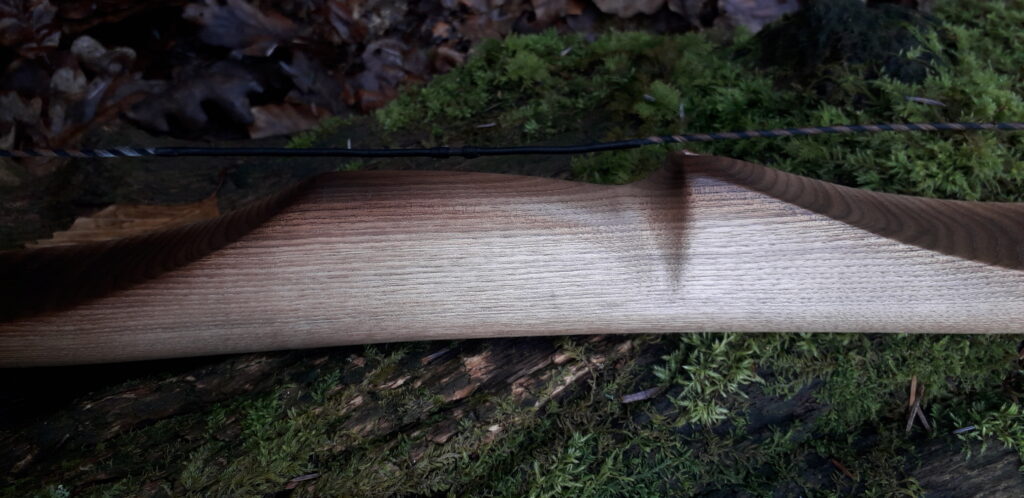
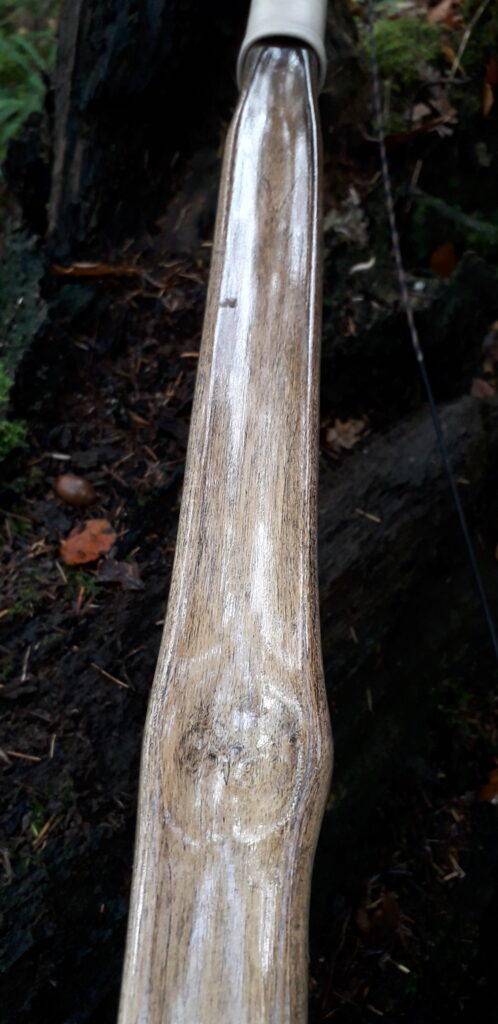
Back: Marginally crowned with minimal undulation. Face profile pyramidal.

Belly Profile: Working limb sections concaved to mirror back, transitioning at the tips to triangular cross section.

Tiller: Elliptical 1/8” positive.

Draw Weight: 58lbs at 28”

Holly Heat Treated Self Bow 40#@28″ (Bow No. 10)

I’ve had the stave this bow came from hanging in the rafters for at least three years and to be honest, I can’t for the life of me remember where it came from. Every time I moved it out the way to get to a different stave it would catch my attention. I love making bows from holly as it is excellent bow wood (if you can find a clean straight bit that is!) But every time I inspected this particular stave I’d be reminded of the bloody great chainsaw cut which was three parts of the way through the belly of what would end up being one of the limbs outer 1/3 sections. (Bloody tree surgeons!) And that is why this particular stave kept getting put  back in the rafters!

There was little intact belly wood remaining usable at this cut point, which led me to believe that the likelihood of this stave making a bow over 20lbs was low. So with those thoughts in my head I decided to quickly chop down to the bottom of the saw cut to see exactly how much wood remained intact. If there wasn’t enough I’d just scrap the stave and make space in the rafters.

But after 10 mins with the axe I was able to see that there was actually a little bit more wood left behind than I first thought, although definitely not enough to make a hunting weight bow. Enthused by this discovery I roughed out a basic profile and limb thickness to see exactly what I was able to play with. About 8mm of wood was all of what remained just outside of where the static tip fade would end and the working part of the outer limb would start. Not Ideal!

After completing the roughing out of both limbs, I set to tillering the stave to brace height. At this point I could see that some fairly minor propeller twist and string alignment issues would need resolving before taking the tiller much further. At this point it was already apparent that the weight was going to end up pretty low so I thought I’d have a go at fixing all the bending and twisting issues whilst at the same time adding a few more pounds of draw weight through heat treating the belly of the stave. The heat treatment took place whilst the stave was clamped strategically into an optimal position on a form with a touch of reflex. And it worked out pretty well! After taking a blow torch to the entire belly for half an hour, nearly all of the propeller twist came out, and the string alignment was resolved to. And all whilst adding a good 5 or 6lbs of well received draw weight too! Bonus!!

After tillering down to 26” on the tree I was now getting about 40lbs ish on the scale. So with a slightly whippy positive tiller I decided to shoot in the last couple of inches rather than pulling her down to 28” on the tillering tree. I often find that I’m best doing this towards the end of the tillering process as lets face it, the way we pull on a bow when actually shooting it is really quite different to how the bow is stressed on a tillering tree.

After a couple of hundred arrows I checked the tiller and all looked good so I finished sanding her down which knocked a pound or so off and left her pulling 40lbs at 28”. The positive tiller held good and I was pleased to have managed to pull off a sweet shooting light weight selfy, which actually looks quite good. I really like the contrast between the light and dark of the back and belly. Buffalow horn tip overlays also contrast sharply with the light wood of the back.

I finished the handle with some really nice thick wild red deer rawhide which I processed myself from a neck cape which came from a stag I shot back in the autumn. After re-wetting the rawhide and forming it around the contoured grip I let it dry for a couple of days. Once dry it got trimmed, punched, stained and glued/sewn back on. I dyed the rawhide dark tan with an impressive product which is new to me, Leather Dye WB – Furniture Clinic. I’ll certainly be using this product again as it works extremely well on rawhide. It’s a water based leather stain and soaks into both dry and wet rawhide amazingly. It penetrates really deep and dries quickly too and once dry it doesn’t rub off either unlike many other leather stains I’ve used before. And as it is a water based stain, you can oil over the stain to leave the whole thing totally water proof and looking like traditionally tanned leather. After a single coating of the leather stain I gave this particular handle covering along with the rest of the bow 6 coats of tung oil. Each coat being left a couple of days between coats to soak right in. I love the satin finish tung oil gives and I think that it sometimes suits certain bows better than the usual glossy Truoil type finishes. The handle covering is glued in situ with Titebond III.

The string is 12 strands of B55 and the silencers are Wild Beaver fur.

This bow would make a great ladies/tennagers primitive longbow and will be listed for sale on my ETSY Shop very soon. My Shop can be found here: https://www.etsy.com/uk/shop/Southmoorbows?ref=l2-about-shopname

Stats are as follows:

Mass: 554 grams

Length NTN: 62”

Width: 1 ¾” at widest part

Tips: 4” static 3/8” wide

Back: Moderately crowned with valleys. : Pyramidal face profile

Belly Profile: Undulating between flat and concaved to mirror the bows back.

Tiller: Lightly whipped. 1/8” positive

Brace height: 5 1/2″

Draw Weight: 40lbs at 28”

Here are the pics. Hope you like her!

Ash HLD Selfbow – Heat Treated 51# @ 27” (Bow No. 8)

Ash is a timber which is super common in my part of the world. As a firewood, Ash is a favourite of mine. As a bow wood though, it is never my first choice. Nor is it my second choice come to think of it!

Ash staves always seem to find their way into my stave collection though. Not surprising really given the abundance of clean and relatively straight logs which abound within my local landscape.

The stave which this bow came from was cut out of a hedgerow by one of my neighbours who was in the process of laying an old derelict hedgerow. The hedgerow in question was full of nice straight and clean 4-6” diameter Ash stems which had coppiced up from the remnants of the parent trees which were laid decades earlier.

I dread to think how many bows I’ve made from Ash. Back in my late teens I would try and make English style D shaped longbows from Ash only to be bitterly disappointed when the bellies chrysaled and the set was measurable in feet not inches! (Joking of course).

So when I pulled this stave out of the rack a few months ago I knew that, without optimising the bow design, a bow made from this stave would only make a “reasonable” bow at best, no matter how clean and straight it was. 

So I decided to make yet another Ash bow, but one which would incorporate design features which would enhance efficient and durability whilst also making it a pleasure to shoot. But without any frills! This was going to be a quick and simple primitive bow with only one none essential addition – An arrow rest. Just because I fancied one!

As is the norm around here, this typical Devonian Ash stave showed thin rings and way more early wood than I like to see. But this is just the way most of the Ash in this part of the world grows. Here in the South West, our mild and wet 10 month growing season produces timber which is fast growing through the spring months. This long growing season leads to many of our native hardwood species laying down a considerable proportion of its total seasonal growth ring to early wood.

Ash in general is weak in compression. Our local Ash is even weaker in compression than normal, so if this stave was going to make a bow which would perform and last, then I would have to pull out all the stops to prevent any delaminating in the fades and/or the belly getting crushed. Both of these faults are common place with our local Ash unless extra care is taken.

This bow came from a stave which was 76” long. I cut it down to 68” to ensure that the length was adequate enough to mitigate for the weaker than average compression strength I’d envisaged this stave suffering from. The plan was to end up with a bow measuring 66” nock to nock with limbs 2” wide for the inner thirds tapering down to 3/4″ wide self nocks

In terms of basic appearance I was going for the typical flatbow face profile with limbs lenticular in shape. The cambium had been left on this stave so I worked a camo effect pattern into it. The handle would be deep and contoured simply because I can knock my favourite shape out so quick and easy these days that it takes me no time but adds tremendous comfort to the grip.

Tiller would be circular and the limb tips would be made to do as much work as the rest of the limb in order to maximise the distribution of compression over the greatest possible surface area. Fades would be 3” max in order to get as much limb bending as I could without sacrificing a rigid handle.

The limbs would be slightly hollowed out so as to almost mimic the crown on the back in order to increase the surface area of the belly. Thickness across the width of the limb would increase slightly towards the centre line and thin towards the edges. And the corners on the back would be slightly rounded in order to take some of the tension strong back wood out of commission. This would achieve a better balance between the overpowering tension strength and the compression weak belly wood which this particular Ash stave presented me with.

After basic roughing out, the stave was pretty straight and with a moister content probably around 12%. I wanted some overall reflex in the bow before starting the tillering process so I clamped the stave to a reflex form with about 2” of induced reflex. Clamped in reflex, I then force dried the roughed out stave over my wood burner until the weight would not reduce any further.

After some time to recover ambient moisture levels (6-8%) I tillered the bow to brace height. Most of the force drying reflex had fallen out so before commencing with full tillering, I decided to put the bow back on the same reflex form and thoroughly heat treat it over my wood burner stove top.

My stove was running scolding hot thanks to some lovely dry beech logs. Each limb got about an hour and a half sat over the stove top in order to cook both limb bellies right through to the centre of the limb. The bow’s mass was reduced significantly and given the depth of the cook, there was no way this bow was going to take in much ambient moisture again.

One of the benefits of heavily heat treating white woods is that the cooking process makes the belly side of the bow somewhat hydrophobic. This reduces the woods ability to suck ambient moisture back in. Raw untreated/unsealed Ash loves to suck in atmospheric moisture, which is why it can become a noodle very quickly in damp condition without very good sealing.

After heat treating, I gave the bow a couple of days to rehydrate back to something more like 6-8% moisture content. An untreated, unsealed ash bow will soon suck in enough ambient moister to raise its moister content back up to around 10%. that would be a recipe for set. However a heavily heat treated bow will not slip back to that kind of moisture content without actually wetting it.

After a couple of days to reacclimatise, I then carried on with tillering the bow back to brace again. The cooking of the belly had moved the tiller slightly and added several pounds in draw weight. This is usually what happens so should be expected. In fairly short time she was finished on the tiller tree and looked and felt about 1/8th positive at 53lb at 27”.

I find that heavily heat treated bows will produce the same arrow speeds as untreated bows of significantly higher draw weights and this bow proved that theory once again. The chronograph demonstrated average arrow speeds of 168fps with a 450 grain arrow. That’s not bad for a simple Ash self bow which was only drawn to 27”!

For a finish I just used a clear polyurethane which I had kicking about. The colour which you can see in the remnants of the cambium are as a result of a couple of days sat in the ammonia fuming pipe before roughing out and force drying began. The tannins in the bark went a nice dark green/brown. The cammo effect looks great.

I didn’t bother with a handle covering on this one. It feels very comfortable even without a covering. For the arrow rest I just used some leather scraps. Nocks were a rendition of the classic Sudbury bow design as depicted in the fantastic book: Encyclopedia of Native American Bows, Arrows & Quivers Volume 1 page 32. My nocks were filed in at 45 degrees though, as opposed to the original 90 degrees as illustrated in the previously mentioned book.

The mass was reduced tremendously by the heat treating process and this bow feels nice and light and manoeuvrable in the hand. After shooting her in, the reflex had dropped a bit. Immediately after unstringing there is about 1” of reflex which settles back to about 1 ½” after resting.

This ended up being a super snappy lightweight bow settling in after 2 weeks of shooting at 51lb at 27”. She is certainly plain and simple but has all the power and functionality that you would want in a primitive hunting bow.

She balances well in the hand whilst being carried and feels well balanced through the draw cycle. She doesn’t stack and is lovely and comfortable to hold back at full draw. The release is nice and quiet without any hand shock due to the low limb mass and comfortable grip. The bow string is the one I made for the previous blog post article I did a few weeks ago discussing using a squirrel tail to make string silencers. You can read that post here: https://southmoorbows.com/squirrel-tail-bow-string-silencers-quick-and-easy-way/

So here she is, hope she inspires you to have a go at heat treating an otherwise simple white wood flatty. Enjoy!

Elder Character Longbow Hollow Limb Design. 40# 28″ Bow No.5

This bow started out life as a very simple 60lb flatbow which was made from a stave which had been given to me by my neighbour who was grubbing out a patch of wasteland on his farm. Whilst the log was fairly straight (for Elder) the twist was the best part of 80 degrees!

I almost binned the log but thought that I’d use it to test how well a roughed out green Elder stave could be trained to conform to a better shape by using a form and clamps throughout the initial air drying phase.

After a few weeks on the drying form the clamps were removed to reveal a nice straight and twist free stave which I moved indoors to hang above the wood burner to speed dry for another couple of weeks.

A one inch long drying check behind one of the larger knot clusters was the only fault which I was a bit surprise by since Elder can check quite badly when force dried too hard.

Elder is strong in compression so I felt safe in keeping the limb width down to around 1″ 3/8ths. I’d never do this for a wood like Ash or Hazel but Elder is a fantastically springy wood which can cope with way more of a narrow limb profile so long as the length is not compromised too much.

I kept the length long at 66″ nock to nock and opted for a straight rigid handle and simple self nocks. I tillered the bow to 60lbs at 28″ and shot this bow like that for about a year. She performed well and was a powerful fast and efficient bow but 60lbs was too heavy for my likings so back in the late autumn of last year I decided to either get rid of this bow or drop the weight.

At around the same time my brother’s eldest son was asking if I could make him a bow. Whilst happy to oblige, (great excuse to make another bow) the reality was that I was short of time so instead of making him a bow from scratch I opted to re-tiller this Elder bow for him.

Long story short, I dropped the weight down to a more comfortable draw weight for my nephew at his draw length which is 26″. And instead of just removing wood from the previously flat belly I decided to hollow out the limbs to match the crown on the back by using the curved scrapper to re-tiller.

The bow had taken about an inch of set whilst in its previous 60lb straight limbed flat bellied form, so after reducing the weight I decided to see if I could reduce that set a little by heat treating the belly whilst fixed to a slightly reflexed form.

But before heat treating the limbs I also decided to lightly flick the tips to try and reduce the stack which it had suffered a little from previously. The recurved tips where steamed in, then once they had settled, I heated the recurves a bit more thoroughly with the stove top in order to ensure that they would never pull out.

After heat treating the flicked tips and the hollowed out limbs I finished the re-tillering and quit at 42lb at 26″ with a 1/8″ inch positive tiller. Shooting in and re-sanding shaved off another couple of pounds so I finally ended up at 40lbs at 26″.

The previous finish on this bow had been urethane varnish which I was keen to strip of so I could stain the revamped bow a darker colour. After stripping I hit the bare wood with a dark Jacobean oil based stain then sealed her up with 8 coats of Truoil.

A simple leather handle cover and piece of leather as the arrow pass finished the job. The bow is now a light in the hand (460grams) snappy and pointable bow and my nephew was delighted the the end result. I’ve paired this bow up with some 35-40 spine arrows and she is sending a 400 grain arrow over the chronograph at an average of 141ft sec which isn’t anything special but sure is fun to point at stumps!

Here are the pics. Hope you like!

Top nock.
Draw to 26″
1/2″ of set immediately after unstringing. Returns to 1/8th inch after resting.