A good friend of mine does a fair bit of hedge laying through the winter months and has been kind enough to supply me with several nice bow staves over the years. Most of these staves have been Elm, Ash and Hazel. One bow wood which I’ve been badgering him about for years is Hawthorn. So it came as a nice surprise when he walked me out to his shed to show me what he’d accumulated for me over the winter. Because sat in the rafters was a reasonably clean, straight and fairly untwisted 70” long Hawthorn stave!
When I say “clean and straight” I mean by Hawthorn standards. The best of hawthorn would still deter all but the most insane of bowyers (like me). And by “untwisted”, what I actually mean is propeller twist of less than 45 degrees, because around here at least, if you can find a Hawthorn stave with less than 45 degrees of twist then boy have you done good!!
I like to split my bow wood logs into staves, and I could have done that with this hawthorn log as it was about 5” in diameter. Trouble is, every time I try this with hawthorn, it splits out into a spiral of doom, terminating with a grain run out which you can absolutely guarantee will run across the proportion of the log which would have made for the back of your bow. I was not going to take that risk with this precious log!
Hawthorn is nice bow wood. Let me explain what I mean by such a statement as there will be seasoned bowyers reading this that will screw their faces up at the very thought of using such a problem laden wood for bows. Hawthorn, with its twist, knots, interlocking grain and undulating back topography will certainly challenge the best of us. But with a bit of patience, and the right design, Hawthorn can make for a powerful, hard hitting bow which will rival many yew bows in terms of performance.
Hawthorn, like most UK thorn species, is more flexible and springy than many other white woods. Most whitewoods in my experience are quite stiff. Hawthorn however is one of only a few whitewoods which has about the right balance between tension and compression strength. Most white woods, at least here in the UK, are very strong in tension, but they lack the compression strength necessary to withstand the crushing forces which the bellies of whitewood bows routinely experience. This creates a challenge for bowyers and requires consideration to be given to bow design in order to mitigate the problems of using such tension strong woods.
Hawthorn is a bit different. Hawthorn has a much more balanced distribution of tension and compression strength. In fact I’d estimate the balance between tension and compression to be pretty close to even. With all that said, correct bow design is still important when using hawthorn, but not as important as when using woods like Ash and Hazel. Leave too much back wood working on a compression weak white wood like hazel, or worst still, not enough belly wood working, and you will experience fretting on the belly for sure. And that’s even with a perfectly tillered bow.
For this reason I typically reduce the amount of back wood which is truly working on most whitewood bows. This can be done a couple of ways. An example would be to use a stave with a naturally moderate to high crown. A high crown ensures that only the central section of the back is working and therefore coming under tension. Another way to balance the tension and compression forces on a tension strong wood could be to keep the entire width of the belly nice and flat so that all of the belly is working against the compression forces brought about by the tension strong back. Heat treating the bellies of compression weak timbers can also help to strengthen the compressive qualities of woods with weak bellies. But go careful with heat treating. Cook it for too long and you can make belly wood even weaker.
But none of this is necessary with Hawthorn. On a hawthorn flat bow at least, you can have just as much back wood as belly wood working and you will likely not experience chrysaling. Or at least you won’t as long as you have a well designed and tillered stick without any hinges of course!.
Heat treating the bellies of Hawthorn bows is unnecessary in my experience. Whilst heat treating woods like Ash, Elm and Hazel will undoubtedly make these woods behave more springy, Hawthorn is plenty springy enough just as it comes.
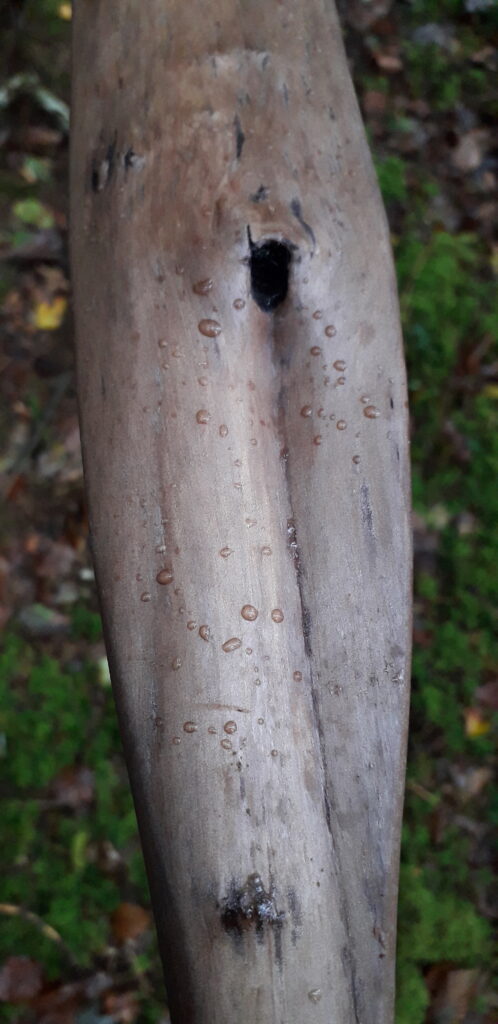
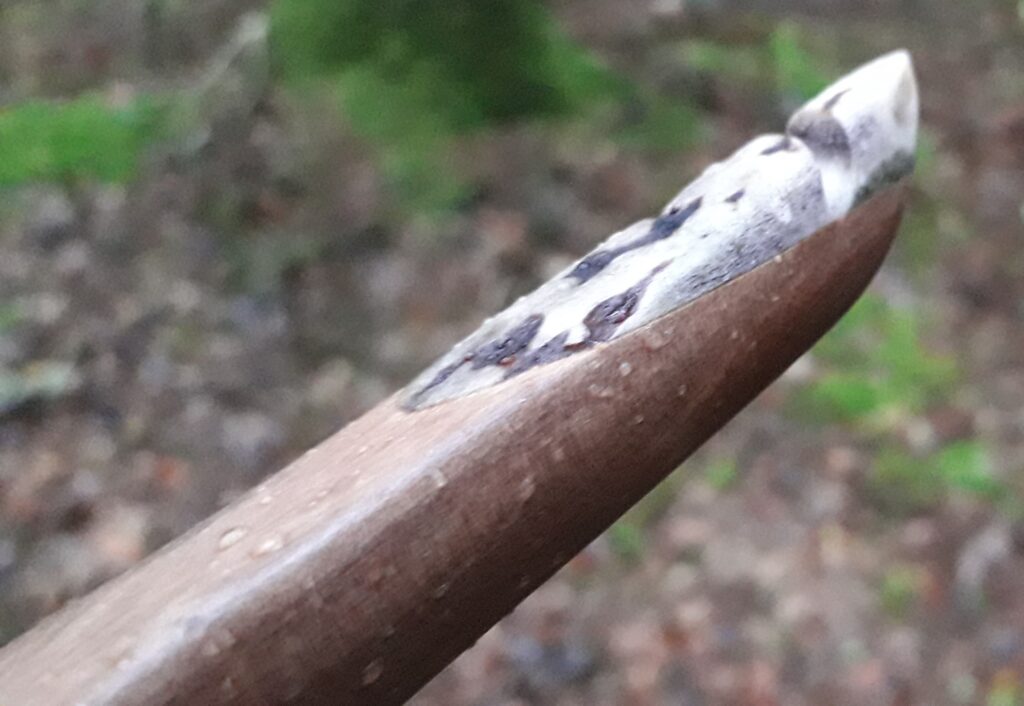
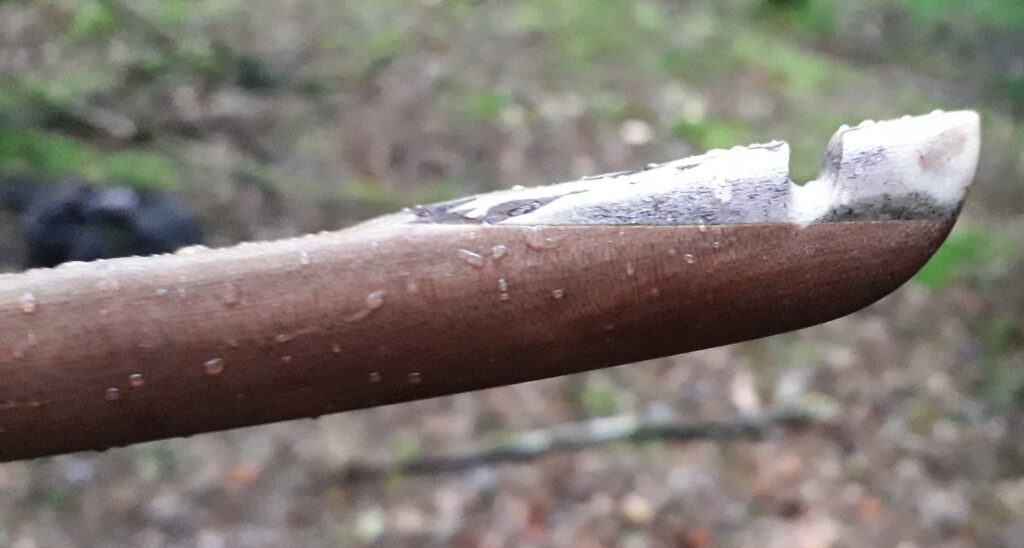
A conversation about hawthorn as a bow wood wouldn’t be complete without touching upon the down sides however. And one of the main down sides to Hawthorn is its tendency to check quite badly during the seasoning process. For this reason I work all of my Hawthorn staves down to as close to final dimensions as I dare. And I do this as soon after felling as is humanly possible.
Normally, if I’ve felled a Hawthorn stave myself, I’ll be planning to get the bark off and work it down to within a couple of millimetres of final dimensions the same day as I felled it. That way I’ll be sure to have removed the bulk of the staves pith therefore significantly reducing the very real risk of the stave splitting out from the bark right to the central pith of the log. That kind of splitting happens very quickly with Hawthorn. And you can bet your bottom dollar that if a drying check does emerge, it will be right through the face which you intend to use as the back of your bow!
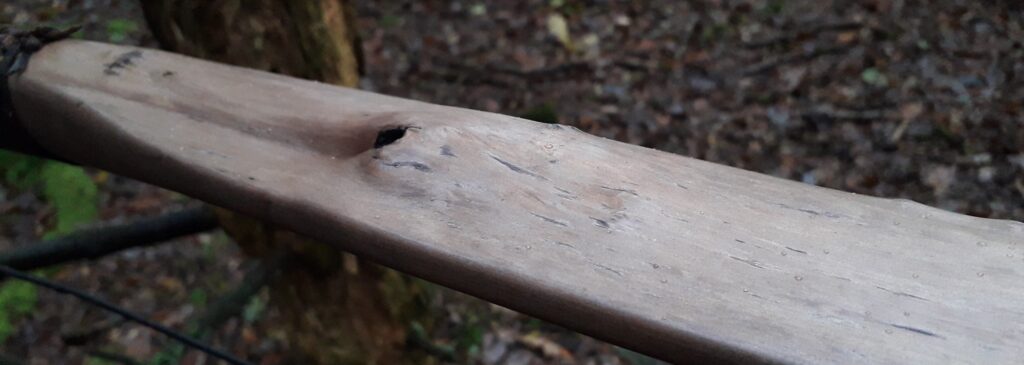
The Hawthorn log which my mate had kindly stashed away for me had indeed split and badly. But since the whole log was relatively clean of knots, I was fortunately able to find a face which did not contain one of the deep drying splits.
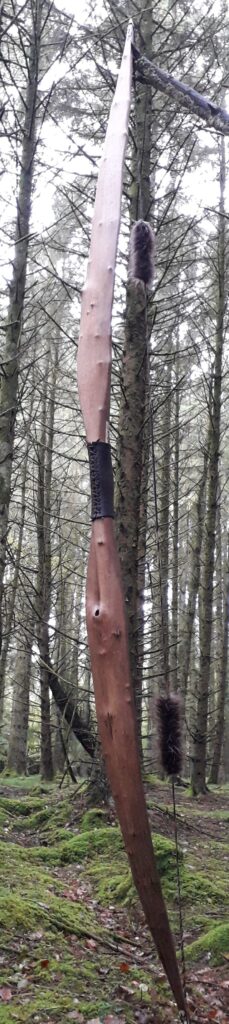
Once home I set to the log with my axe and within half an hour I had a roughed out stave without any major nightmares to contend with. I was very careful to follow the grain with the axe as the natural tendency of the grain was to spiral. Fortunately the amount of spiral in the log was manageable and ended up being about 30 degrees of propeller twist.
Since this stave was still wearing its bark, the next thing I needed to do was get the bark off. Since the log was cut in the middle of winter, the bark was stuck on good and proper, so I took the draw knife to the bark with a view to leaving a trace of cambium behind to serve as some level of protection whilst the stave was being worked on.
Once the bark was off, I clamped the stave to a flat form and parked the clamped stave in a warm spot for a couple of weeks. The stave was still very green at this point so I was hoping to use the opportunity to clamp out some of the twist on the form whilst the stave was still able to lose a significant proportion of its heavy moisture content.
When the stave finally came off the form, it had actually gained a fraction of reflex. Some of the twist had come out but about 10 degrees remained and would have to be heated out at a later date. For now though, I needed to get the moisture content down to as low as I could get it, which normally works out around 6 – 8%.
I have a room in my house which is both warm and has low humidity. I built a bow rack in this room so that I can store all of my wooden bows, and all of my drying roughed out bow staves, without the risk of them gaining moisture or getting bent out of tiller. The rack enables me to keep all of my bows lying horizontally, whilst being supported at only two points situated approximately mid limb. This ensures that the distribution of gravitational force is equal across my bows whilst they are not in use.
The wall against which the bows supports are fixed is the back of my chimney breast, so when the wood burning stove is in use, the wall gets nice and warm. This increases the ambient temperature within the whole room, but especially around the immediate vicinity of the bow rack.
This slow and steady maintenance of warmth, combined with a dehumidifier situated in the middle of the property, really speeds up the drying process of green staves. Especially during the winter months, which is when I like to cut most of my bow staves. This arrangement also keeps all of my finished bows at below 8% moisture content all year round. So with this set up in mind, within just a few weeks I was able to get this stave down to a point where it was not losing any more weight.
So once the weight loss had completely ceased, I set about fixing the 10 degrees of remaining propeller twist. Some dry heat applied to the fades and limb tips and some strategic application of force in the right direction got the twist out easily. Another benefit of using Hawthorn as bow wood is that it bends quite easily with both dry and steam heat.
In fact, as long as a piece of hawthorn is clear of knots, some pretty aggressive bends can be put into Hawthorn using steam. And dry heat can move Hawthorn a good bit too. I wouldn’t say that Hawthorn heat bends almost as well as yew. Or at least it certainly bends much better than most other white woods!
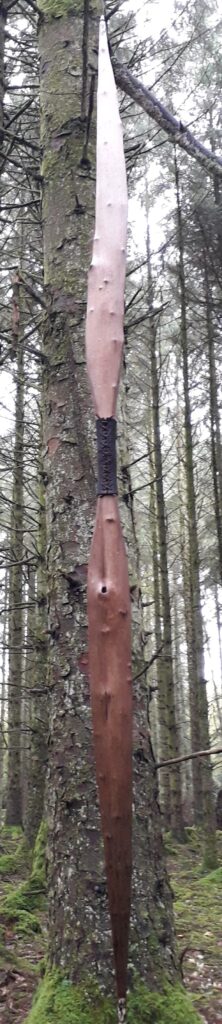
Whilst I was in bending mode, I used the heat gun to very slightly flick the tips and perfect the string alignment, which was pretty good from the start. Then after a day to reacclimatise after all that heating, I set about finalising the face profile which had been left excessively wide to facilitate better torque when using my G clamps to pull the twist out.
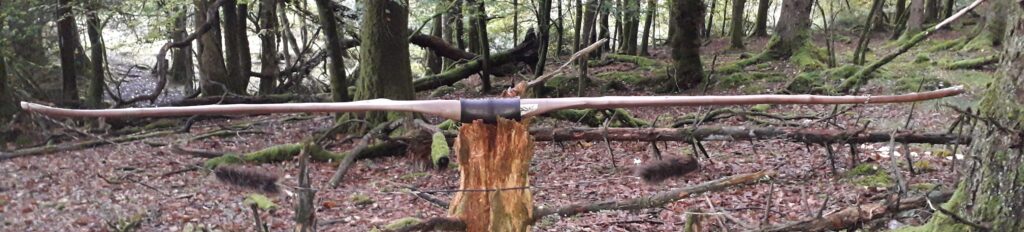
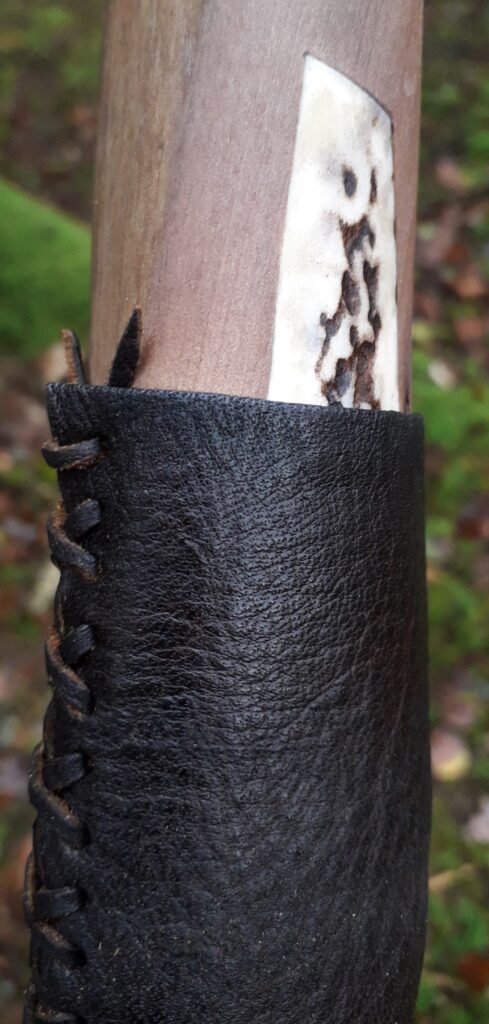
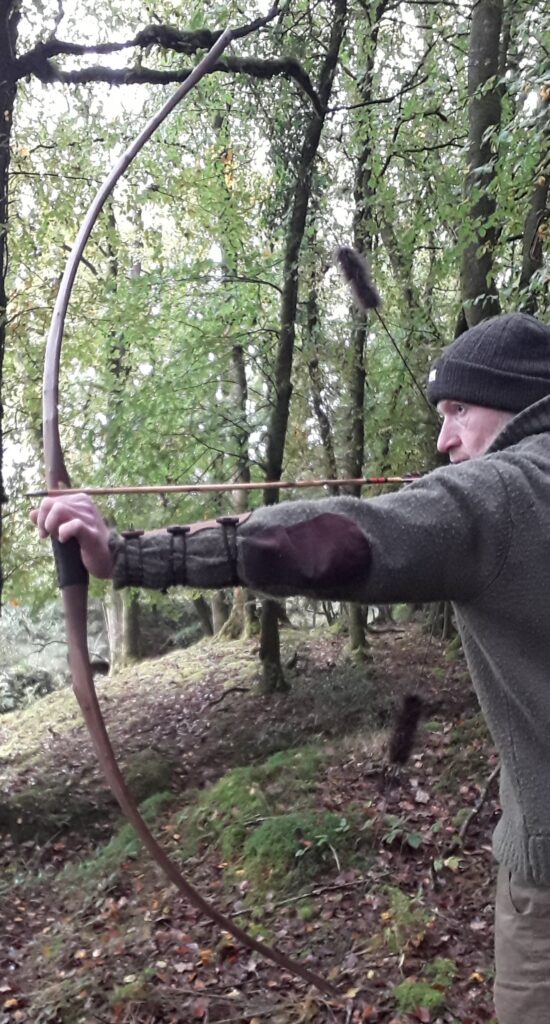
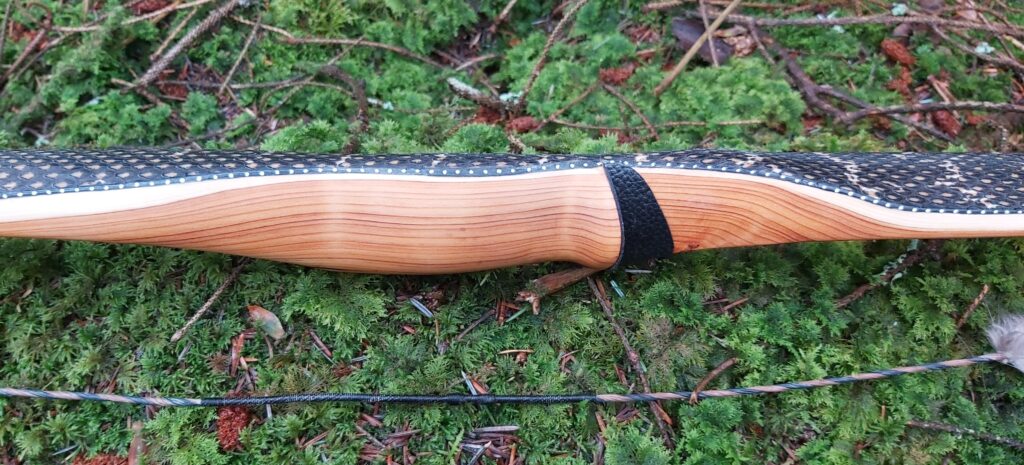
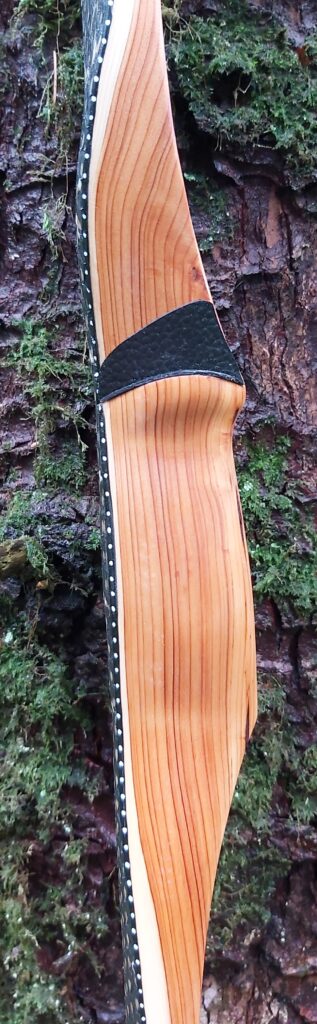
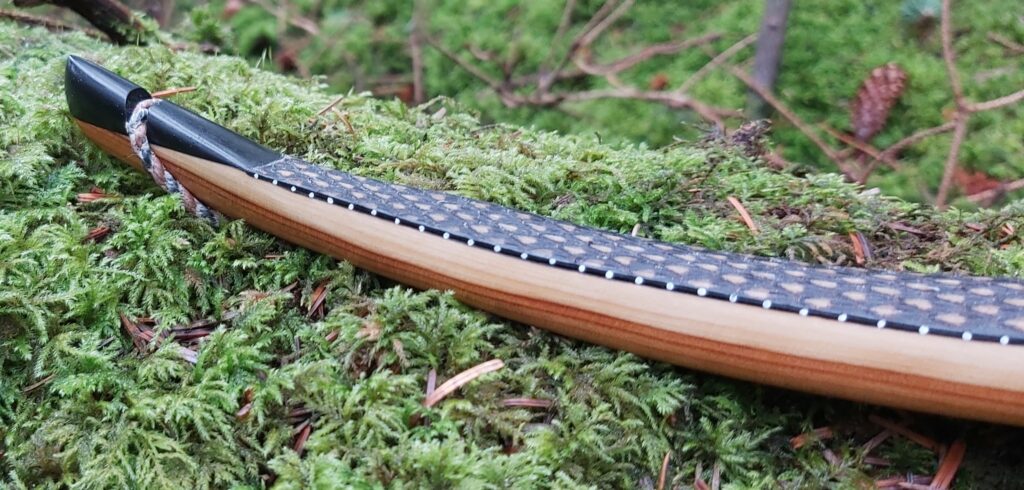
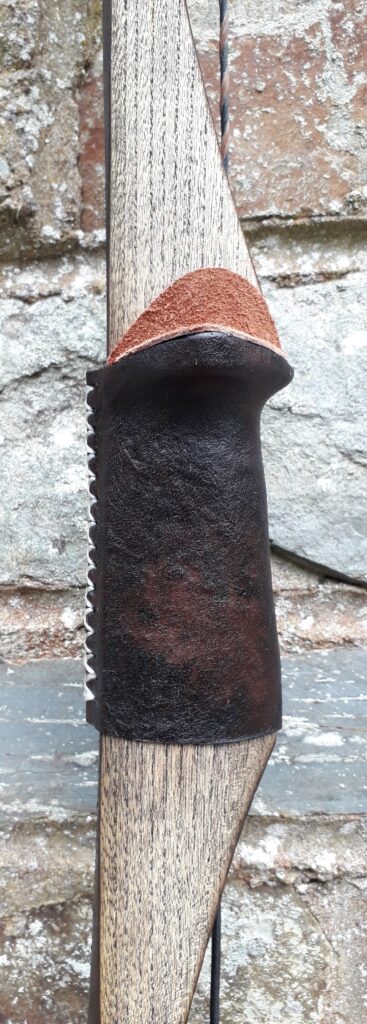
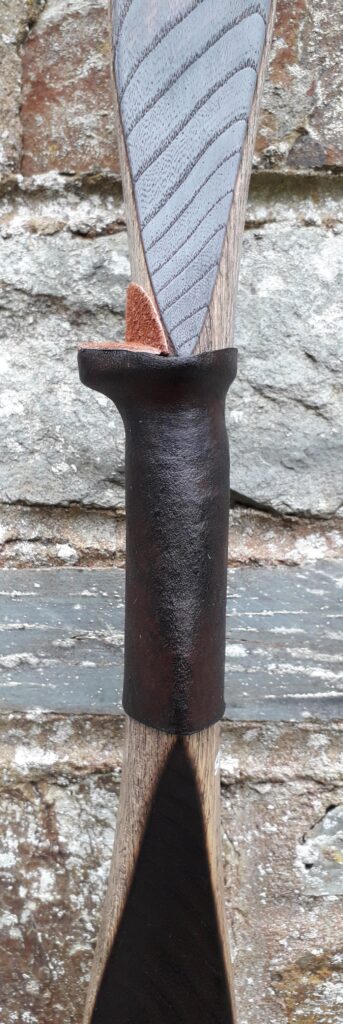
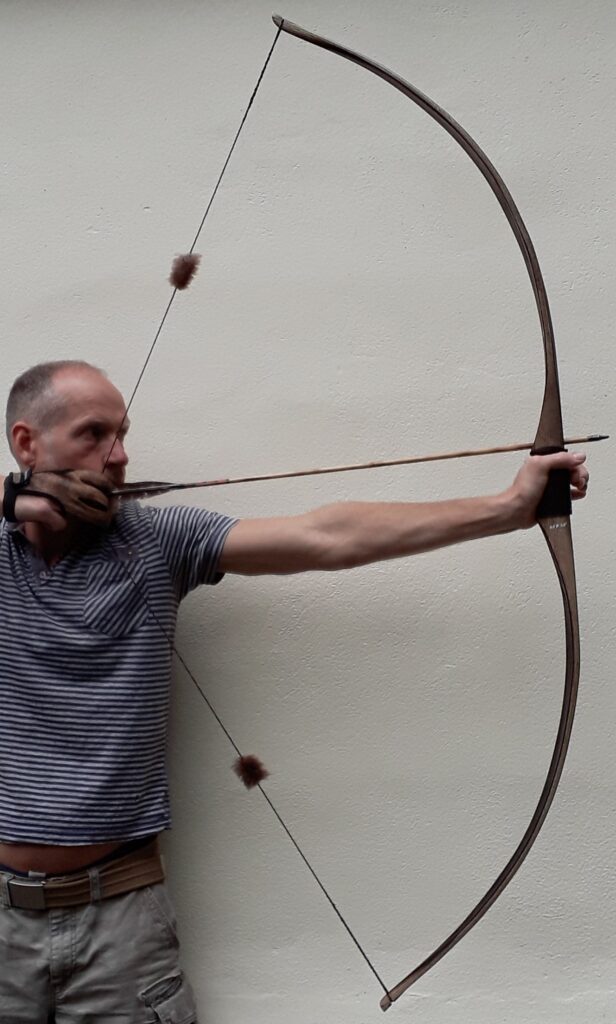
The design I was planning for this stave was nothing fancy. I just wanted a nice, clean, functional, hard shooting right handed flat bow. My idea was for something in the region of 50-60lbs at 28” with a pyramidal face profile merging long fades and nice fine semi static, lightly flicked tips. These tips would be fitted with overlays. The handle would be 4” long, rigid, and without a shelf and inlayed with antler at the arrow pass.
Since the limb face profiles were tapering evenly through the working sections, I wanted to keep the tiller elliptical so as to spread the work evenly across the whole of both limbs. For this reason I also decided to only very slightly flick the semi static tips. This design would maximise the retention of as much of the slight overall reflex as possible. And for the same reason, since the overall length of the stave was now 66” after cutting of the split ends, I was looking to maintain all of that length in the finished bow. This gave me plenty of bow to provide long working limb sections which would help avoid any risk of overstressing a bow which was destined to be drawn to 28”.
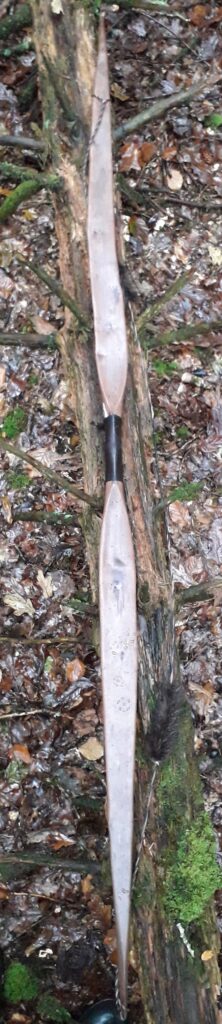
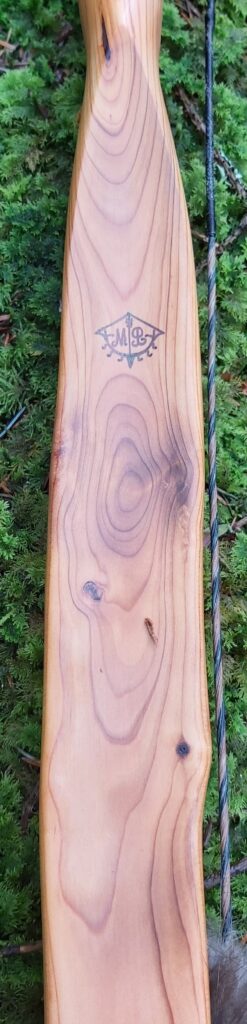
With the face profile finished and the handle and fades basic shape finalised, I set the working limb thickness up as close to even as possible. The back of the bow was carrying some undulation and a significant knot presented in the middle of the inner third of the lower limb, so with the gouge and the curved scraper, I followed the limb thickness up and over all the high and low spots to mirror on the belly what was presenting on the back. As time consuming as this process is, it really is worth it in my opinion as it ensures true, even distribution of thickness across the length and width of the limbs. This in turn increases the likelihood of achieving an even distribution of tension and compression throughout the entire length and width of the working sections of the limbs. Extra meat was left around the large knot to provide some extra strength there.
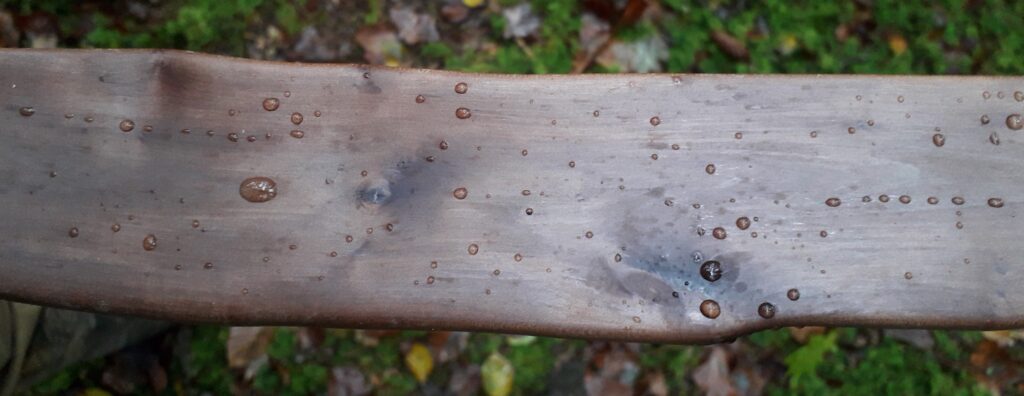
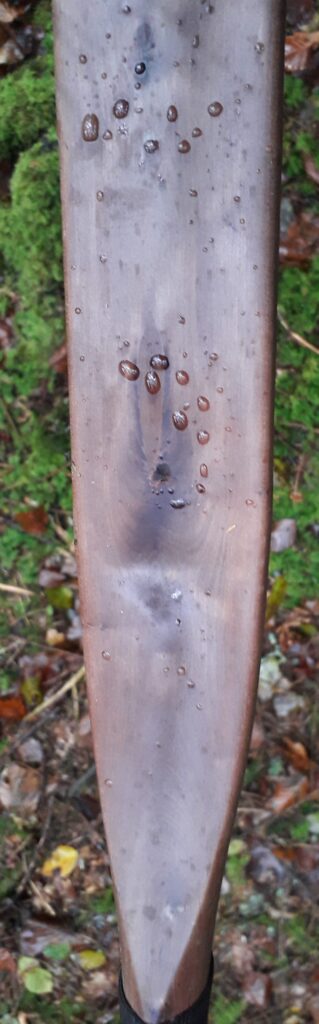
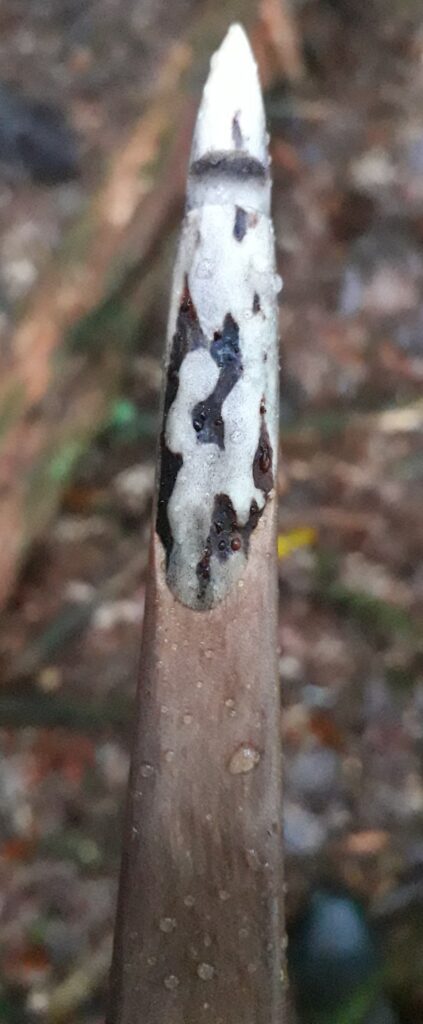
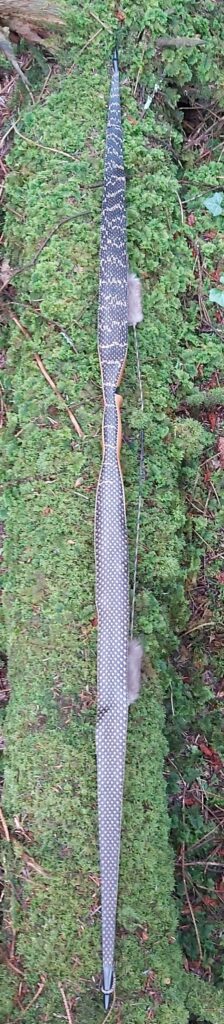
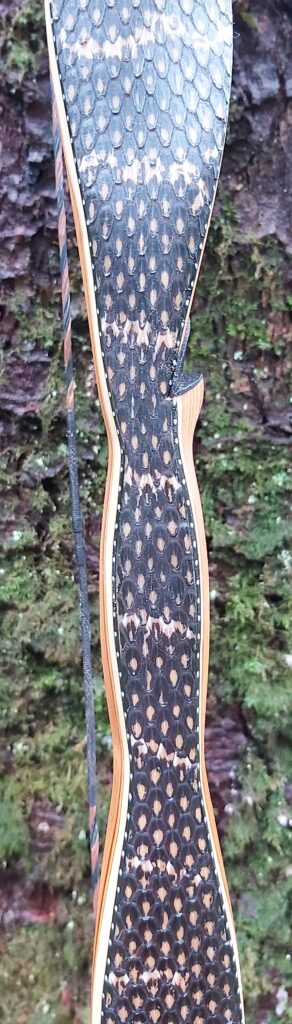
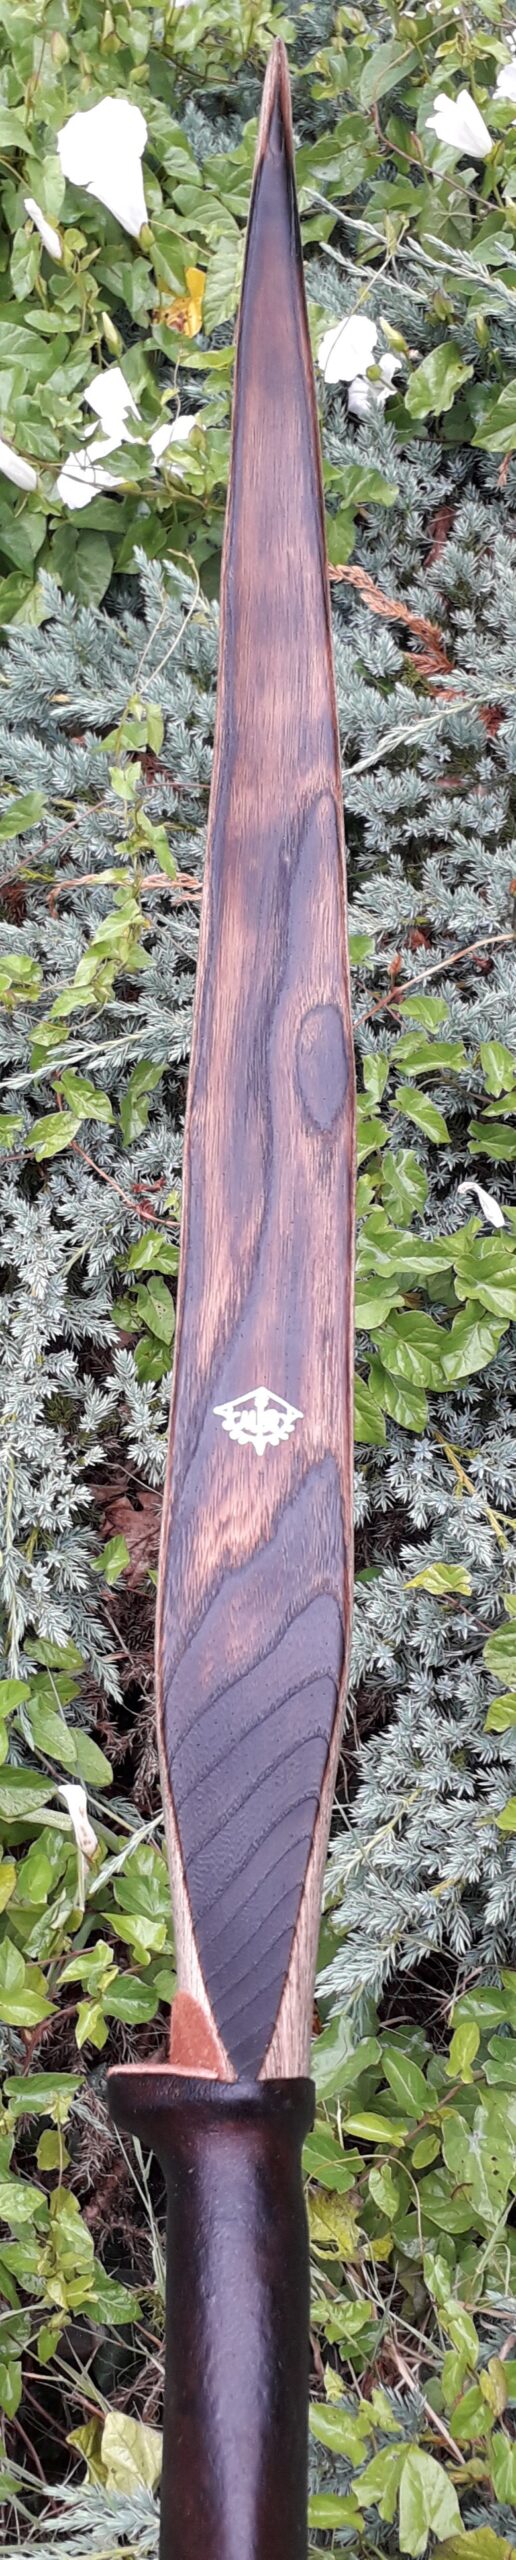
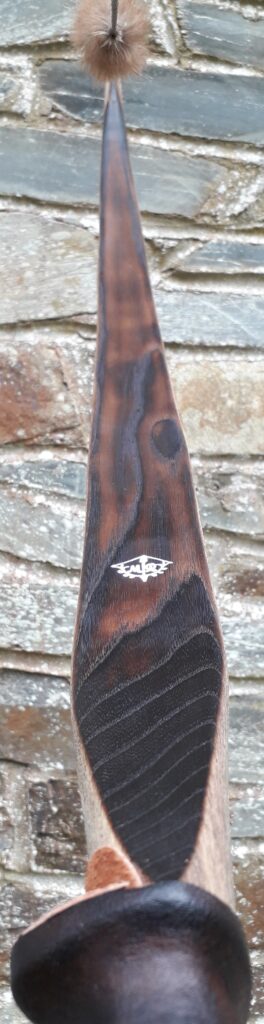
Before proceeding to tillering I wanted to experiment with a process which I’d been wanting to try for some time. This process is called “fuming”. I’d come across this process whilst drooling over some of the beautiful works of art produced by seasoned bowyer Simon Sieß who’s inspirational and informative website can be found here: Stonehill Primitive Bows – Handing the flame on since 2005 (primitive-bows.com)
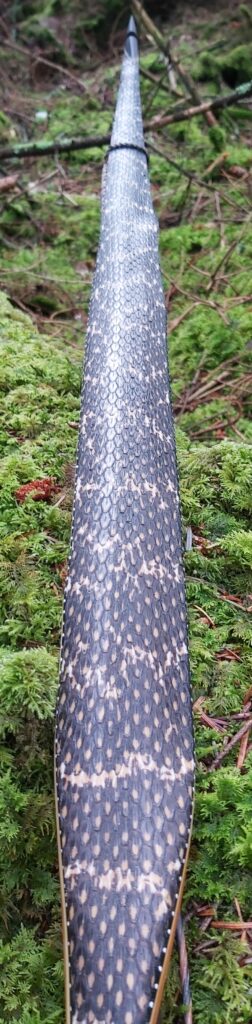
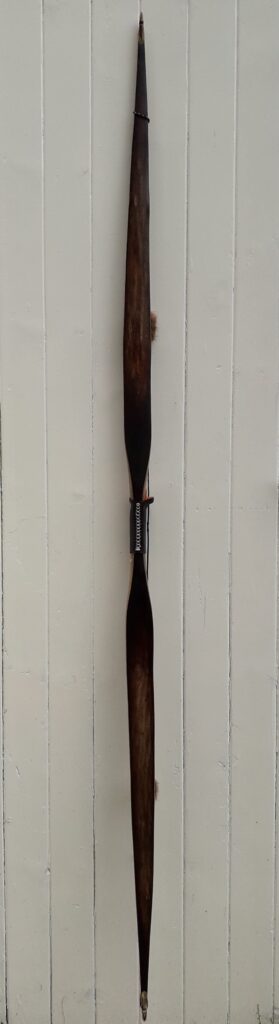
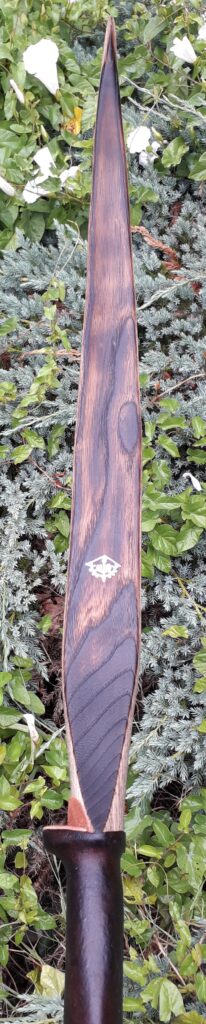
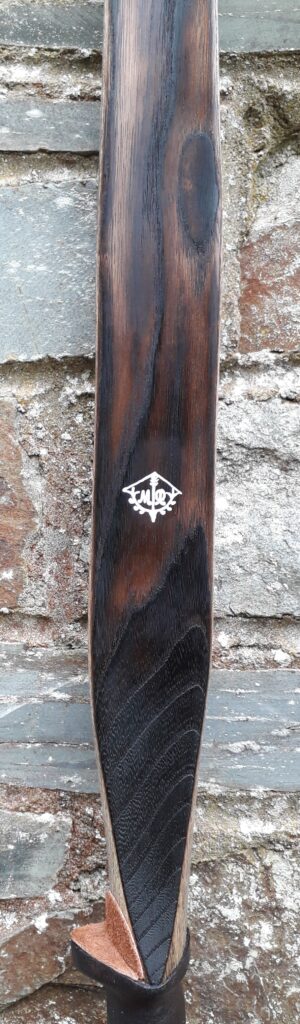
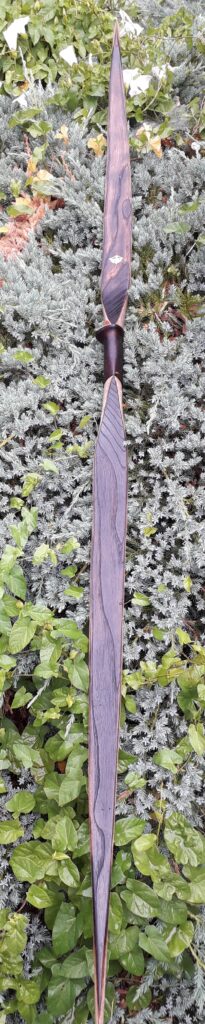
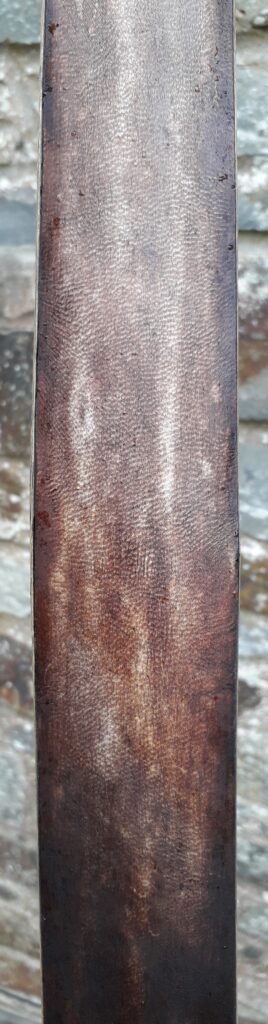
Simon and I have shared conversations in the past about the whole process of using ammonia fumes to colour and darken tannin rich woods like hawthorn. Simon has a great article on his website which details the process of fuming and can be found here: Fuming experiments – Stonehill Primitive Bows (primitive-bows.com) Inspired by Simon to try fuming hawthorn, I set about following his advice and proceeded to fume this hawthorn stave for two weeks. The colour transformation was wonderful! And the colour transformation had penetrated deeply throughout the fibres of the entire bow, just as Simon had described. Thank you Simon!!
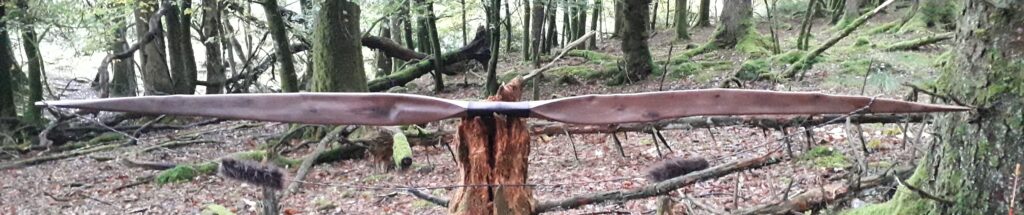
After letting the now damp fumed stave dry for another couple of weeks to remove the strong smell of ammonia as well as restore the staves pre fuming mass, I was now ready to start long string tillering. So I cut in some tillering nocks so that I could get the long string on and see what she looked like when pulled down an inch or two on the tillering tree. A bit stiff in the out thirds was my first thought and the bottom limb was looking considerably stronger than the top limb. So after letting off the outers, and dropping some wood off the whole of the bottom limb things were starting to look quite balanced.
Once I’d got her down to brace height I could see that a little bit of limb twist had returned so a little more dry heat in the top limb got things back to nice and even. I could also now see that a 4” section in the middle of the bottom limb was carrying a bit more reflex than everywhere else. This was resulting in the appearance of a very heavy positive tiller. I decided to heat this reflex out a little to create a more even overall reflex of the bottom limb. This resulted in a much more even looking side profile at brace whilst still maintaining a 3/16” positive tiller overall.
After achieving as good an elliptical tiller as I could I began pulling her down a bit further. I stopped at 22” I checked the draw weight. I was getting around 55lbs at 22” so clearly had a bit of wood still to remove before I could push on down to 26”. So I kept on perfecting both limbs by carefully removing more wood from the bellies of both limb wherever I figured I could improve the evenness of limb thickness or the visual presentation of bend.
Once I was down to 52lbs at 26” I called her done. No signs of any overstressing were noticed and overall, set was minimised to about 1/4 of an inch, which is what I would expect from a nice dry hawthorn stave. Since I was now close to shooting her in, I shaped the handle up to facilitate putting a few arrows through her. Since this required the removal of a fair bit of wood from the handle and fade sections I thought I’d better recheck the string alignment to see if there had been any change. I could now see that the alignment had shifted slightly away in the direction of the right side of the bow.
Since this bow was intended for right handed shooting, I really wanted any string bias to favour the left side of the bow, so I gently reheated the handle section with dry heat once more and eased the tips back across to the left hand side of the bow. Once cooled off thoroughly a quick recheck of alignment with the help of a piece of string and some hand clamps now confirmed that the string alignment was back to just favouring the left side as originally planned. Perfect for a right handed shooter.
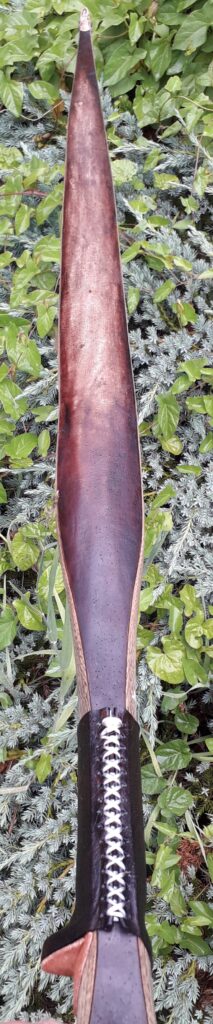
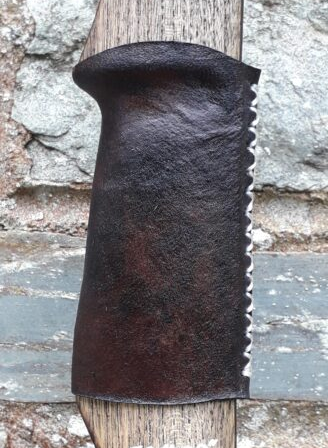
Time to shoot in the last 2” of tiller. On went a piece of leather strip would make do for a quick and simple handle wrap/arrow pass. Then out we went for some stump shooting. I like to give all my unfinished bows a good bit of shooting in before committing to final touches. There is nothing more upsetting than going through the whole finishing process only to identify an issue with the tiller once the bow is properly shot in.
I always put at least a couple of hundred arrows through a bow before I consider finishing a bow. Even the most perfect of tillers witnessed on the tillering tree can change dramatically after a few hundred arrows, so I always expect to see some change and need for adjustment before I embark on sanding and sealing a bow. The last thing any bowyer wants to have to do is make tiller adjustments to a bow which has already been finished.
This bow had moved a little during the shooting in phase and the tiller had droped from 3/16th” positive down to about 1/8” positive. I personally think that a bow with these dimentions and draw weight would better suit a 3/16th – ¼” tiller if it’s likely to be shot with split fingers. So I let the top limb off a tad bit more to regain that nice 3/16th” positive tiller. This resulted in the weight being reduced slightly which when combined with the sanding and shooting in was now registering as 52lb at 28”. This was pretty much what I wanted so I was happy with the final weight.
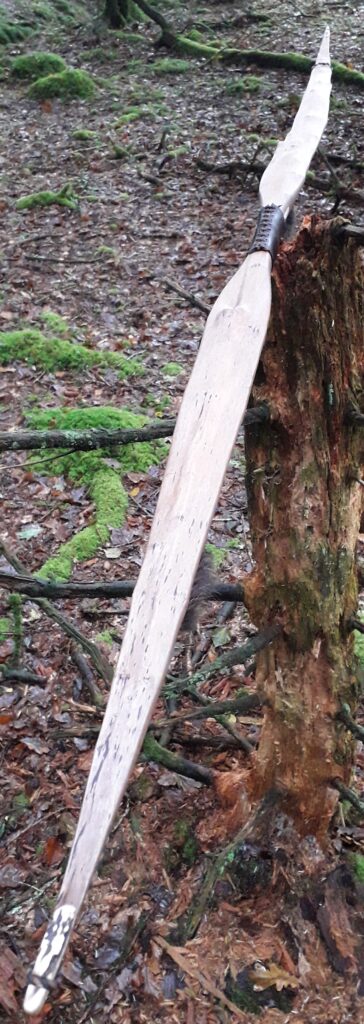
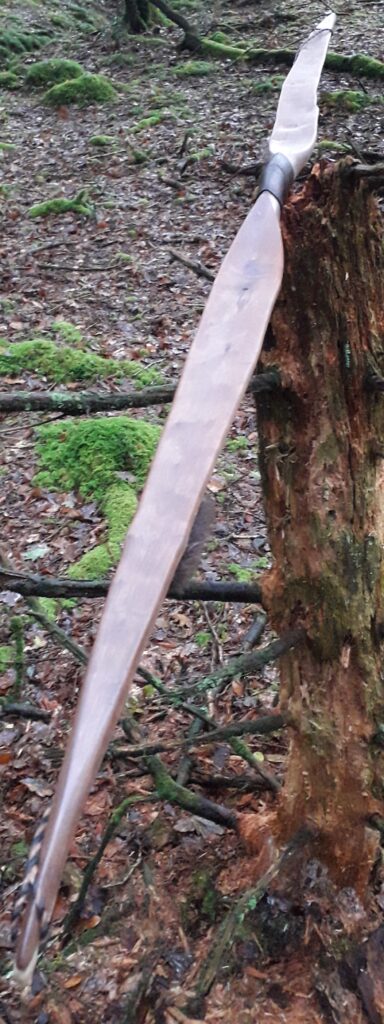
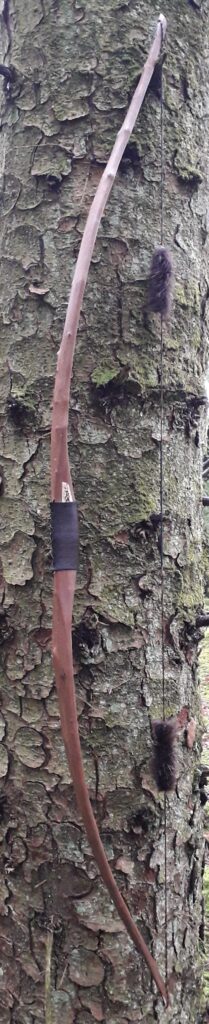
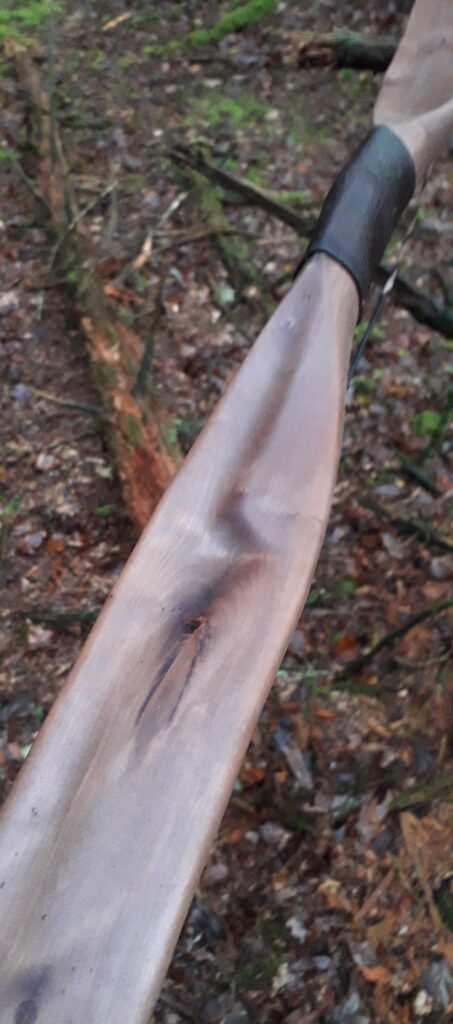
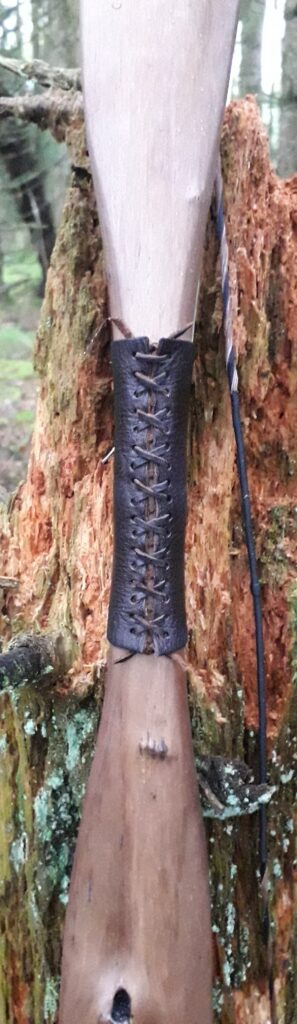
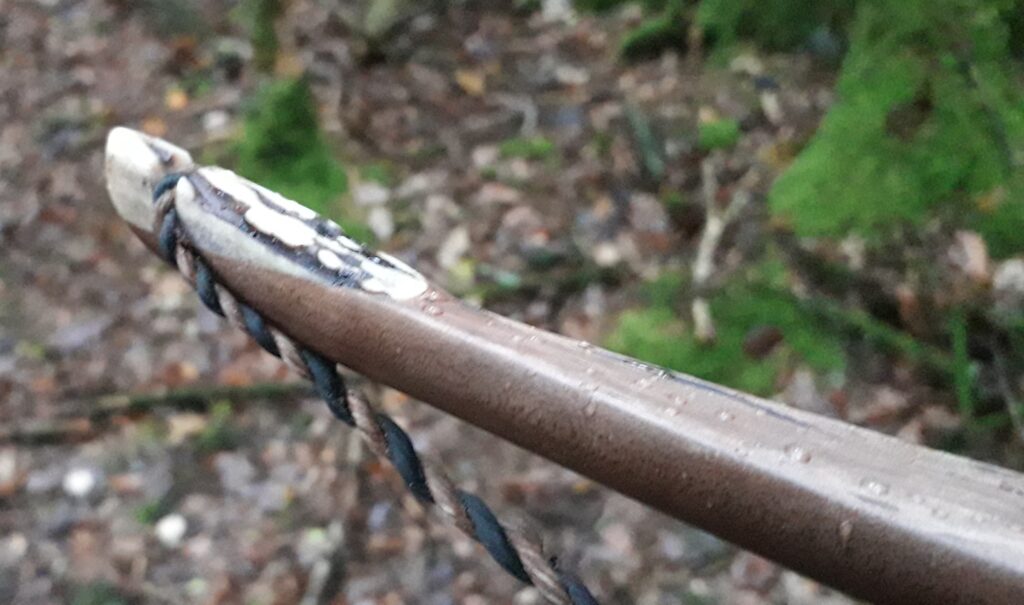
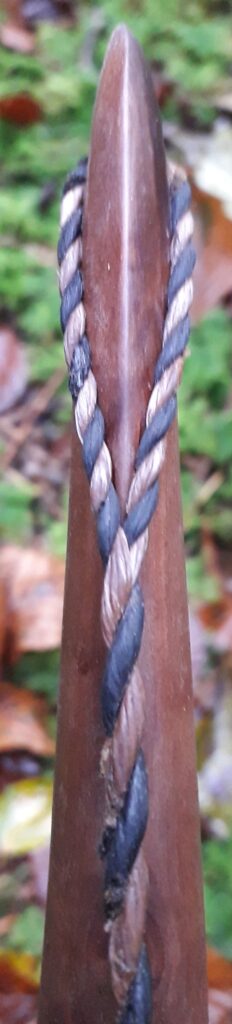
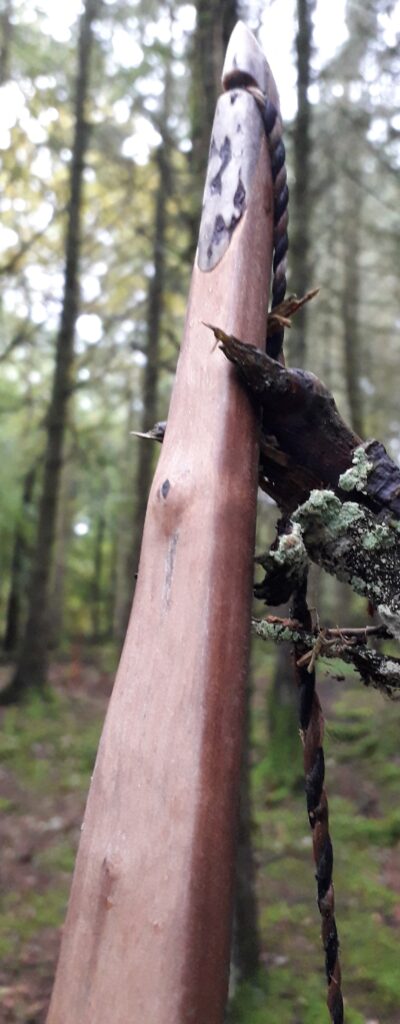
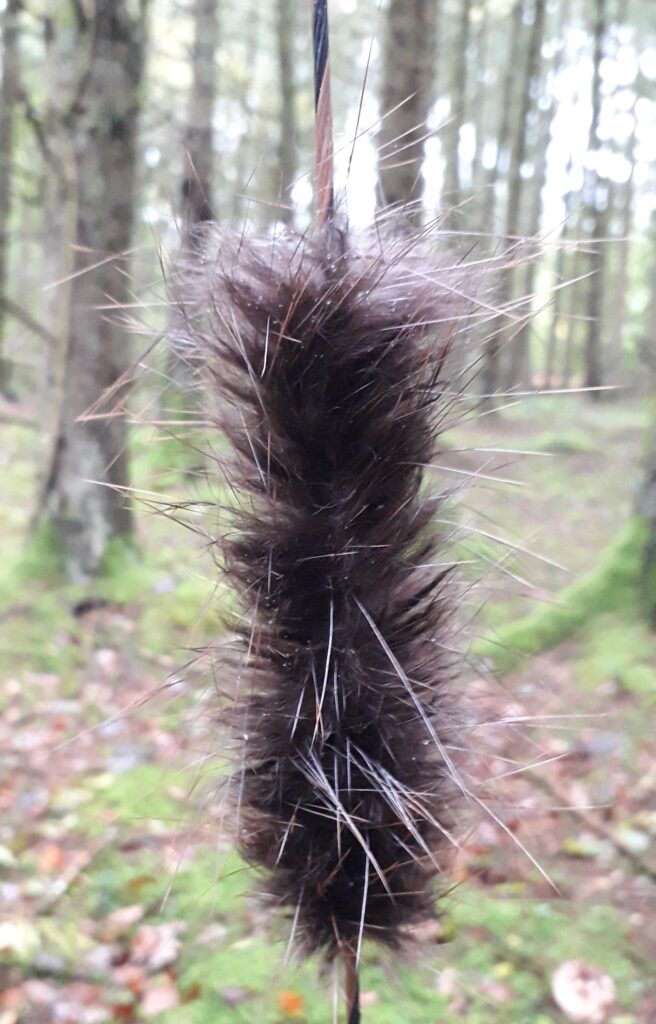
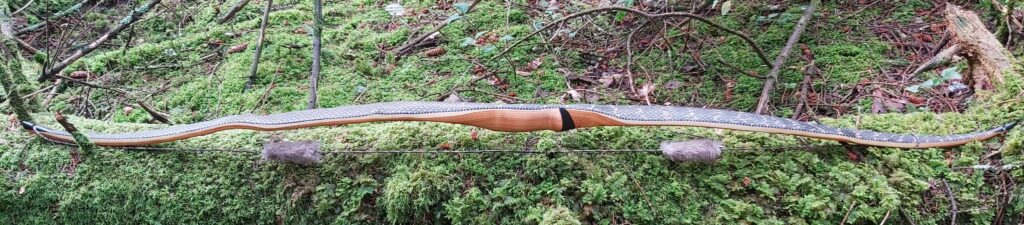
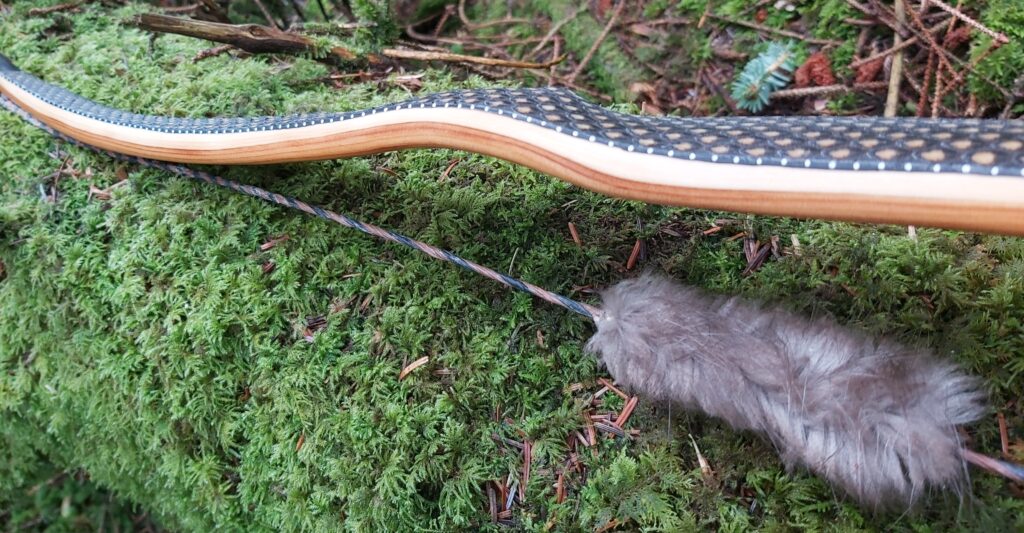
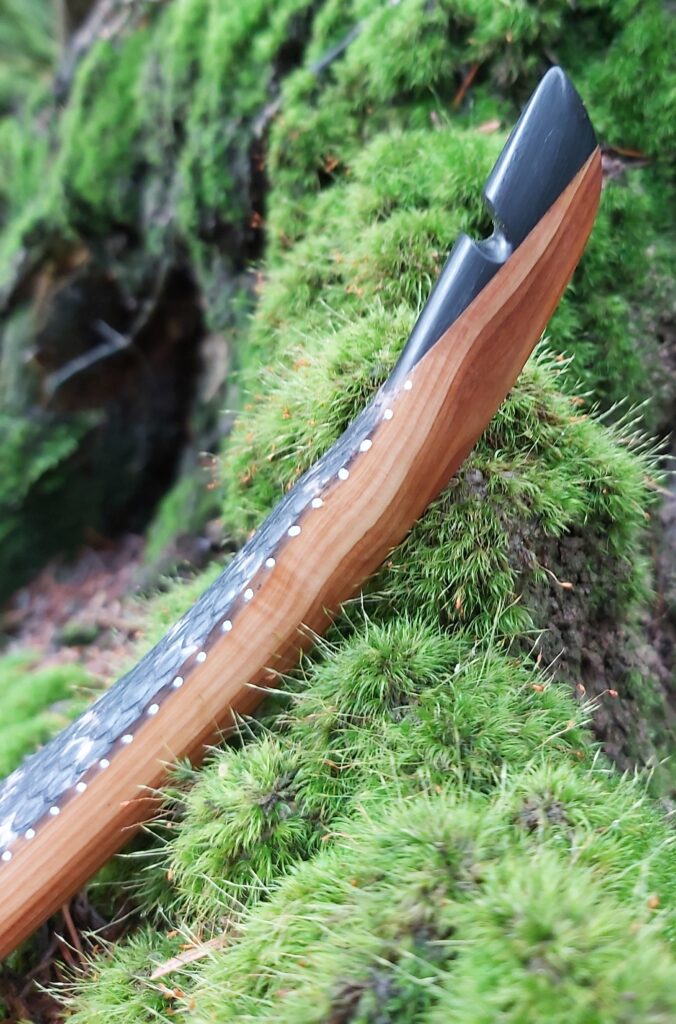
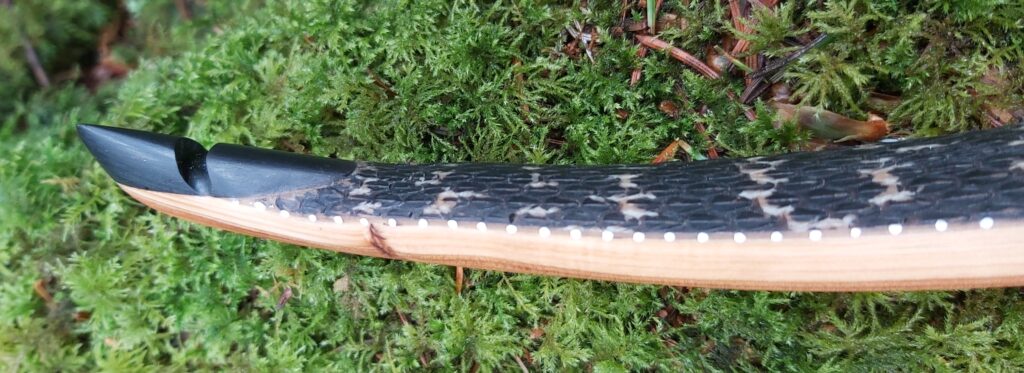
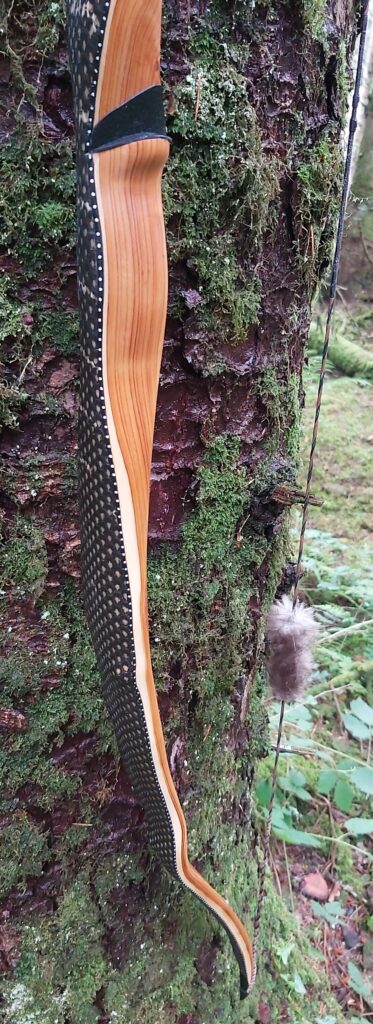
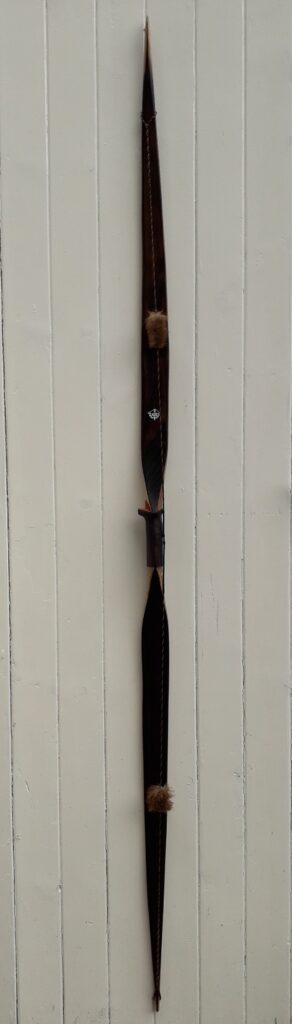
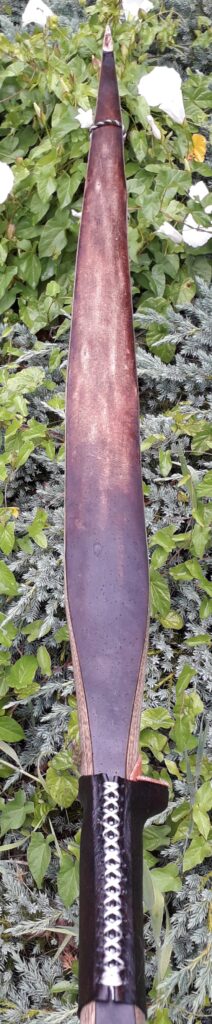
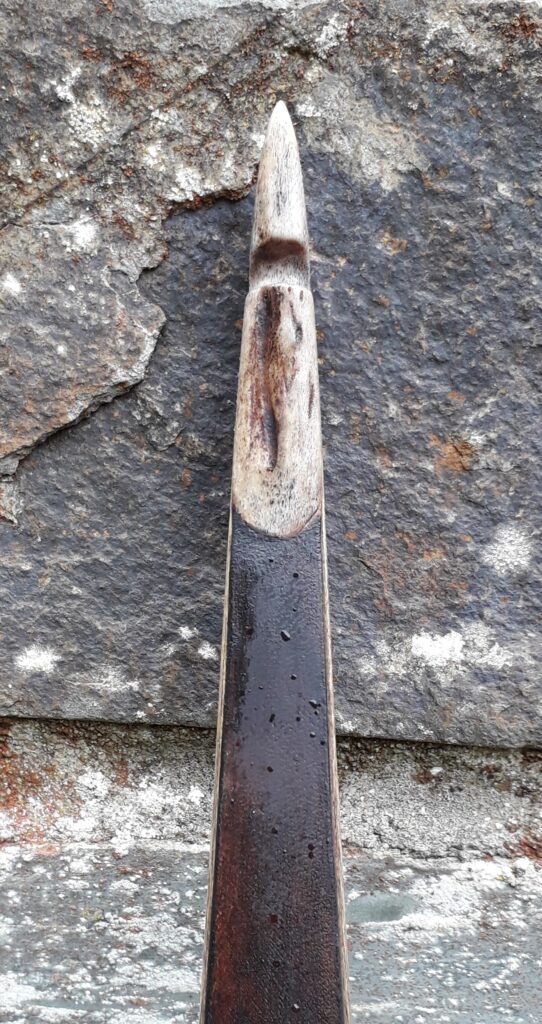
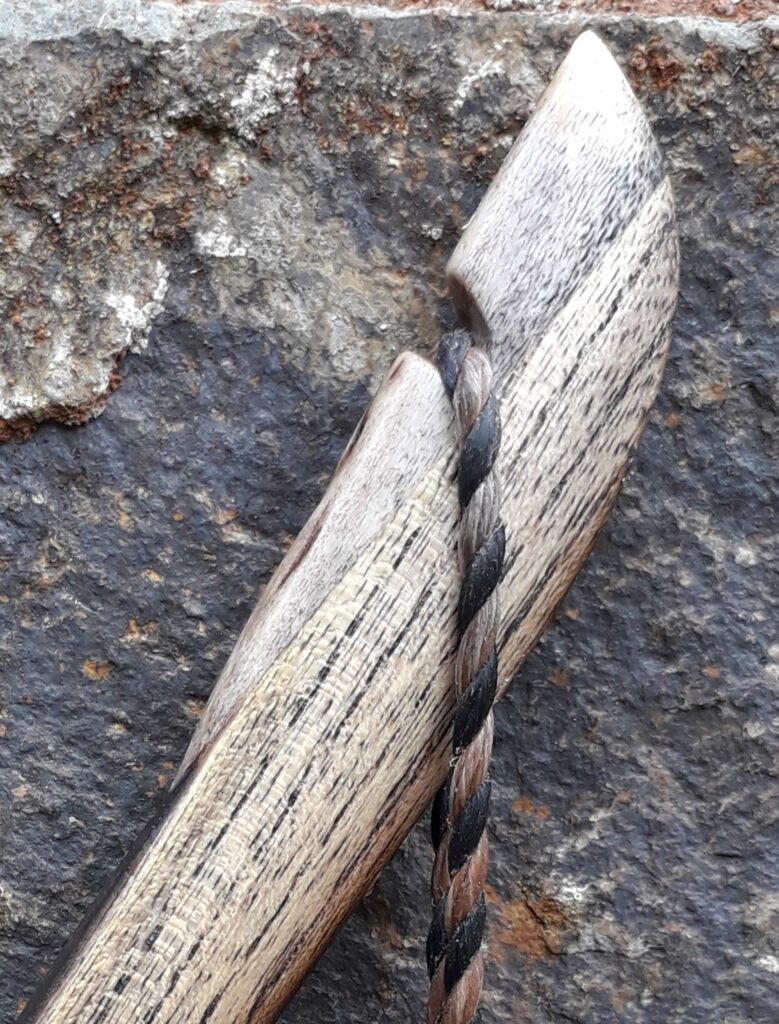
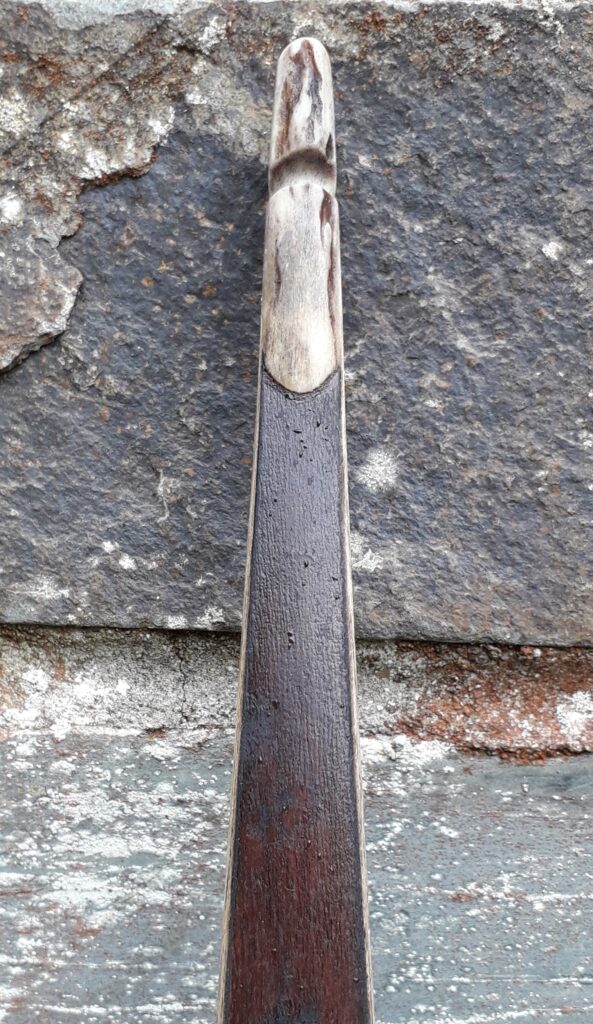
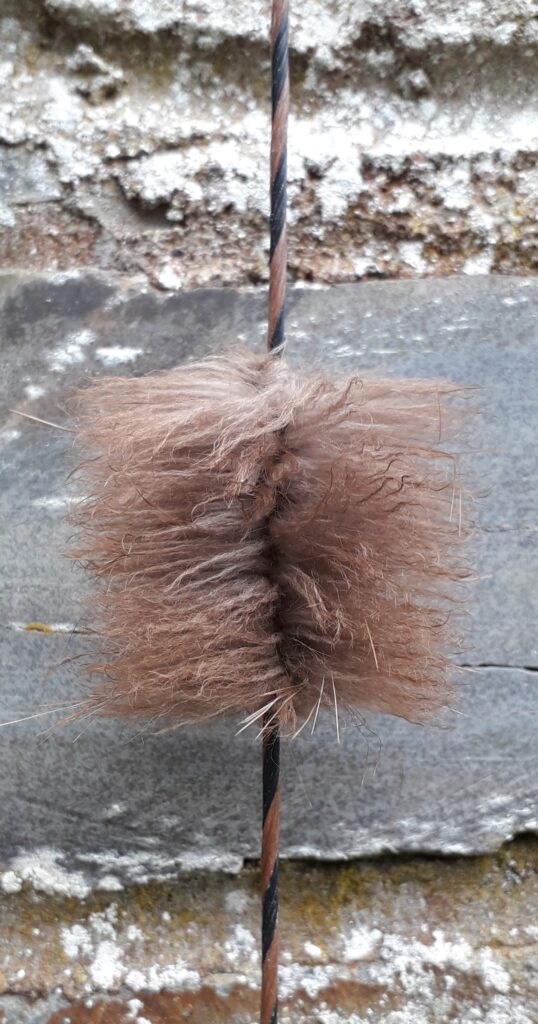
To finish her up I set about fitting her with a nice pair of wild English Red Deer antler tip overlays. The tips where shaped up nice and fine transitioning from flat to triangular. Antler was used as a an arrow pass inlay too. I wrapped the handle with a piece of my own traditional bark tanned deer hide and finished the whole bow with tung oil which really darkened the colour change brought about by the ammonia fuming. Wow! For a bow string I made a 12 stand Flemish twist from B55 which was fitted with beaver fur string silencers.
Now that the tips had been reduced in mass and the bow was completely finished I wanted to shoot her again to get a real feel for any hand shock. I also wanted to hear what she now sounded like with silences fitted to the string. And what a difference tip mass removal makes to the feel of a bow upon release! The little bit of hand shock which I’d earlier felt when shooting her in was gone. And the release was now whisper quiet too. I experience this change all the time and put it down to two things in the main.
First and foremost I believe that most hand shock and vibration in general is due to poorly timed limbs. This is why I favour a 3/16th – ¼” positive tiller on all of the bows which I make which are intended for split fingered shooting. 1/8” just isn’t quite enough to remain permanent in my opinion and can soon get pulled out to neutral, or worse still, negative! Shoot a negatively tillered bow split fingers and feel the vibration and hand shock and you’ll soon know what I’m talking about.
The mass of the tips is the next most important consideration to make when designing a bow to have minimal vibration/hand shock. By minimising the mass above the knocking points especially, as well as throughout the last 6” of the limbs tips, vibration upon release will be reduced significantly. Shout out to many of the incredibly talented bowyer at Primitive Archer forum for emphasising these points to me many years ago.
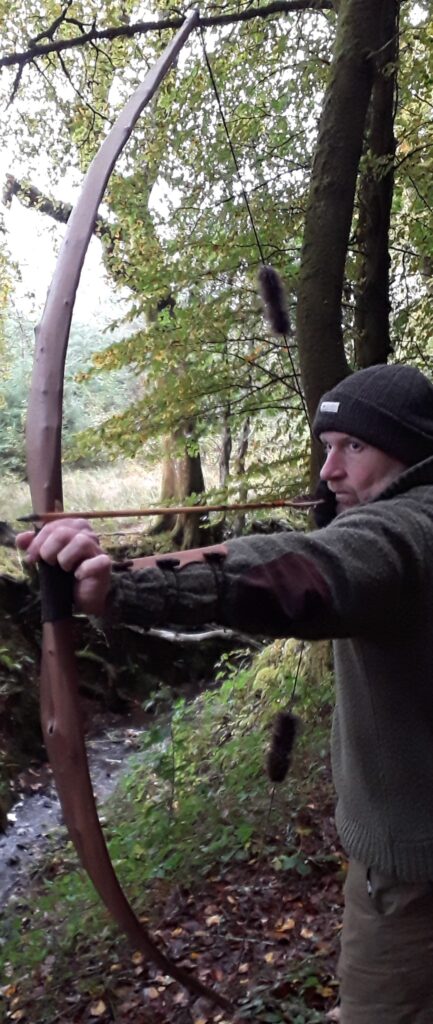
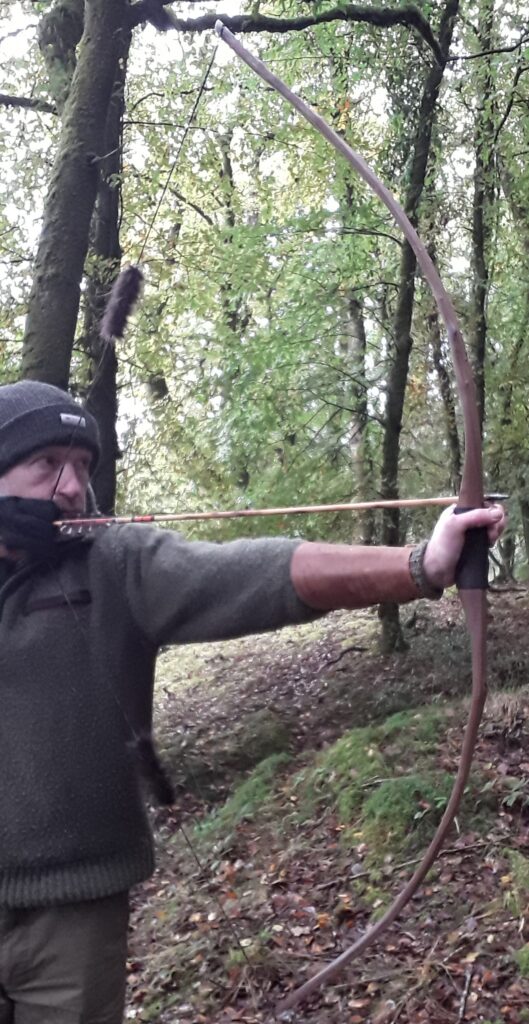
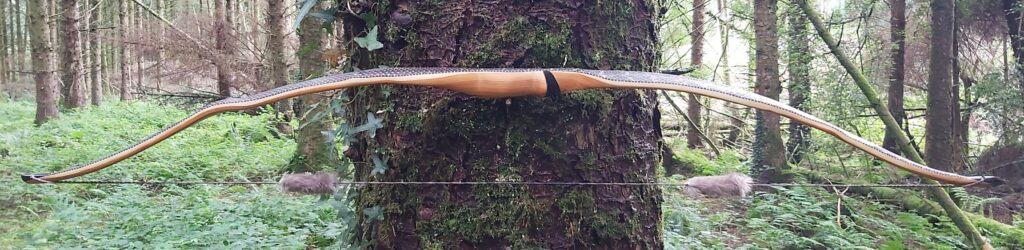
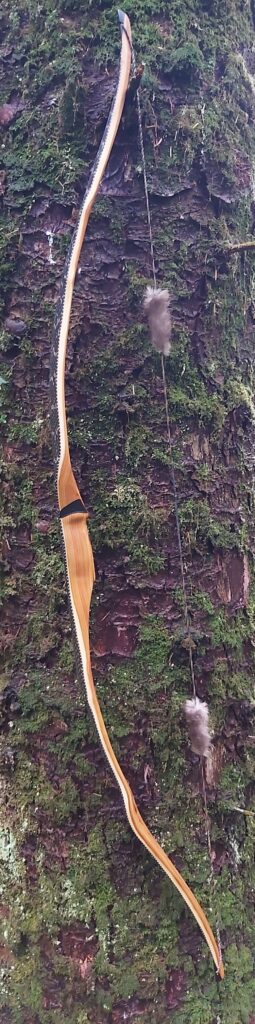
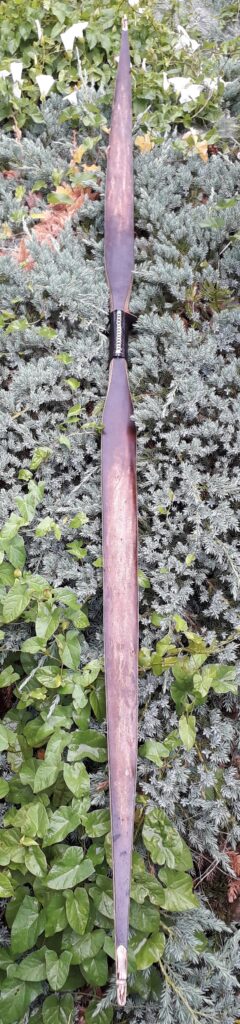
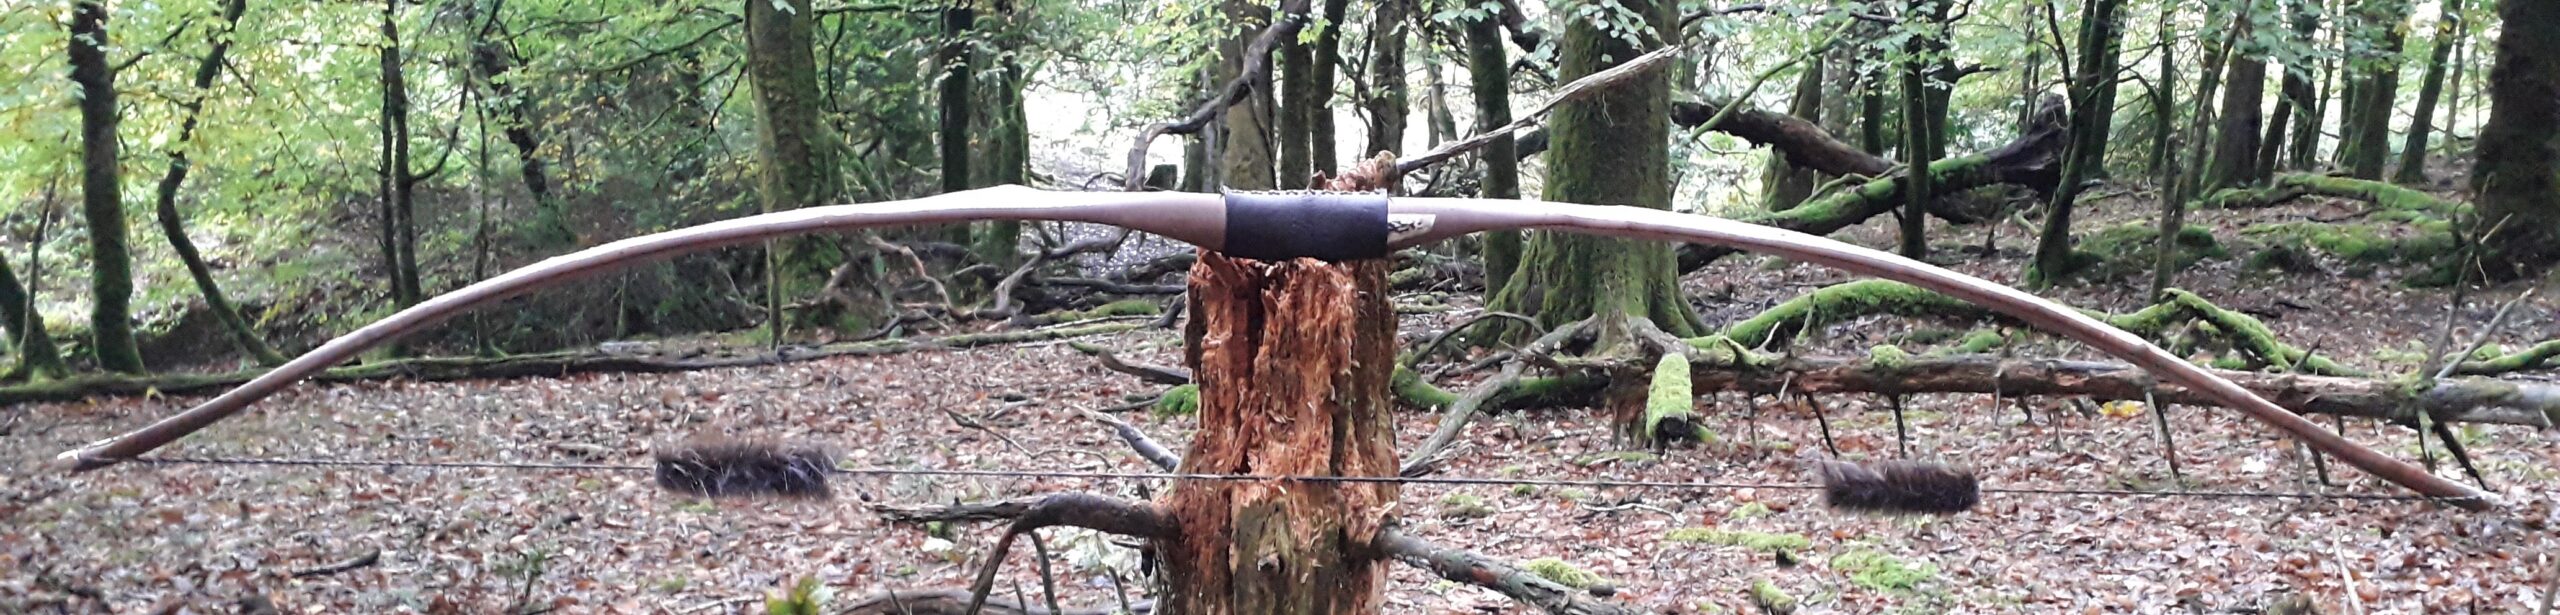
So to sum this bow up, she ended up being a smooth, quiet, hard shooting bow with no noticeable hand shock and minimal stack. Immediately after unstringing she holds about ½” of deflex which goes back to neutral after resting. She’s nice and light in the hand but packs a nice punch. She would make for a lovely hunting bow (if only!)
Anyway, I hope you enjoyed the story of her build and like the look of her. This bow is now listed for sale in my Etsy shop and is available for purchase here: Primitive Character Hawthorn Selfbow 5228 – Etsy UK
Mass: 732 grams
Length NTN: 65”
Width: 2 1/4” at widest
Tips: 6” semi static 3/8” wide at tips
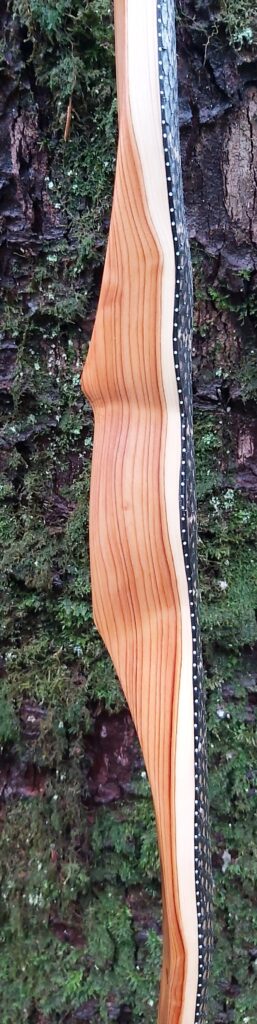
Back: Marginally crowned with undulations. Face profile pyramidal.
Belly Profile: Working limb sections undulating to mirror back, transitioning at the tips to D shaped then triangular cross sections.
Tiller: Elliptical 1/8” positive.
Brace Height 6″
Draw Weight: 52lbs at 28”