A friend of mine is a digger operator. He often ends up getting involved with projects like pond clearance/restoration type works. Whilst digging and dredging these kinds of places he often unearths all kinds of stuff. Much of my local part of North Devon is boggy wet ground. And whilst we don’t have those classic preservative peat bogs found elsewhere in the UK and Ireland, the bogs we have here are still sufficiently acidic and anaerobic enough to preserve certain types of organic mater which become submerged or buried within these often forgotten and neglected wild places.
Ages ago I asked this bloke to keep an eye out for any submerged oak he might come across, knowing that such a find would likely yield some very nice black ancient bog oak which would make for great carving or wood turning projects. So I was pleased to pick up a message from this chap last summer in which he detailed a find which he thought may be of interest to me.
He’d been working on an old estate property dating back to the early 1800s which had an overgrown cider apple orchard adjacent to a large silted up pond which he was in the process of reinstating on behalf of the estate. The pond was fed from a bog below the orchard which had a large earth hedge bank along one edge. And up on top of this hedge bank was a large, solitary, and likely very ancient yew tree.
At some point many years, if not decades ago, a large section of this ancient Yew had broke away from the rest of the tree and had fallen into the bog. And after decades sitting there this lump of yew had been completely consumed by the bog which had enveloped it with several feet of silt and clay.
Whilst digging out the bog this chap caught hold of this buried lump of yew and raised it up and out of the bog. Initially he assumed that it was just a big old piece of willow which had caved in from the edge of the bog. But once he’d pushed it up out the way he could feel how solid this particular timber was in comparison to other woods which would be well rotten and fragile by now.
He could also see from the broken ends of the tangled mass of wood that the preserved timber inside the muddy mess was a deep, bright orange colour, as opposed to a dull brown grey which you would have seen with most other species of rotten bog submerged tree.
Once he’d noticed the large yew tree standing up on the bank above the bog, he realised immediately that this buried timber was actually yew. And since he knew that woods like yew and oak will preserve in bogs, he thought he’d give me a shout in case I could make use of any of it. Trouble was he’d been distracted by other work and had forgotten about it for several weeks before telling me. Needless to say though, once he told me where it was, and that I could help myself to it, I was round there like a shot!
Upon first inspection of the mass of stinky mud and timber, I wasn’t very hopeful of salvaging much other than a few nice bits for making spoons and bowls etc. But after a bit of digging around, I was excited to find a fairly straight looking section of timber which was about 6 feet long, 5 “ in diameter and looked to have been undamaged by the digger.
With my silky saw I was able to cut the section of timber out from the rest of the fairly useless tangled mess of smashed branches and cord wood. And after wrestling this piece of timber out from the rest of it, whilst covered head to toe in mud and stink, I finally got a chance to inspect the log in more detail.
This log (like the rest of the wood) was completely free from even a hint of sapwood. The sapwood being free from tannins had rotted off decades ago. When a wood like oak or yew sits in a bog environment for any length of time, the sapwood simply rots off like any other wood would do. This is because most sapwoods including yew don’t contain the tannins critical for the preservation of the timber.
But due to the very high tannin content present within the heartwood of timbers like oak, chestnut and yew, the heartwood stays intact for decades, if not centuries, so long as conditions are suitably acidic and anaerobic enough to prevent decomposition.
And in addition to the anaerobic/acidic preservation of this tannin rich heartwood, there is another wonderful feature that our local bogs can bring about in tannin rich timber – and that is the unique colour change that takes place to the heartwood after many years saturated in our local ground water. This unique colour change is only attainable through this longwinded natural preservation process.
Due to our local underlying geology consisting of carboniferous sandstone, we are fortunate to have a large geological reserve of iron pan deposit within the sandstone bedrock endemic to our local landscape. This iron rich bedrock both surrounds and sits below our local bogs. And when these iron oxide deposits come into contact with our typically acidic ground water, the iron is dissolved into the water which in turn supplies high levels of dissolved iron rich water to these ancient saturated bog sites.
Given enough time submerged in such a iron saturated bog, the dissolved iron in the water reacts with the tannic acid in the heartwood of timbers like yew and oak. Slowly over time this turns the preserved heartwood a wonderful dark antique colour, which penetrates right through the entire log. Oak will often go almost jet black in this process. Oak preserved this way (“bog oak”) is typically prized and sort after by wood turners and carvers alike.
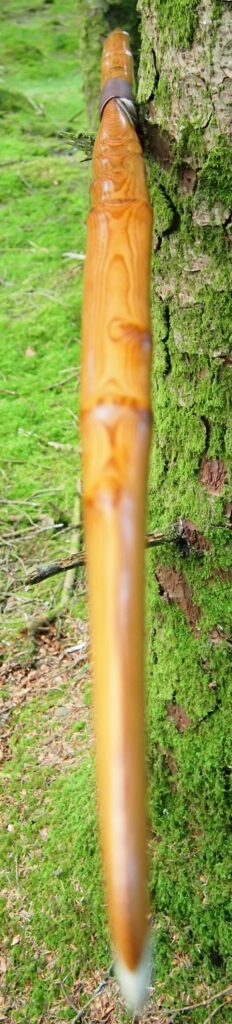
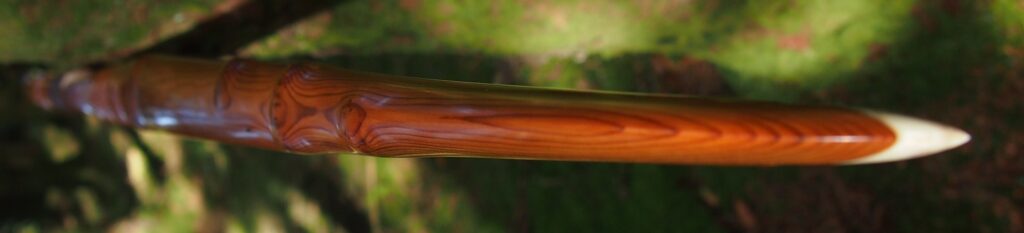
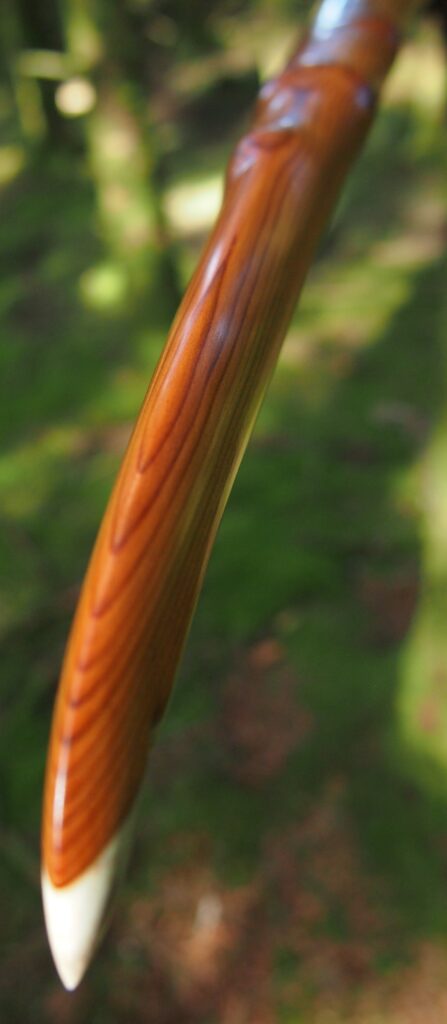
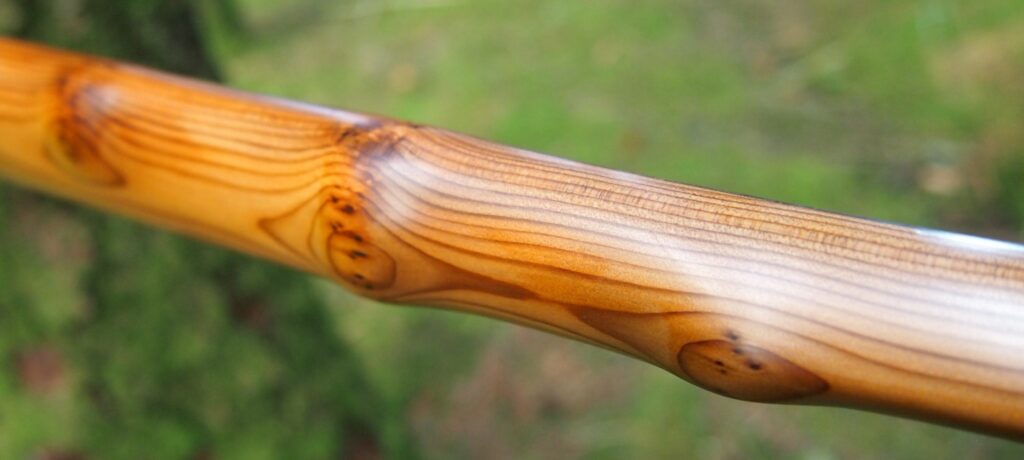
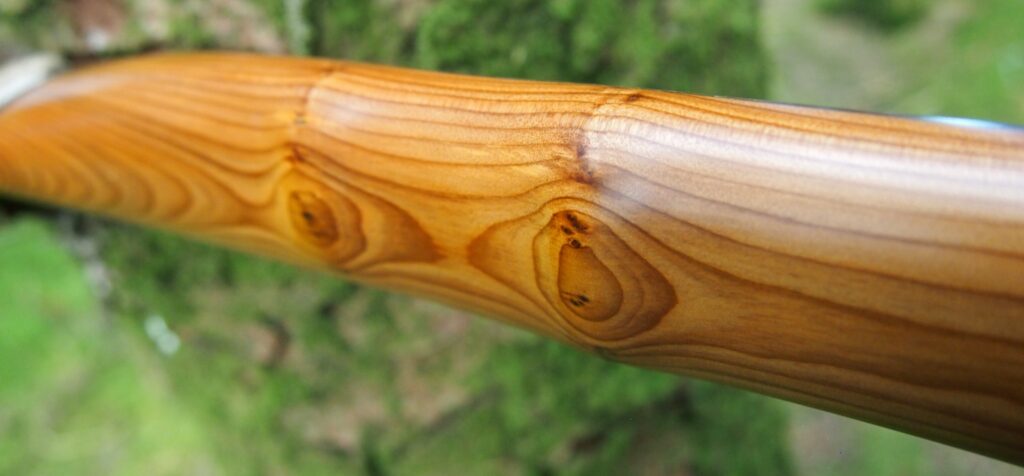
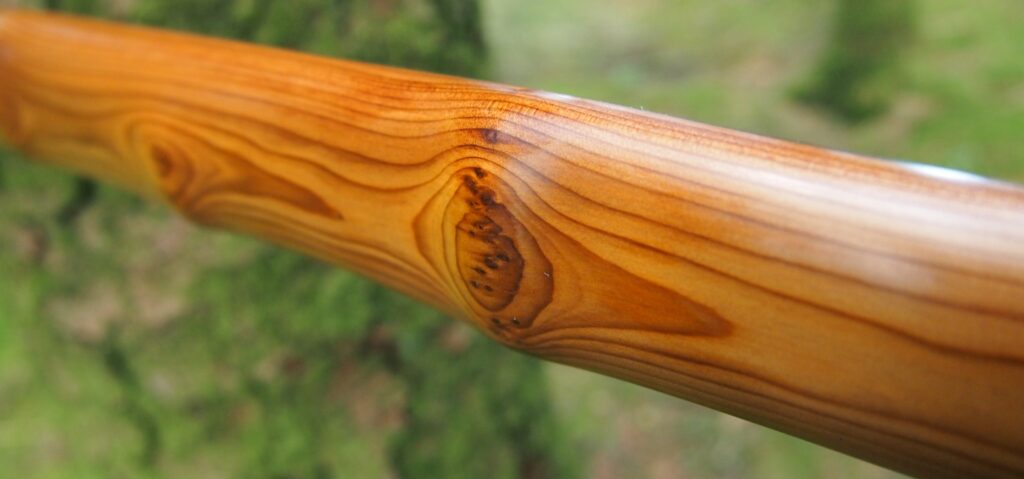
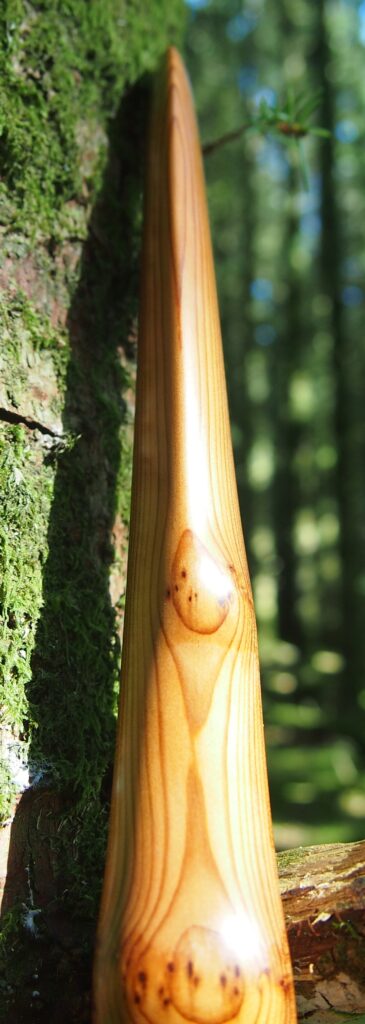
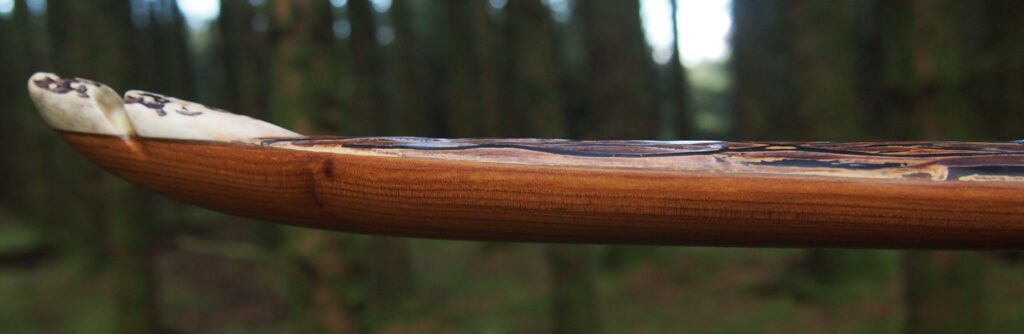
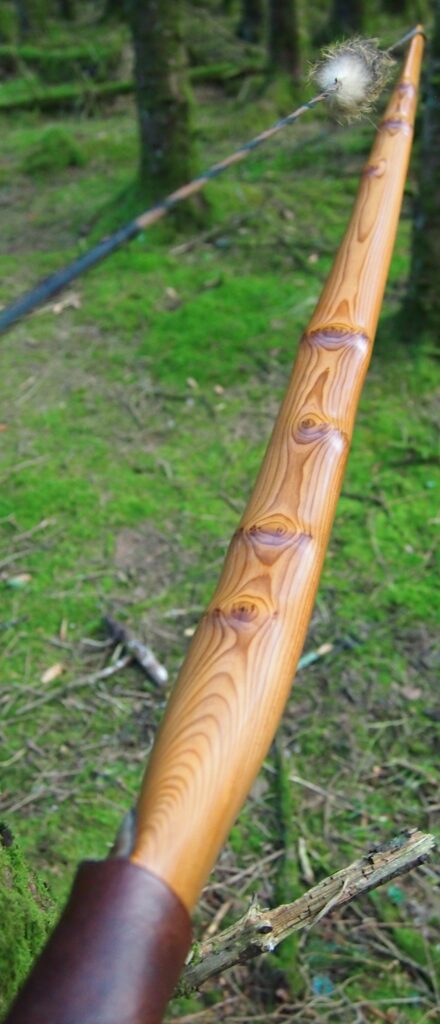
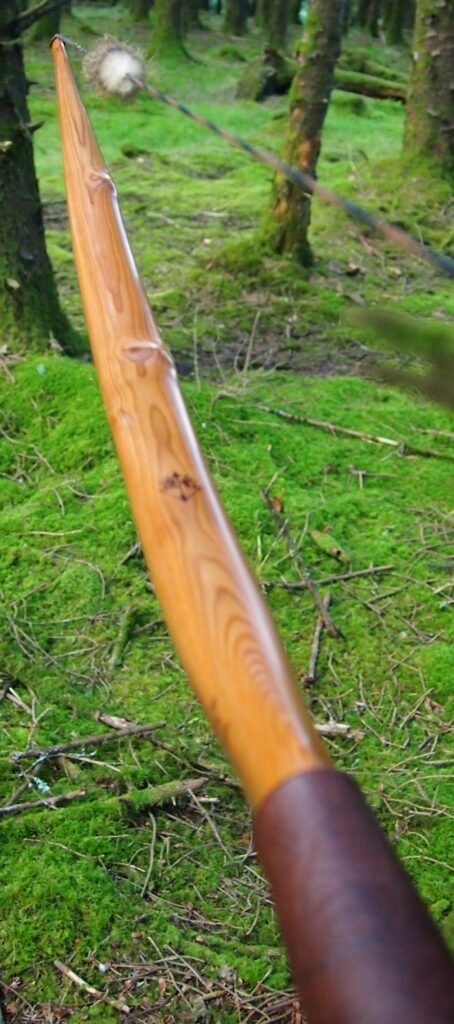
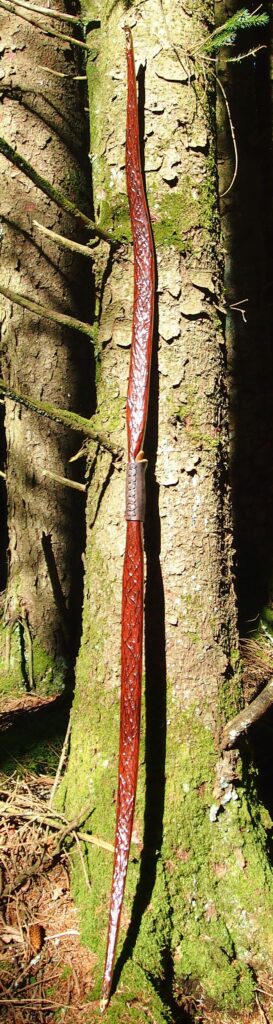
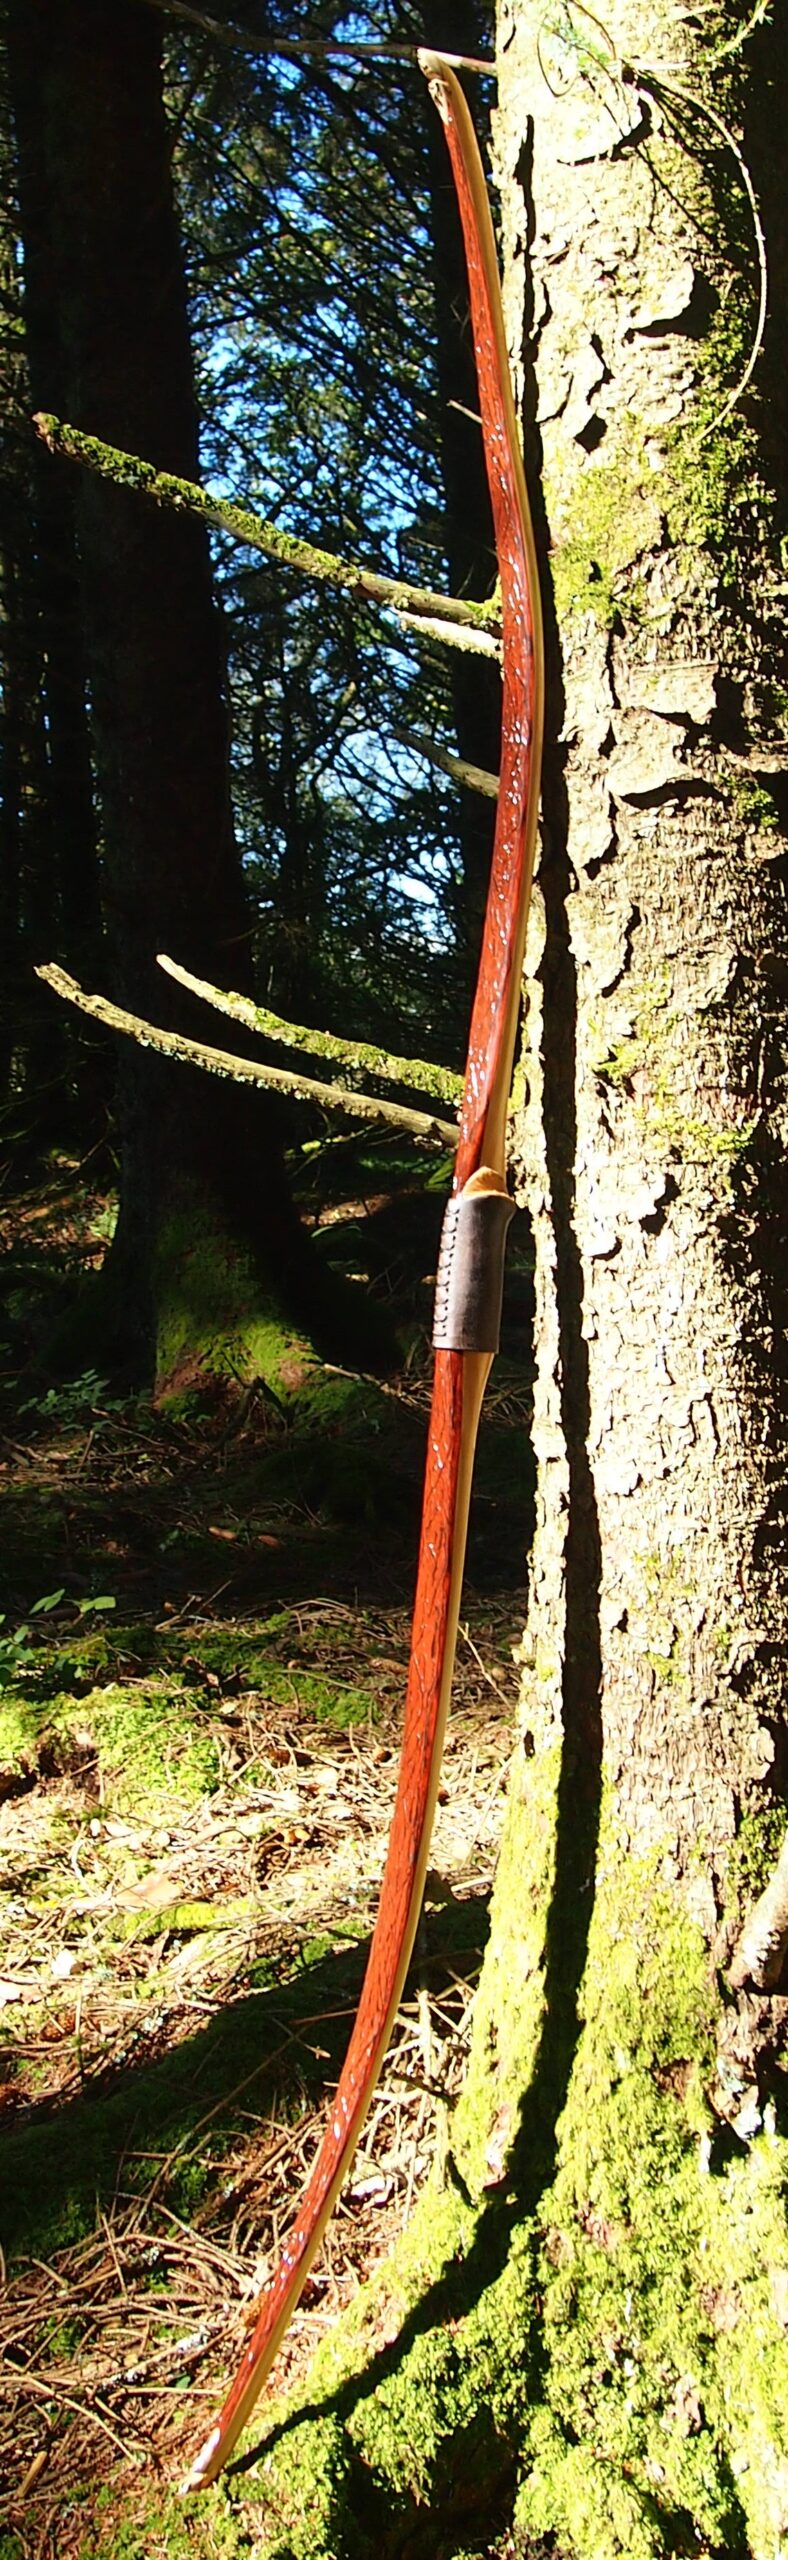
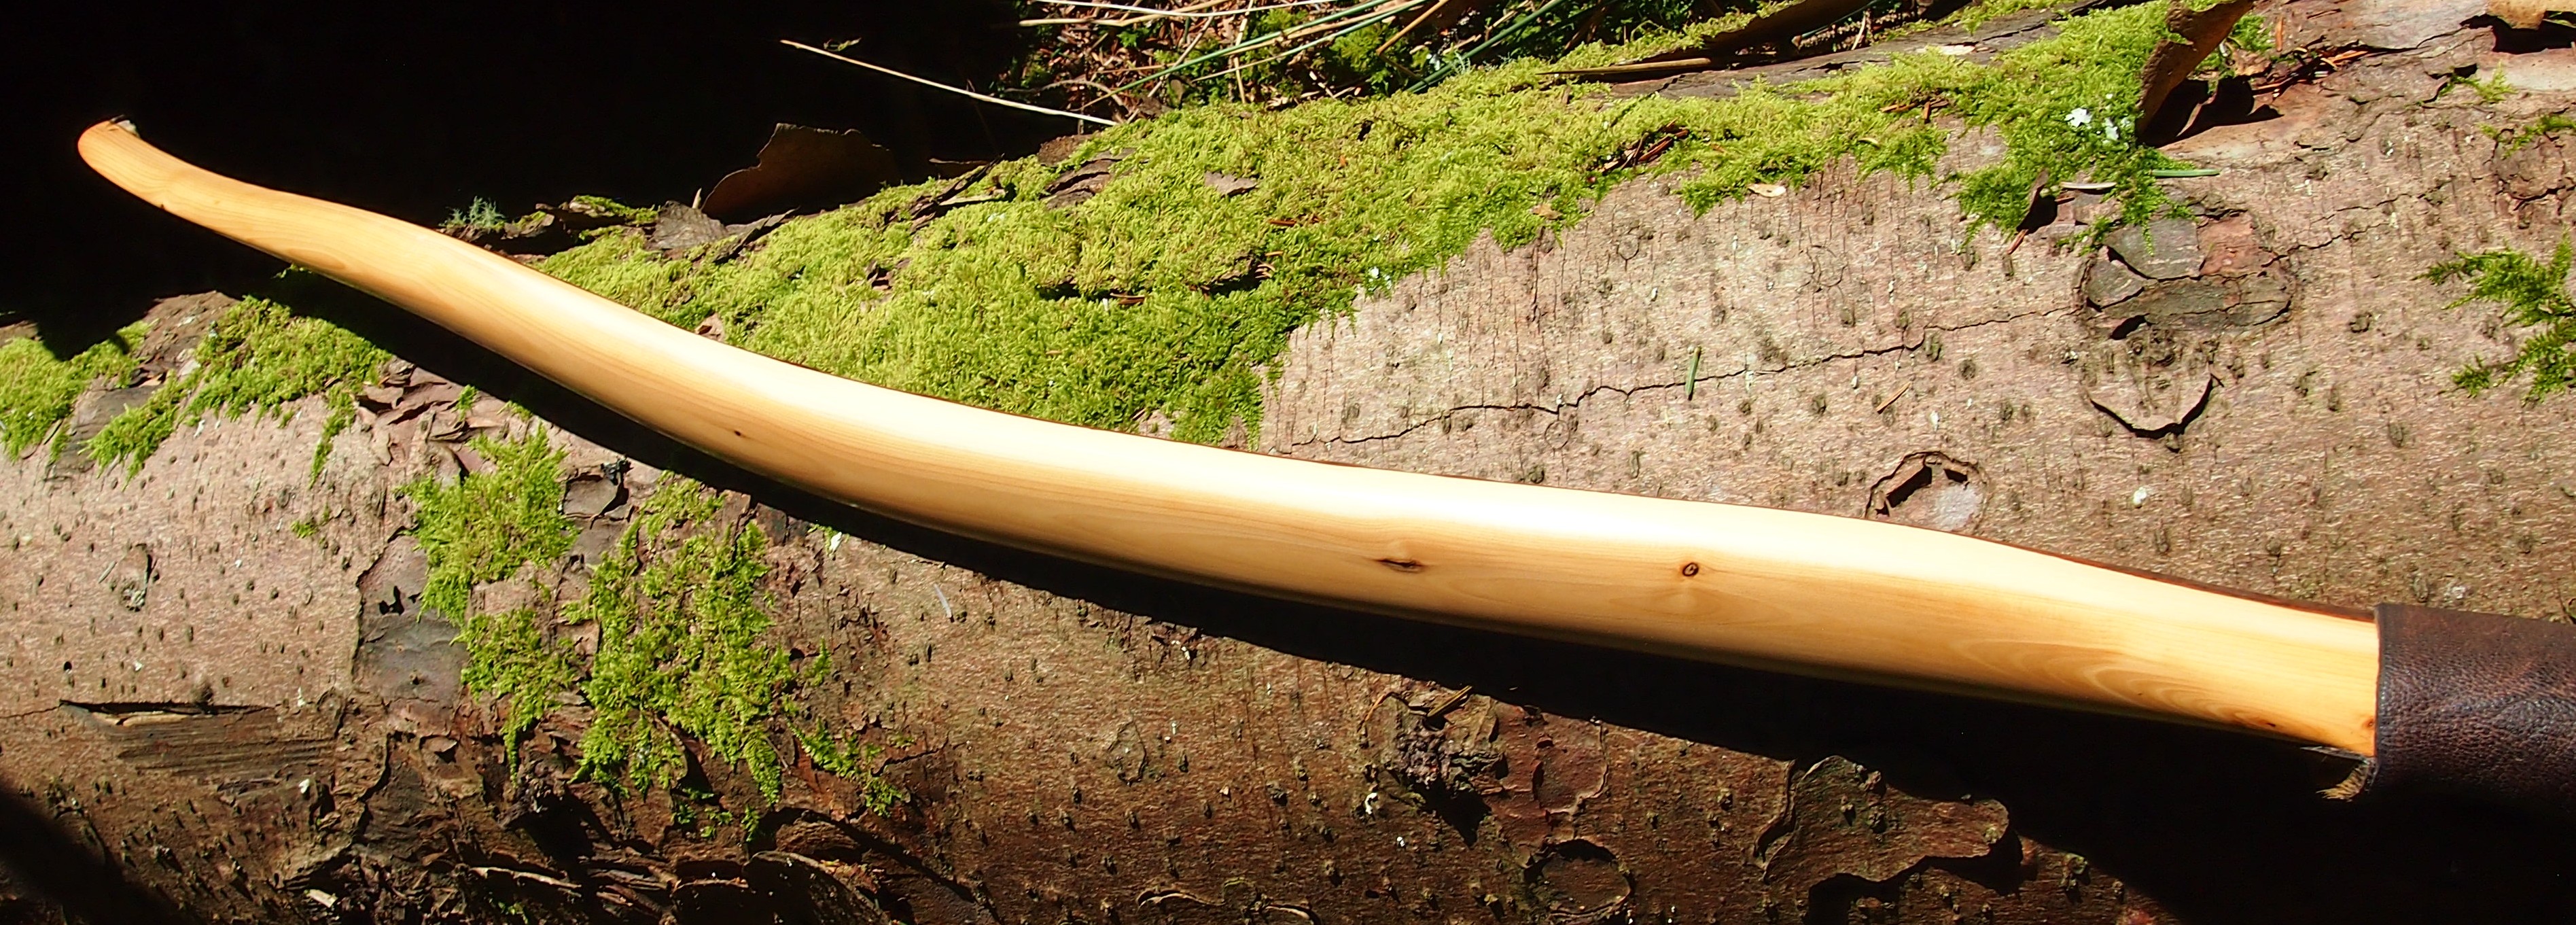
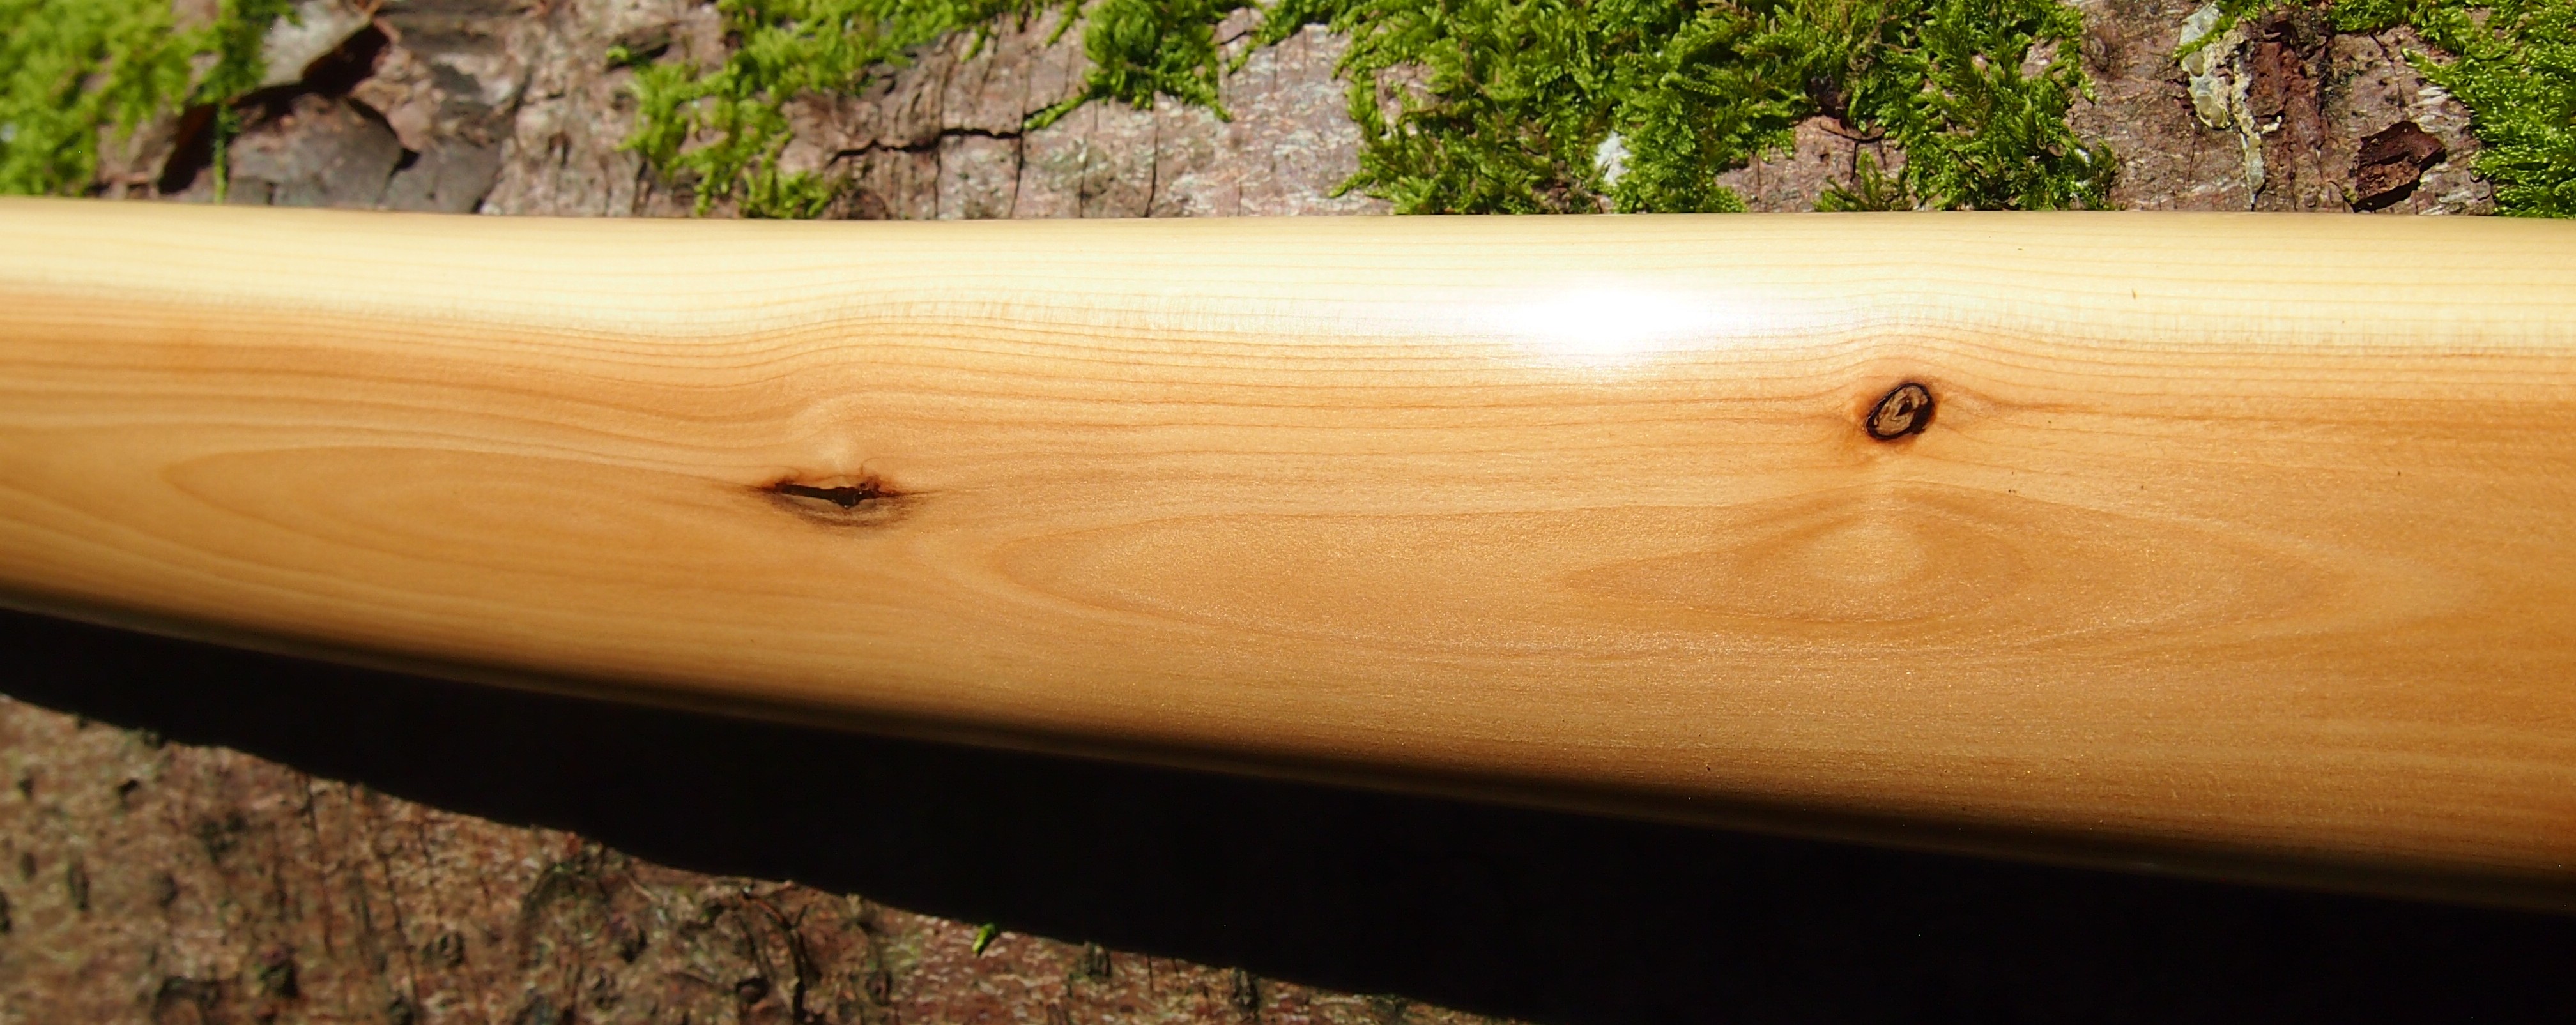
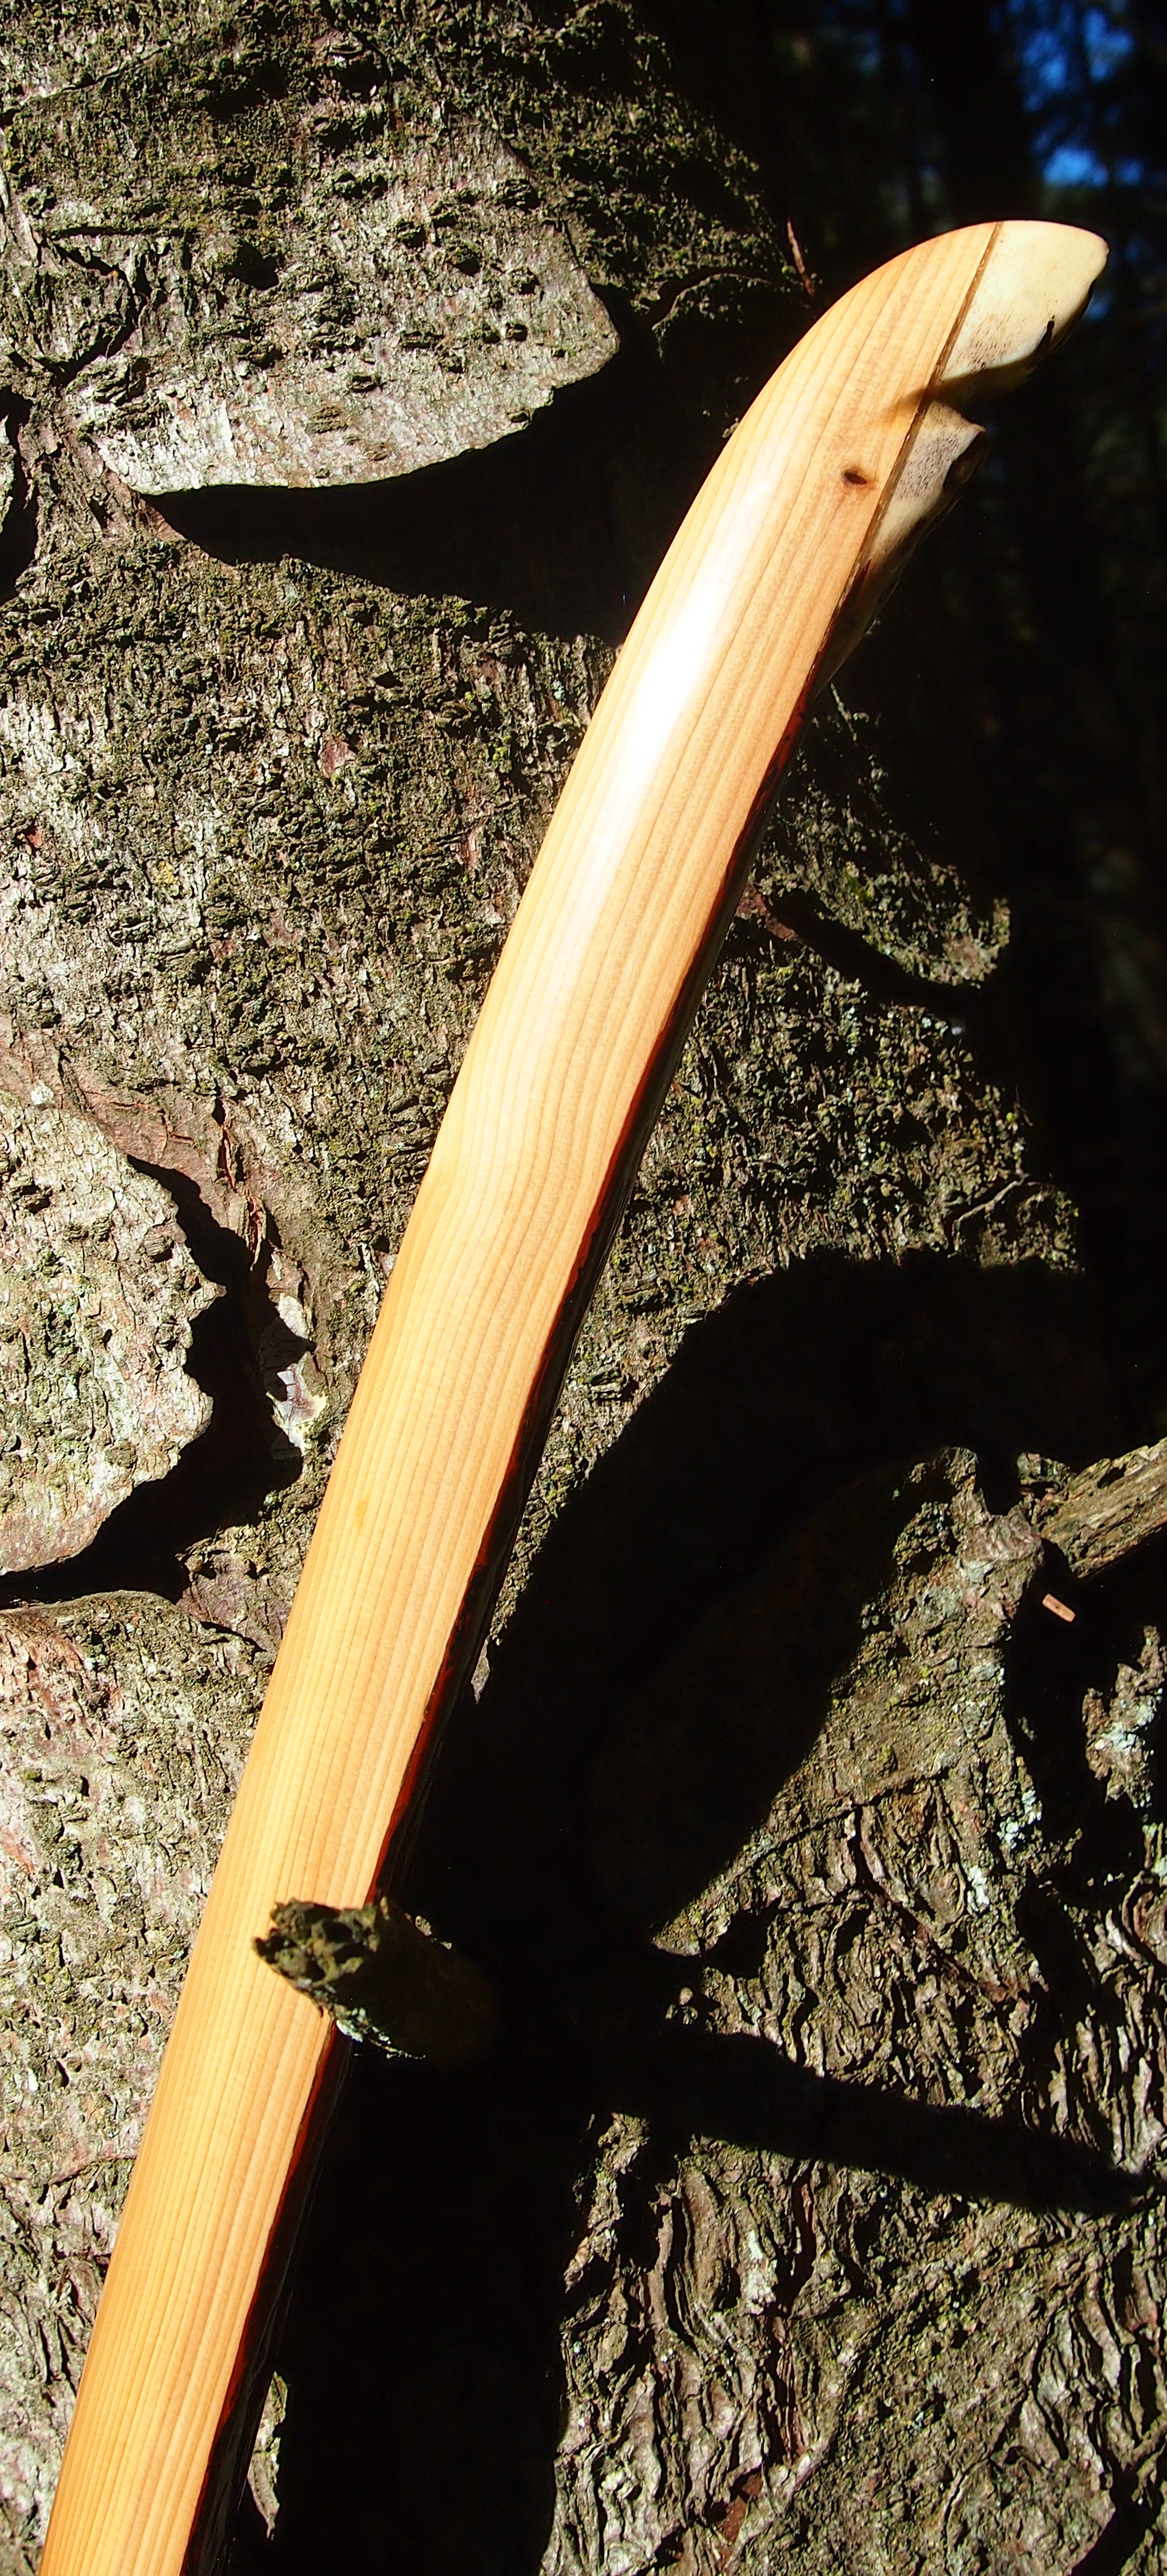
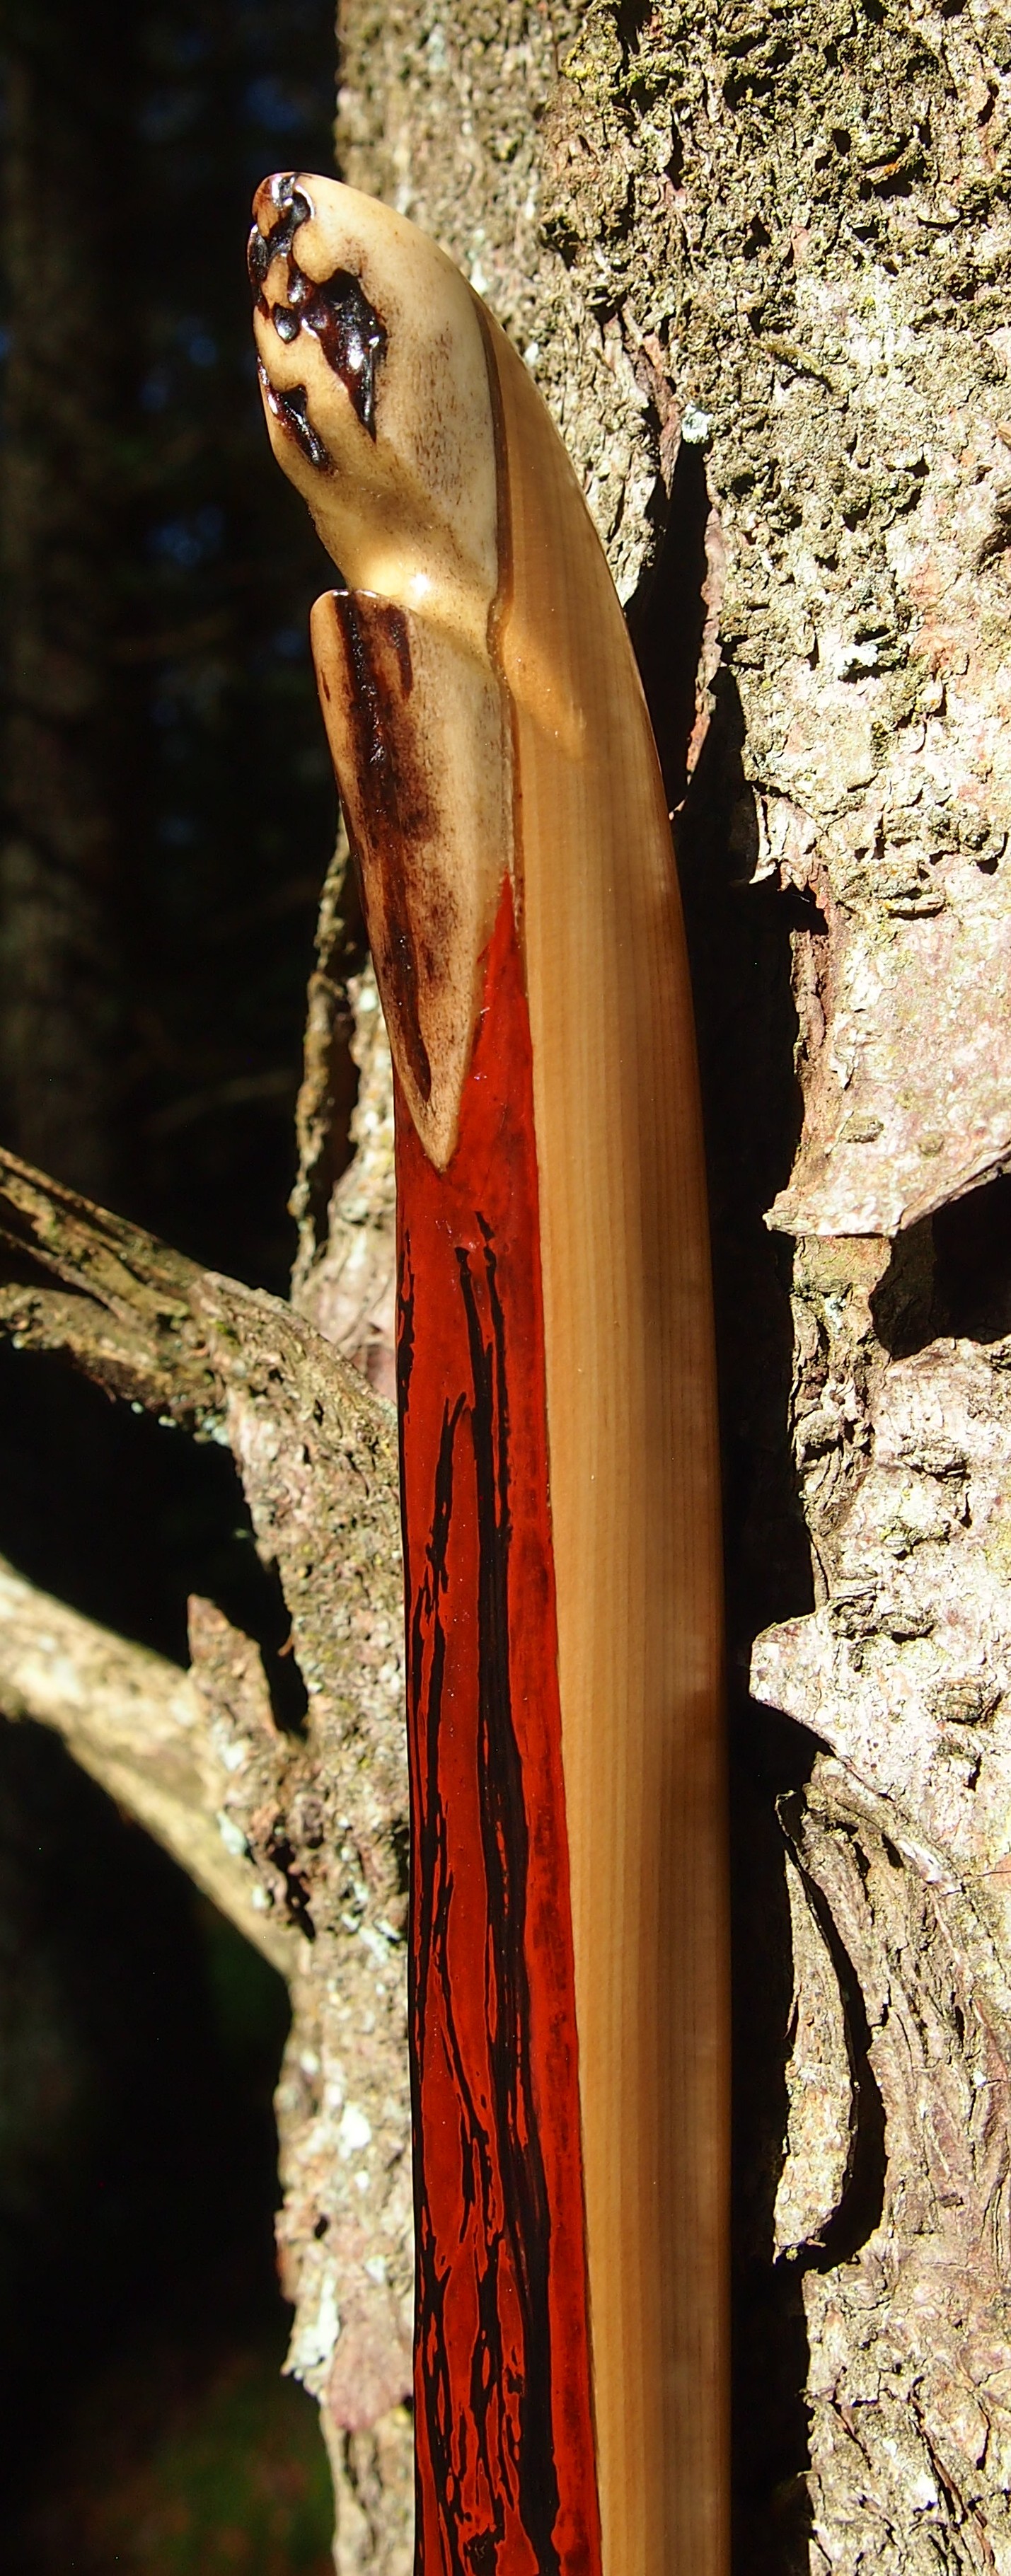
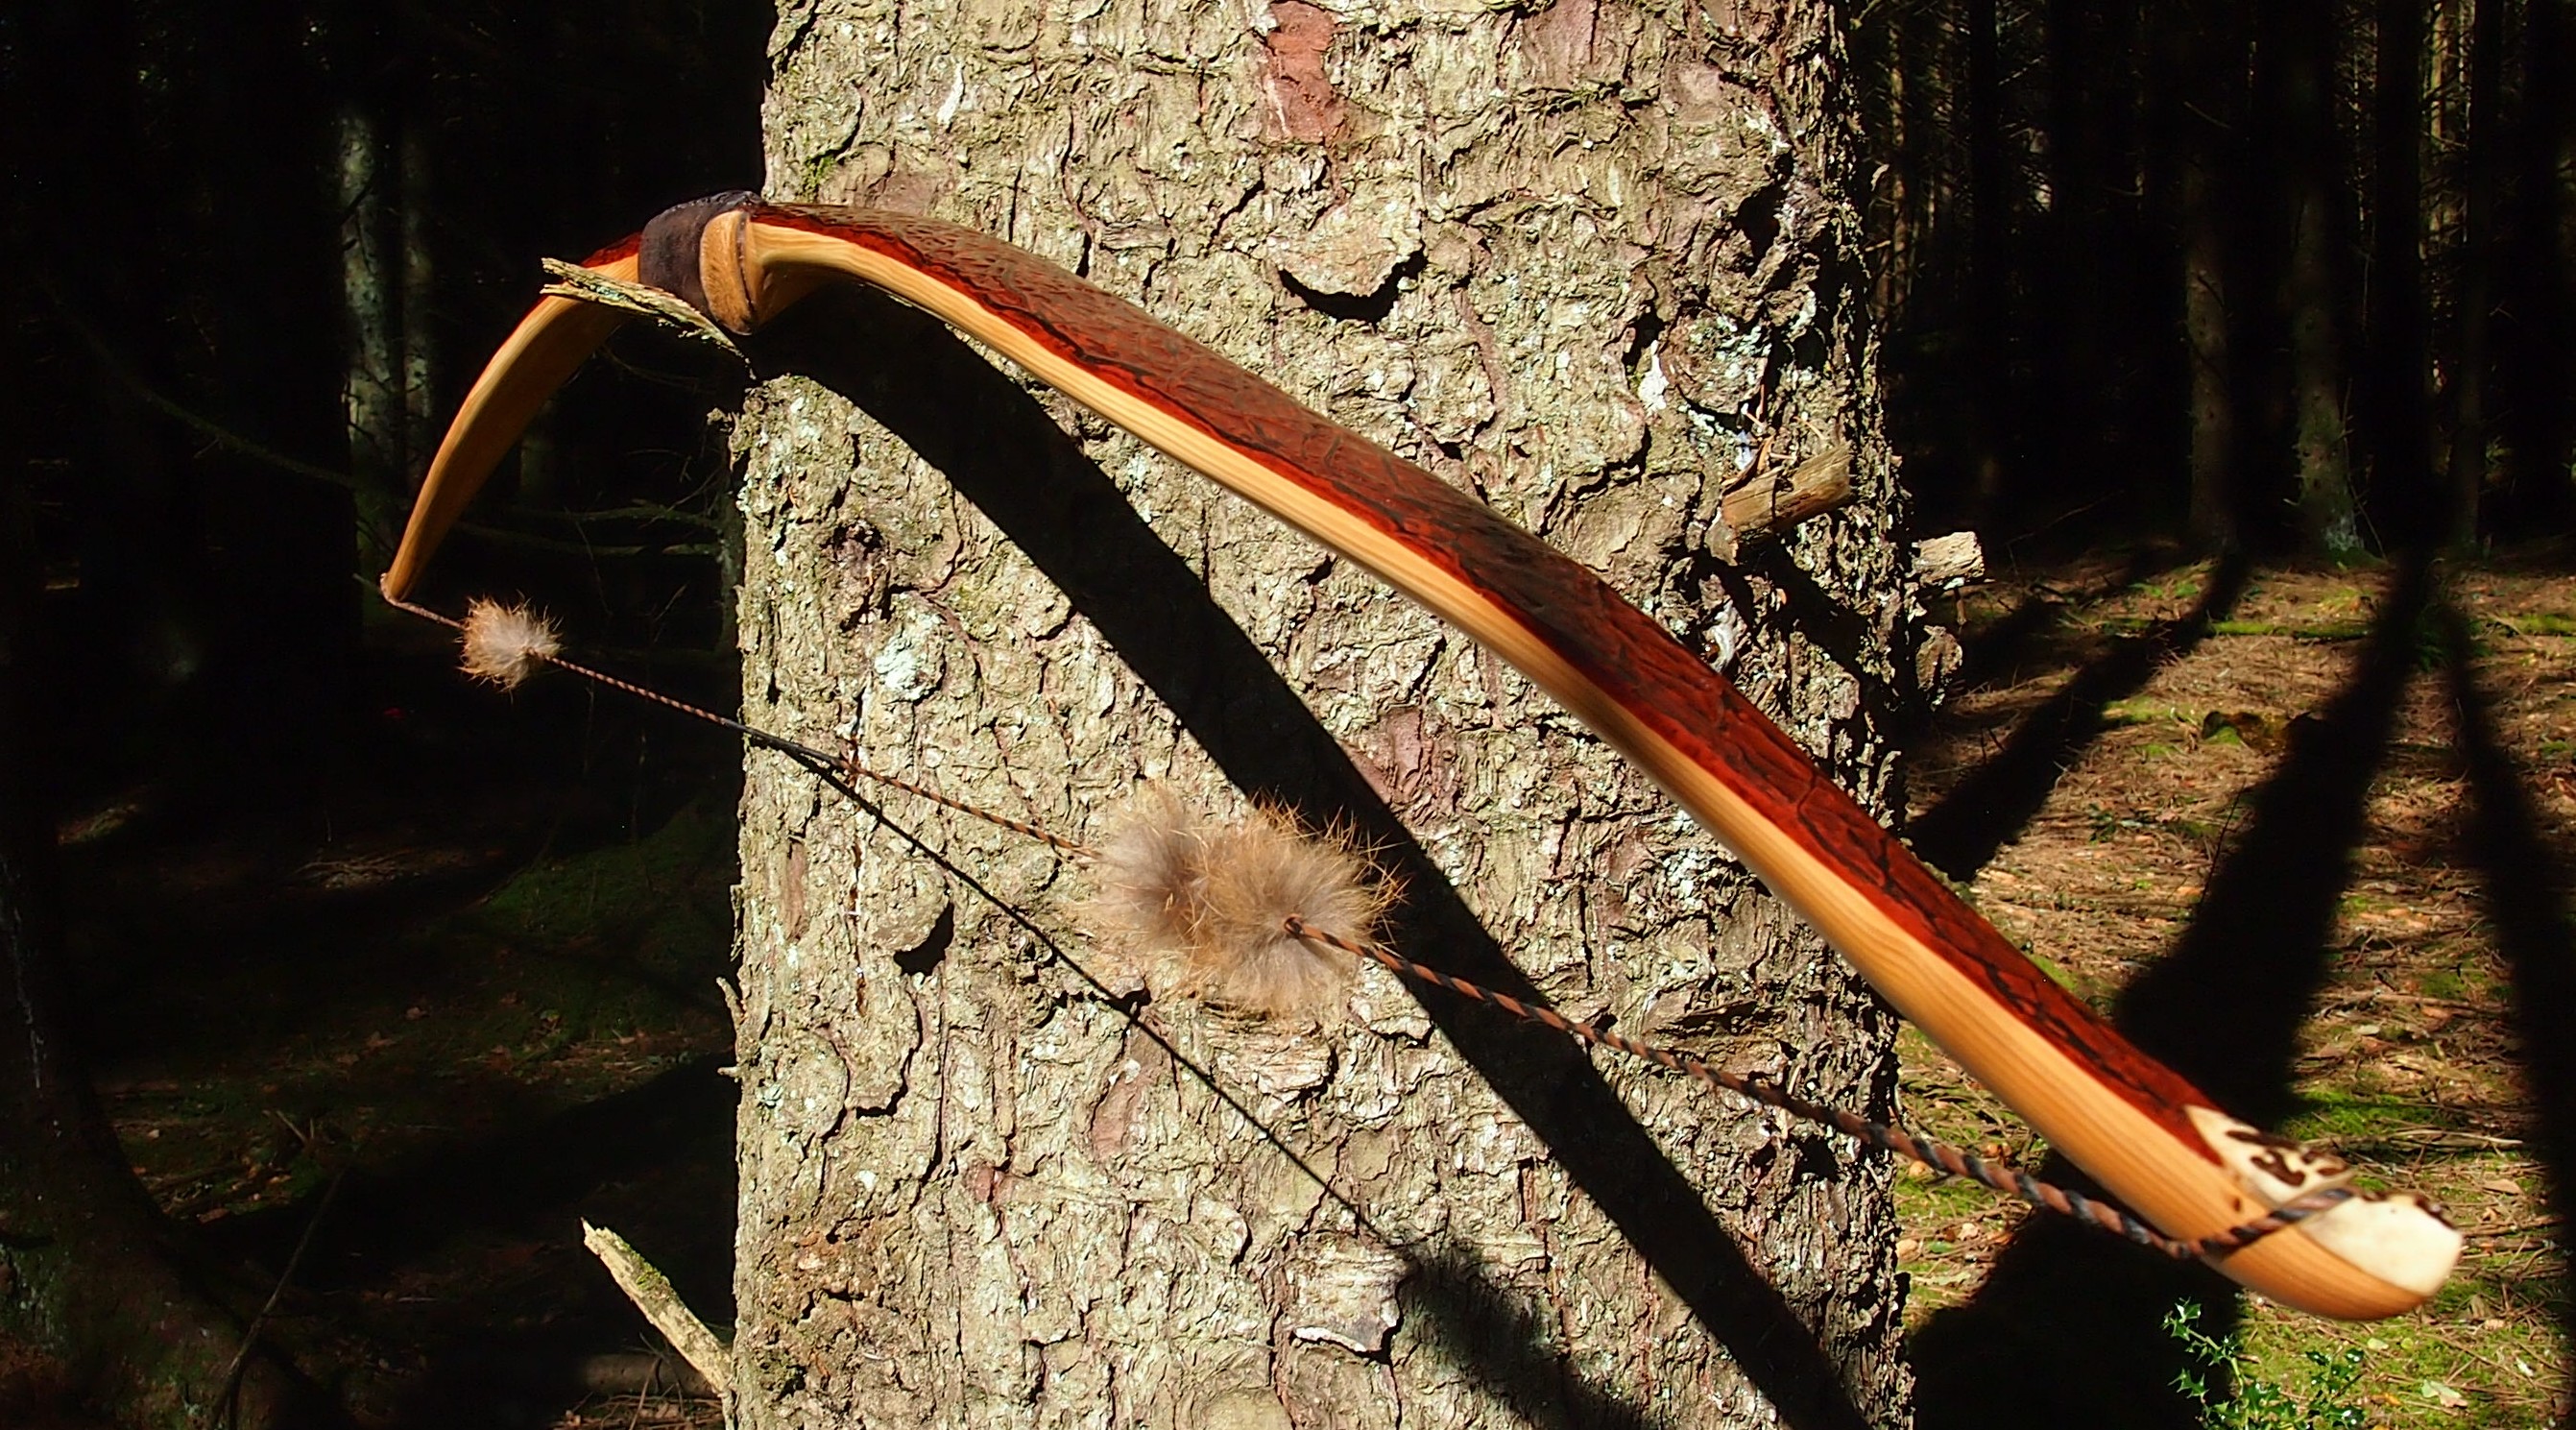
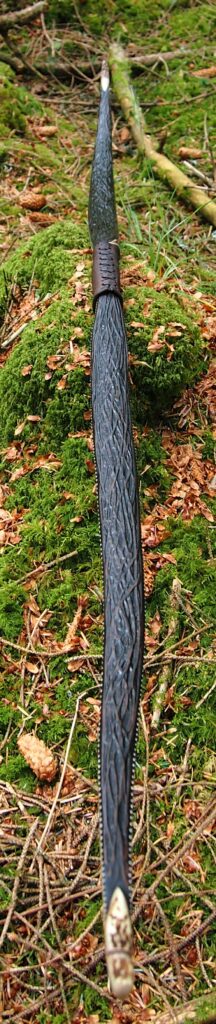
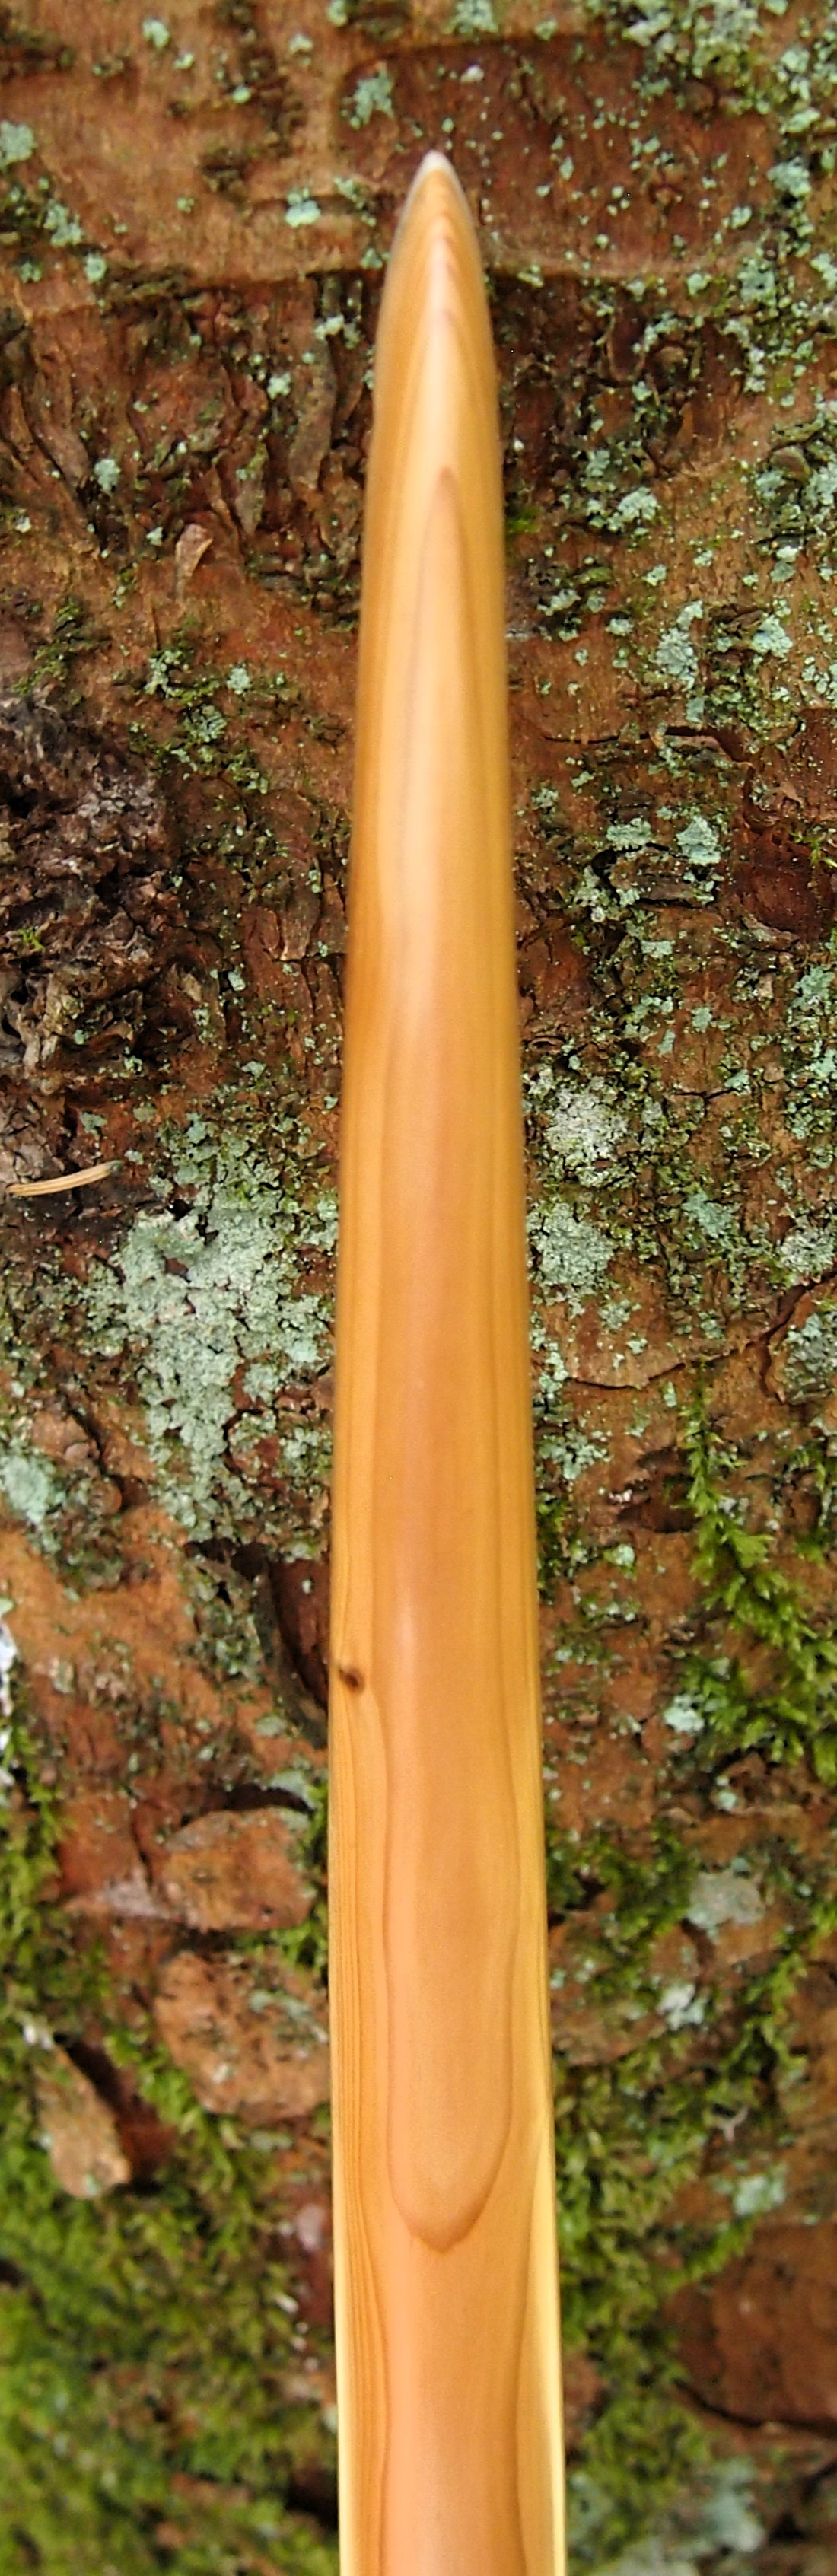
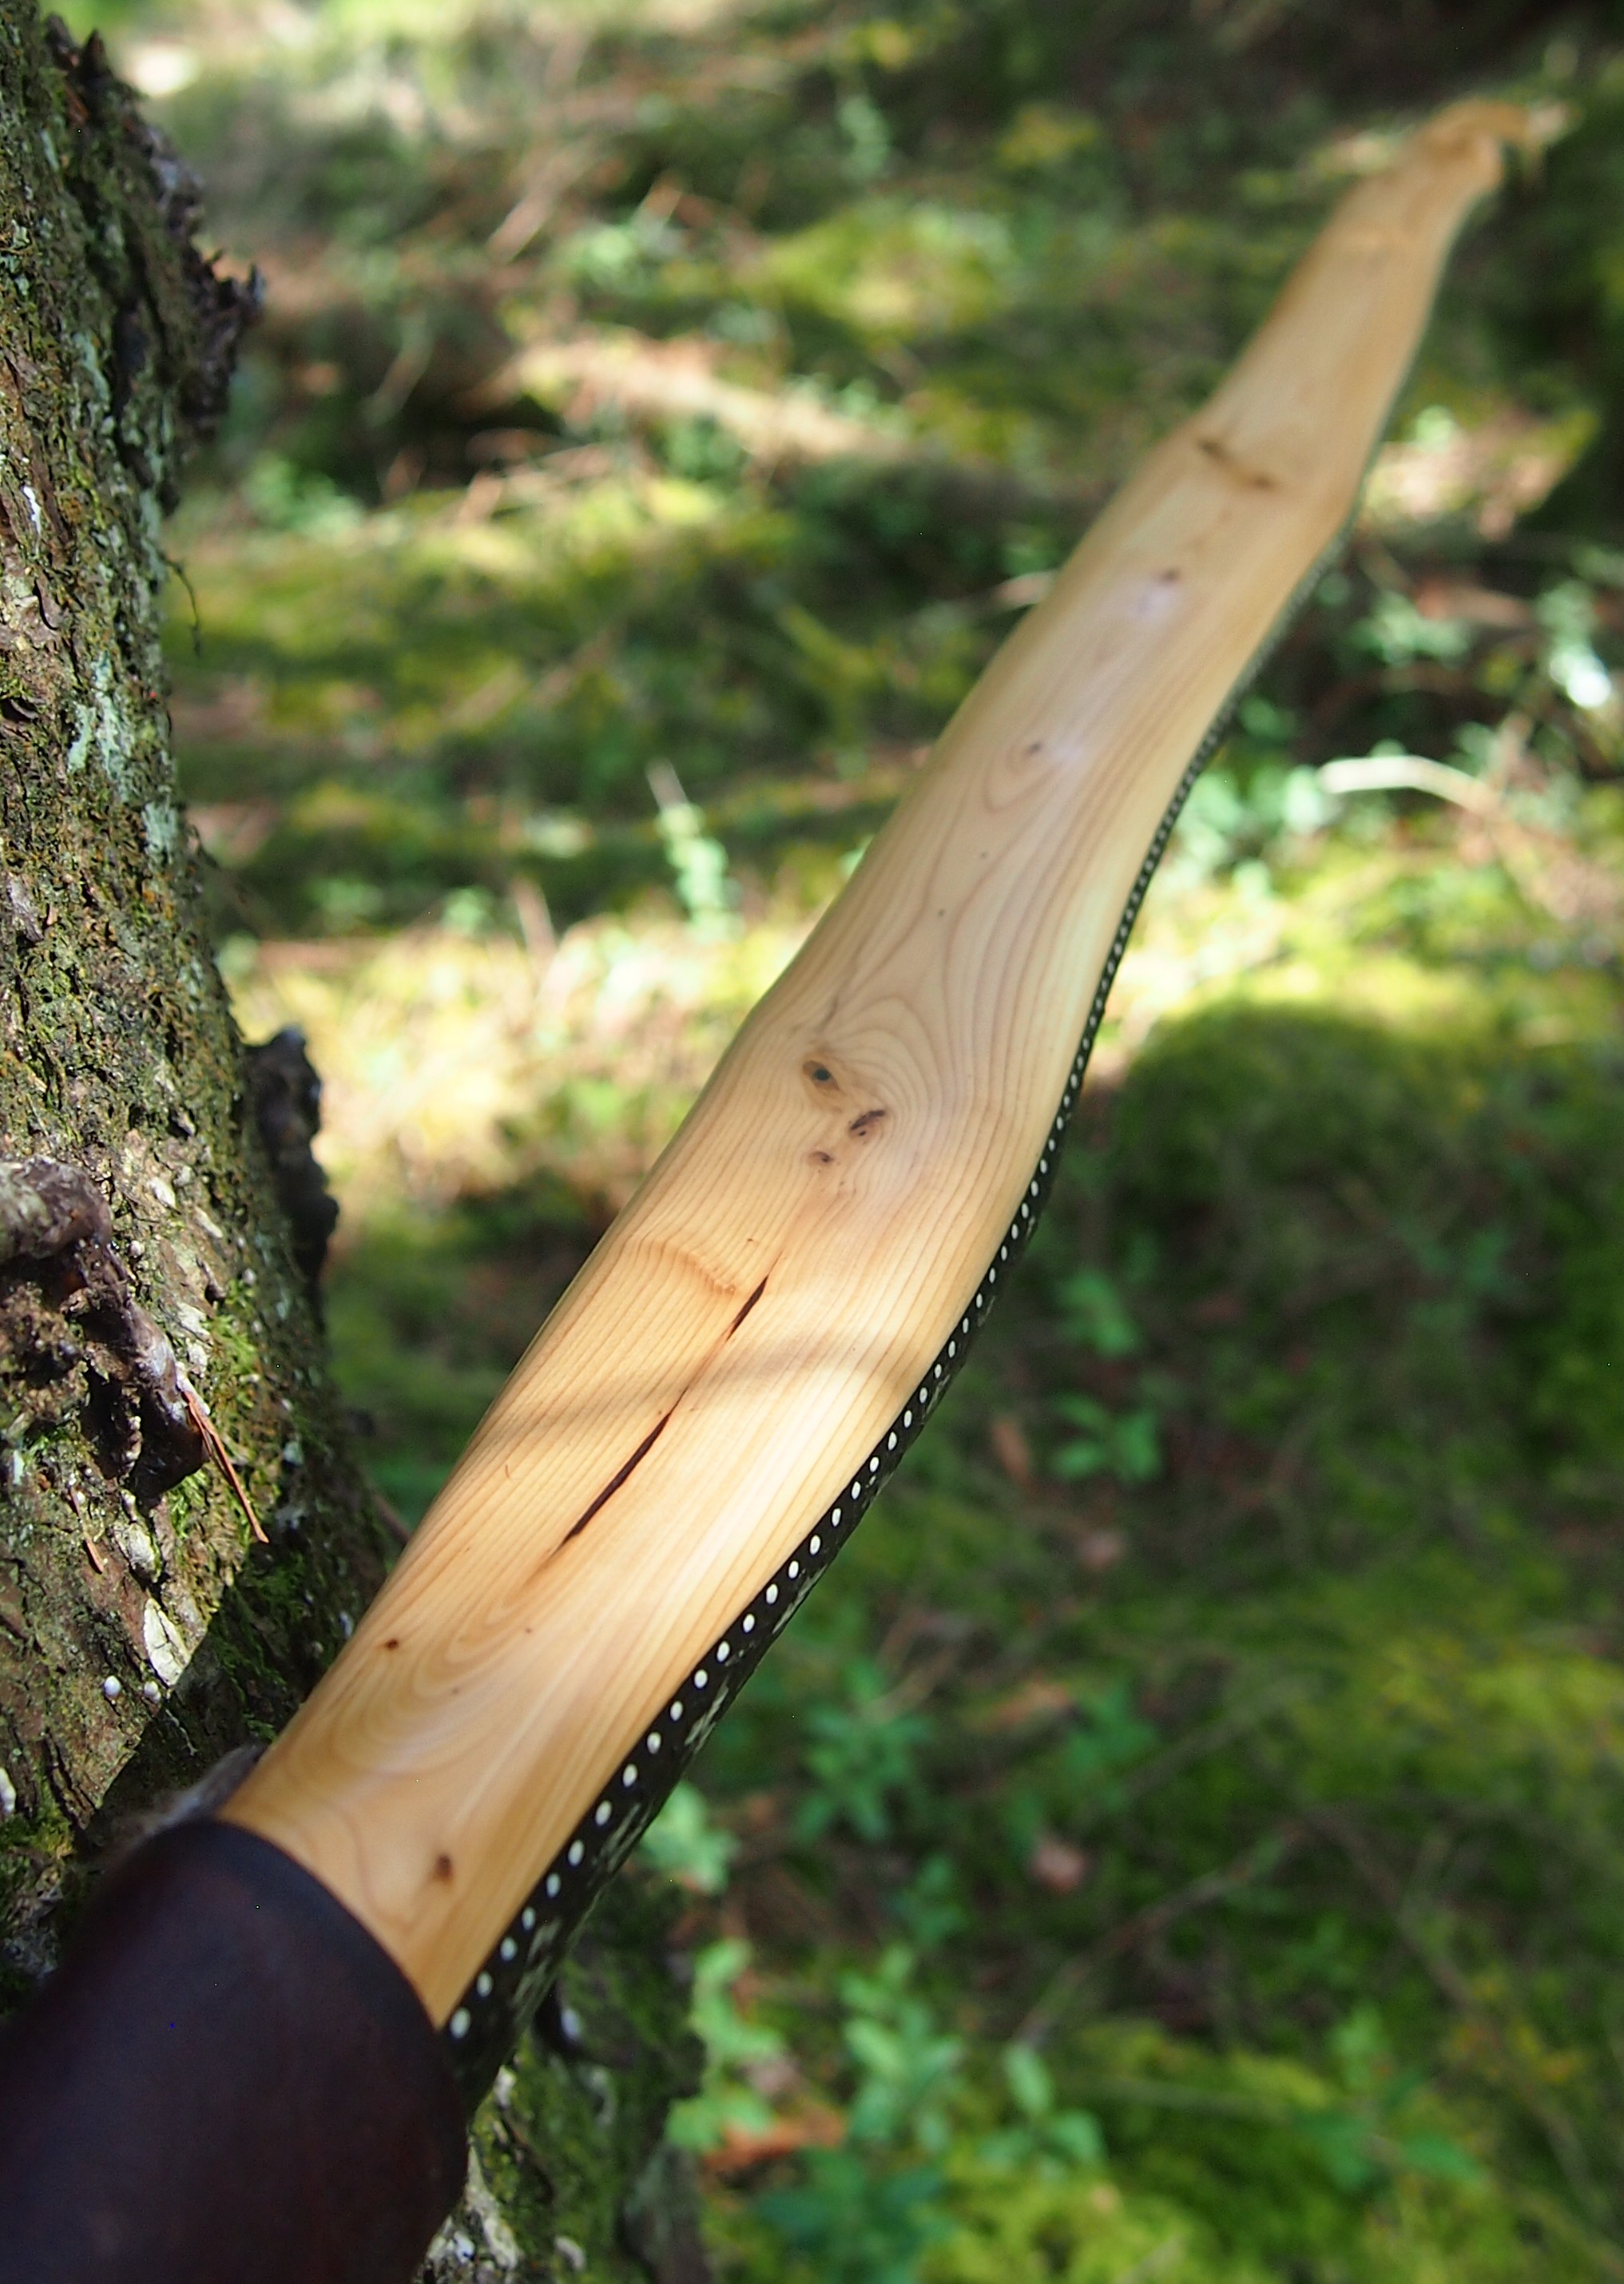
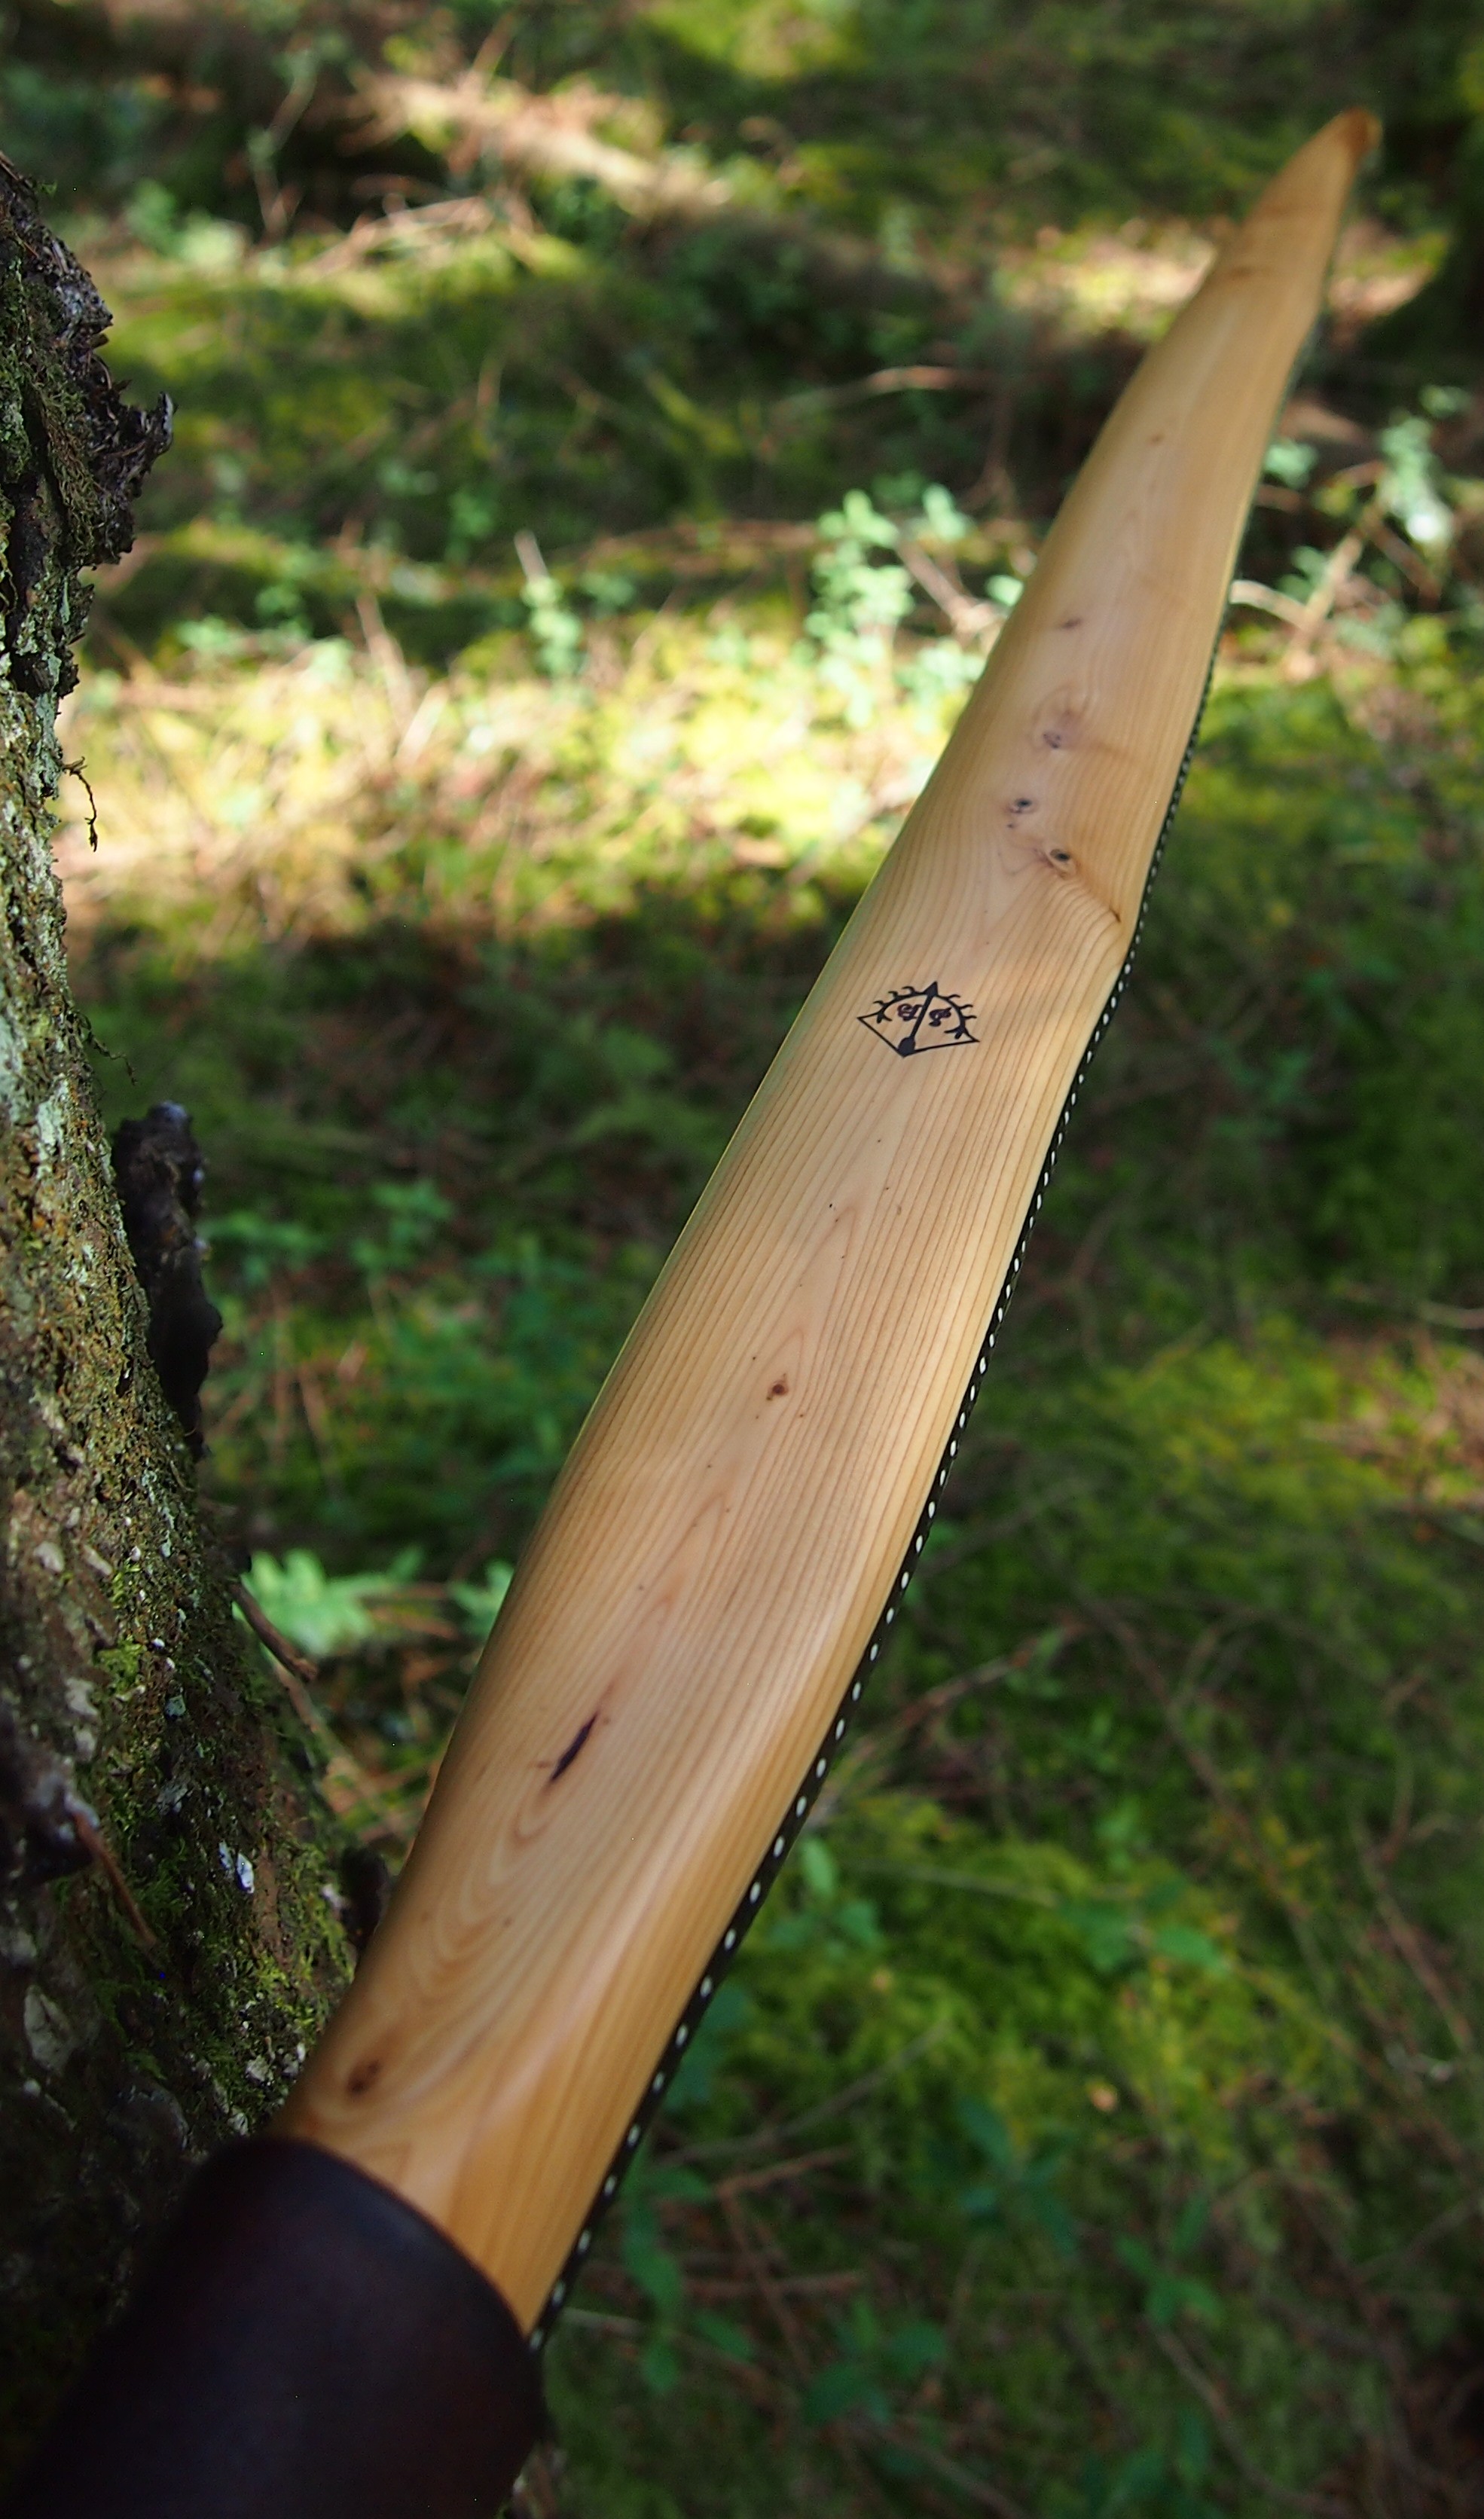
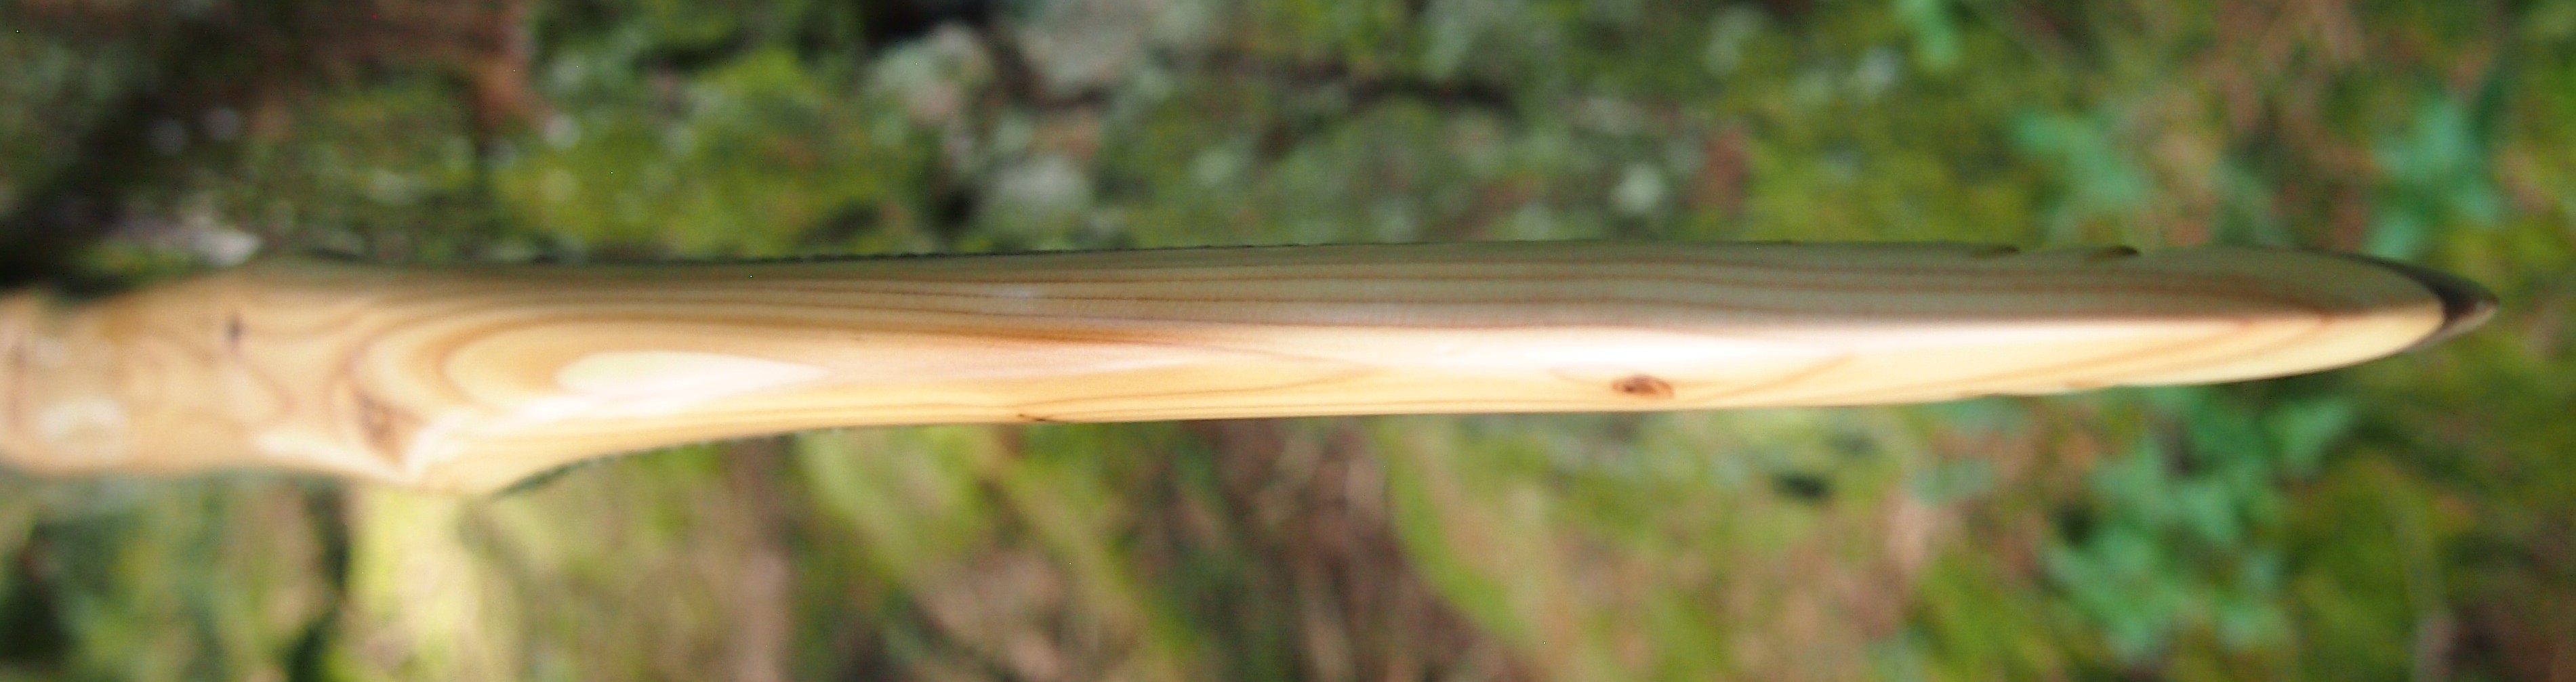
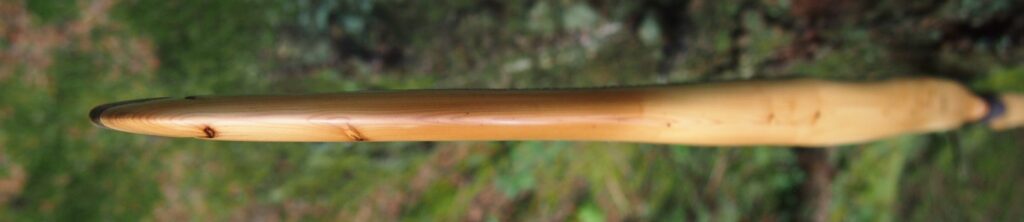
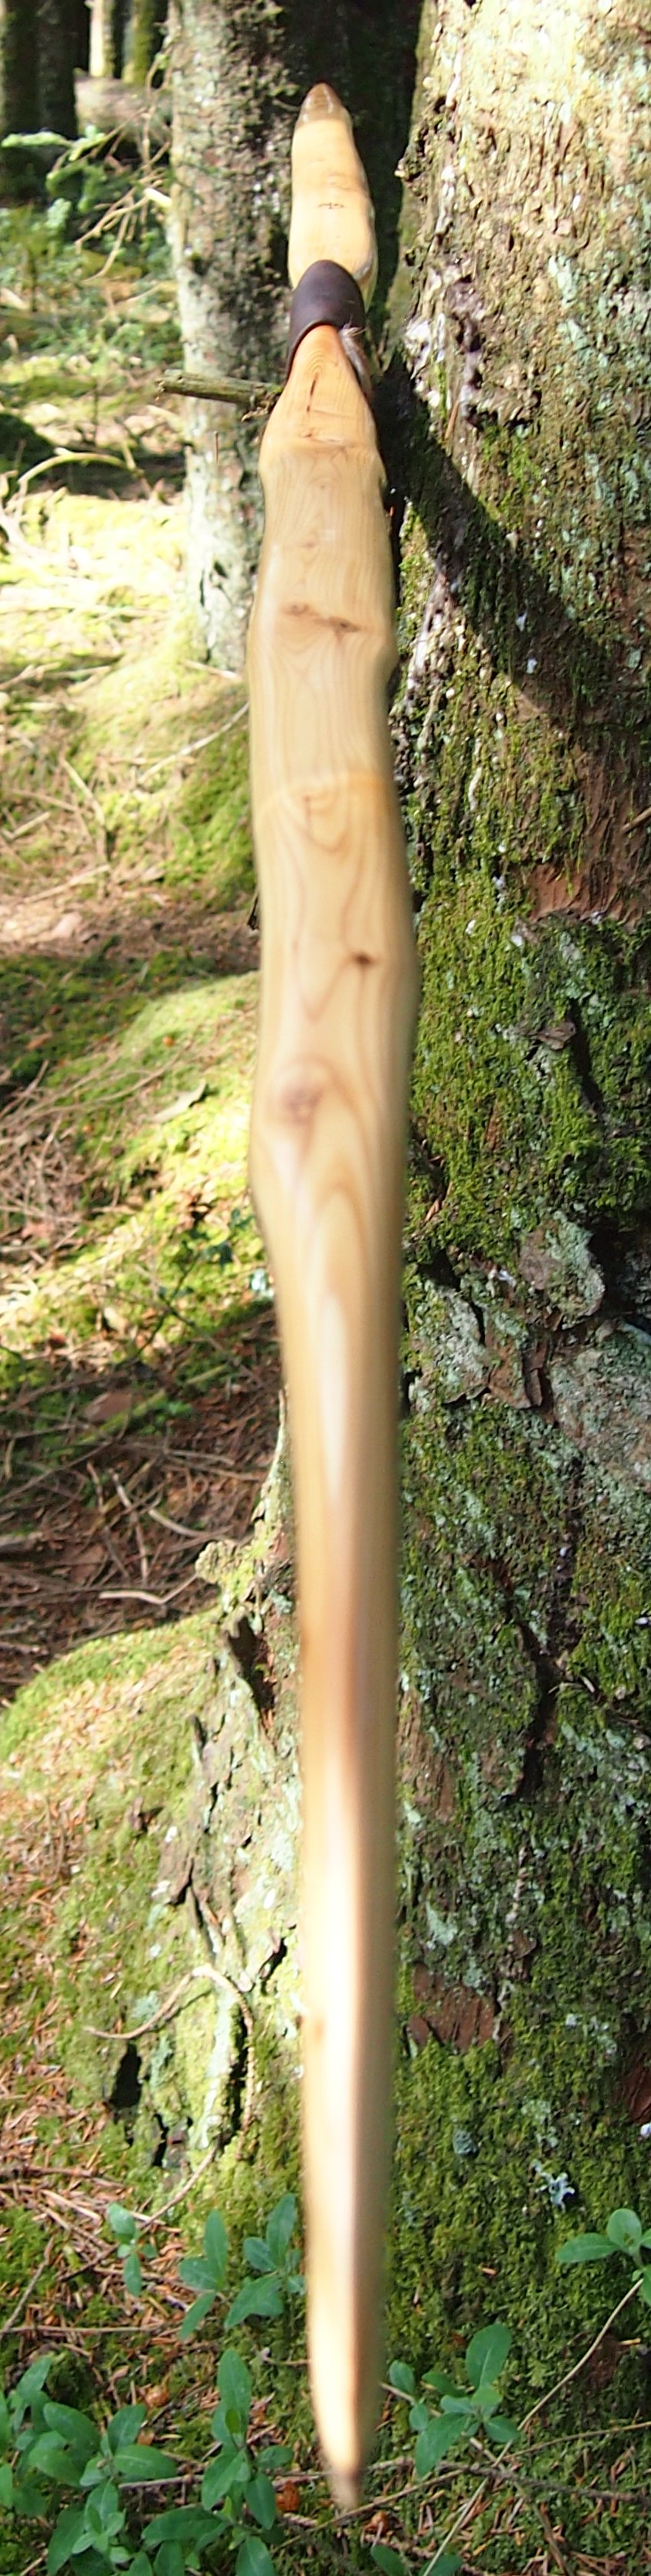
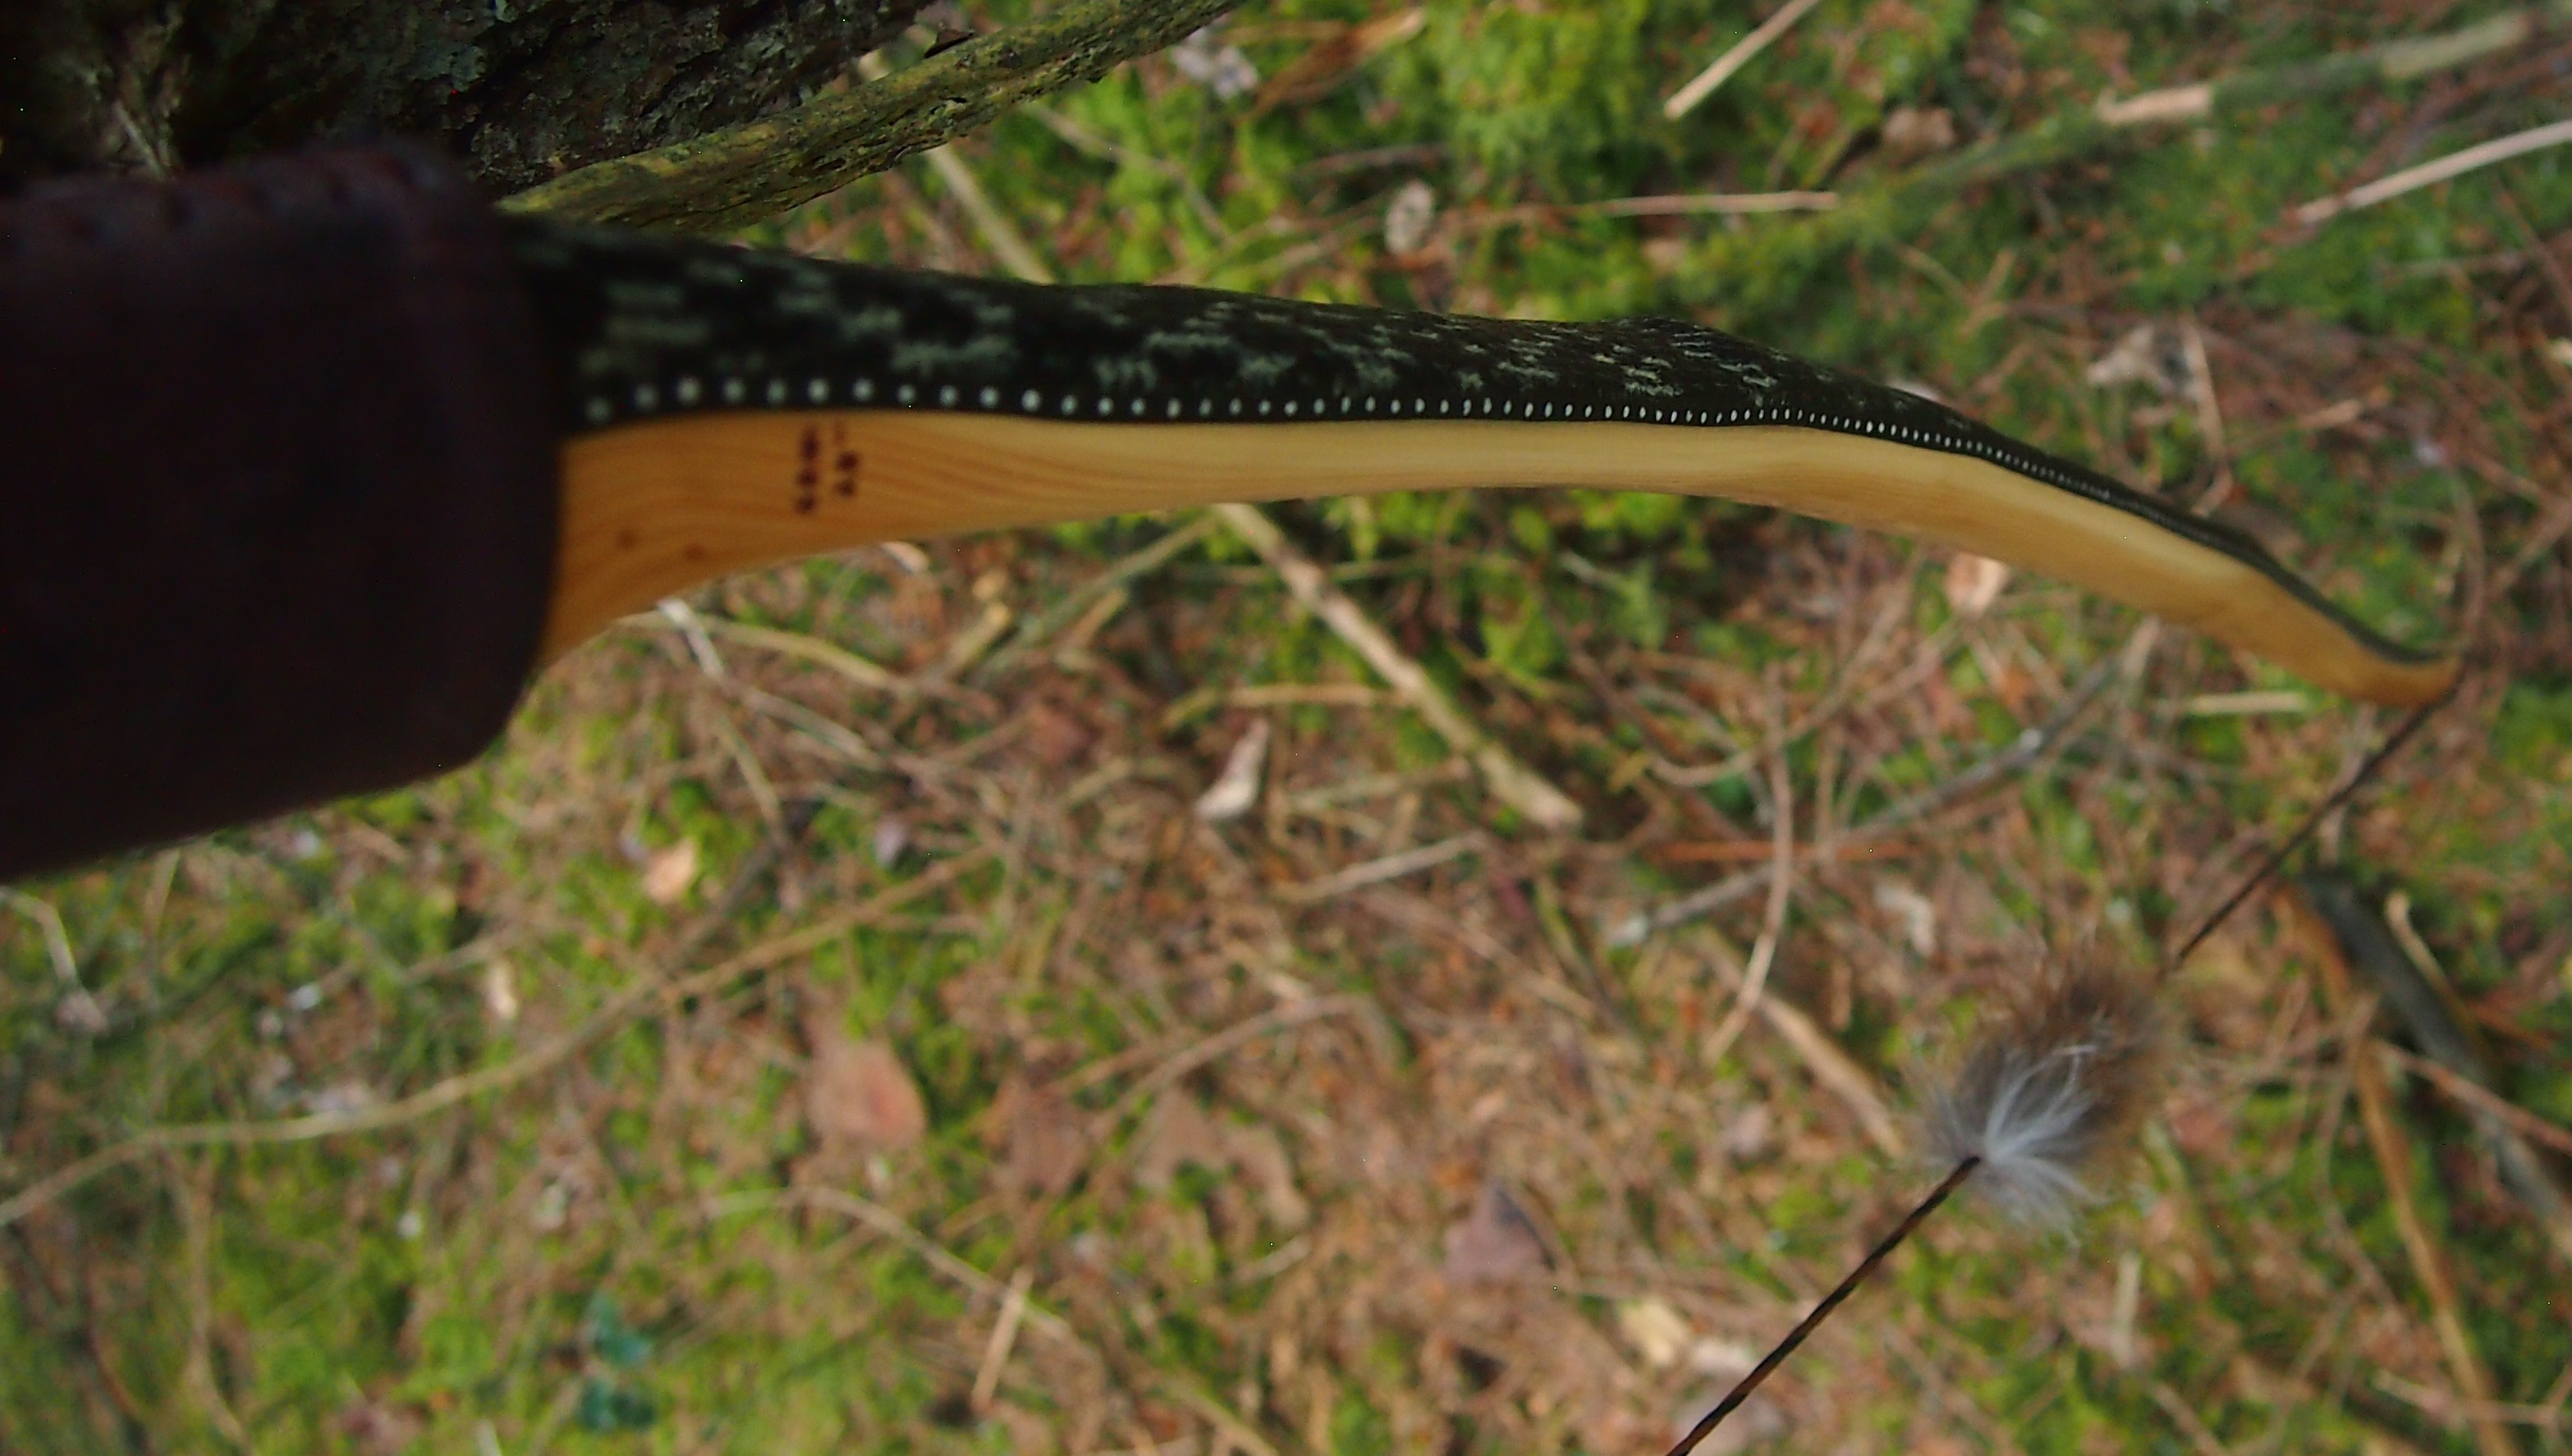
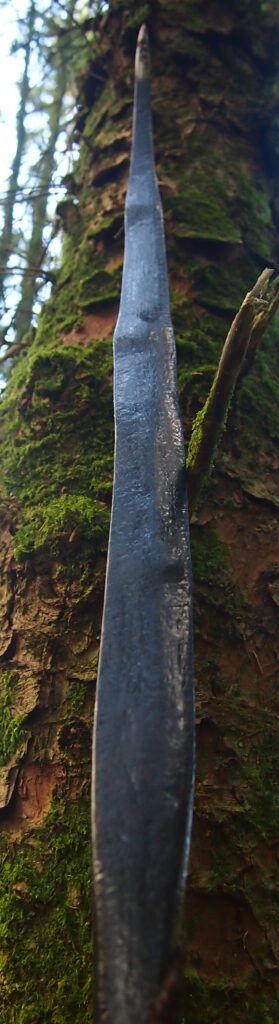
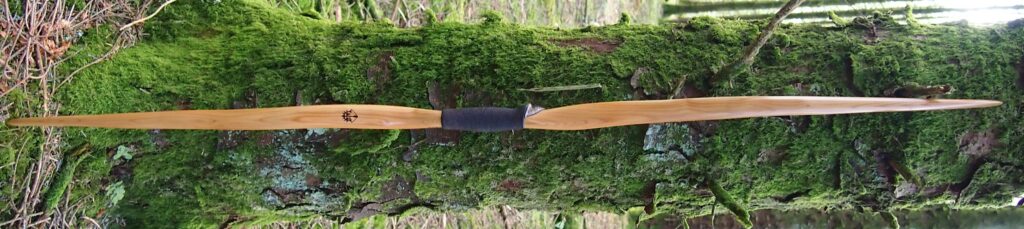
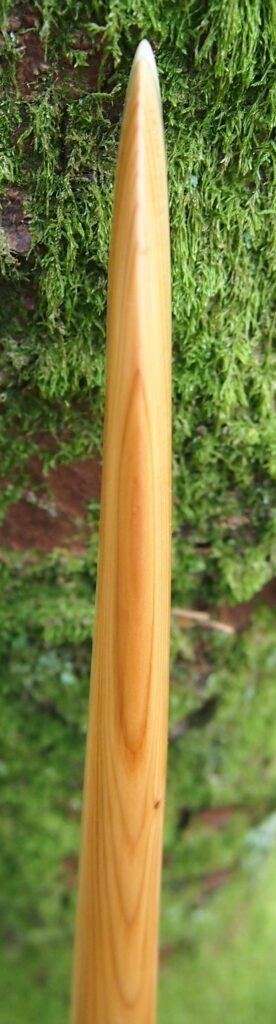
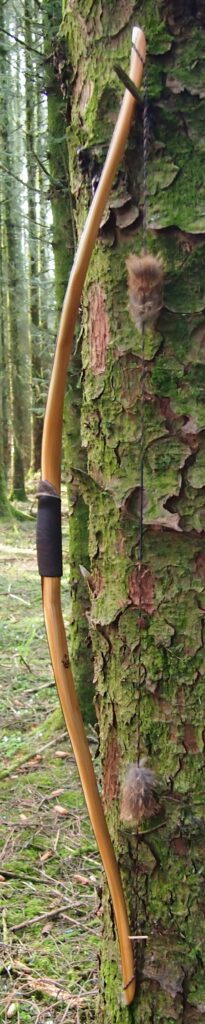
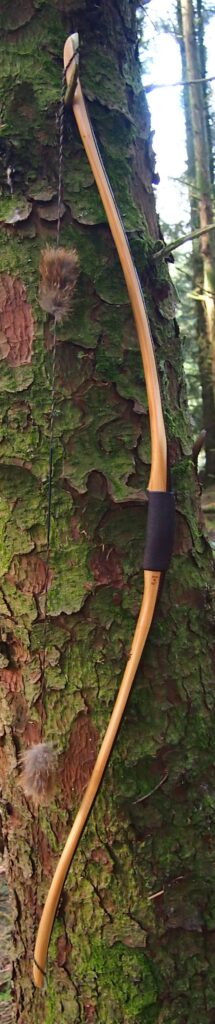
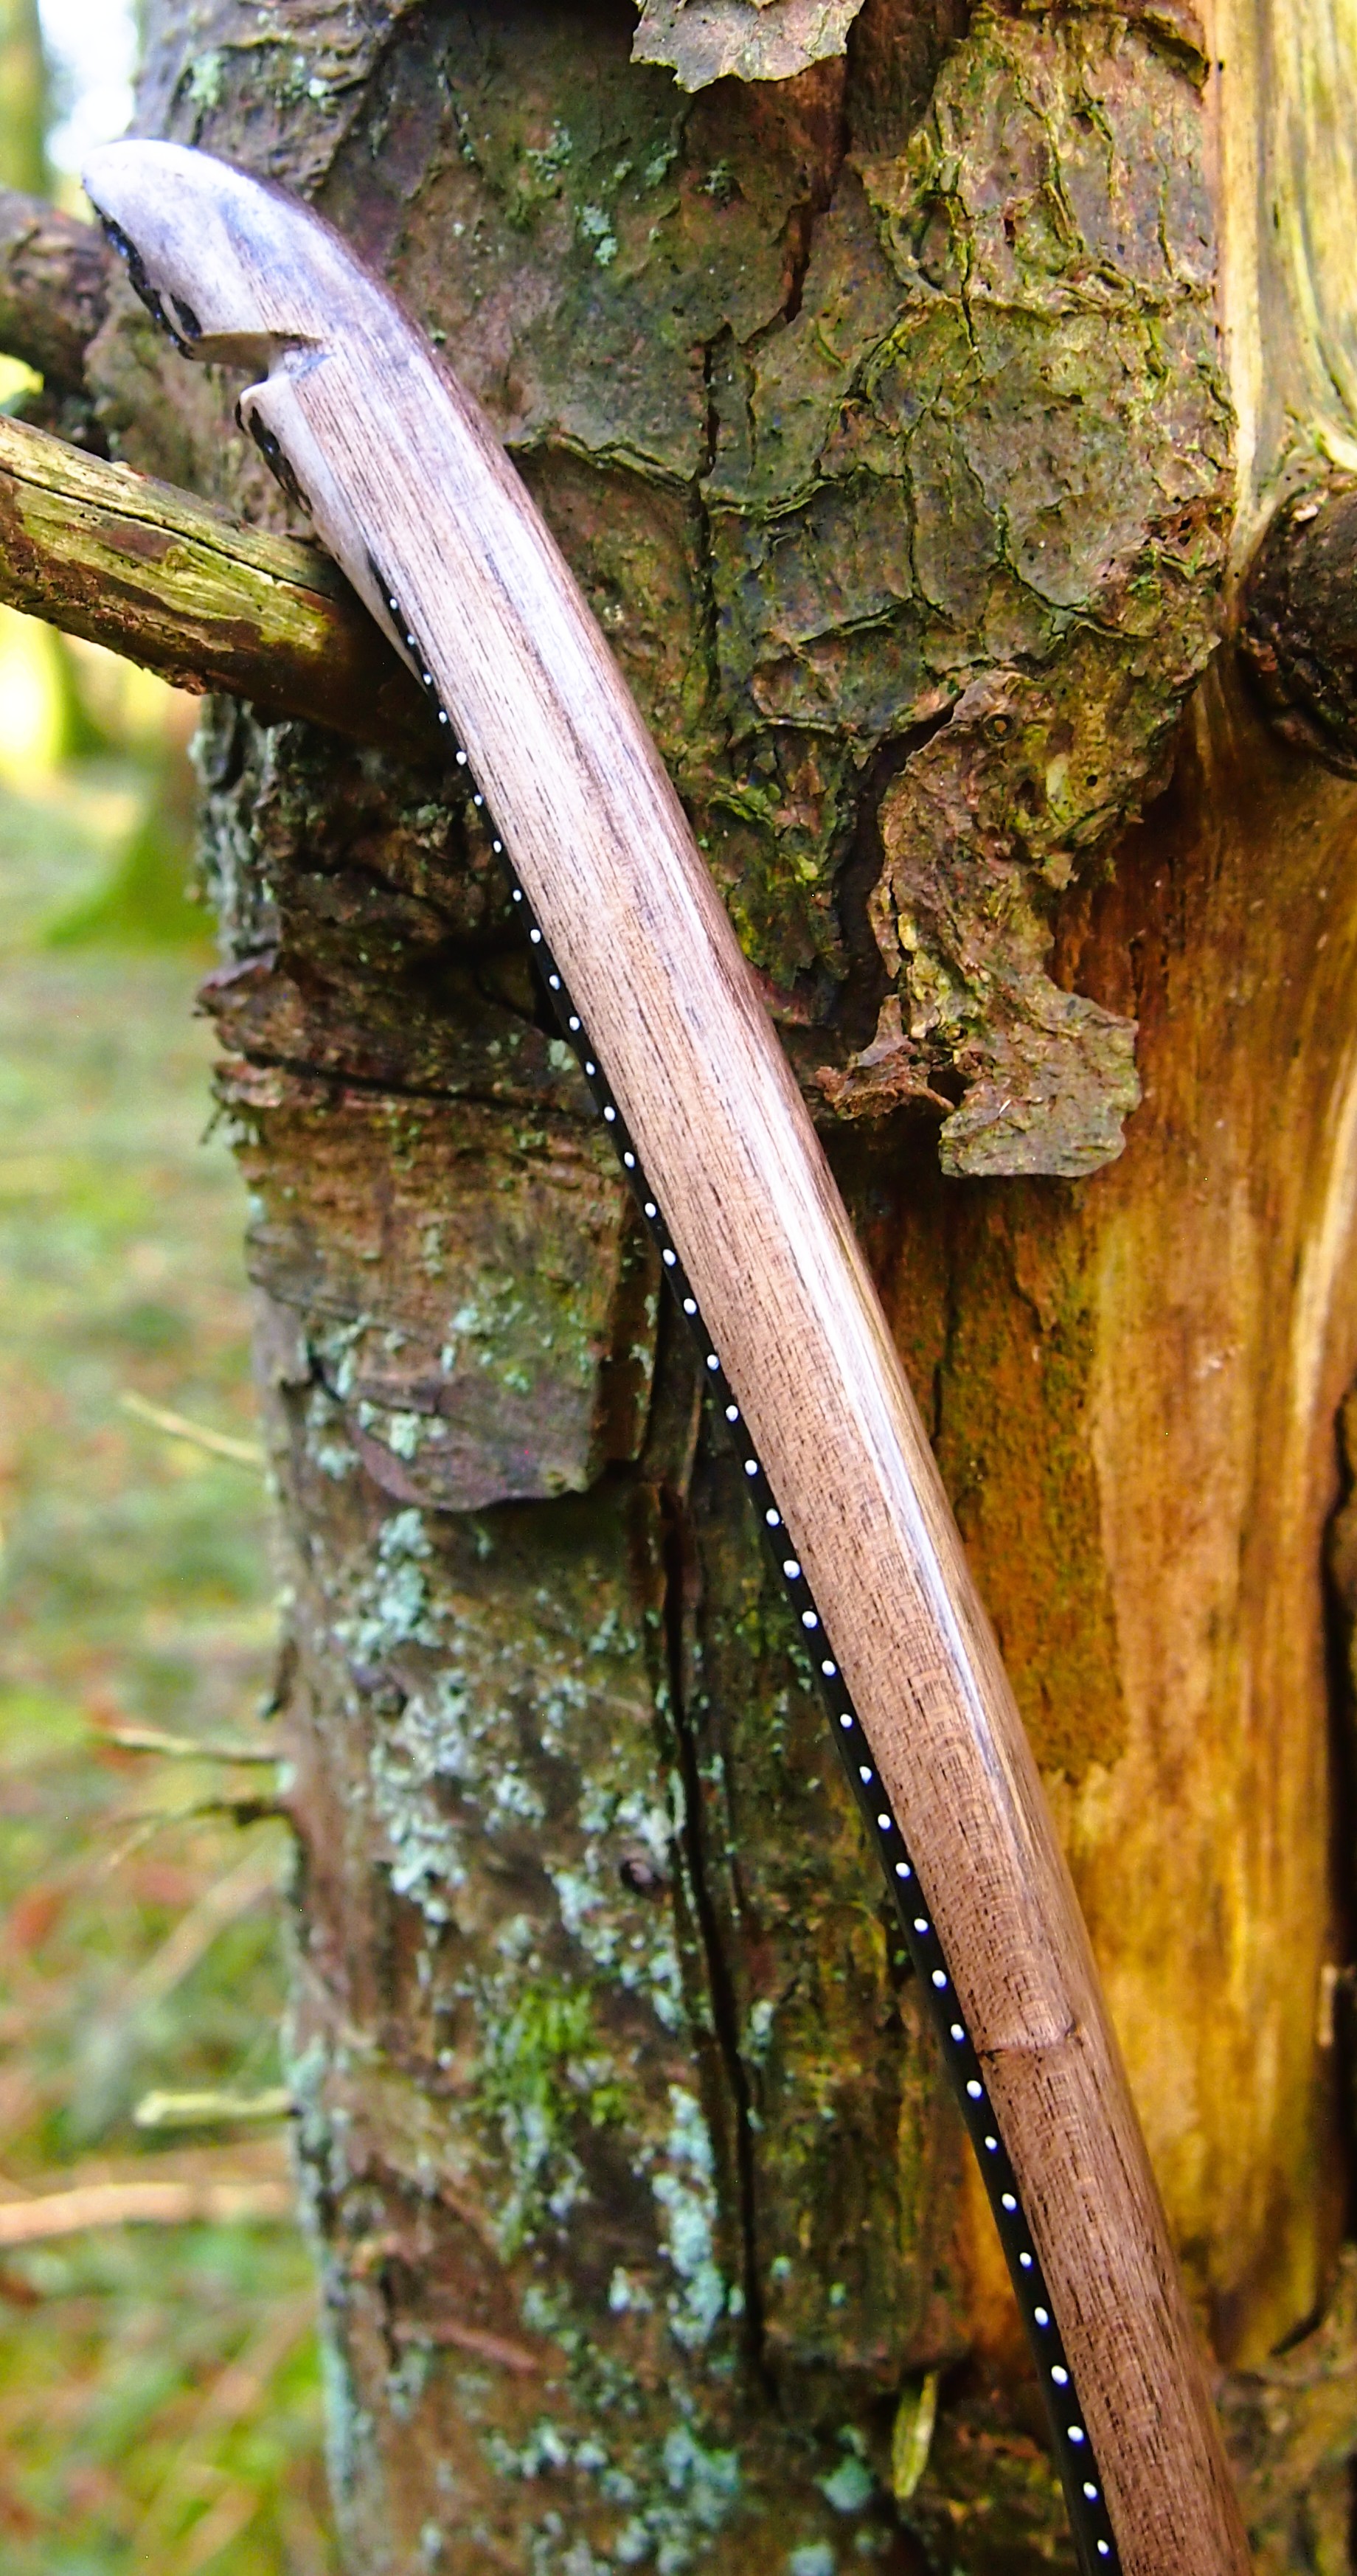
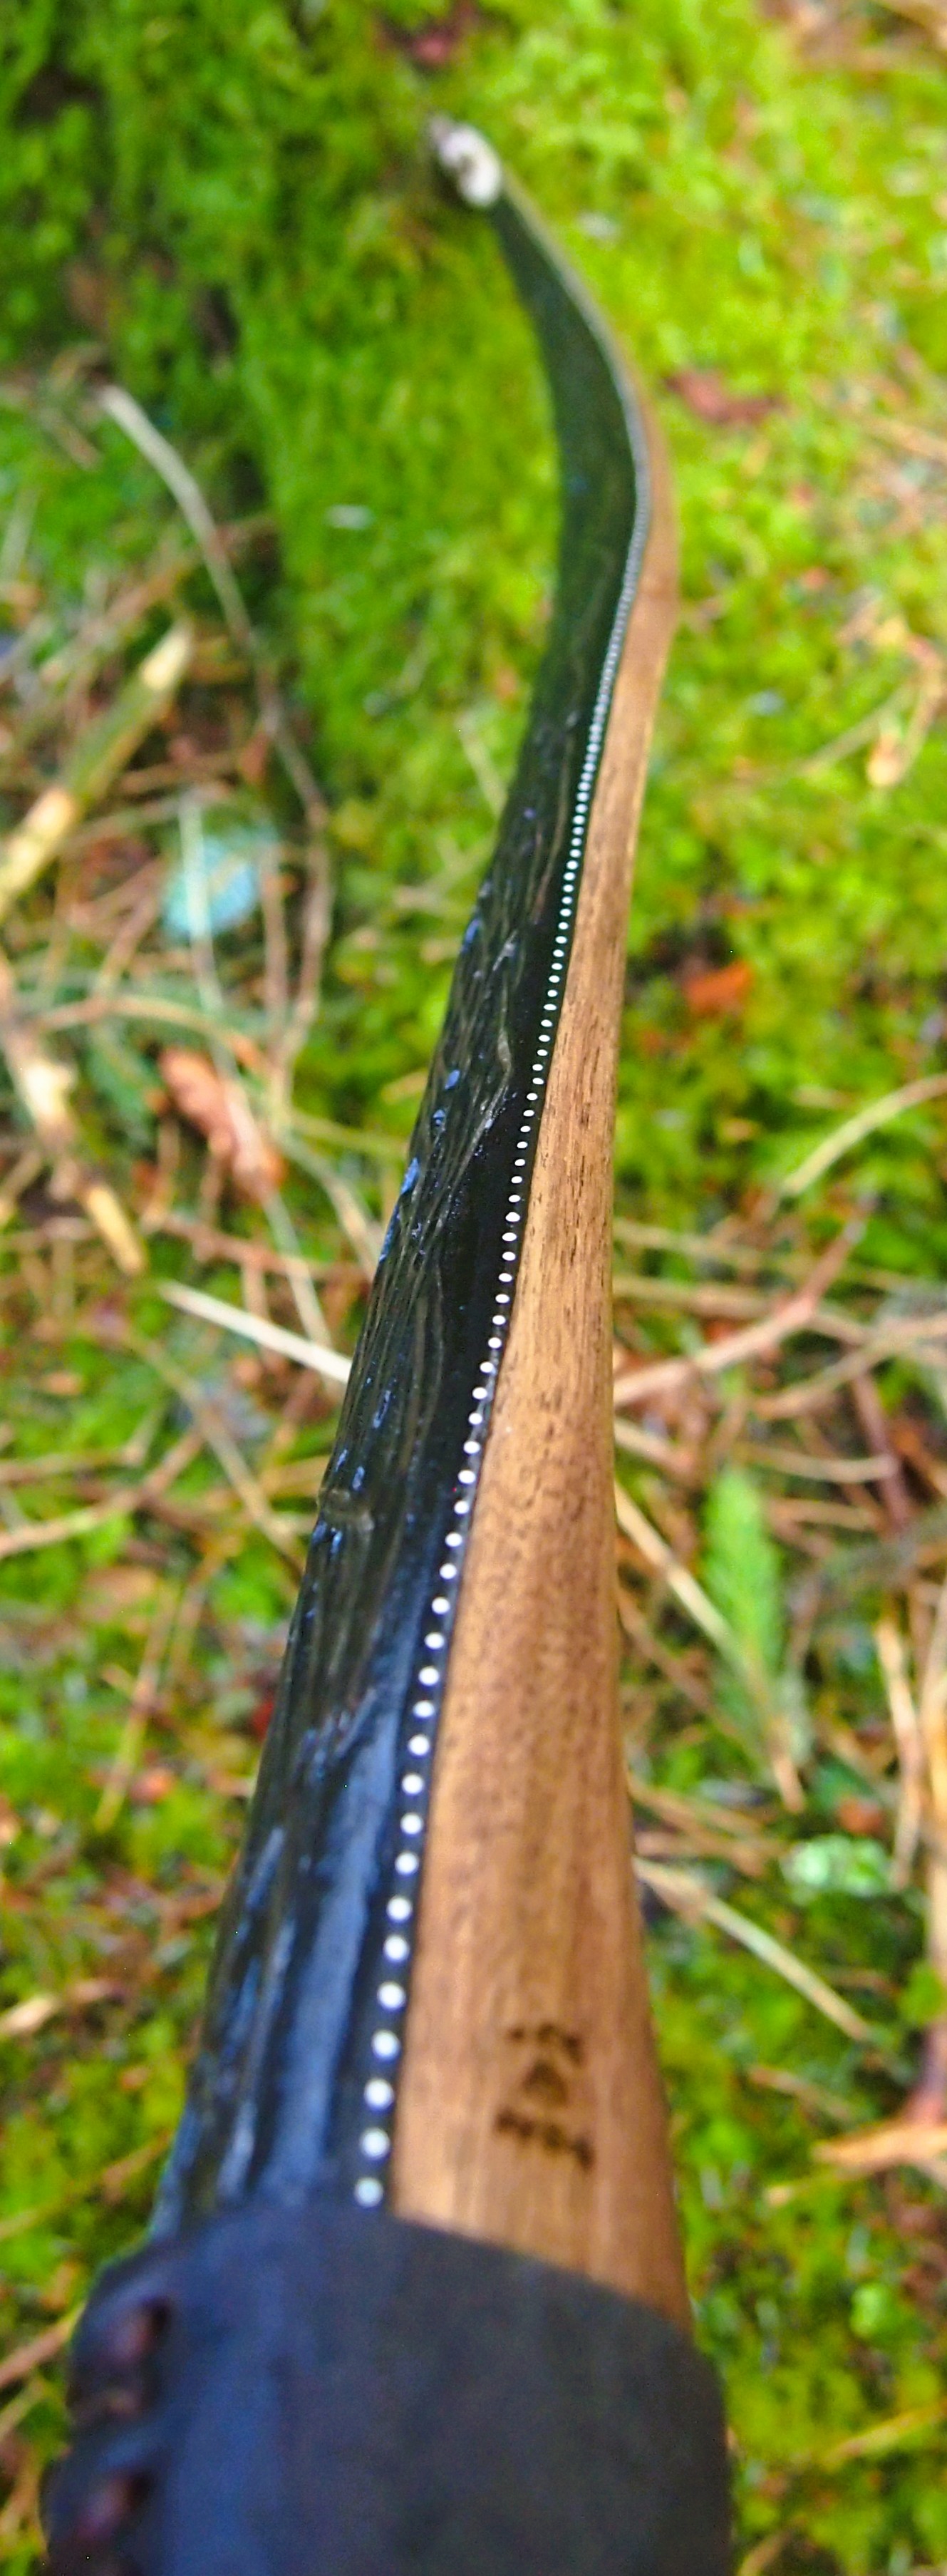
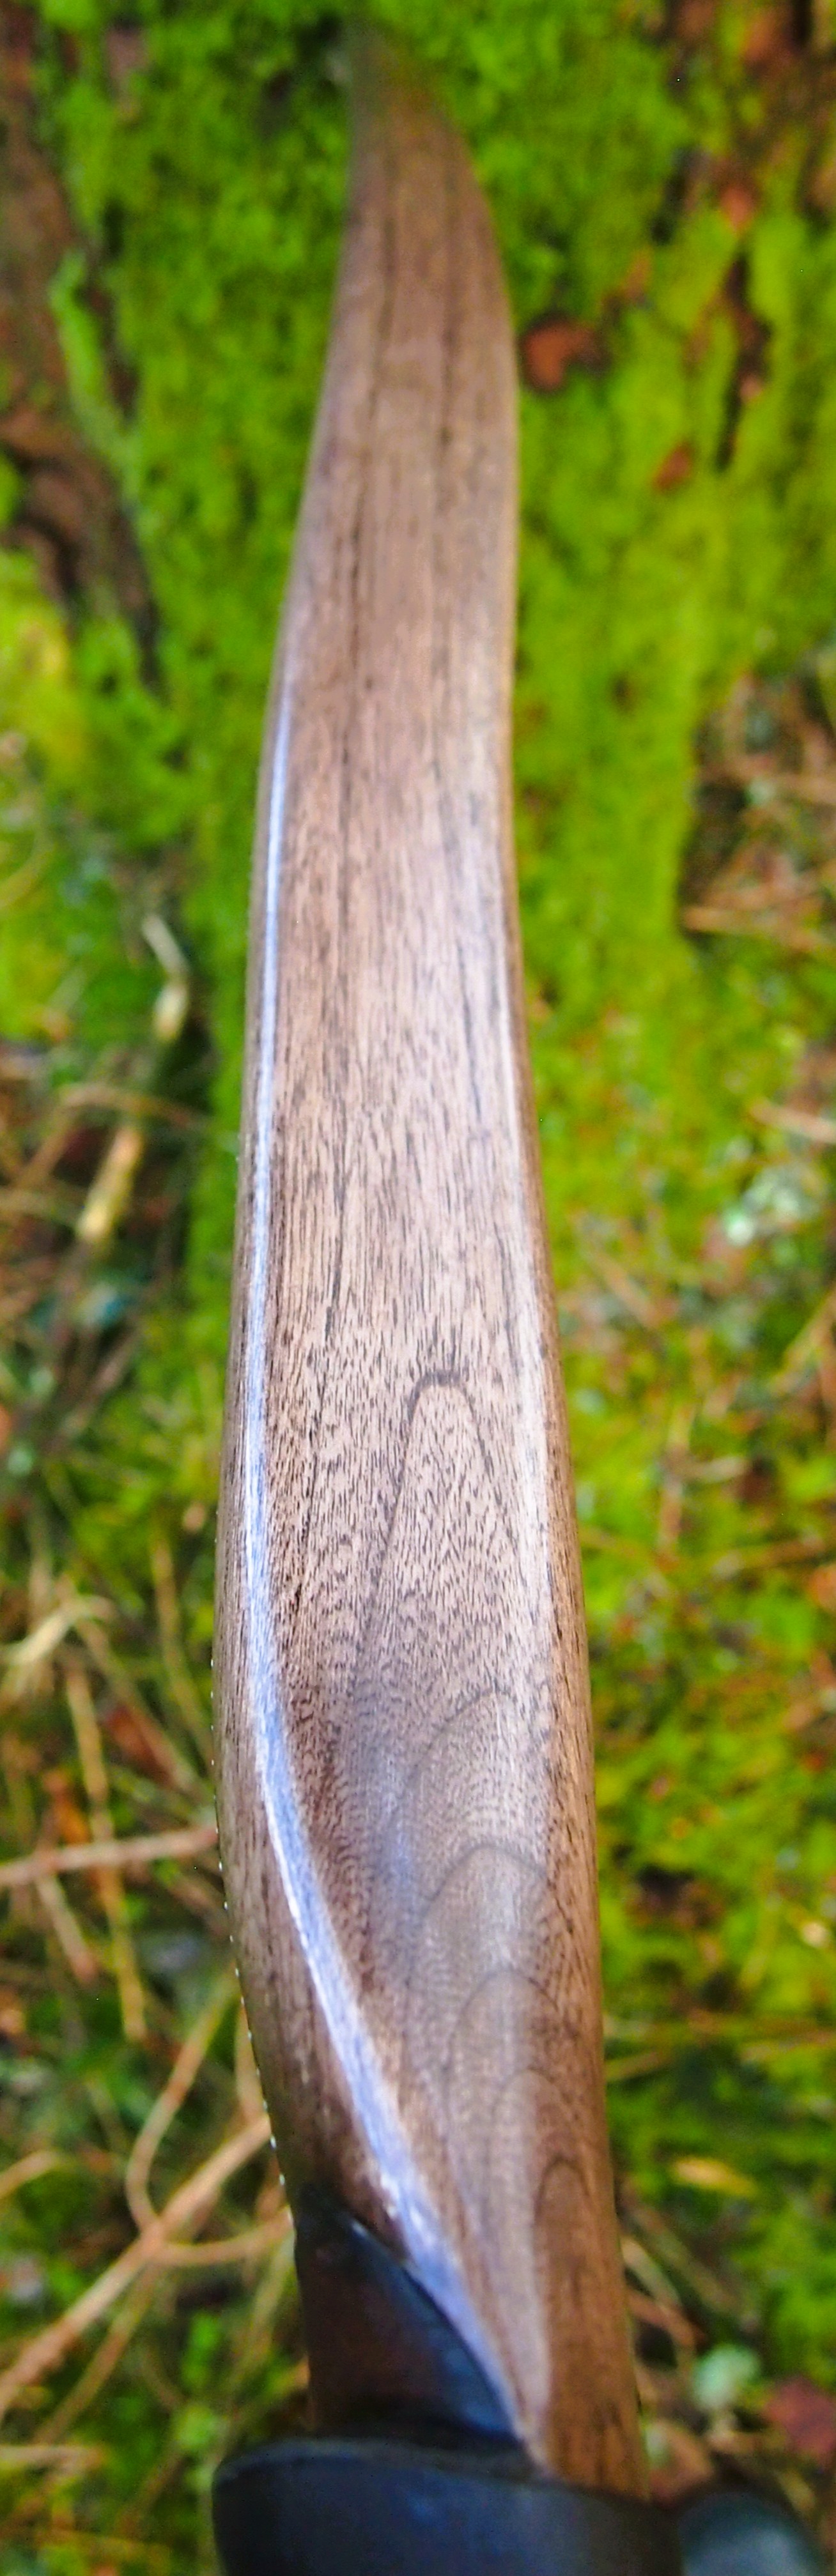
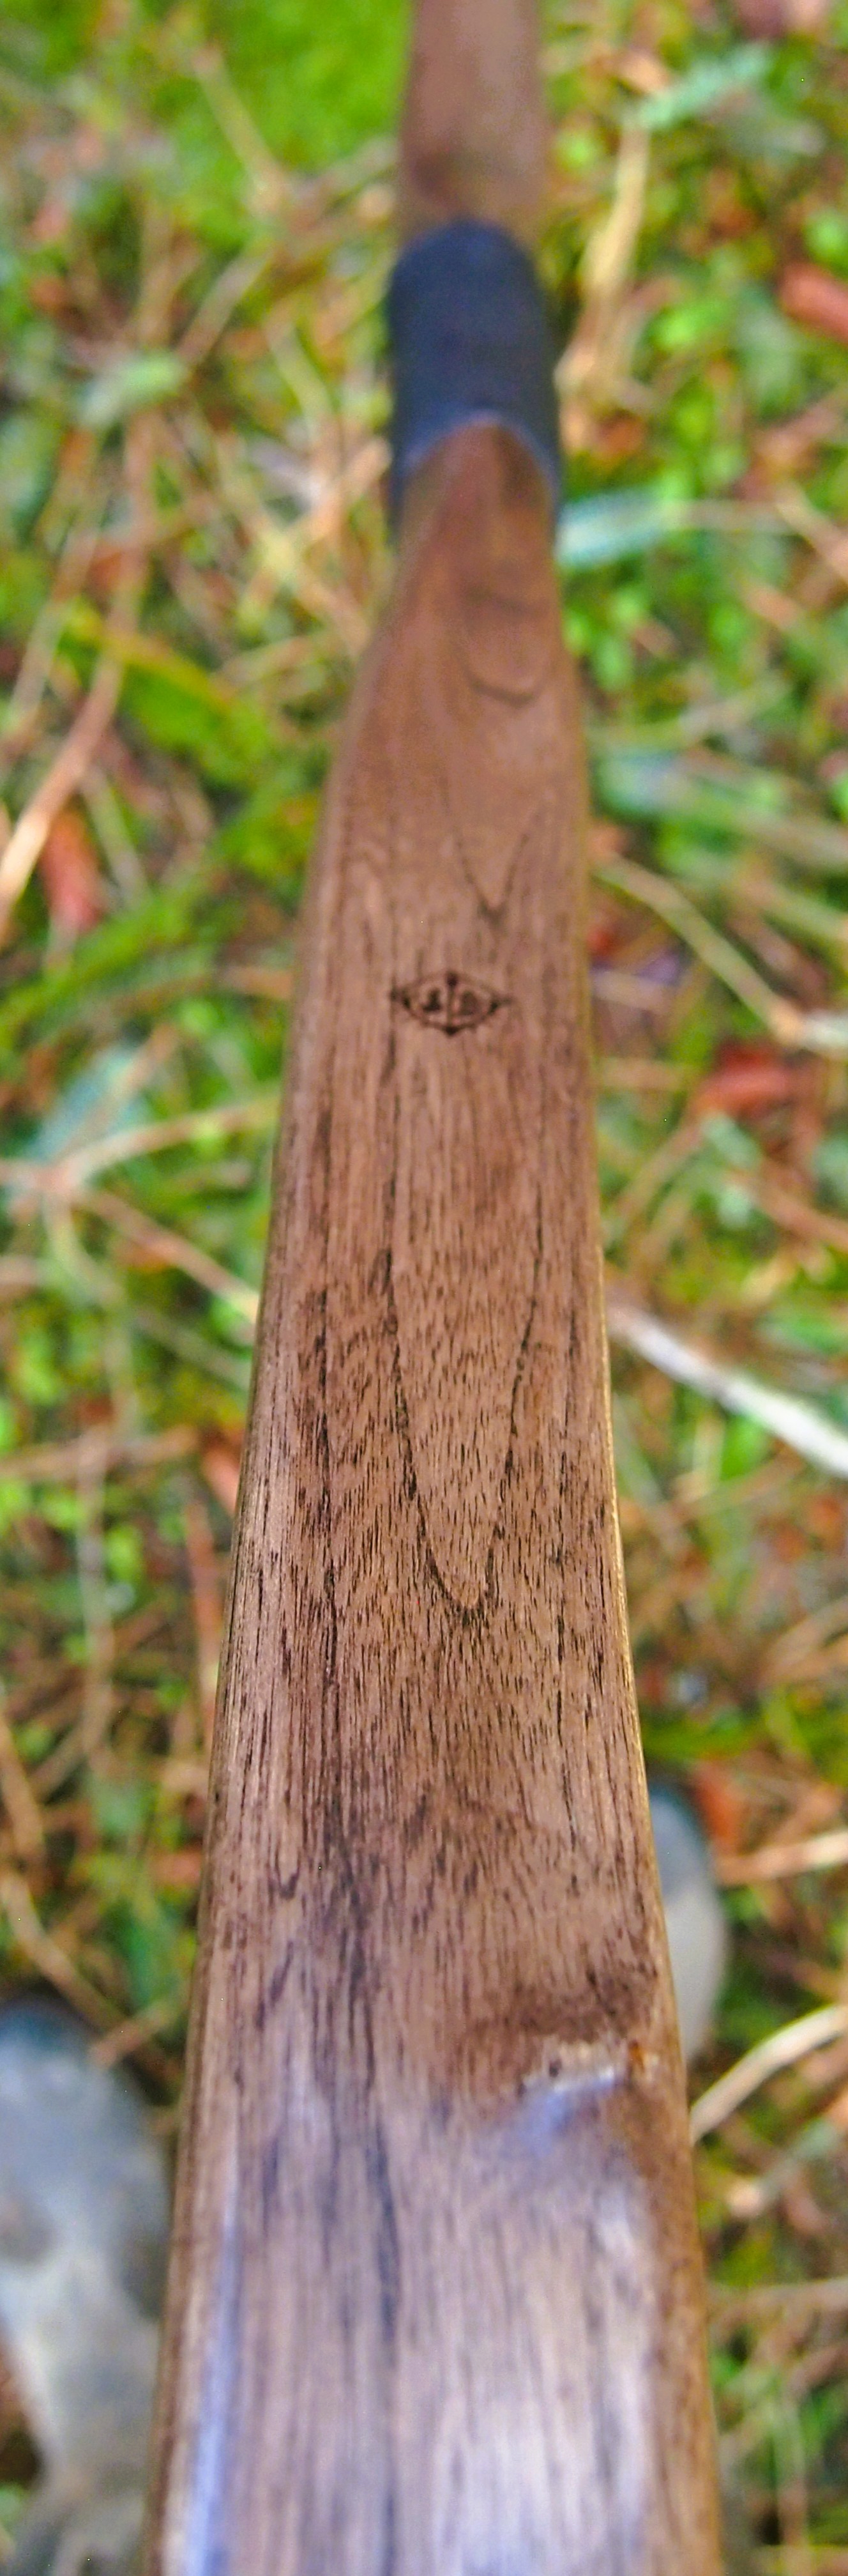
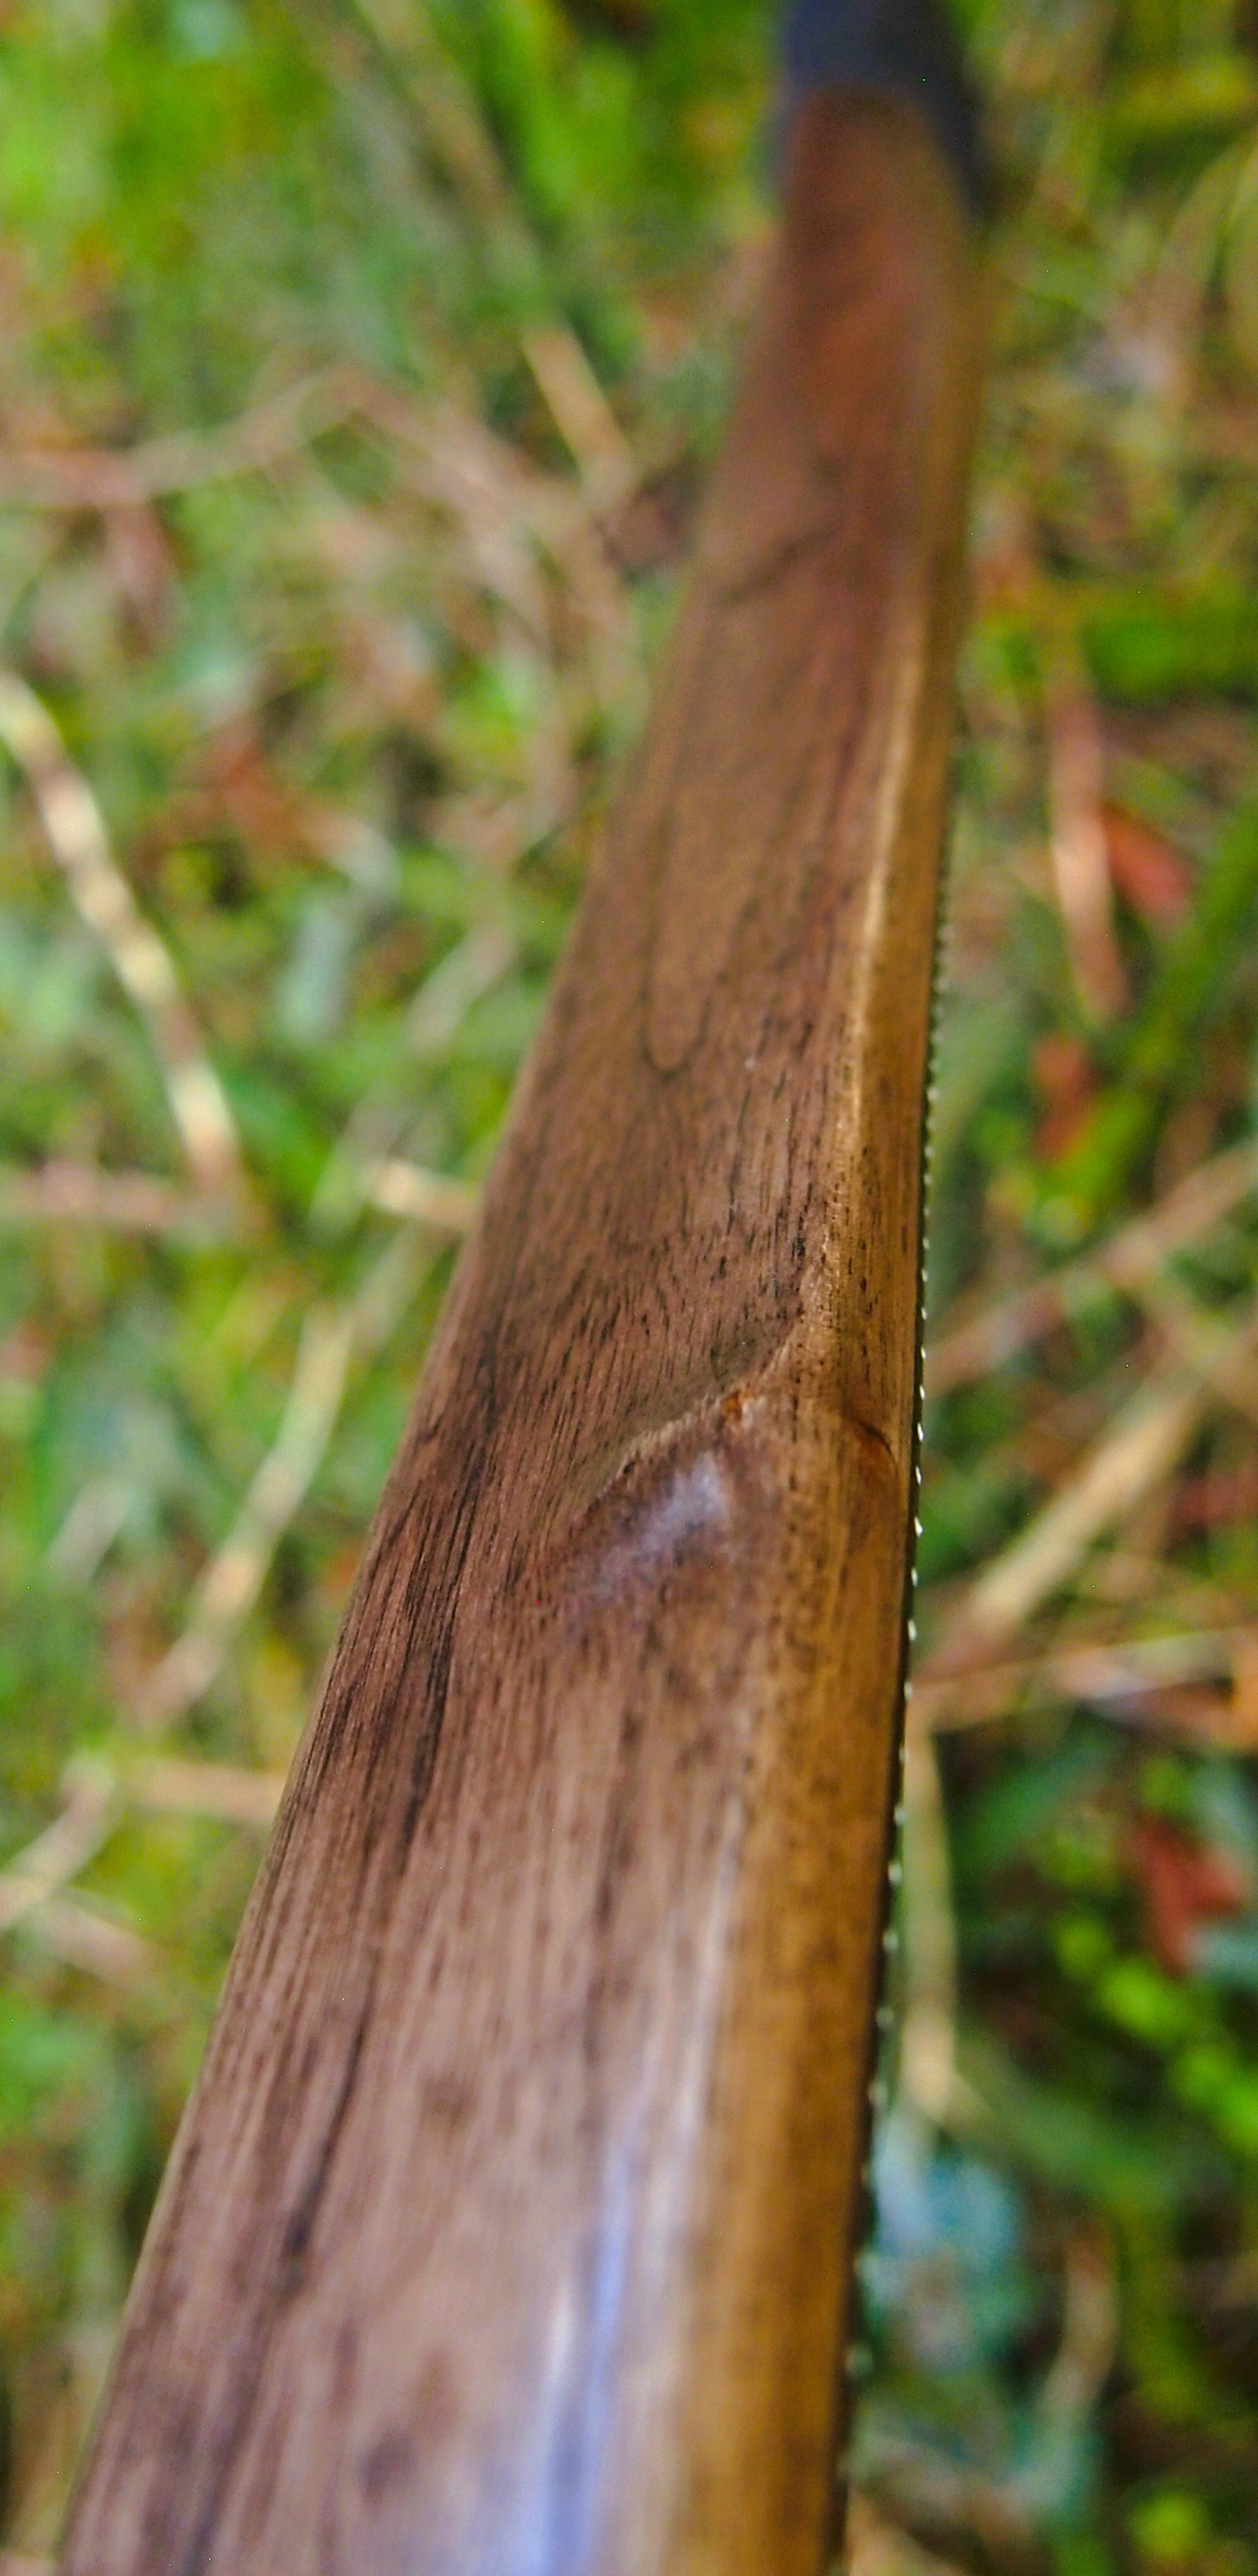
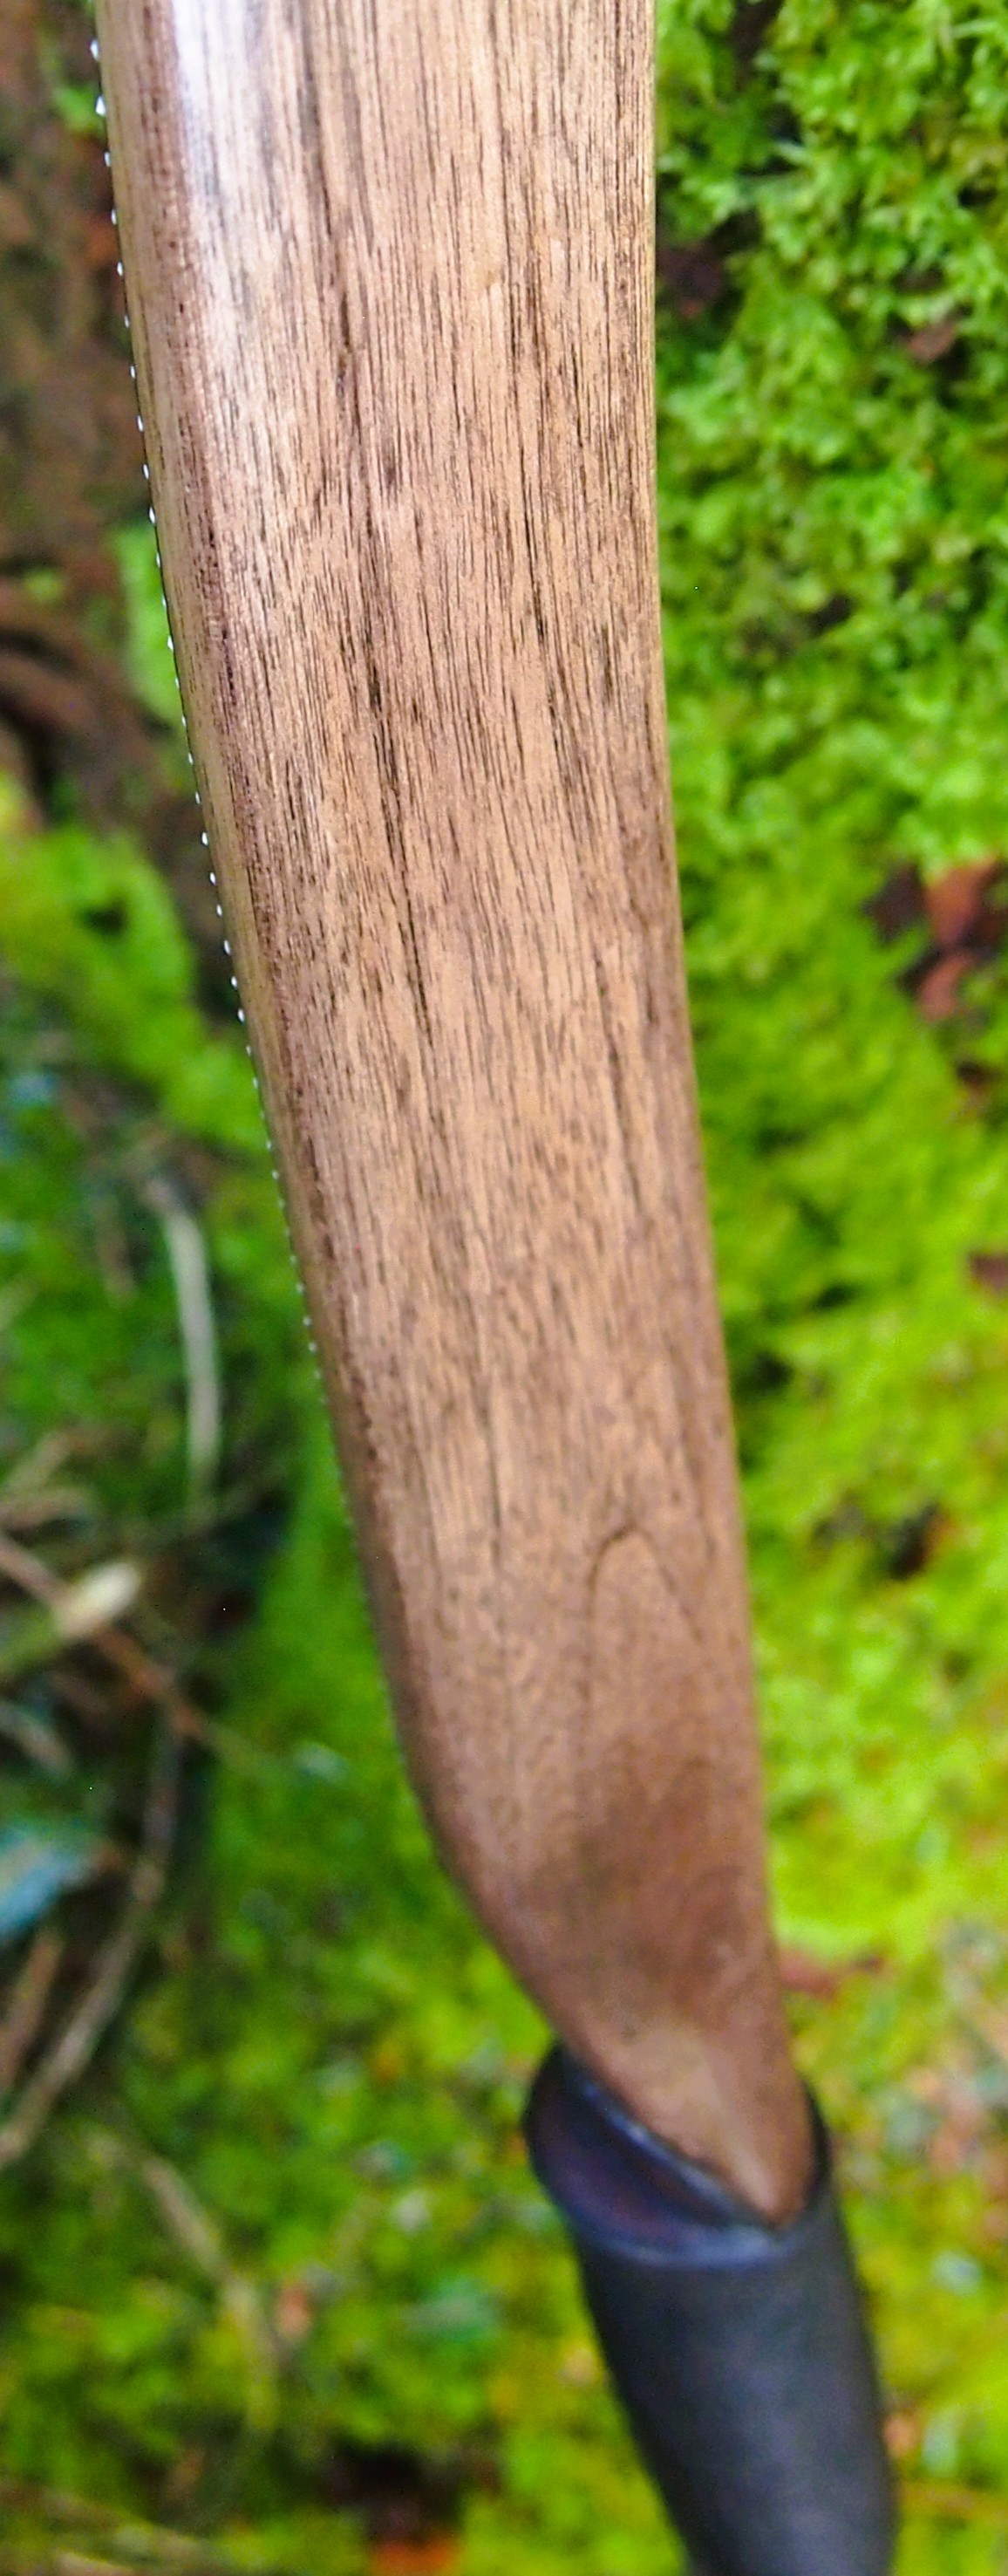
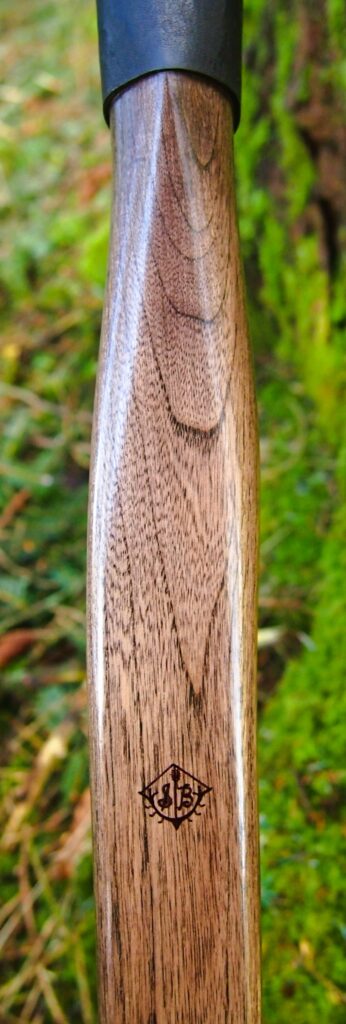
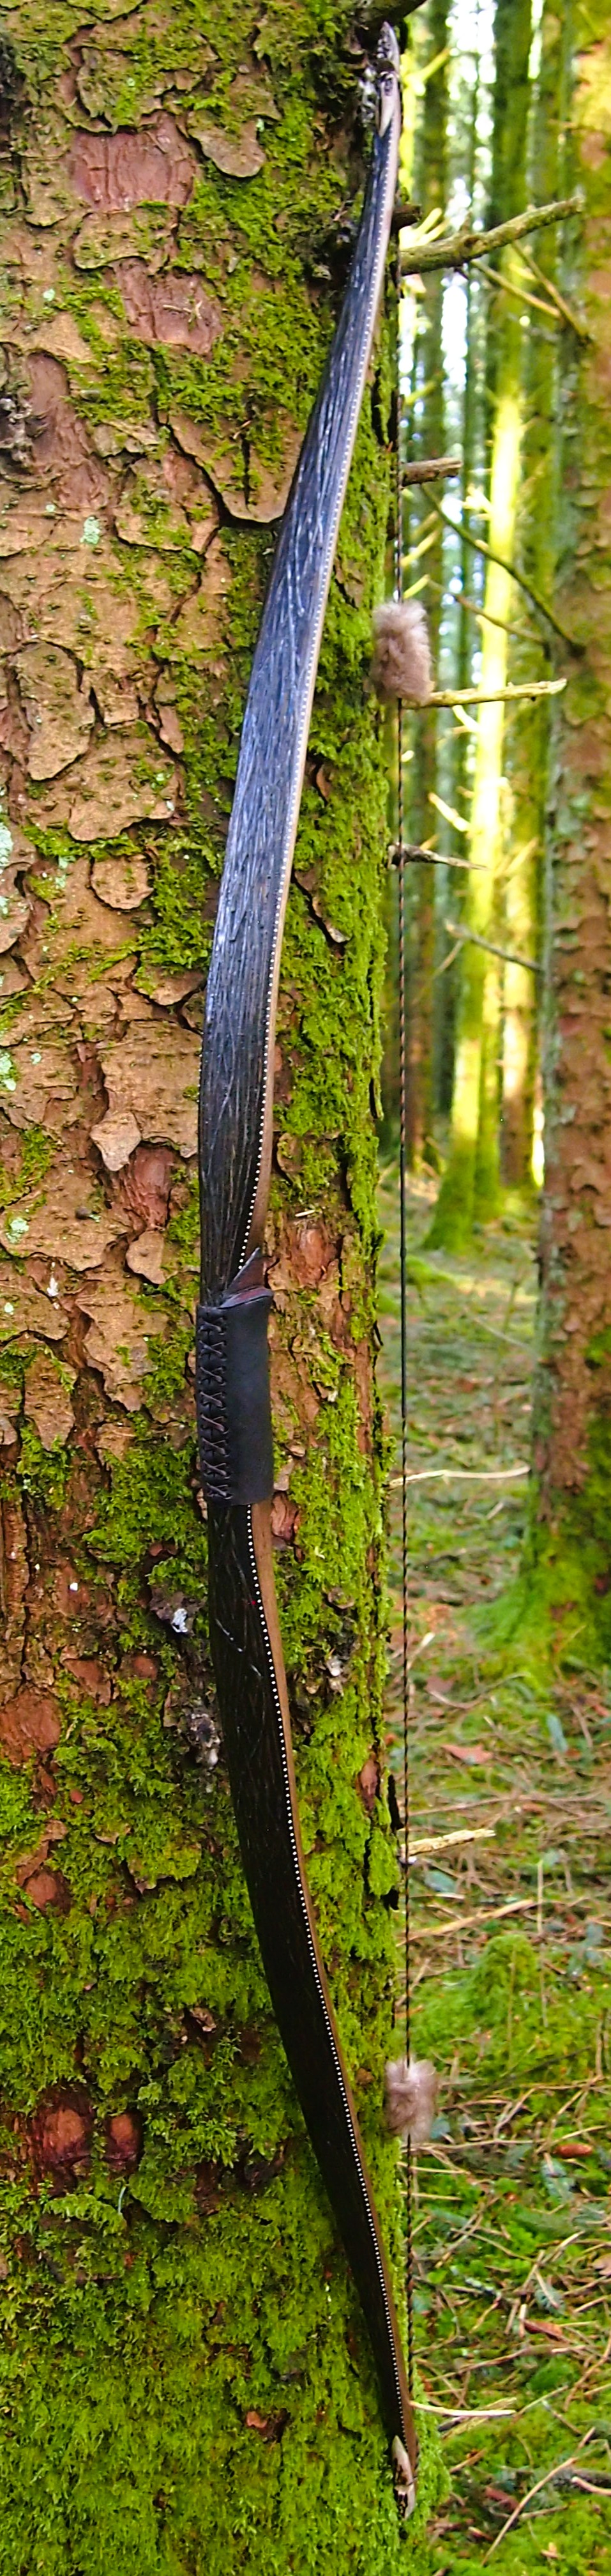
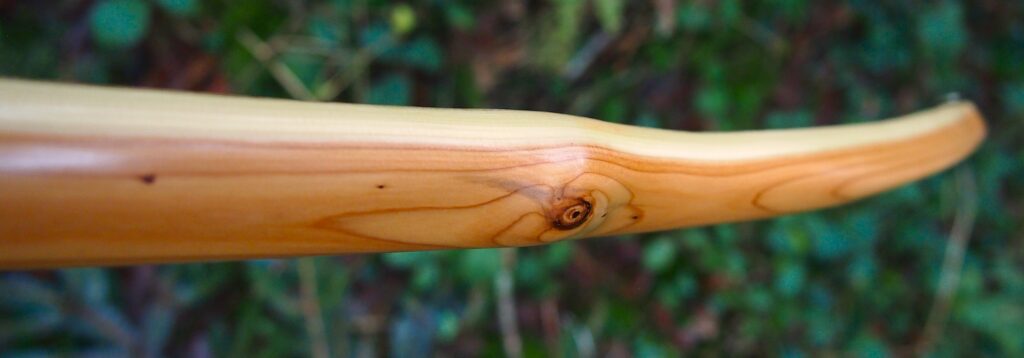
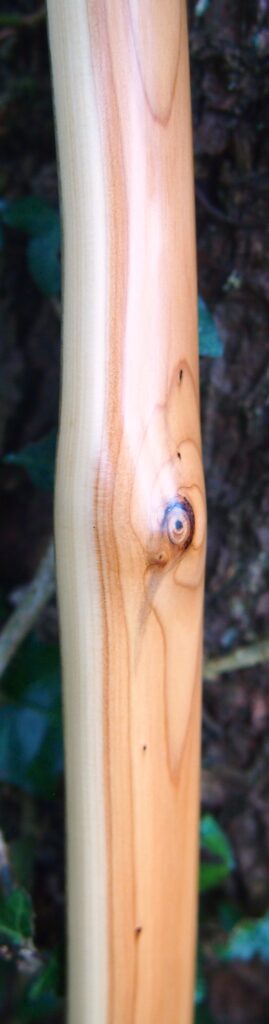
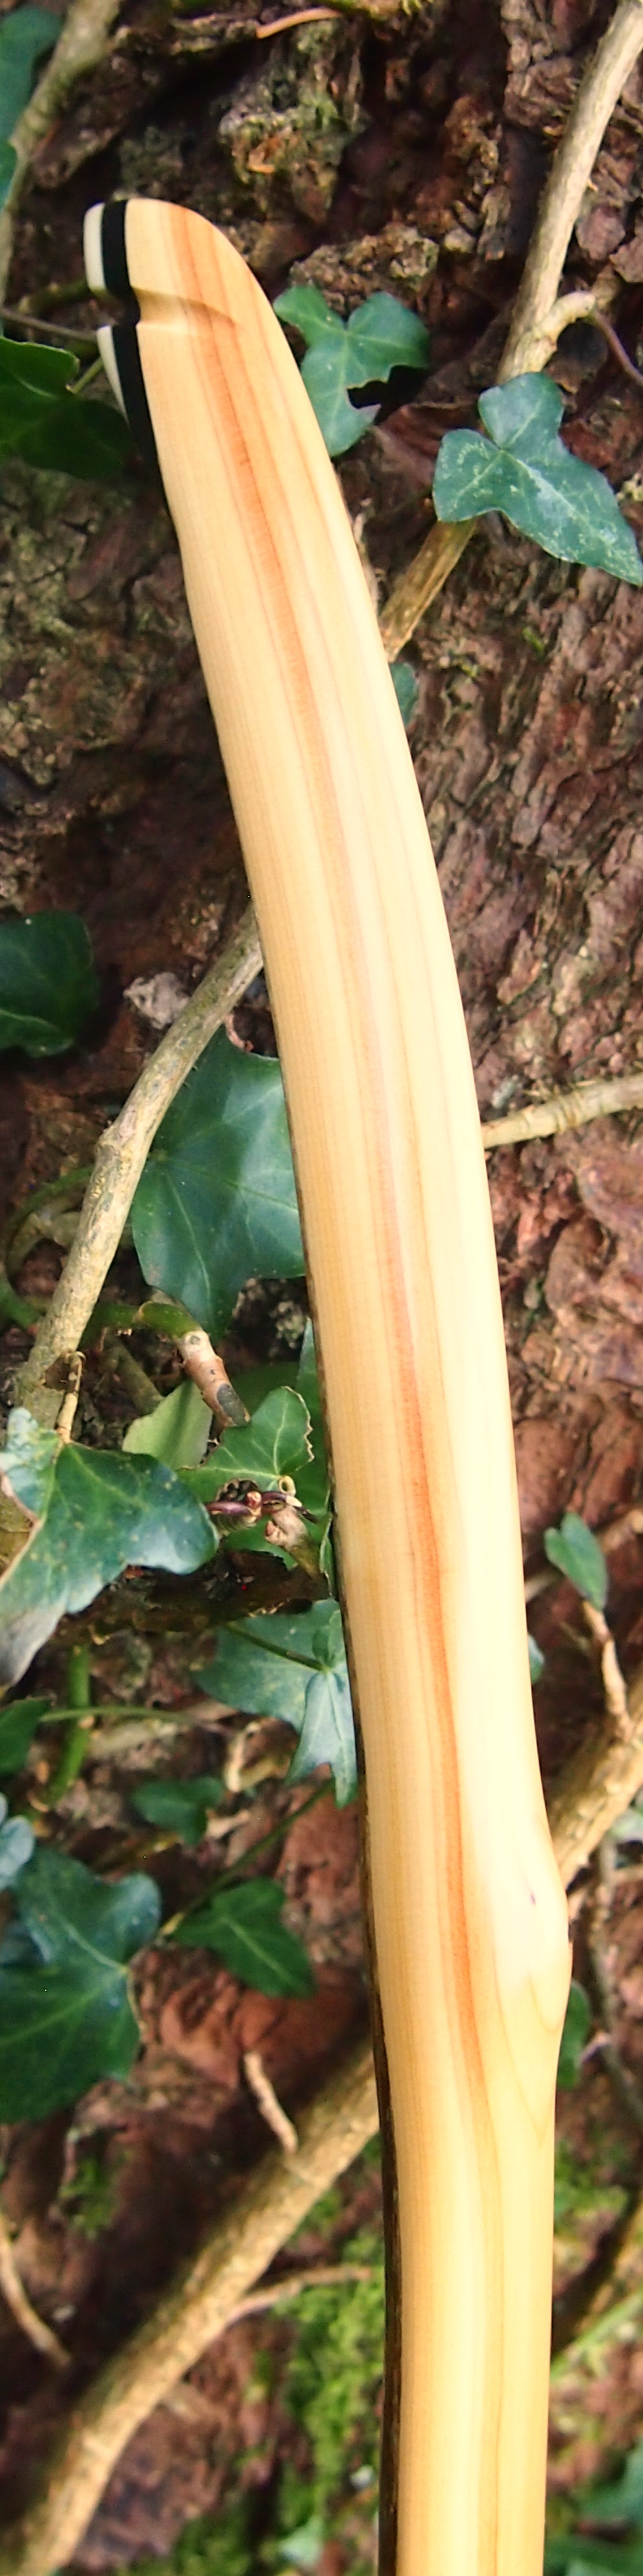
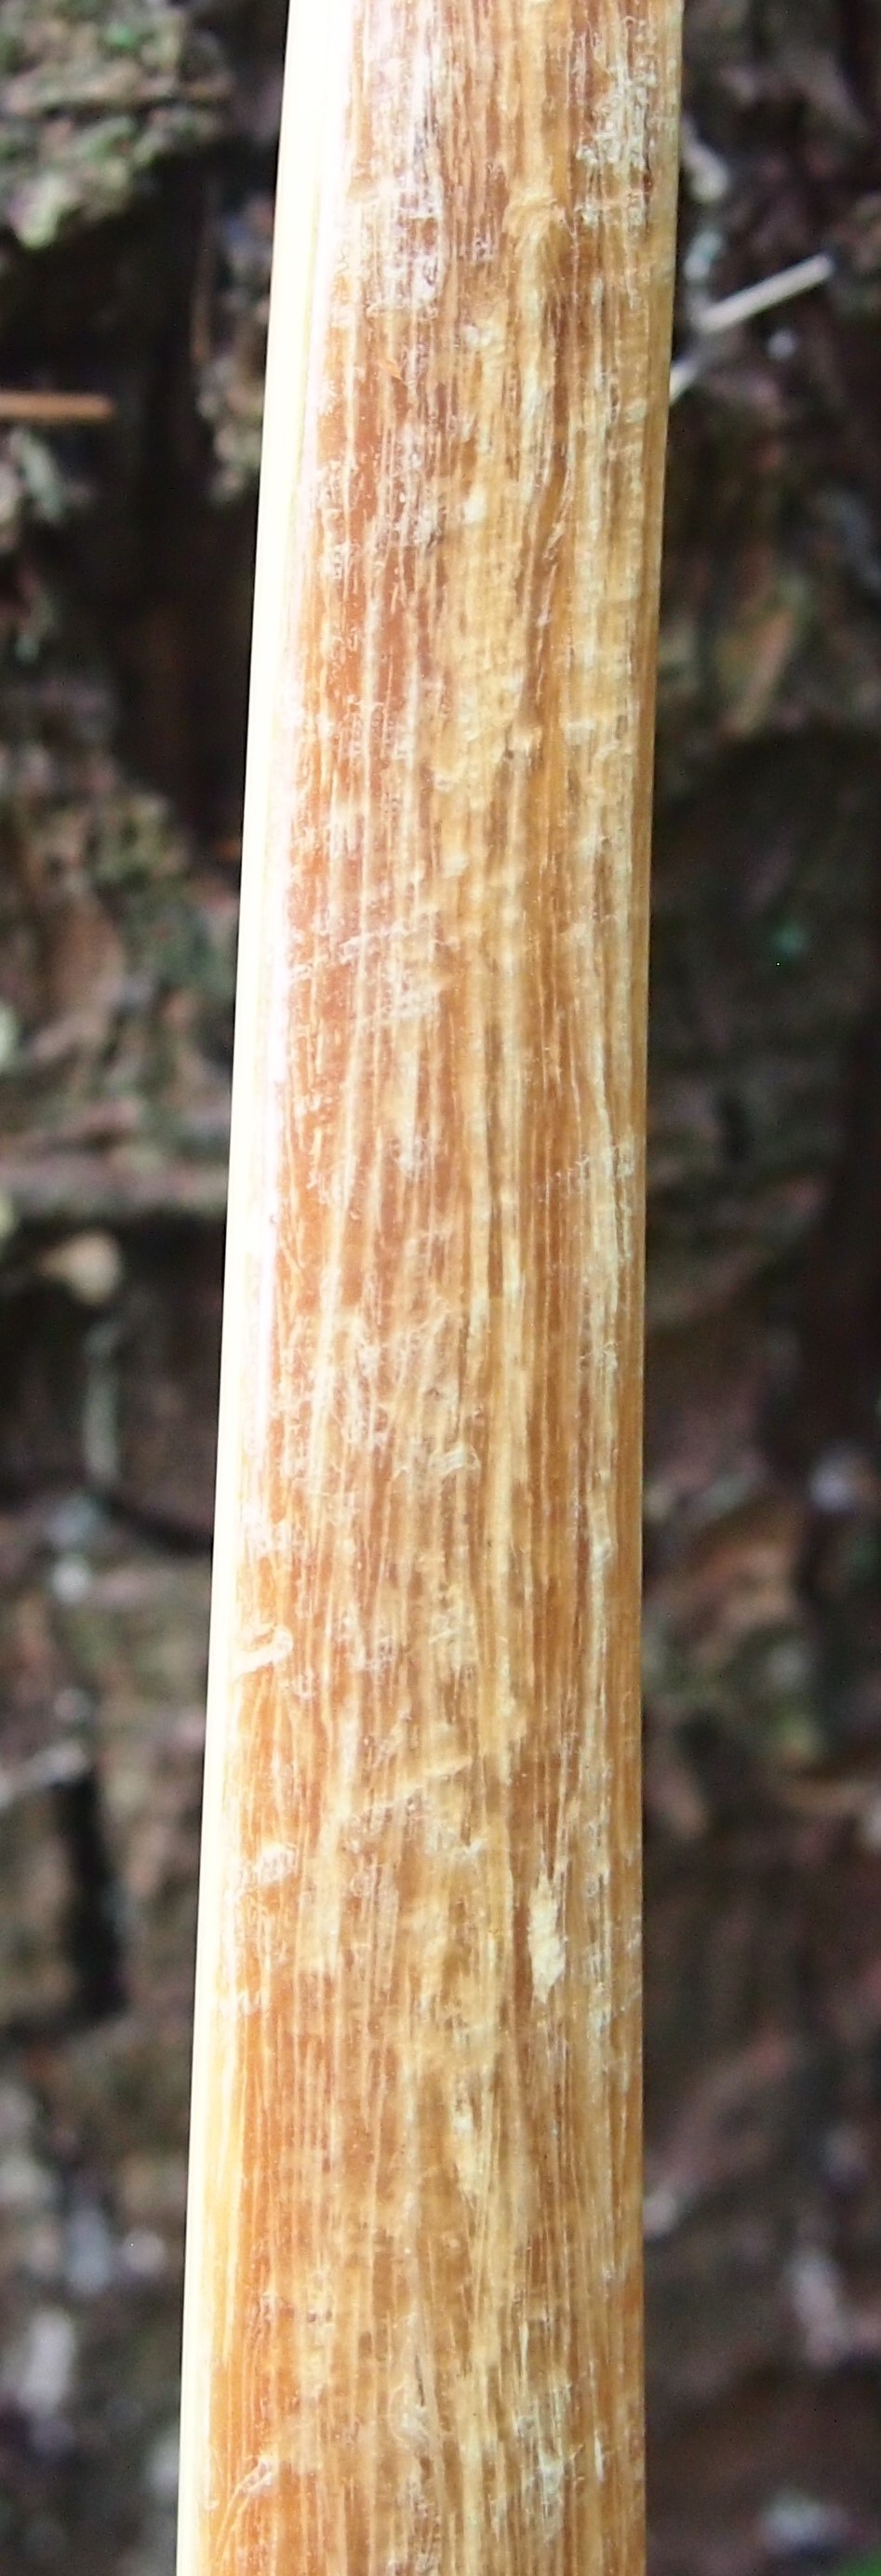
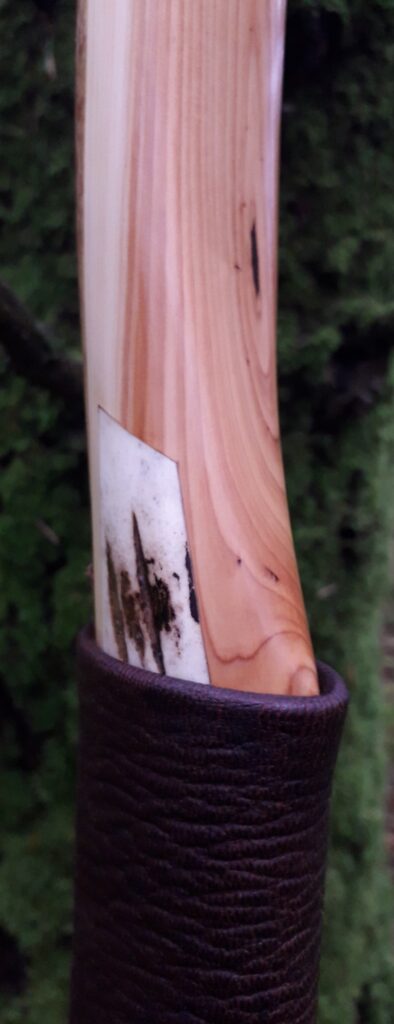
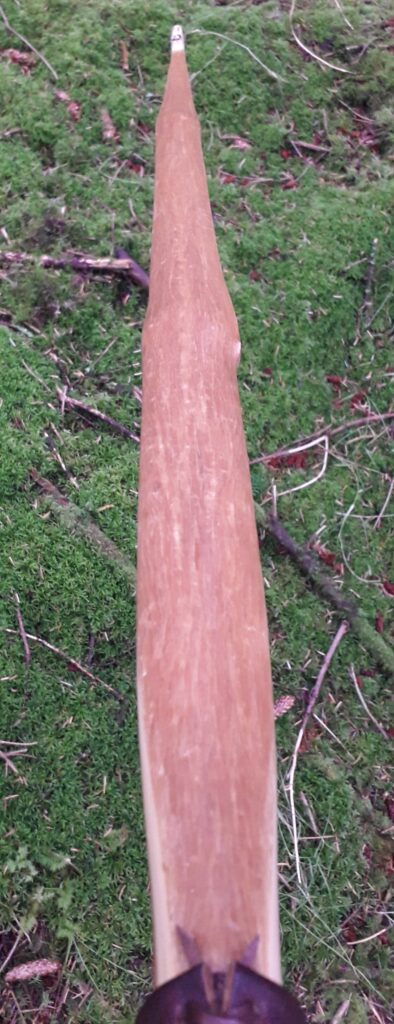
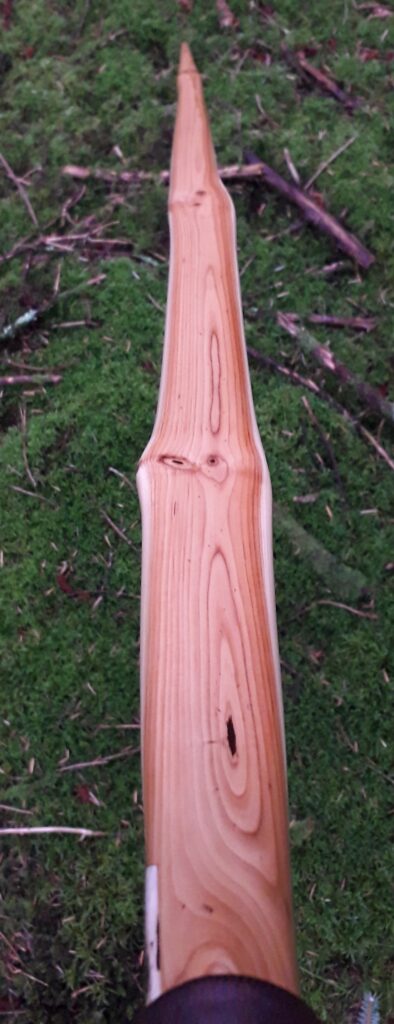
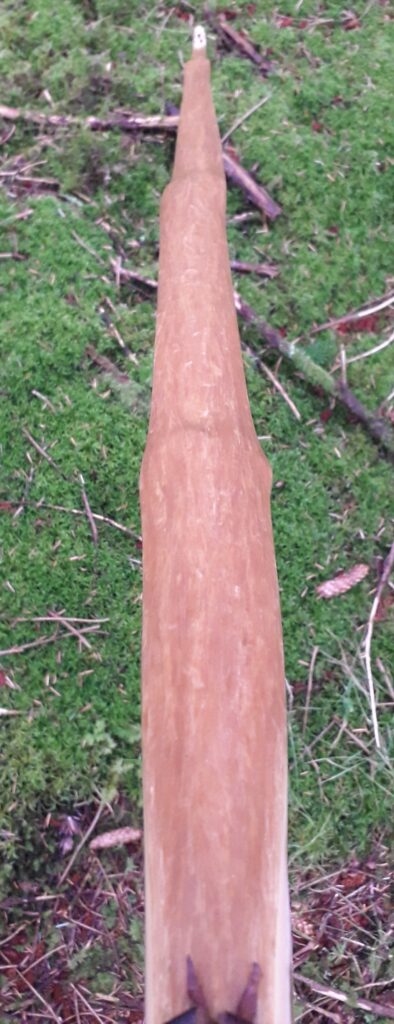
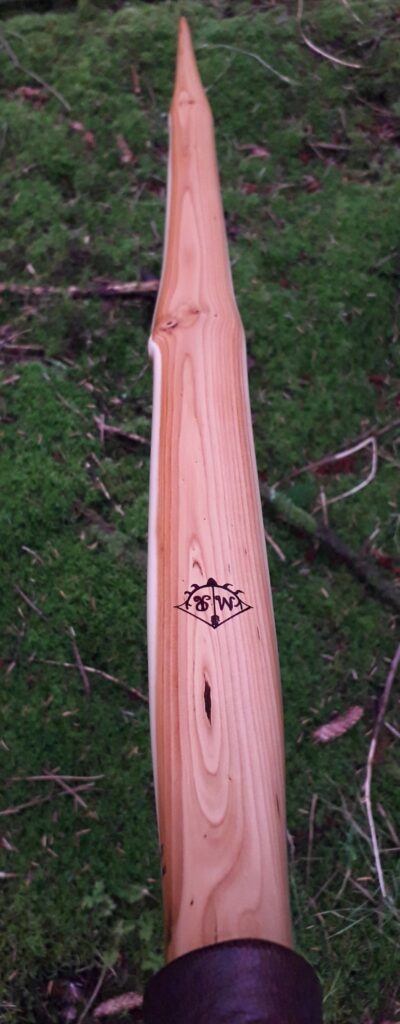
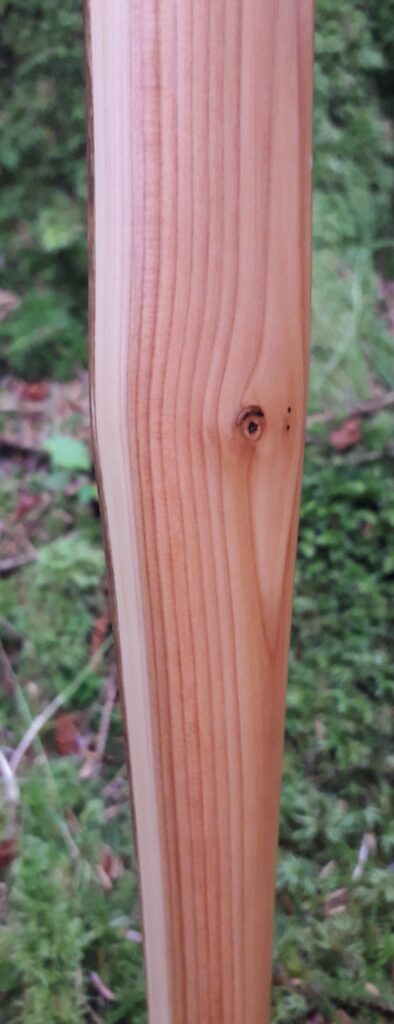
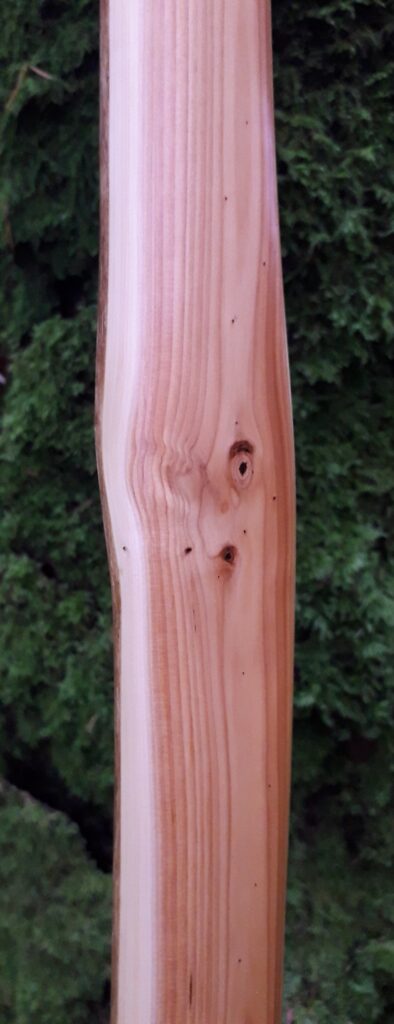
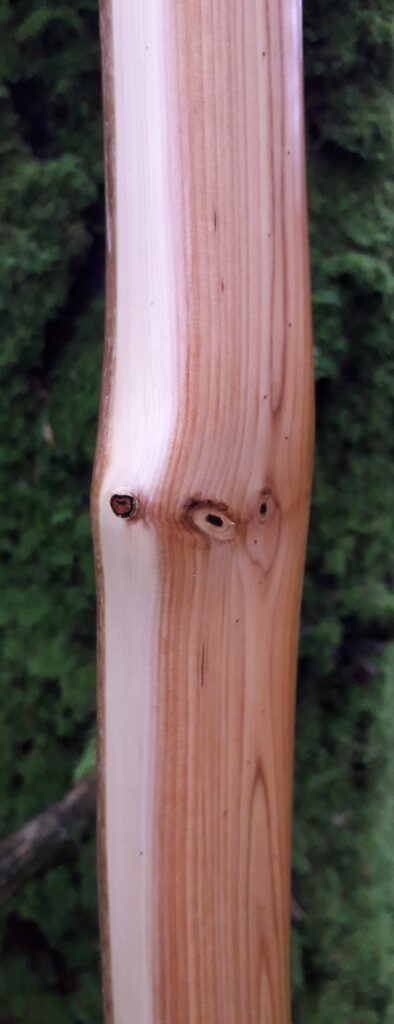
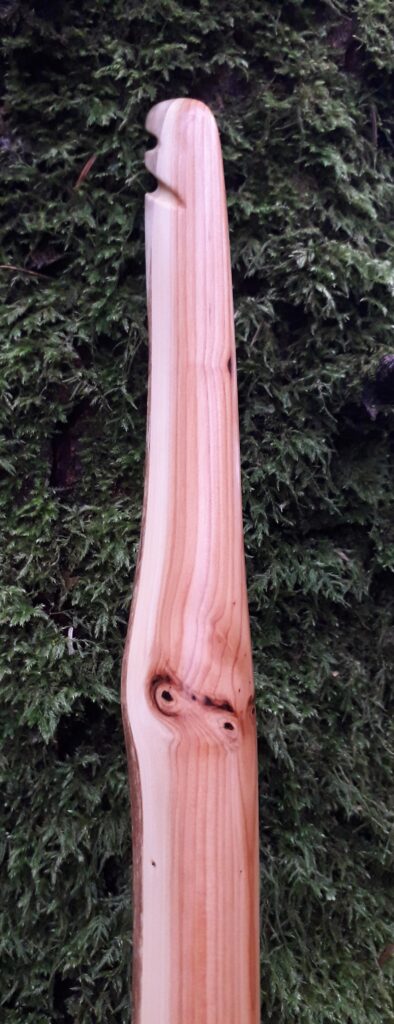
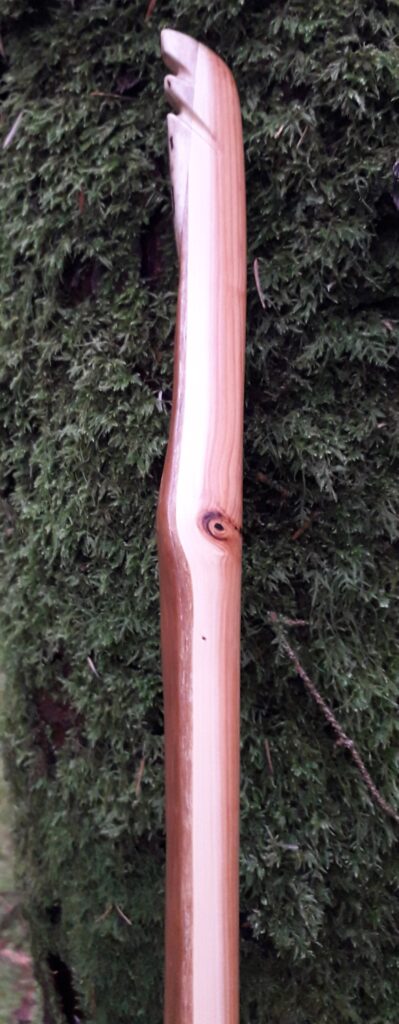
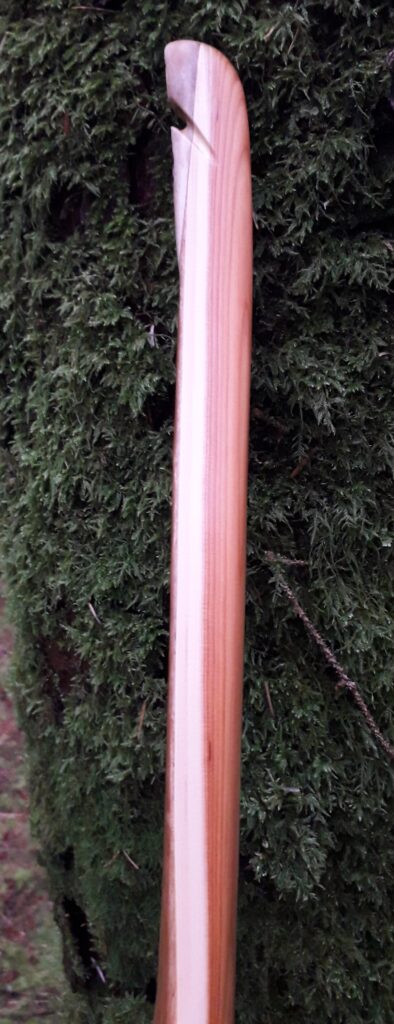
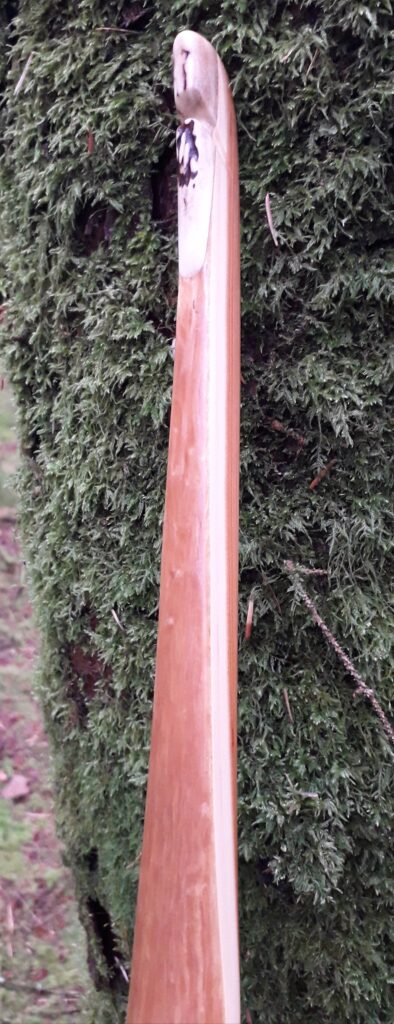
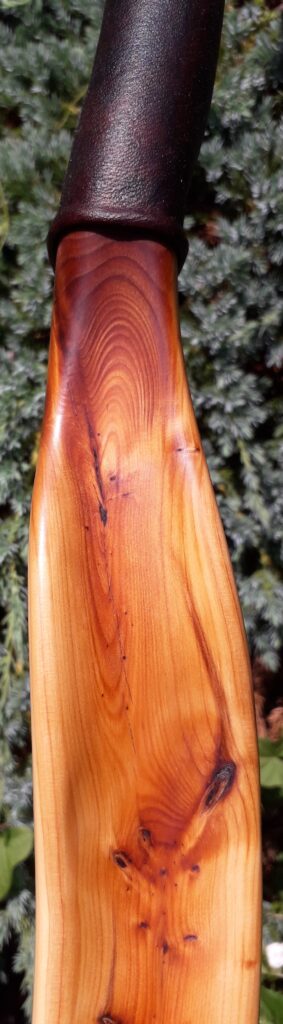
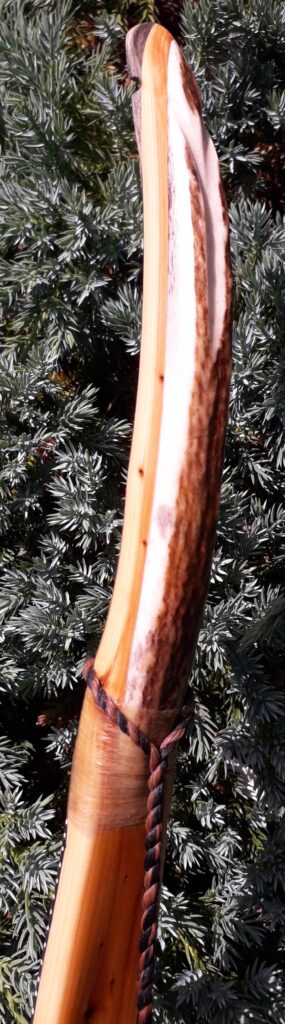
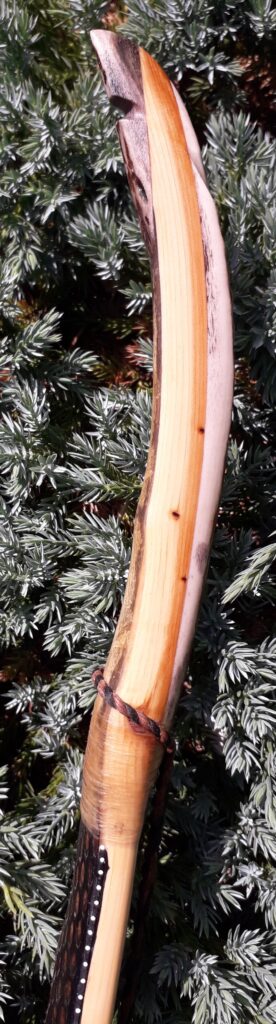
This salvaged pure heartwood yew log was clearly preserved and coloured right through as could be seen by looking at the end grain on the freshly cut log. I was blown away by the stunning bright rose gold colour which had penetrated the entire log. And from what I could see of the end grain so far, I couldn’t see any checking radiating in from the outside of the log either. Nice!
Drying checks in bog timbers is a common issue when wood is pulled out of its saturated boggy situation and suddenly exposed to air and sunshine for several weeks. Which unfortunately was the case with this particular find. But this log appeared to be free from checks and looked like I could potentially produce a bow stave. So once home it got hosed and scrubbed down so I could see what I had.
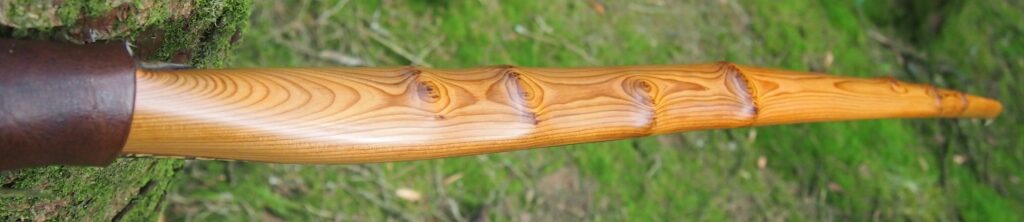
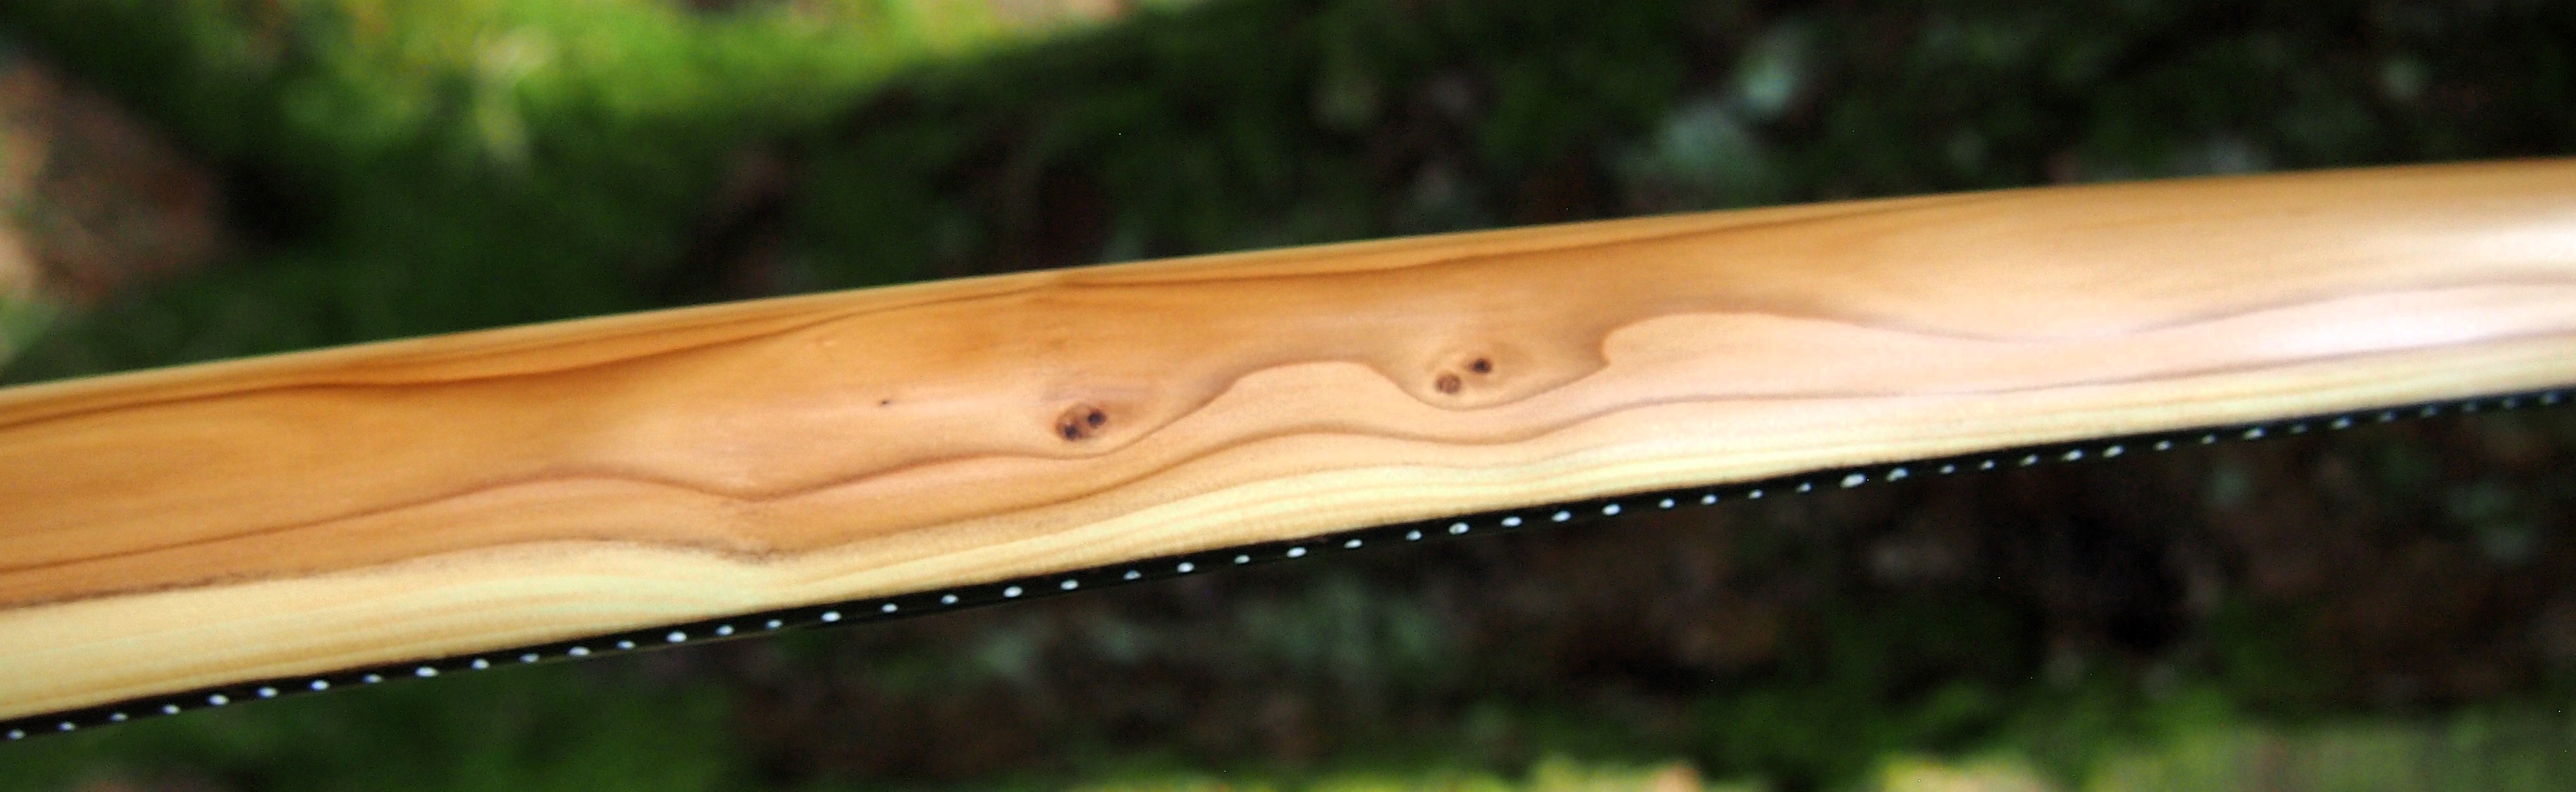
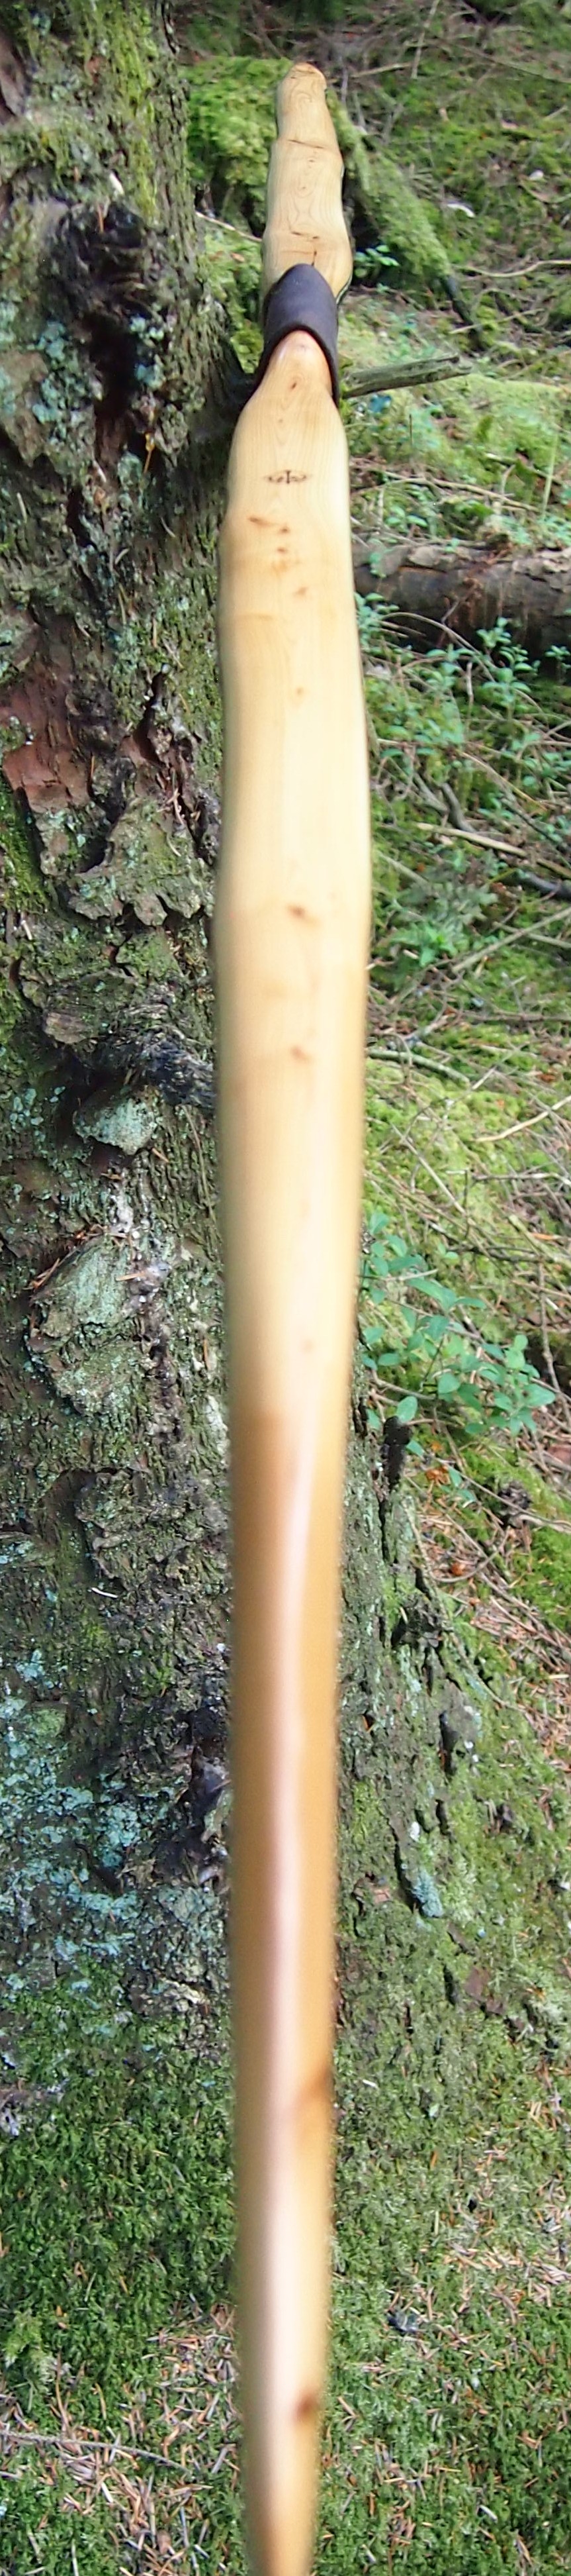
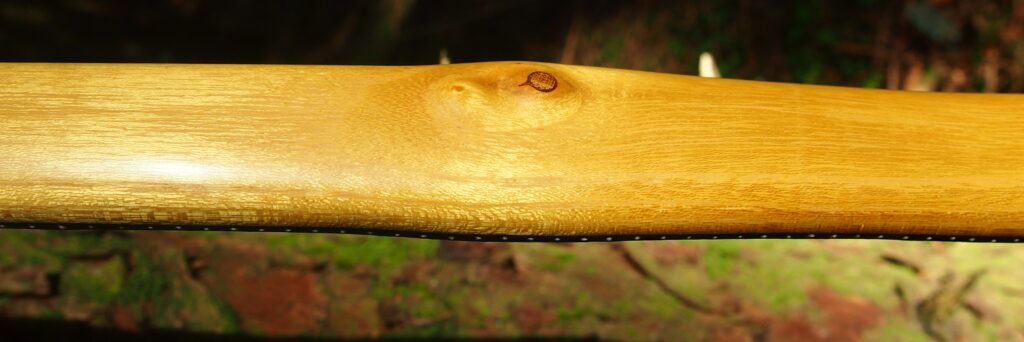
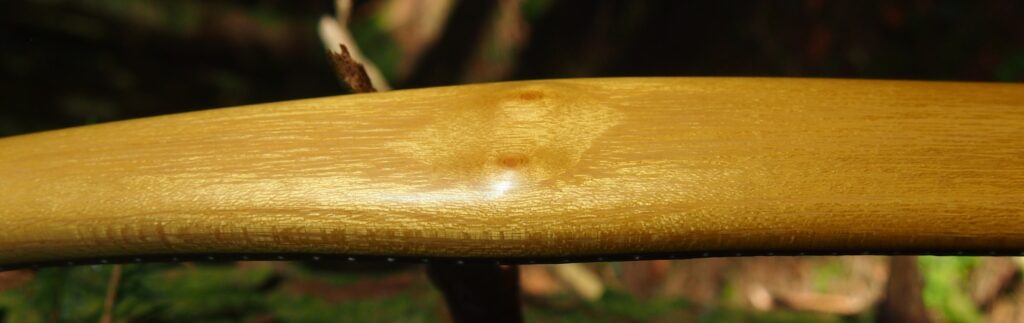
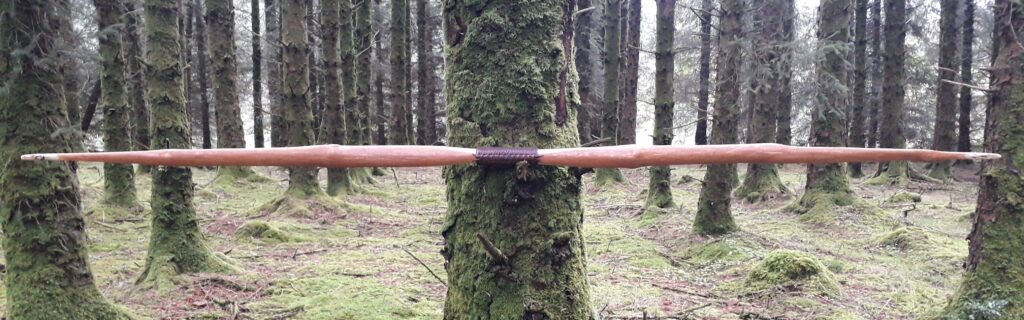
One side of the log was full of large knots and other problems, but the other side looked clean except for several whirls of pins situated with varying gaps between the pin whirls. I didnt dare to try and split this very precious stave, so I cheated and ran the saw through the middle of it splitting it into two halves. Inside was dreamy looking and also free from drying checks, mainly due to the stave still being saturated.
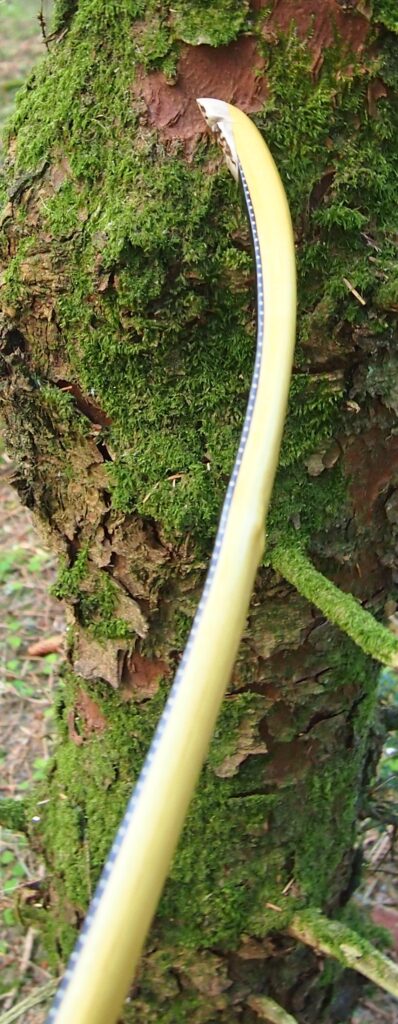
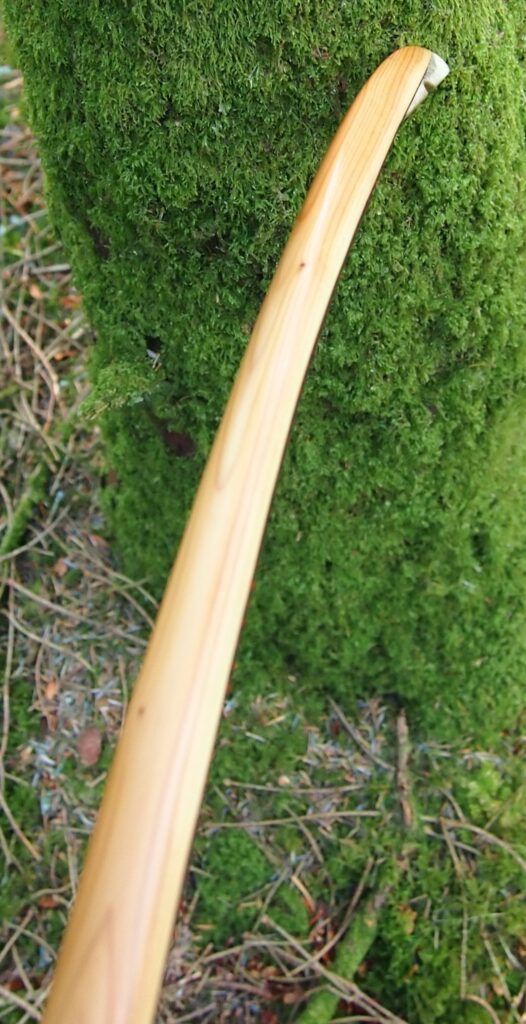
Keen to minimise the risk of drying checks developing, I decided there and then to get this stave roughed out to as close to final dimensions as possible so as to get way past the inner pith and reduce the mass to a point where I could feel confident that the stave wouldn’t start splitting as it rapidly dried out.
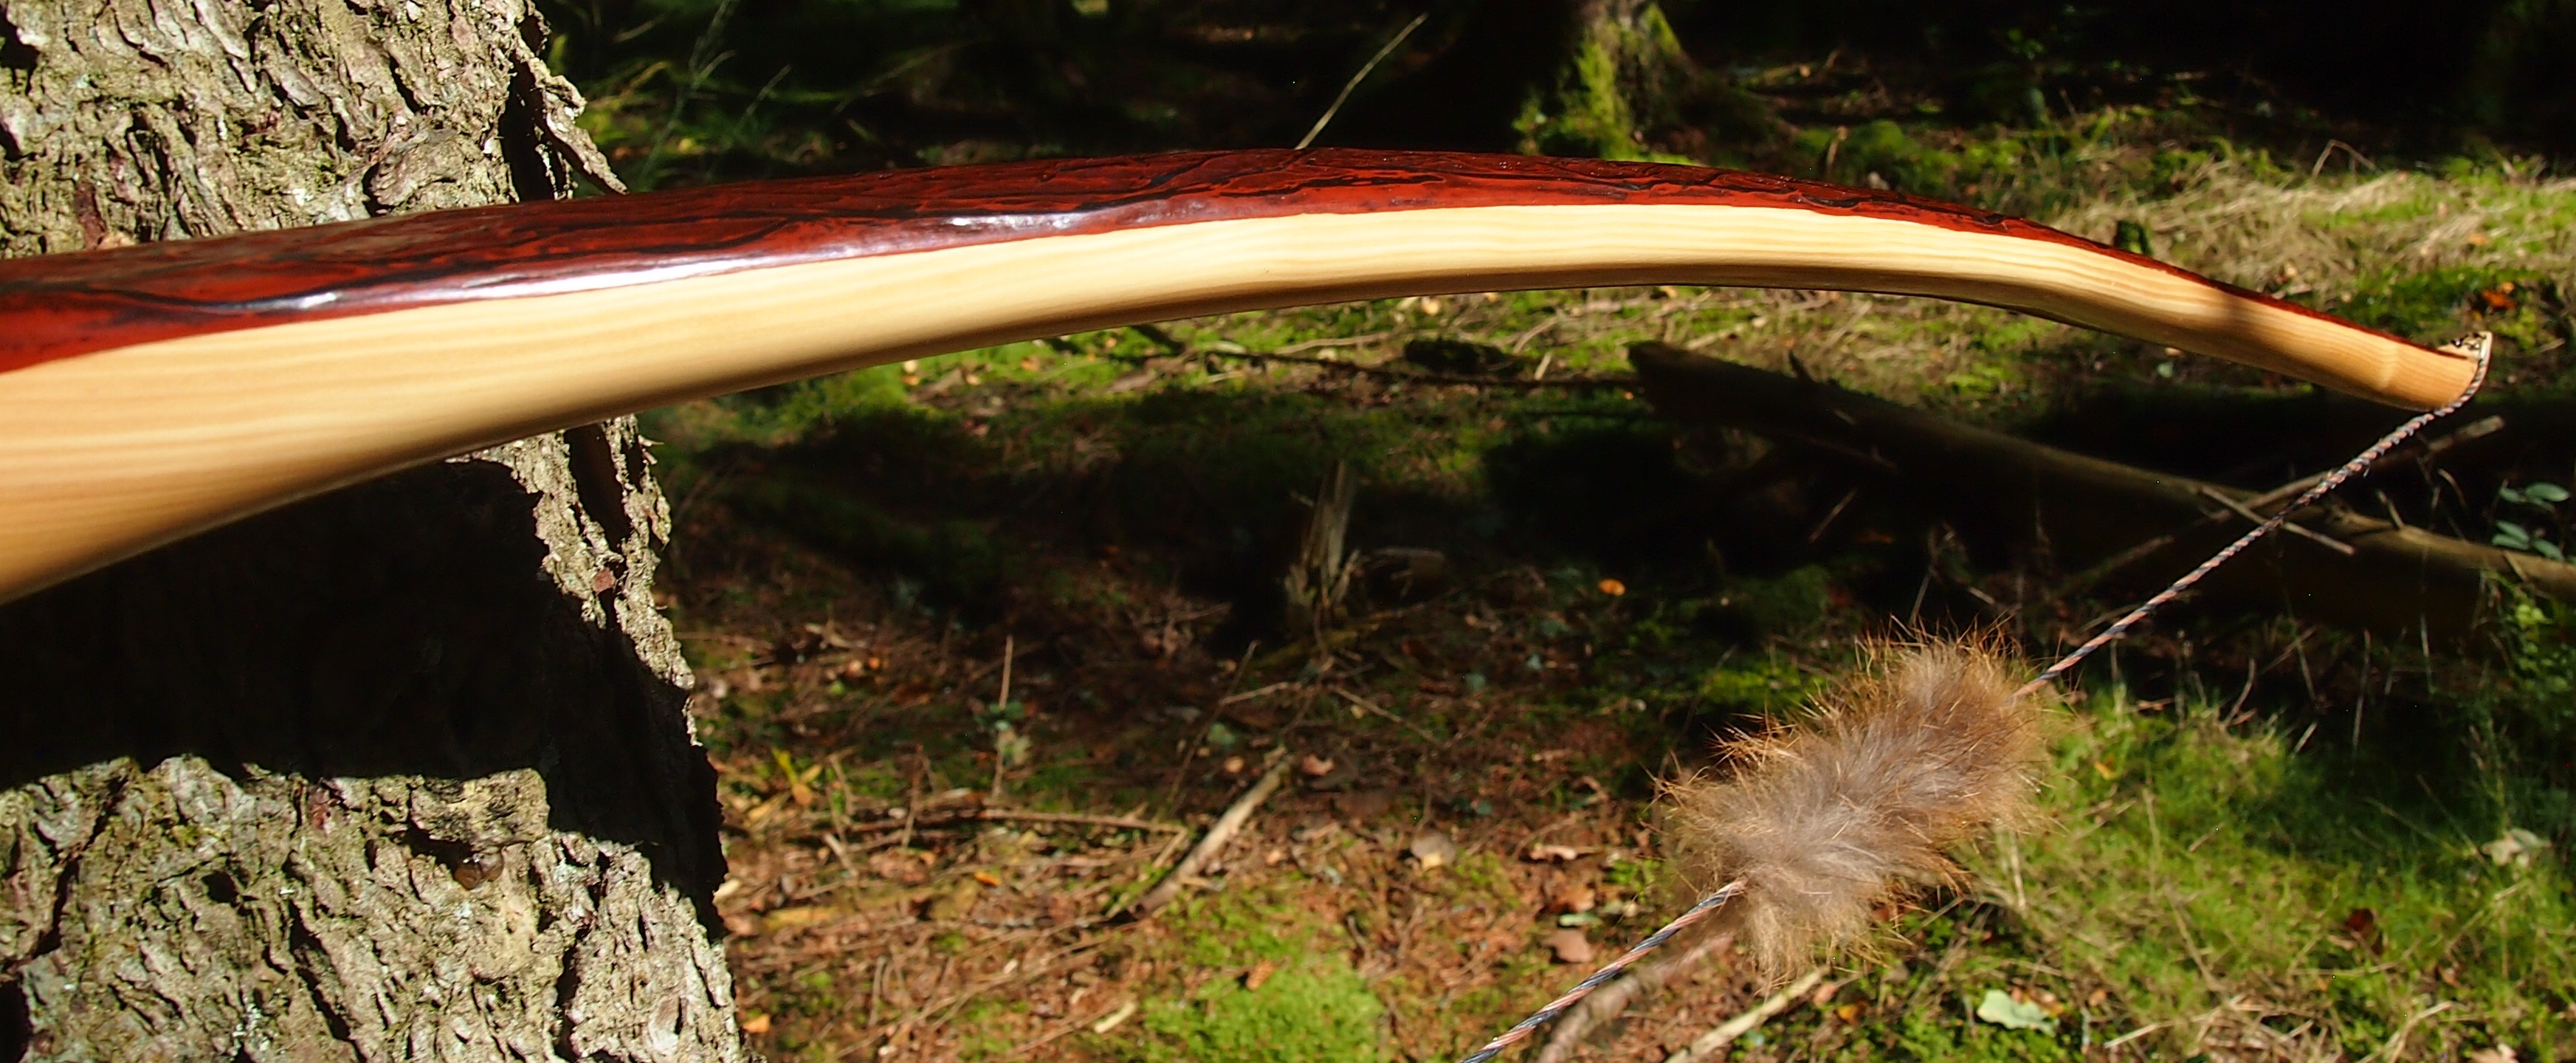
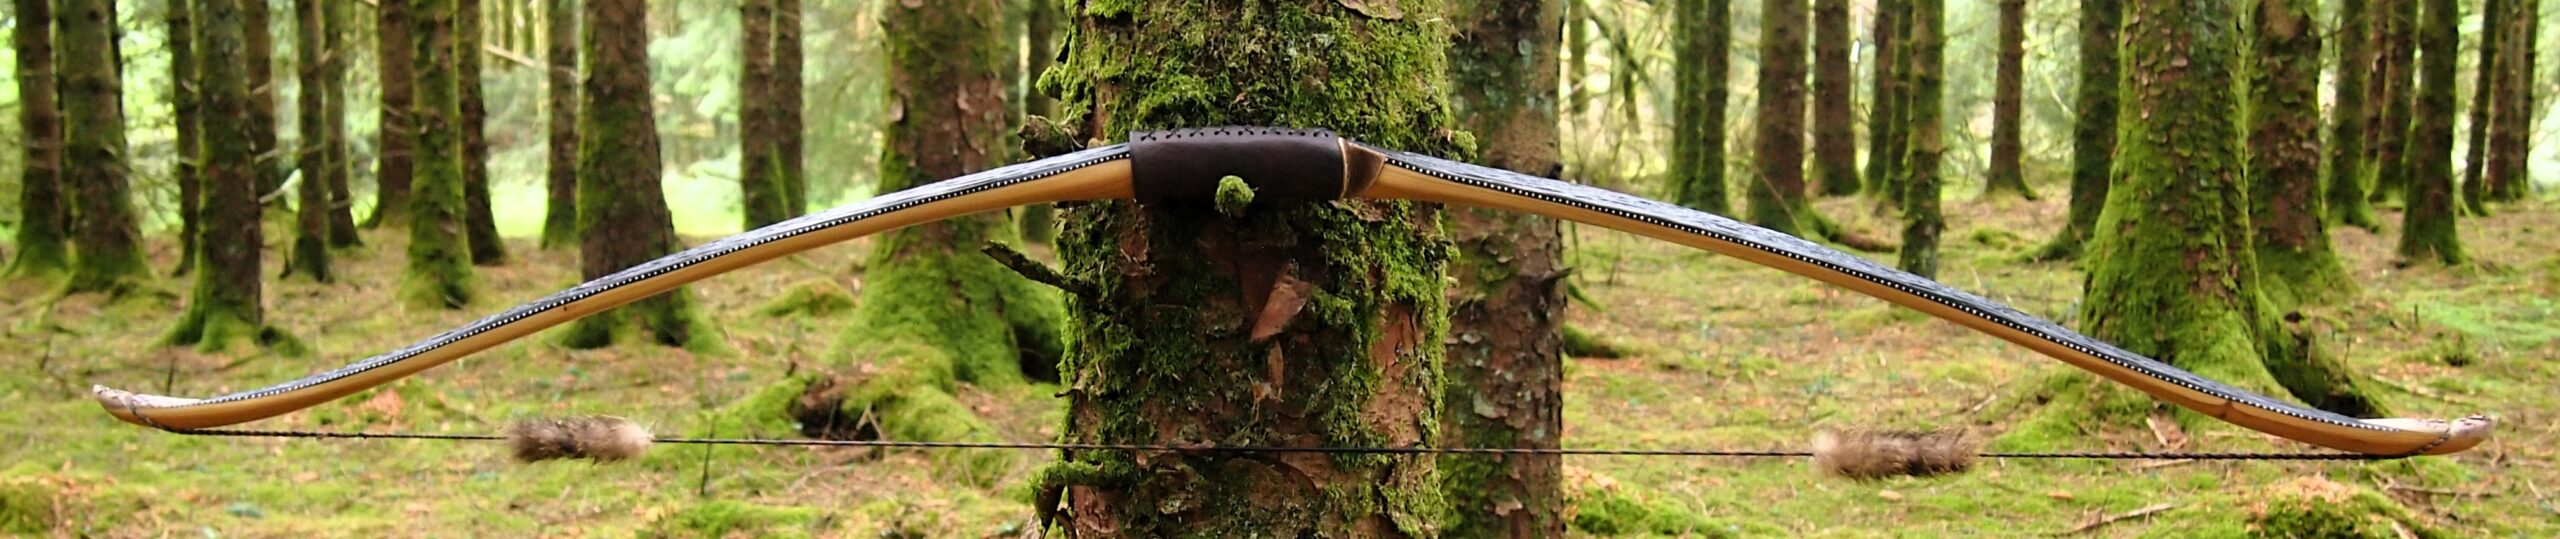
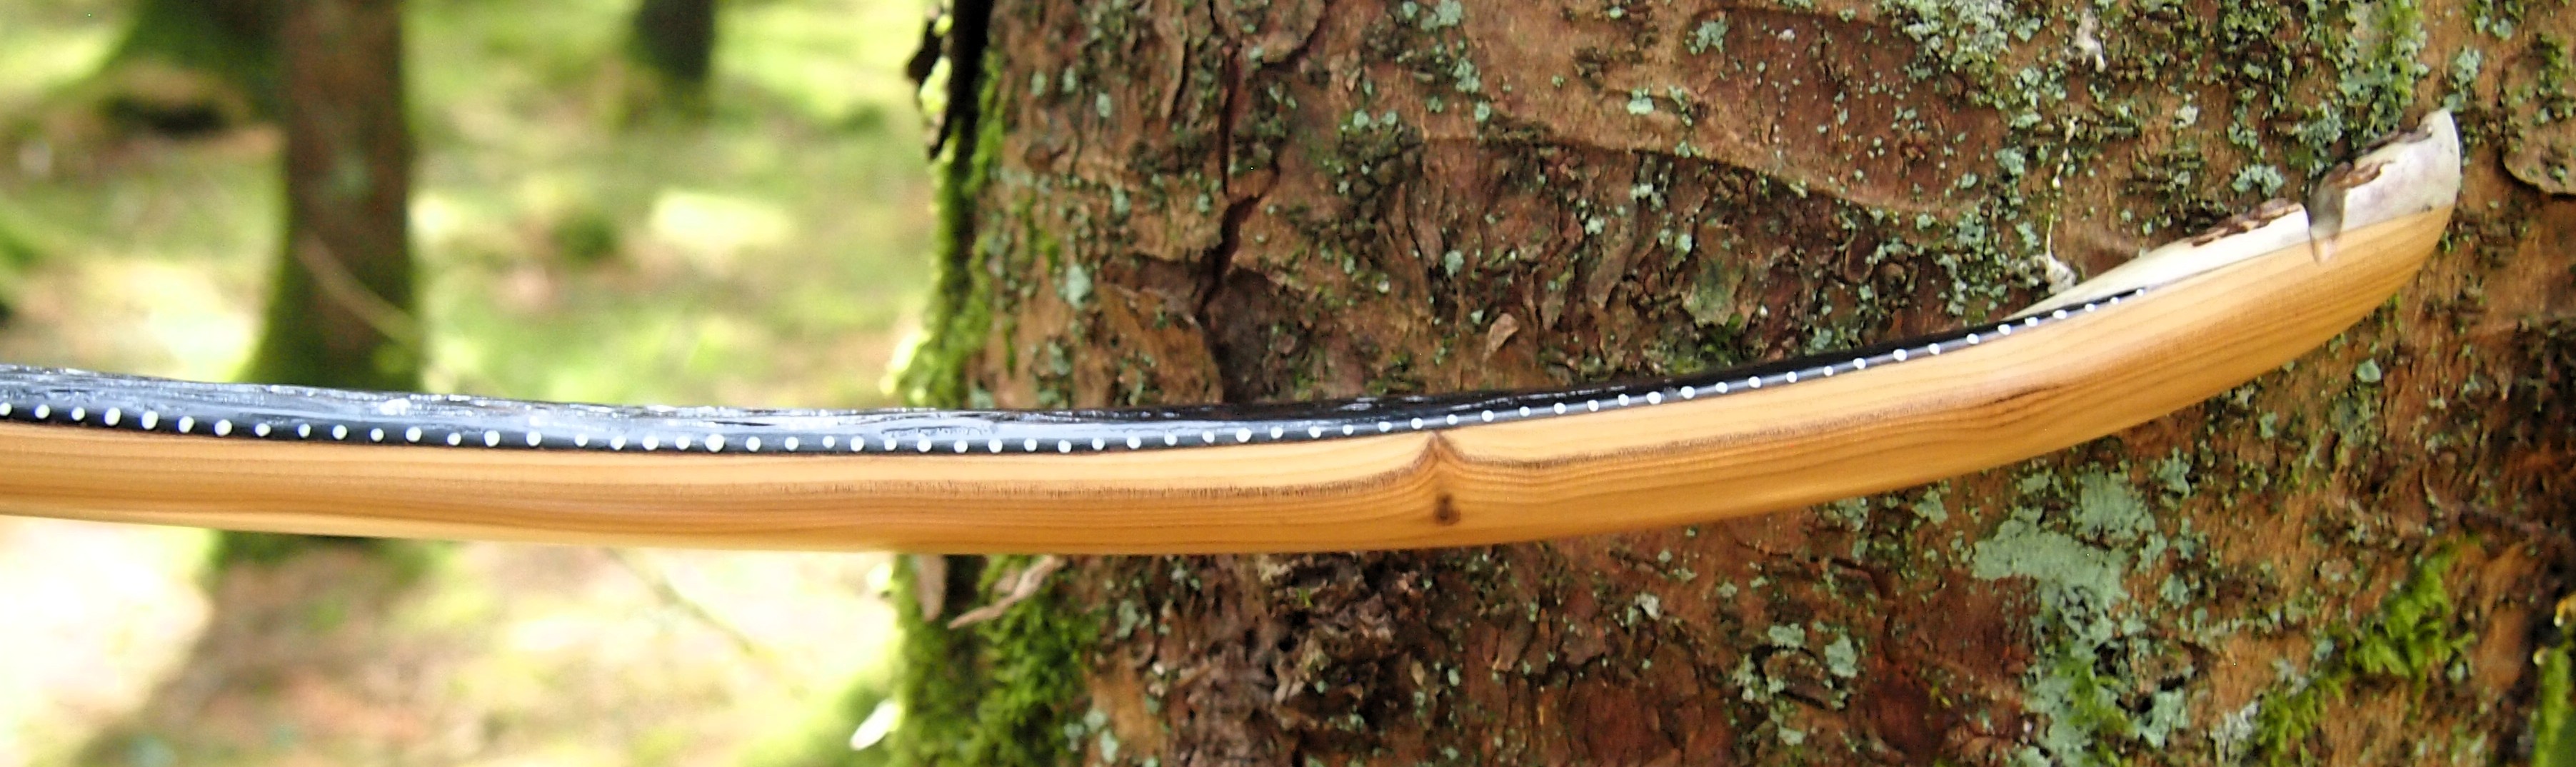
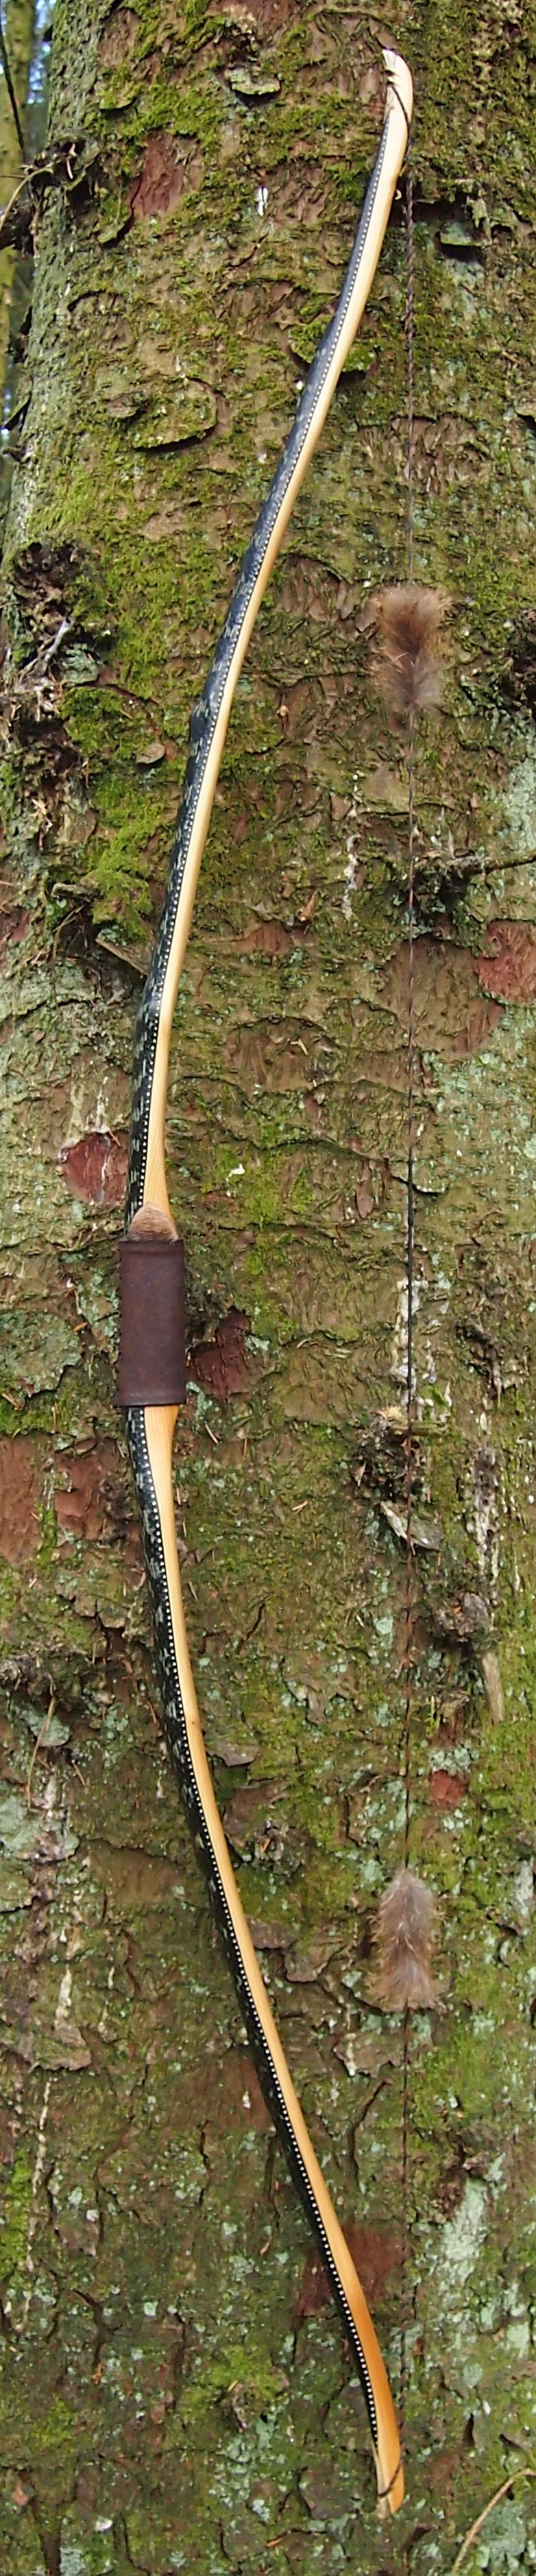
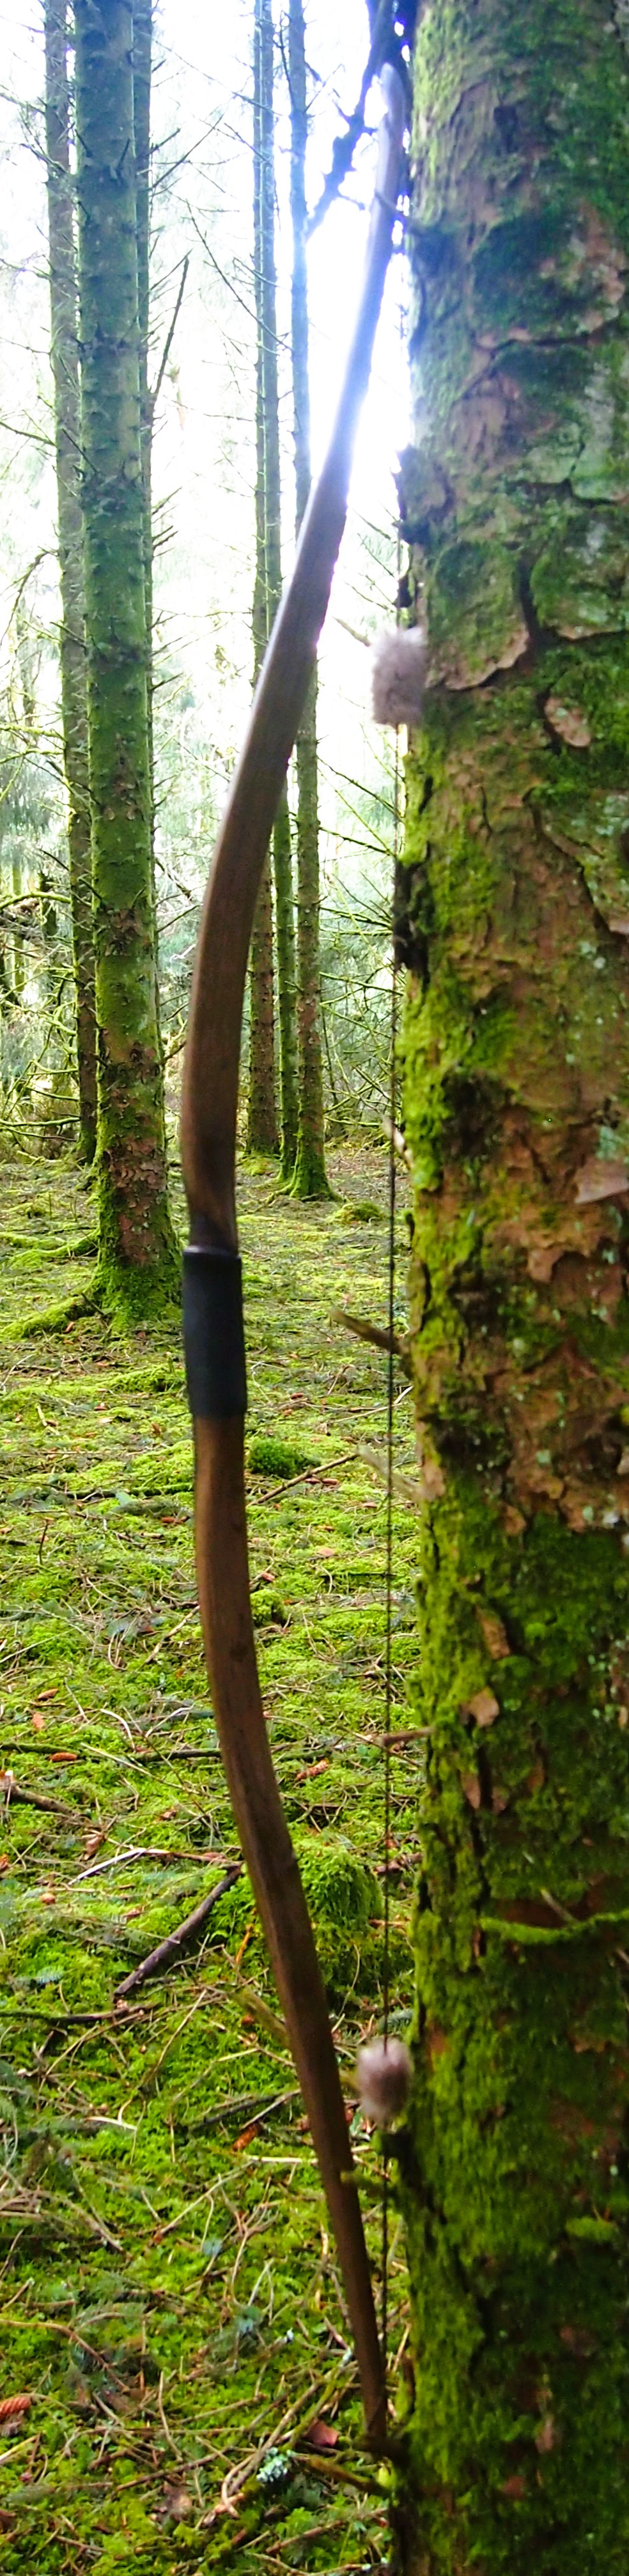
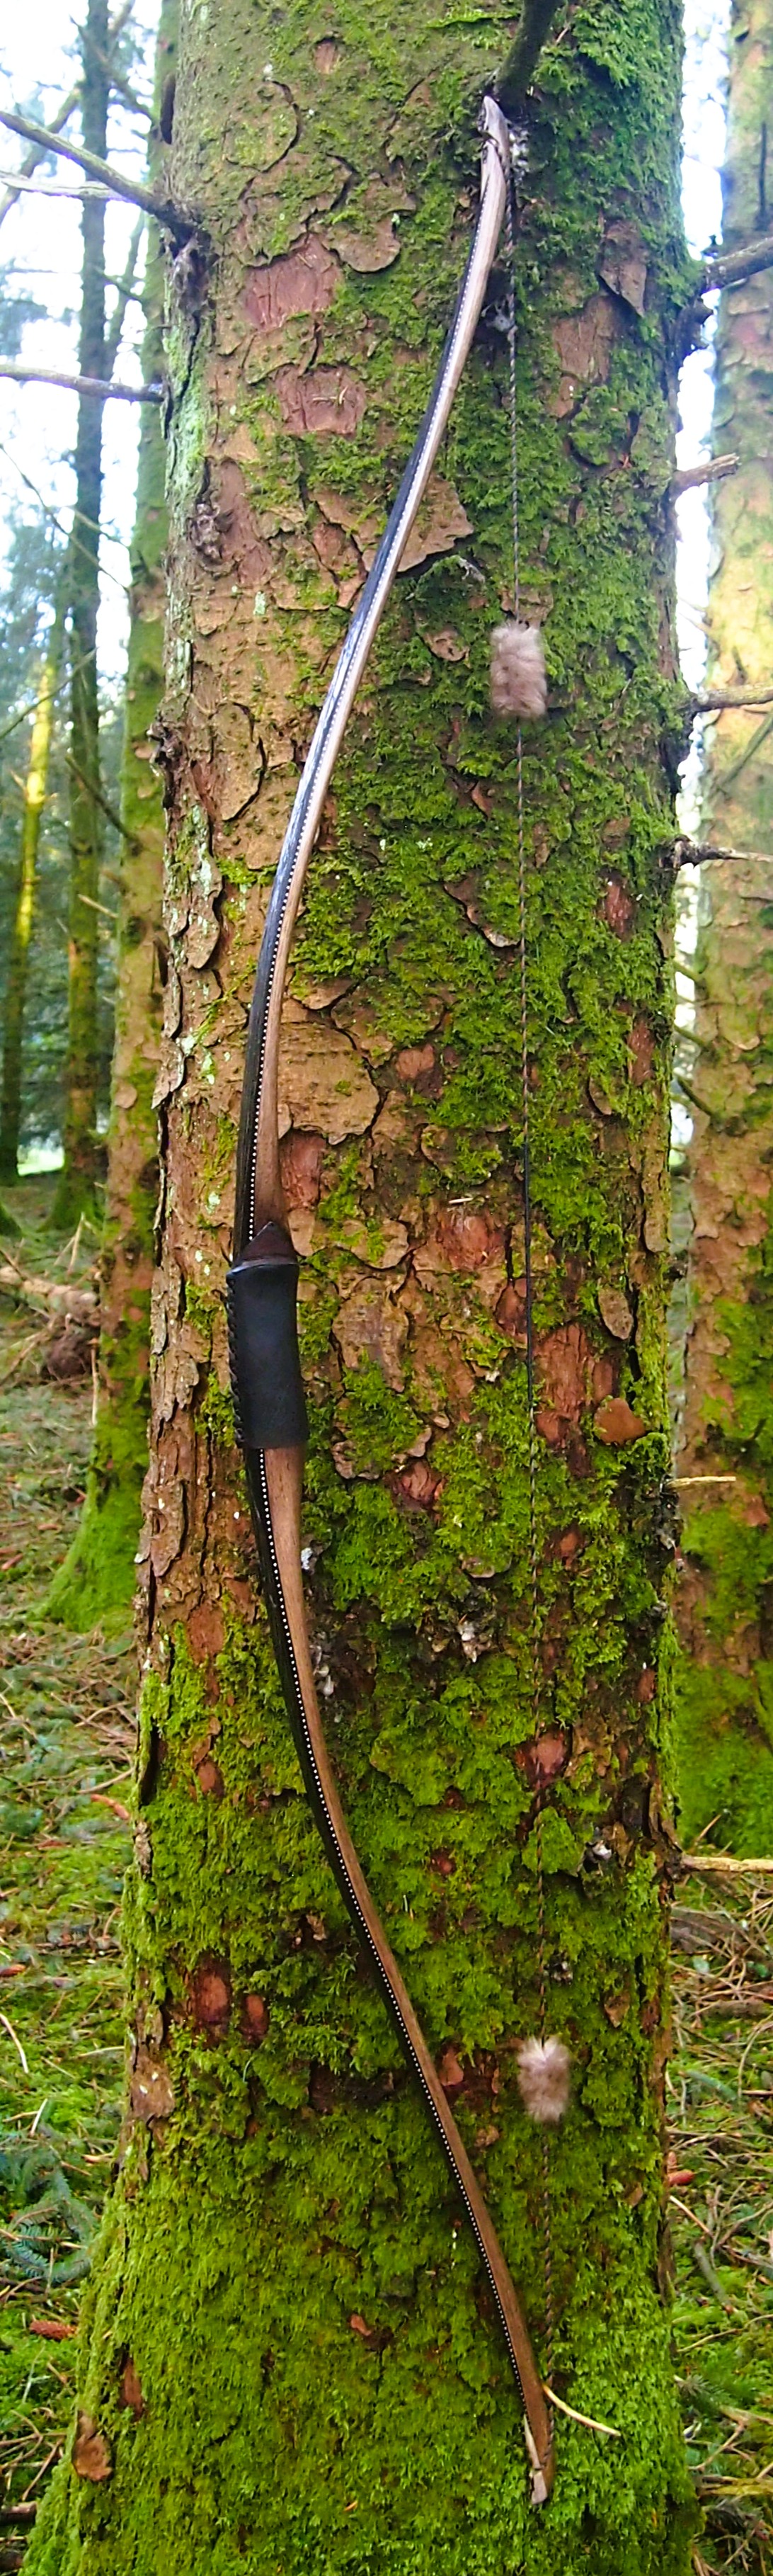
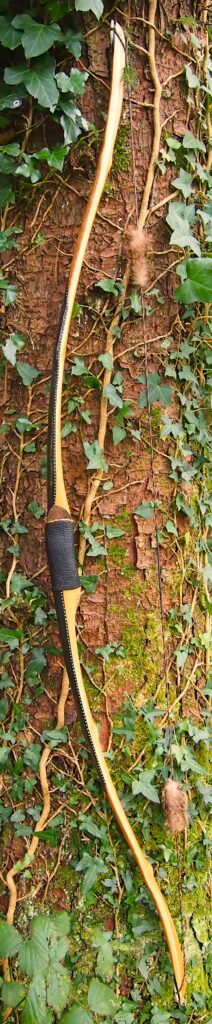
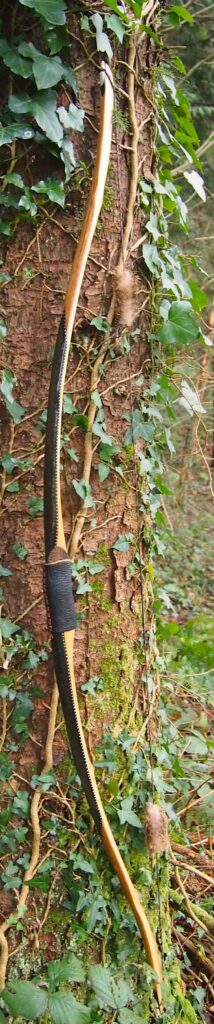
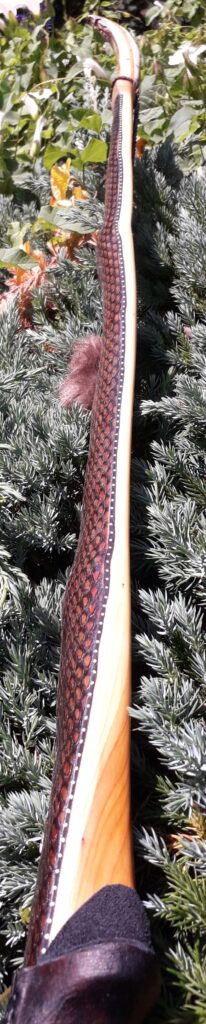
Once roughed out I used steam and a form to put a small amount of deflex in the middle of the riser. I also wanted to use this opportunity of having saturated wood to add a little gentle sweeping reflex into the entire length of the limbs to counter the deflex and reduce any potential stack felt at full draw.
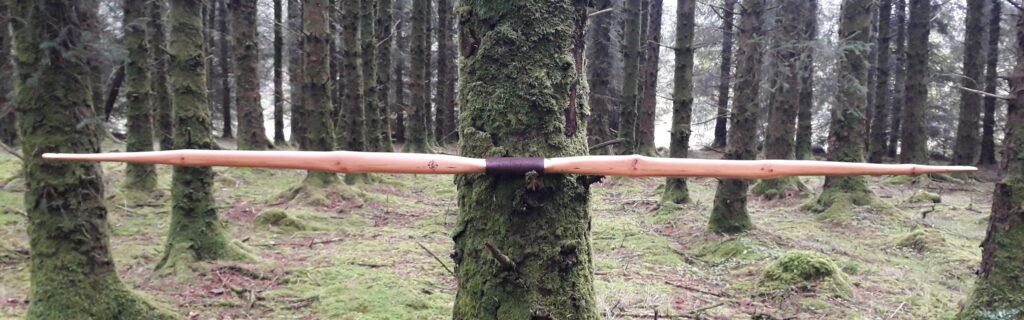
Even whilst fully saturated this stave felt very stiff so I didn’t want to push my luck with the heat bending. So after heating, and once I was happy with the shape and approximate string alignment, I clamped her tight to the form and parked her up to dry out fully. After a couple of months the stave came off the form for inspection. No cracks visible and the light R&D shape had held tight. The stave felt a fraction of its former weight too indicating that it was now dry.
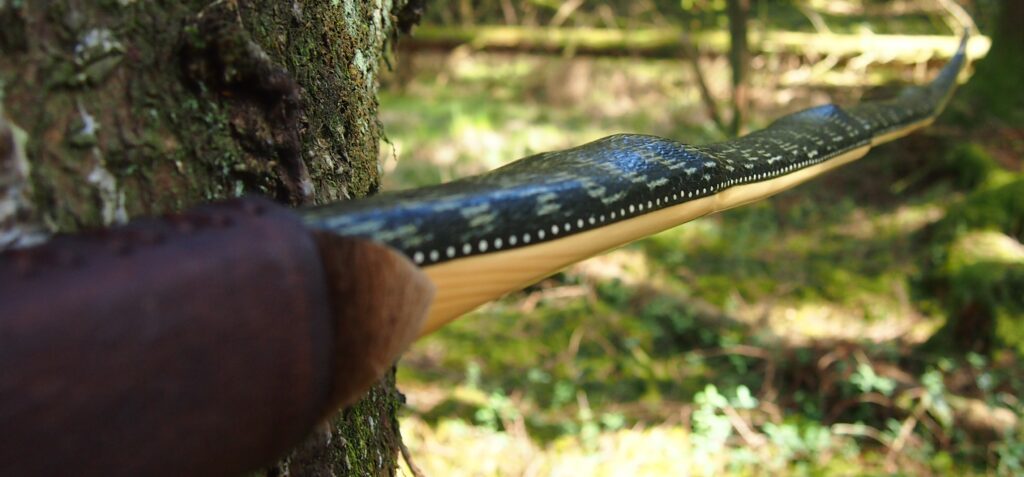
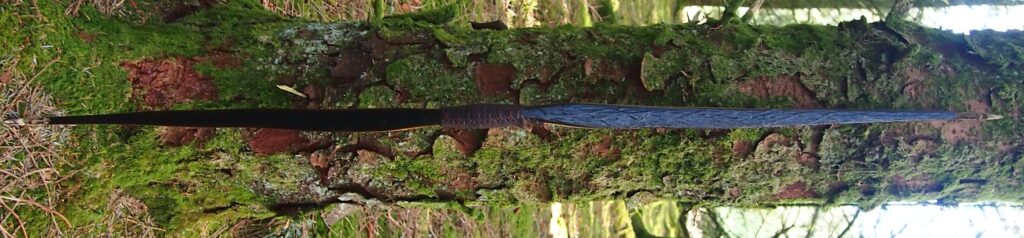
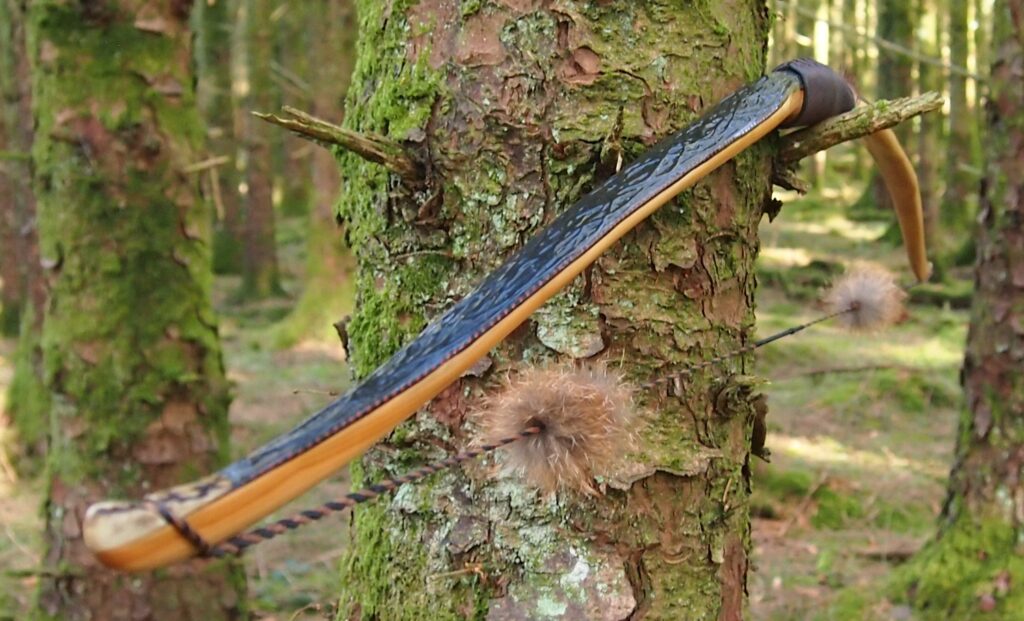
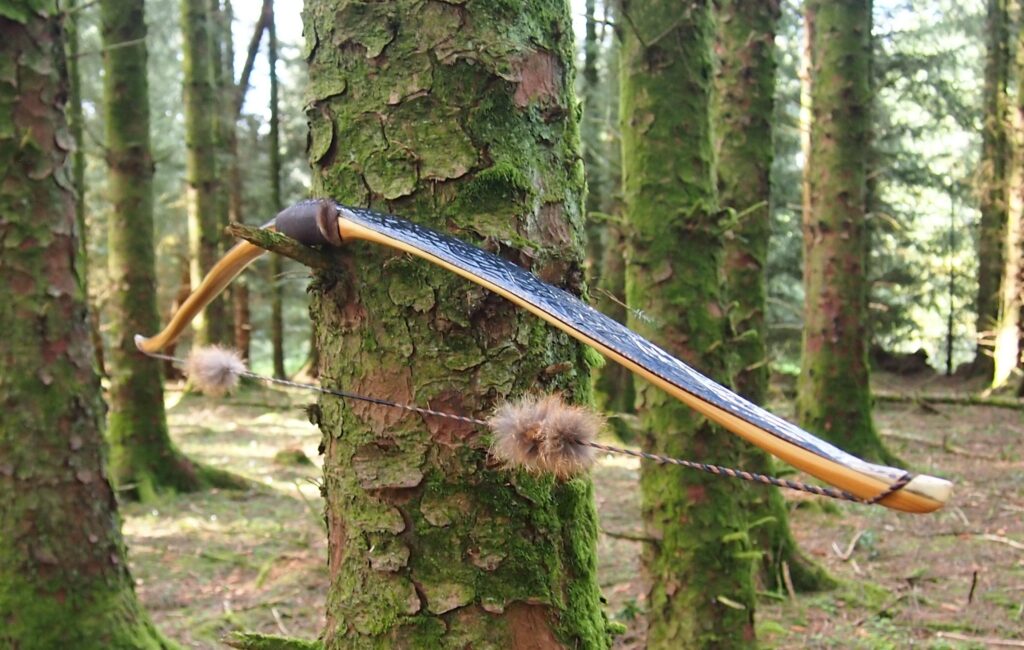
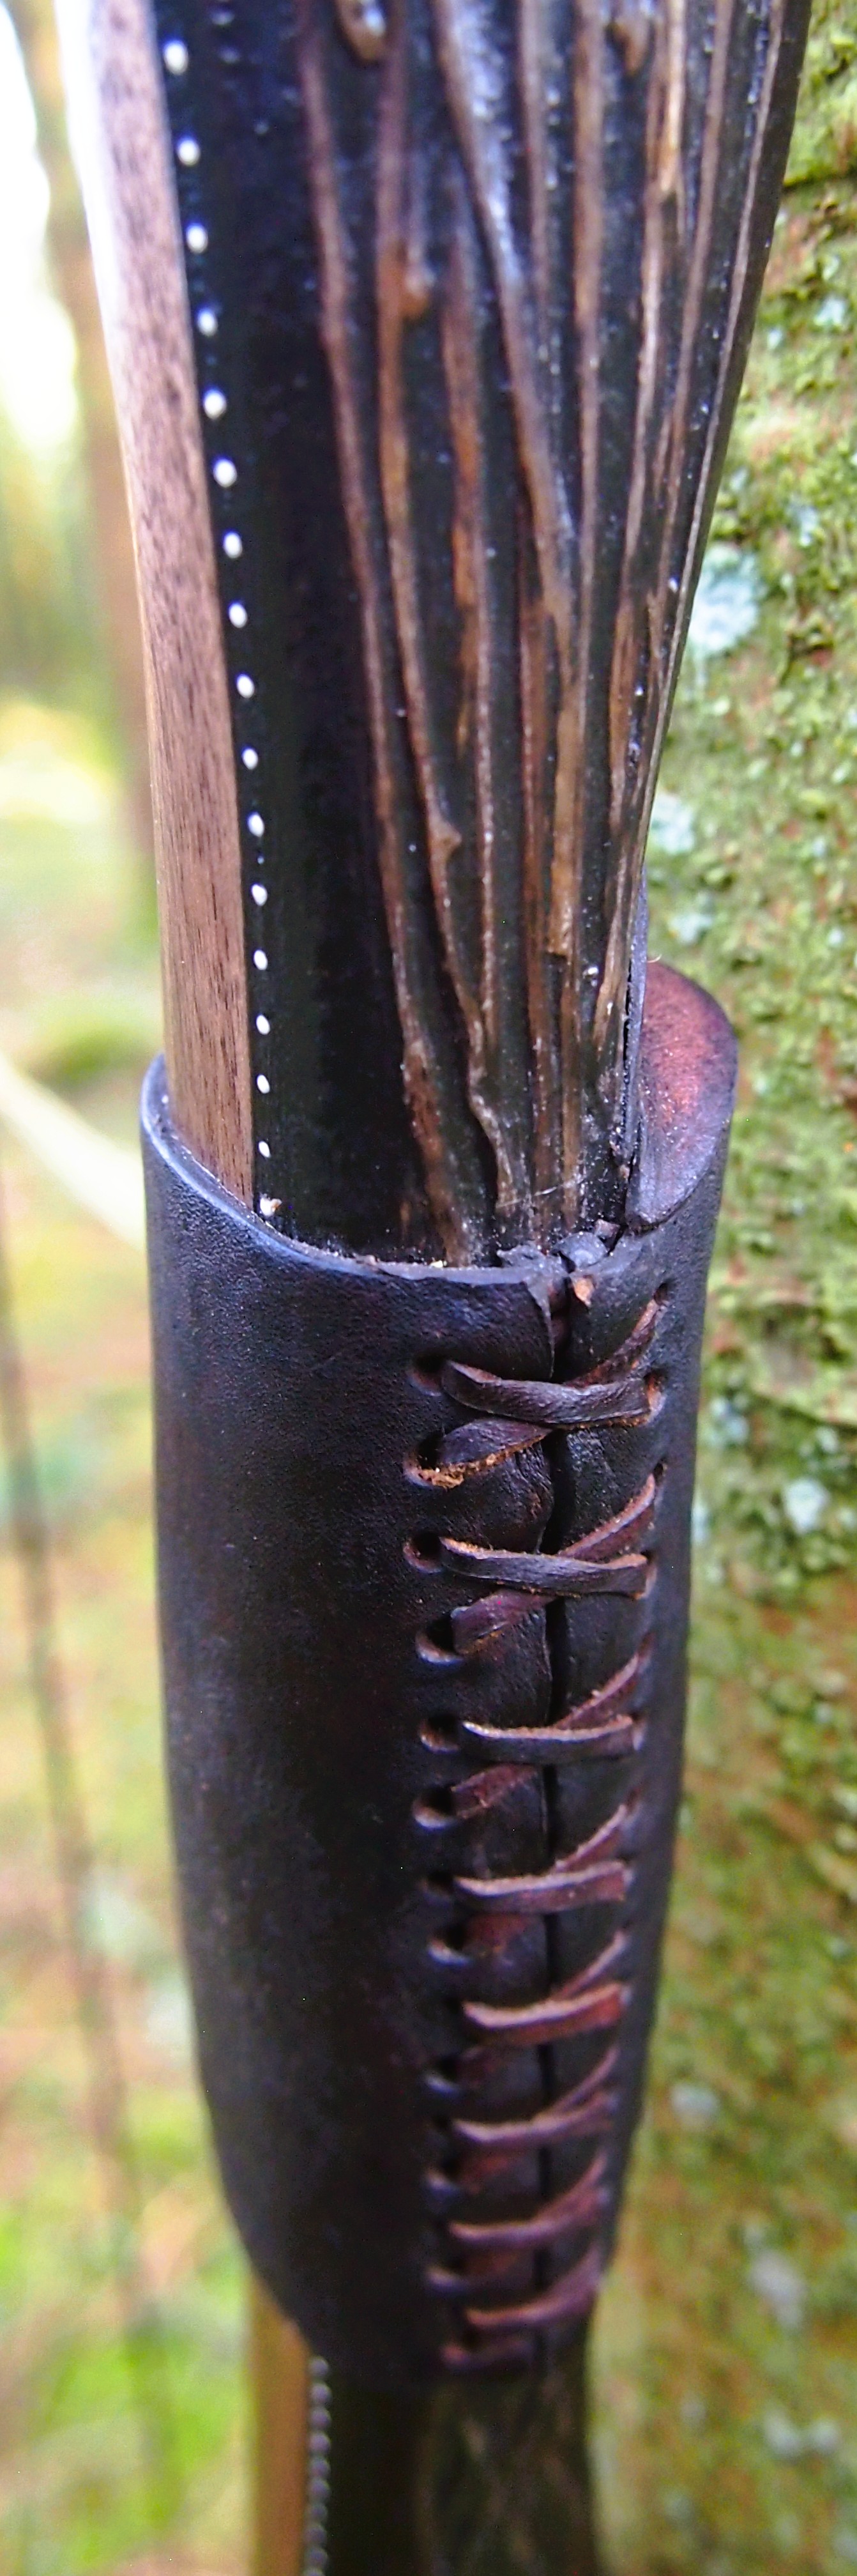
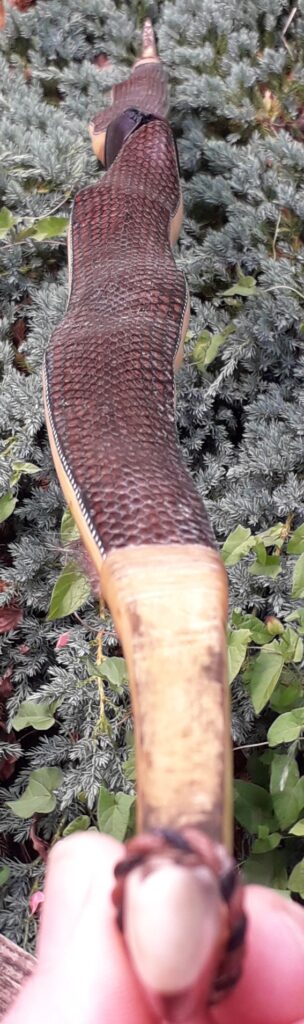
I’ve never before worked with bog yew so I was unsure of its ability to make a safe bow. Especially as it felt quite stiff. So to make absolutely sure this stave wouldn’t explode during tillering, or worse still, explode during use, I decided to sinew back it with 3oz of wild English red deer leg tendon sinew. Once the backing was completed and wrapped up on a drying form to retain the staves shape, the stave was put away again for another 8 months of curing time.
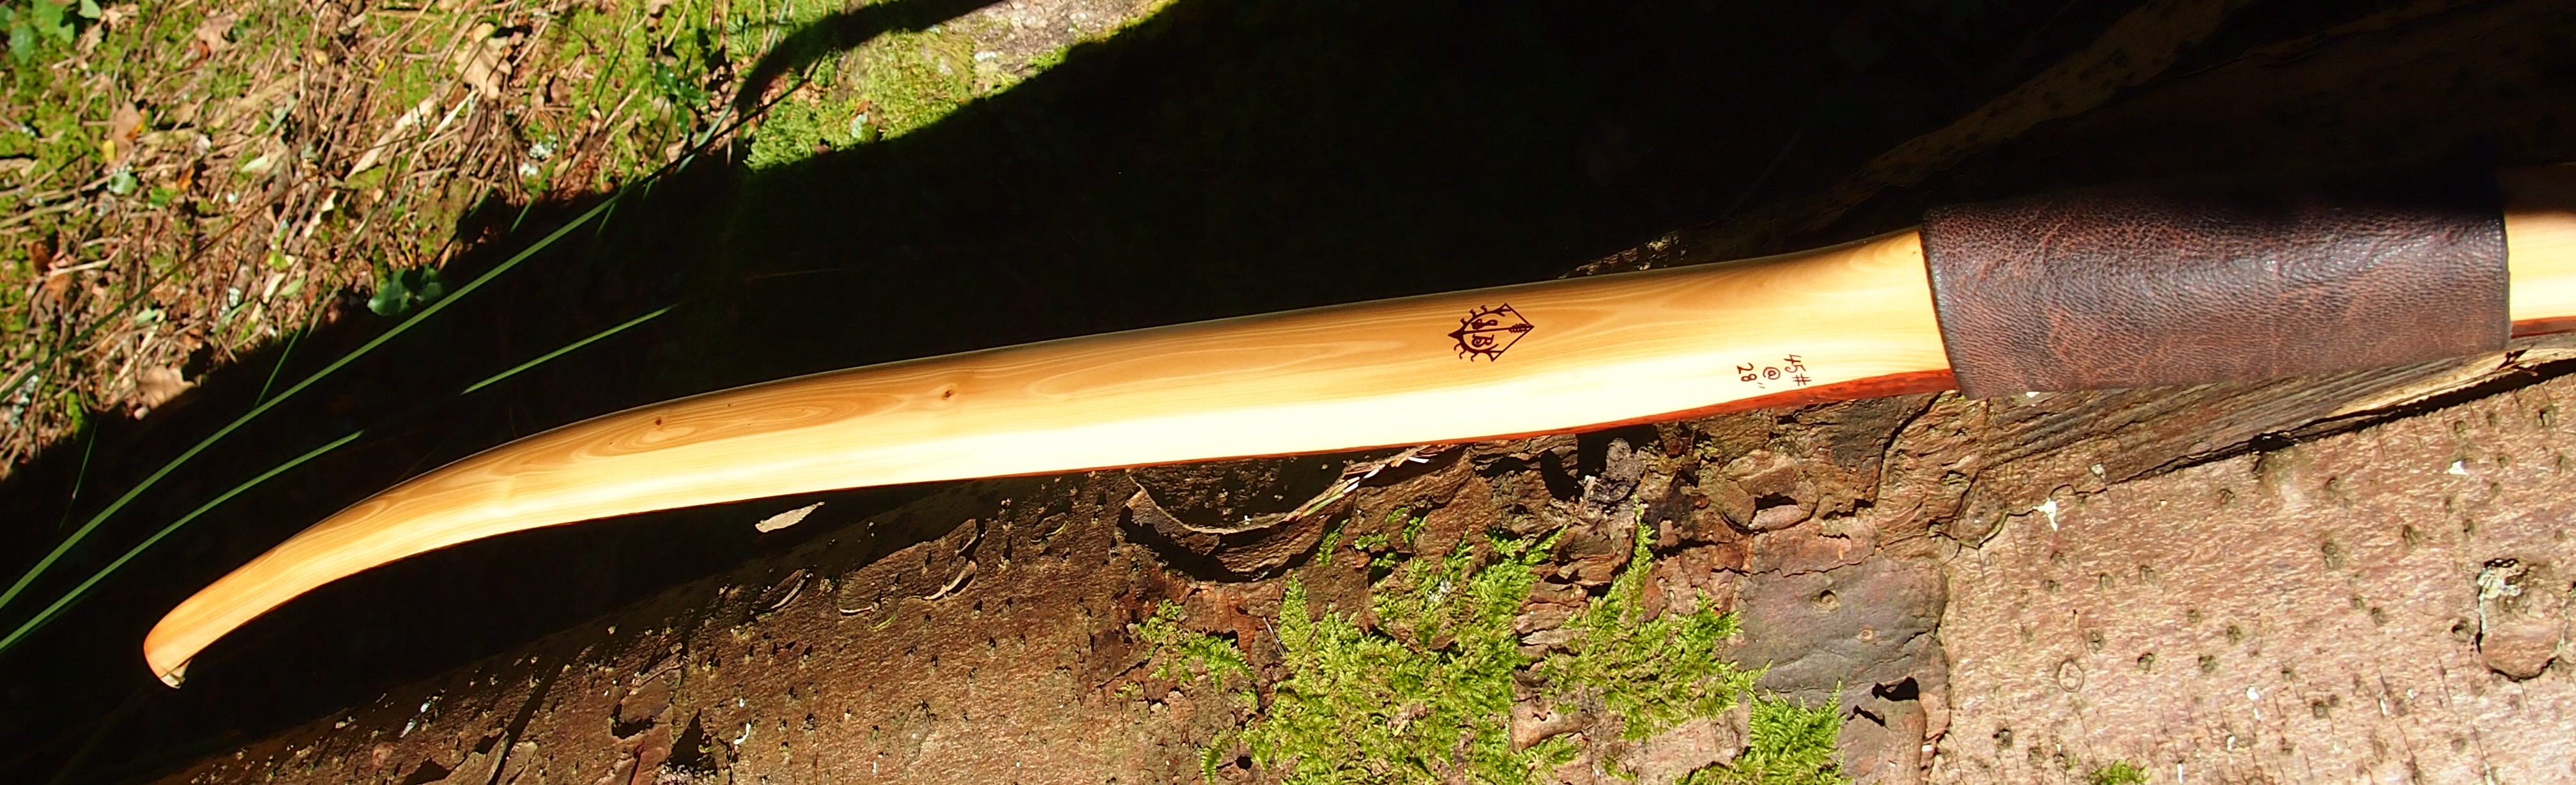
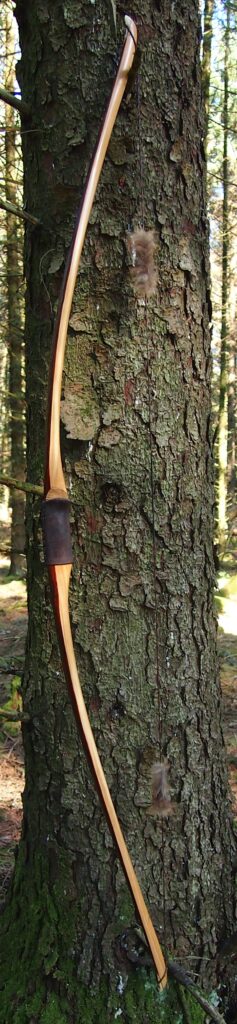
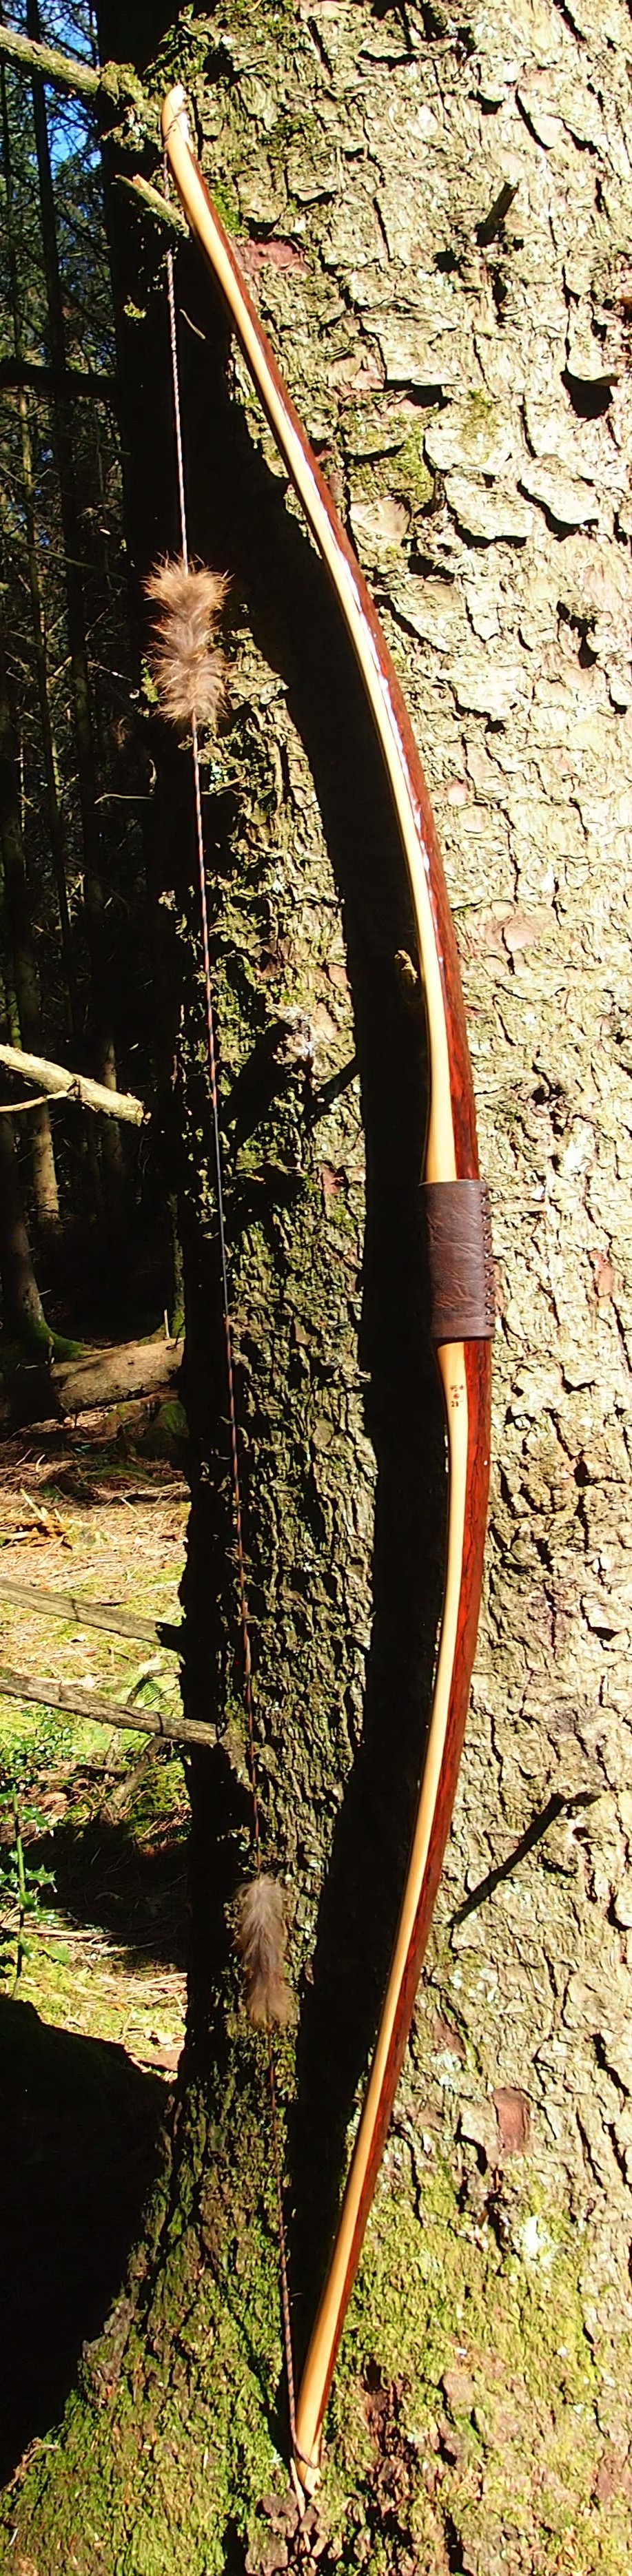
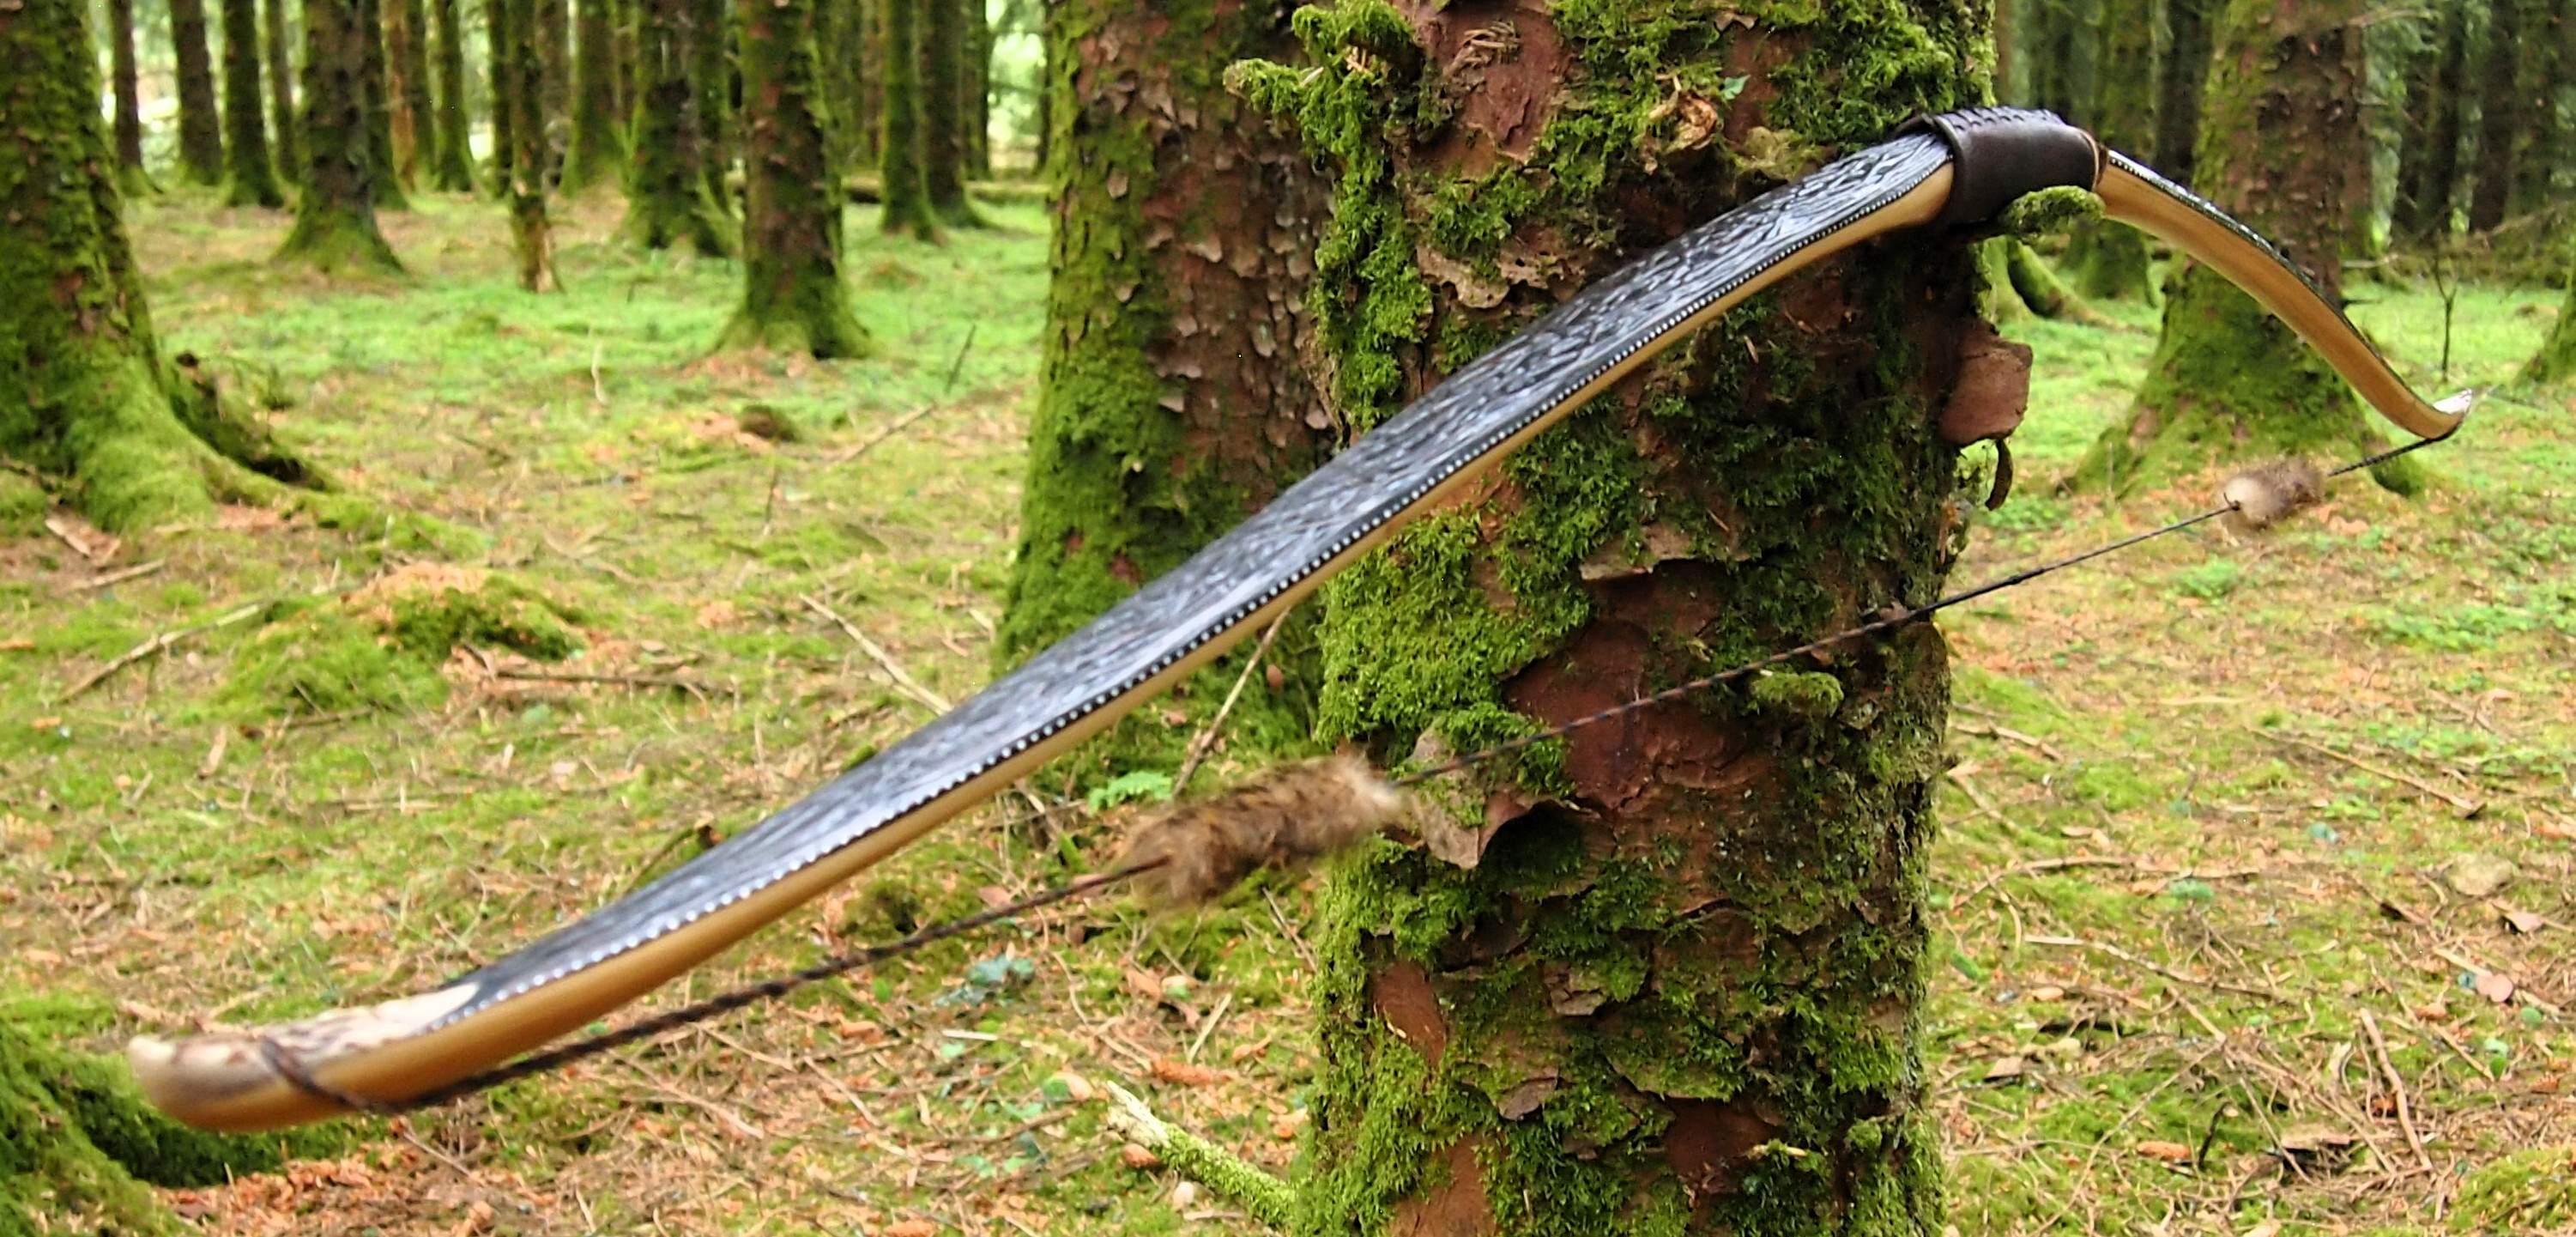
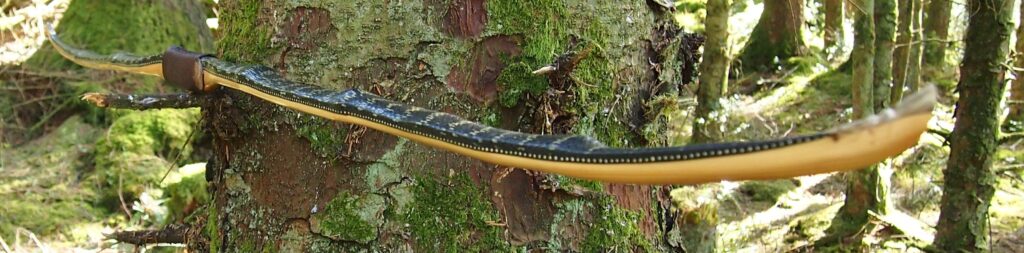
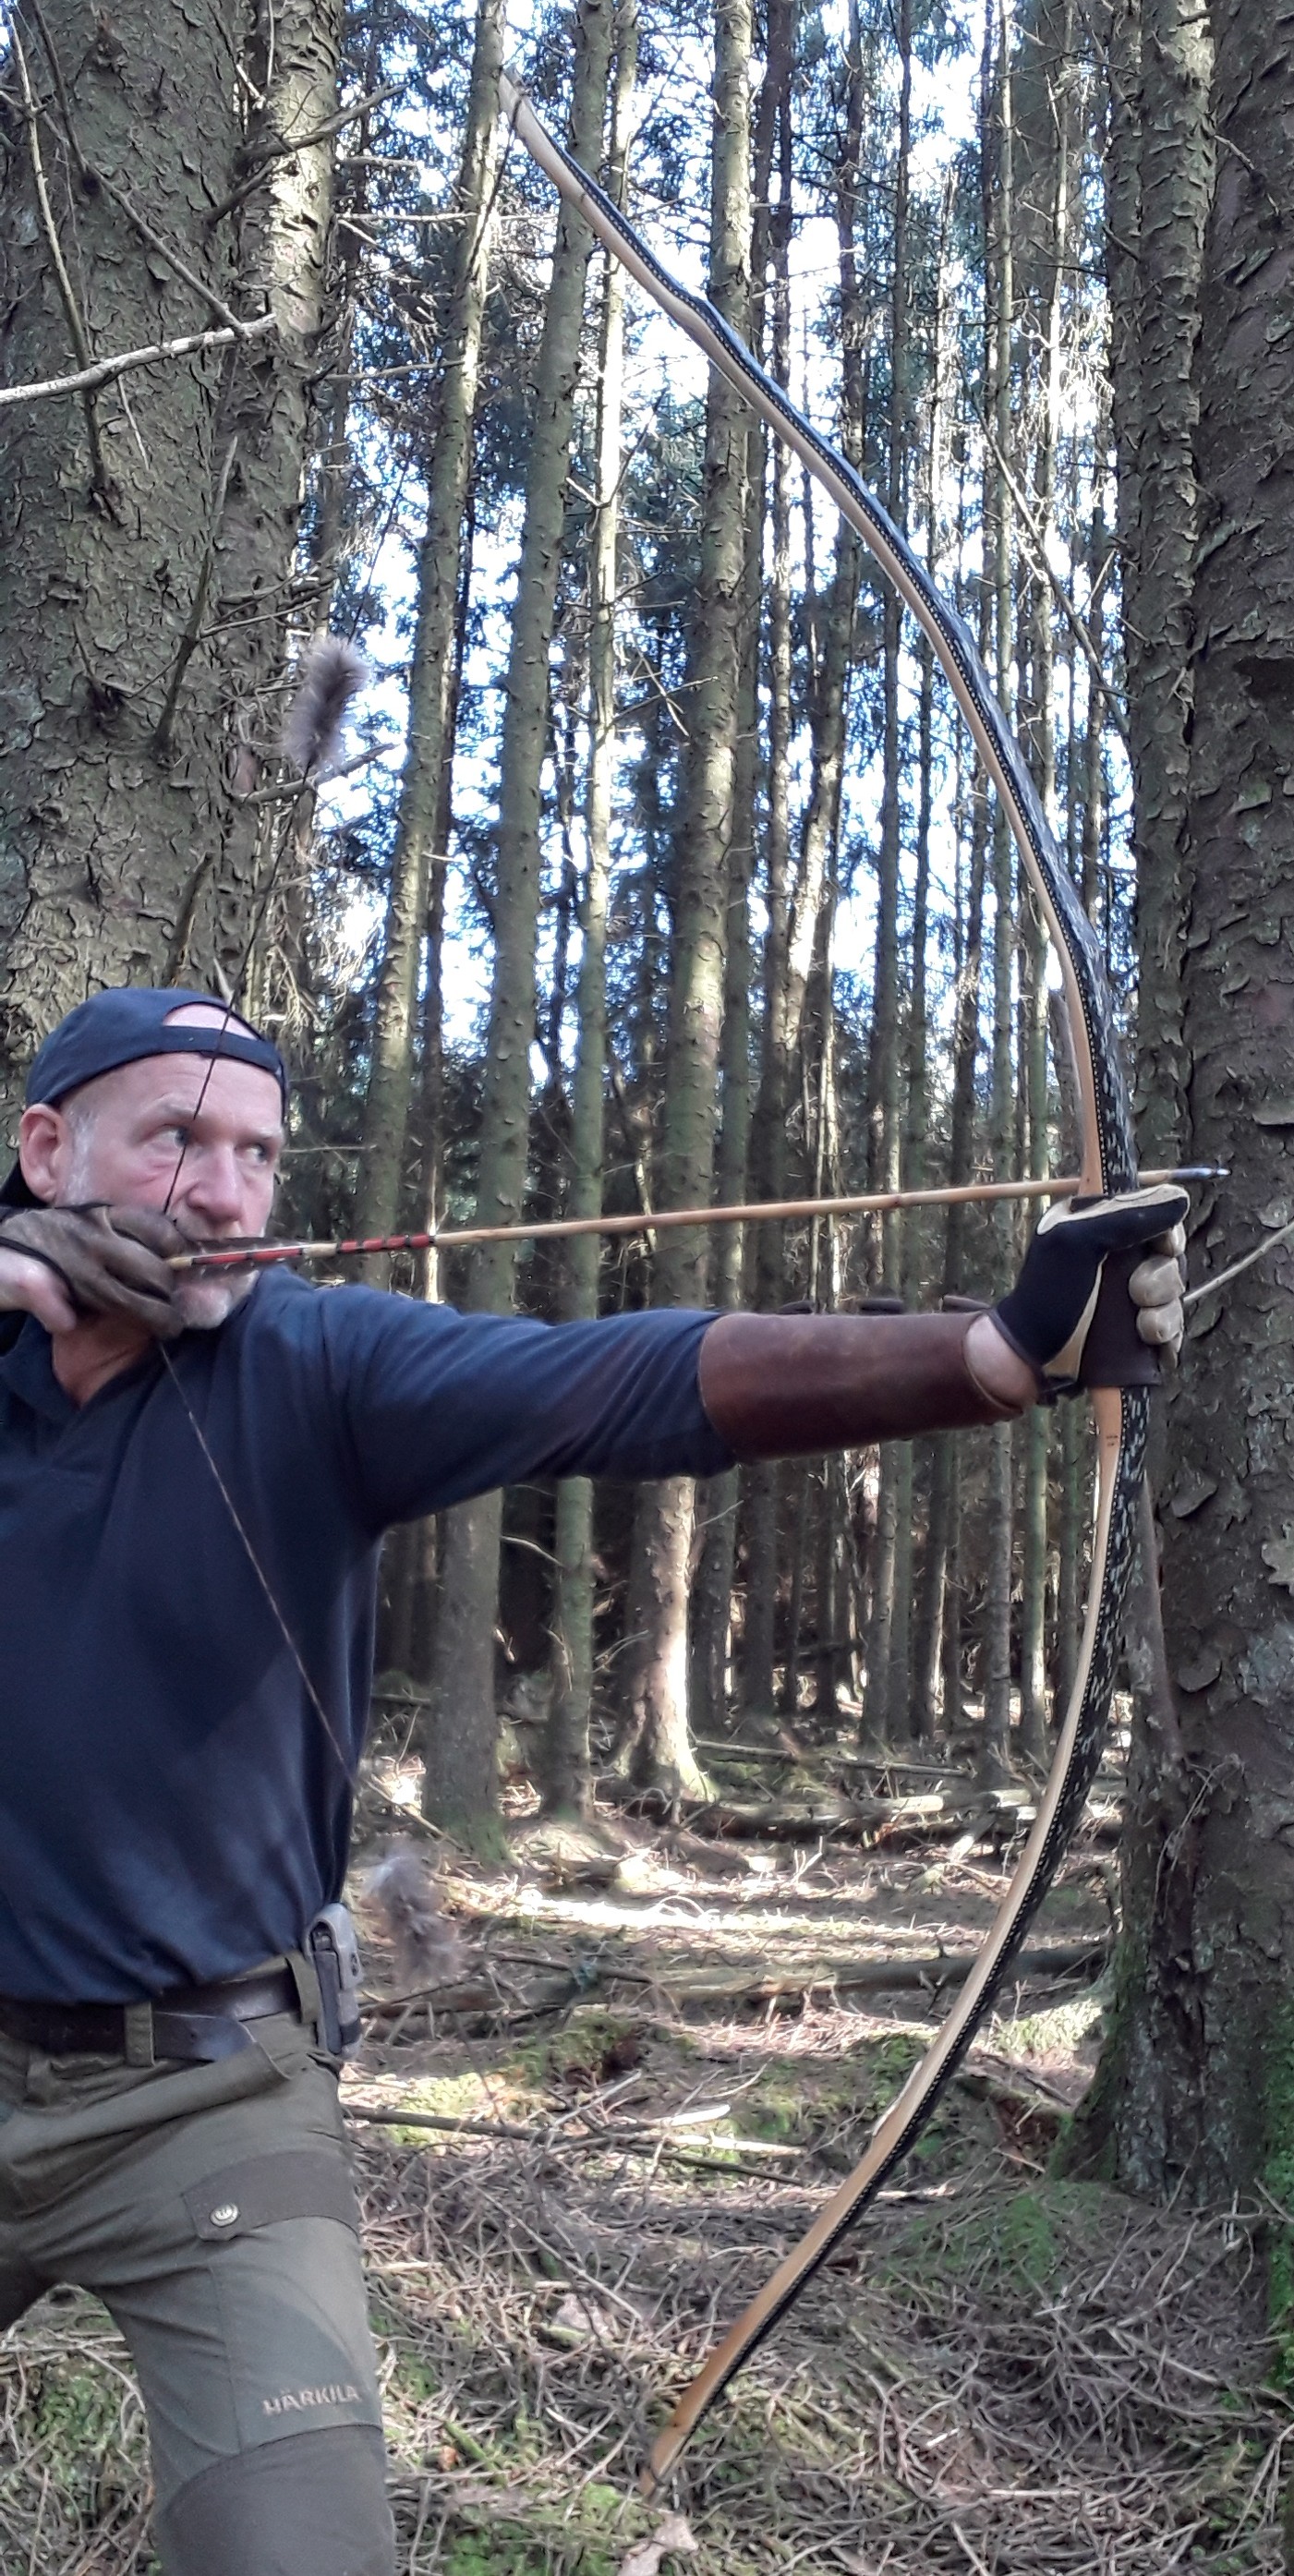
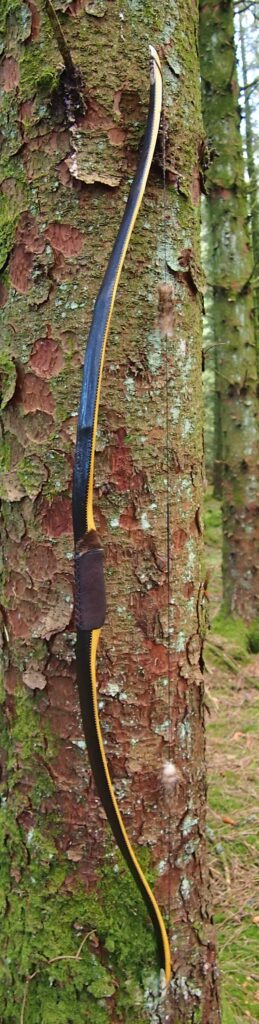
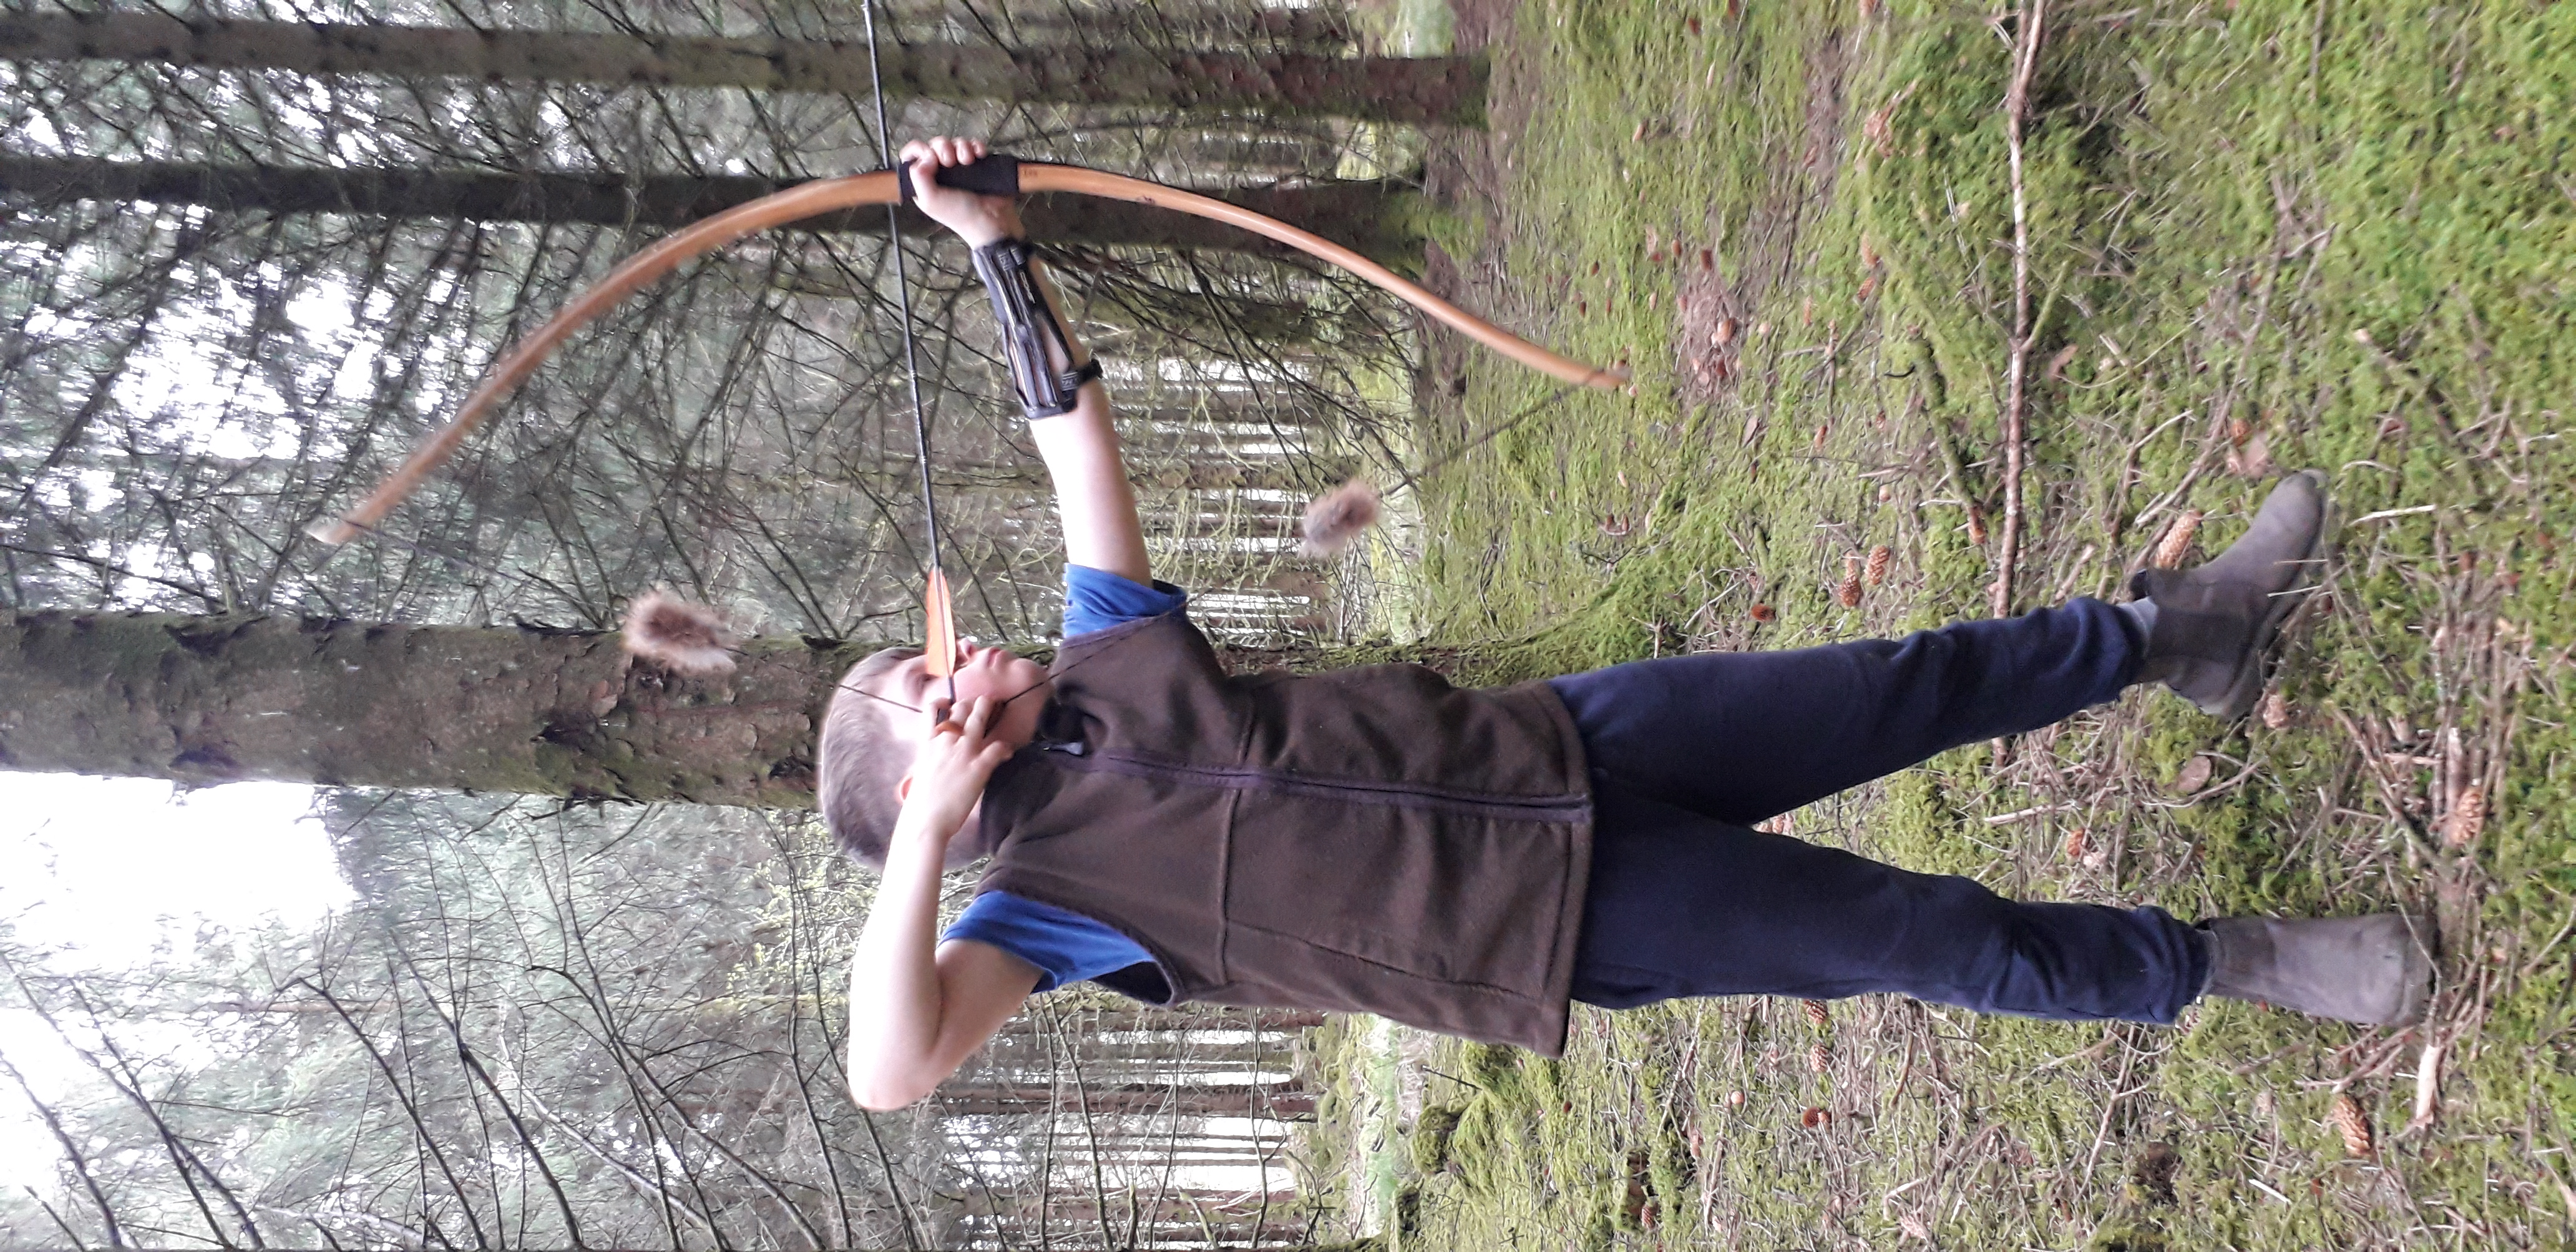
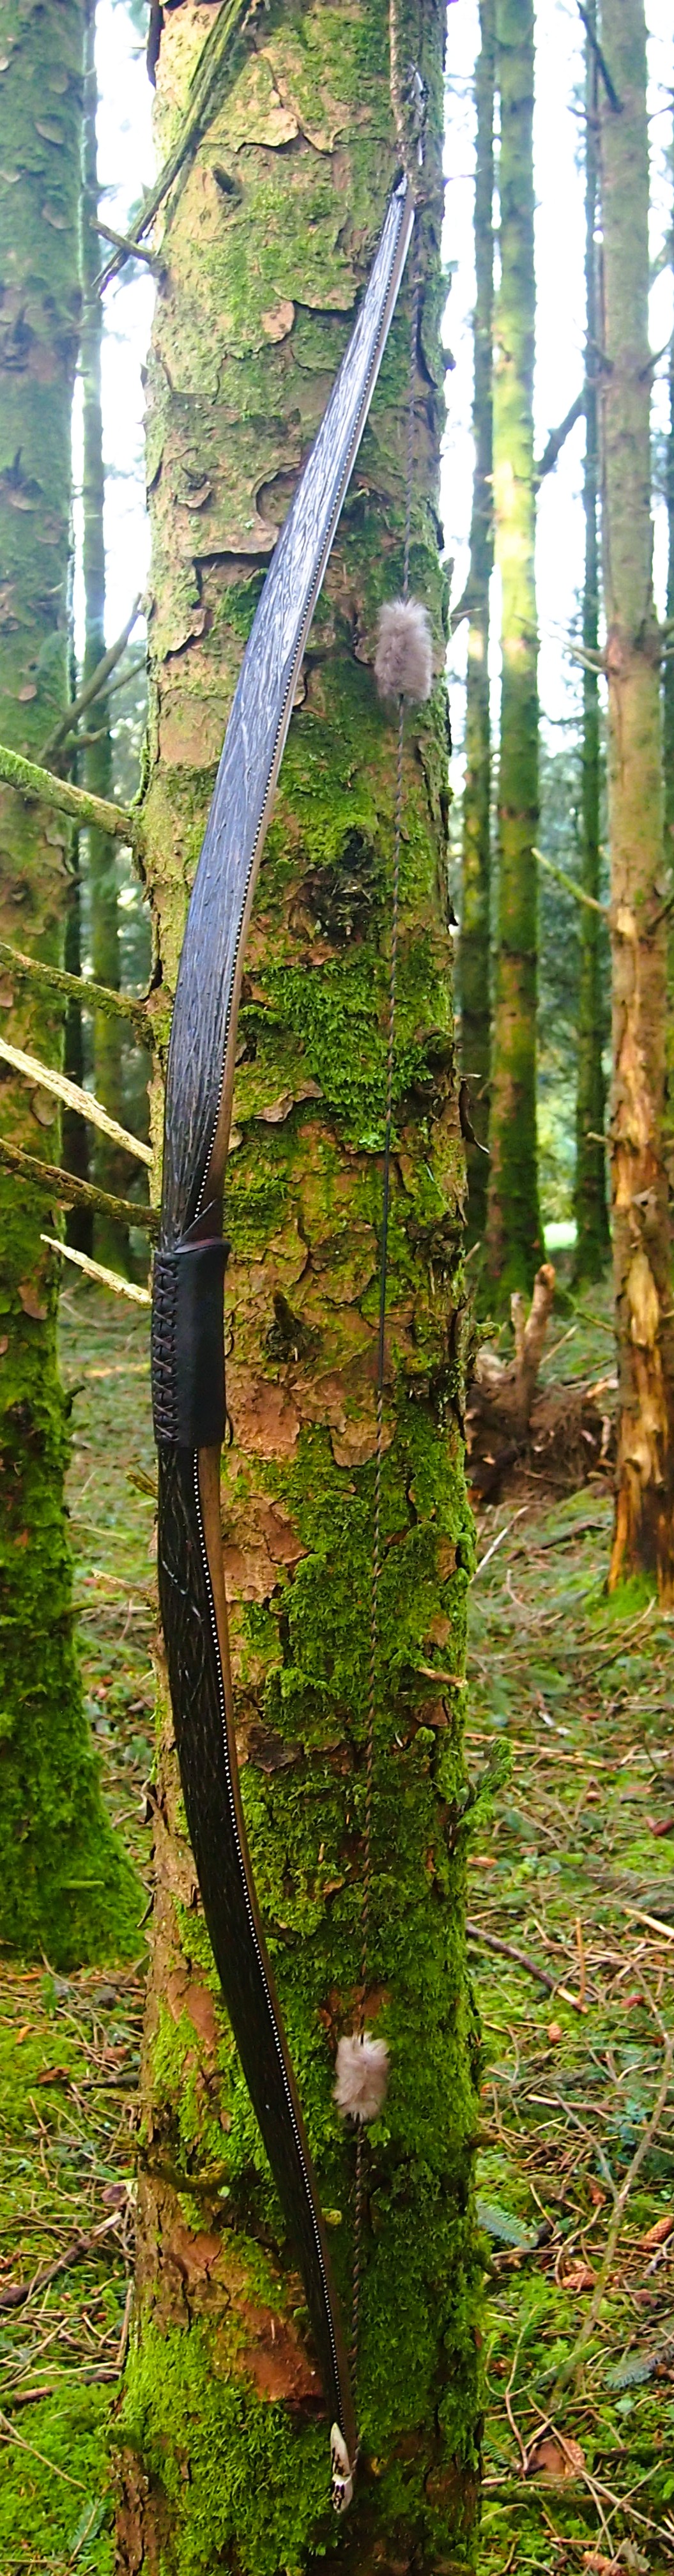
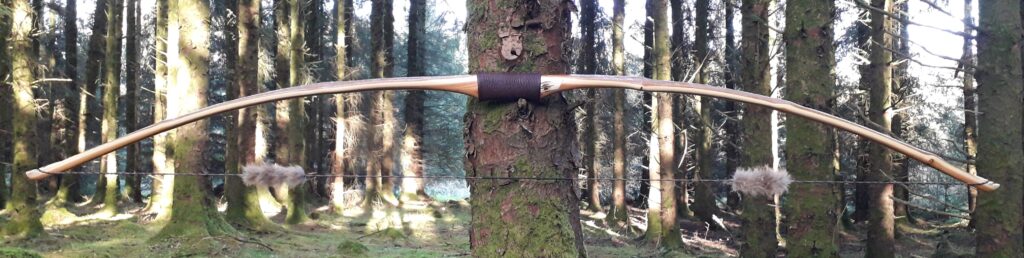
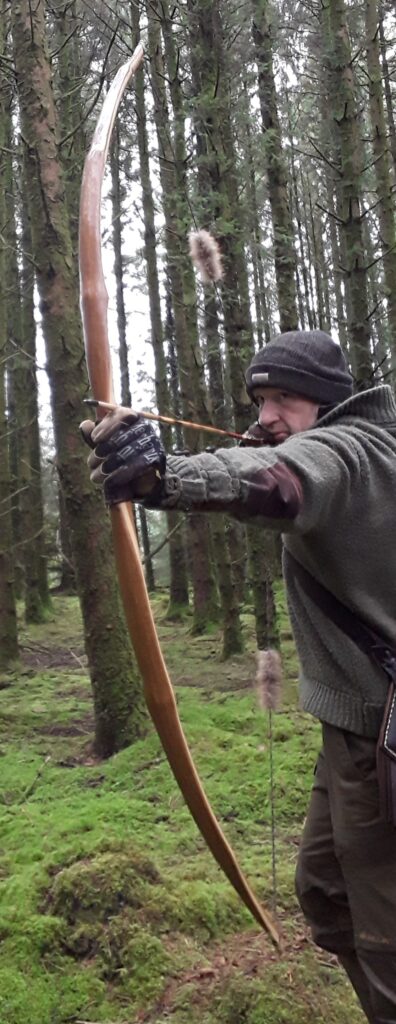
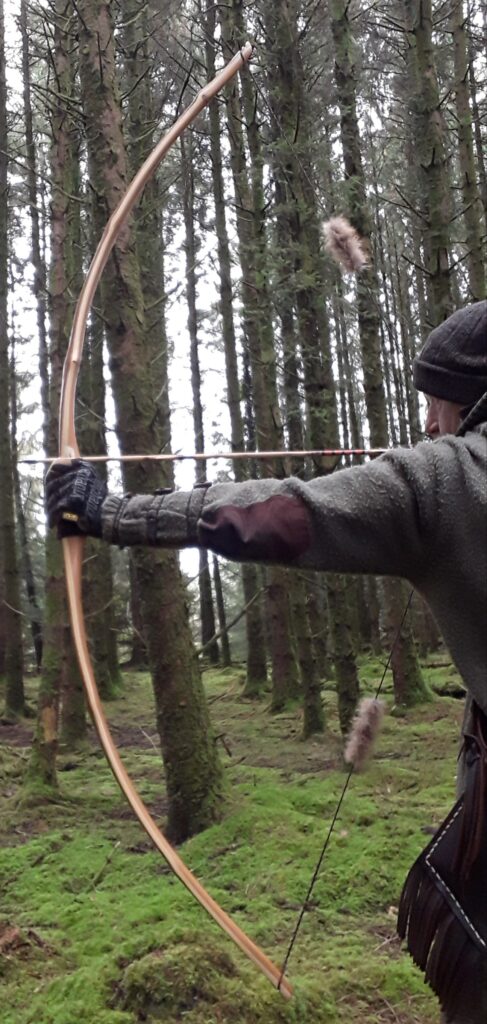
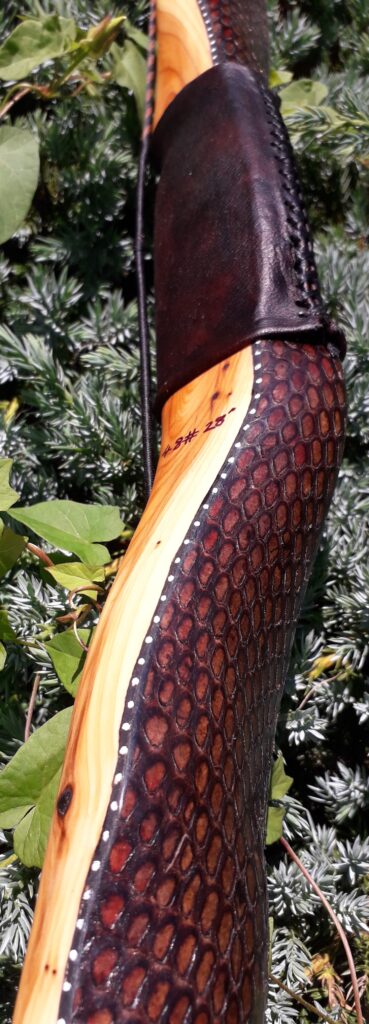
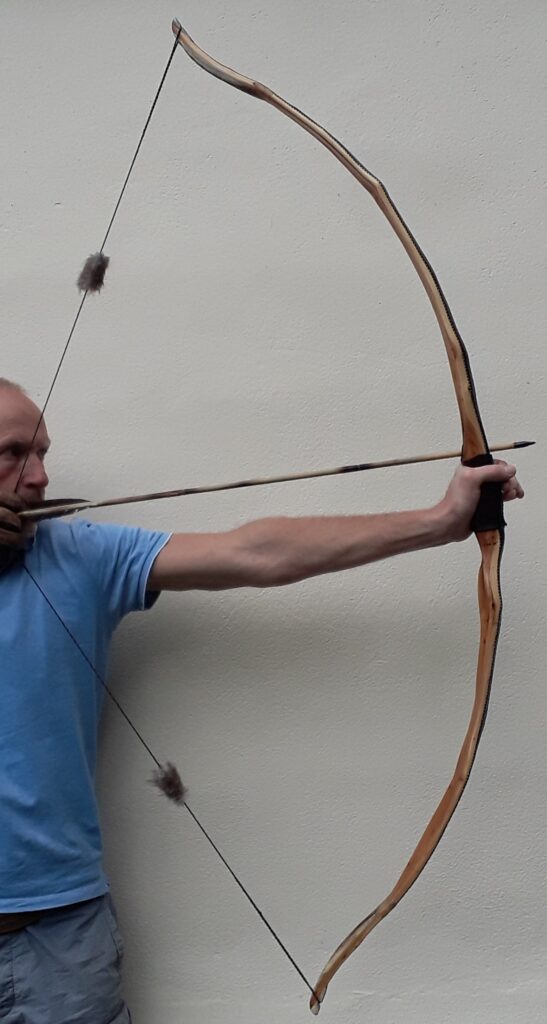
Once fully cured and cleaned up she tillered out to 45lbs at 28”. After tweaks, shooting in and sanding she finished up at 42Lb at 28”. She’s been a cracker to shoot and I had great fun putting a couple hundred arrows through her on my stump shooting forays. She’s sending 400 grain arrows over the chrono at 145fps at my draw length of 26” so I’m guessing at 28” she’ll be pushing 150+fps. She doesn’t stack and she doesn’t kick so she’s a real pleasure to shoot.
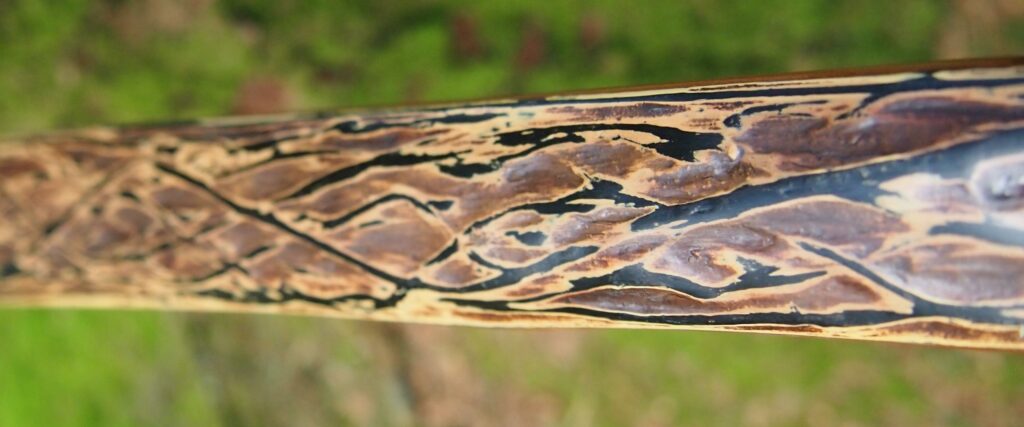
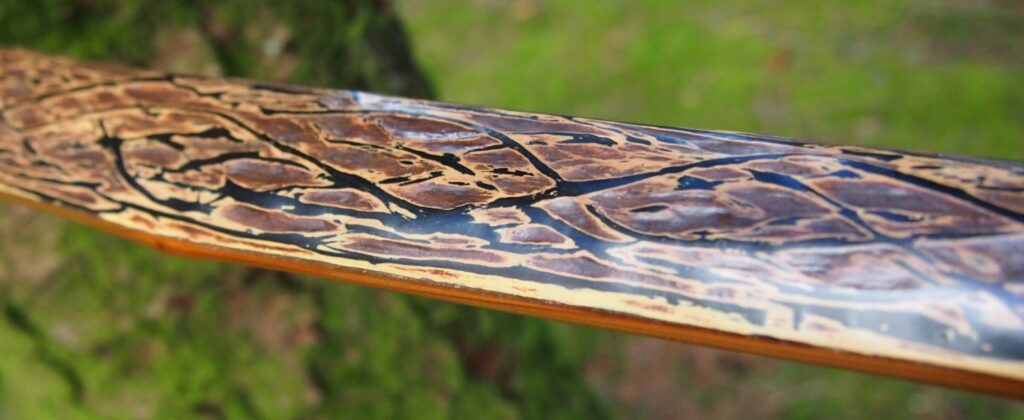
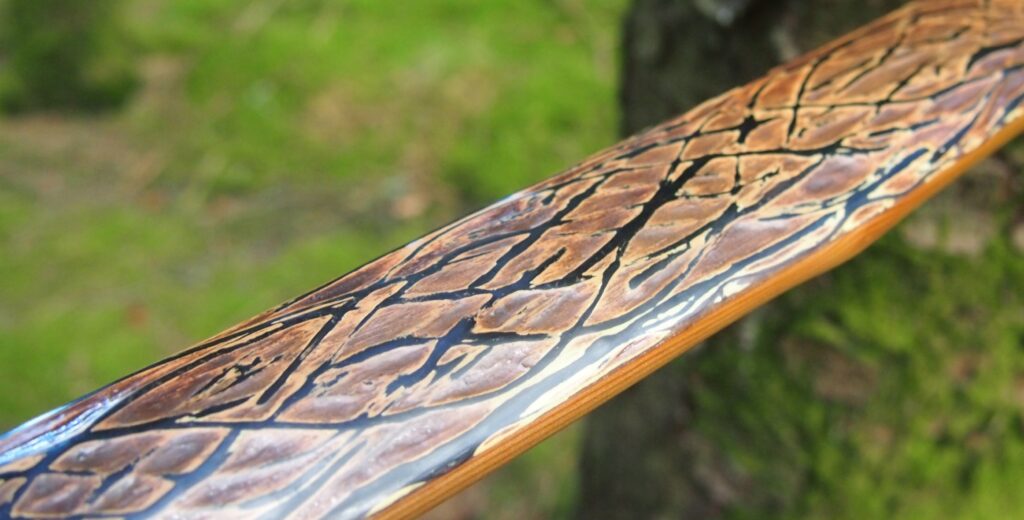
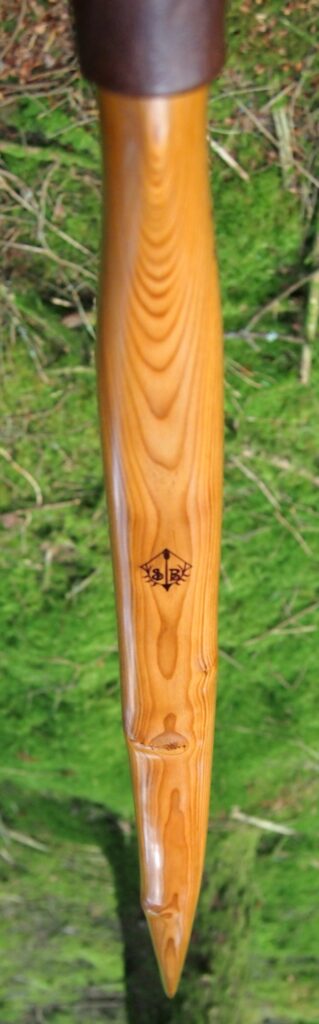
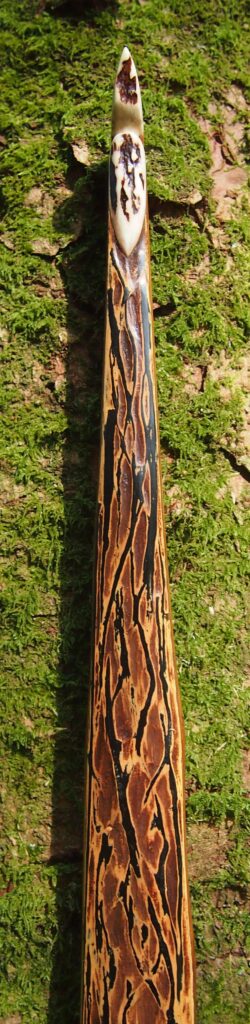
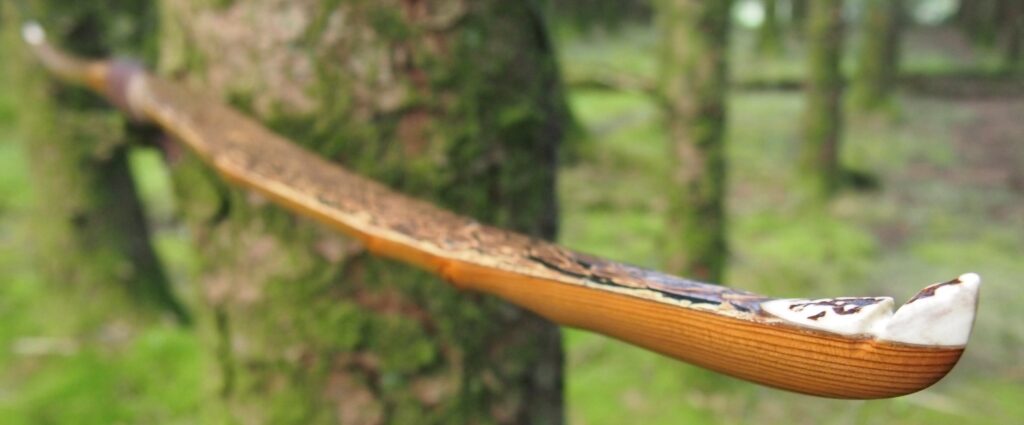
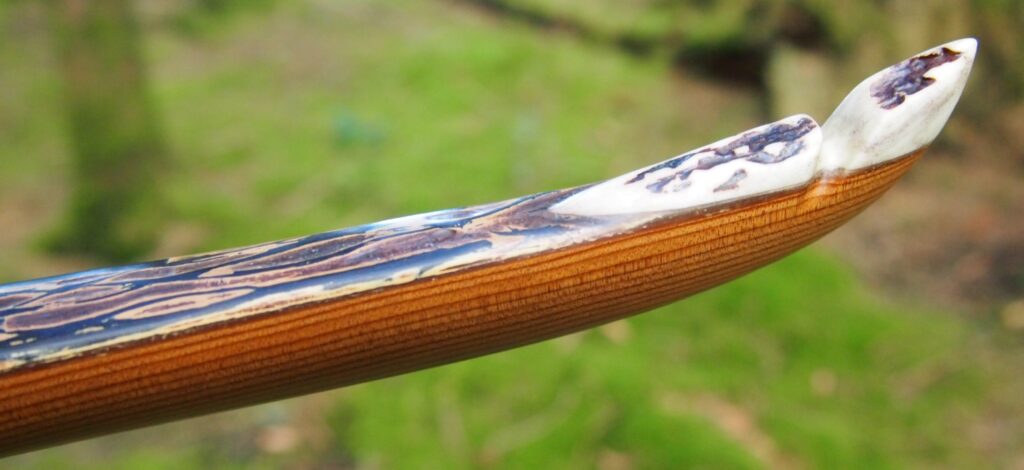
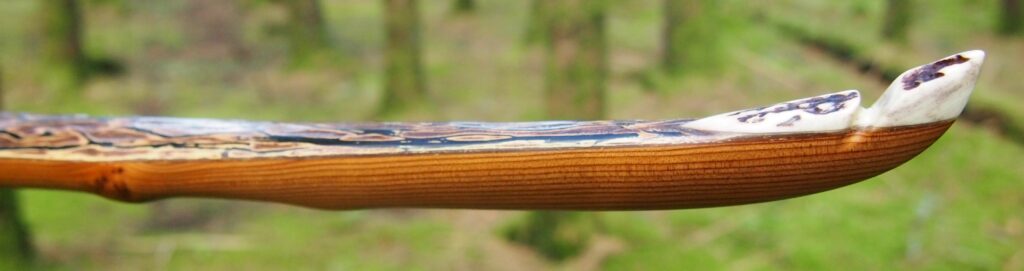
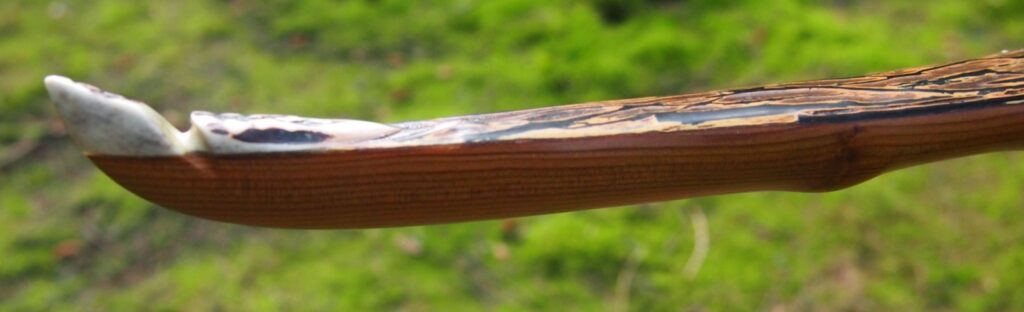
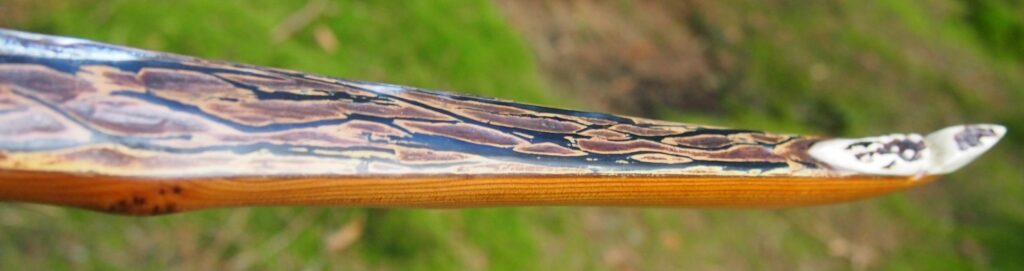
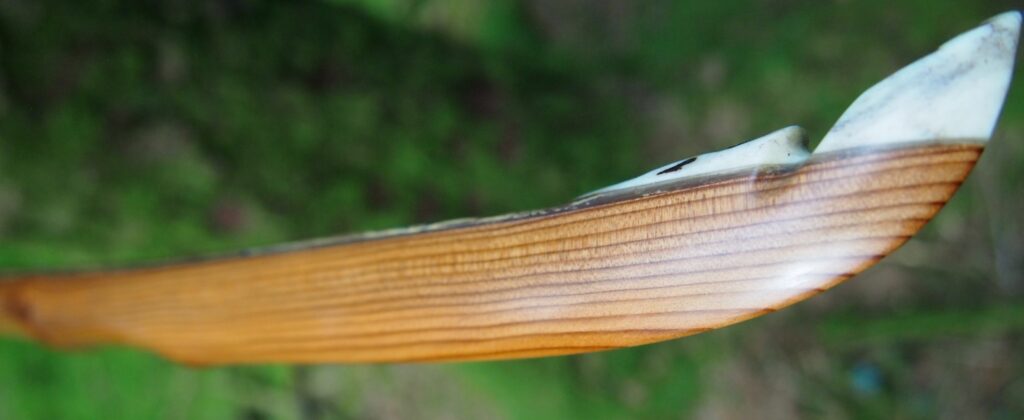
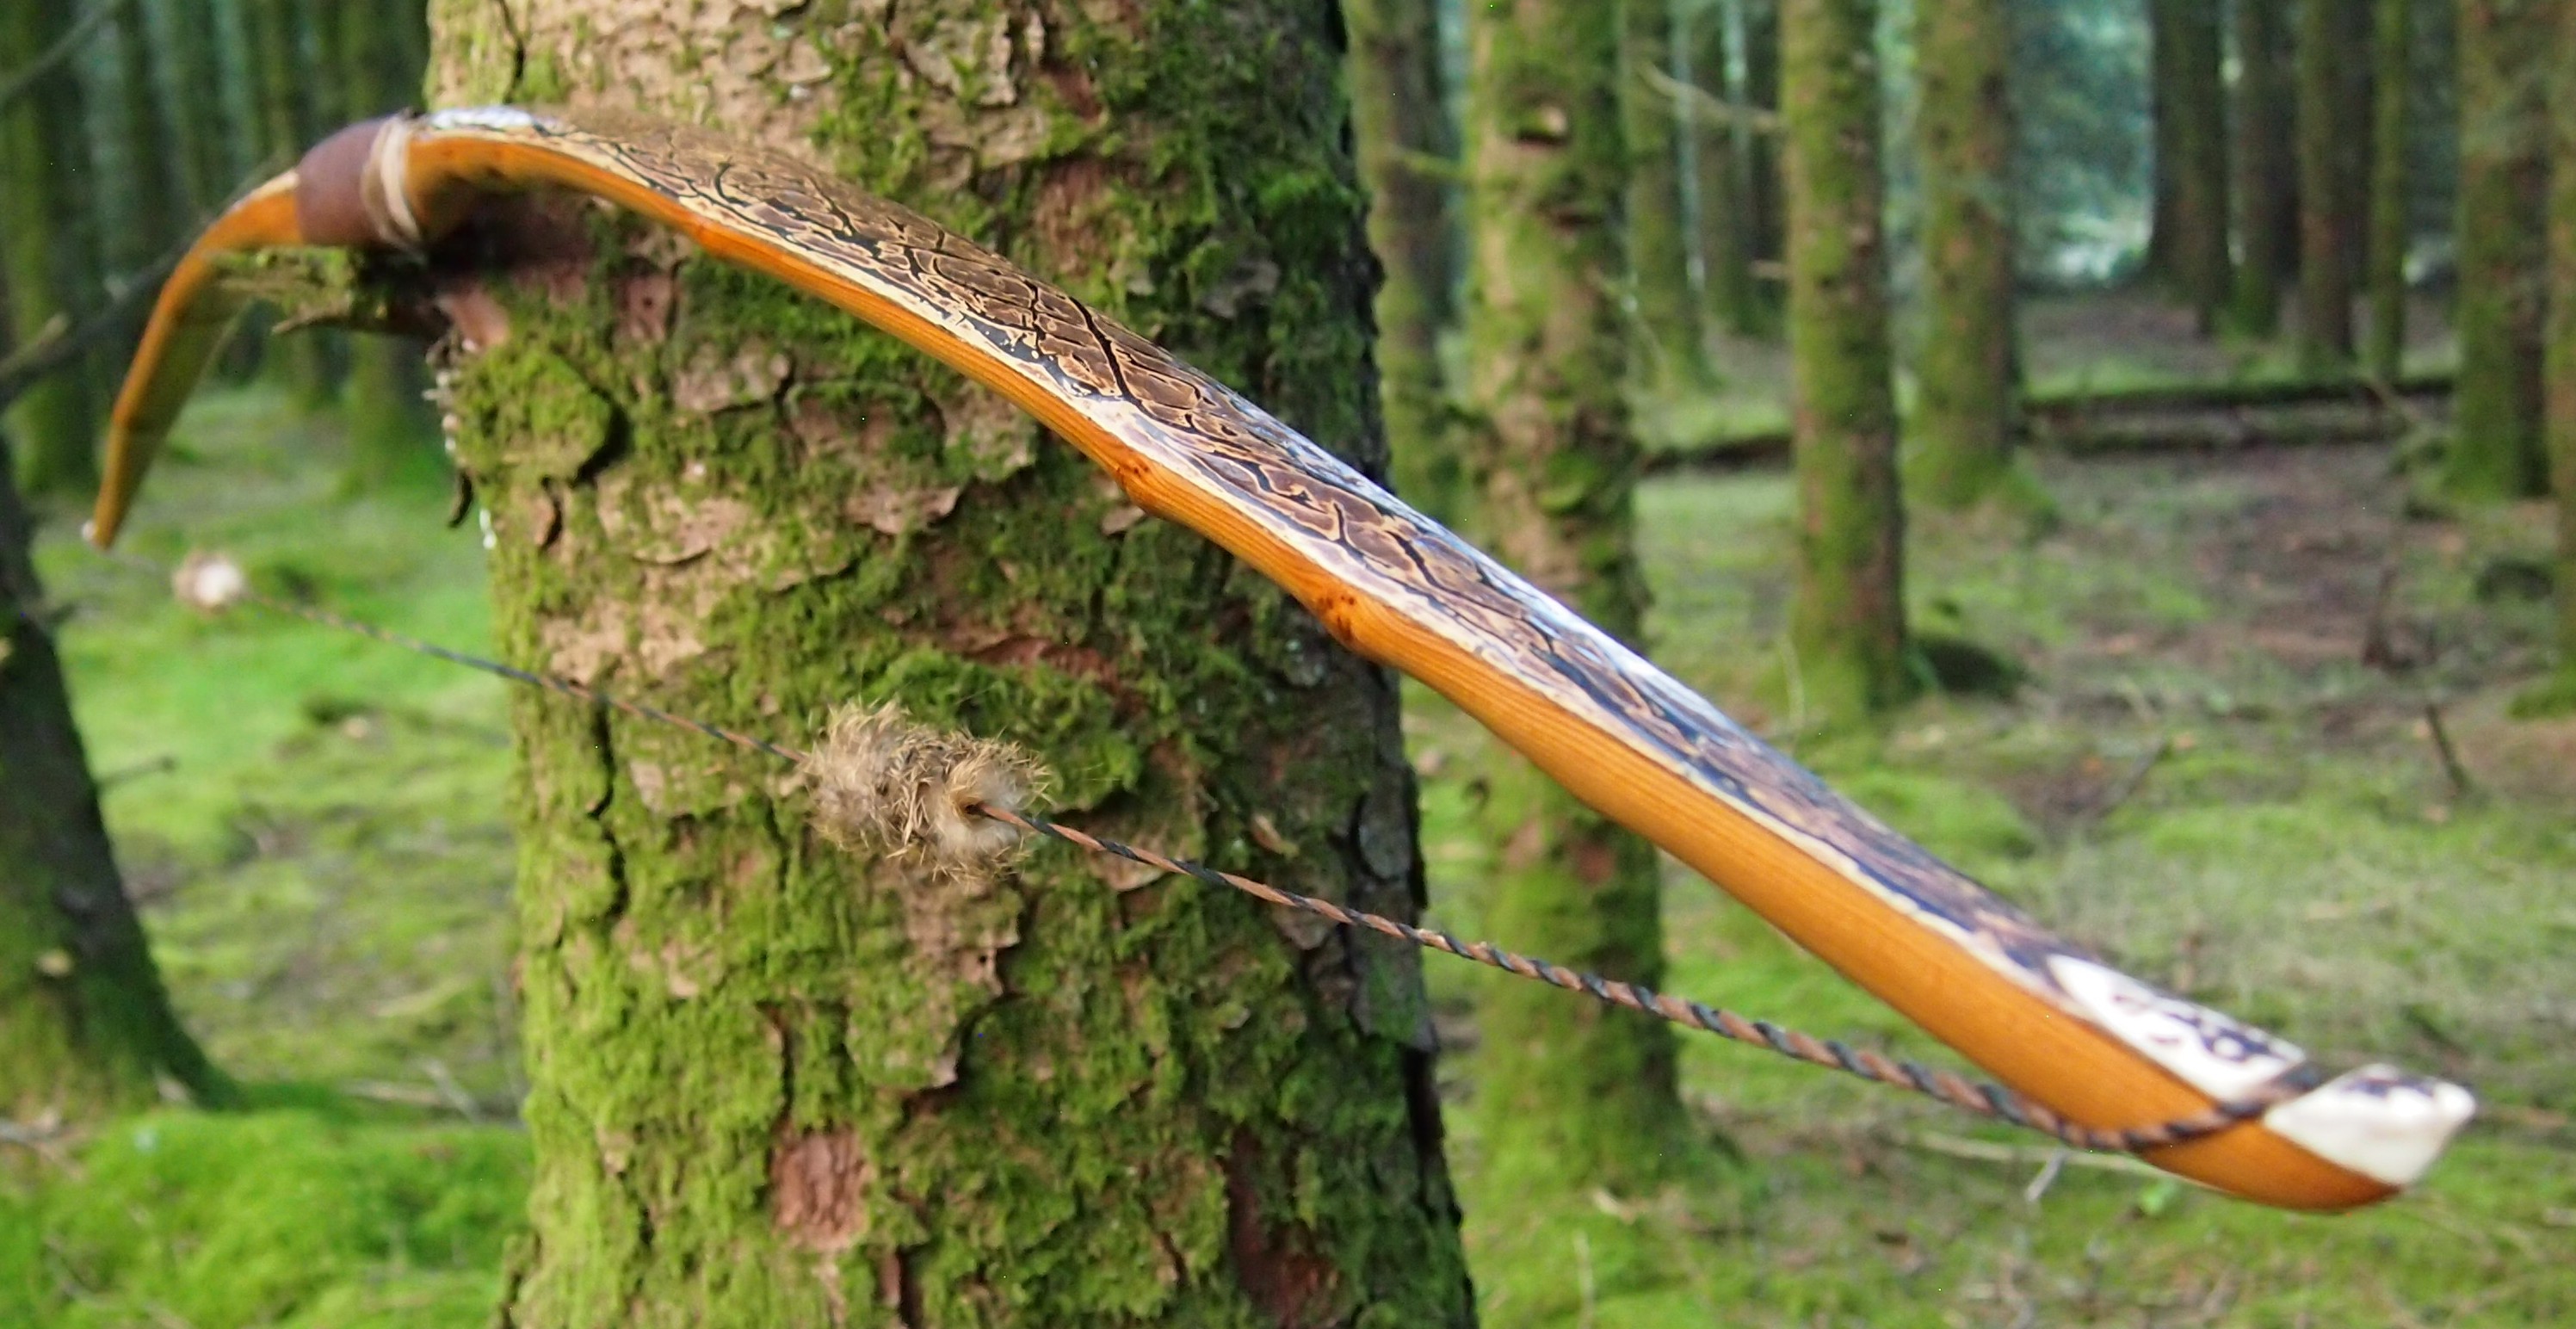
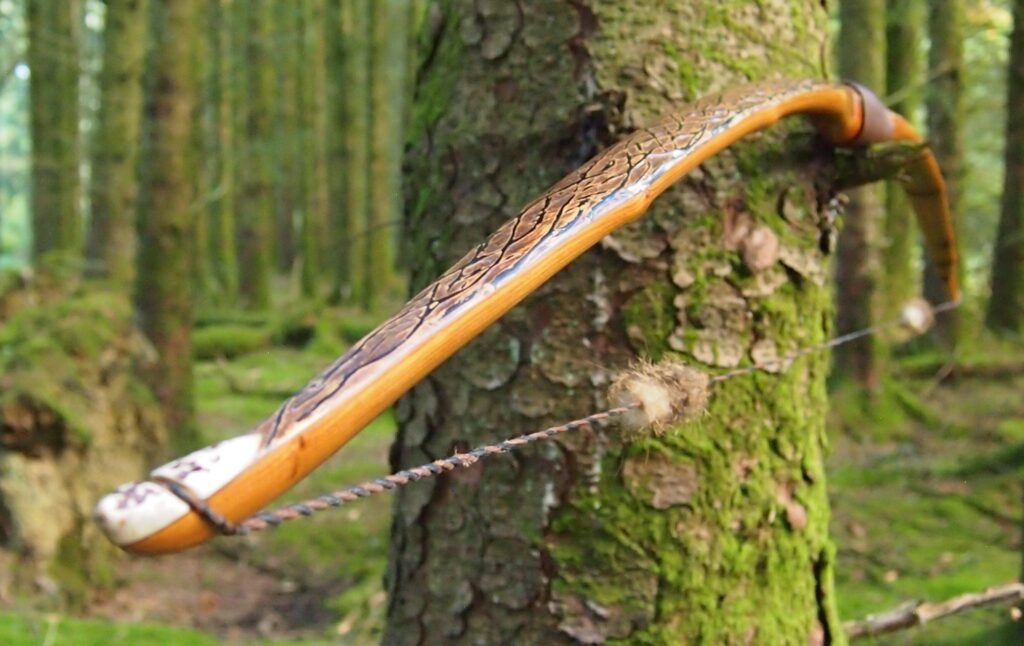
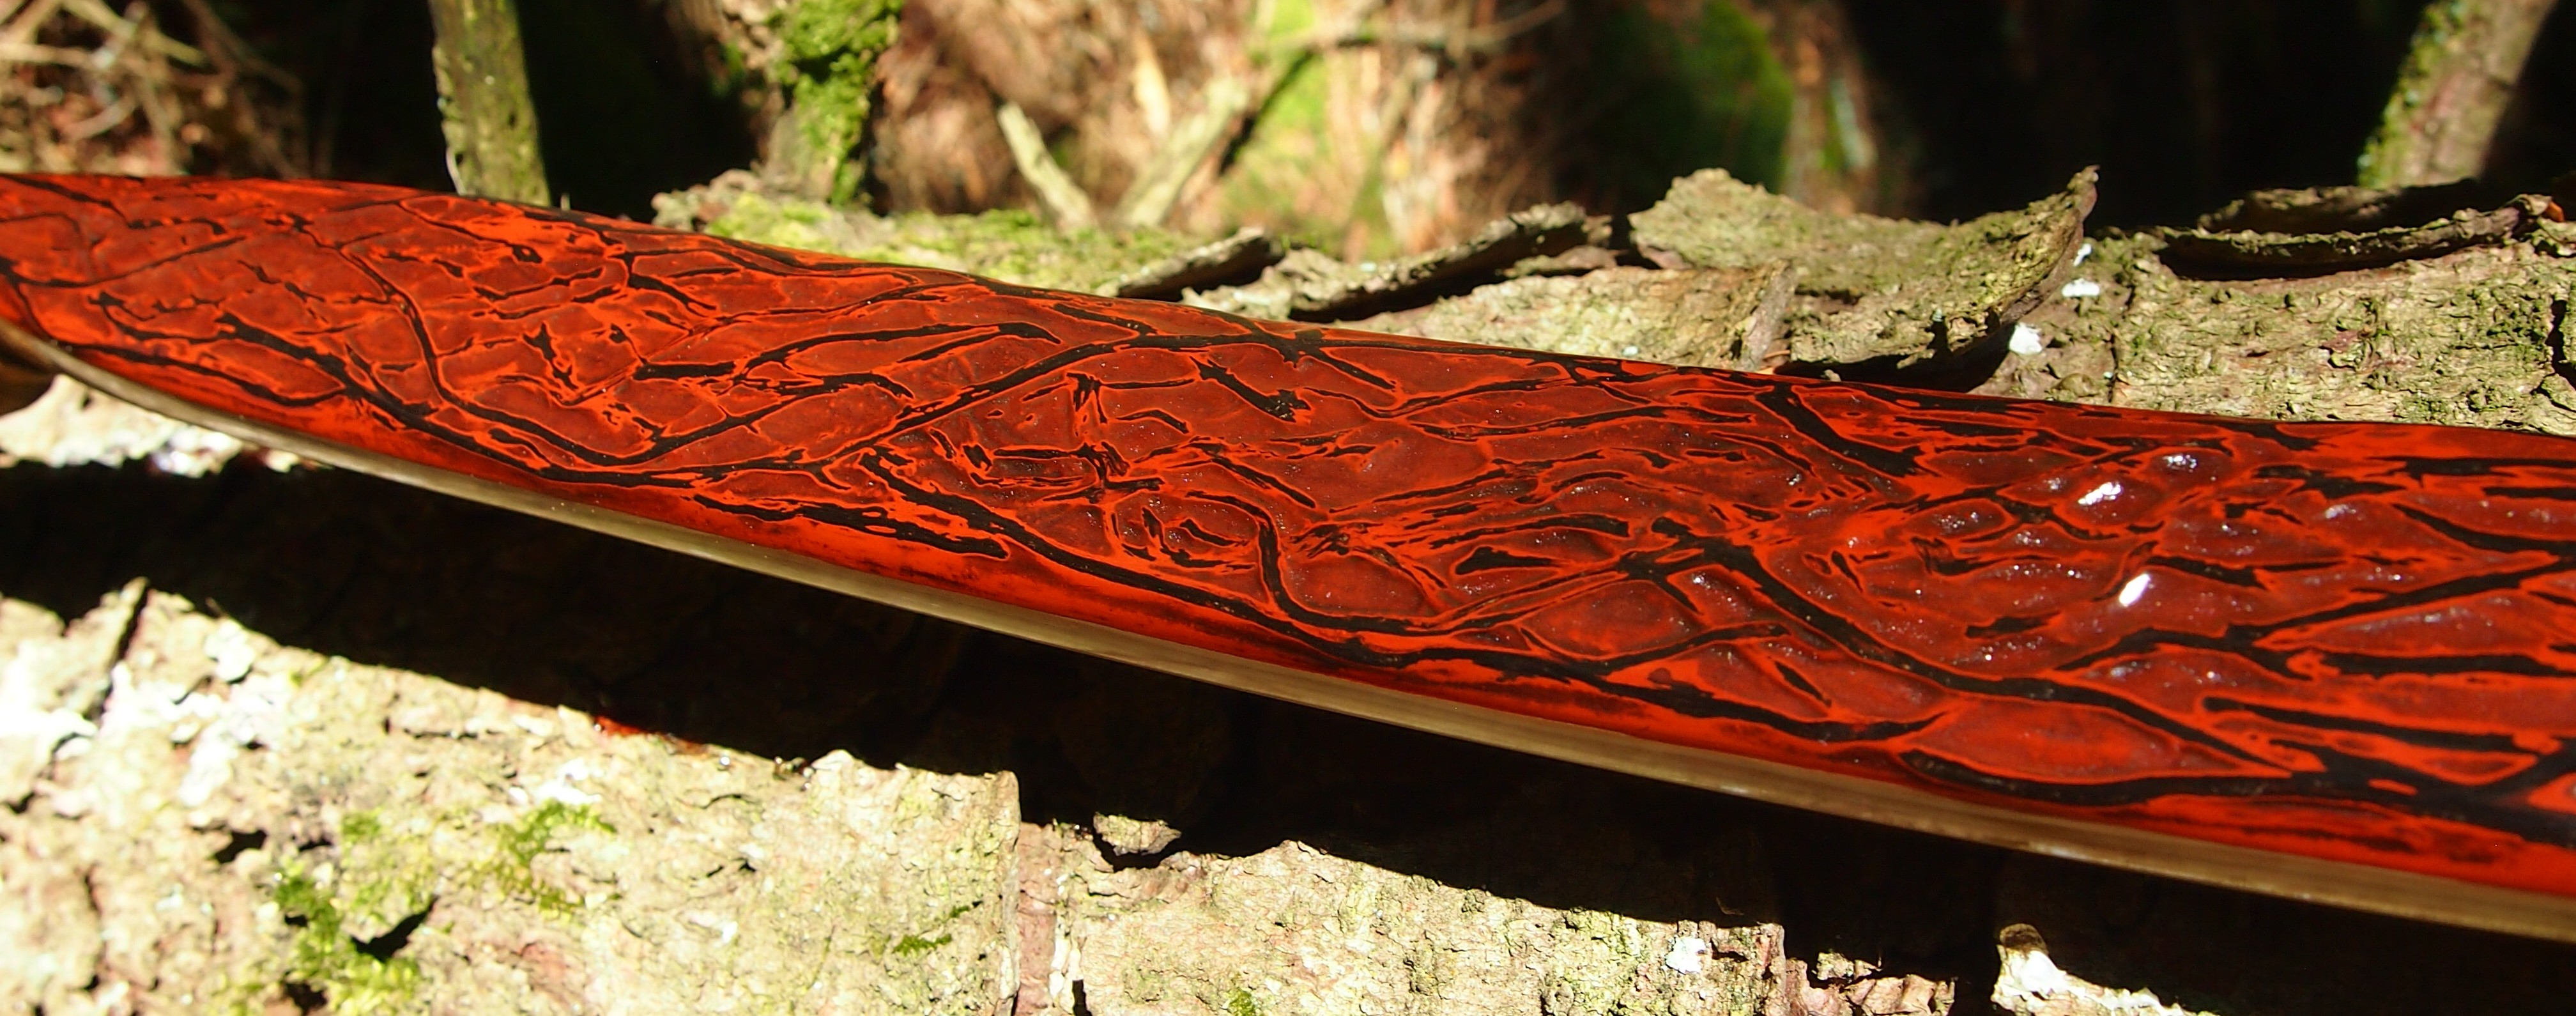
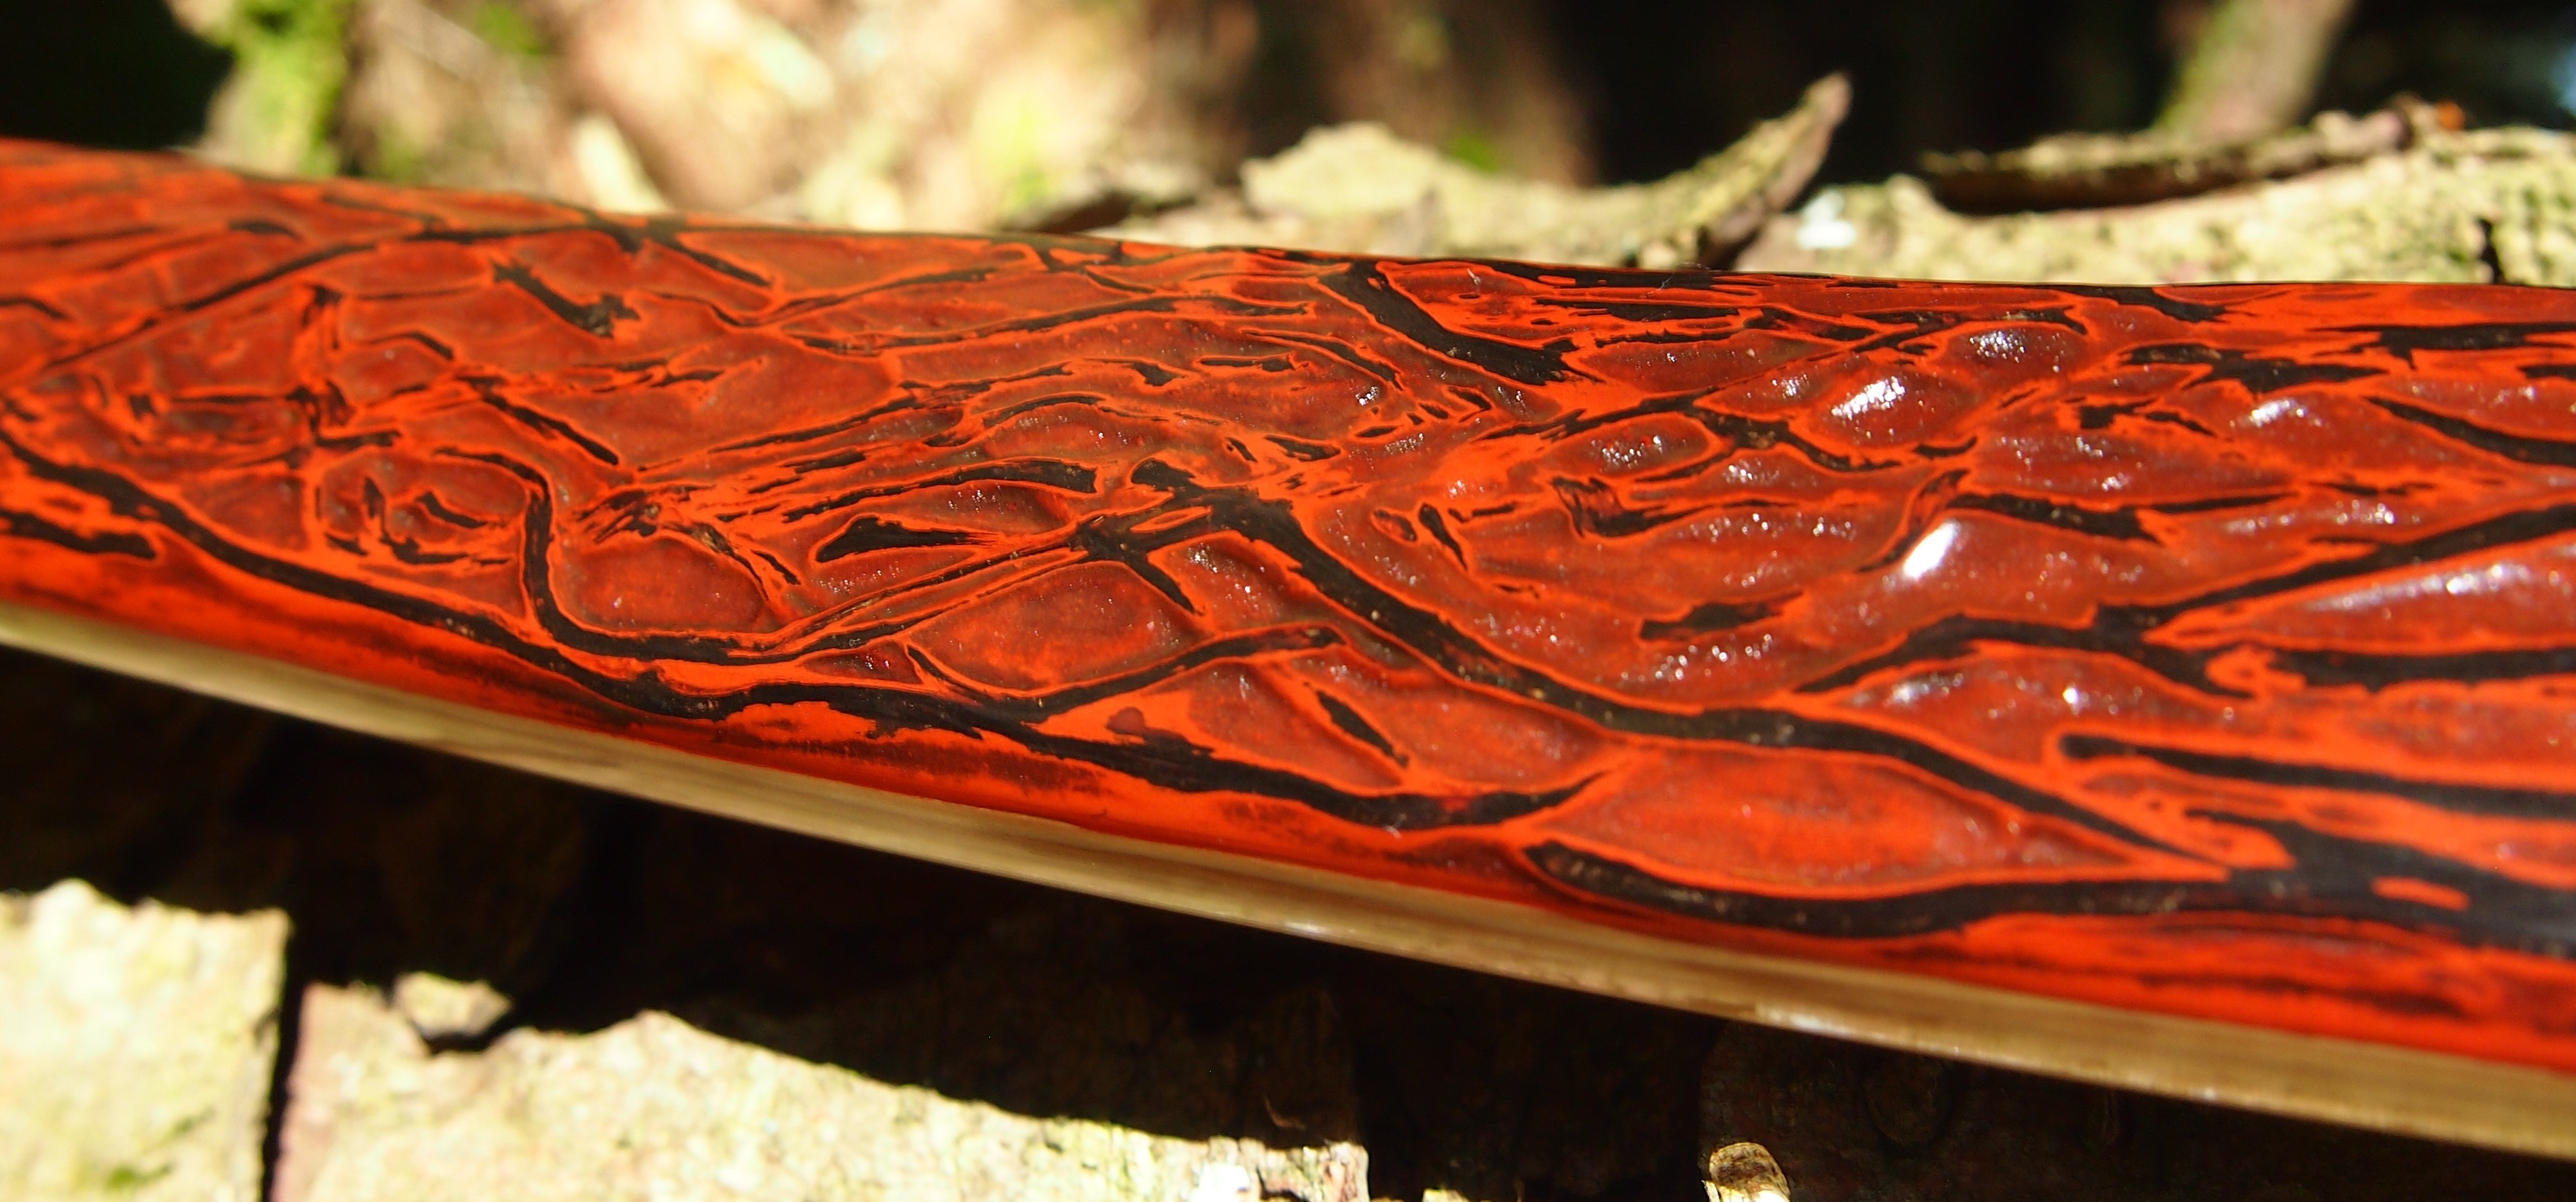
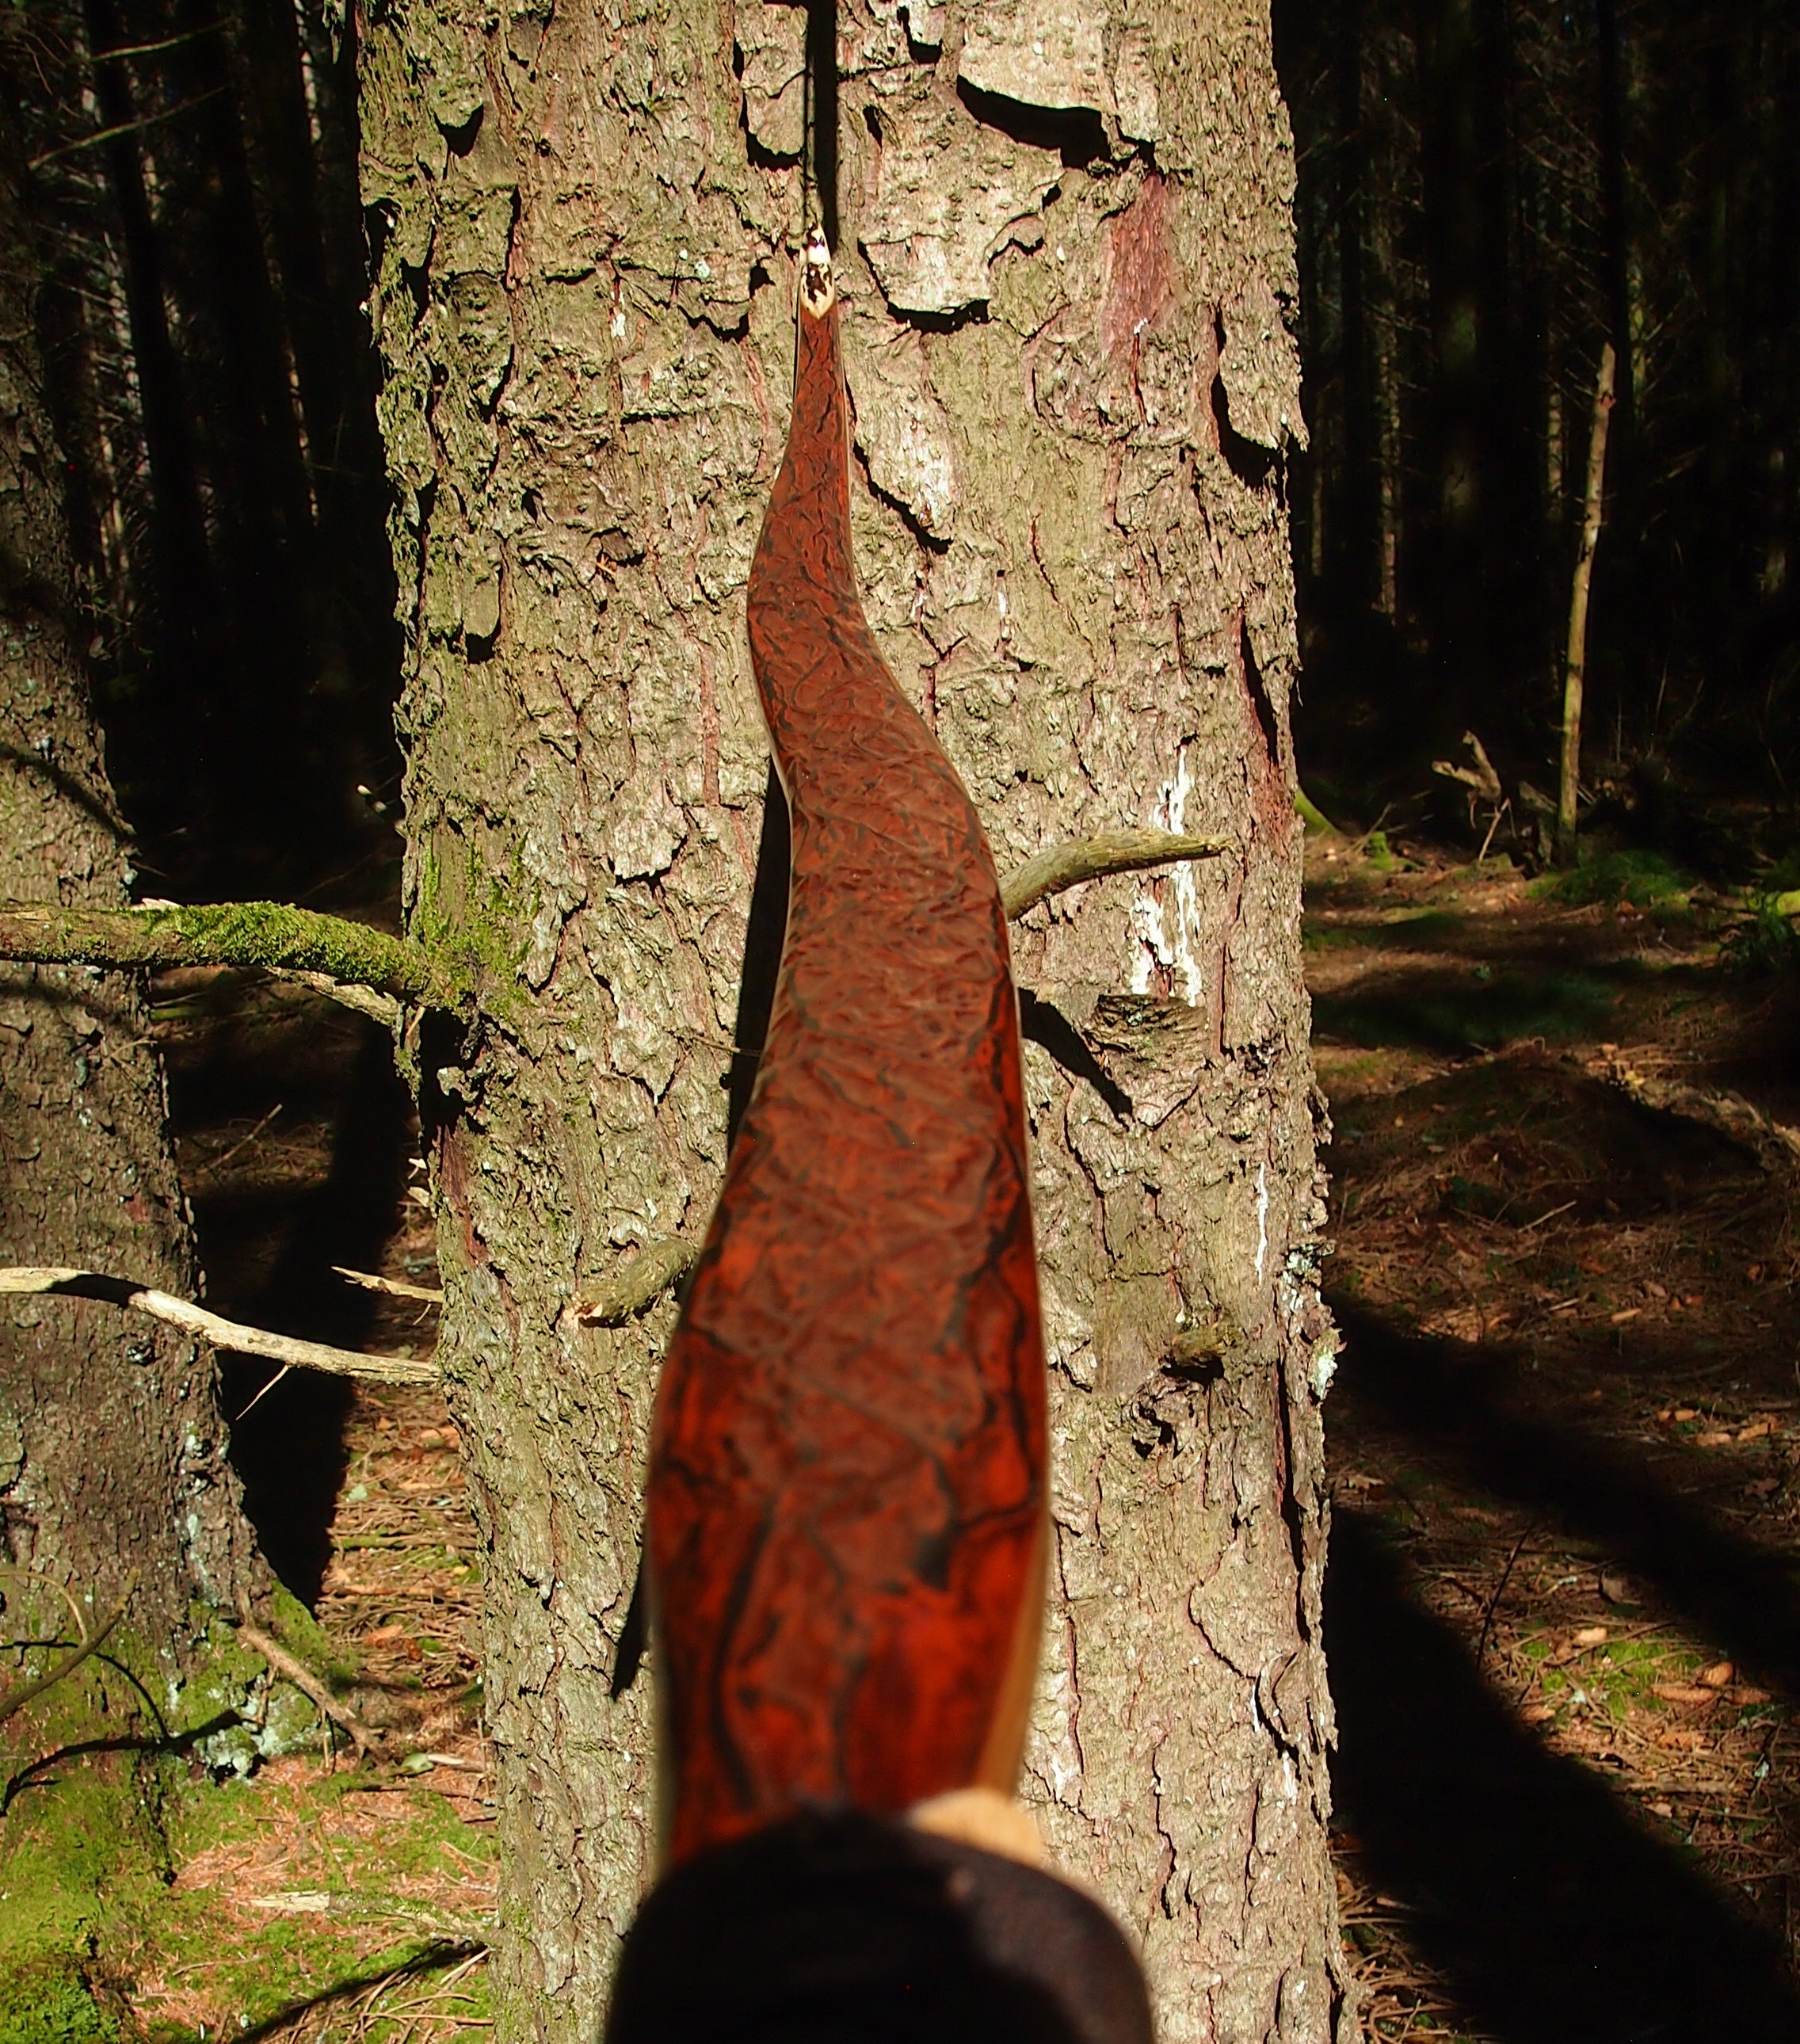
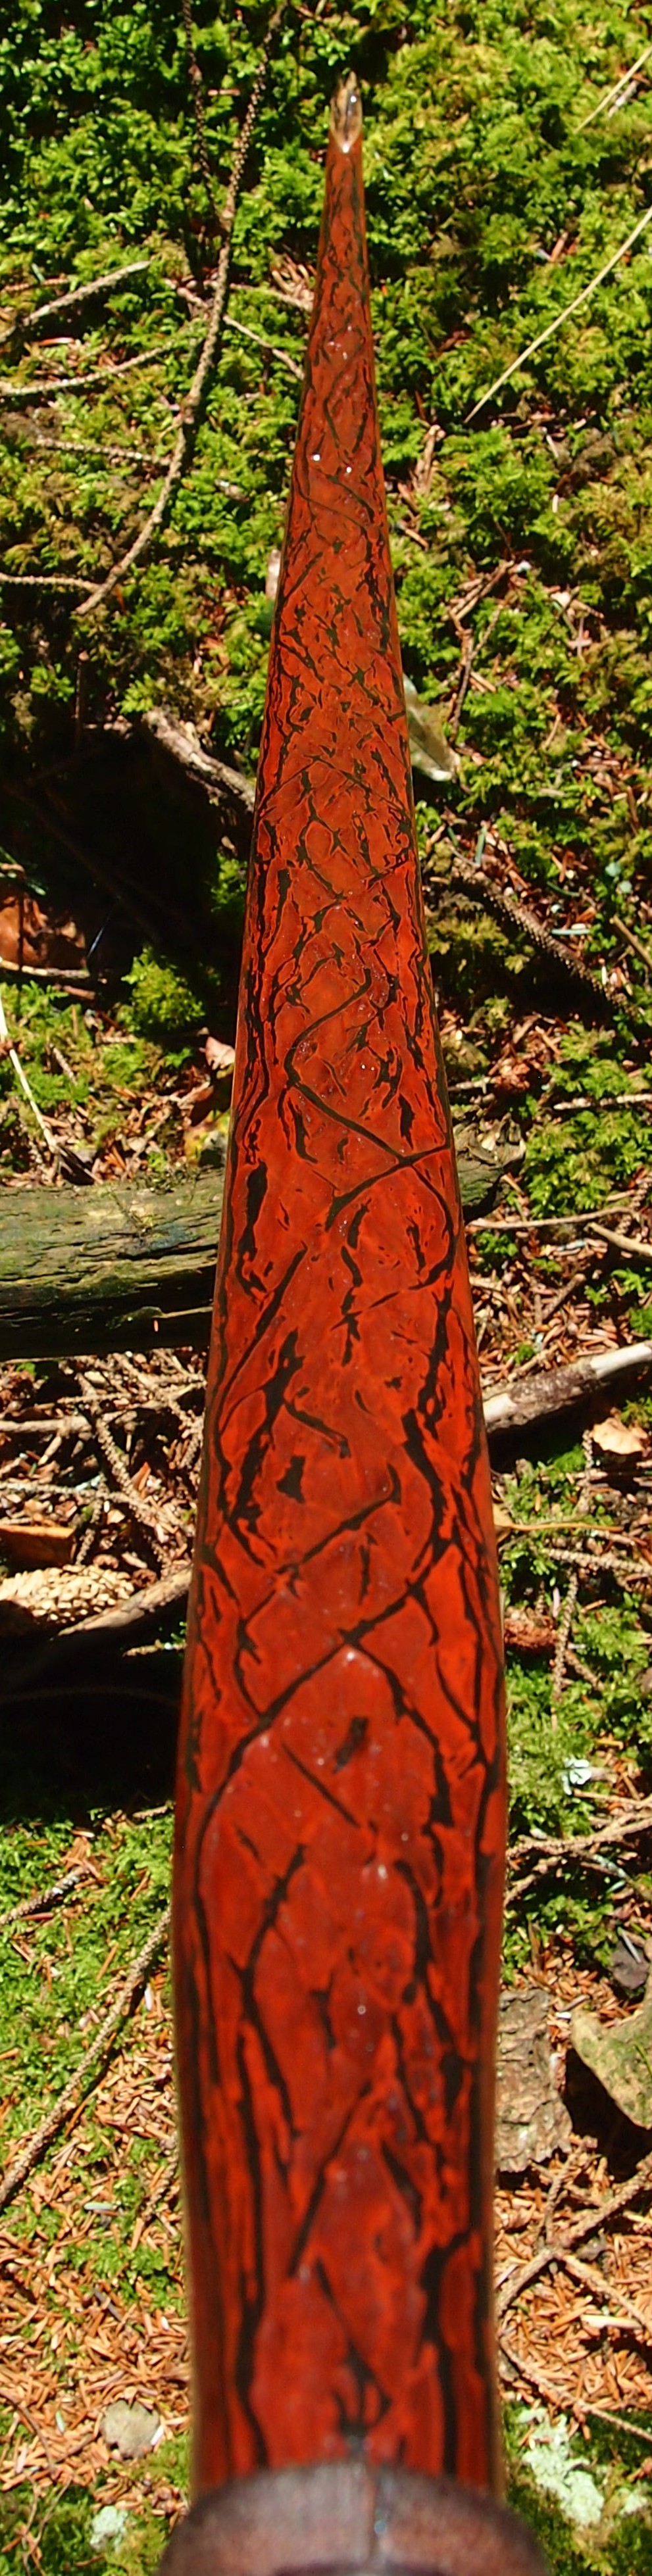
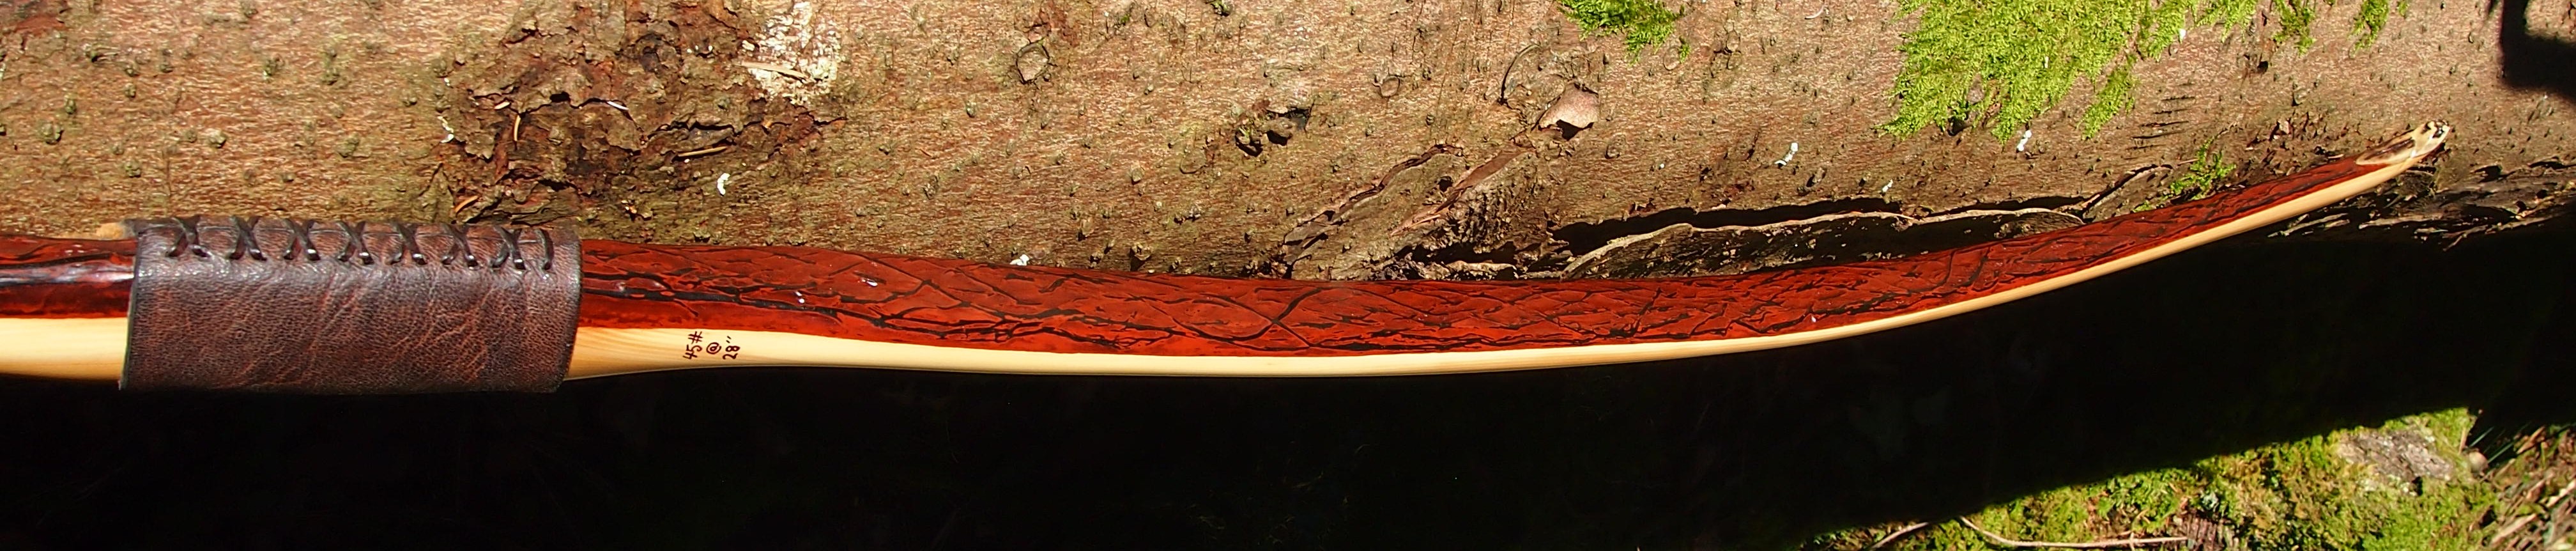
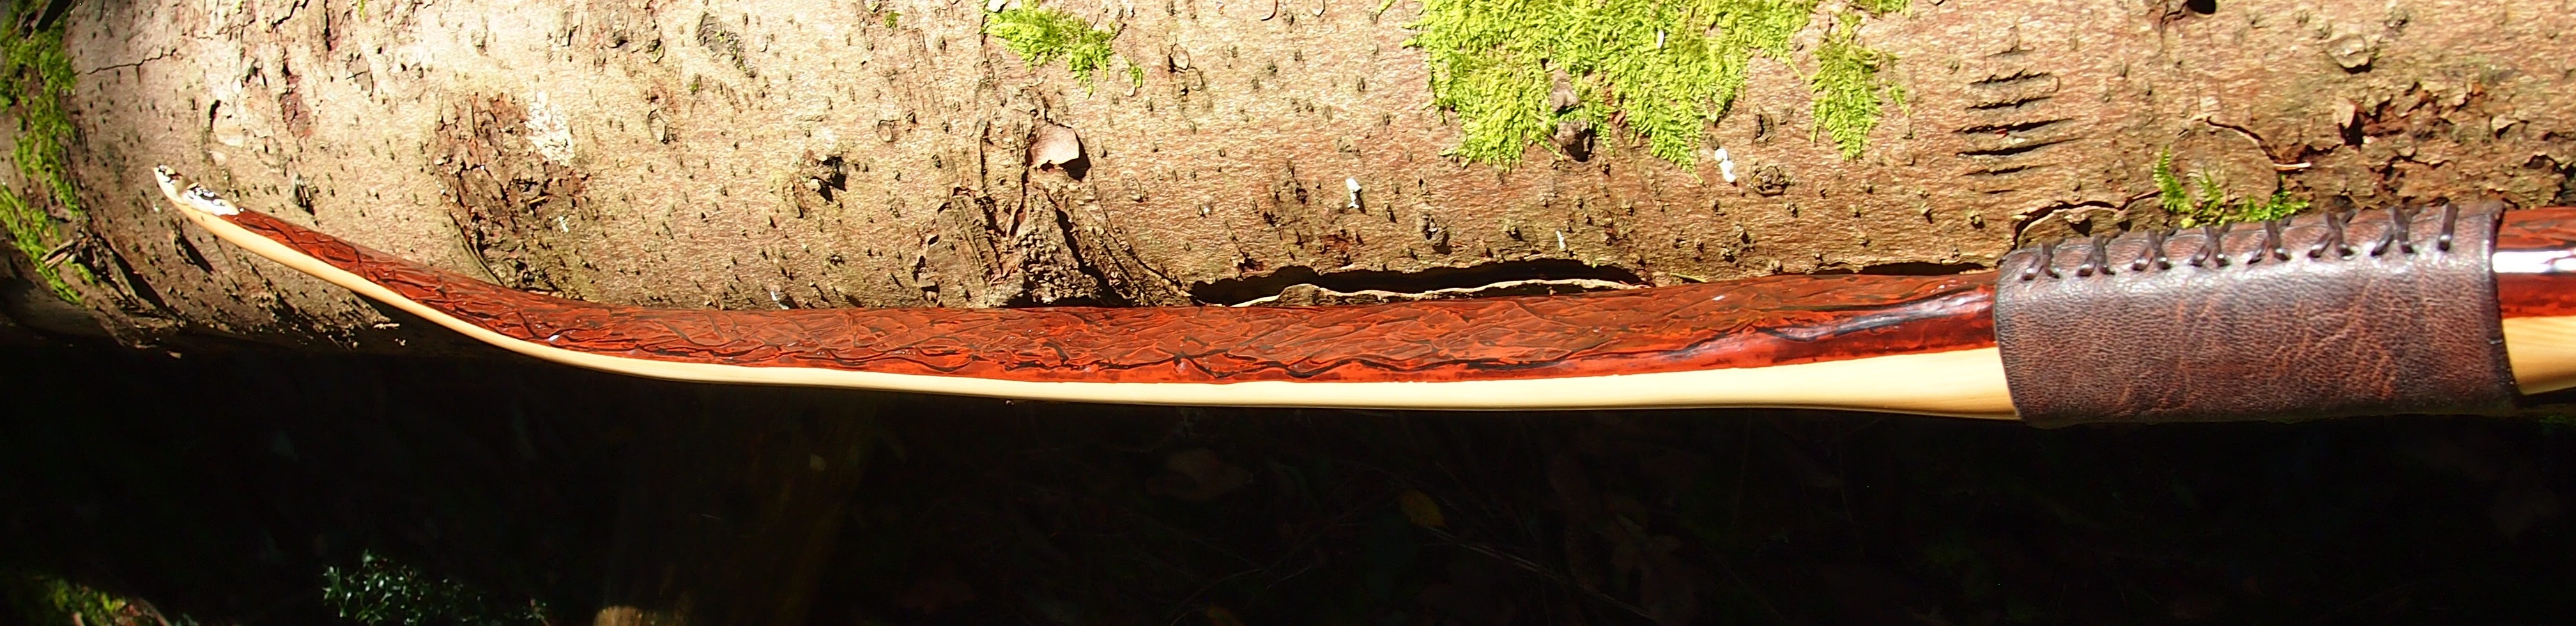
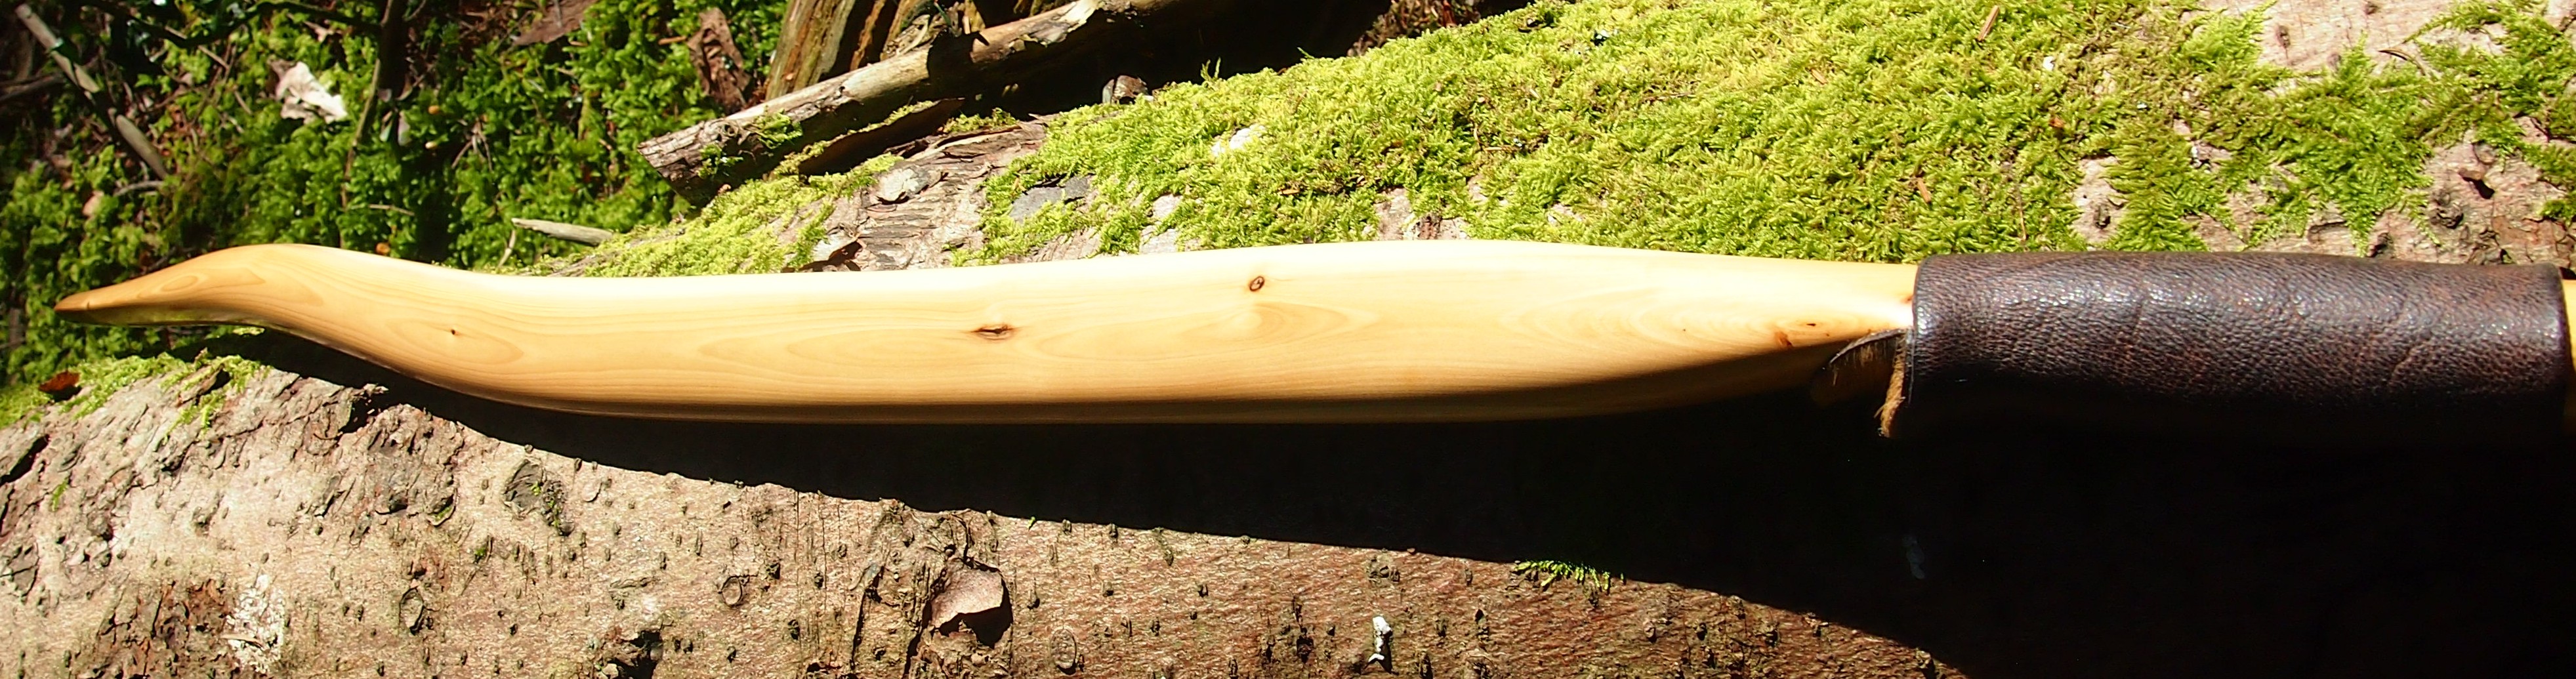
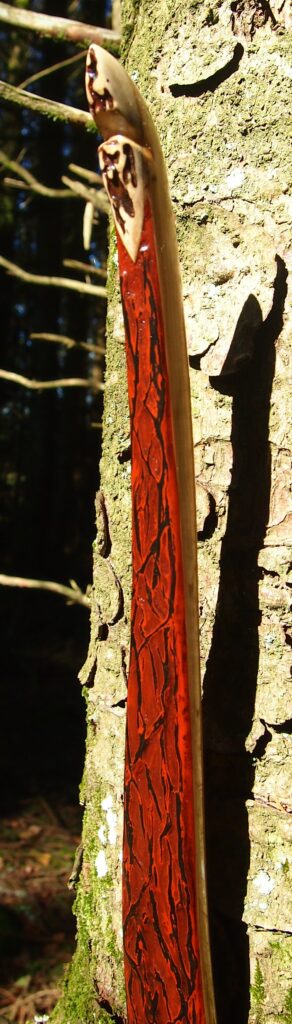
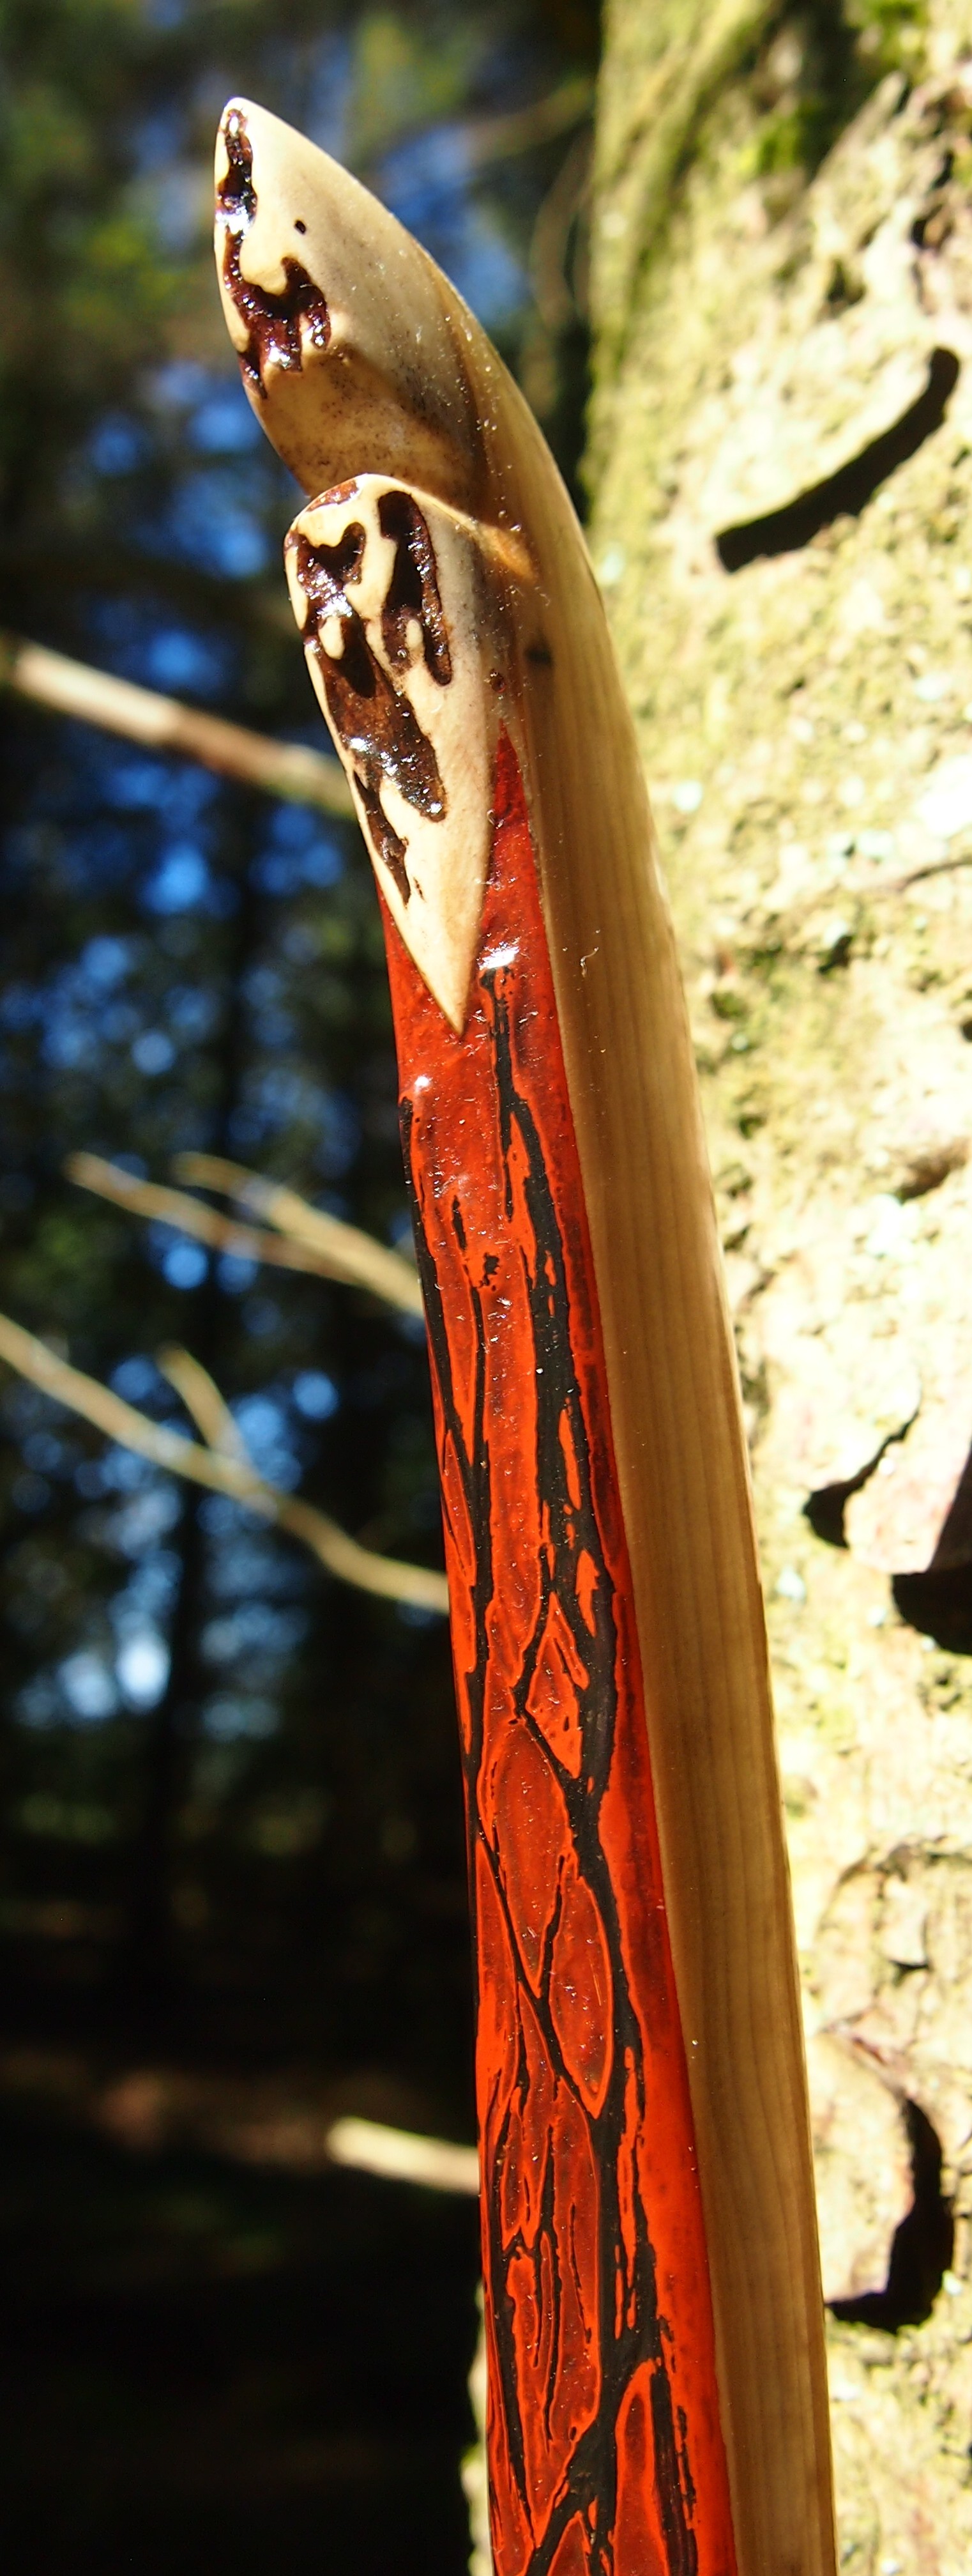
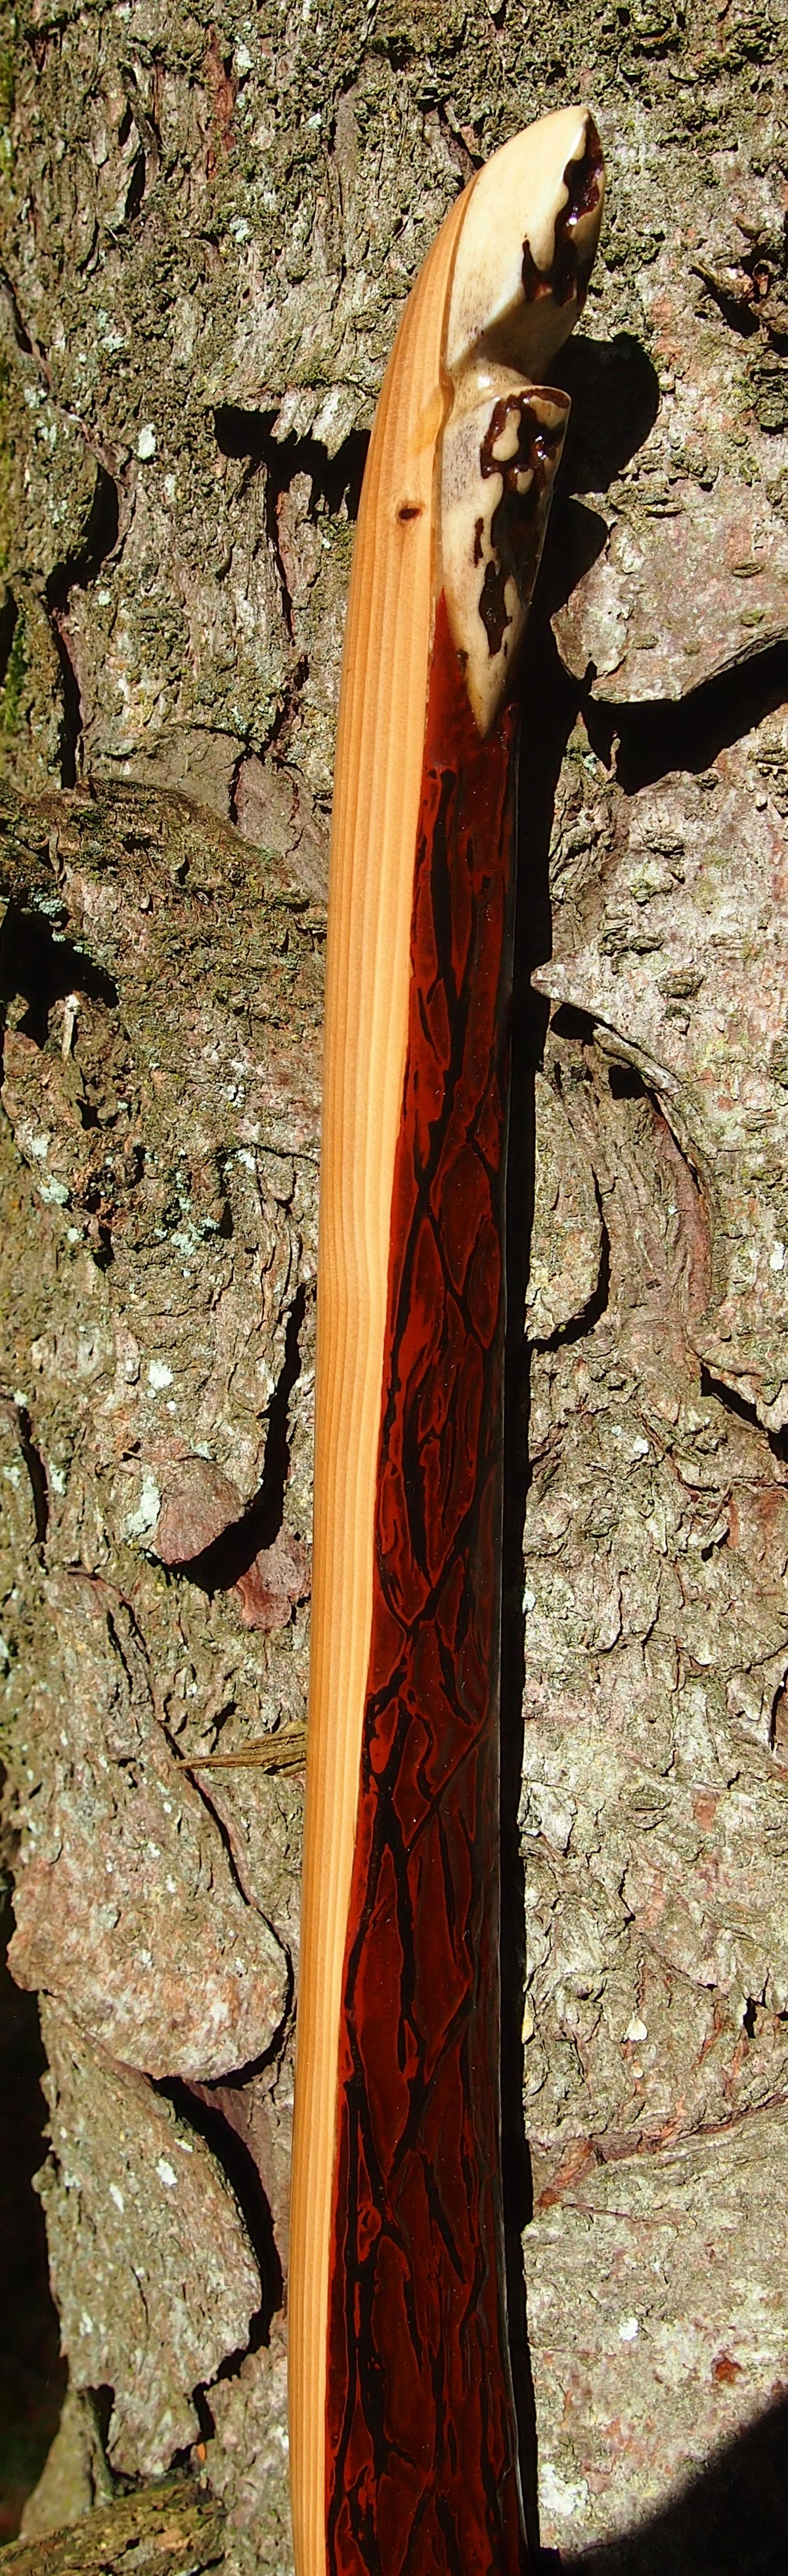
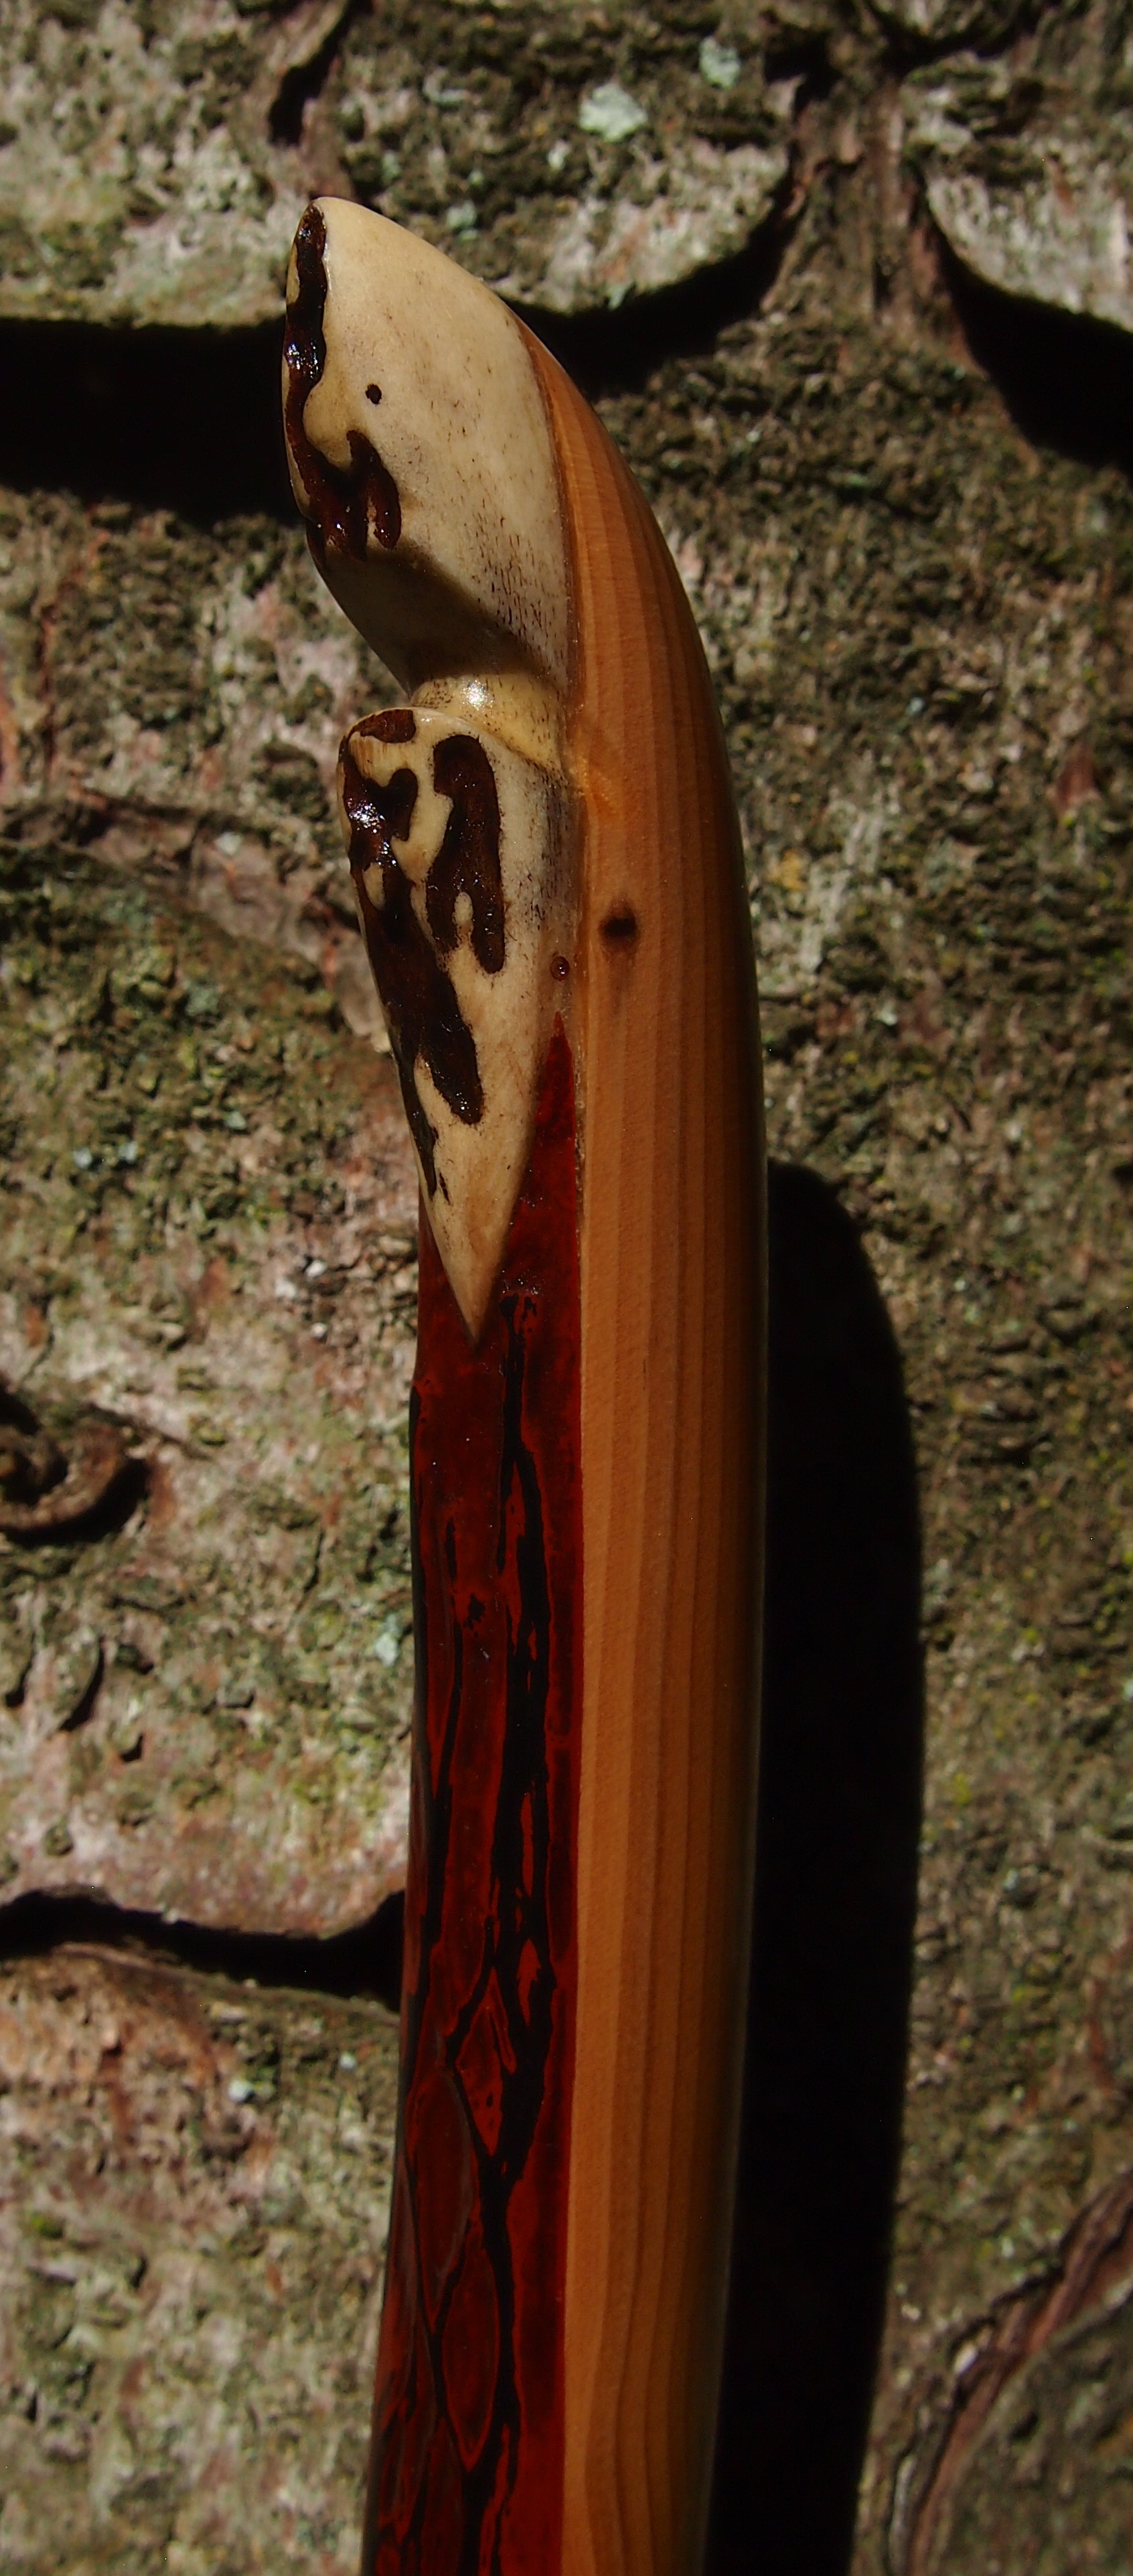
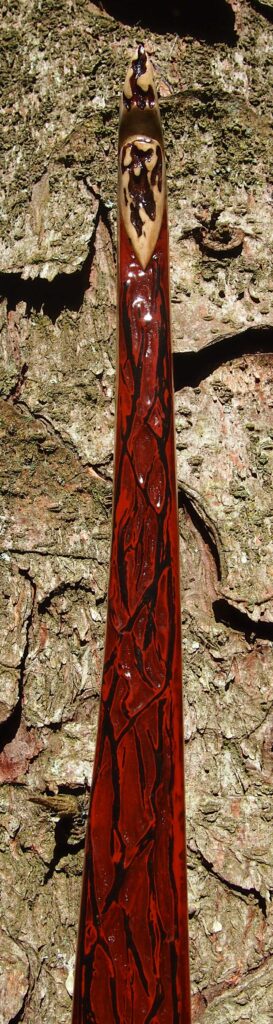
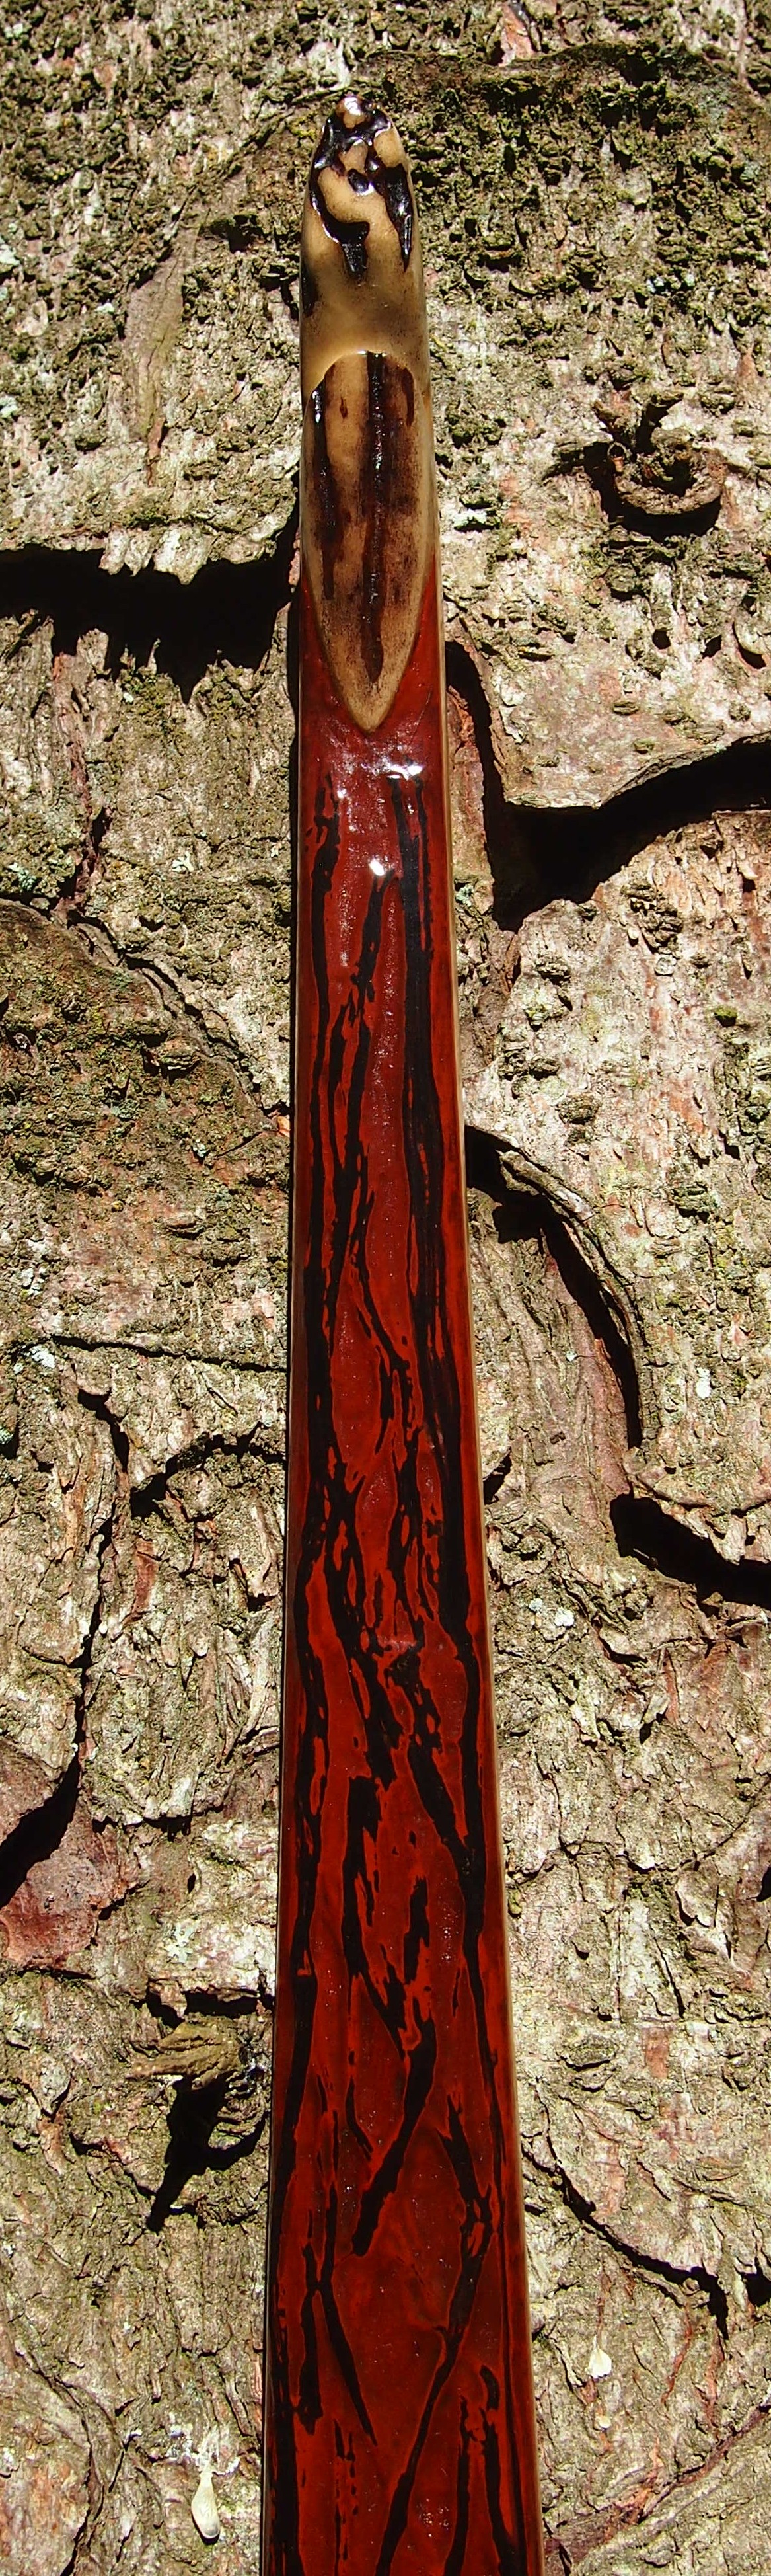
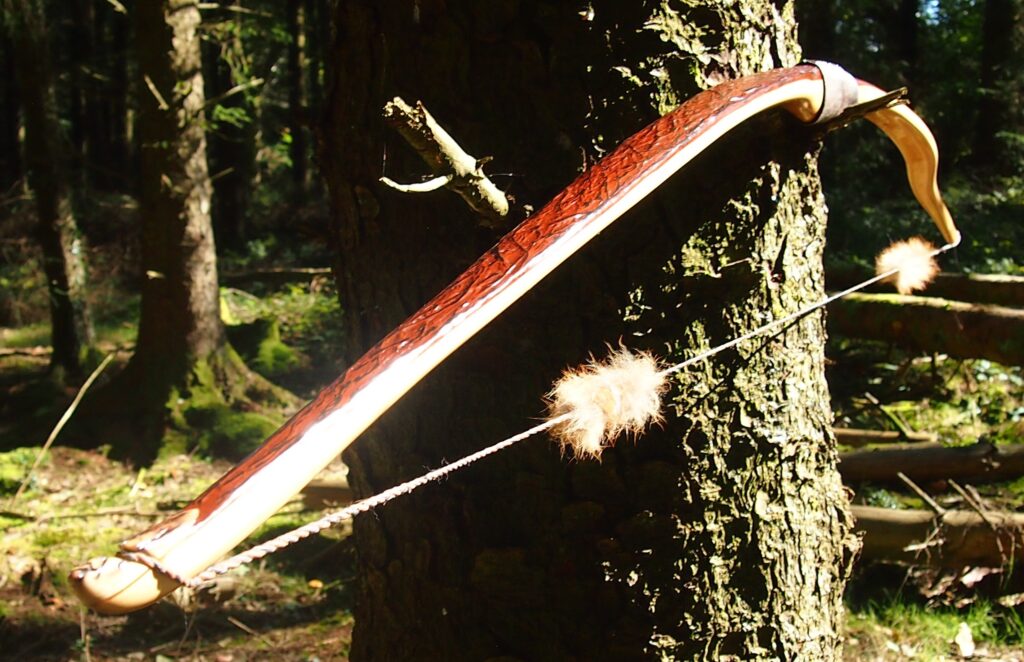
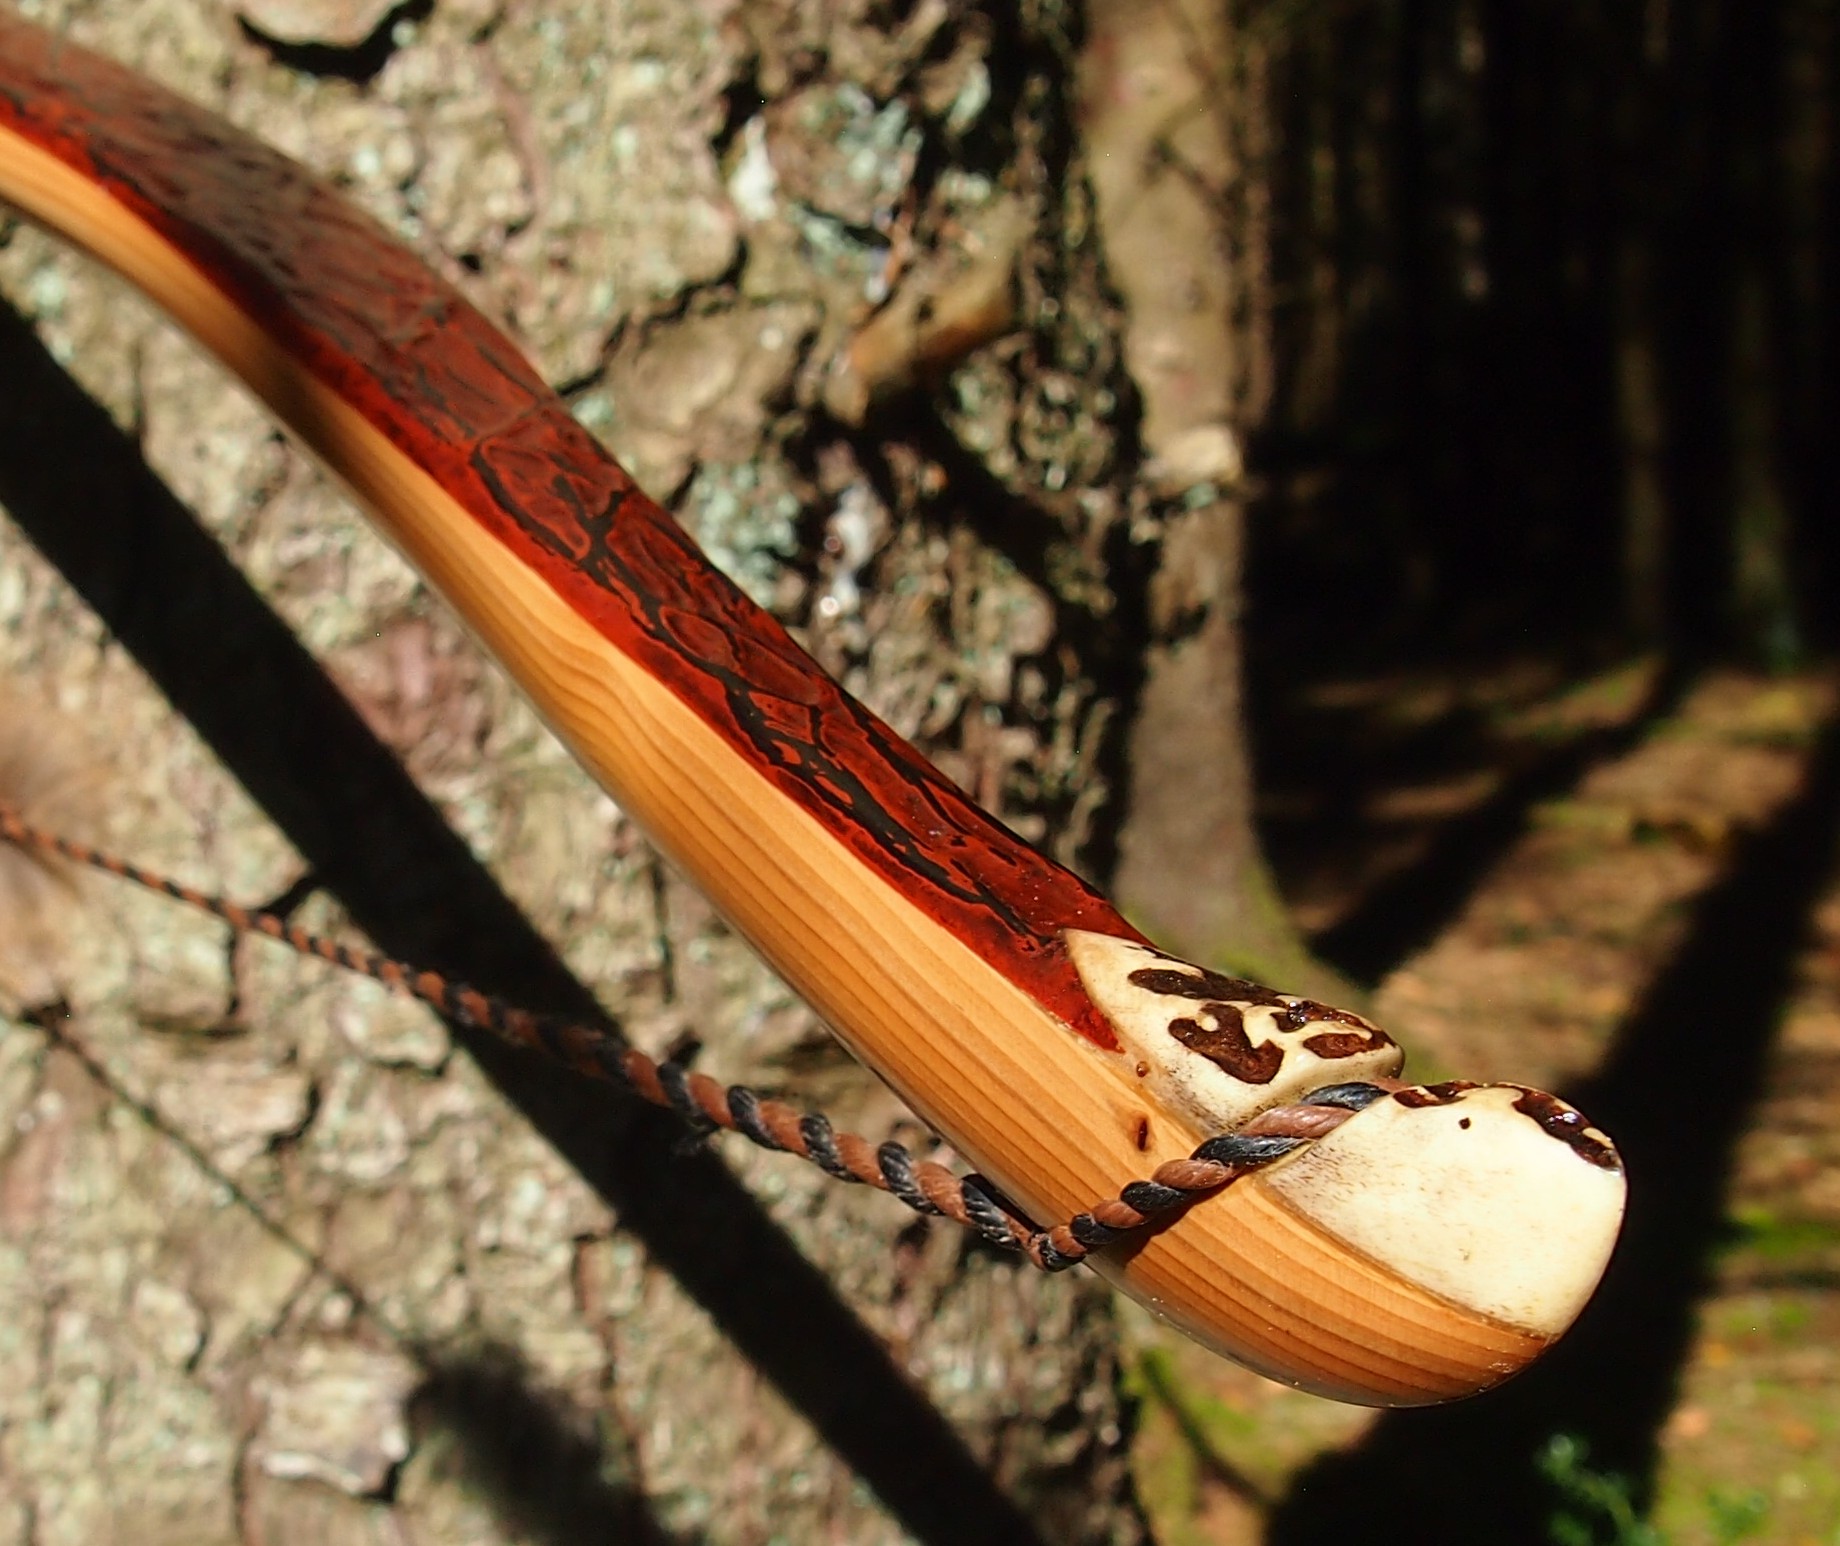
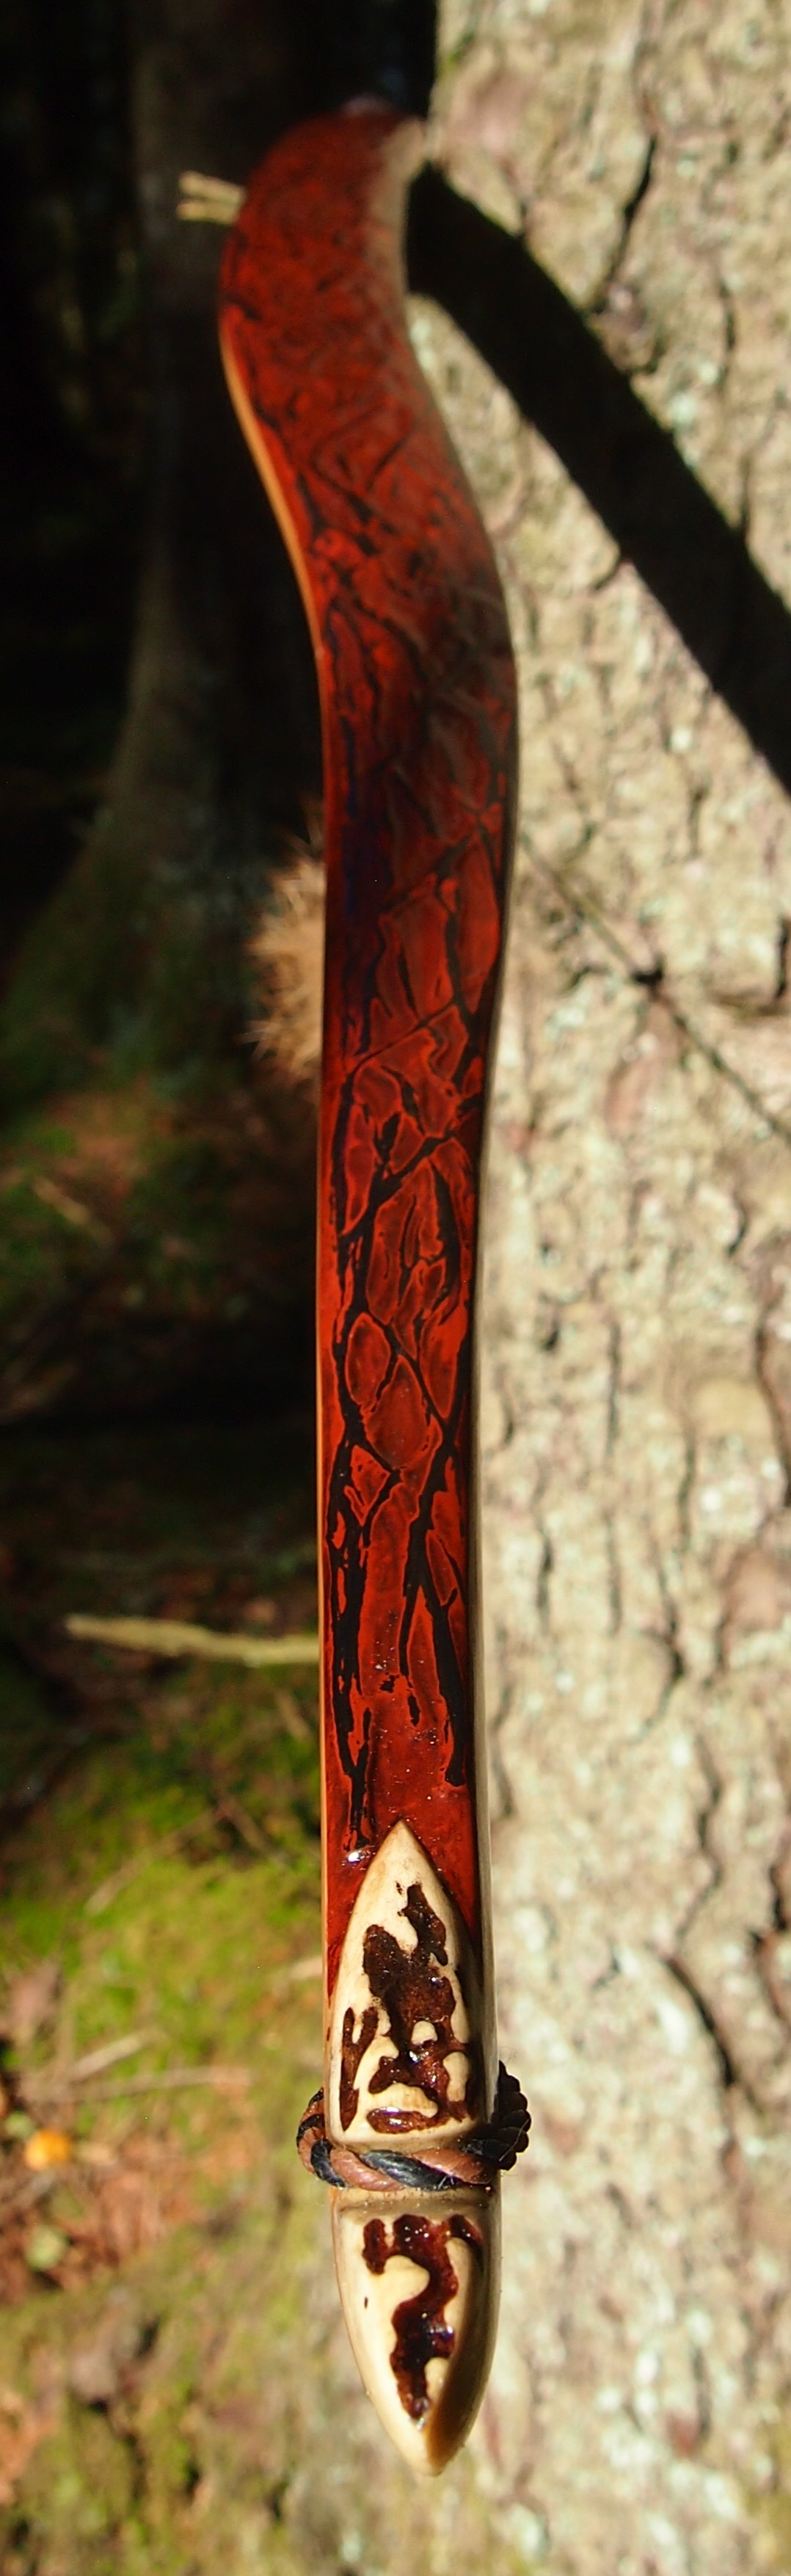
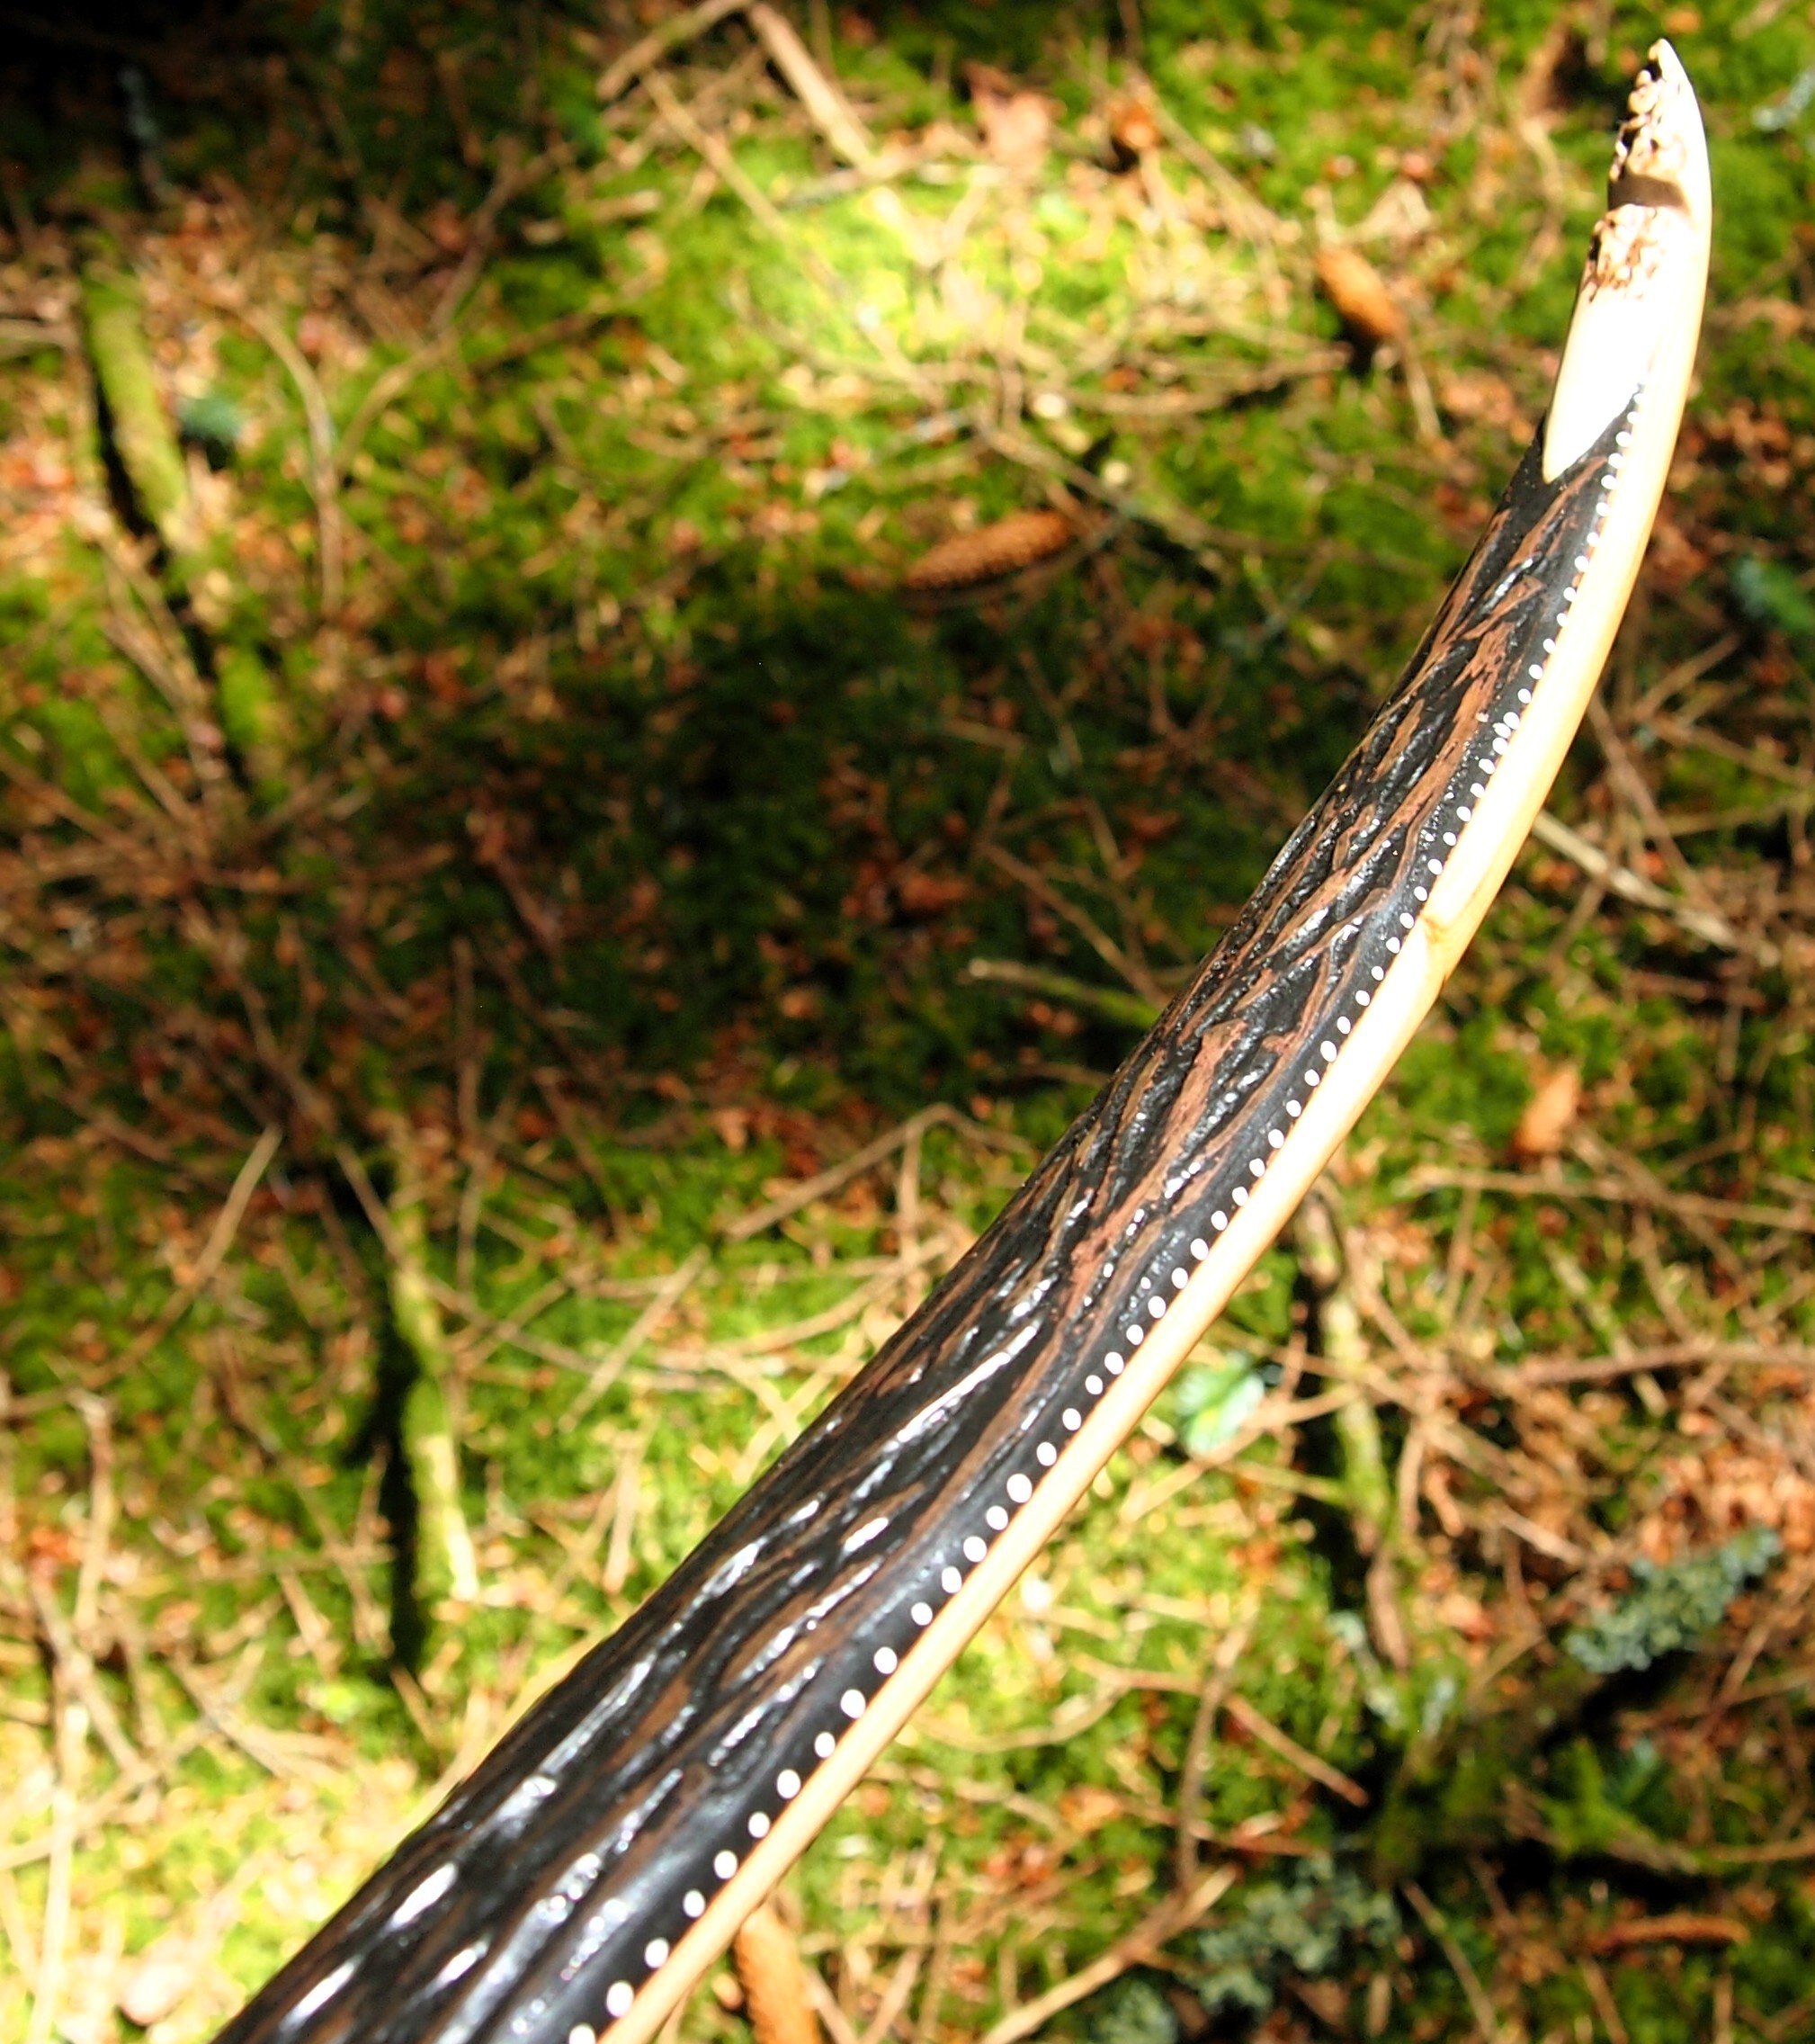
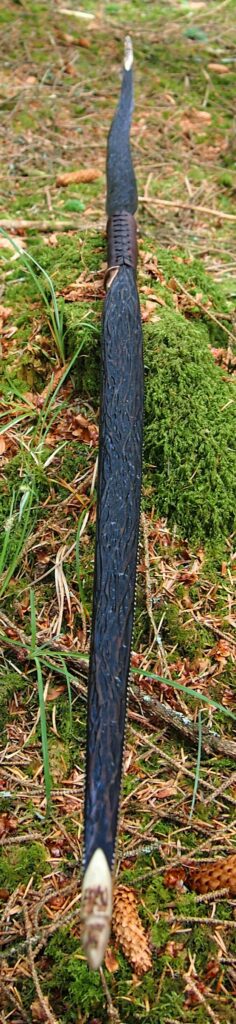
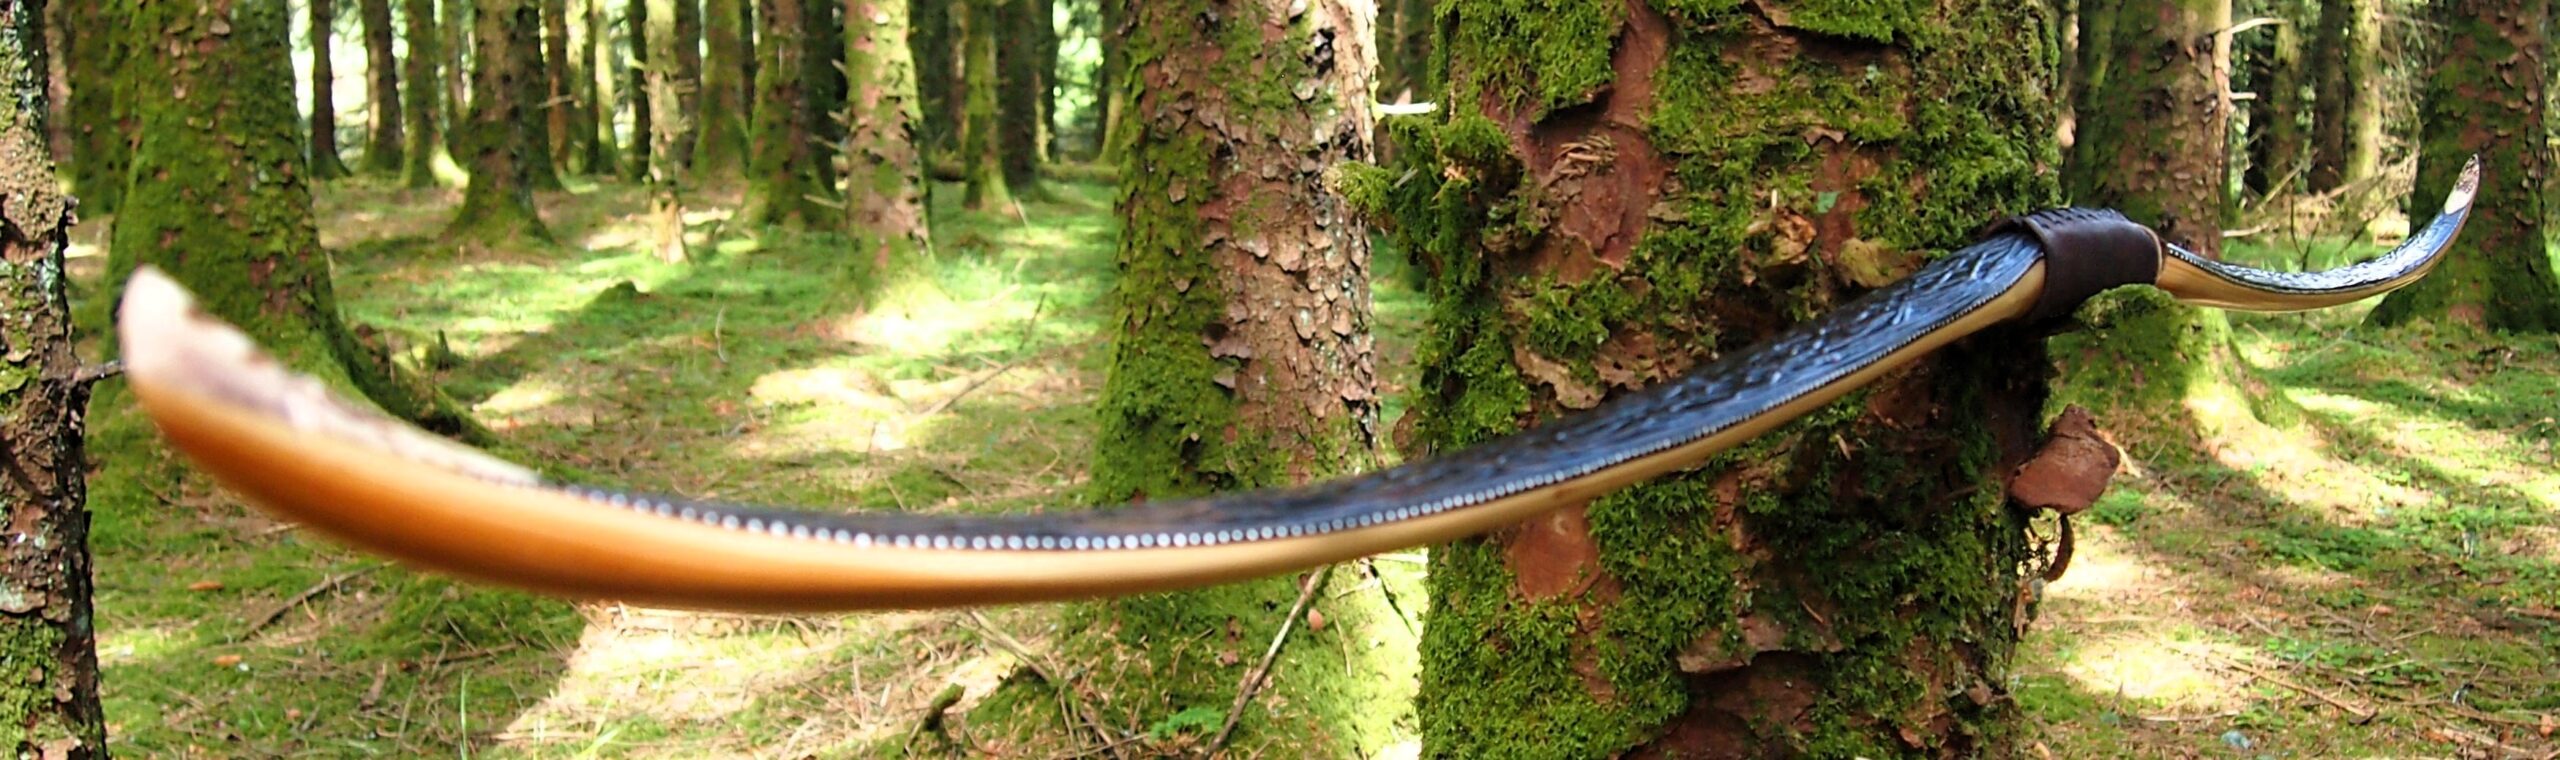
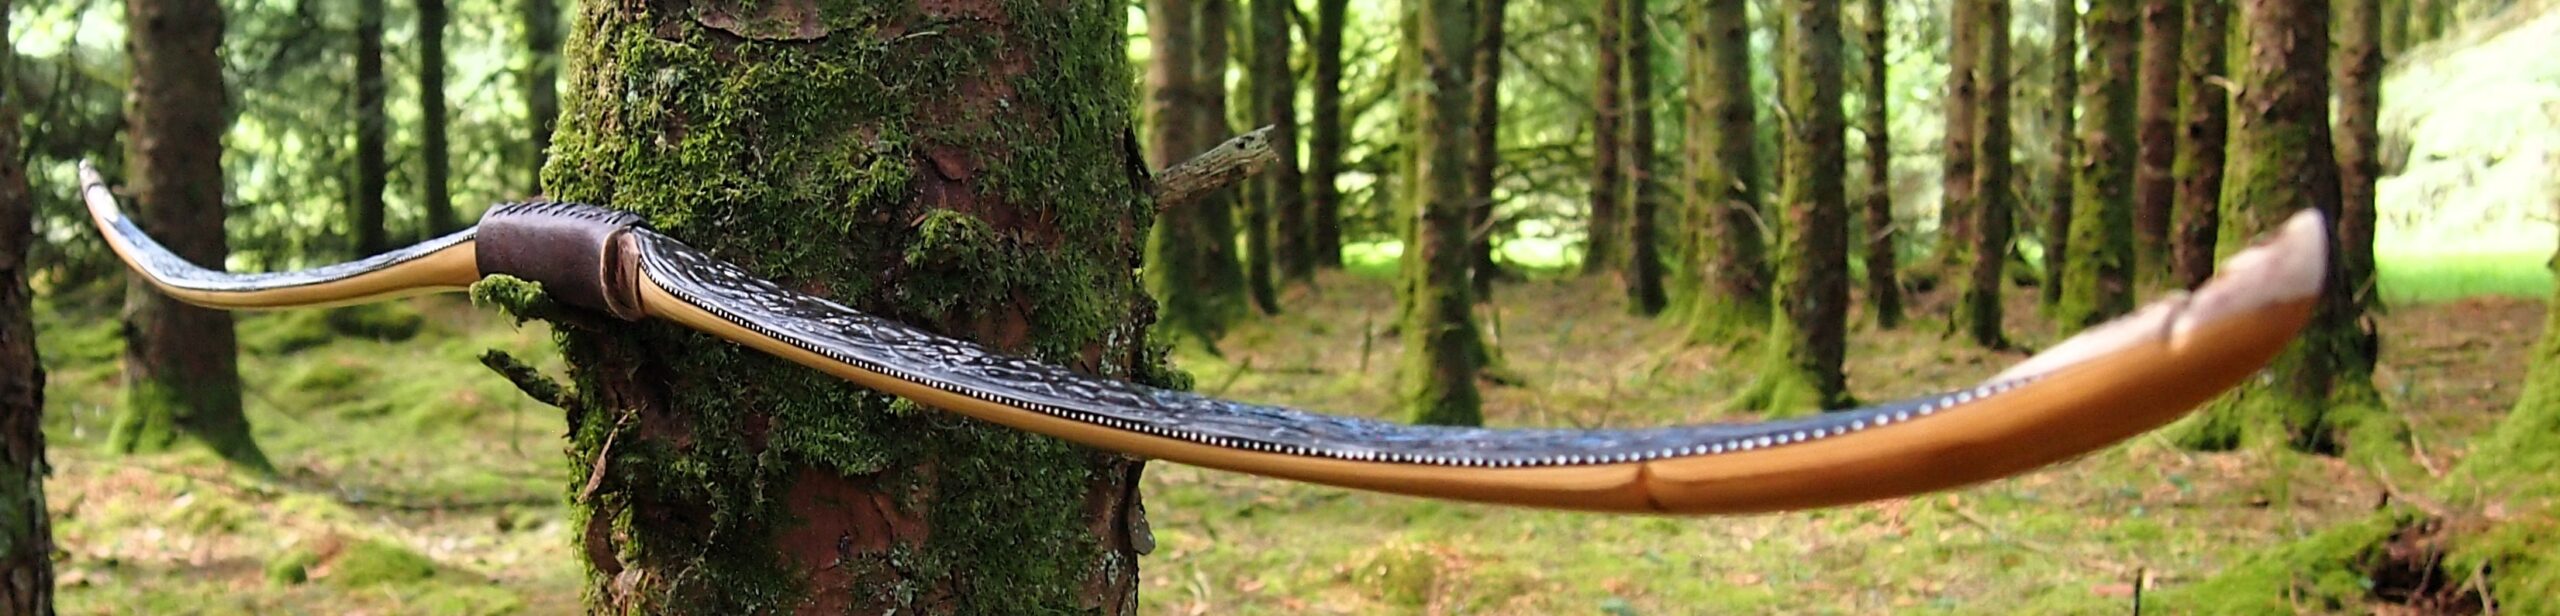
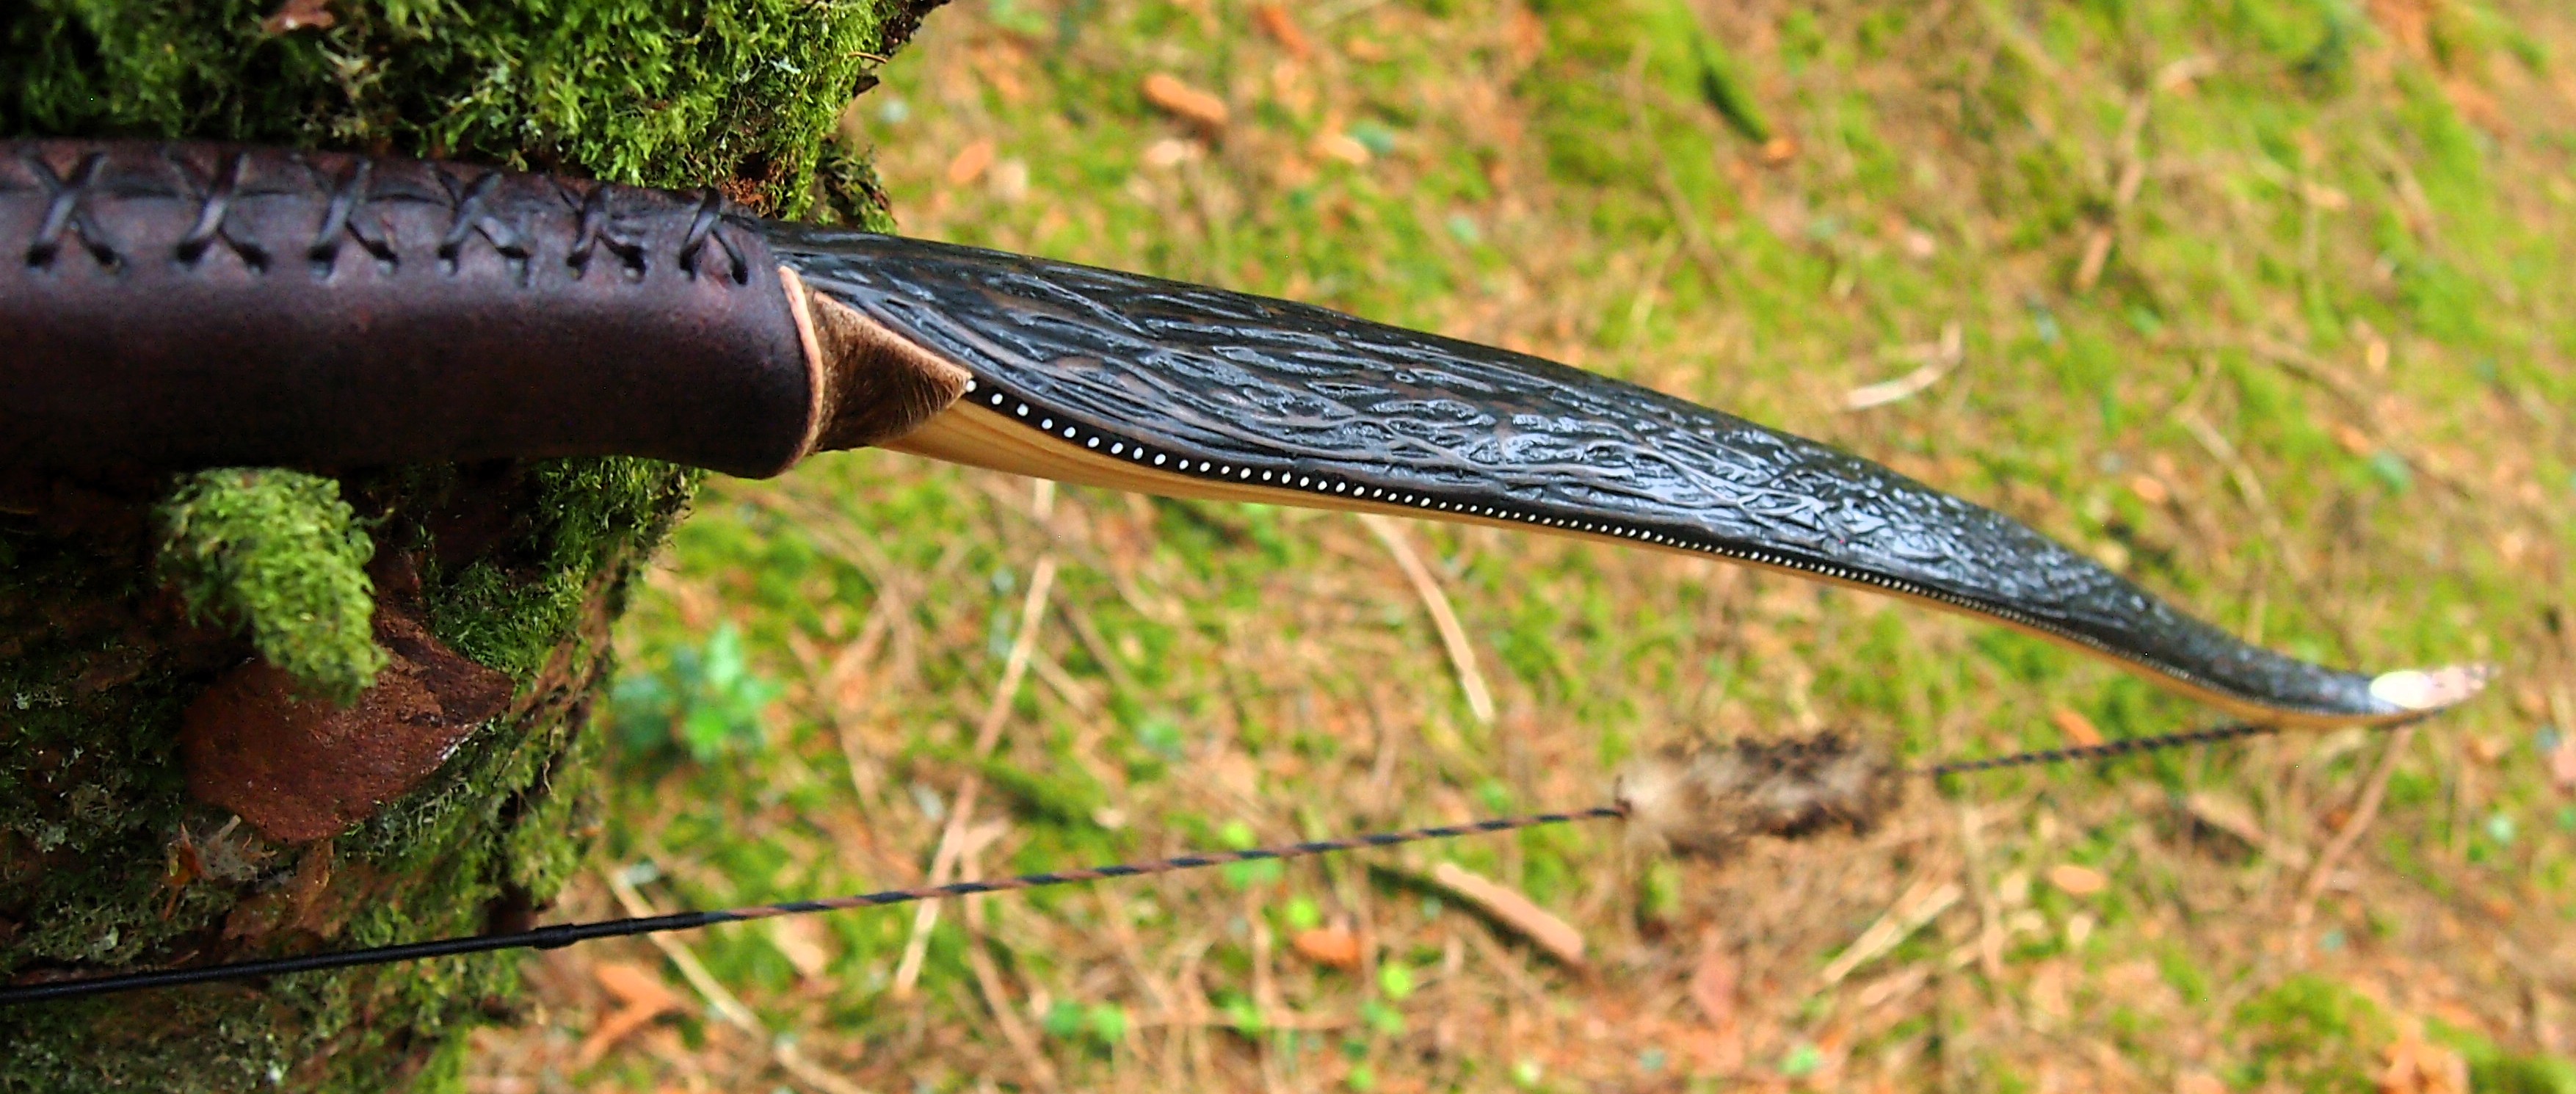
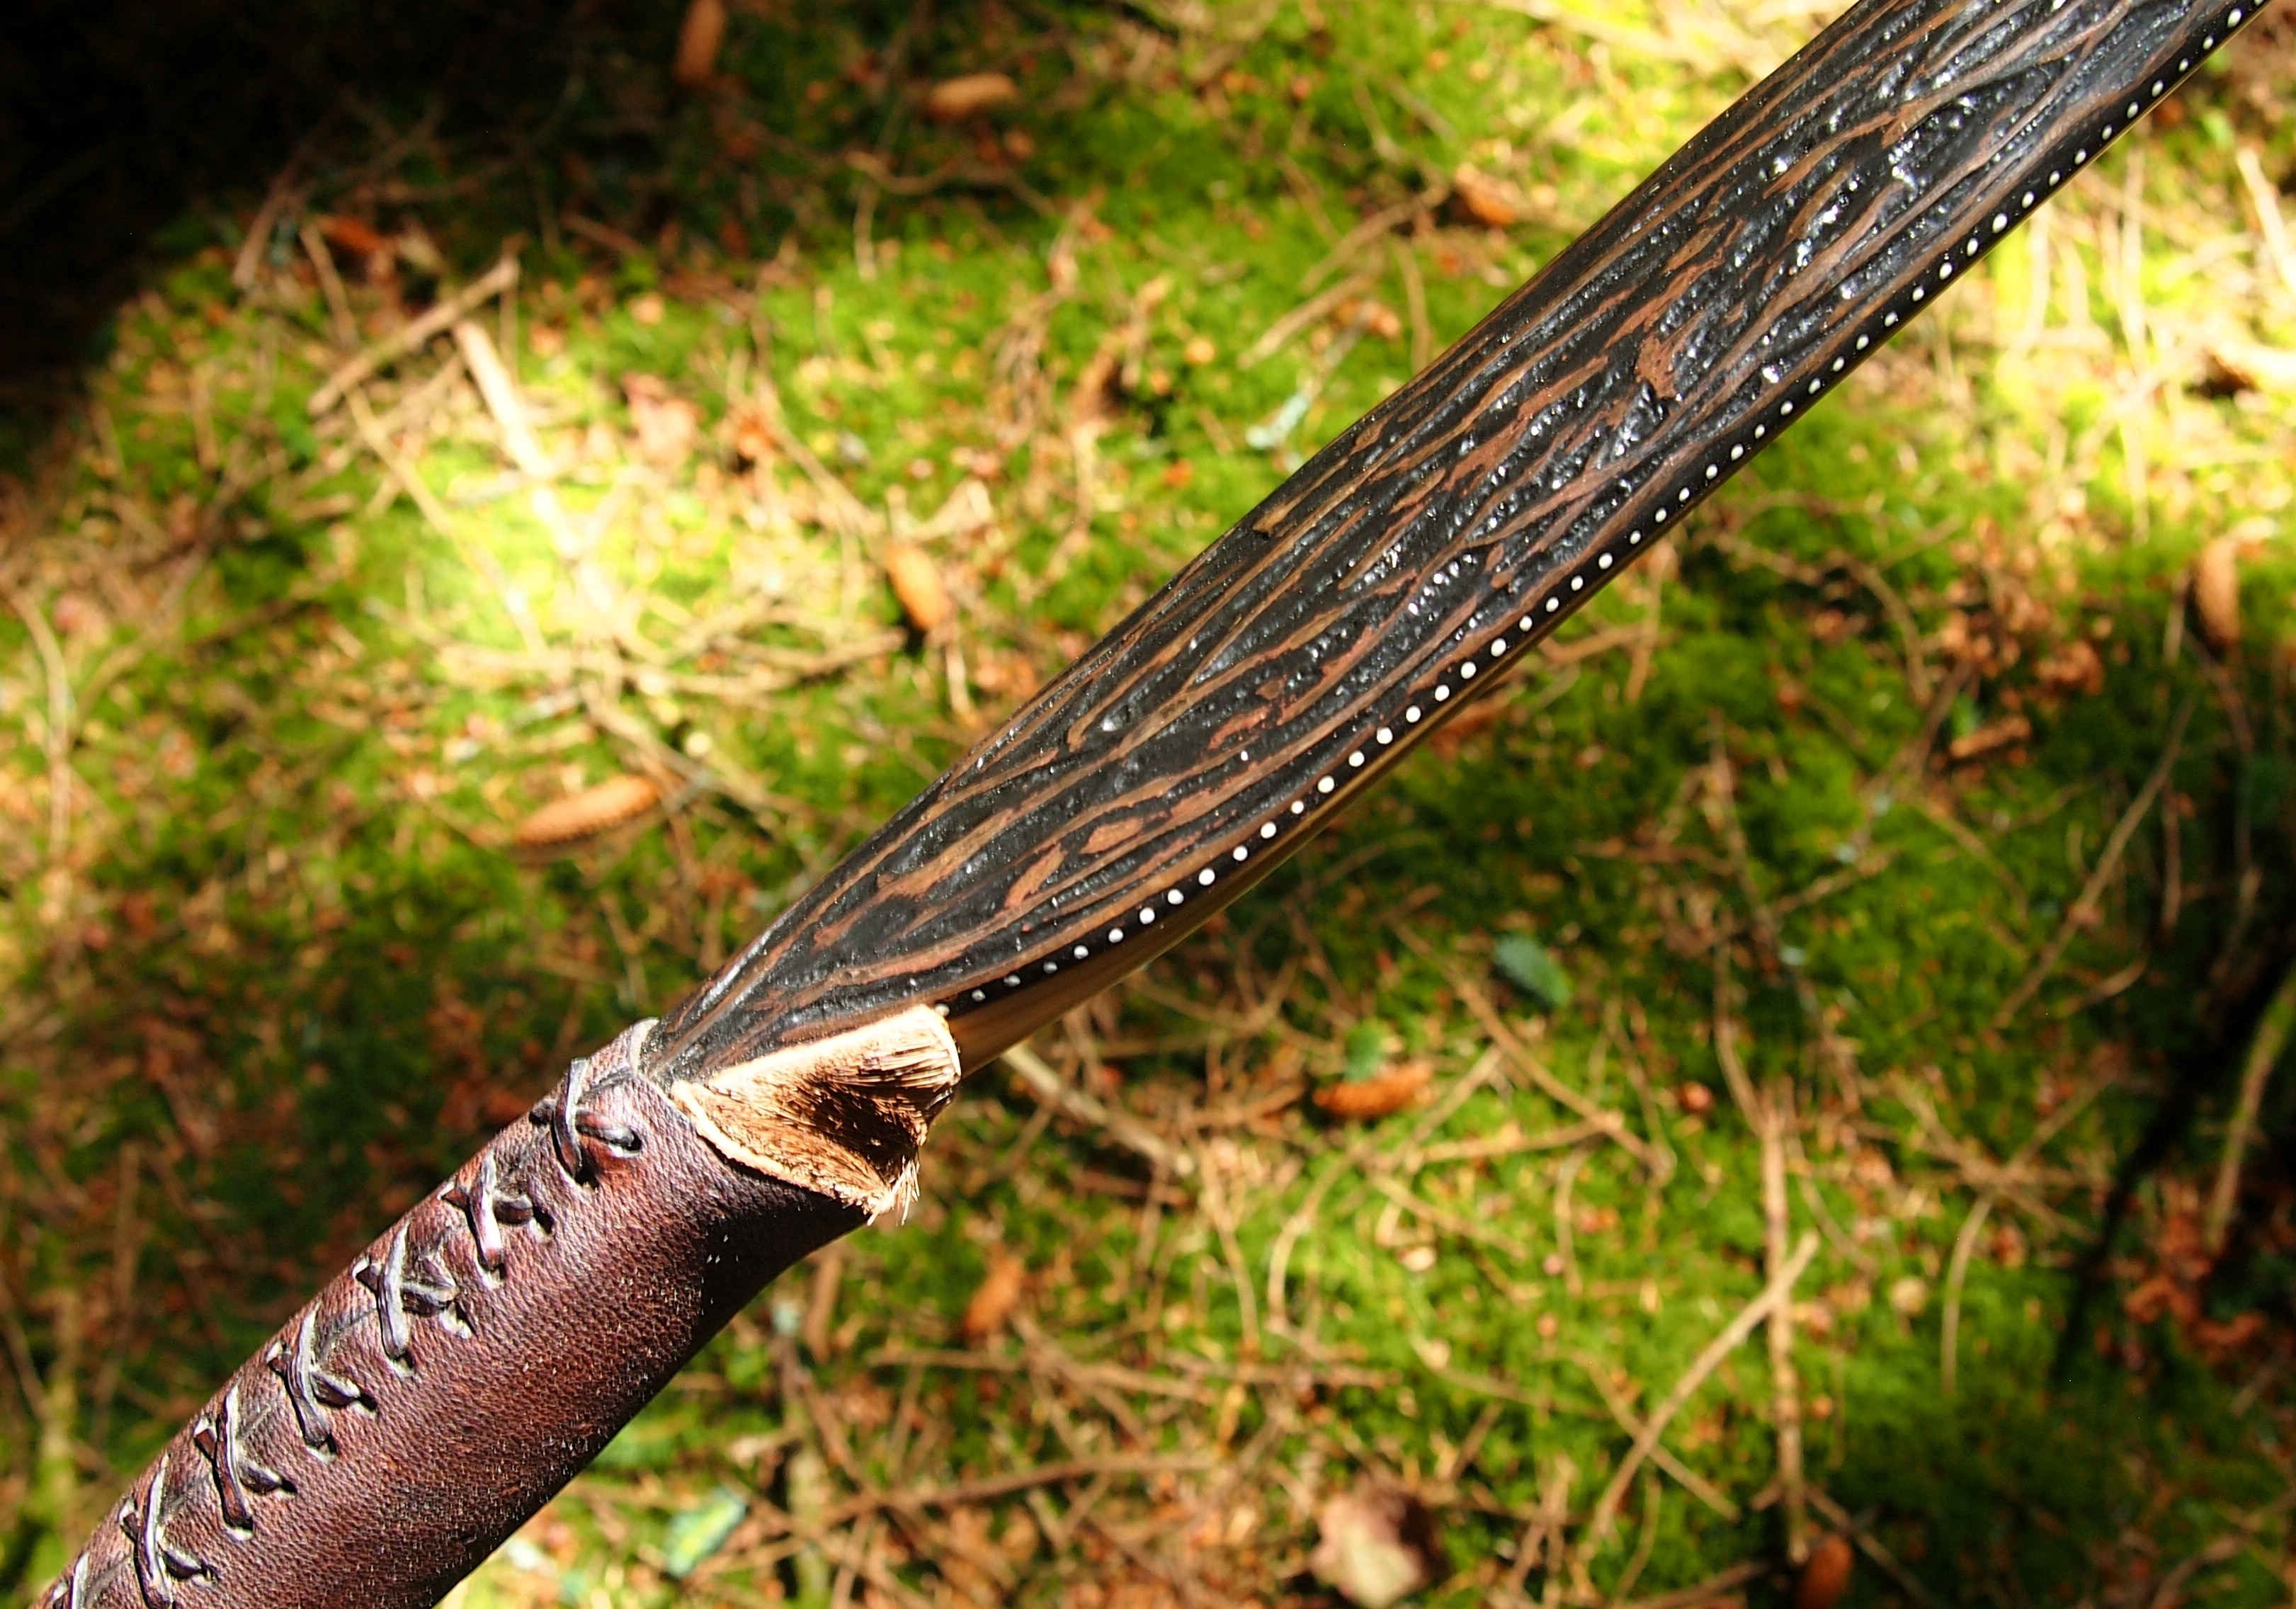
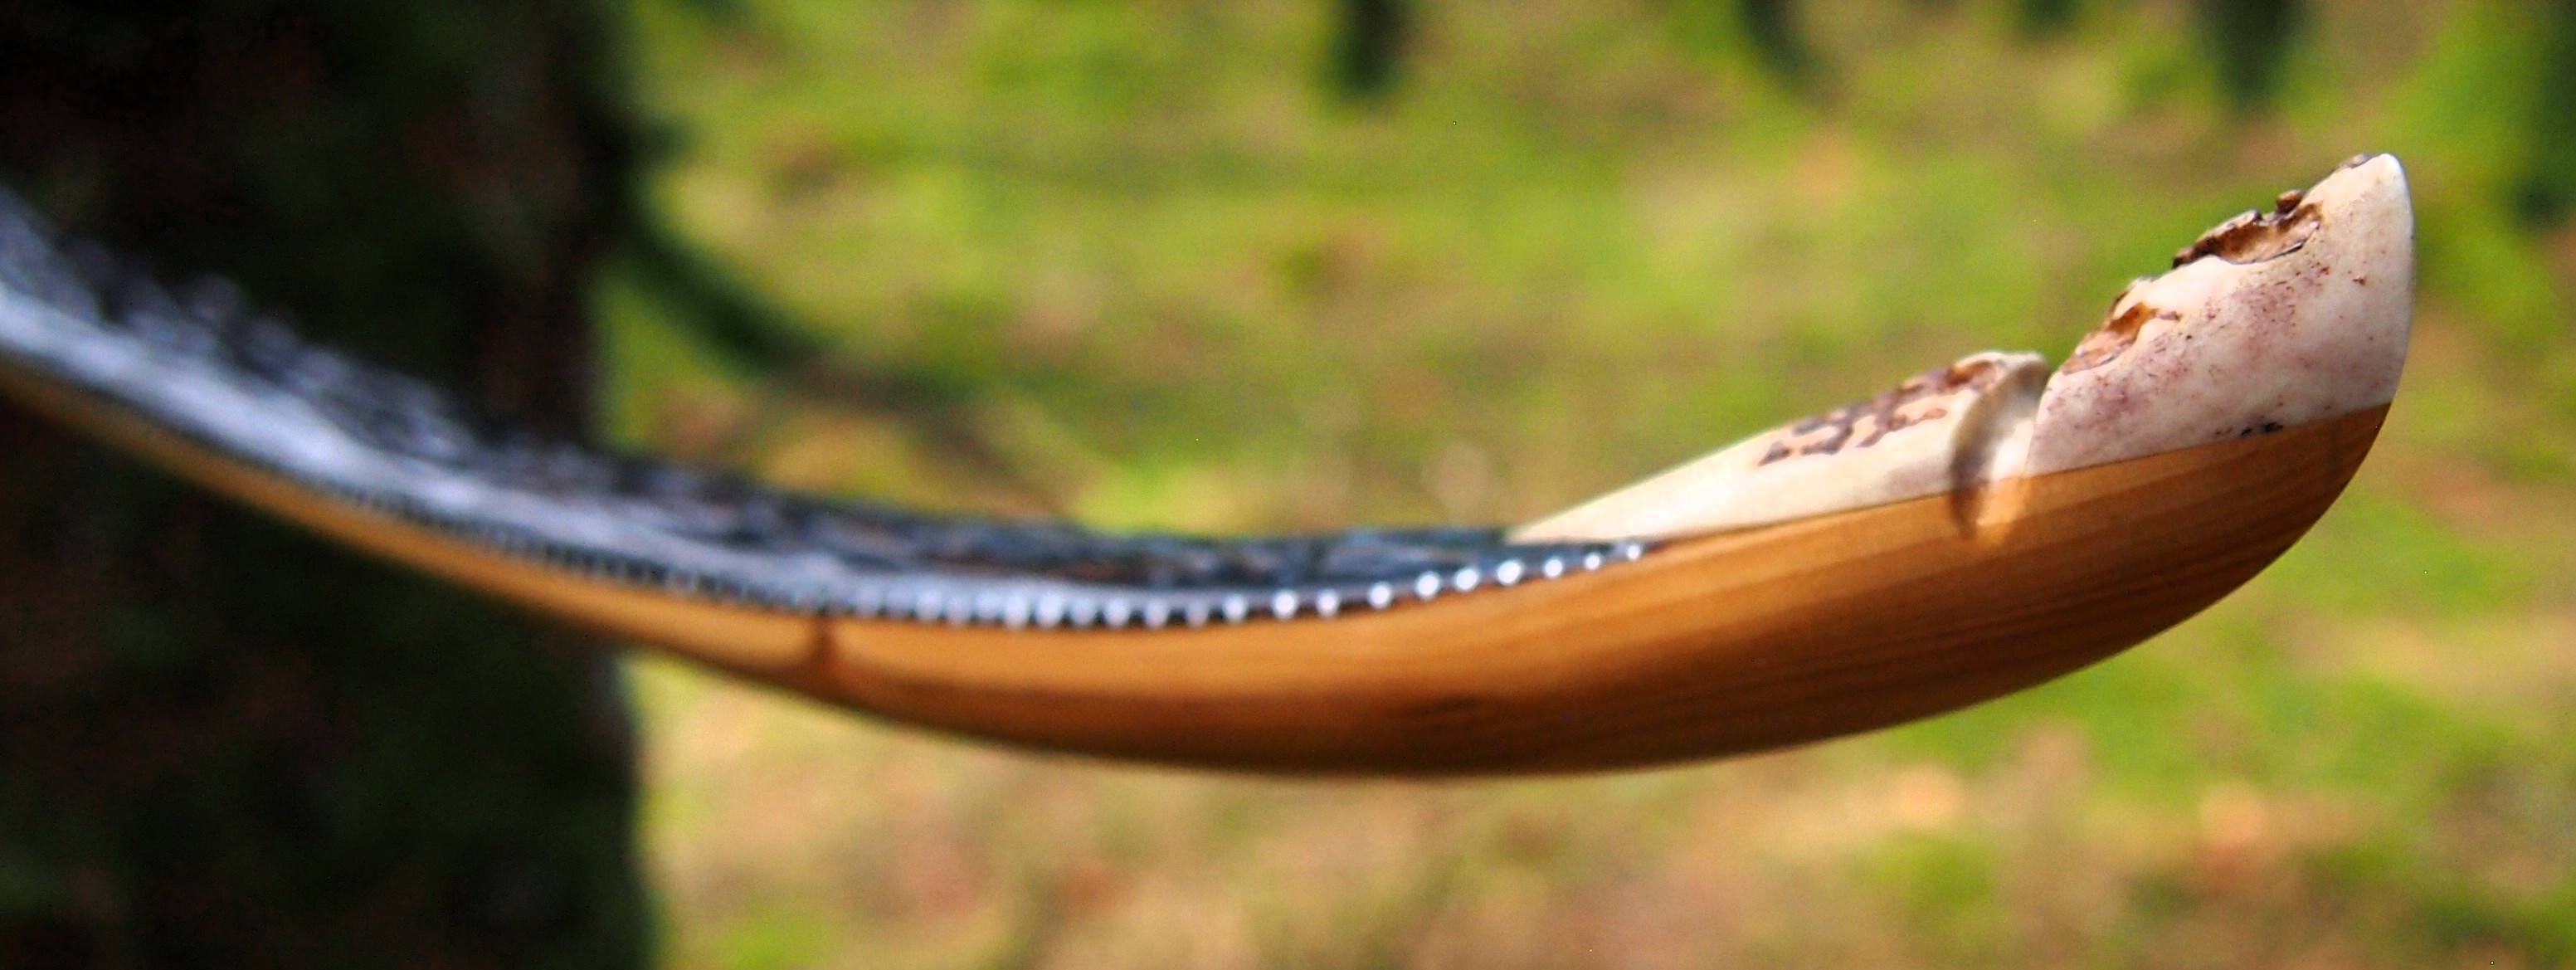
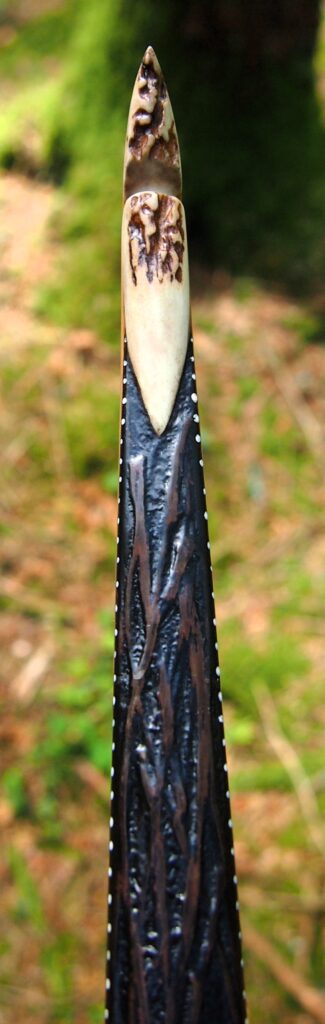
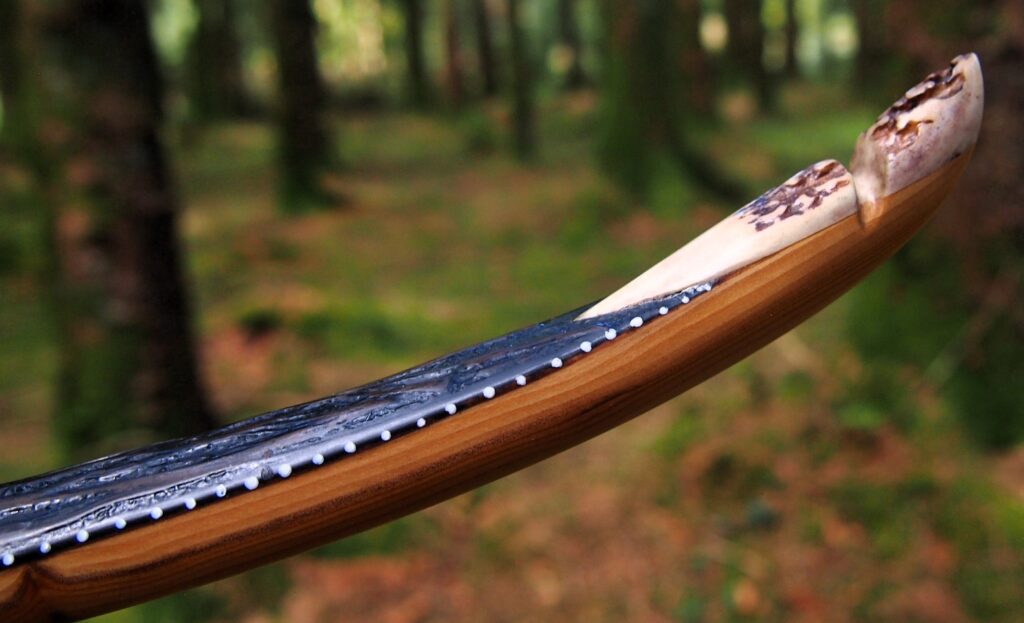
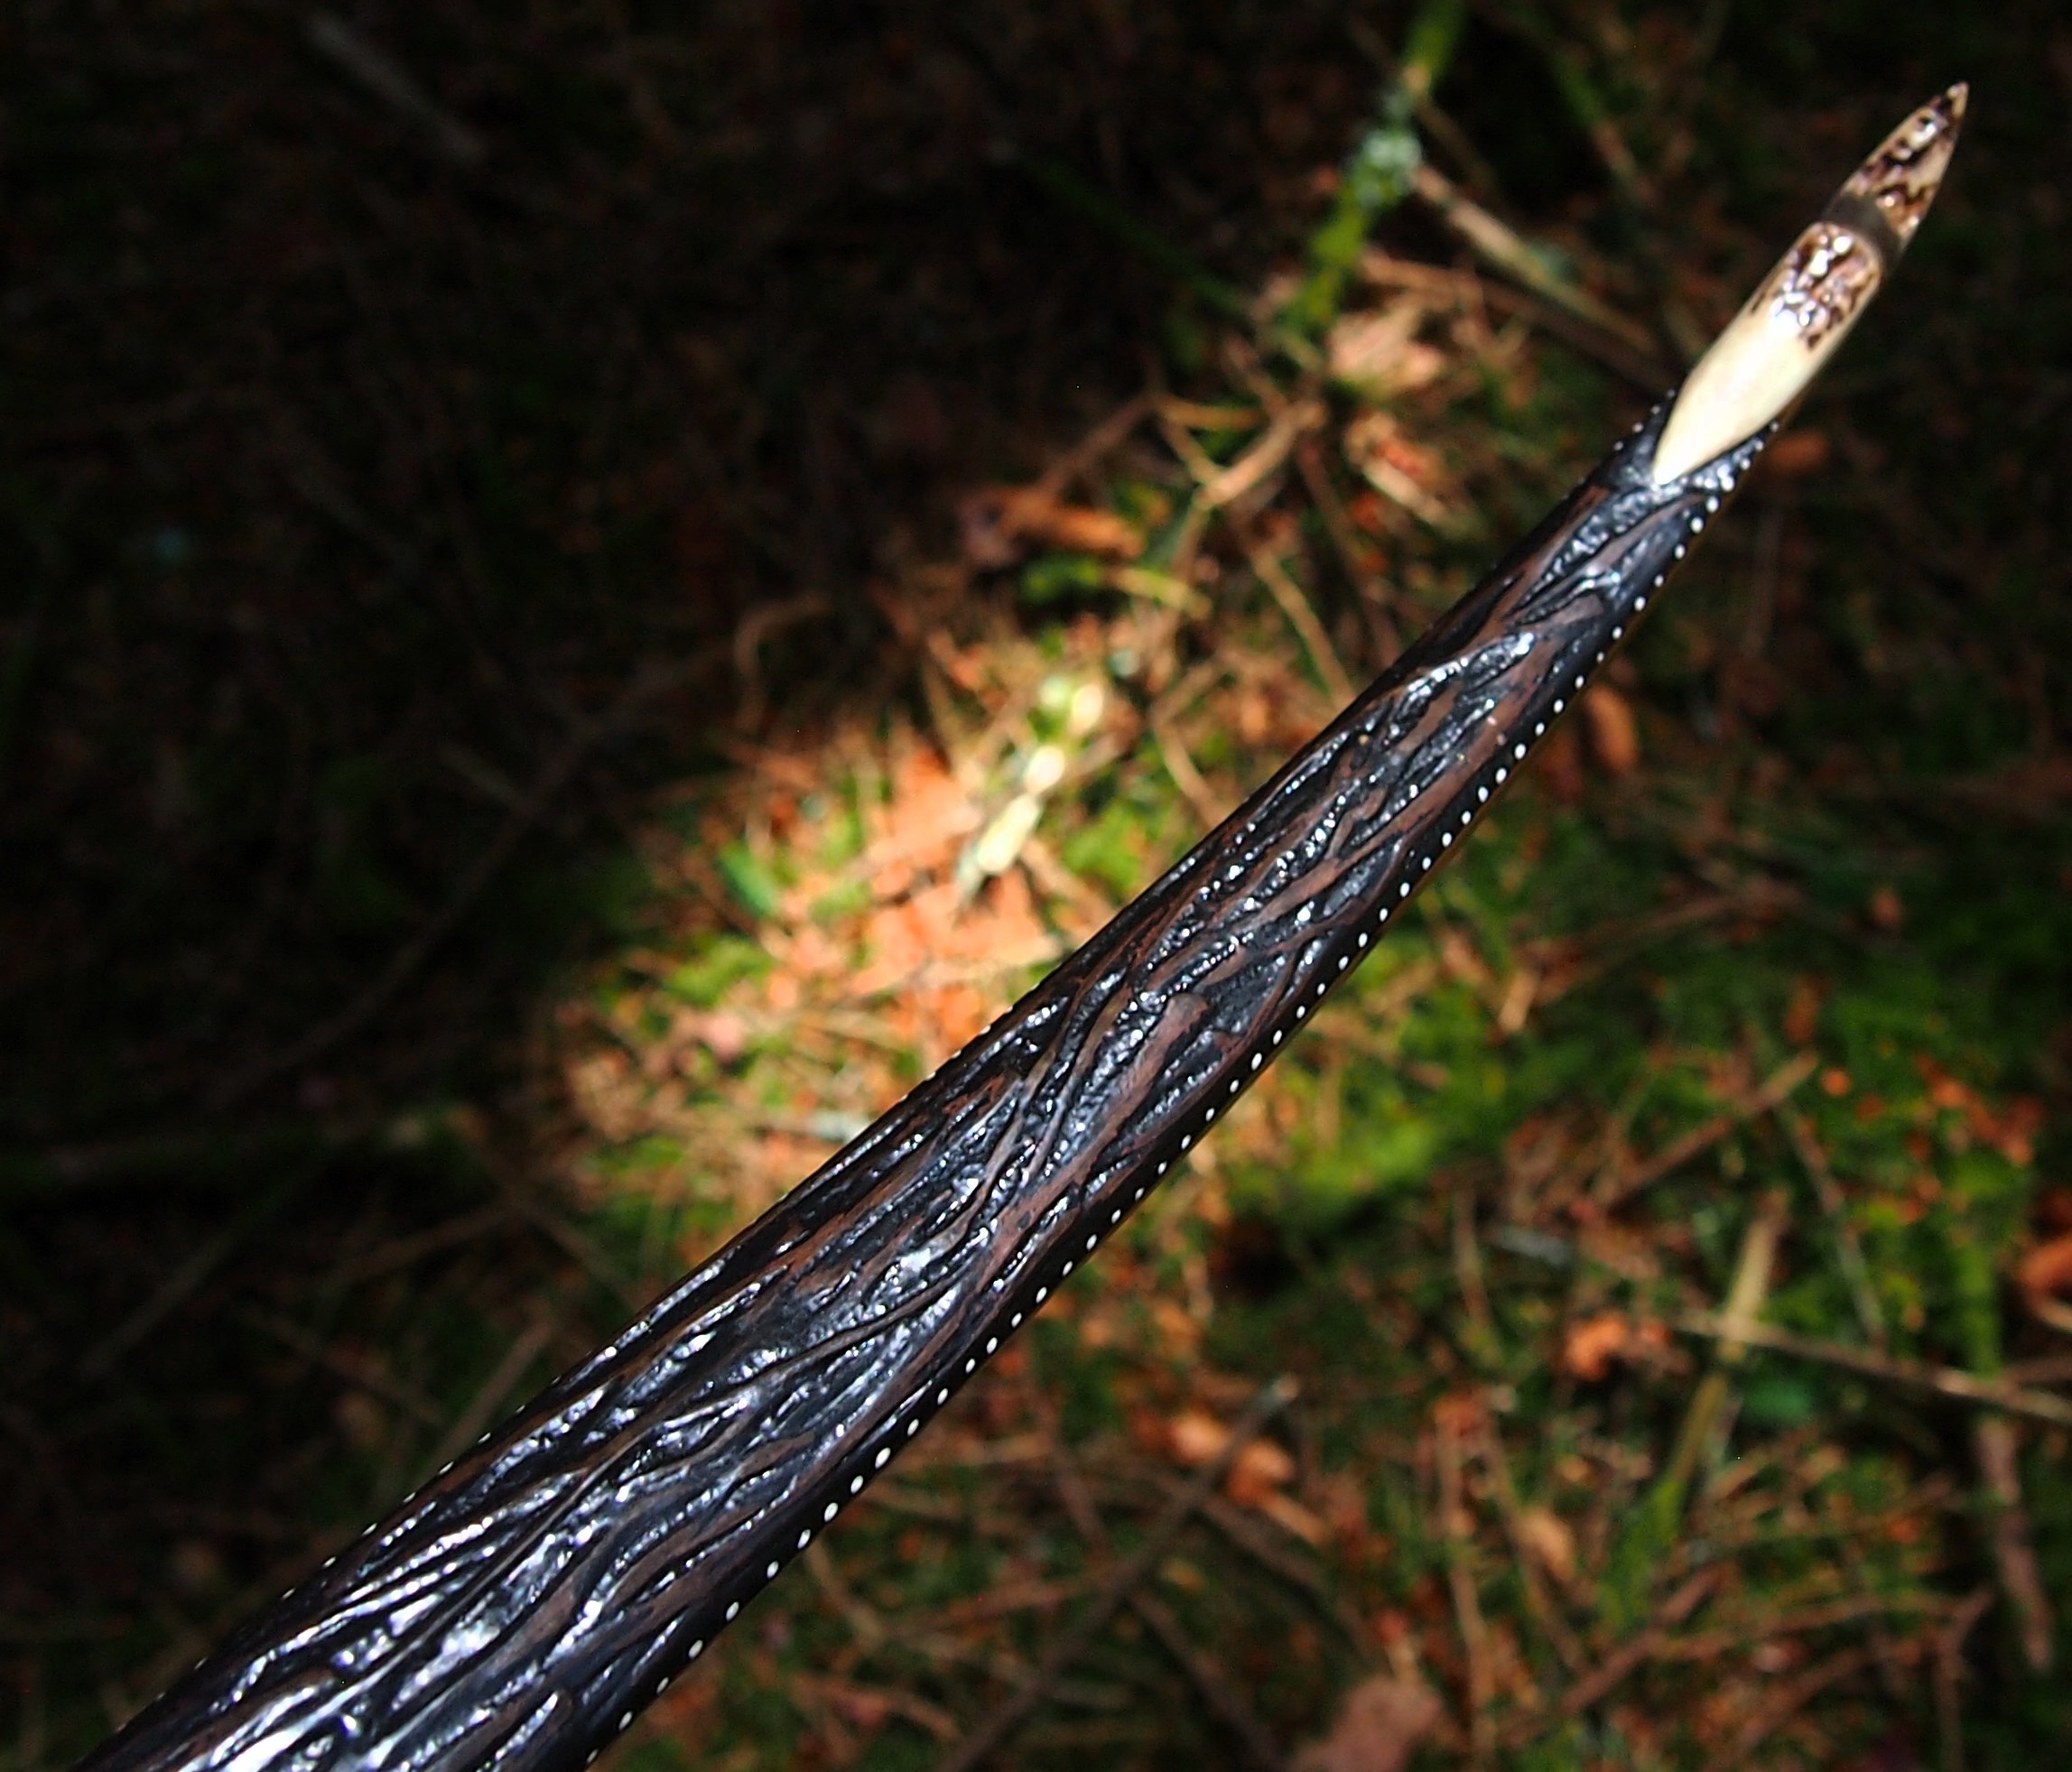
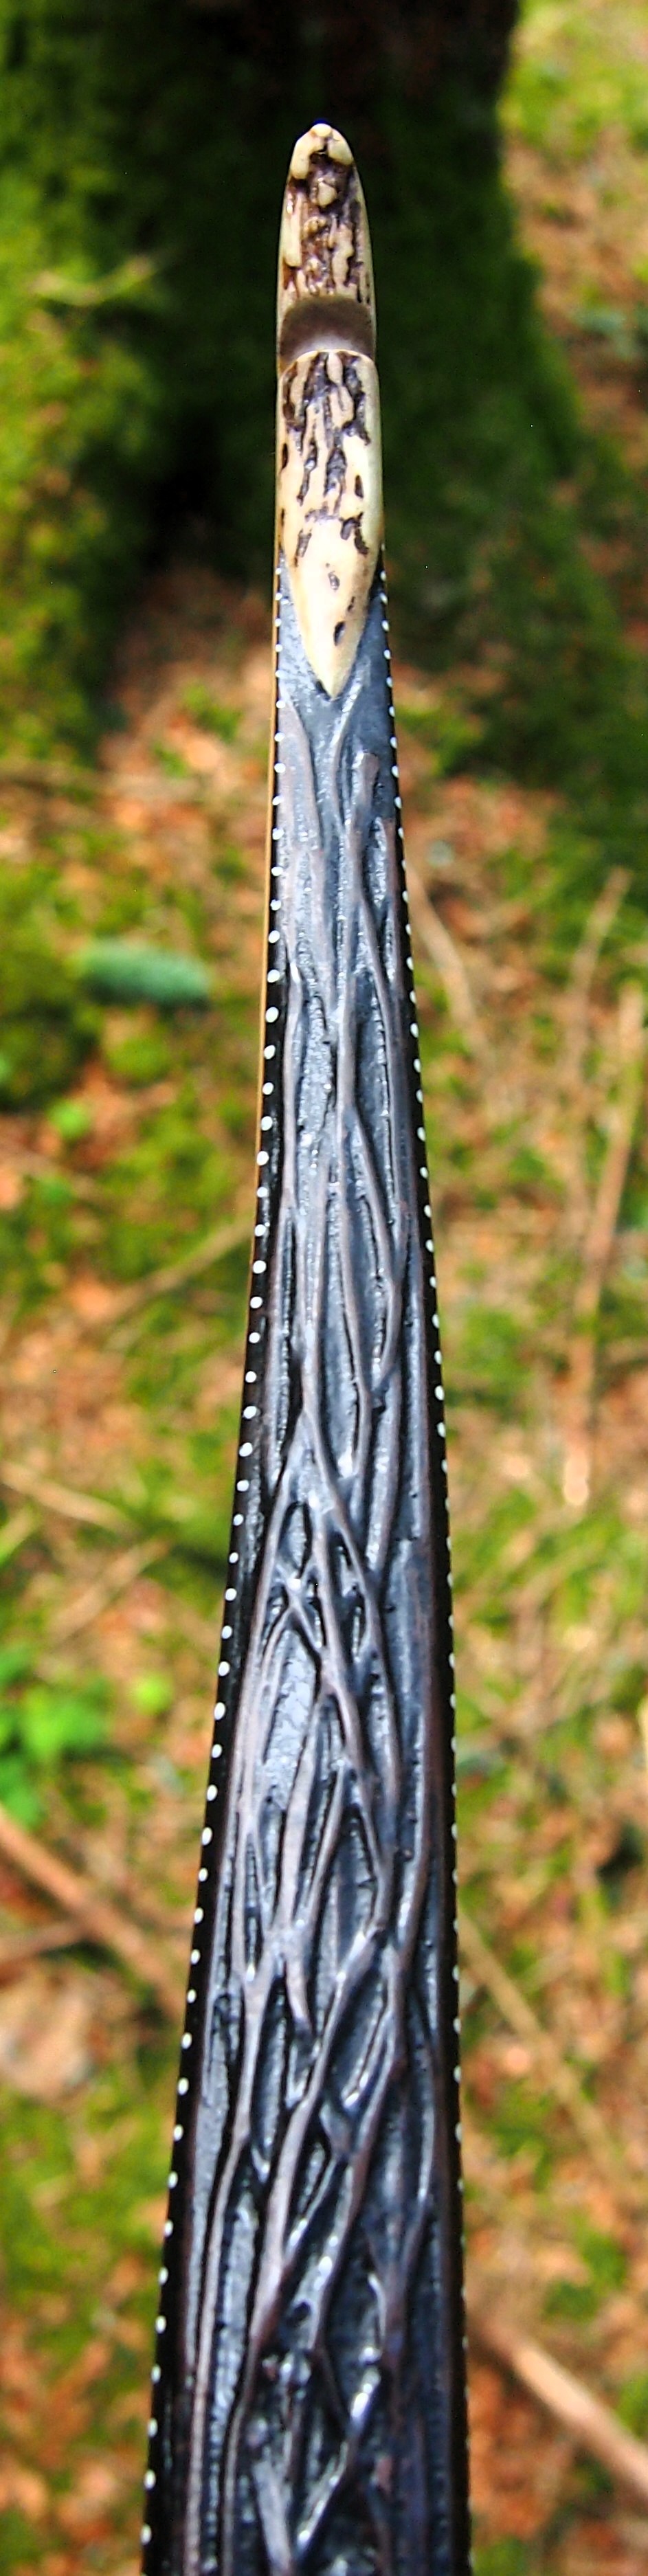
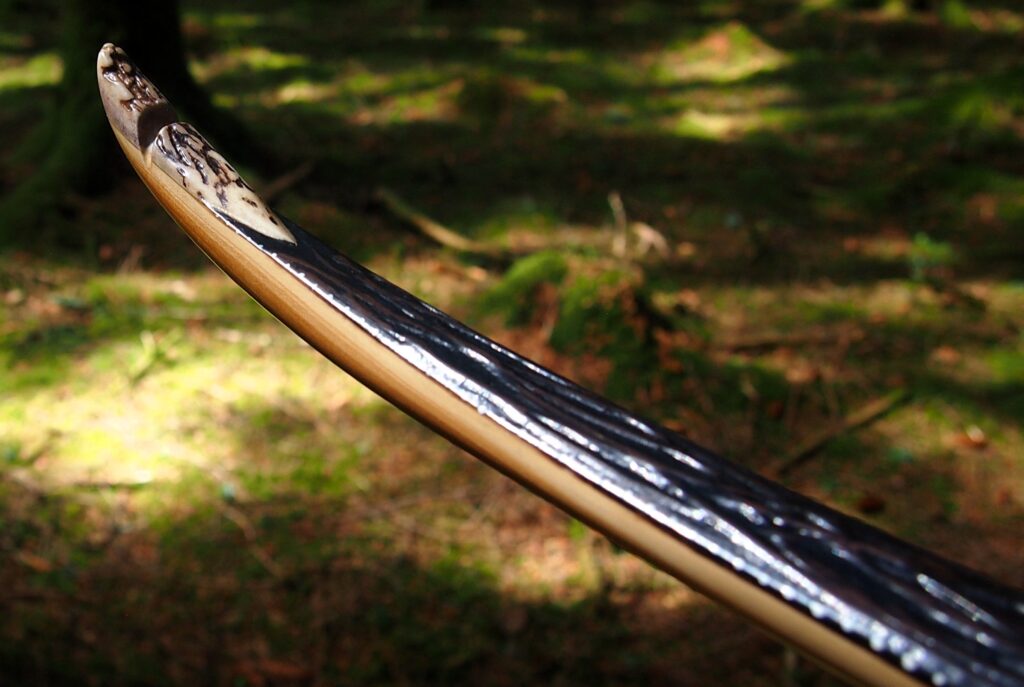
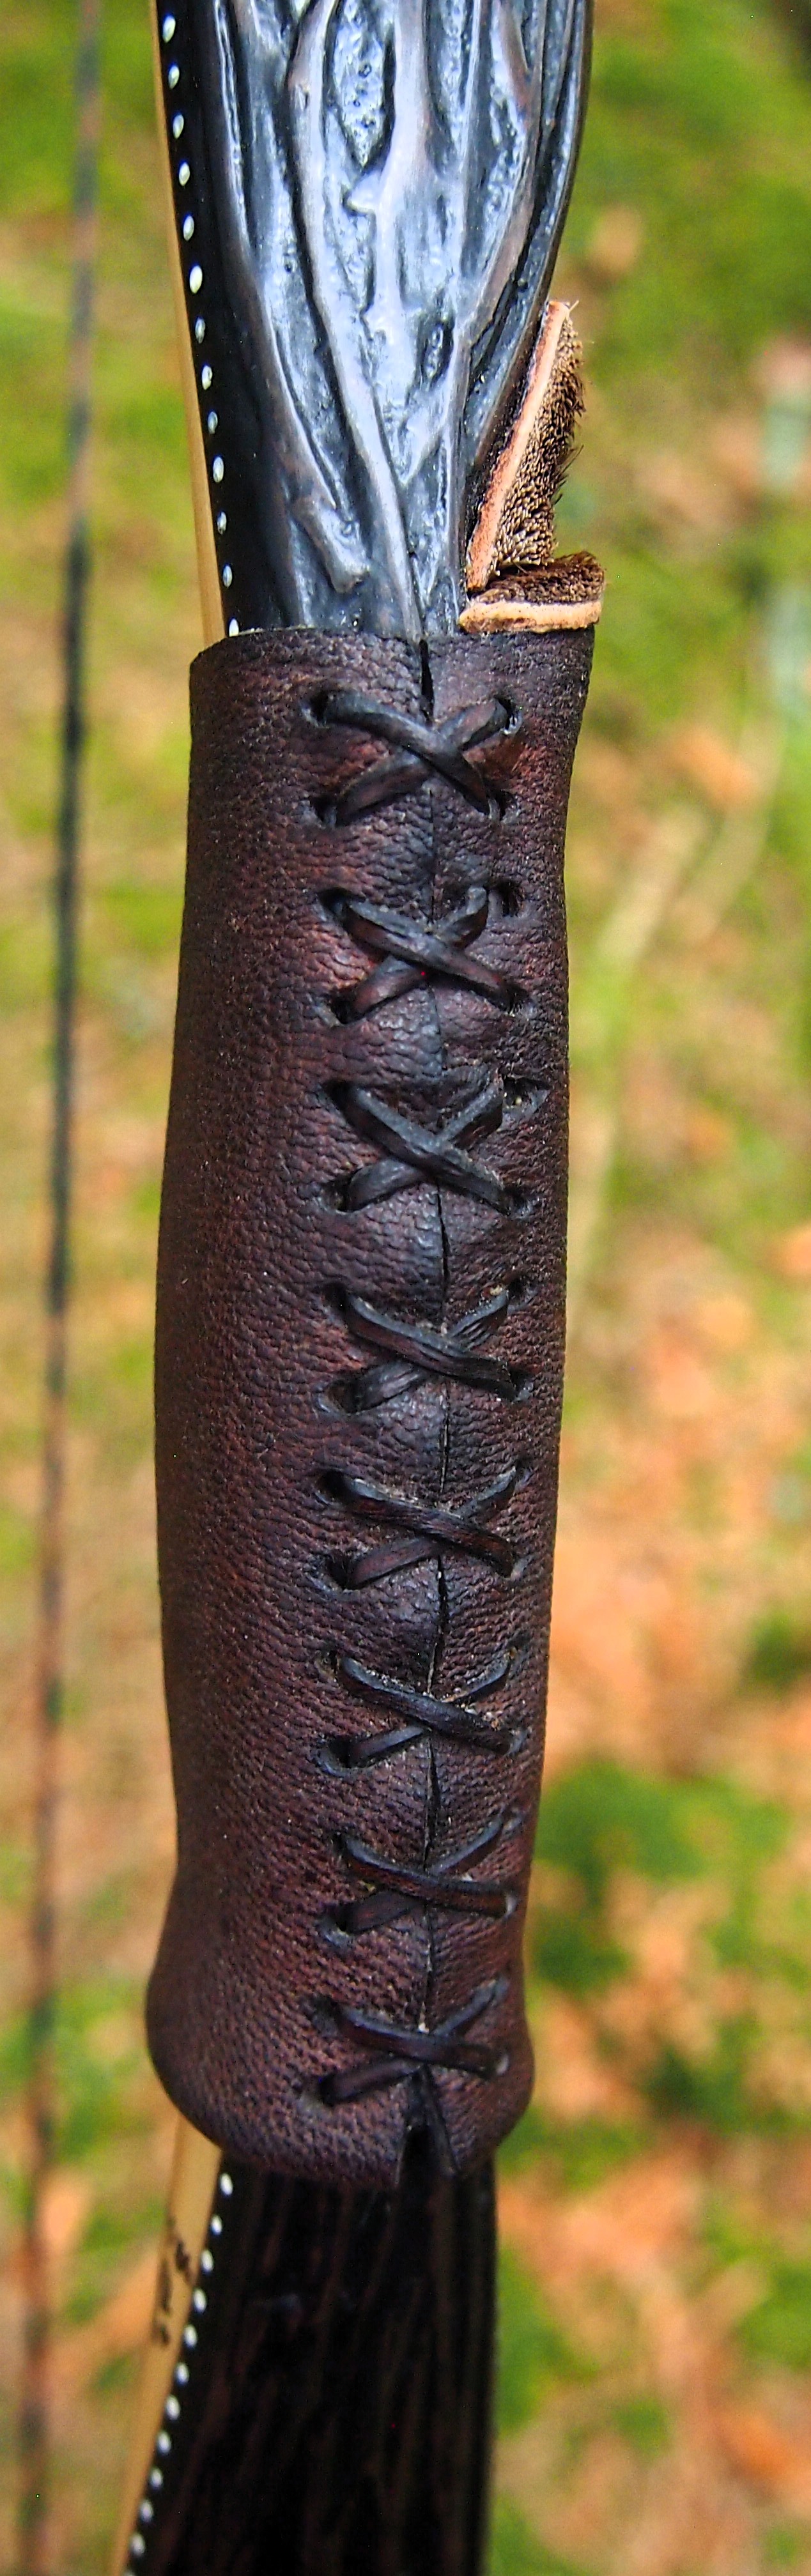
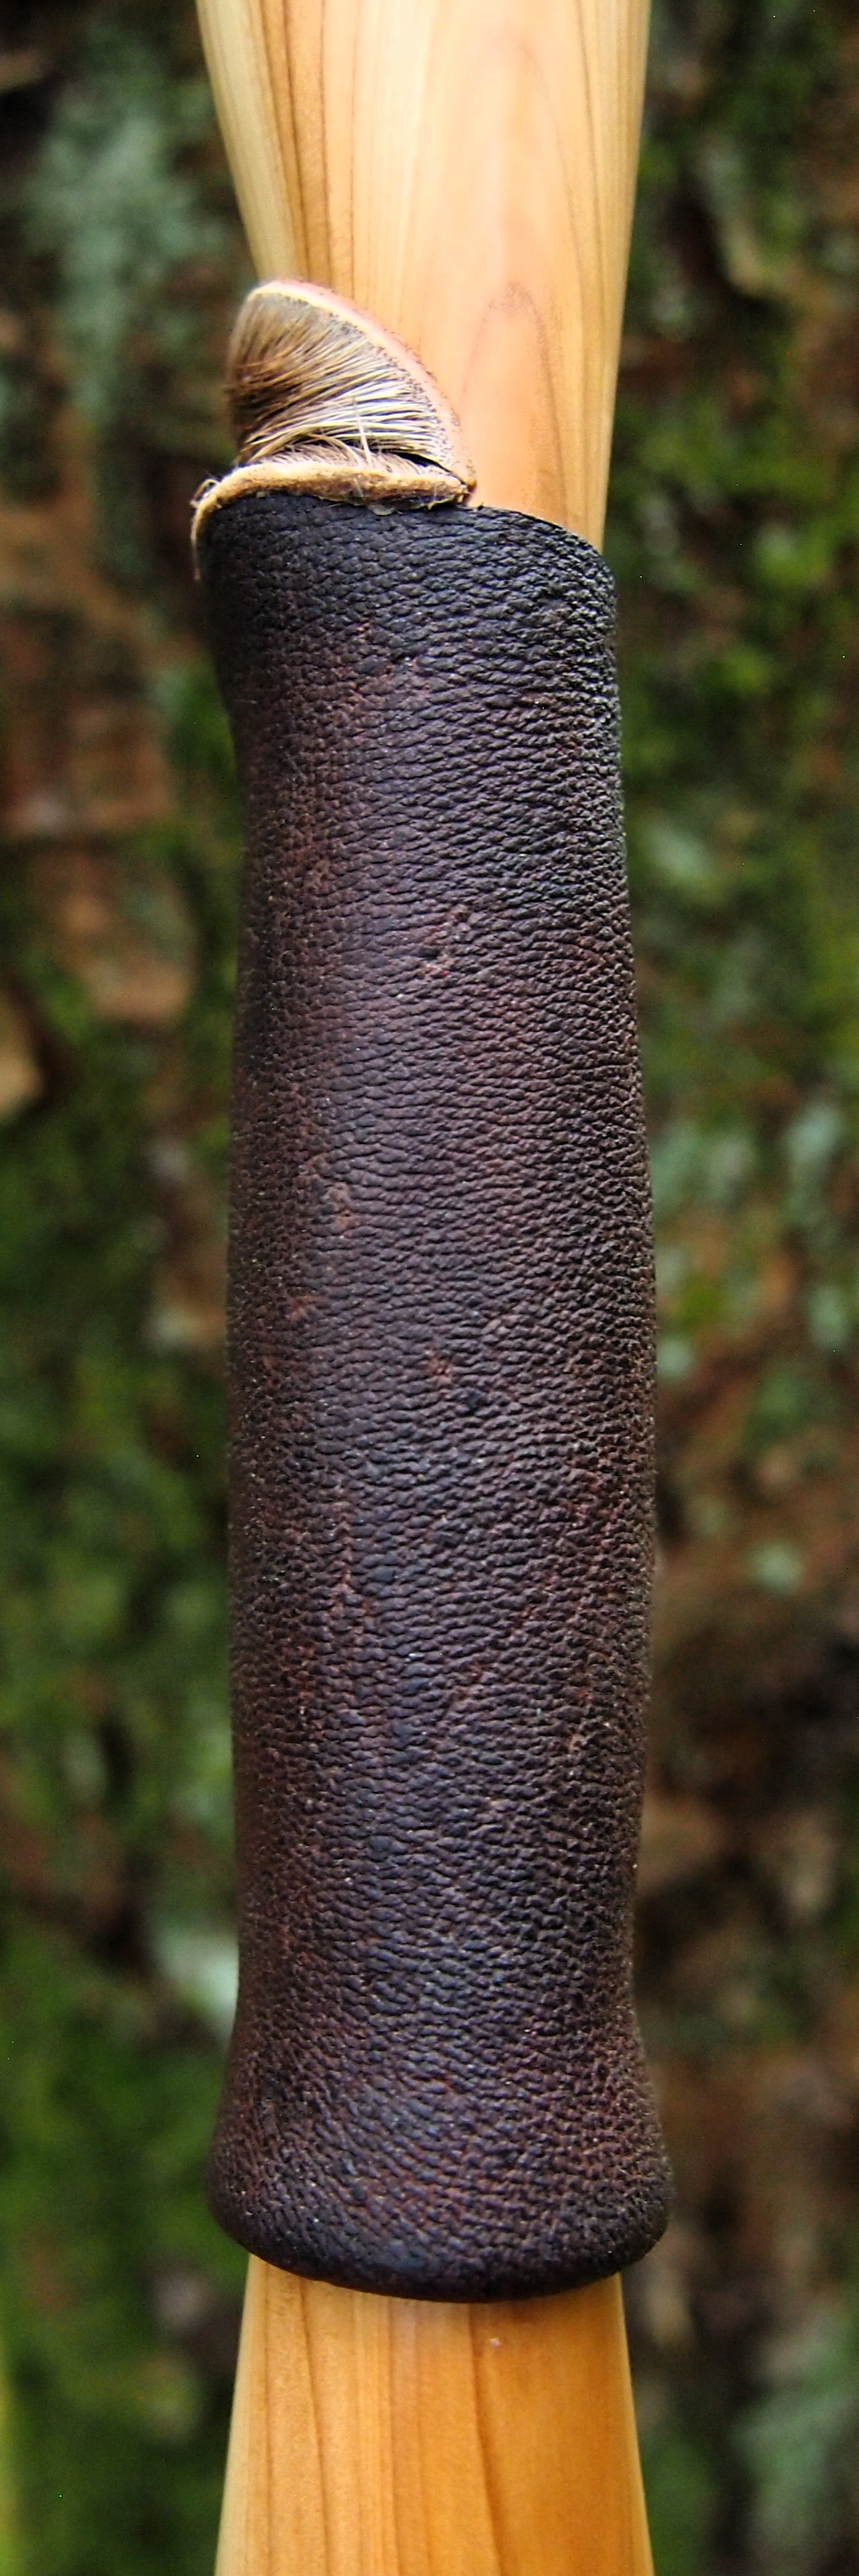
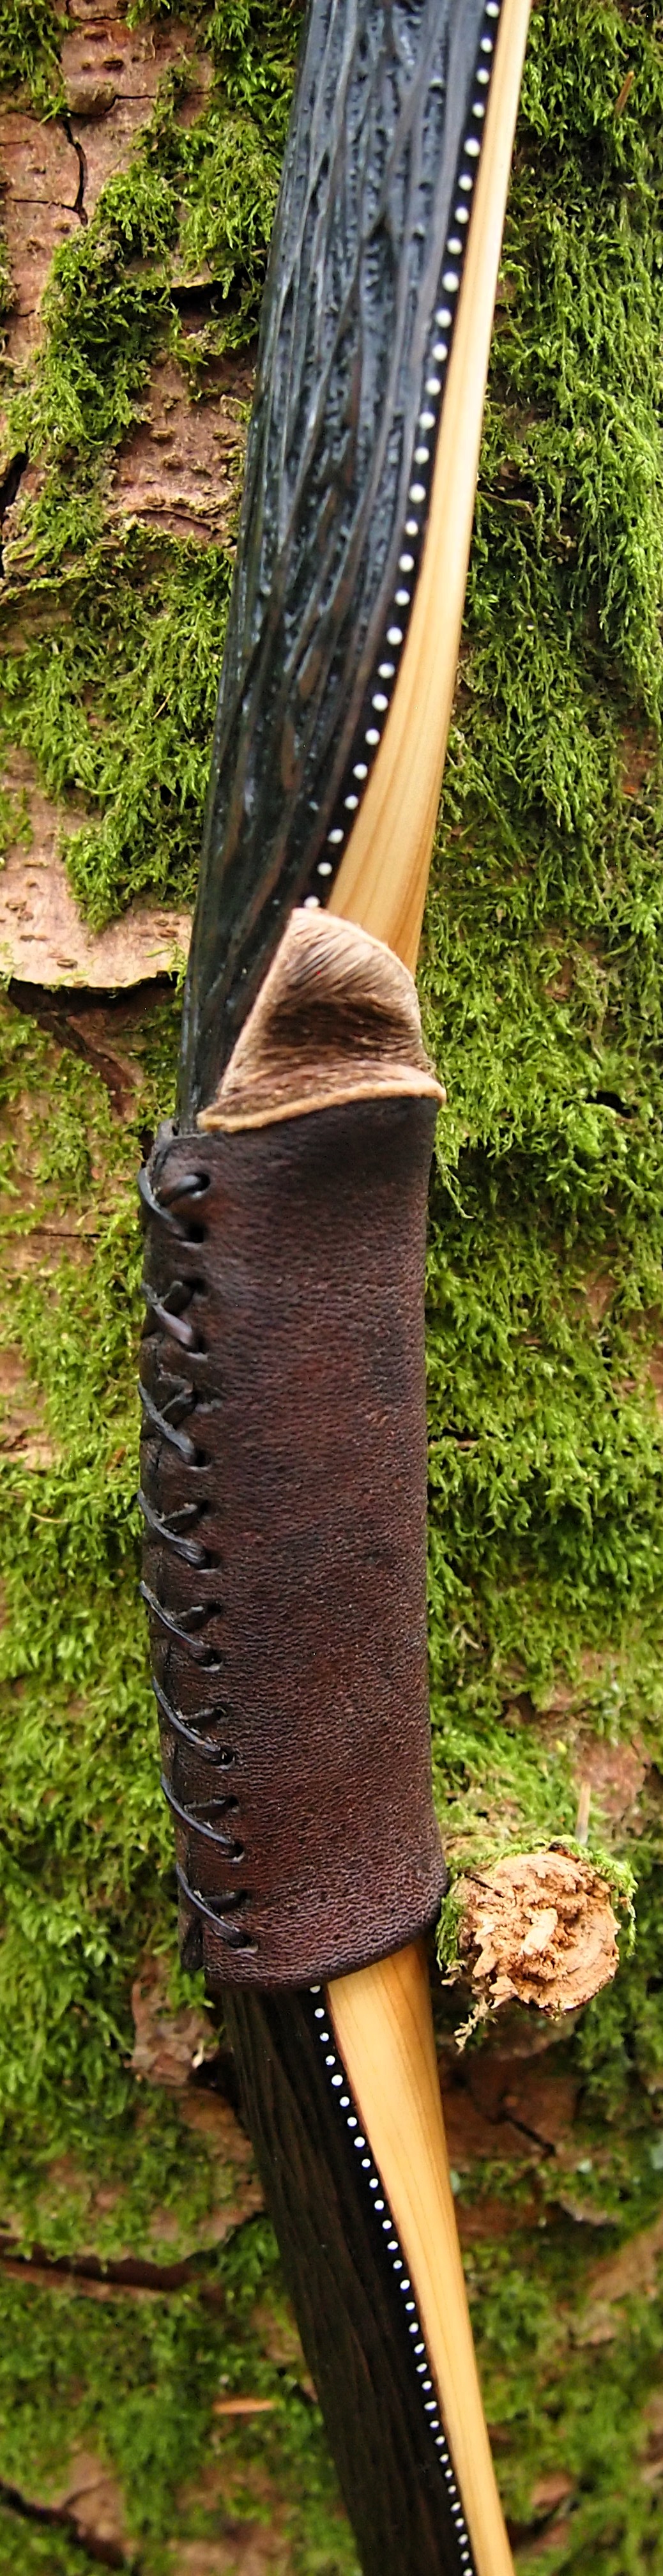
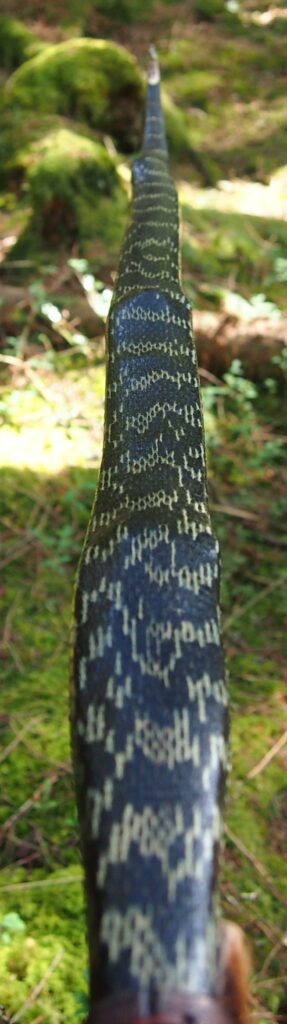
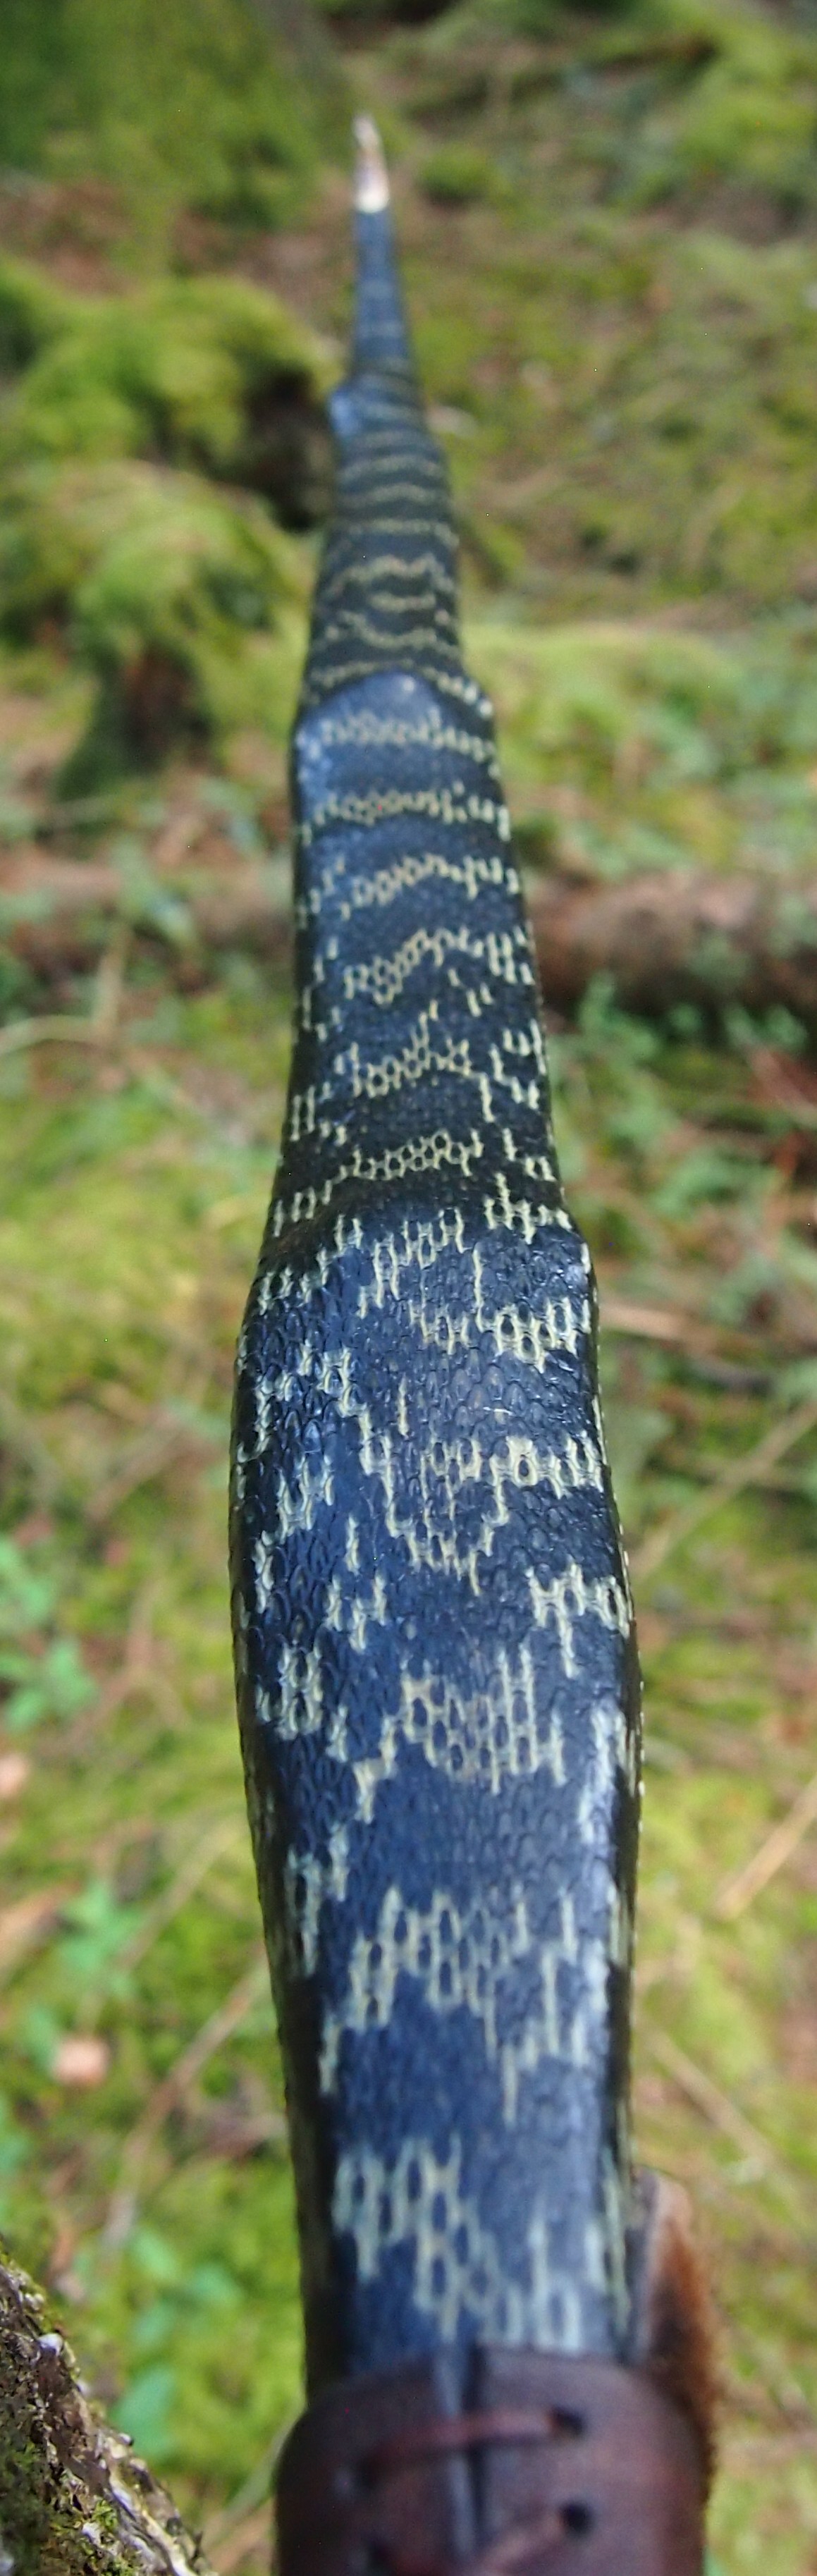
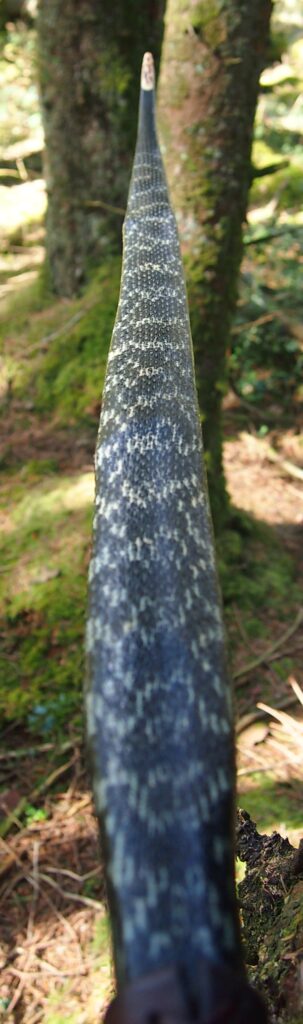
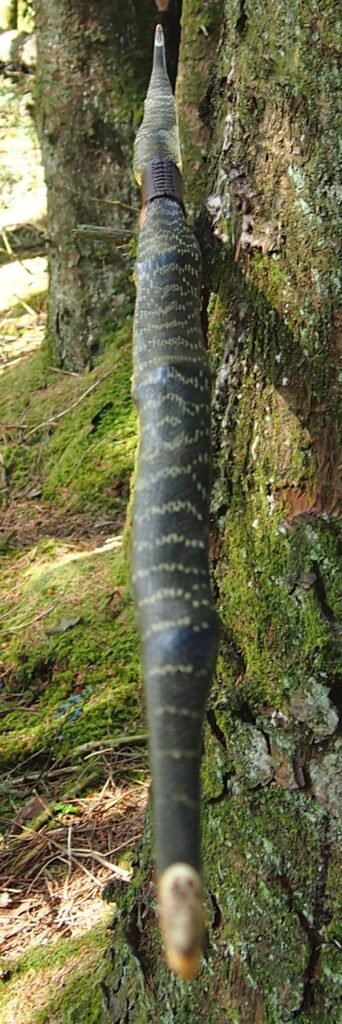
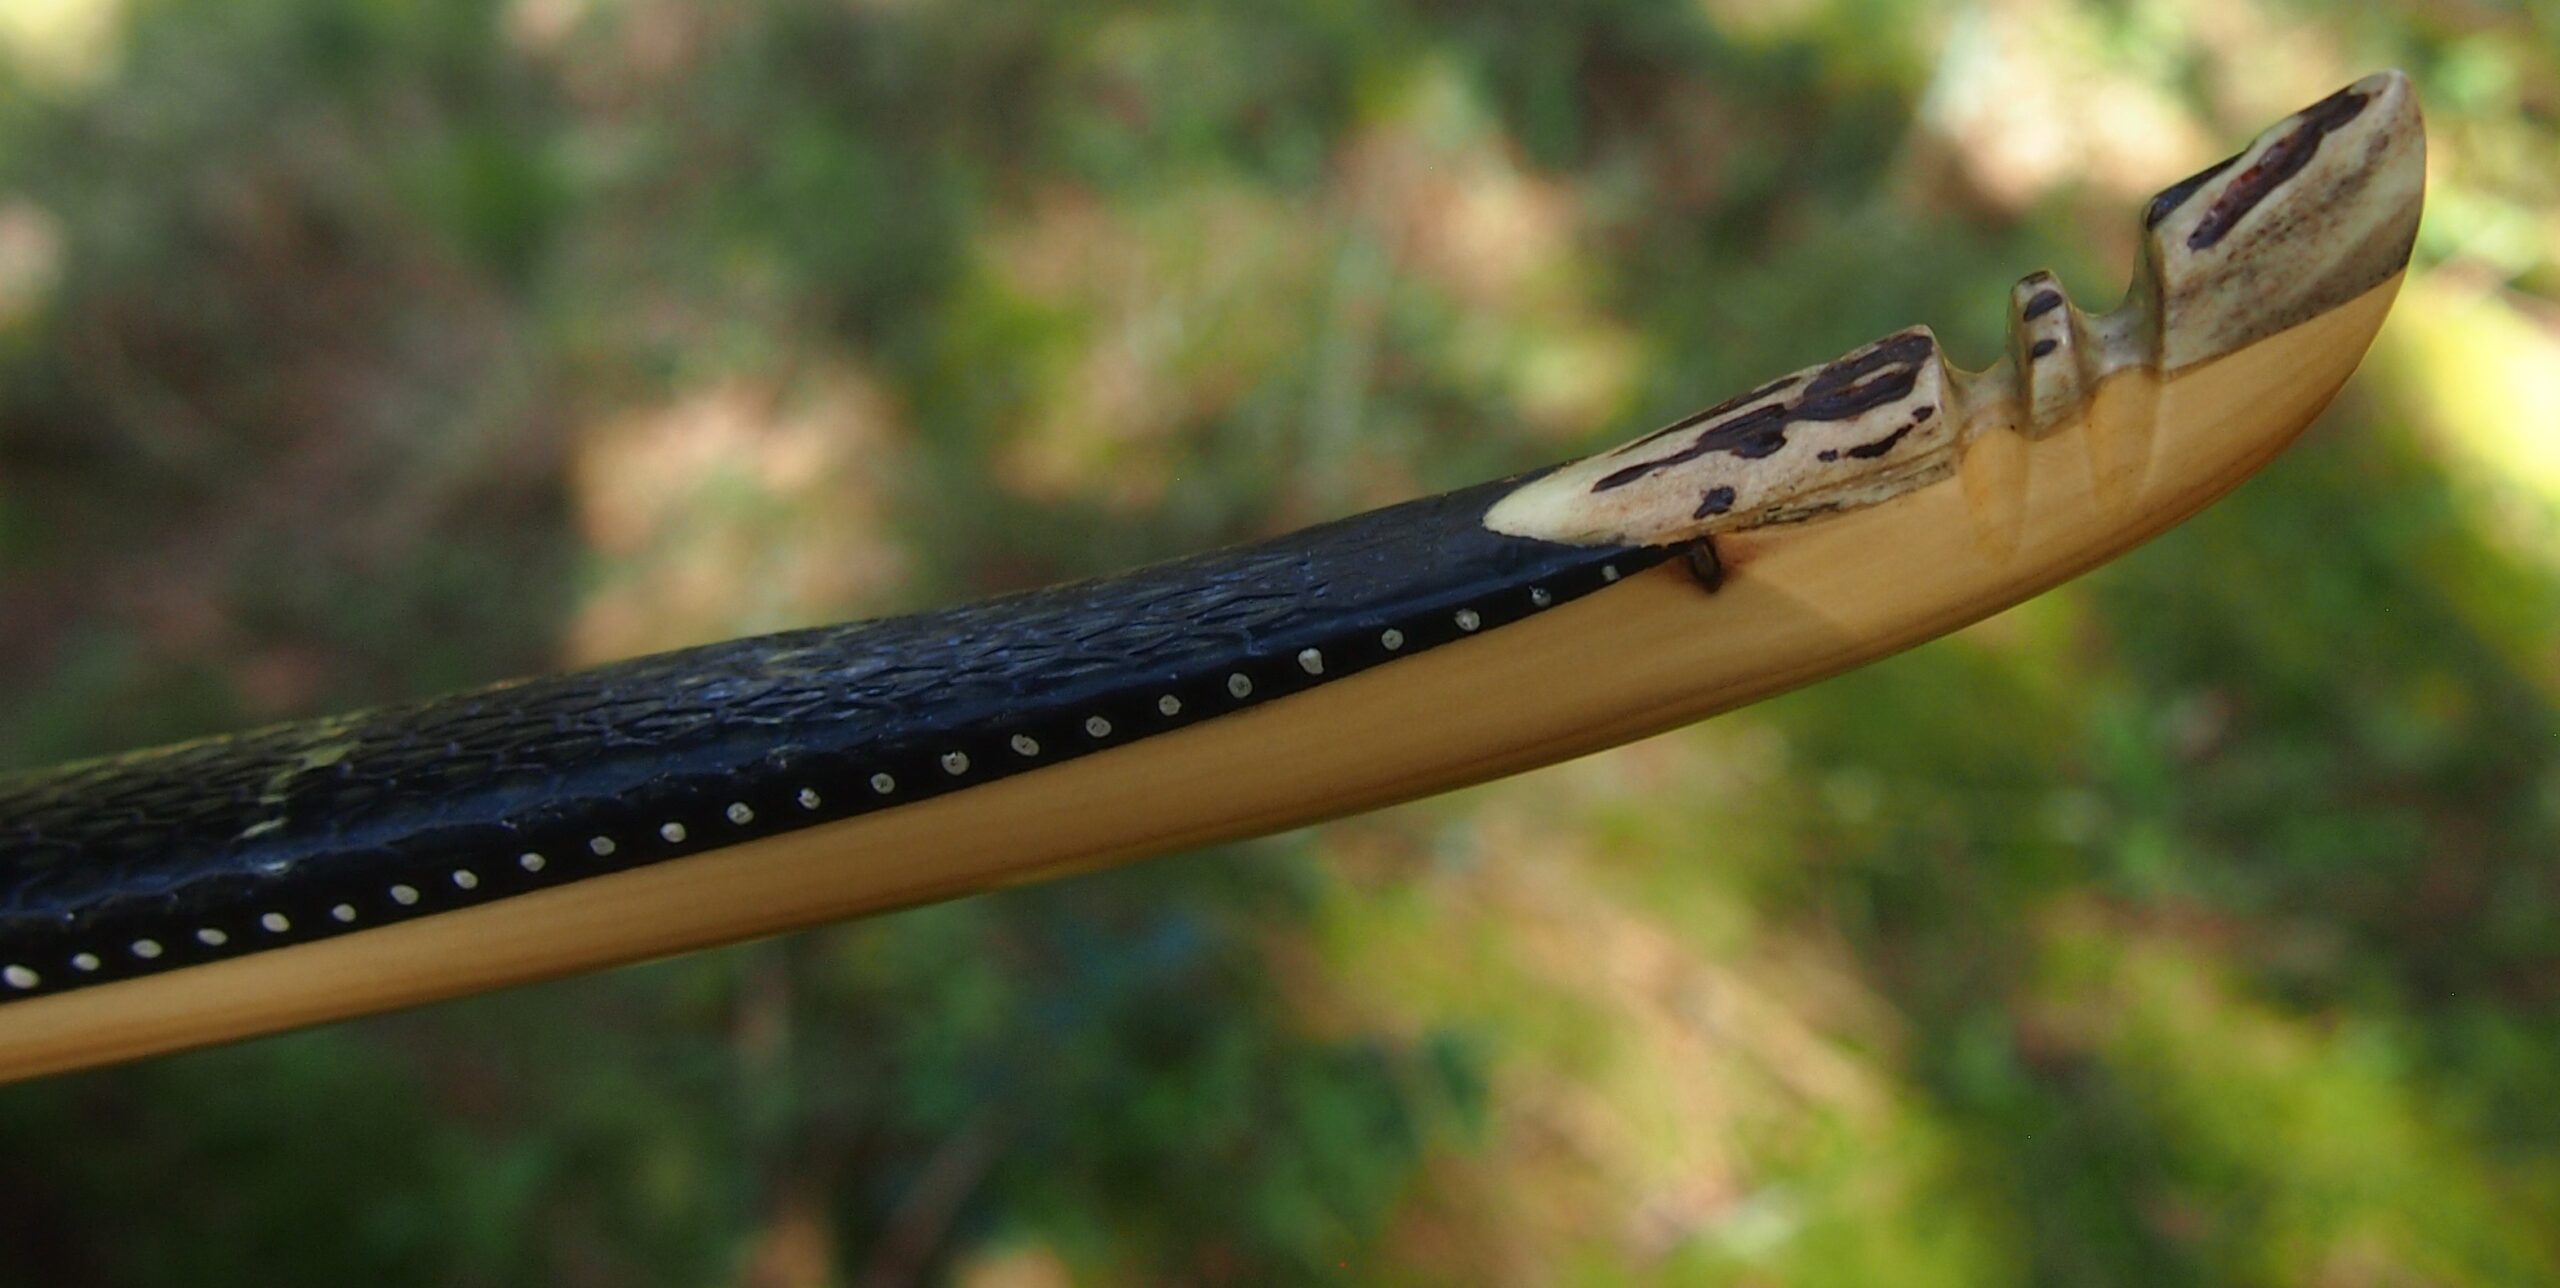
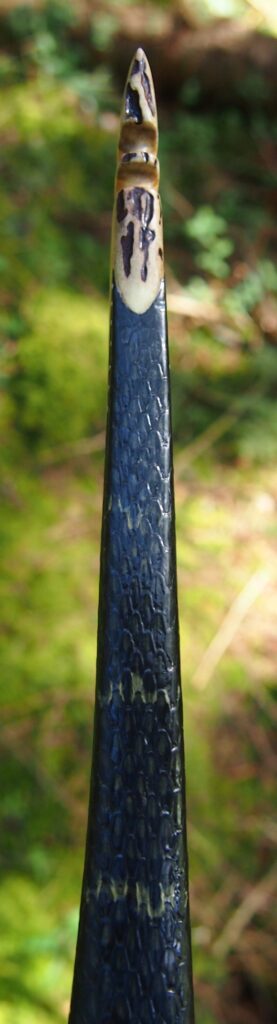
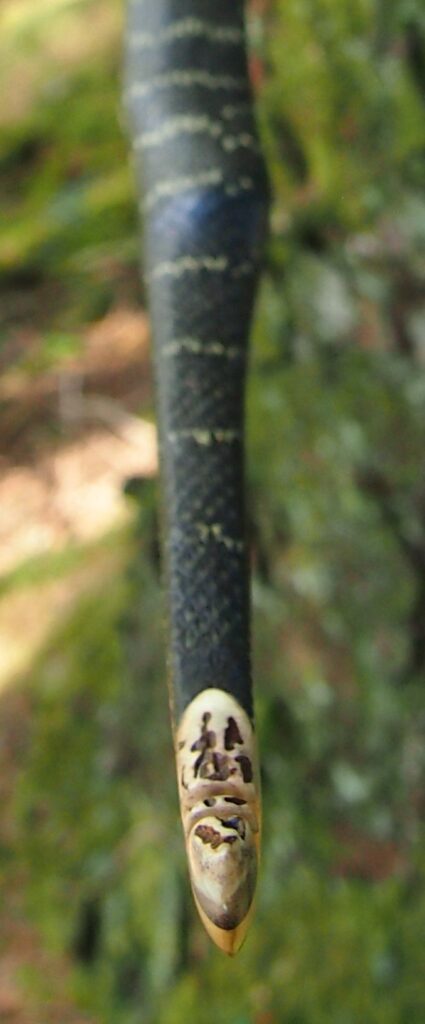
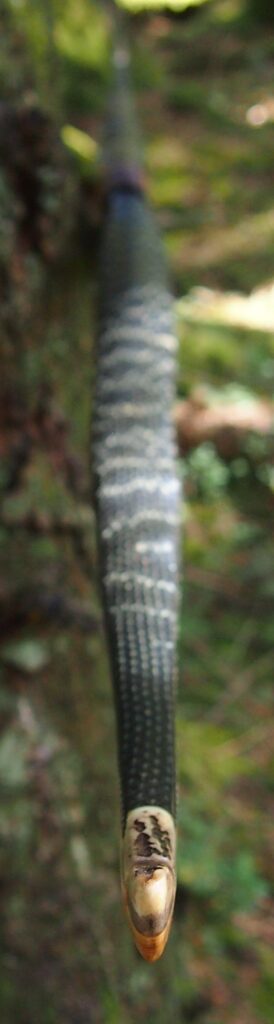
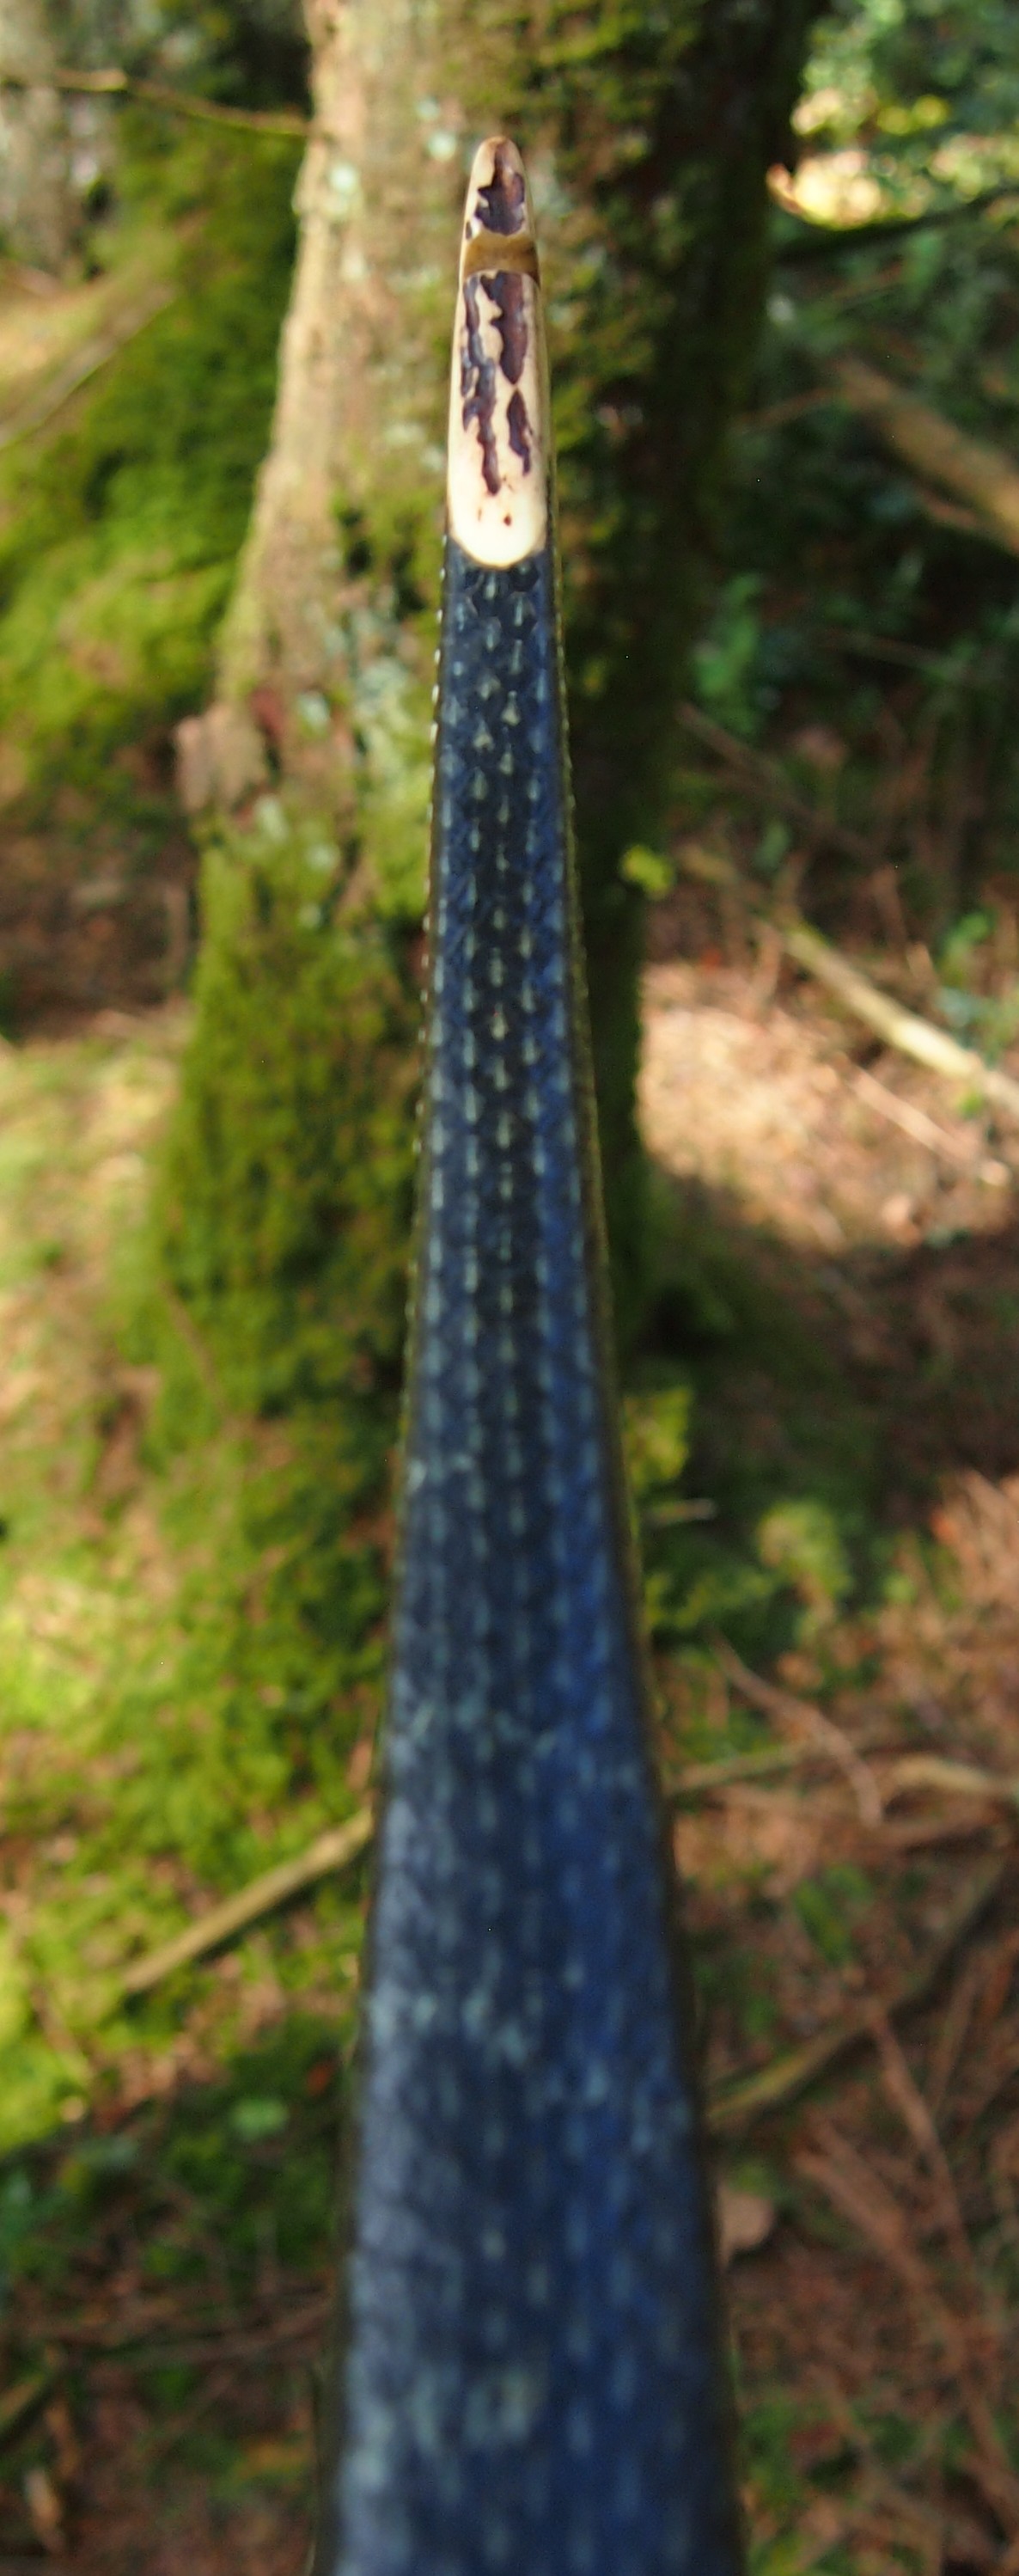
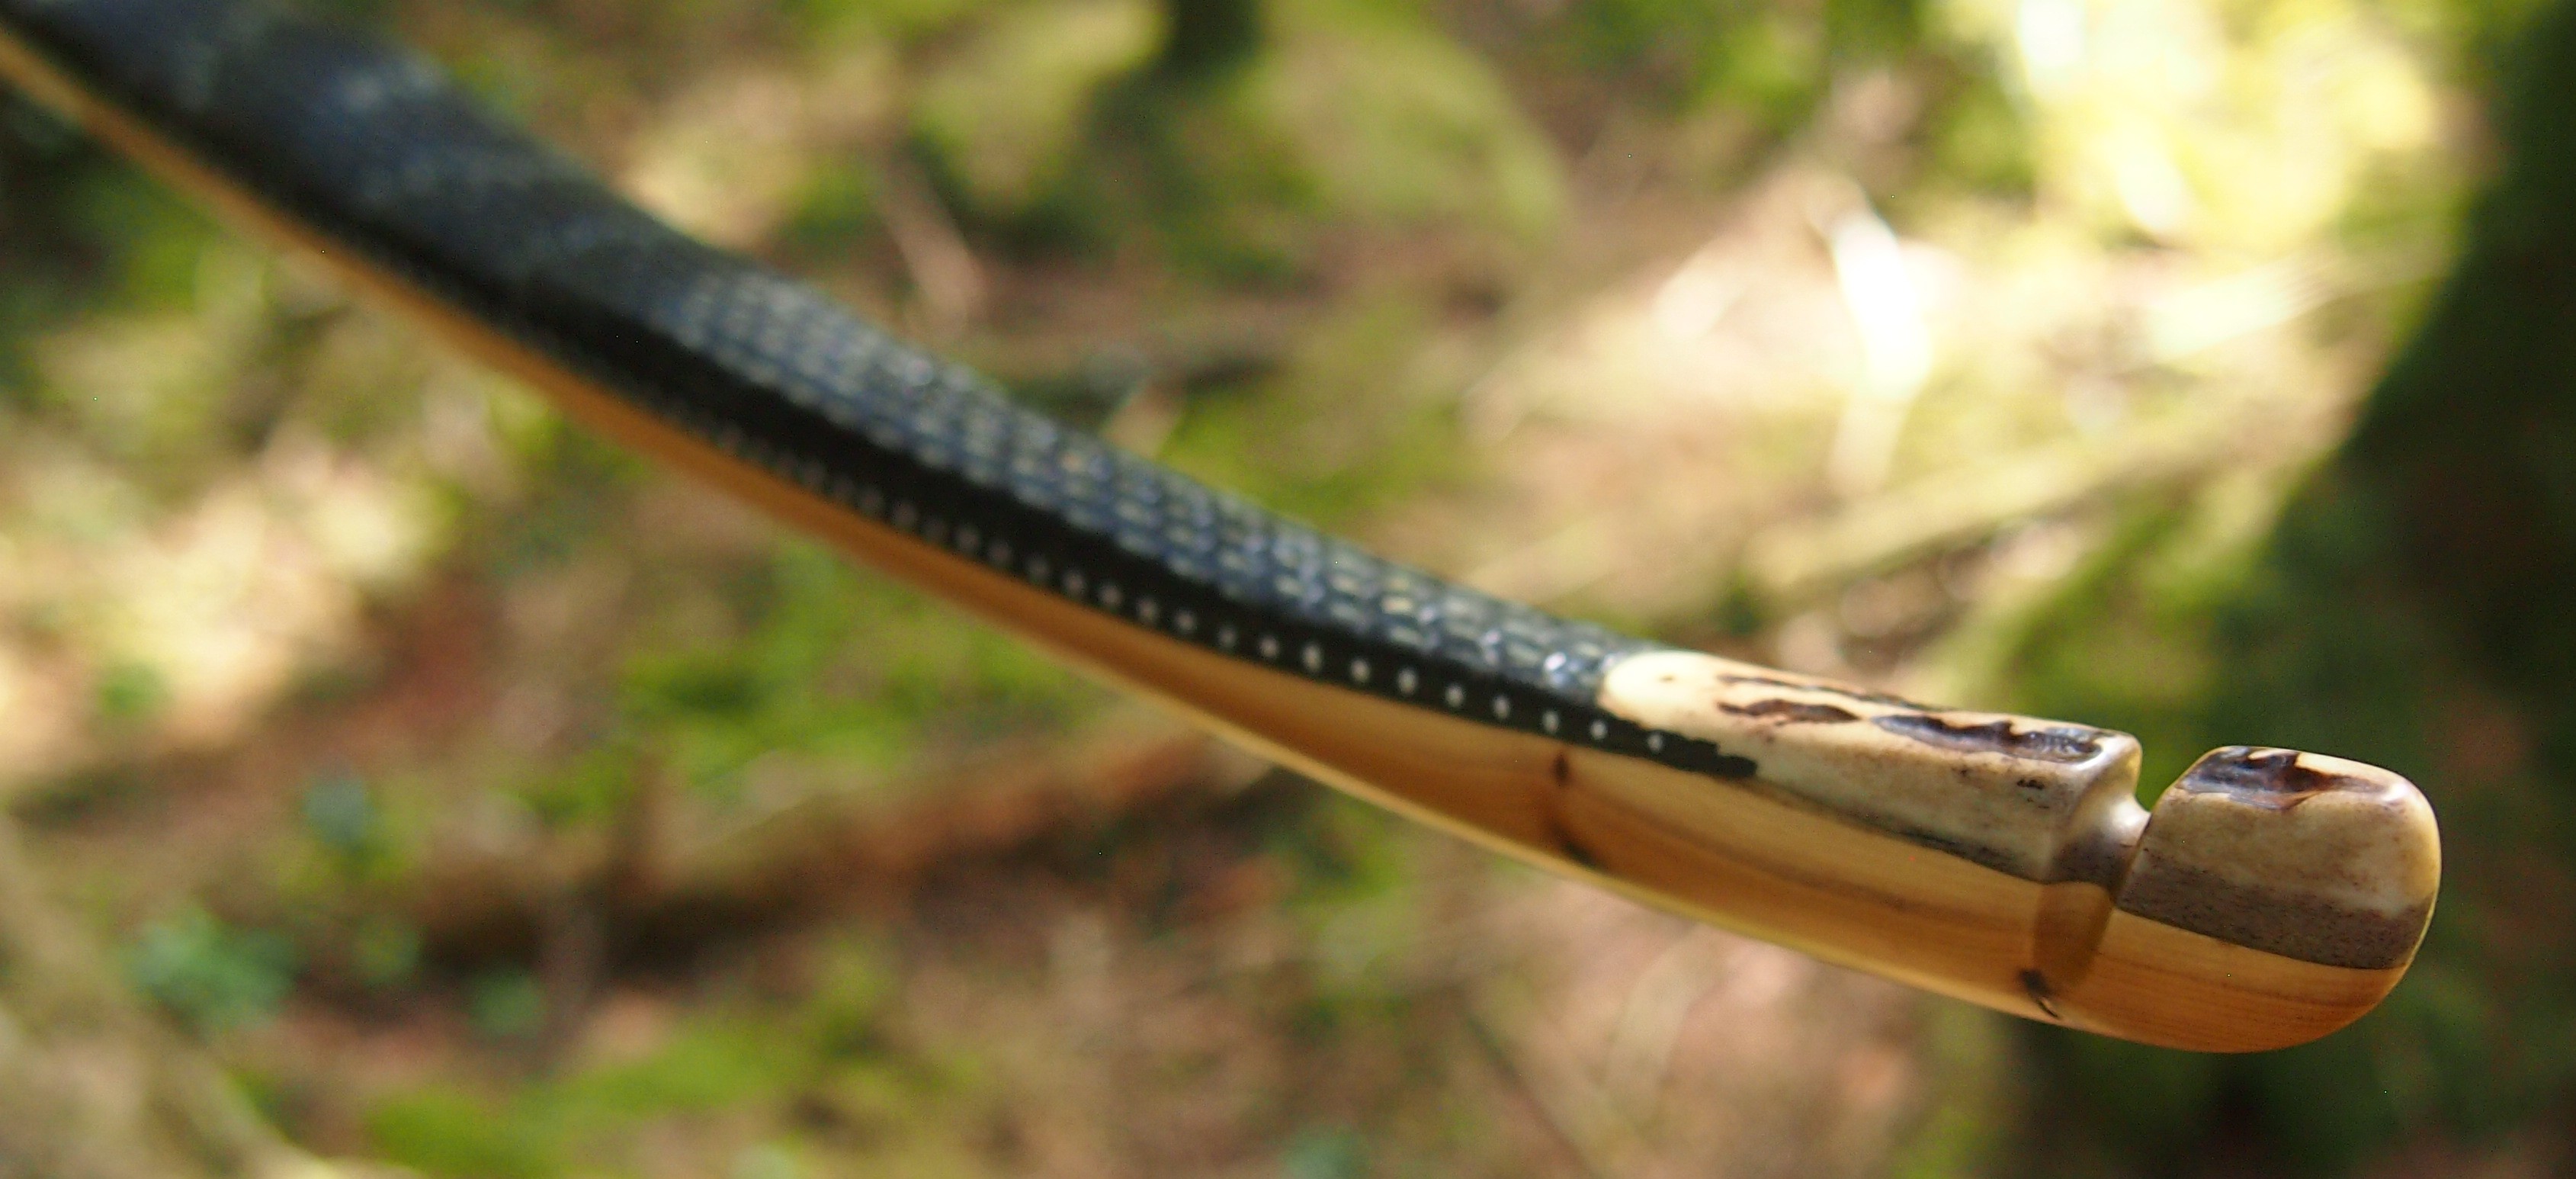
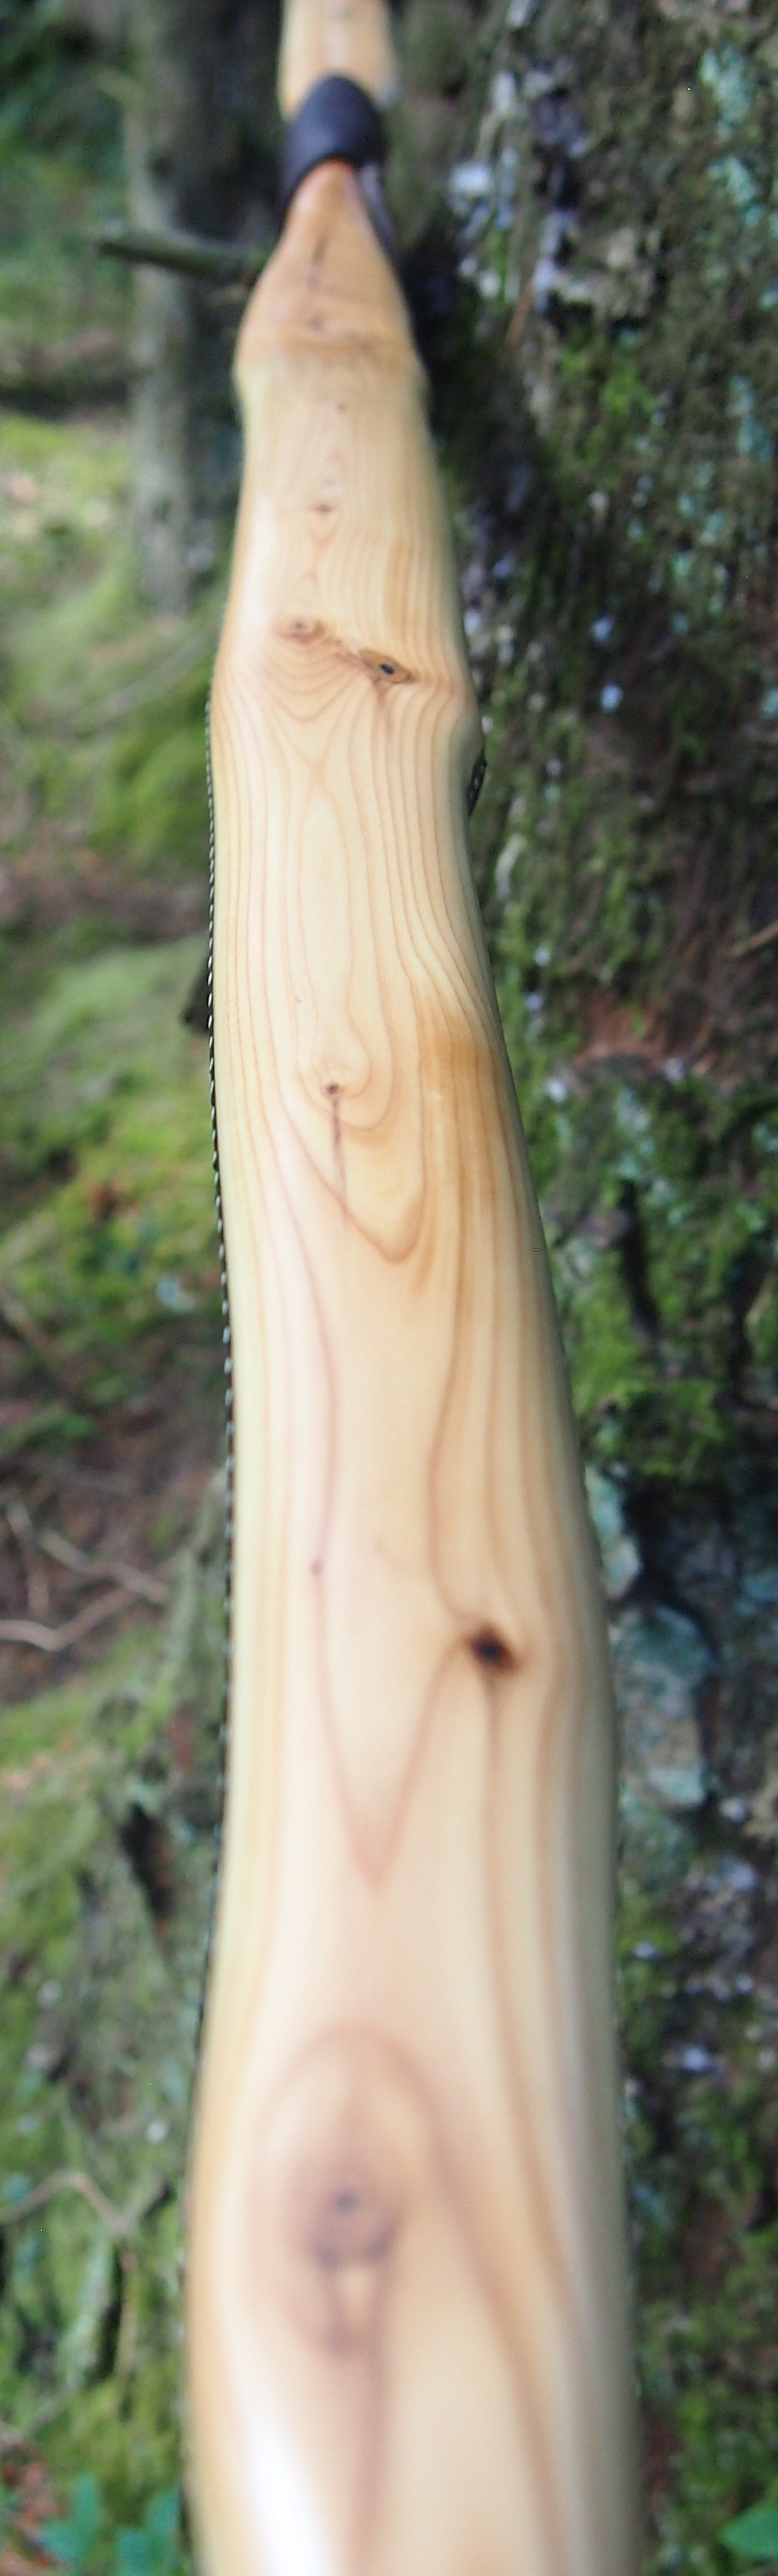
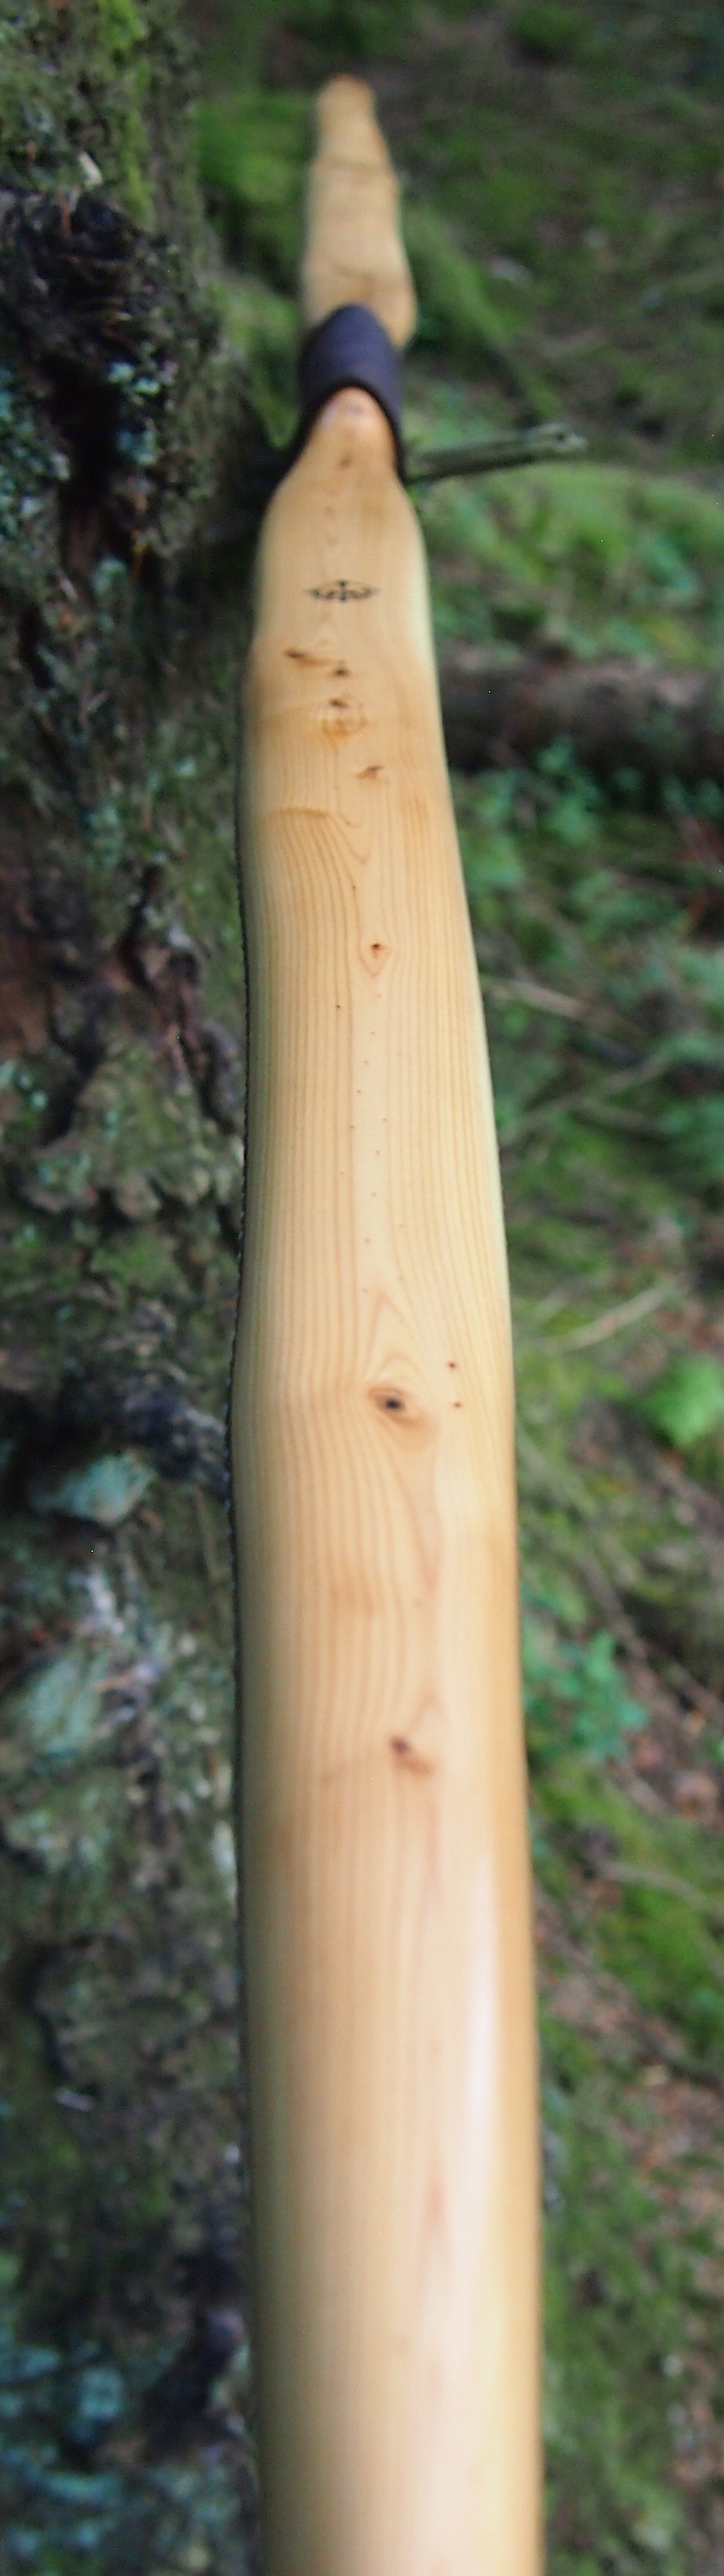
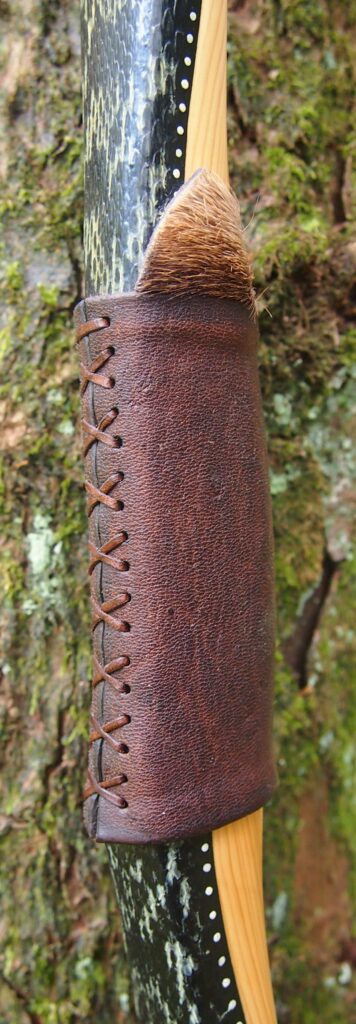
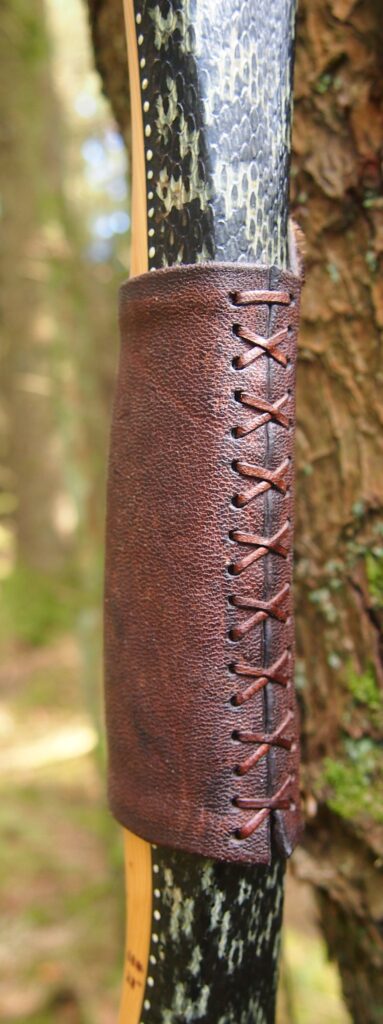
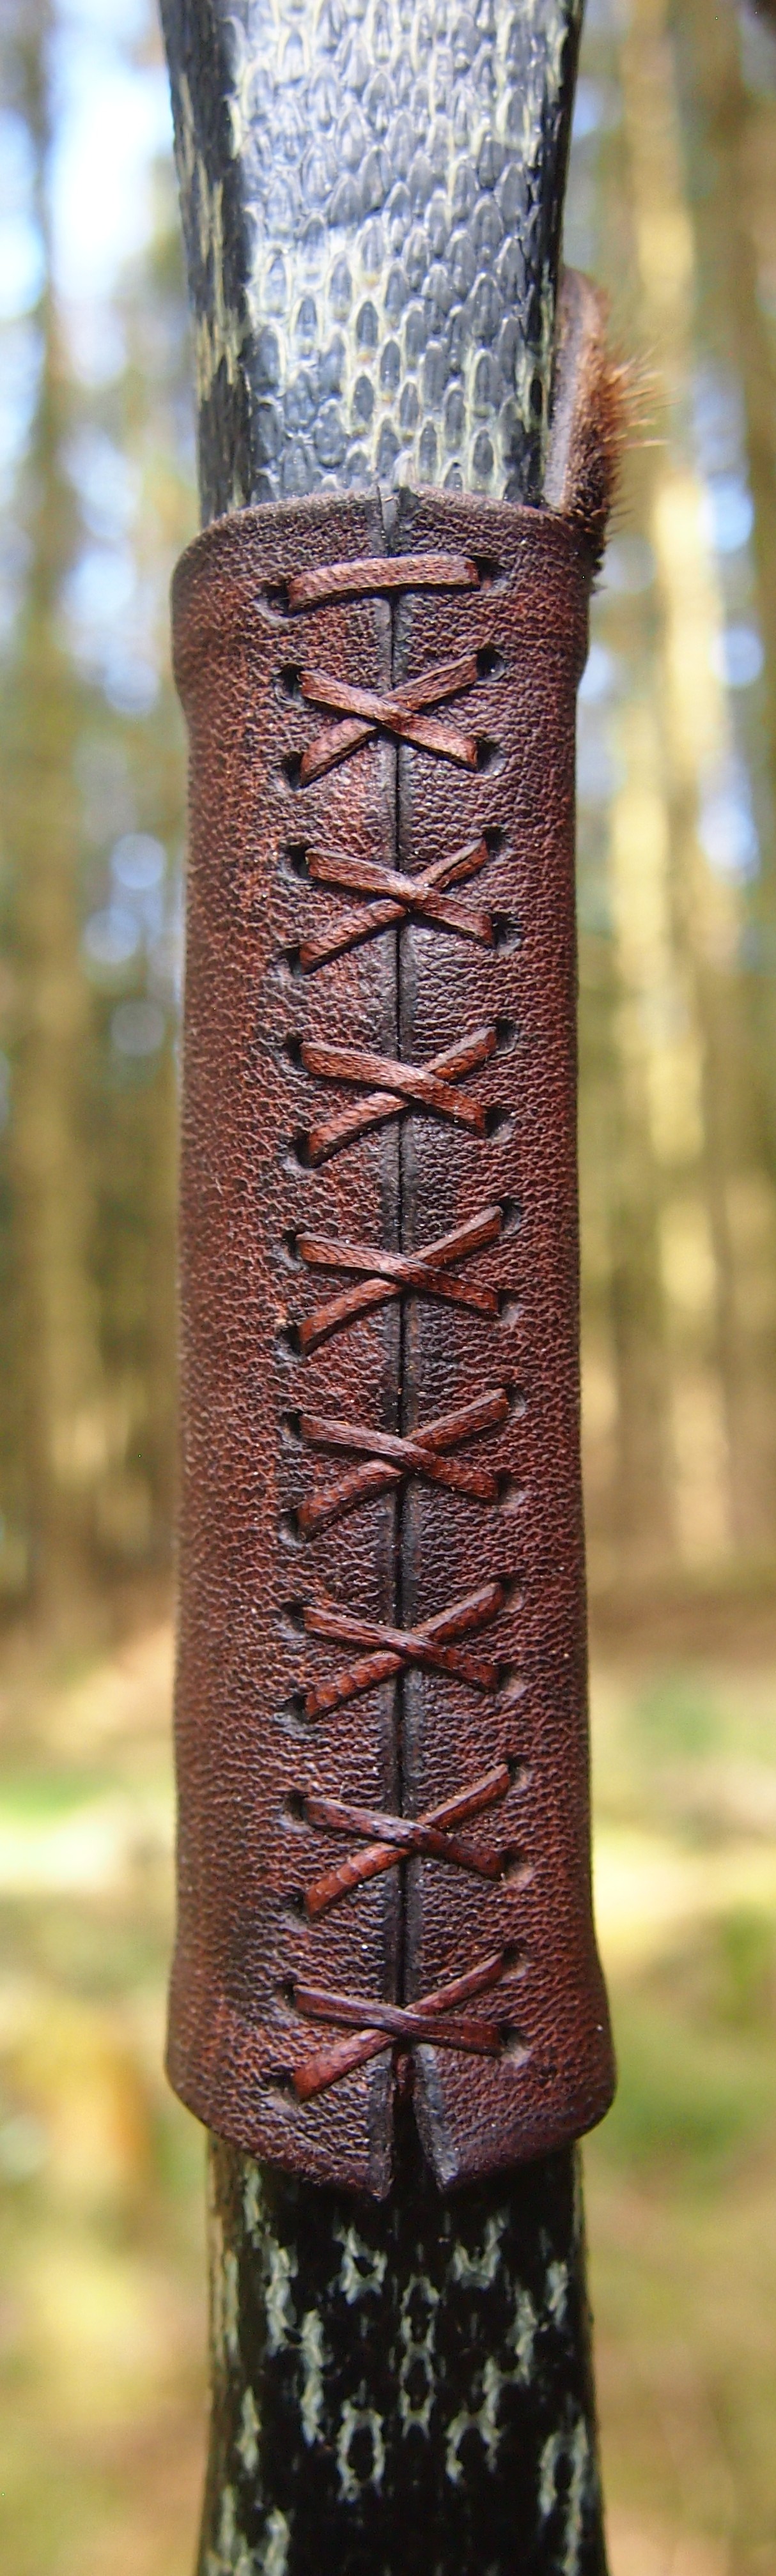
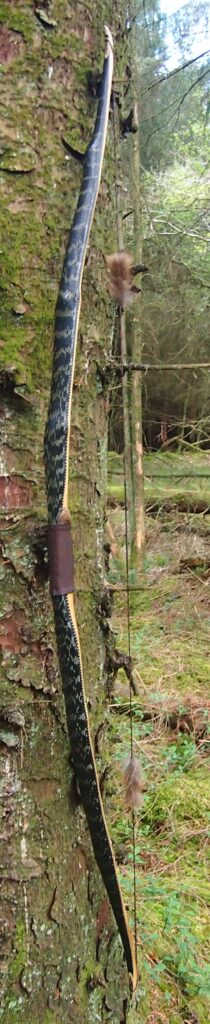
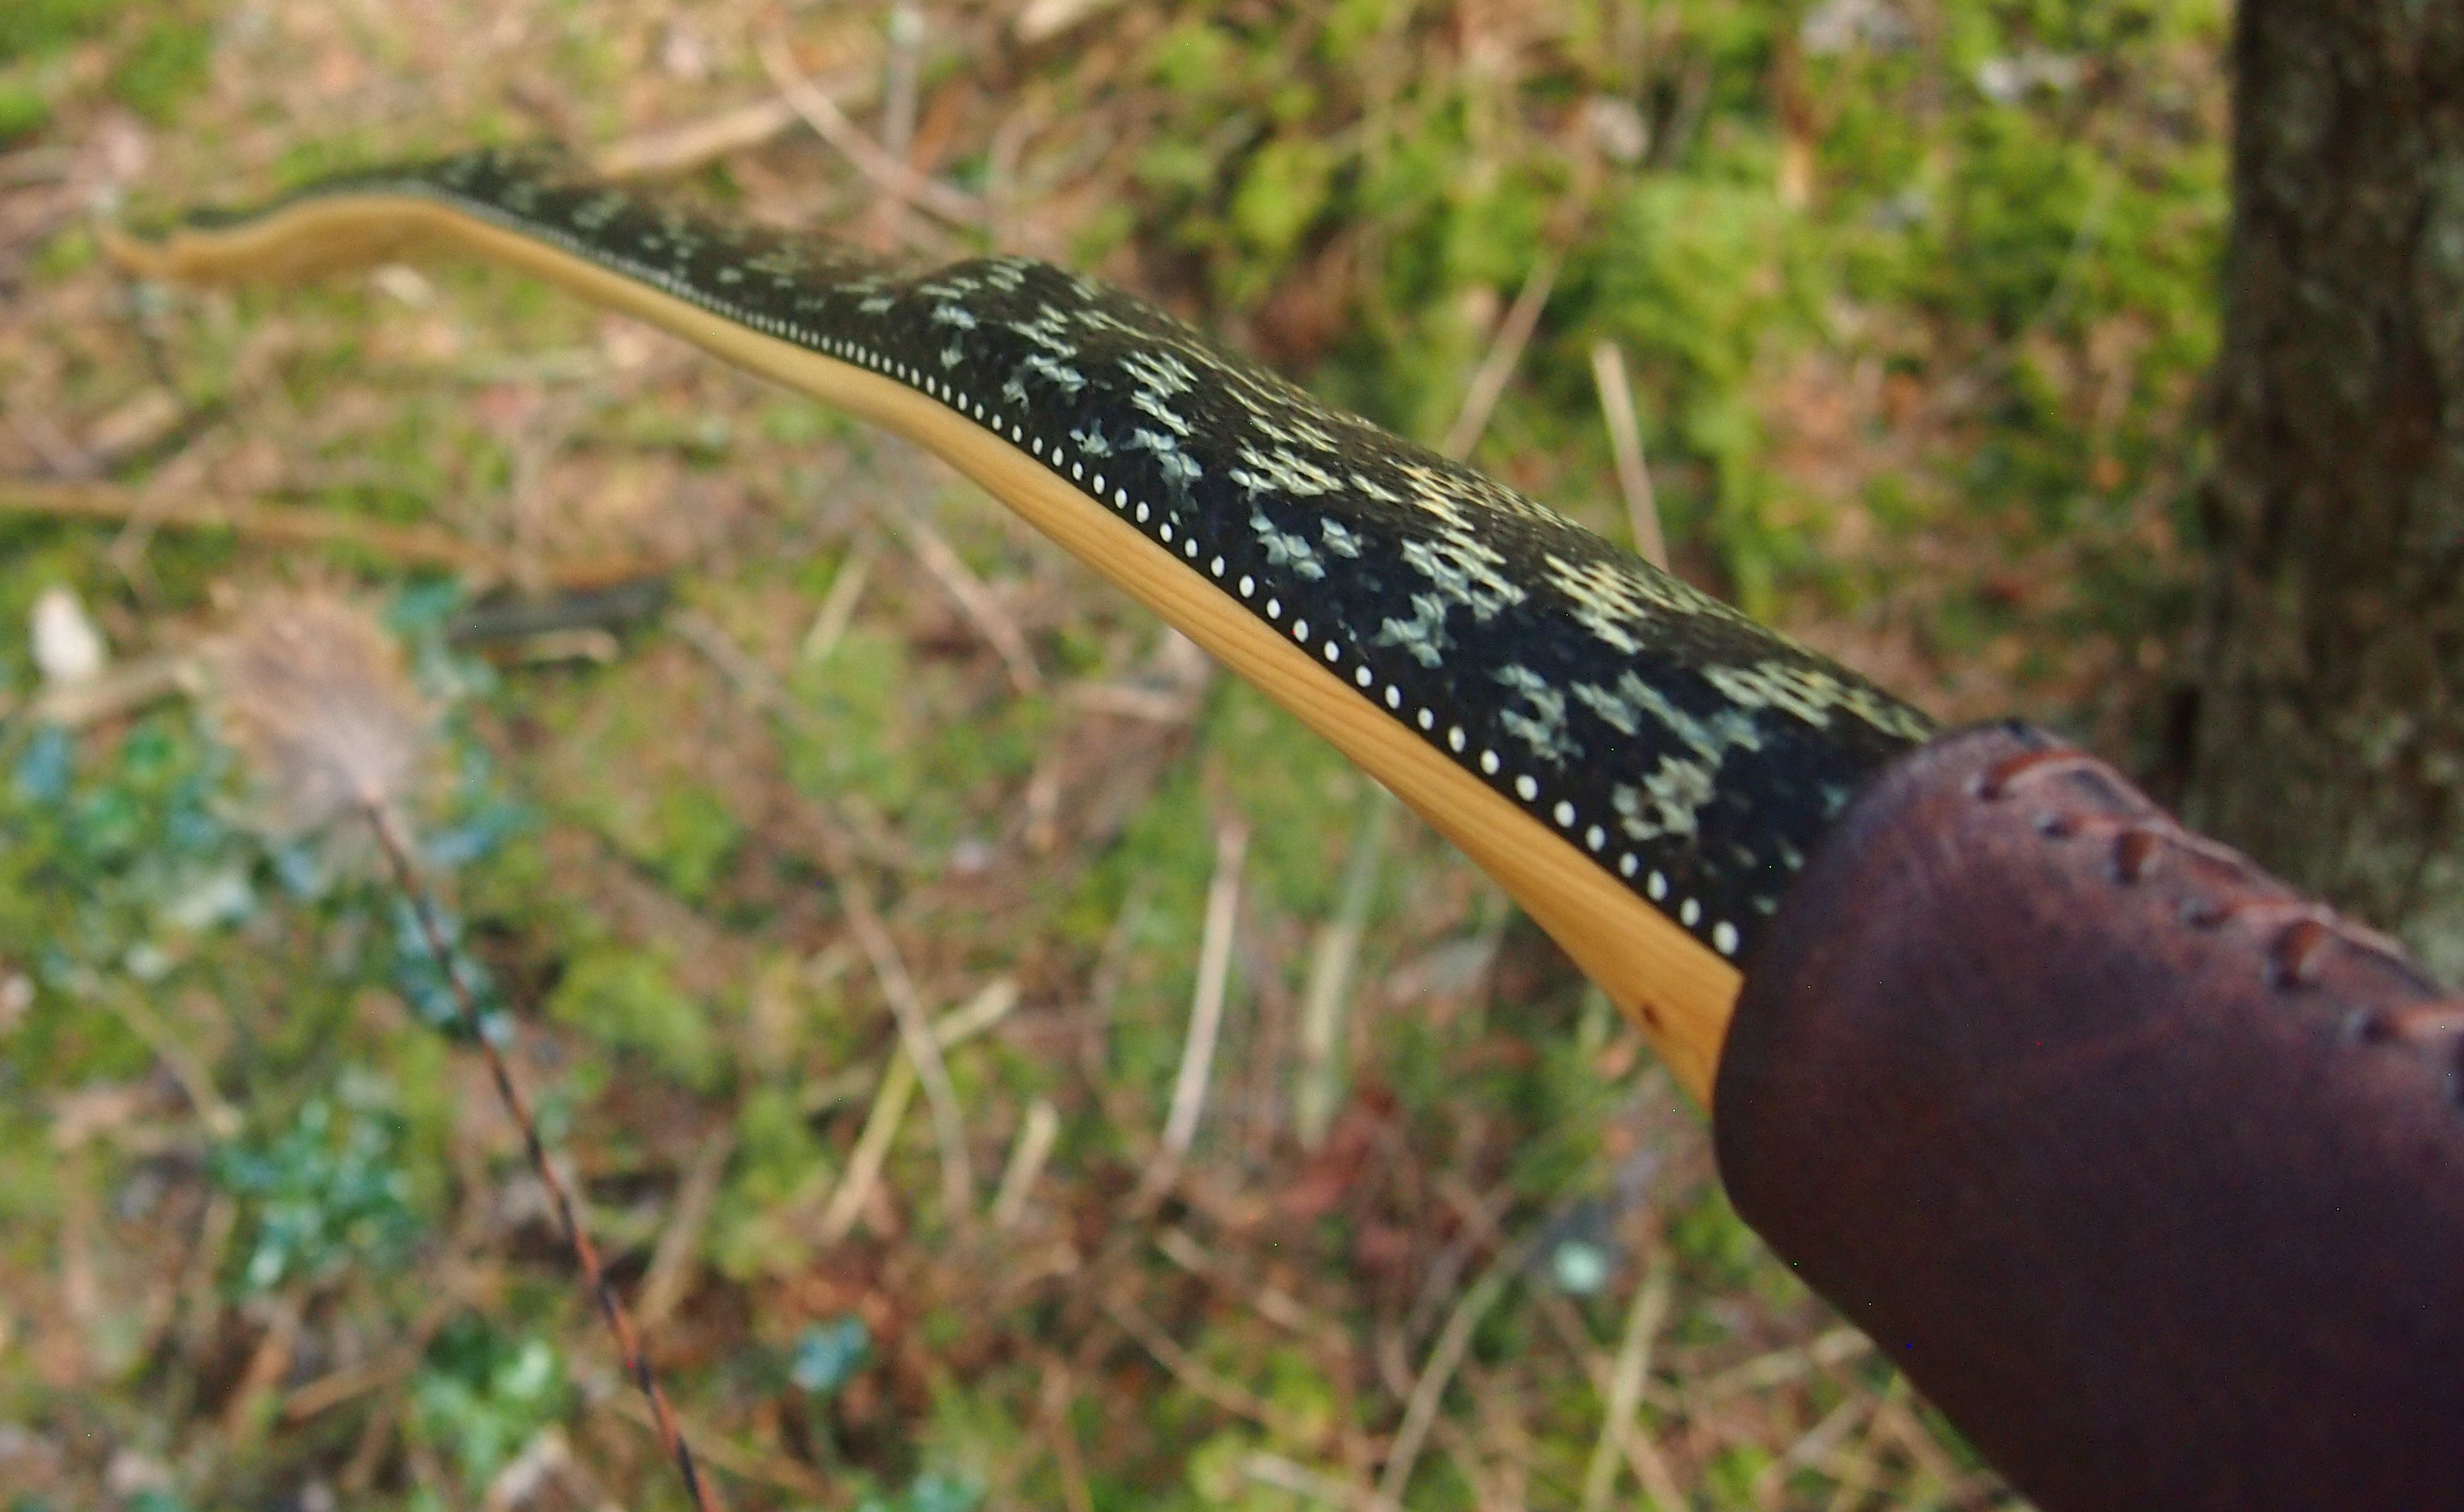
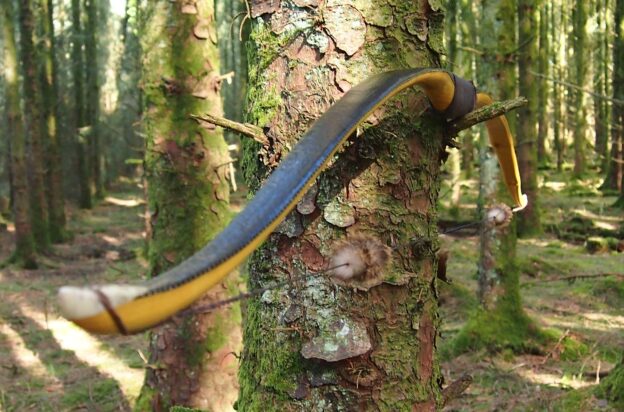
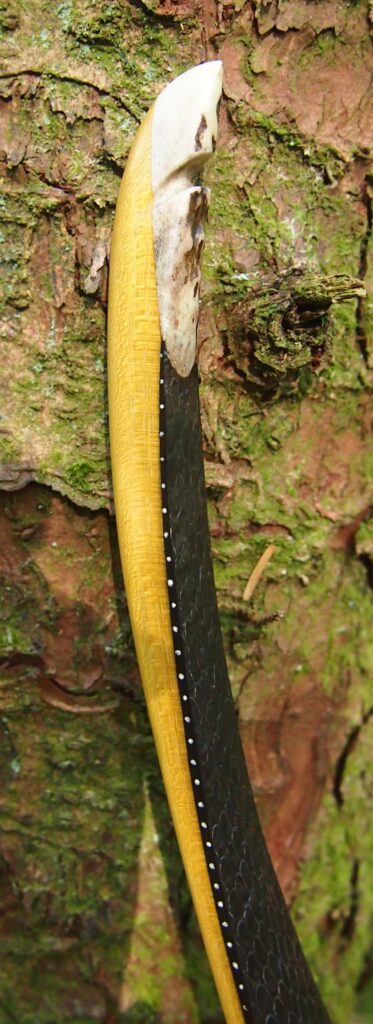
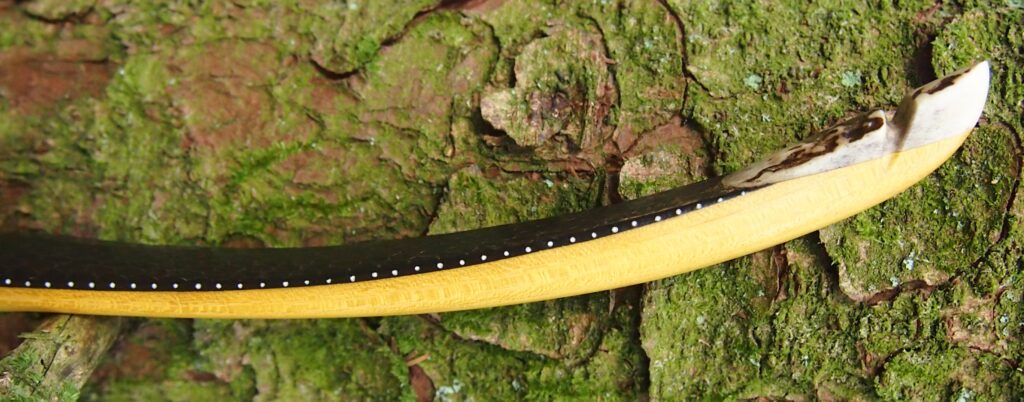
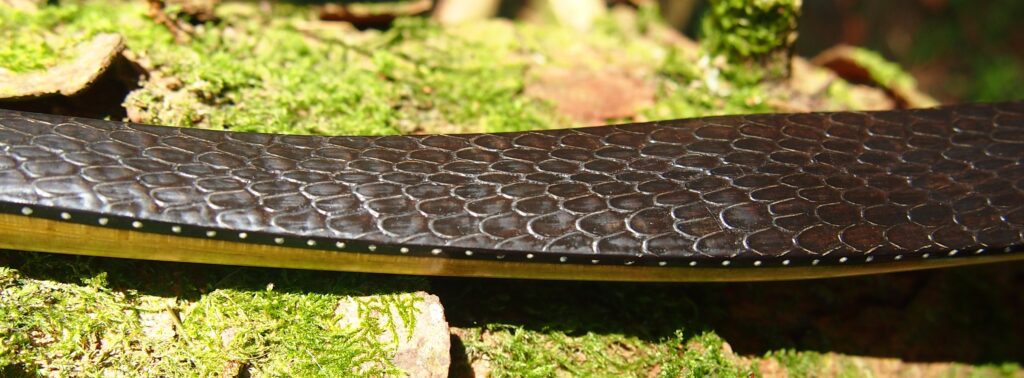
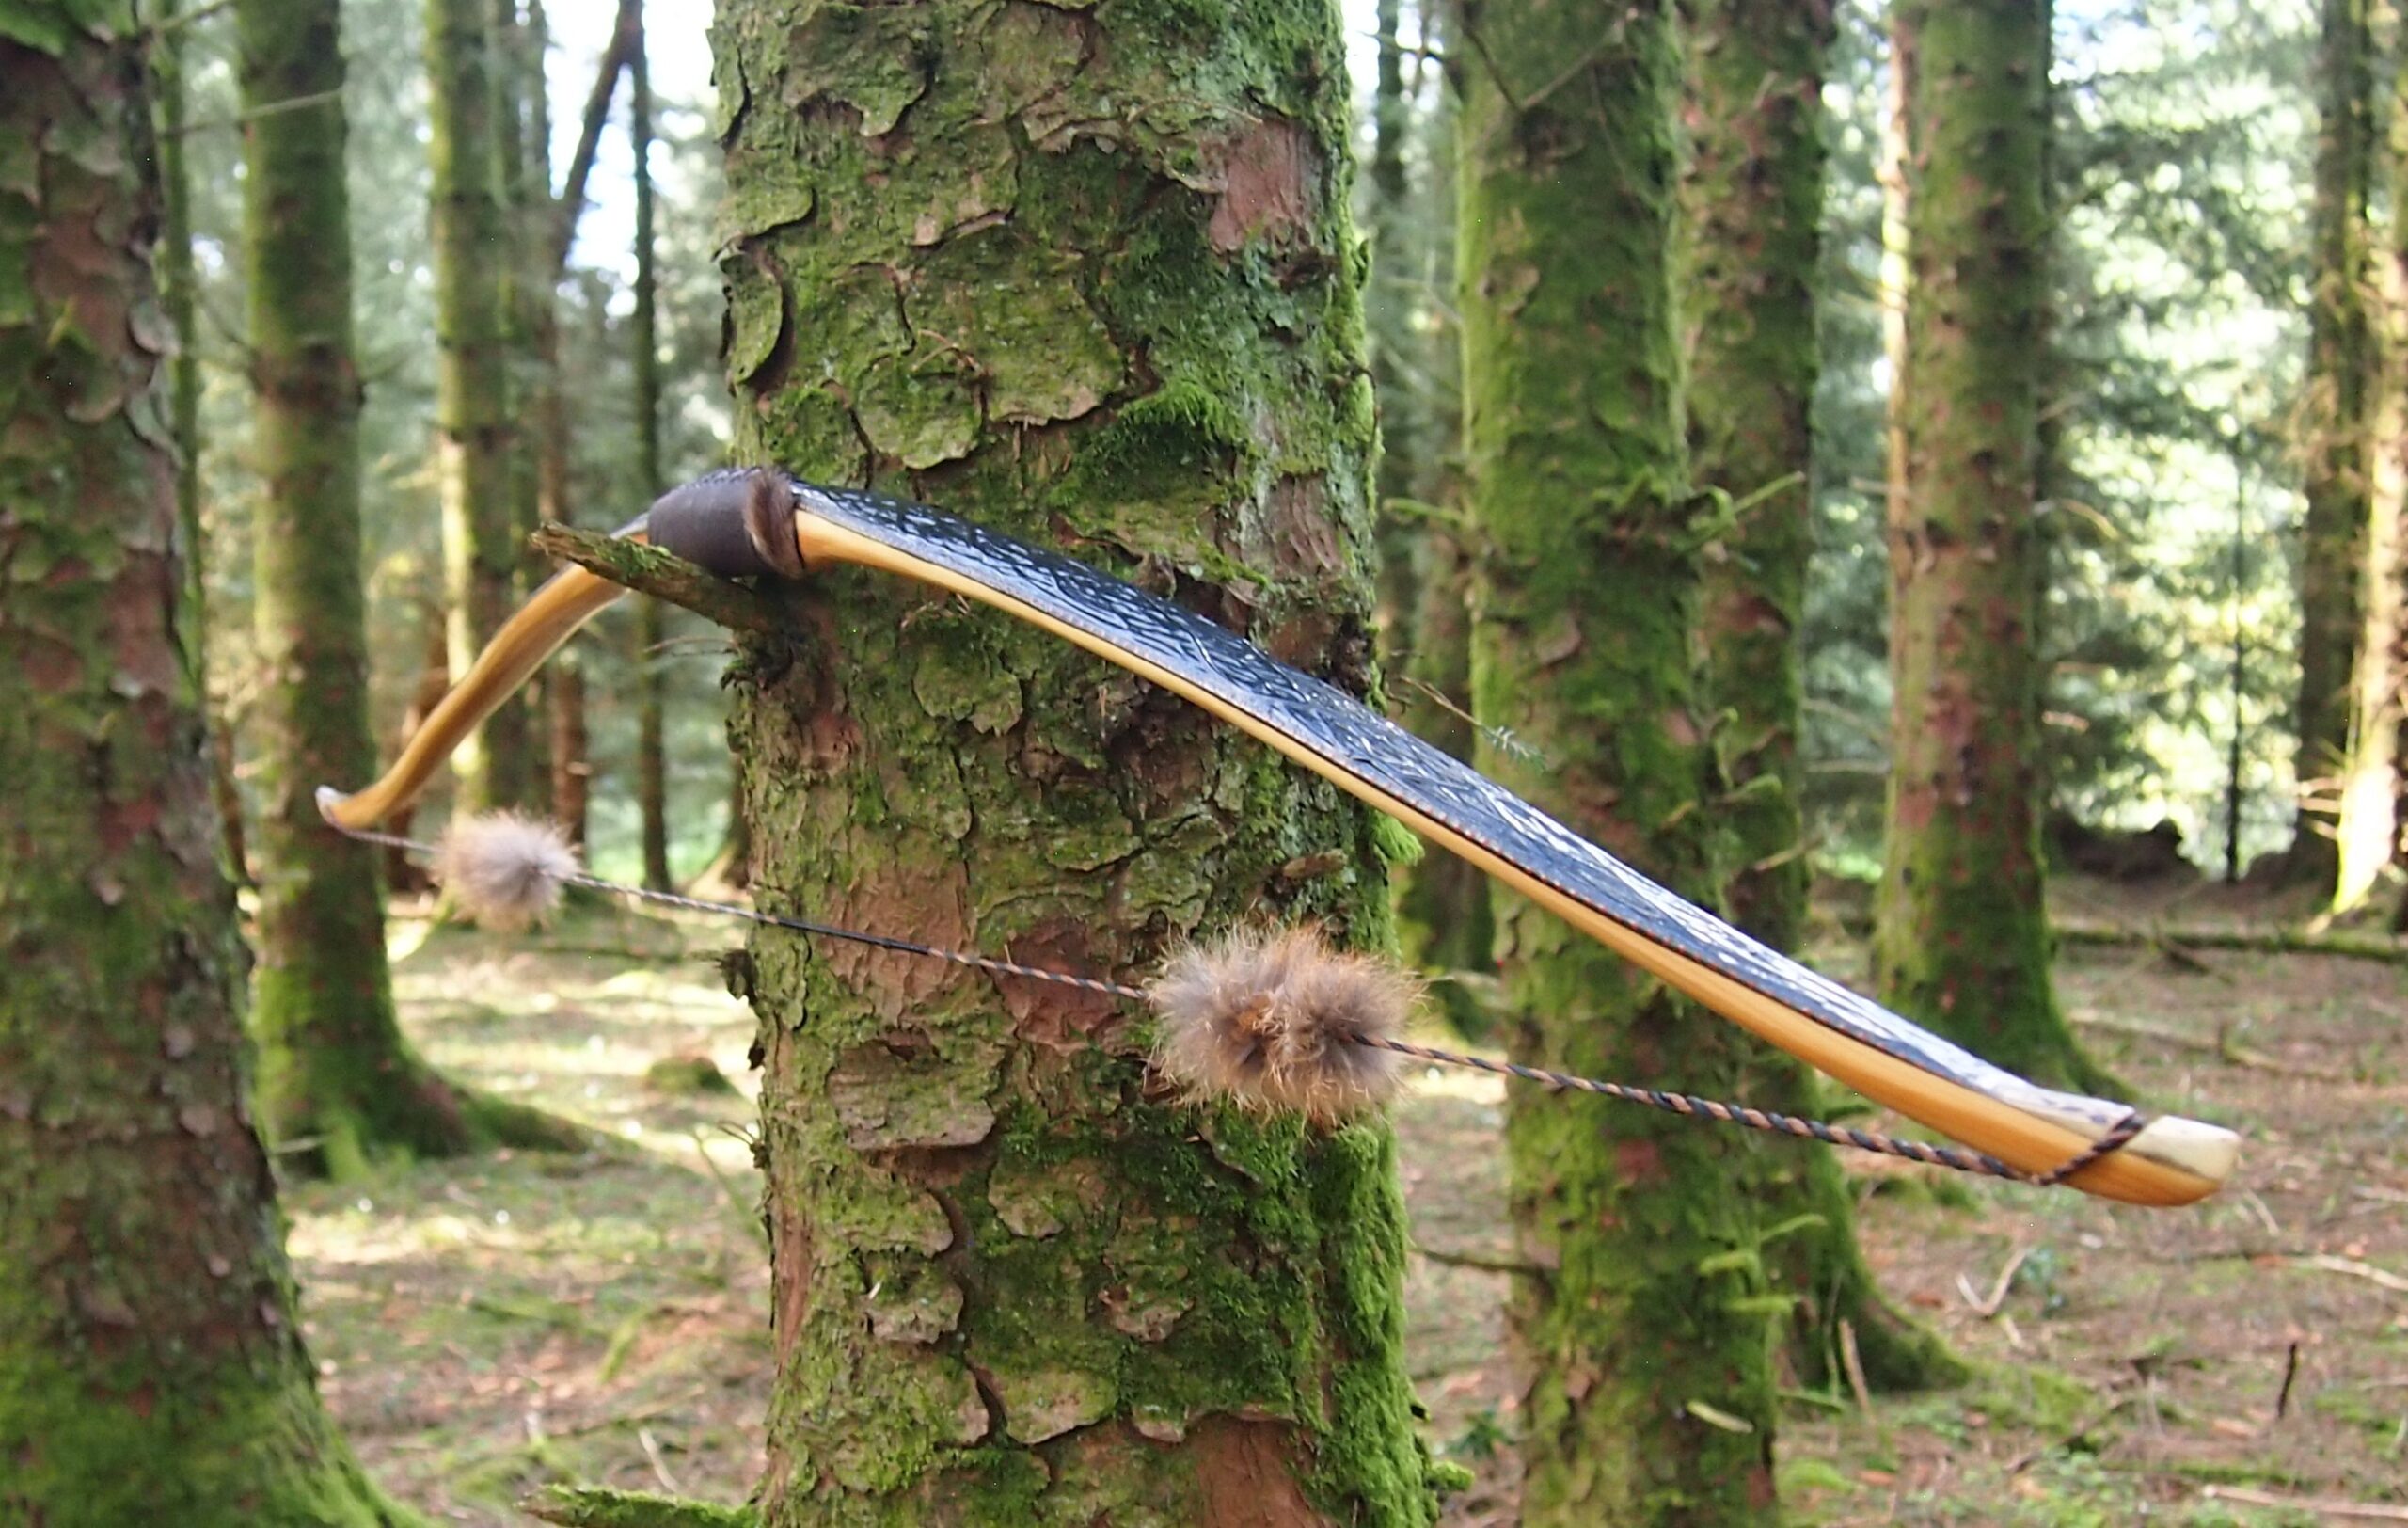
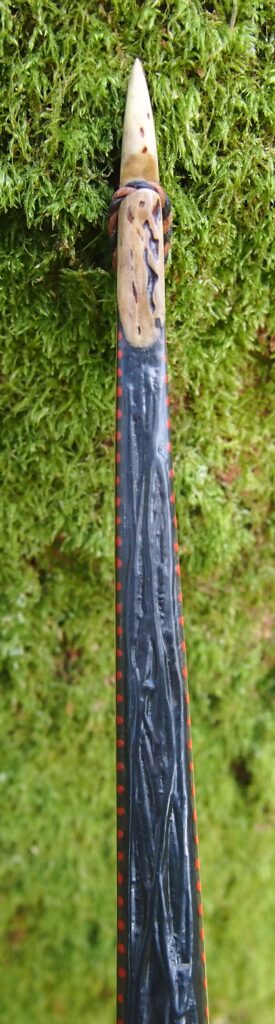
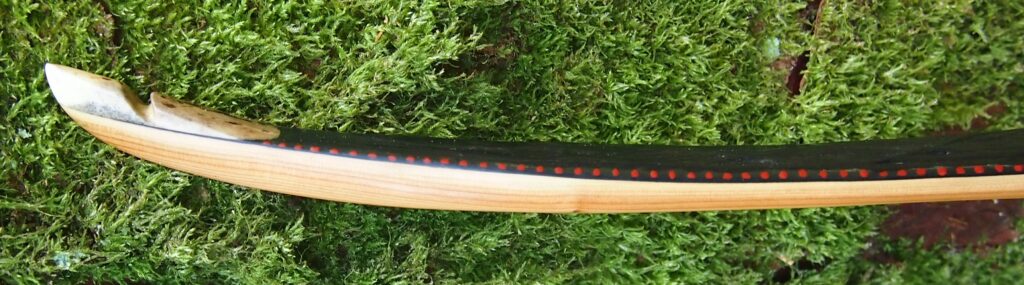
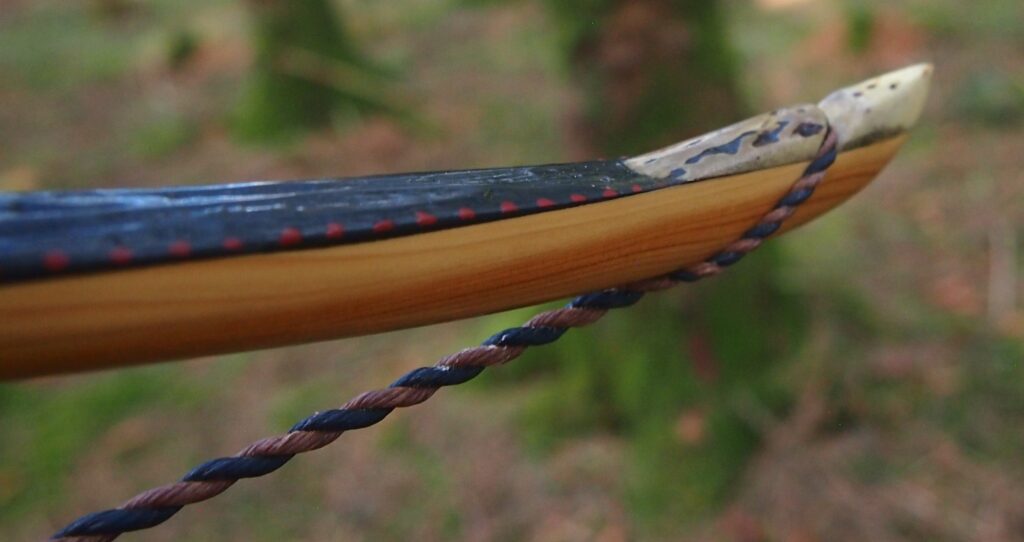
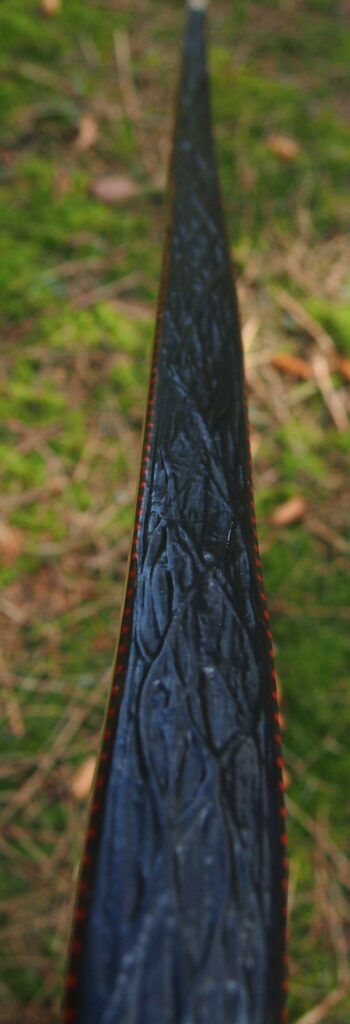
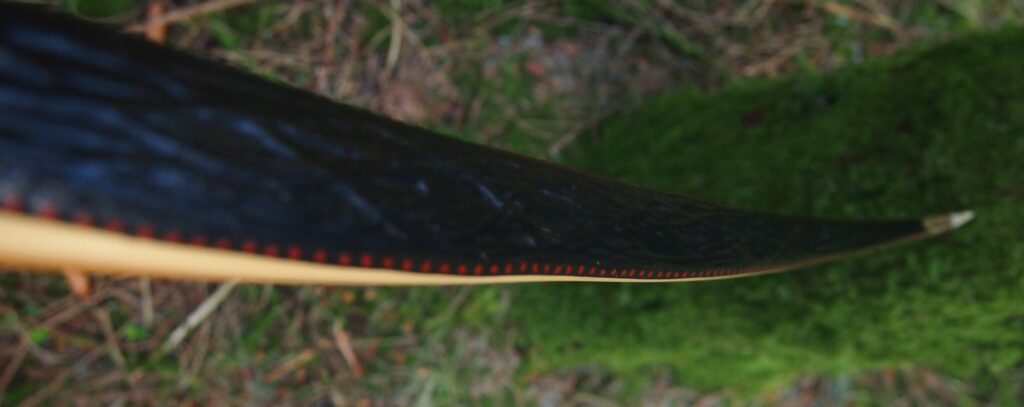
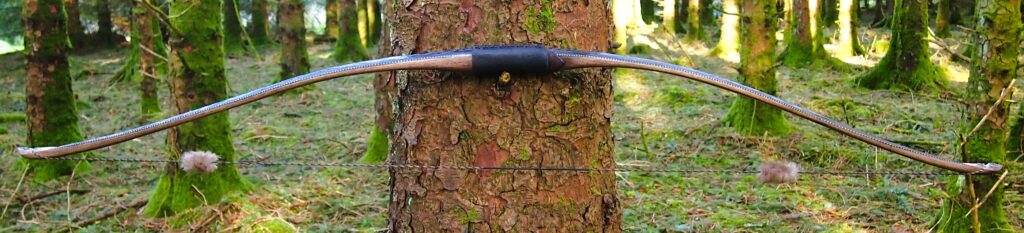
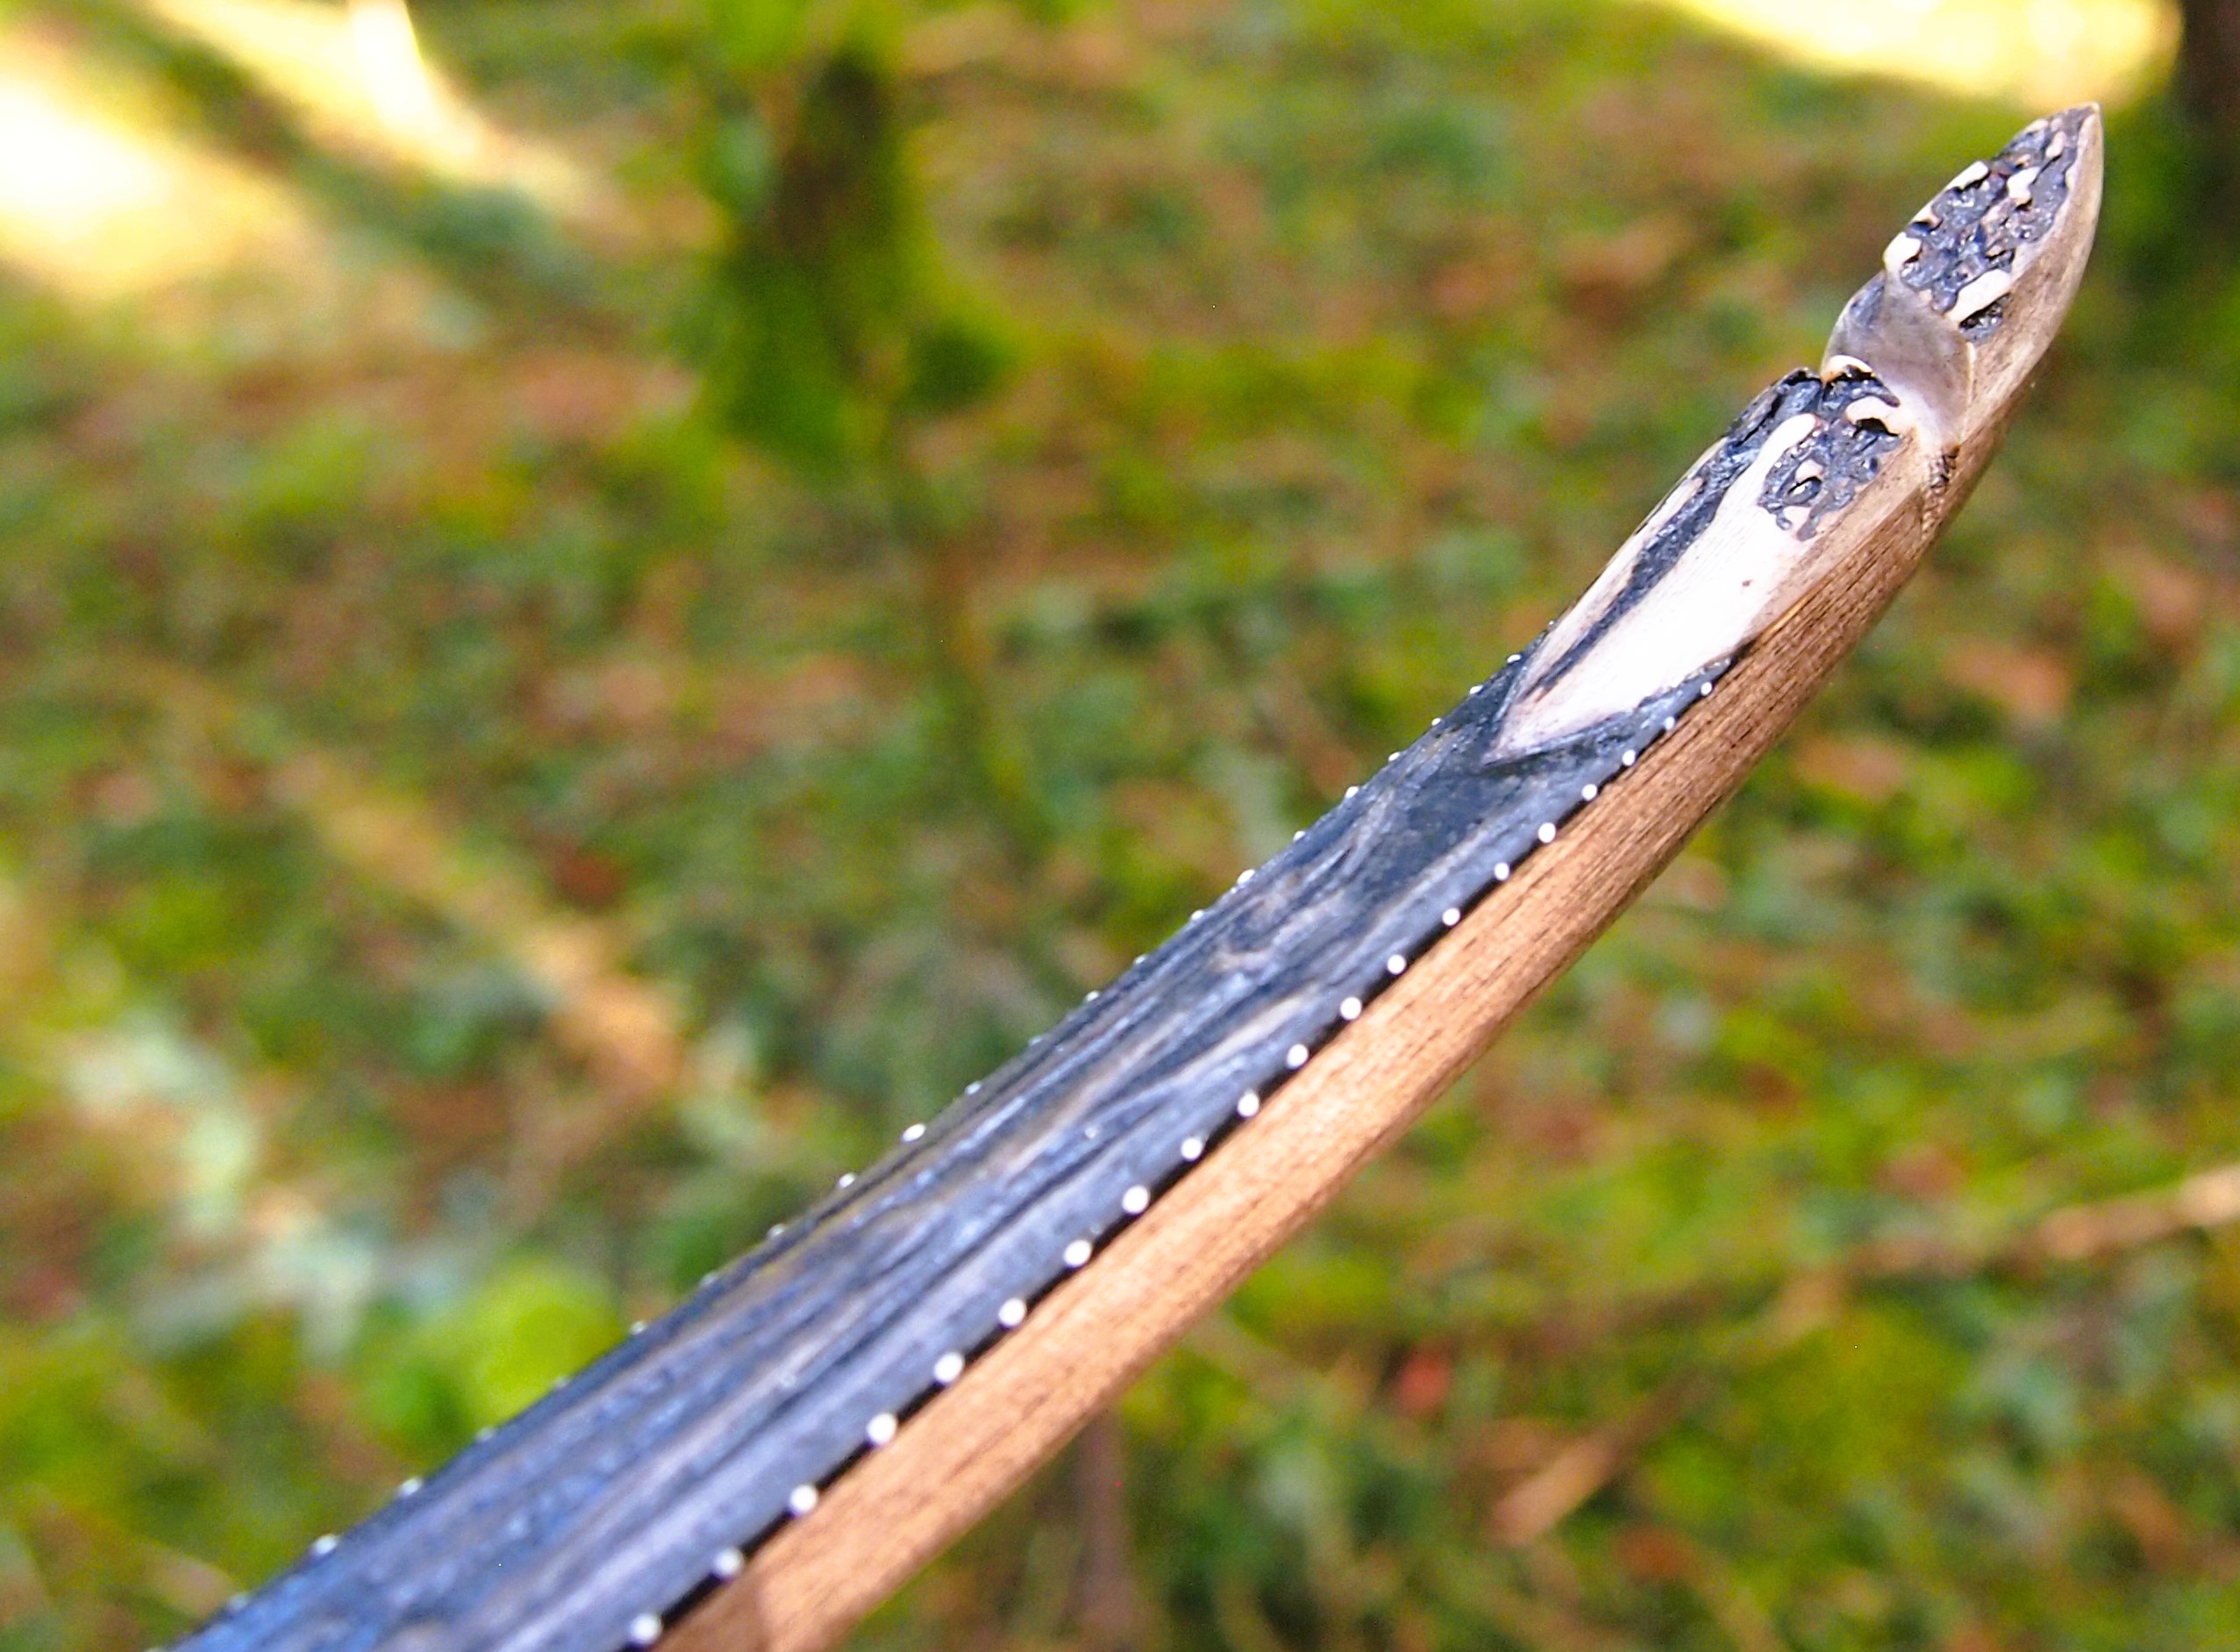
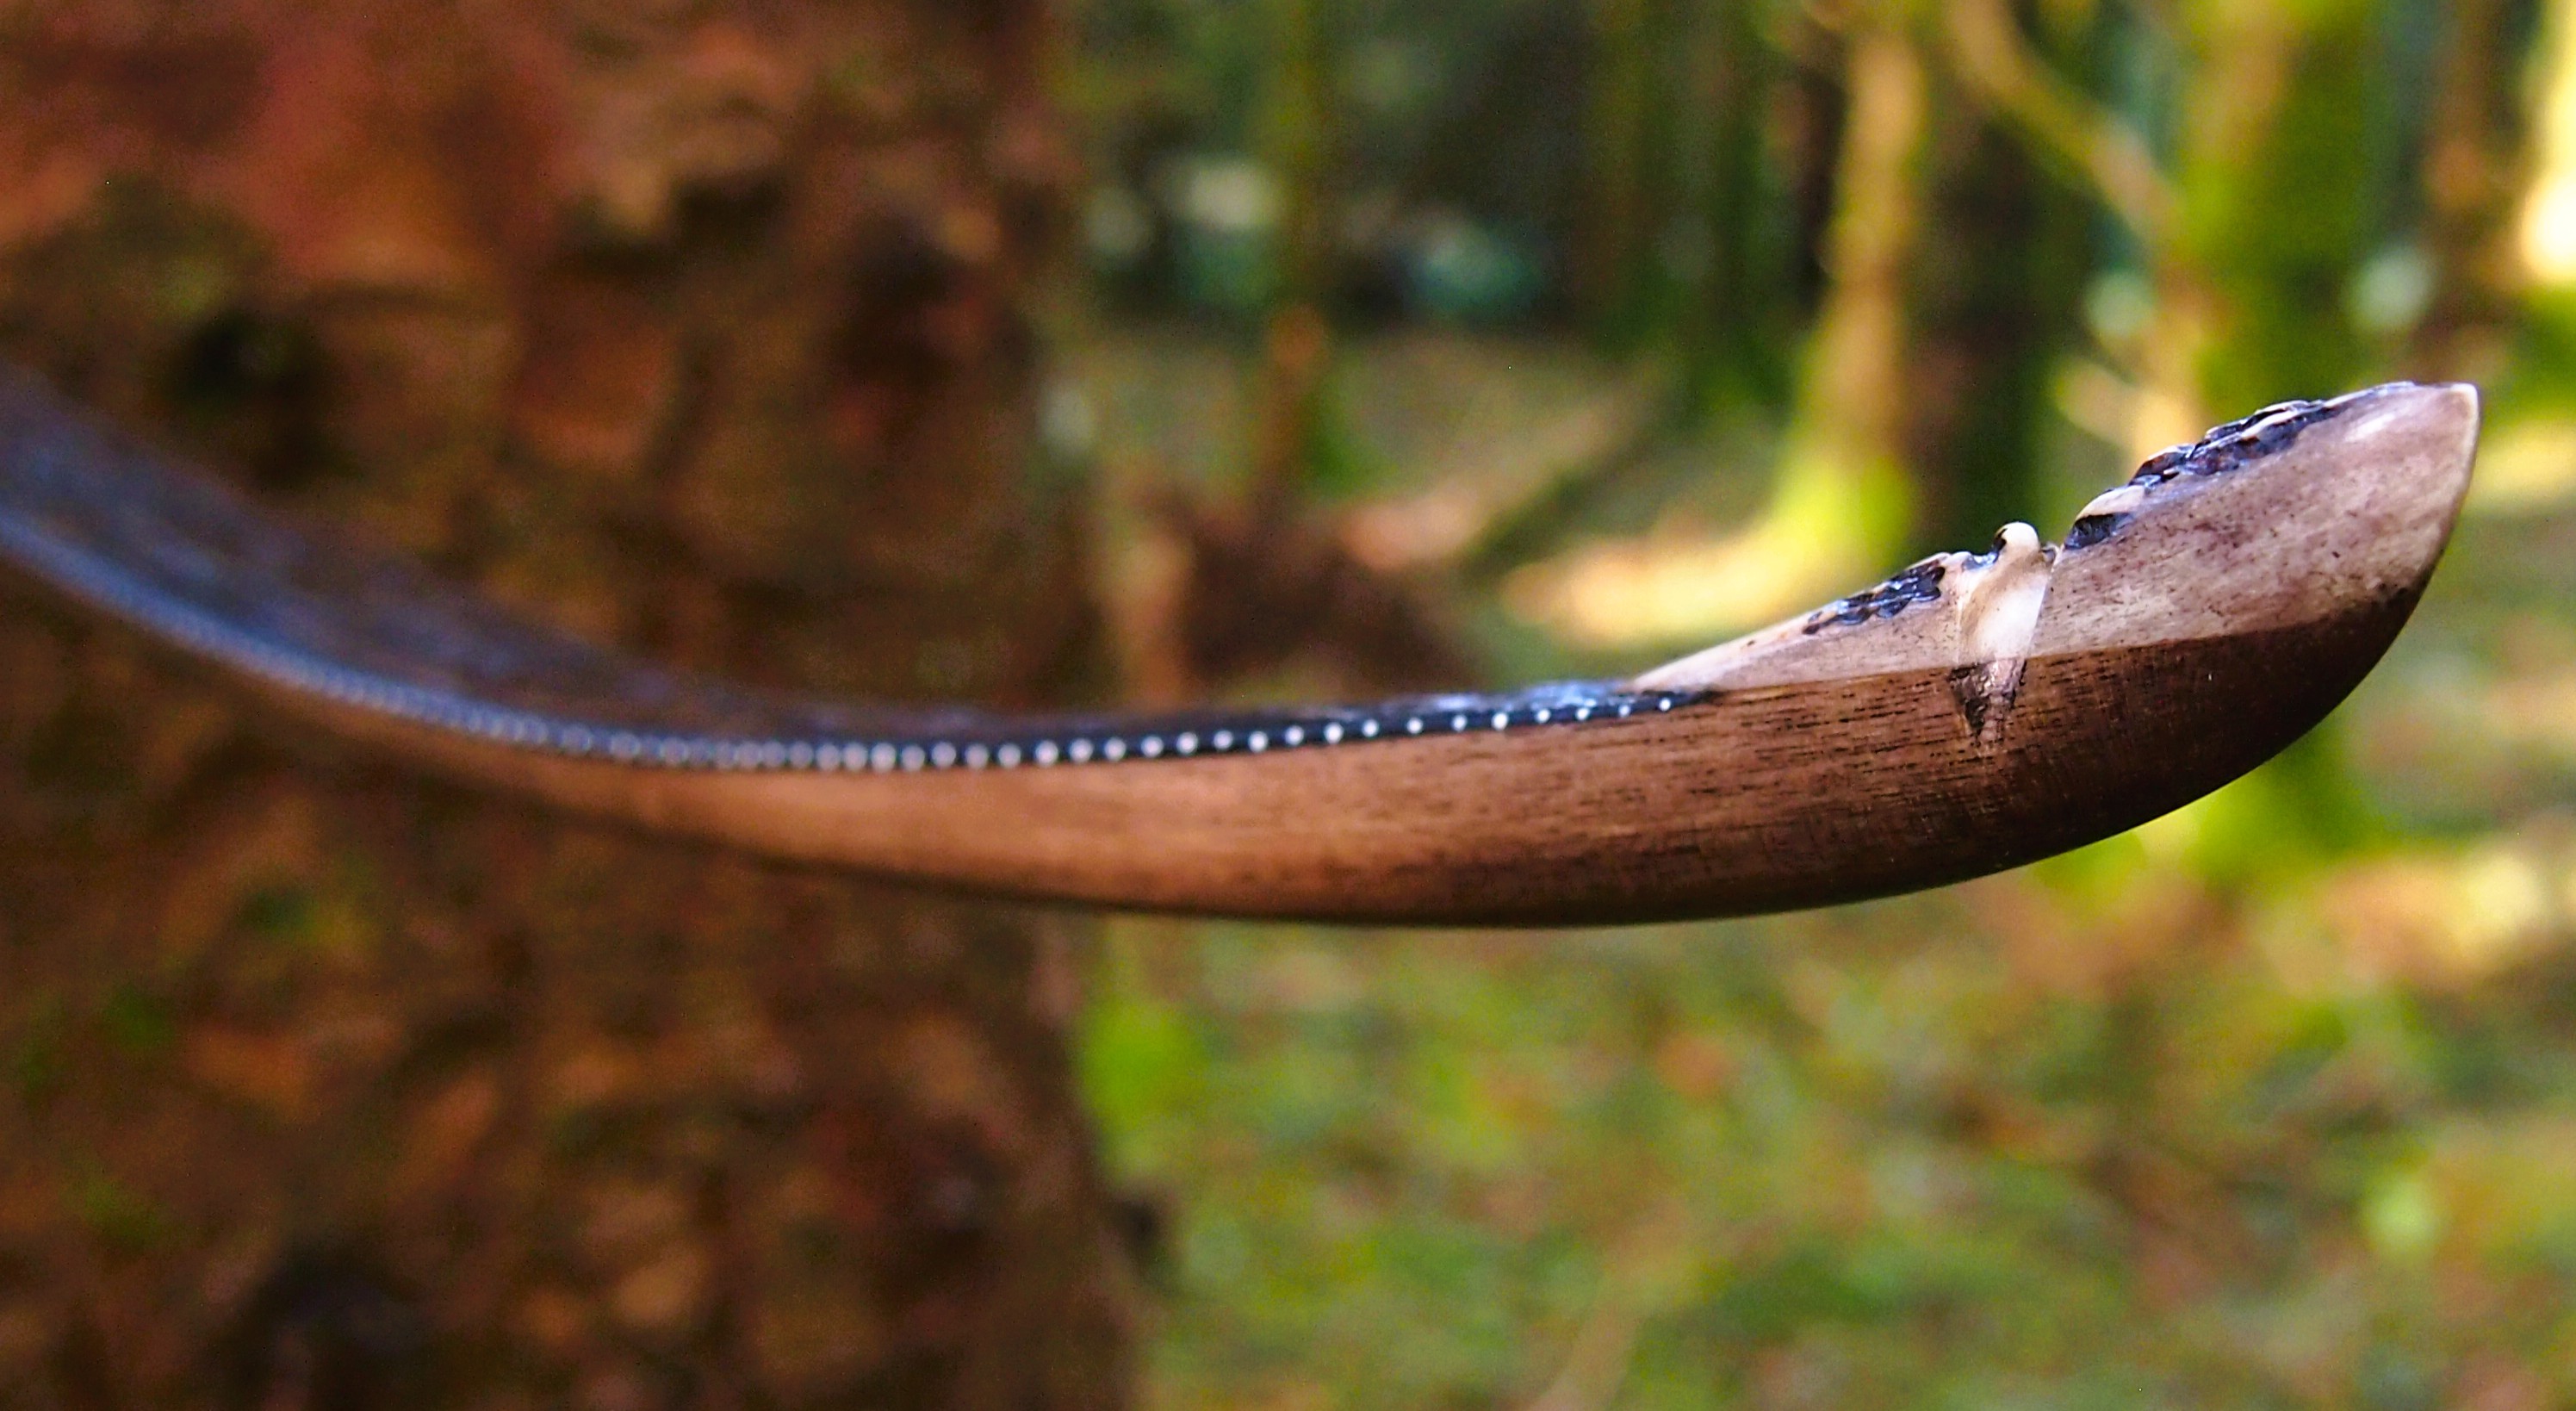
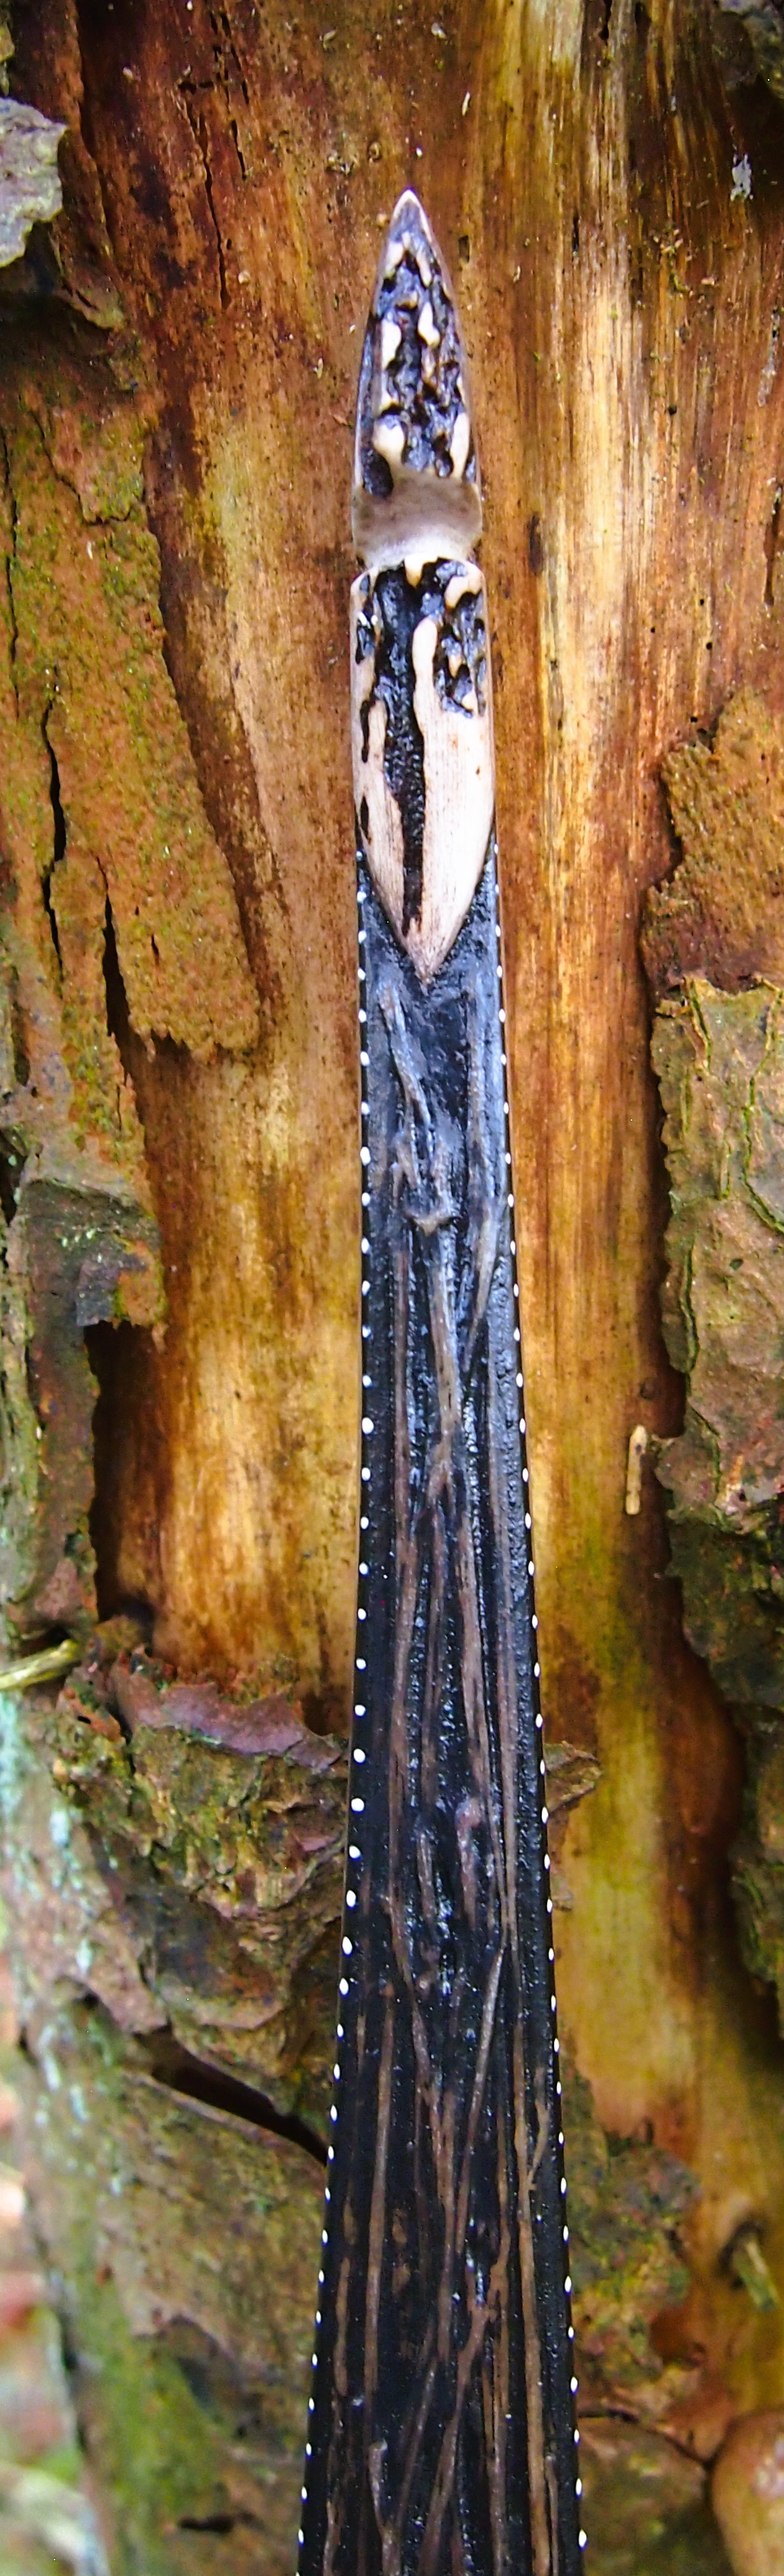
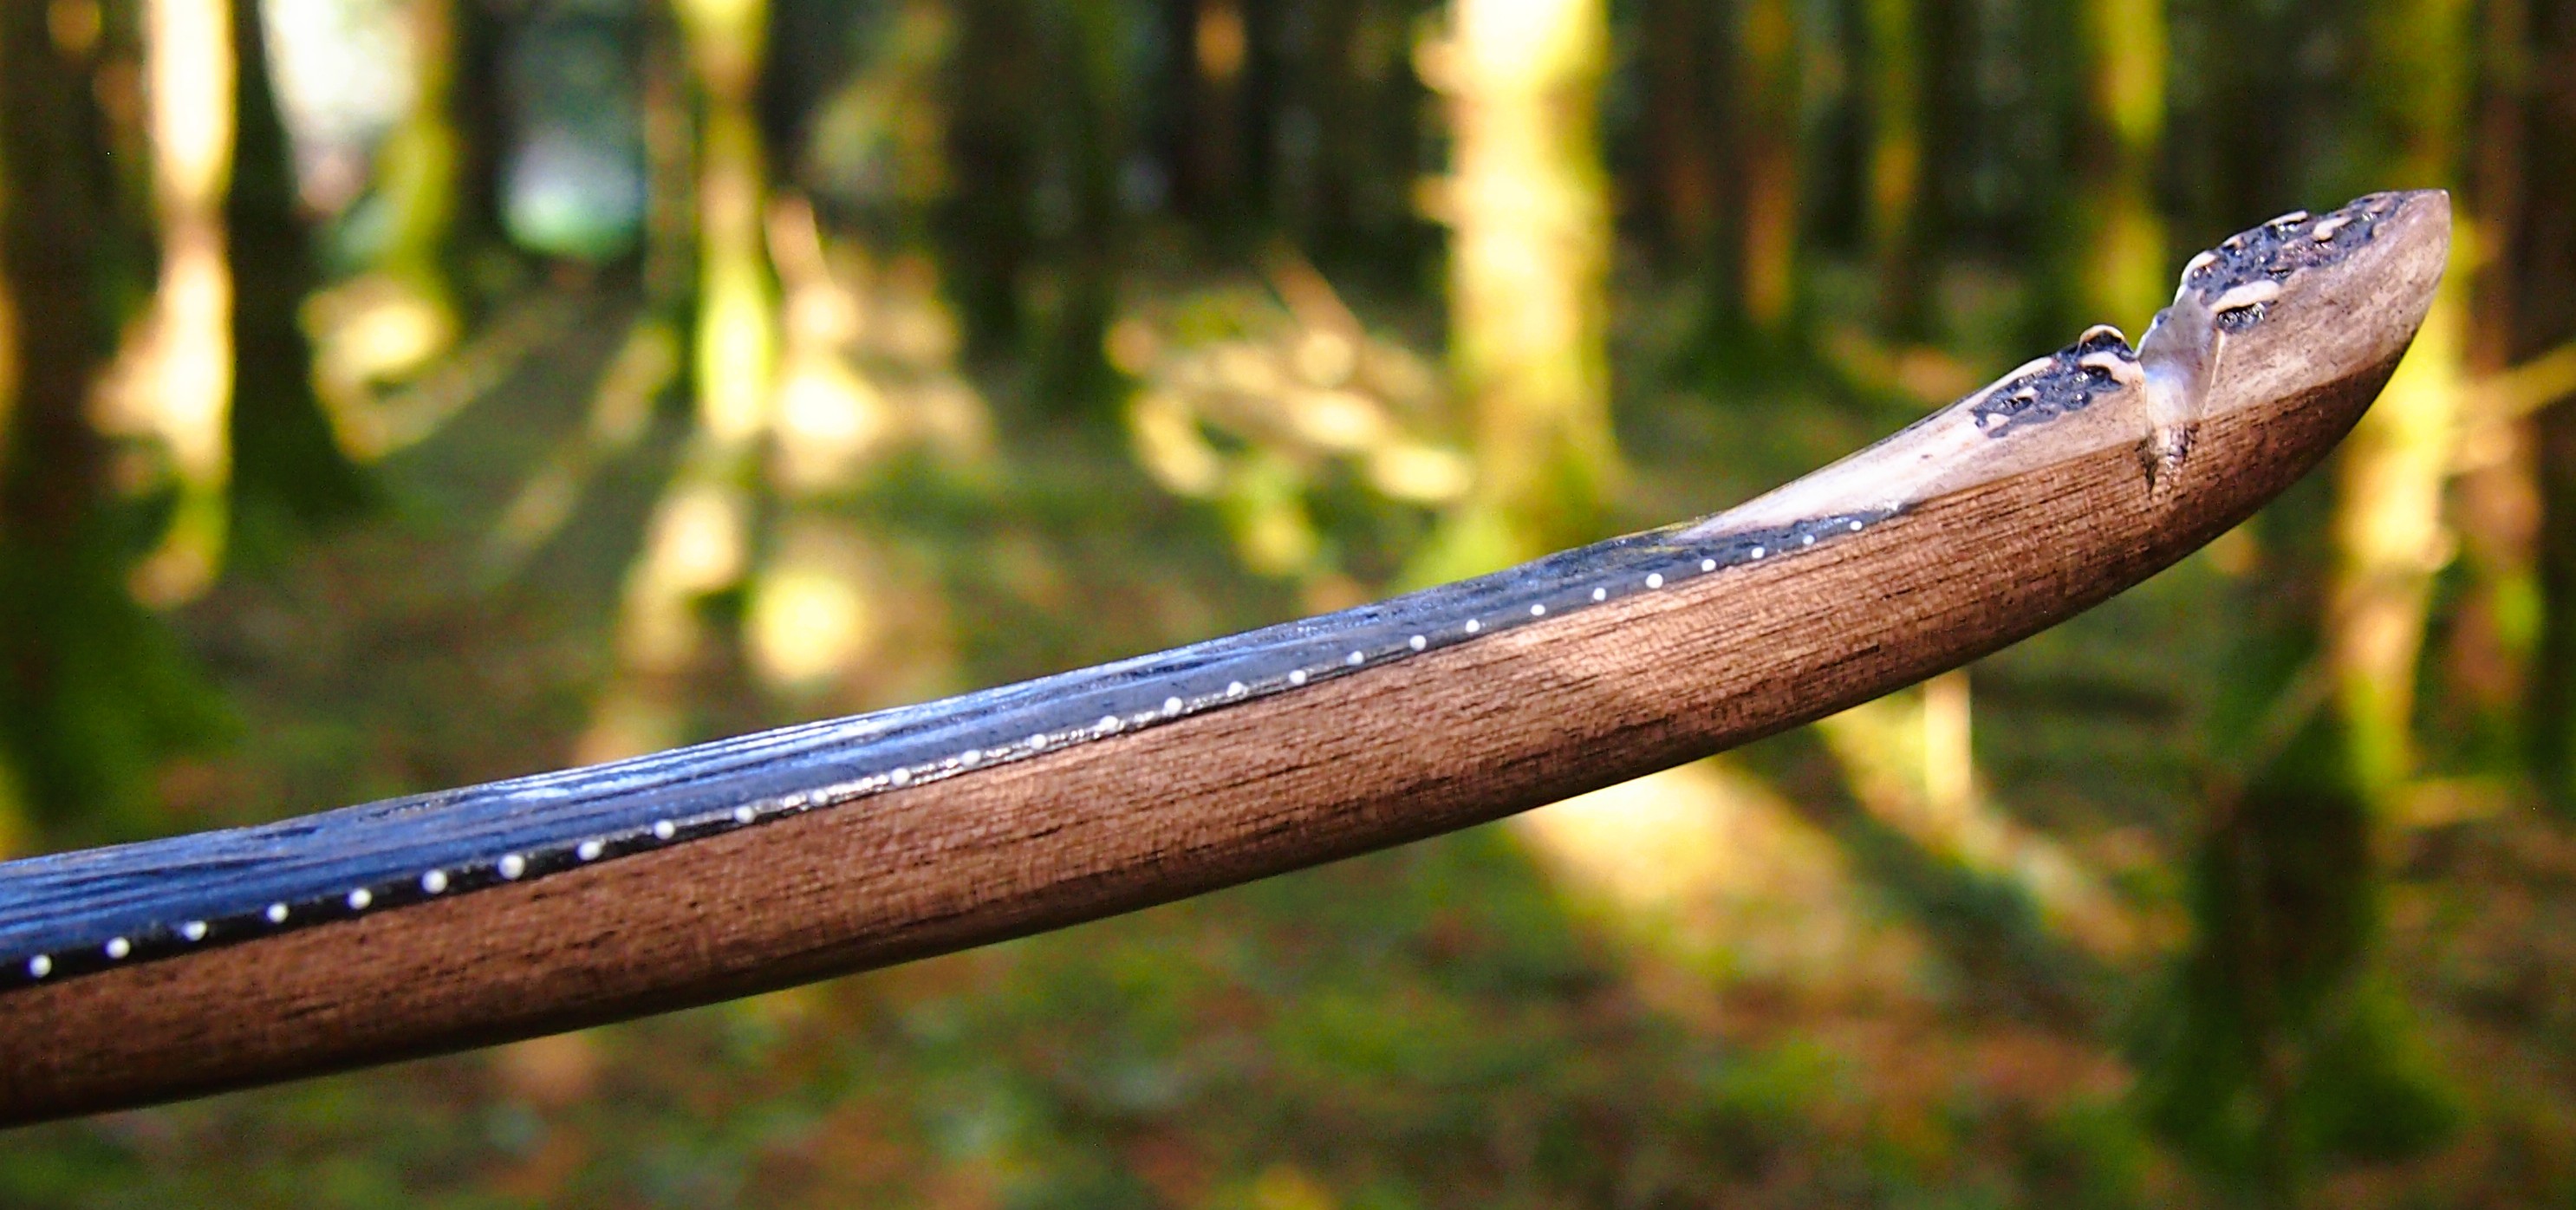
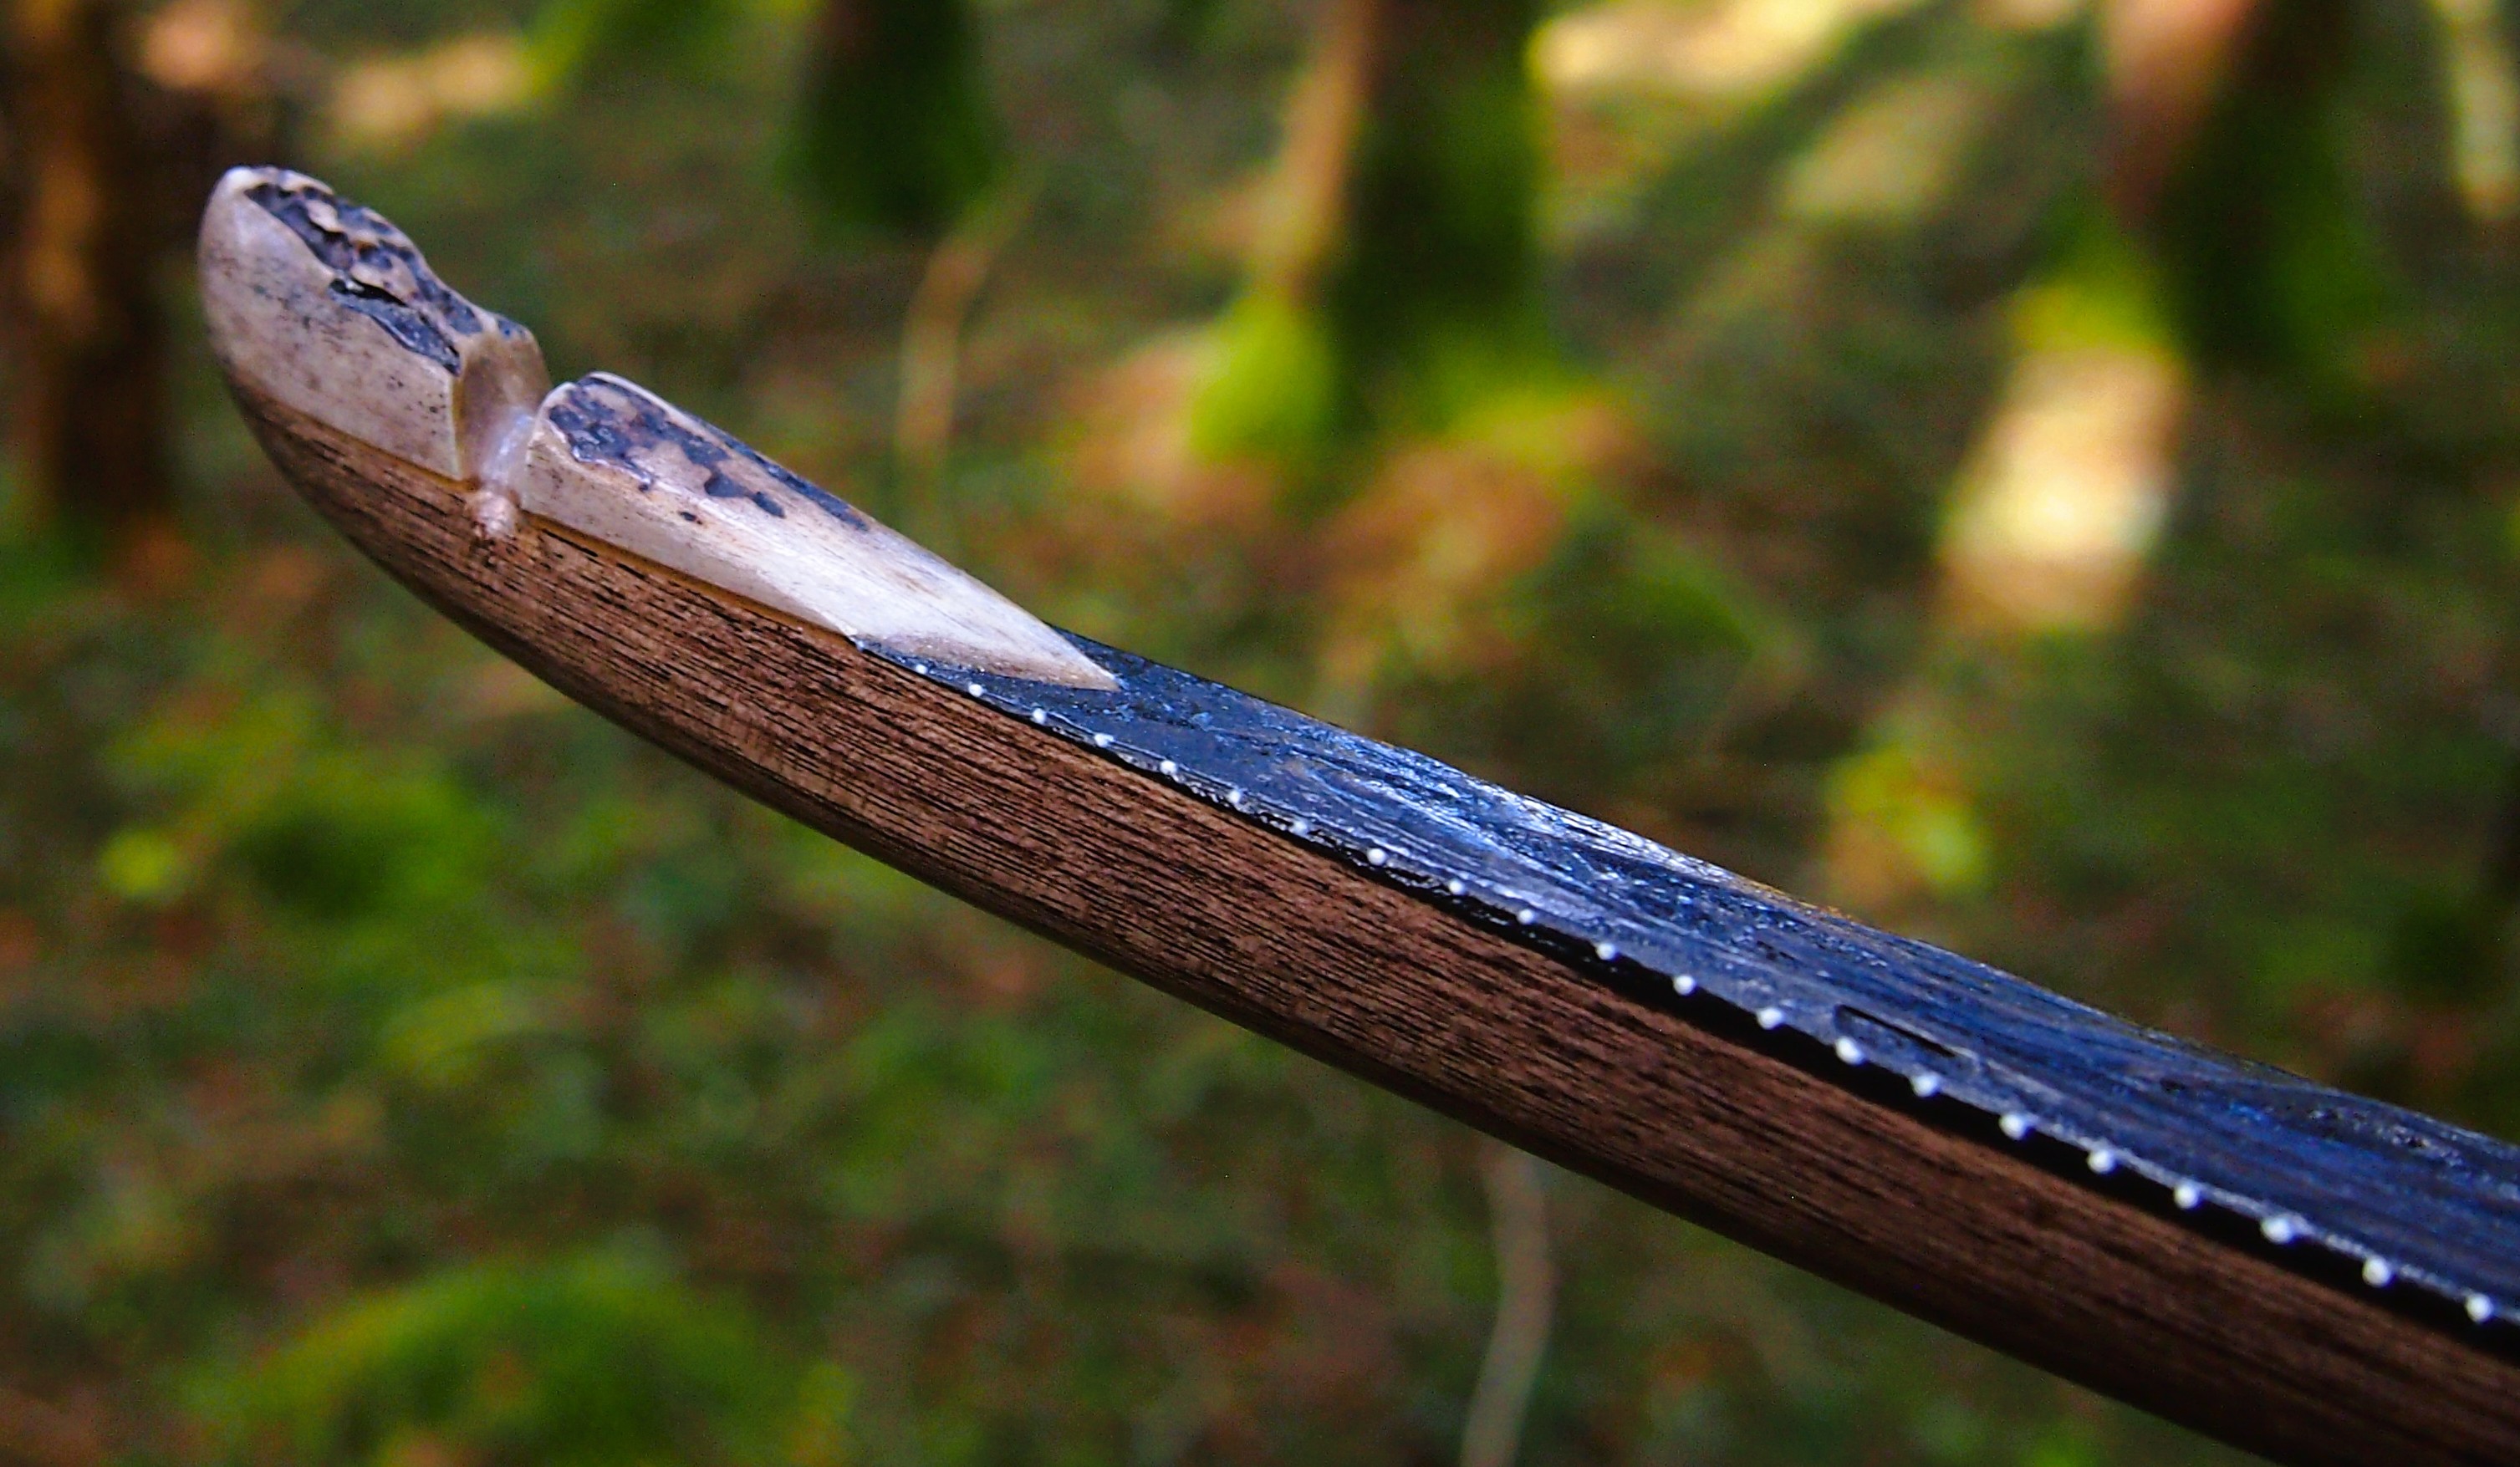
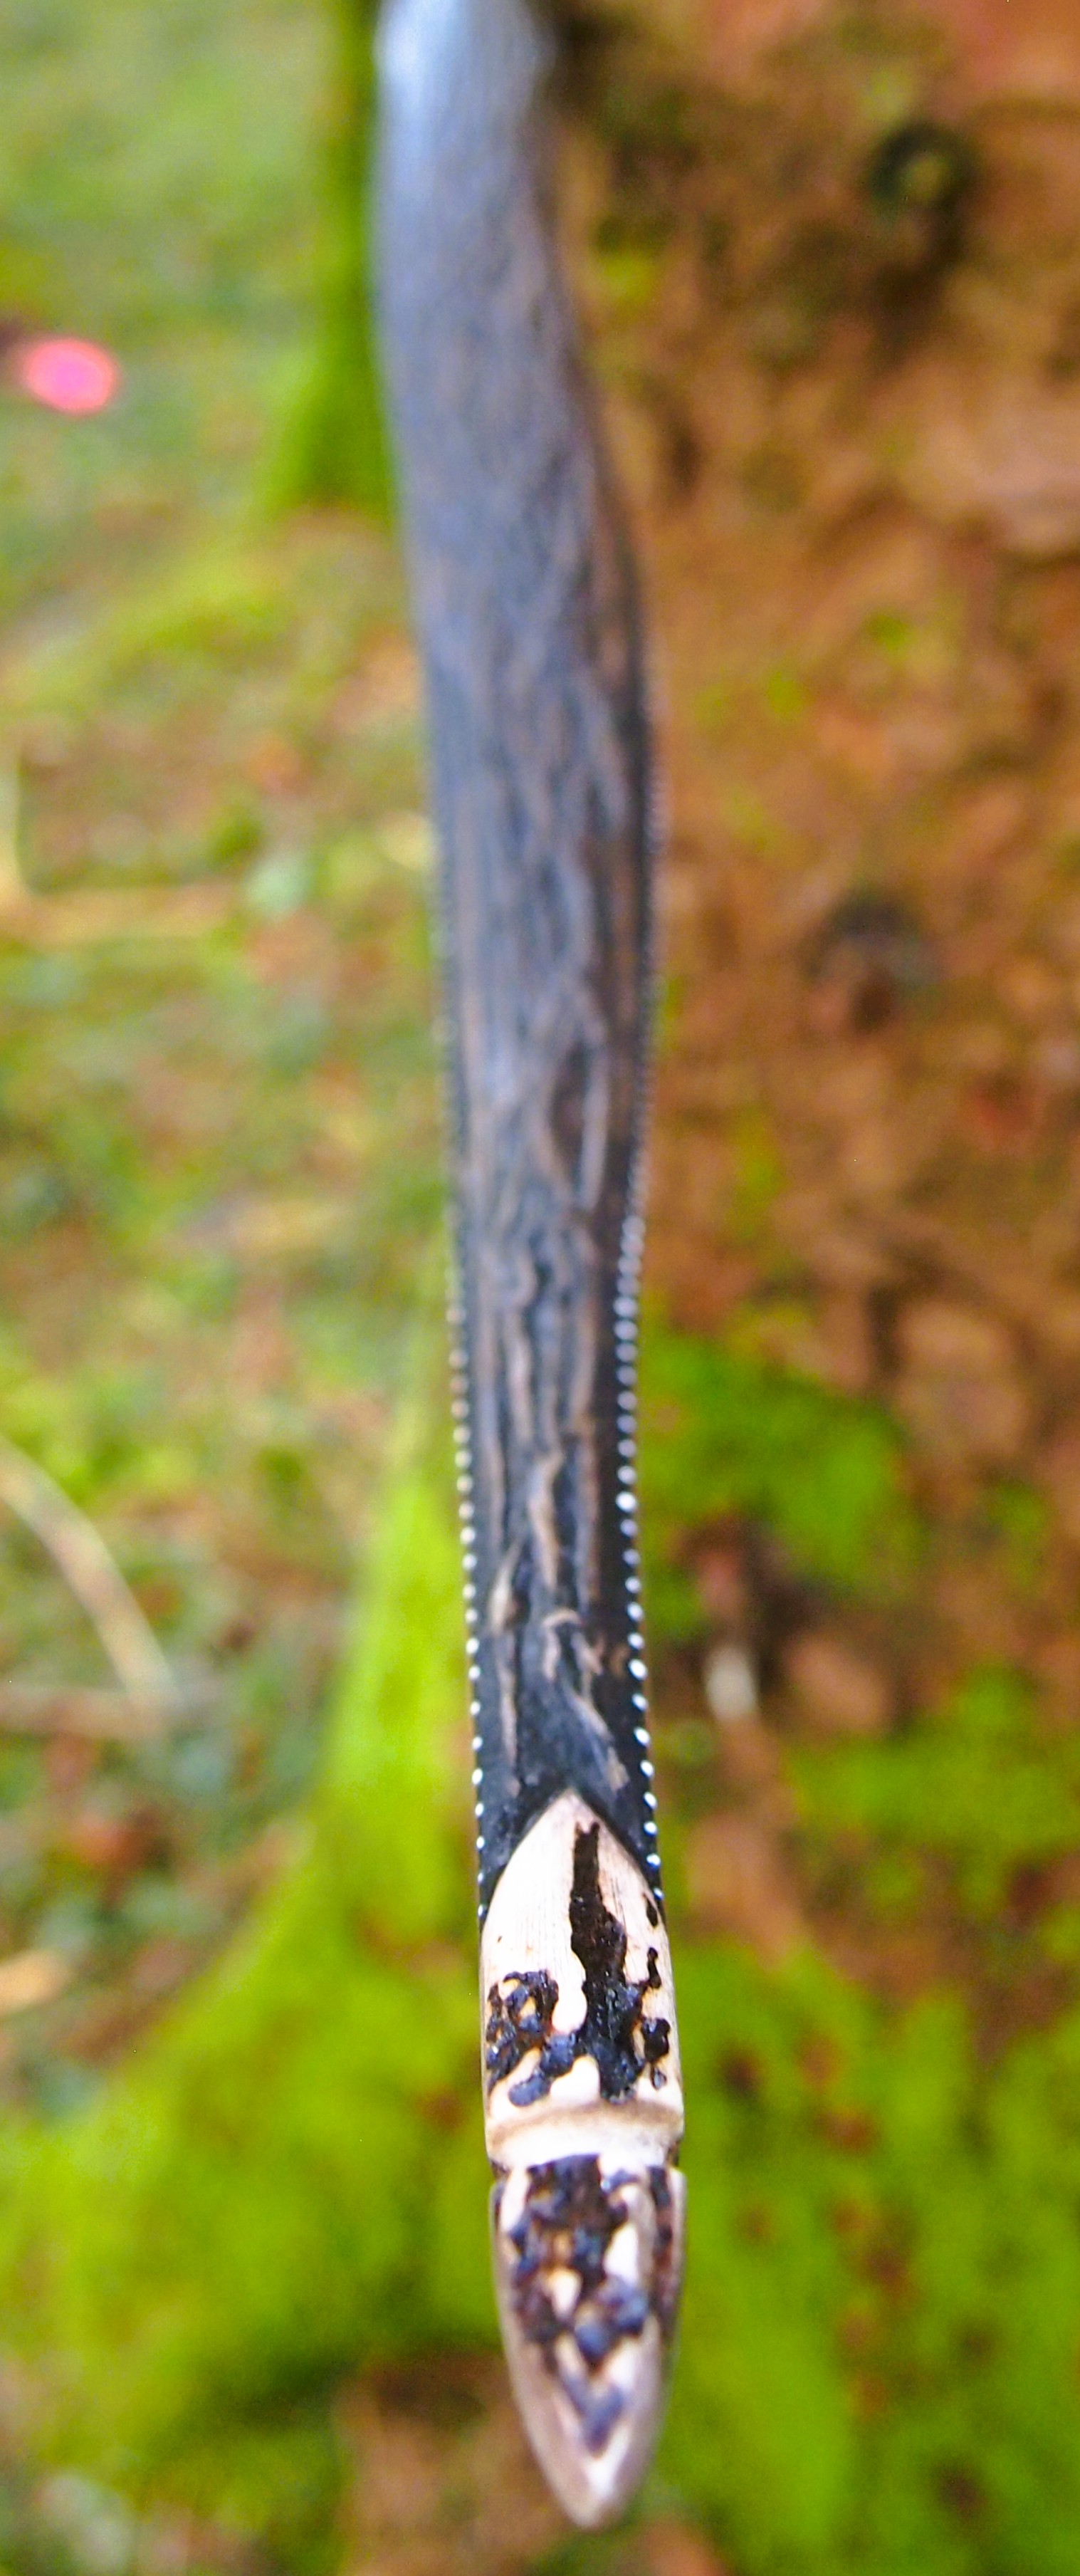
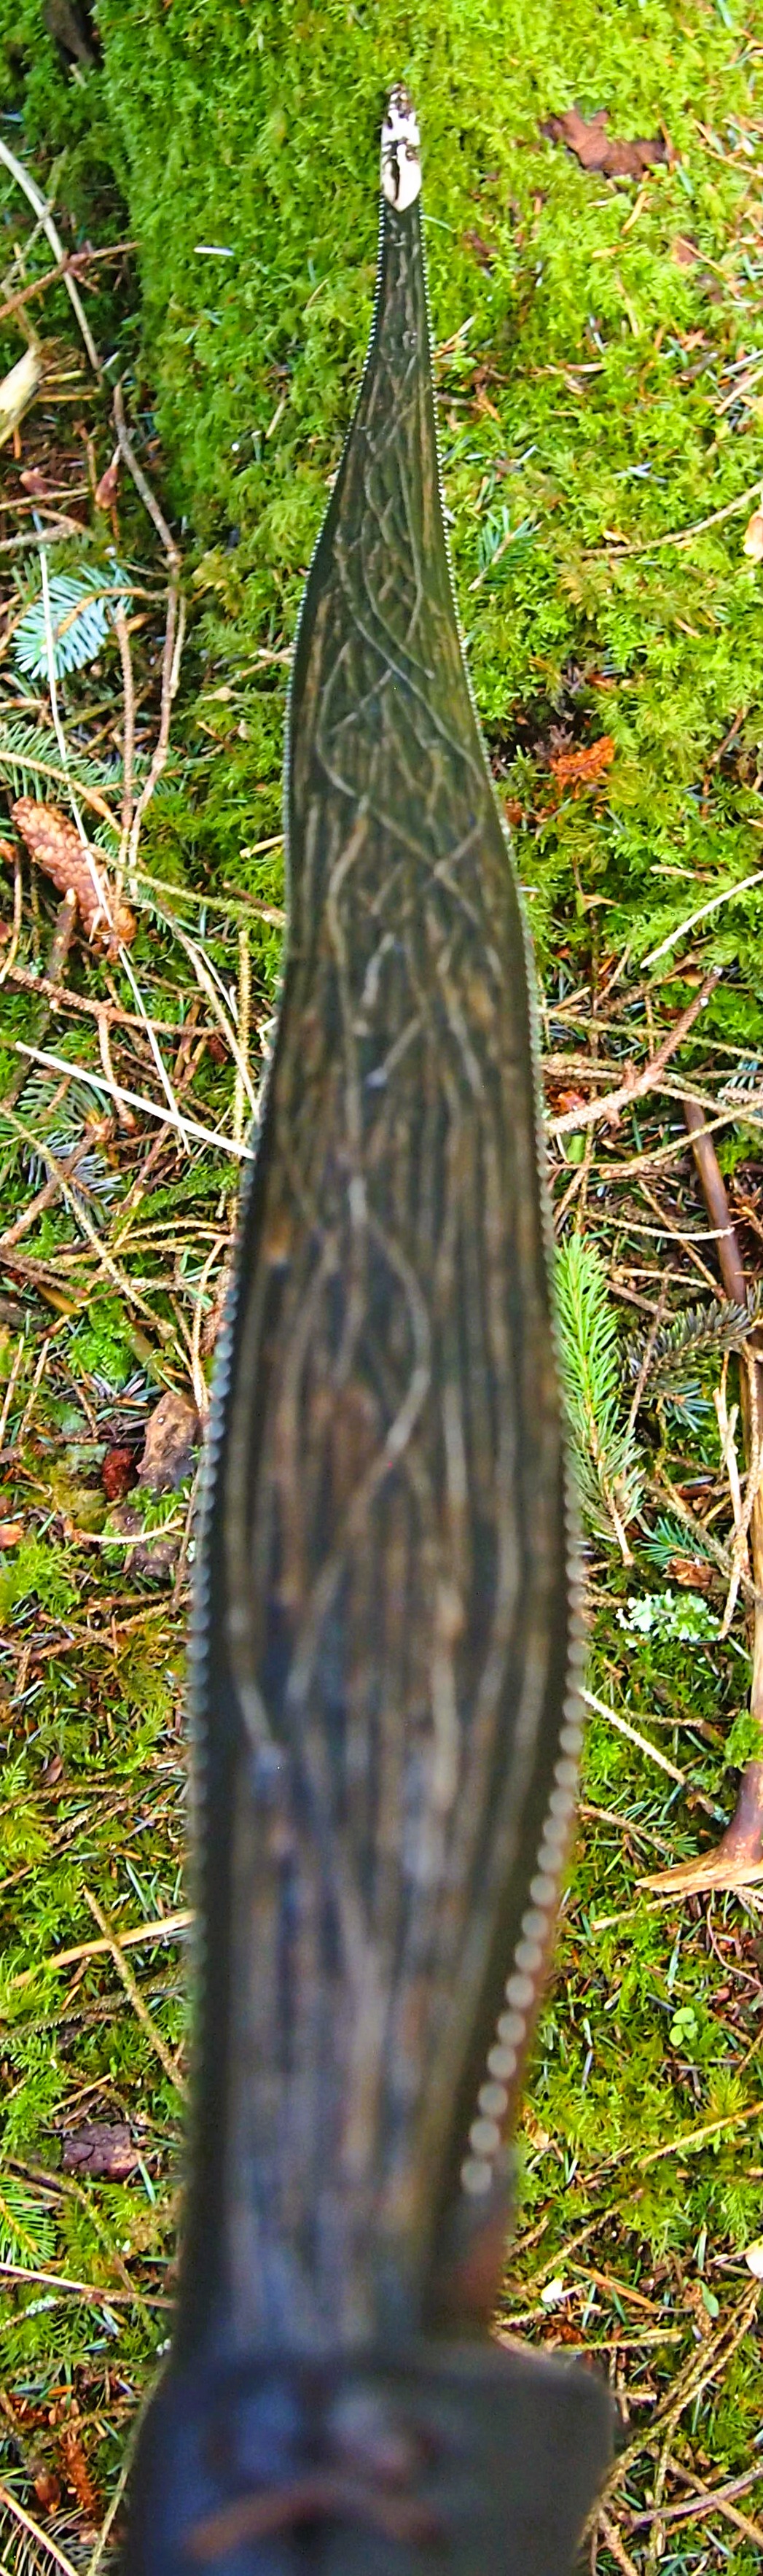
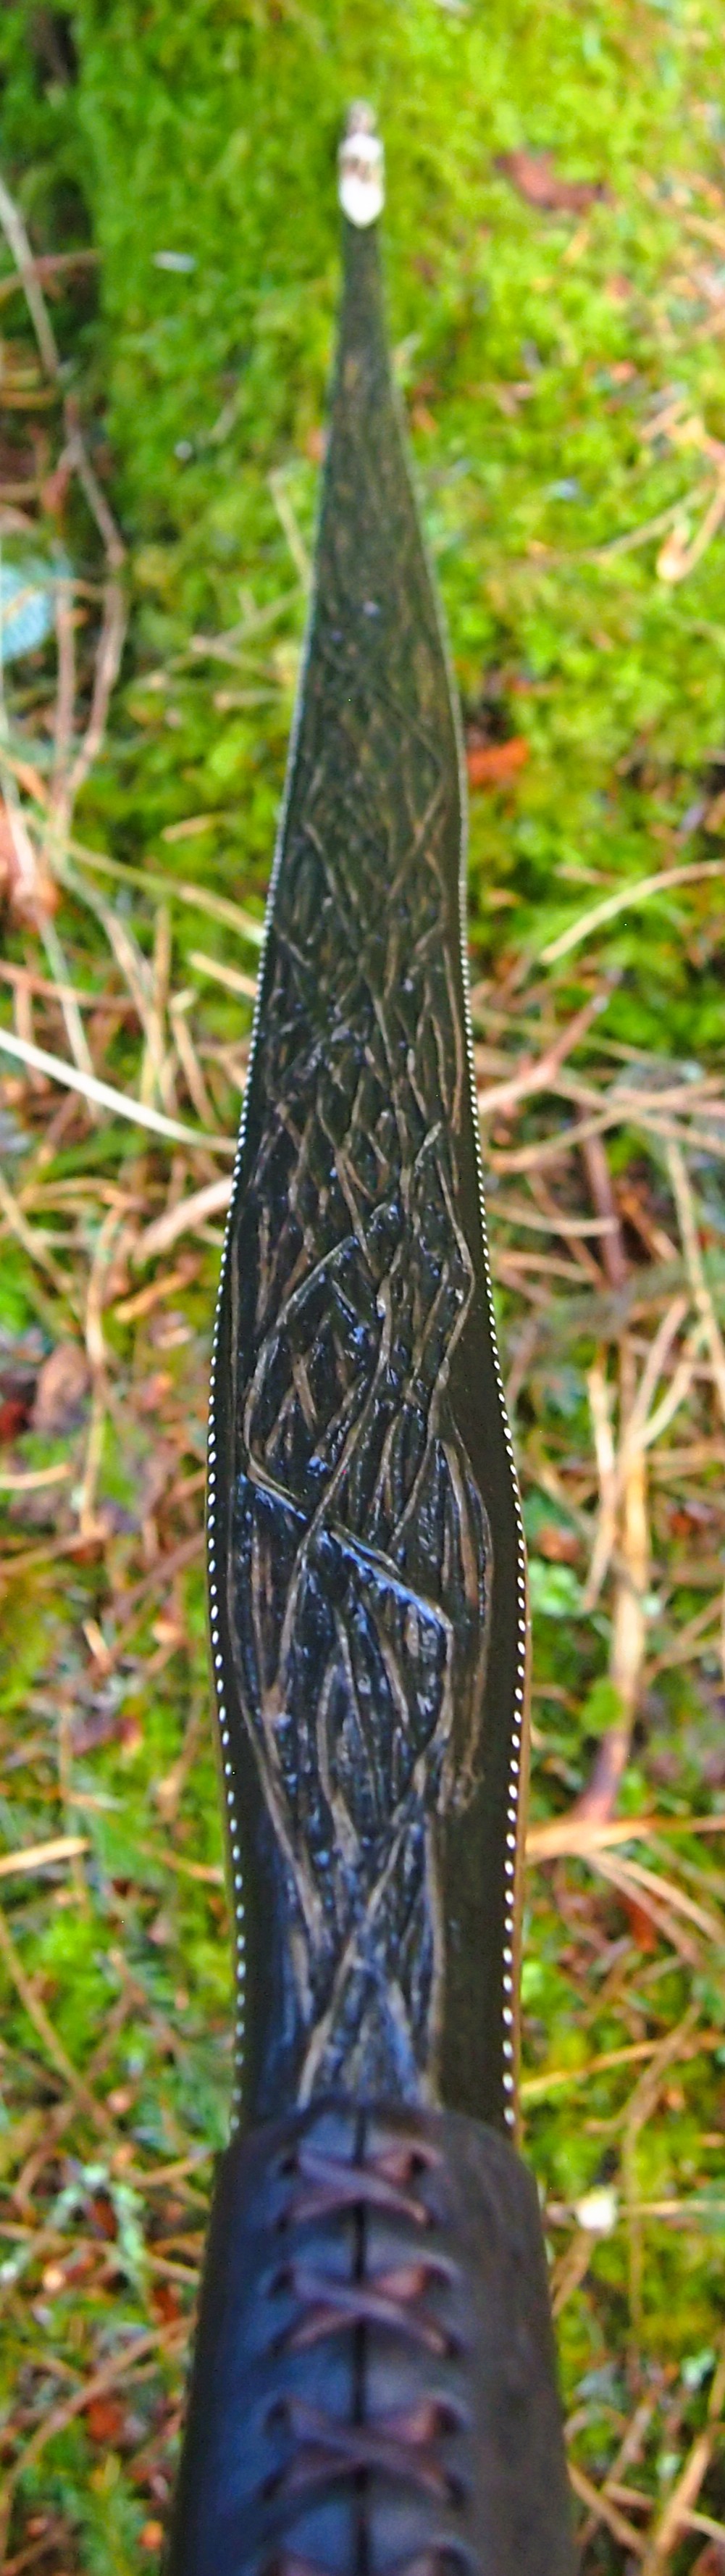
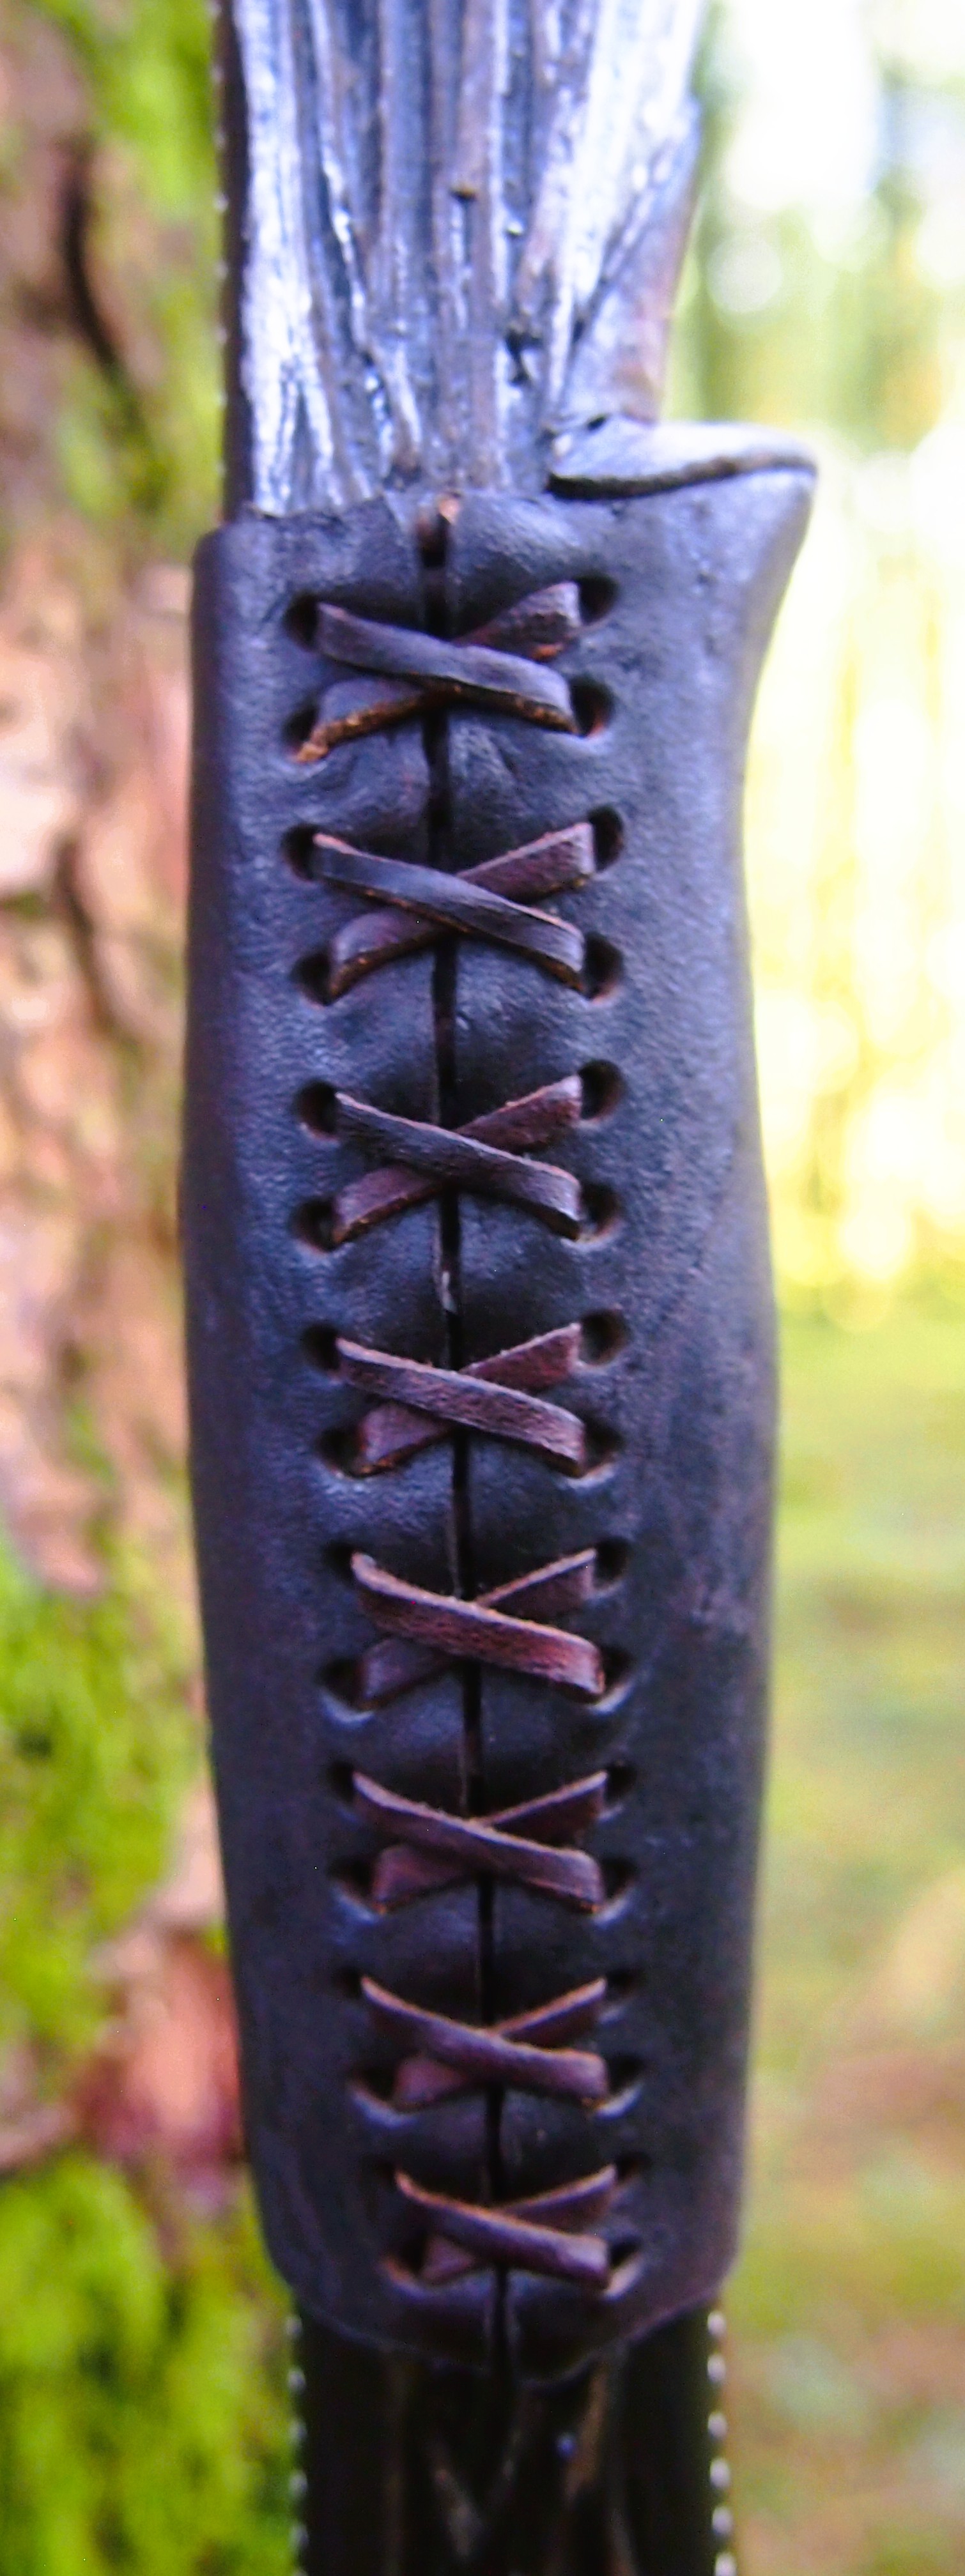
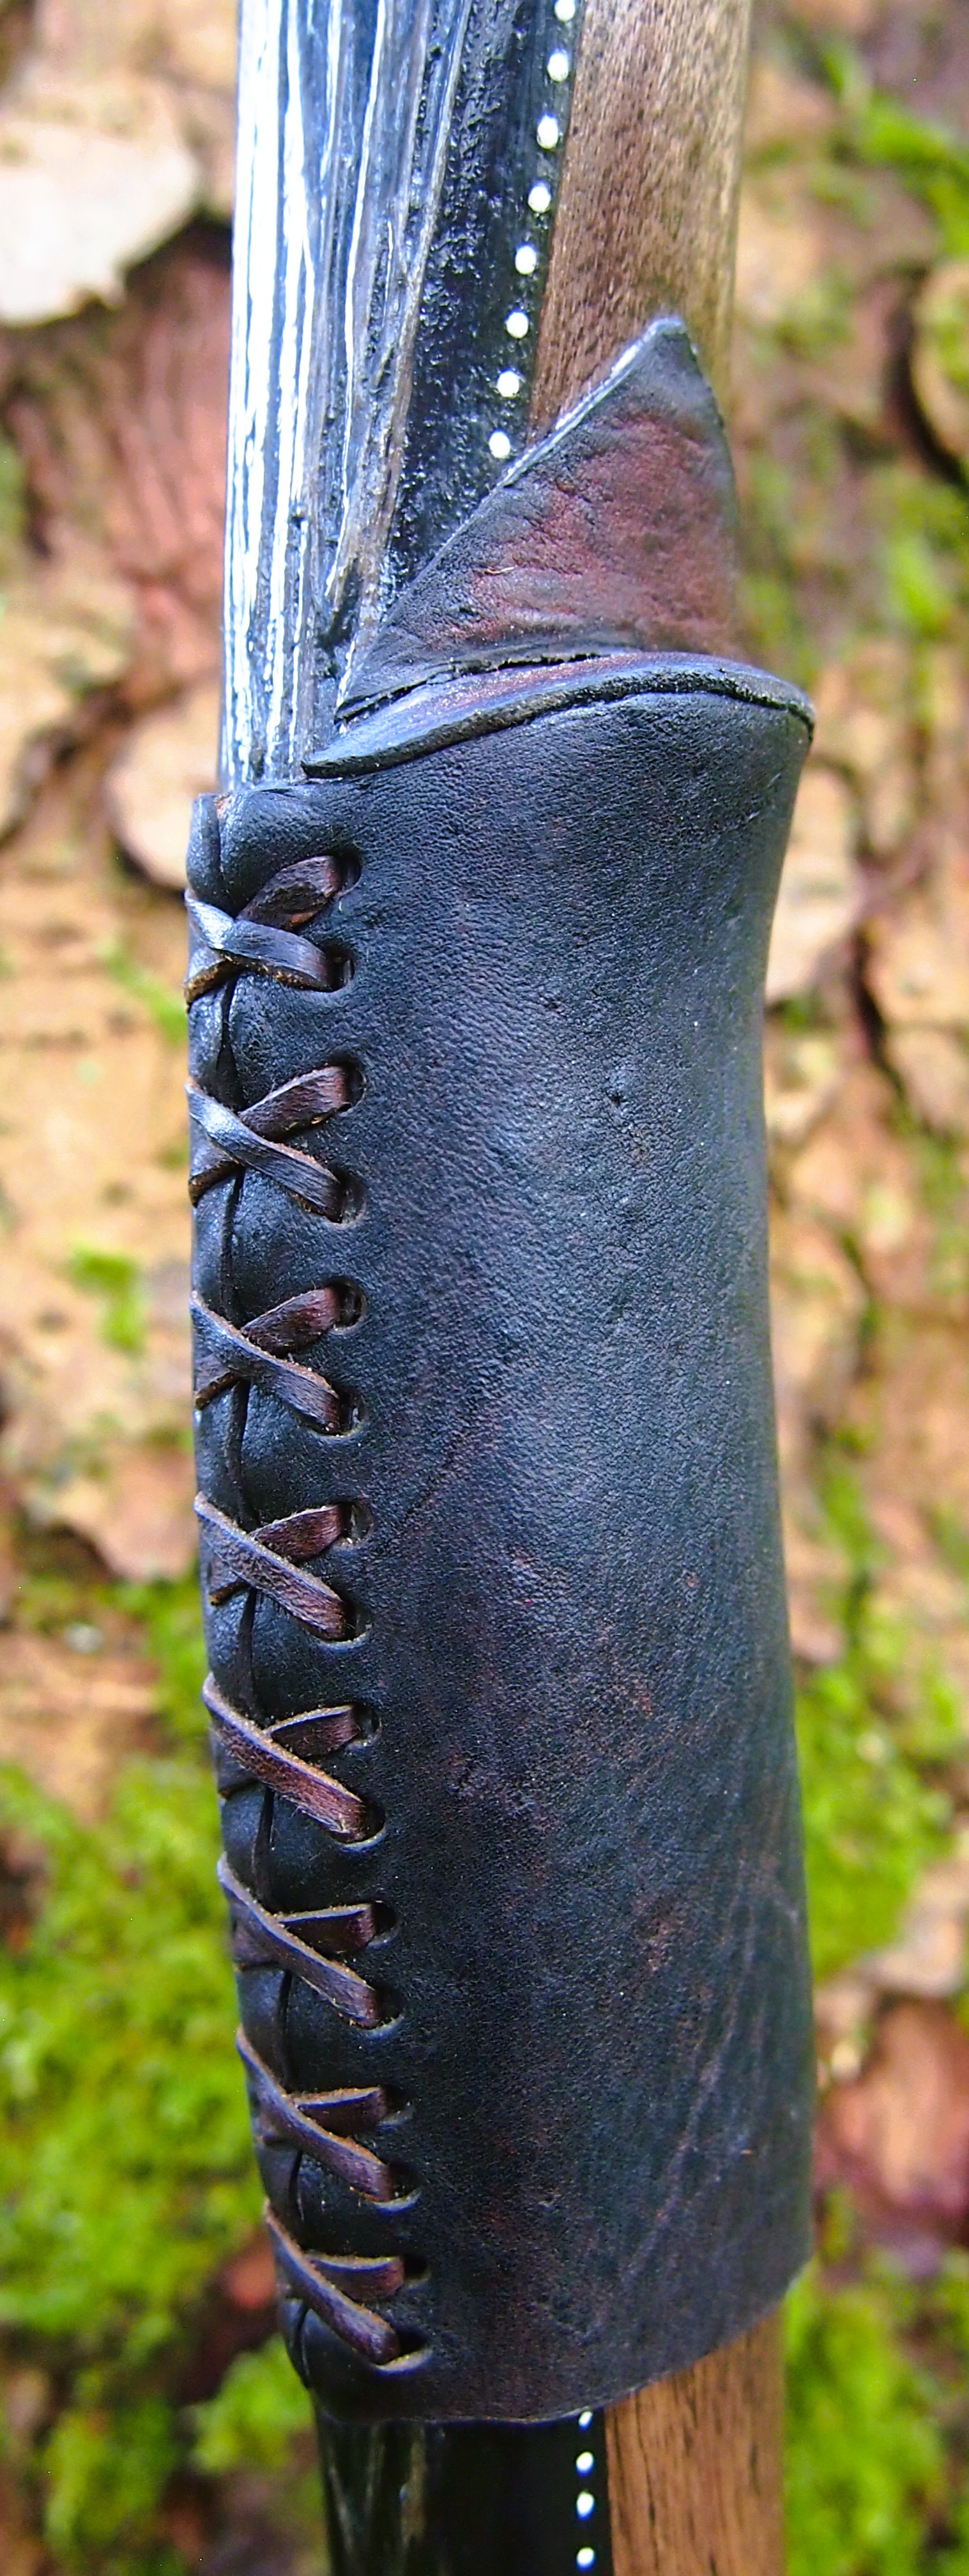
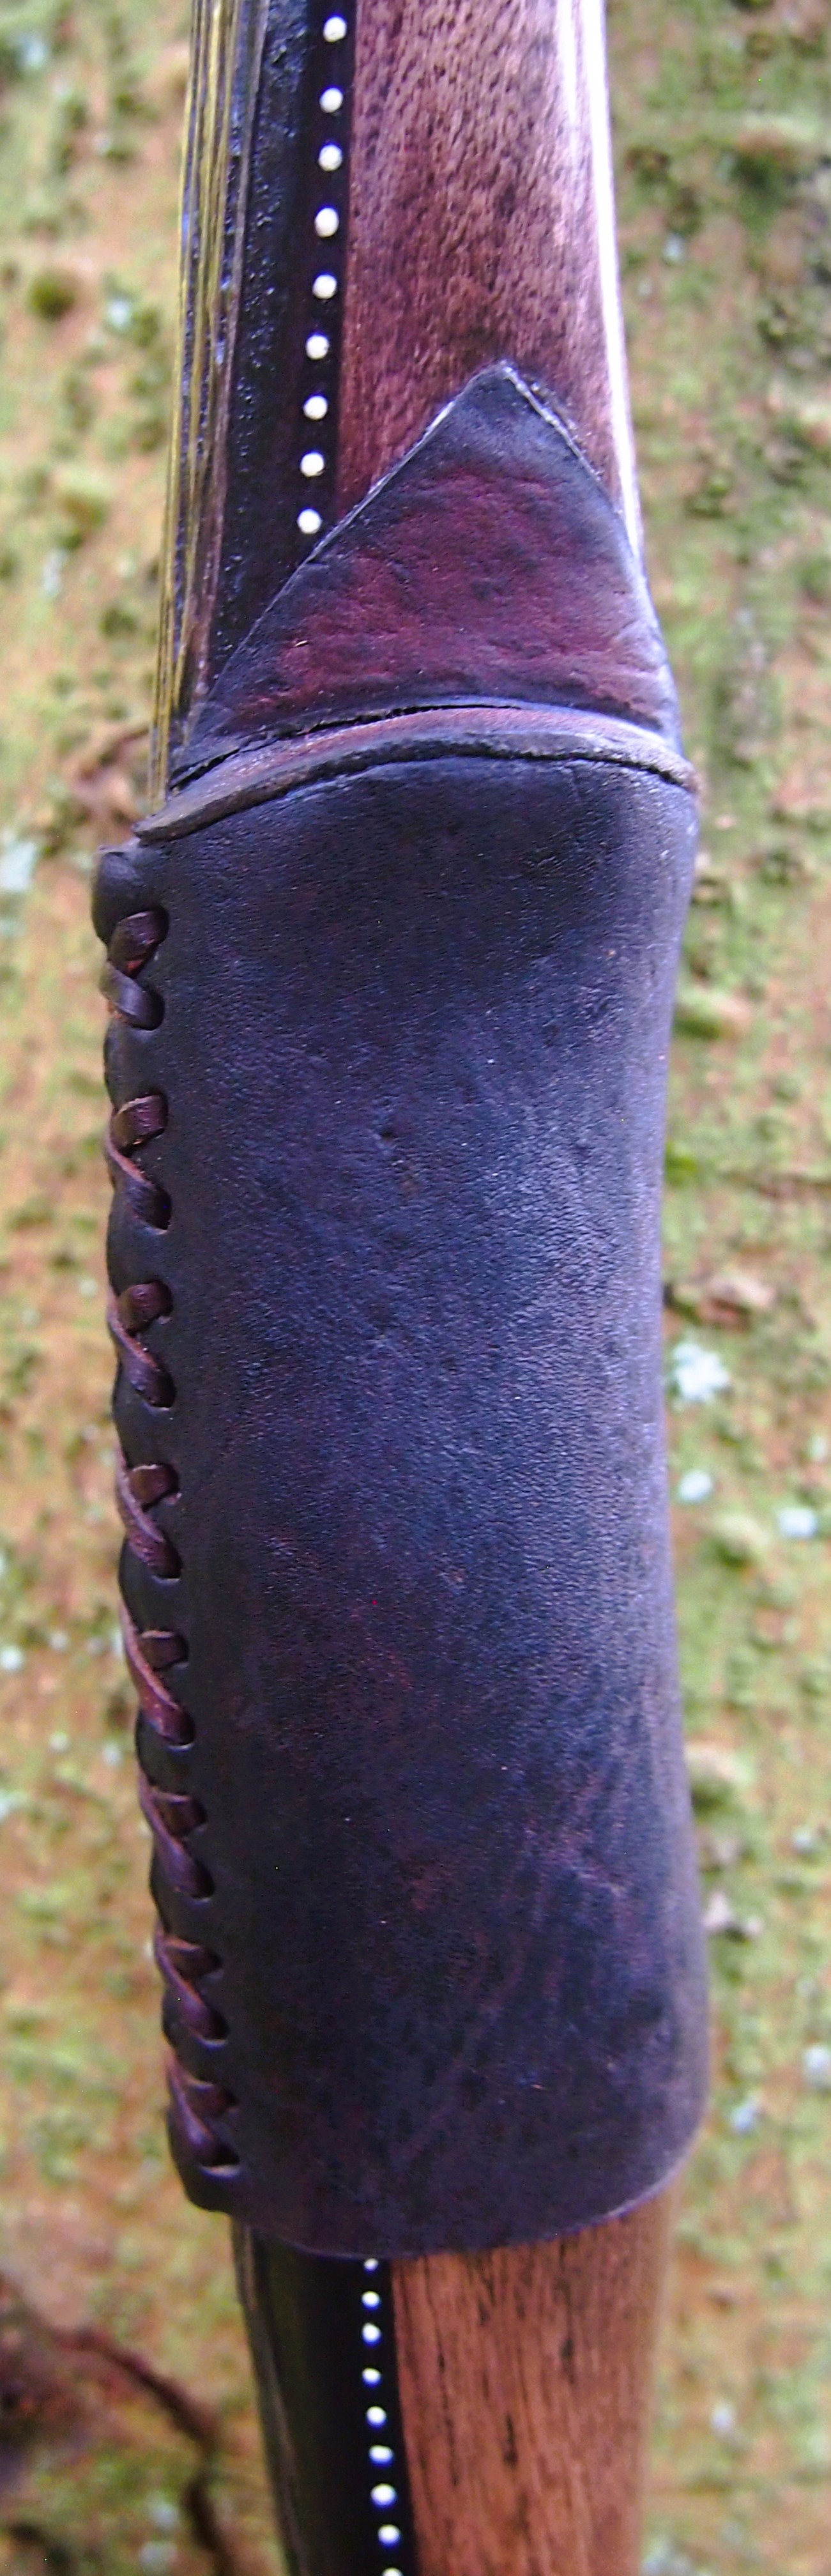
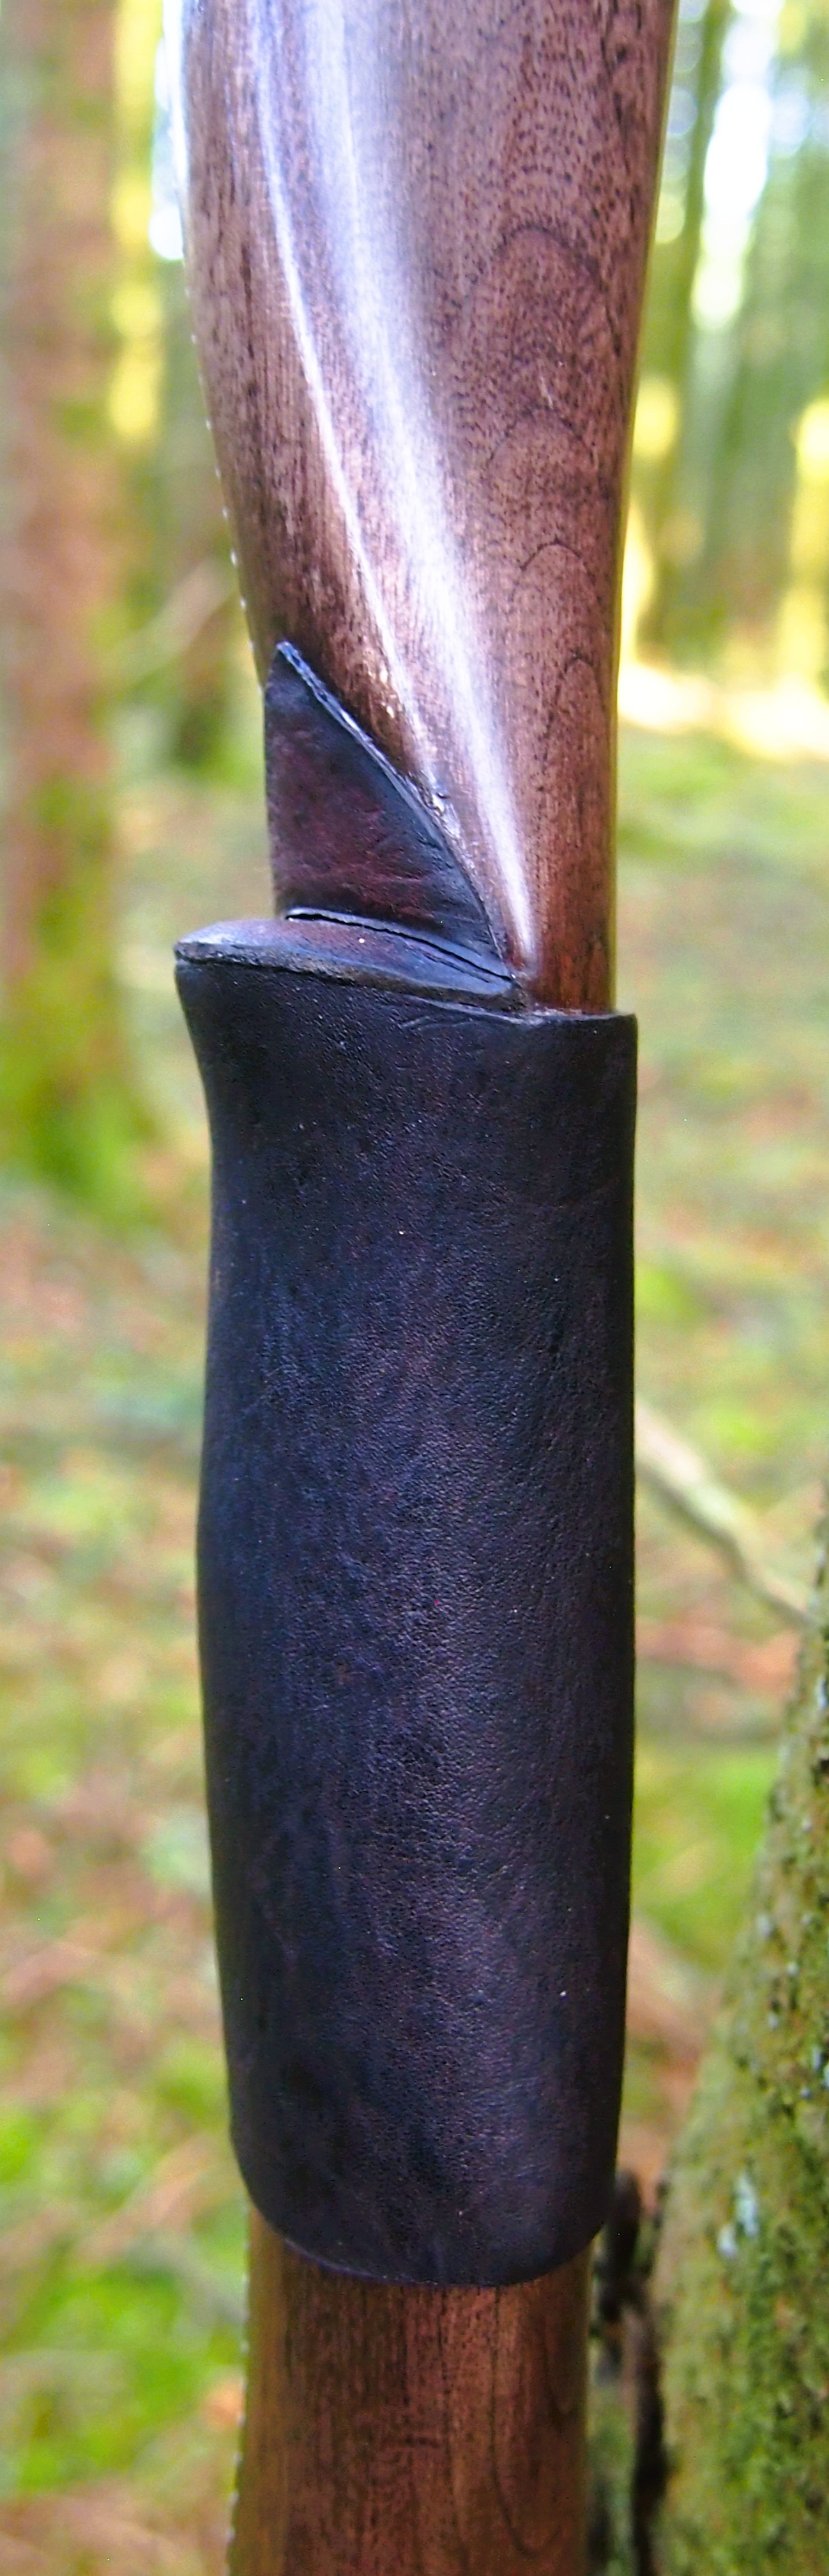
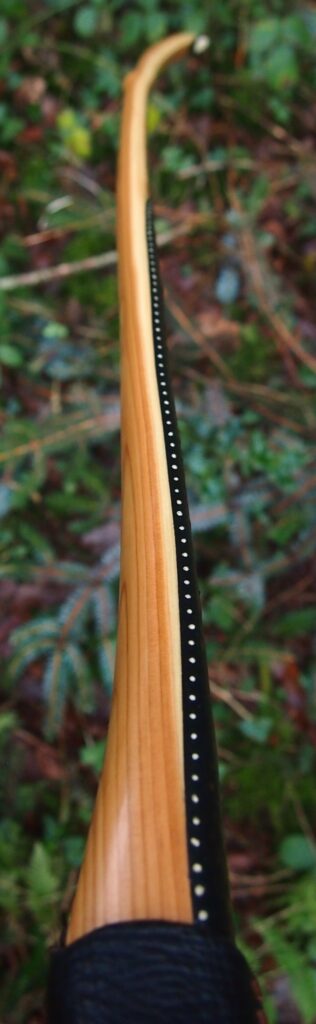
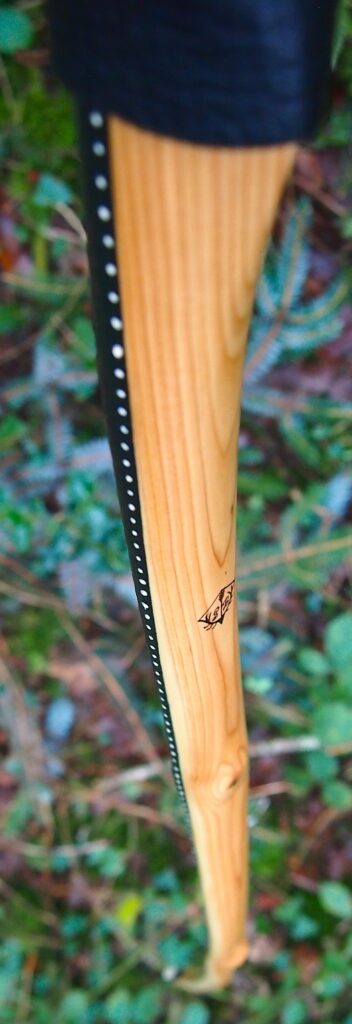
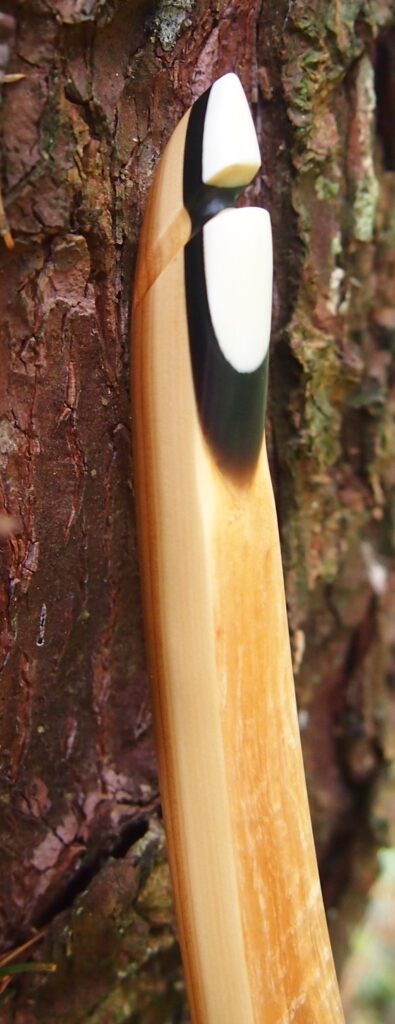
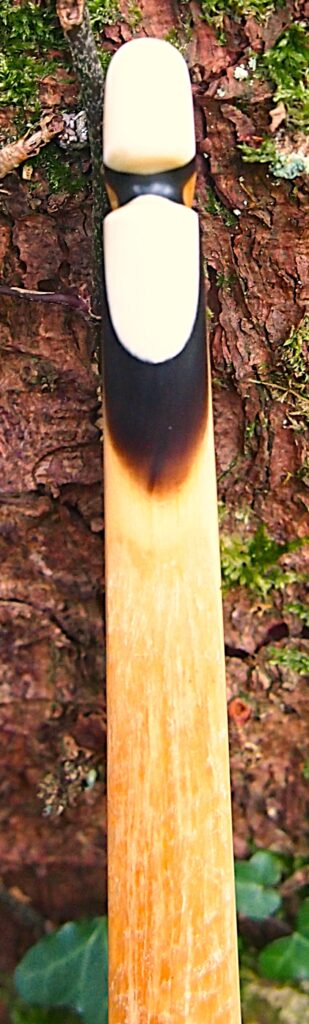
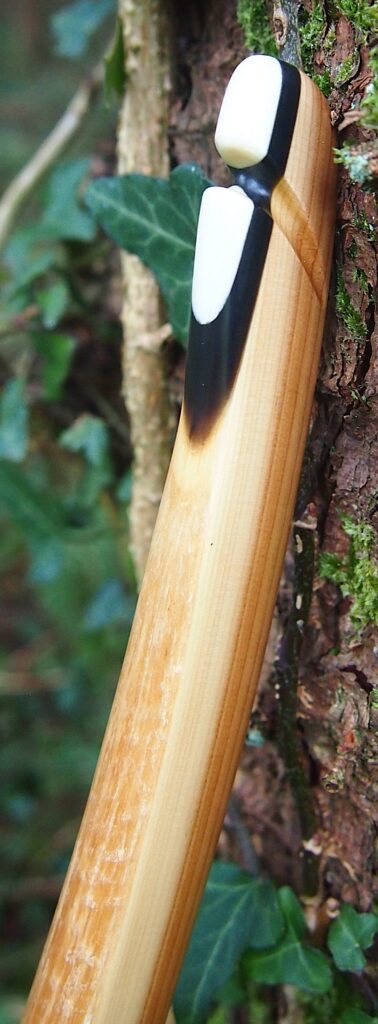
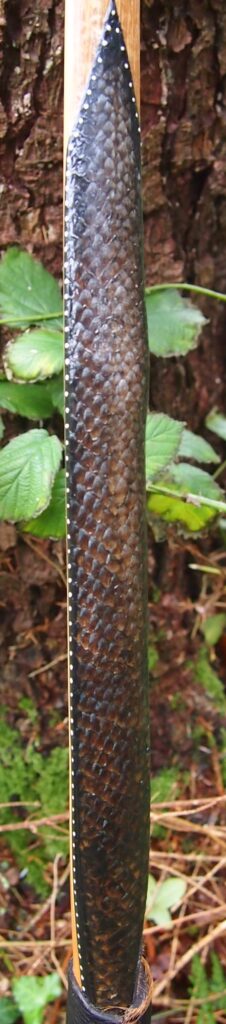
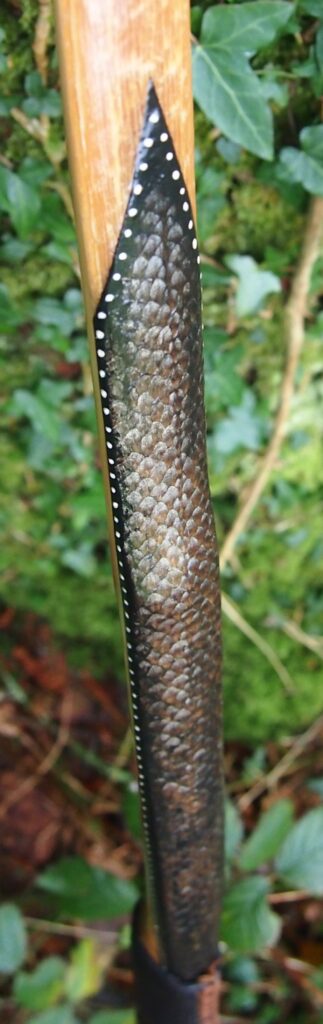
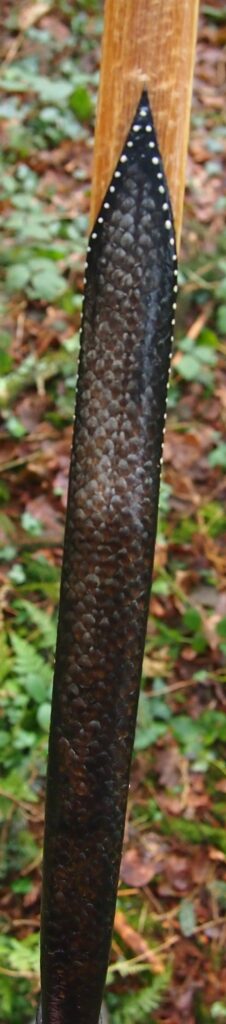
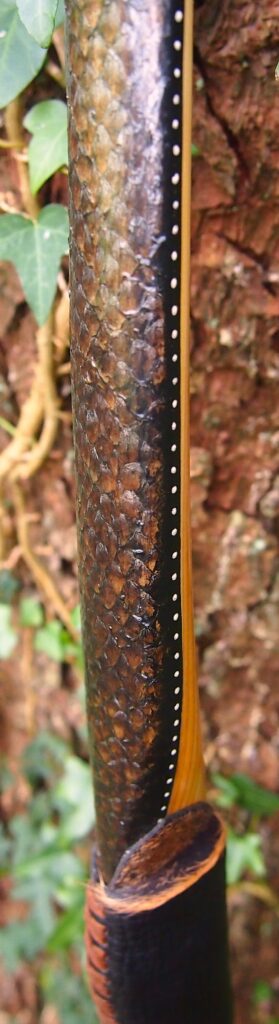
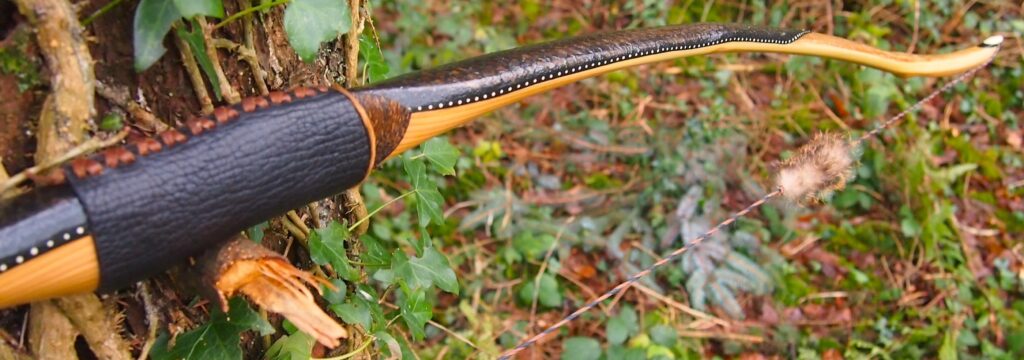
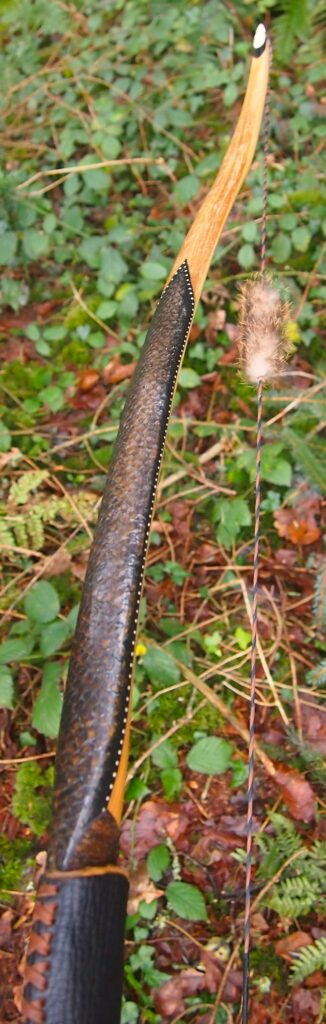
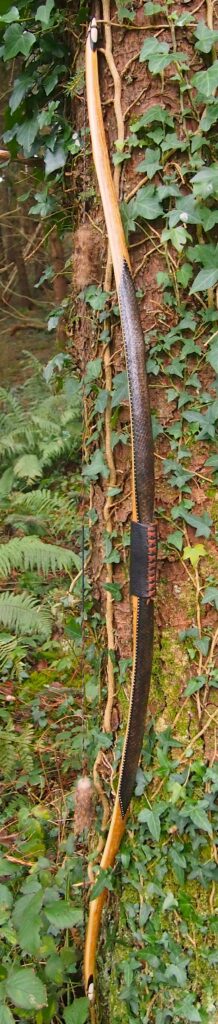
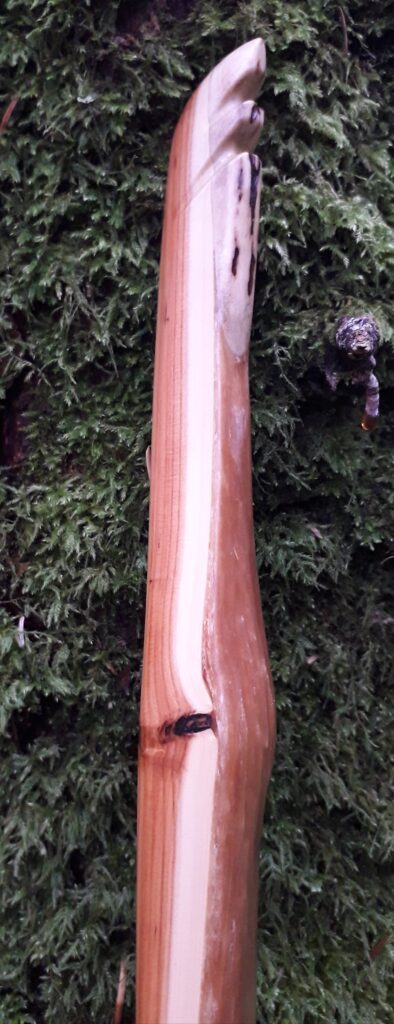
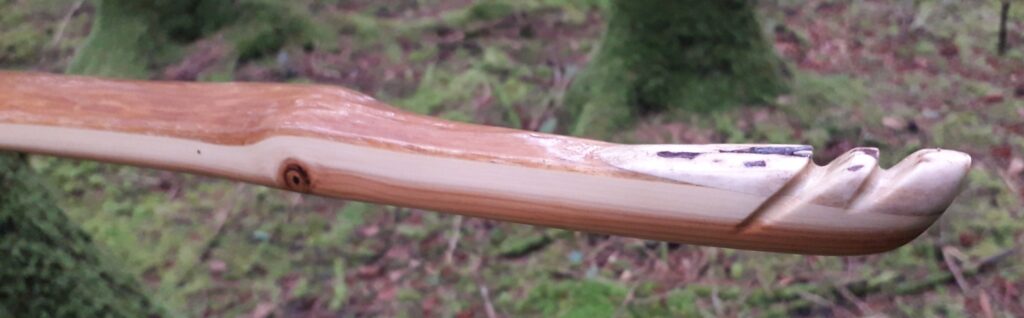
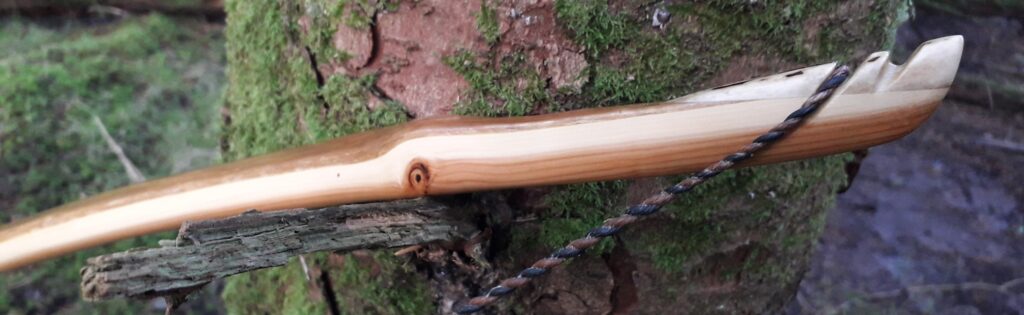
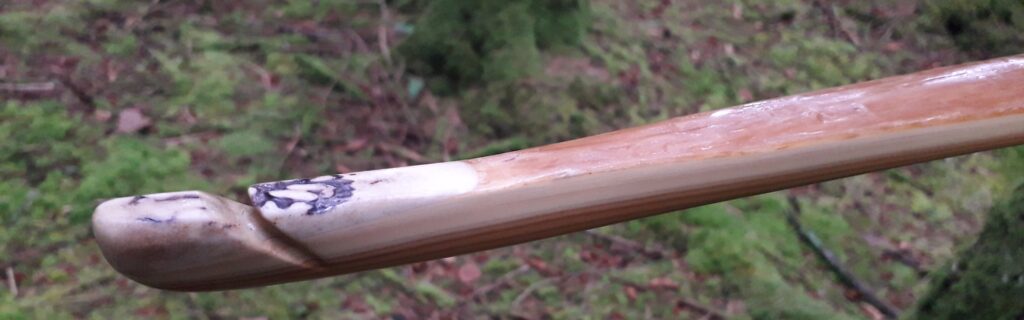
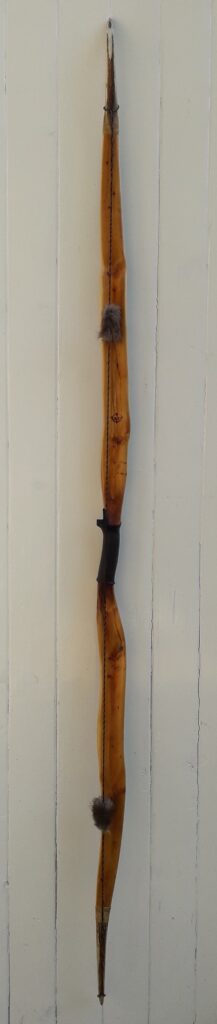
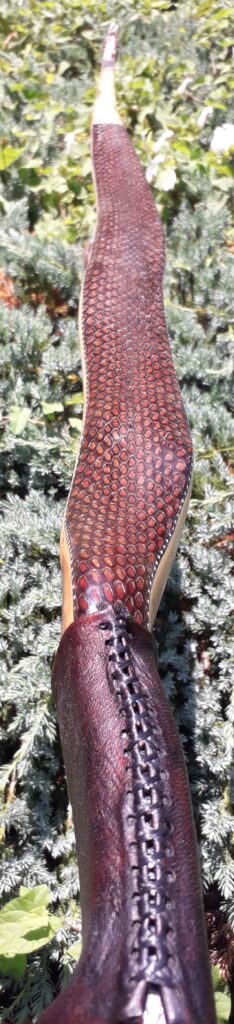
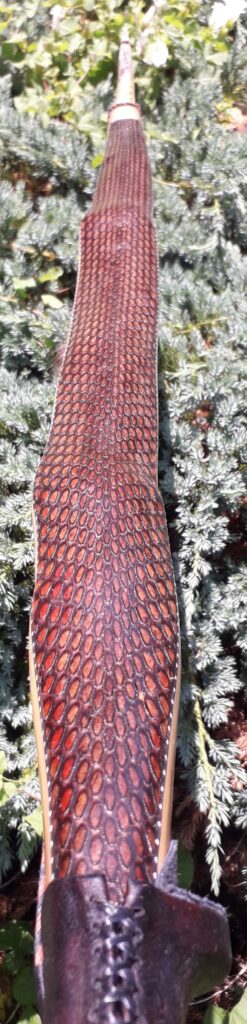
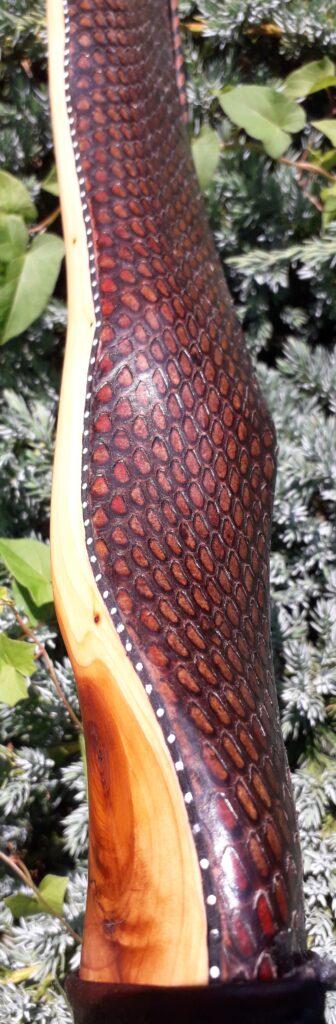
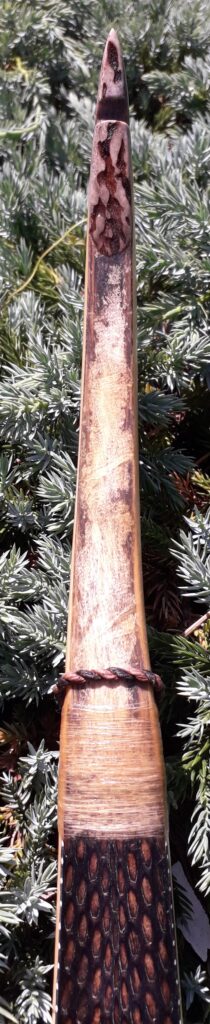
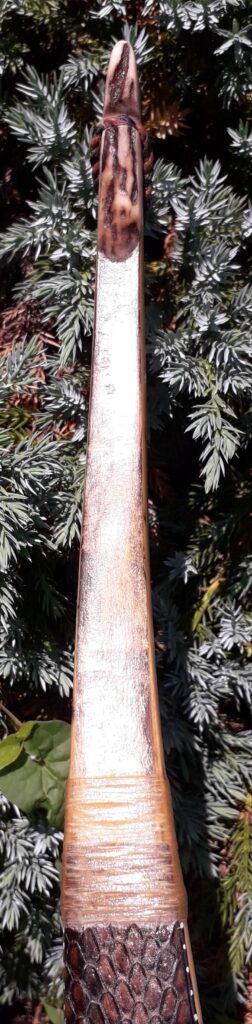
After refining the tips to minimise mass I fitted Wild English red deer antler tip overlays. I’ve also decorated the sinew backing in the exact same way as I’d described in my previous blog post which you can find here: Snakey Sinew backed Yew R&D Flatty (Zombie Killer) Bow No: 25 – Southmoor Bows
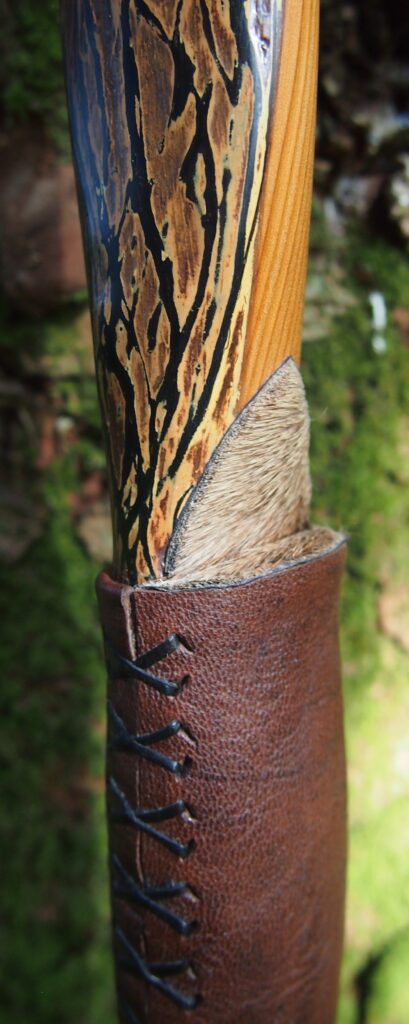
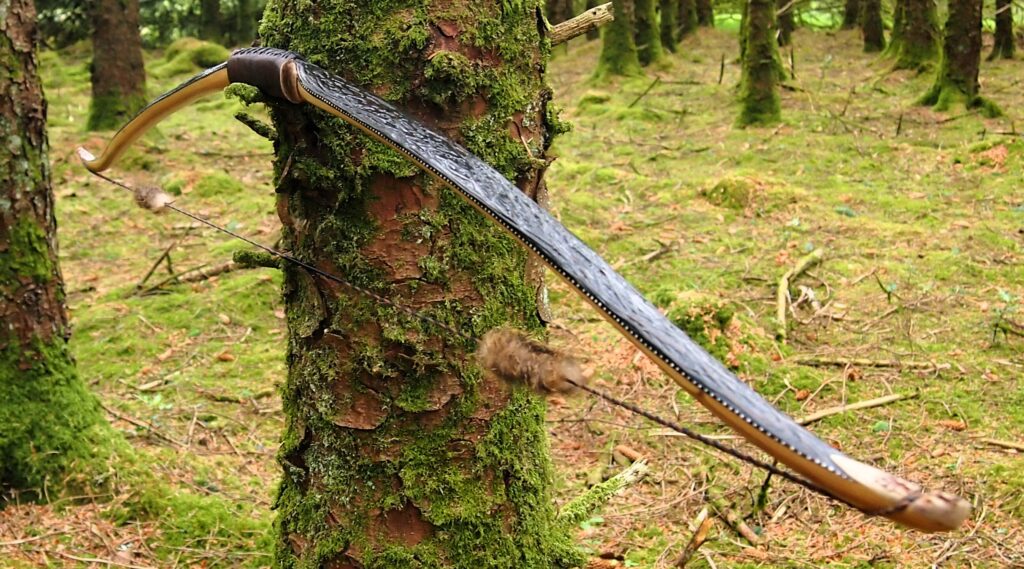
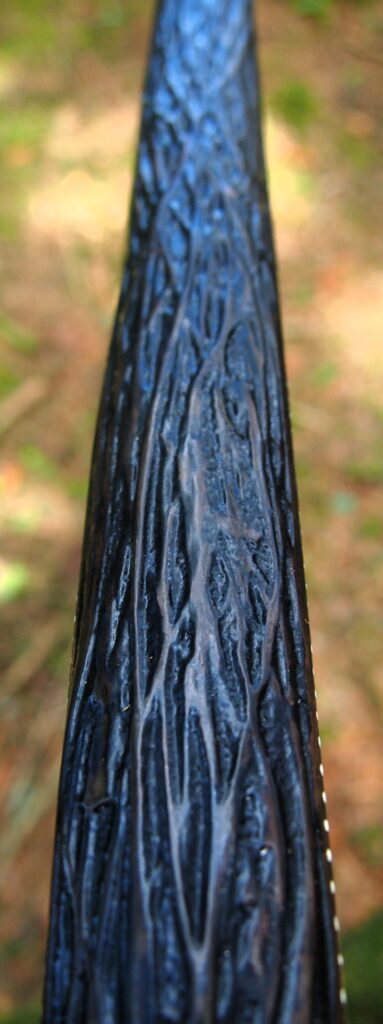
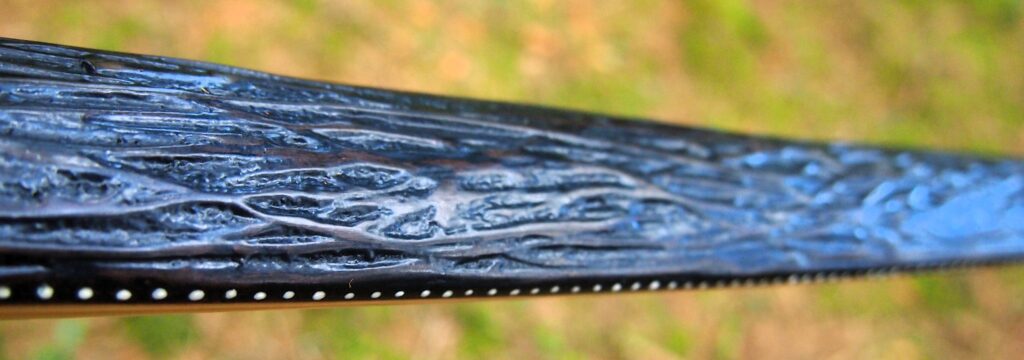
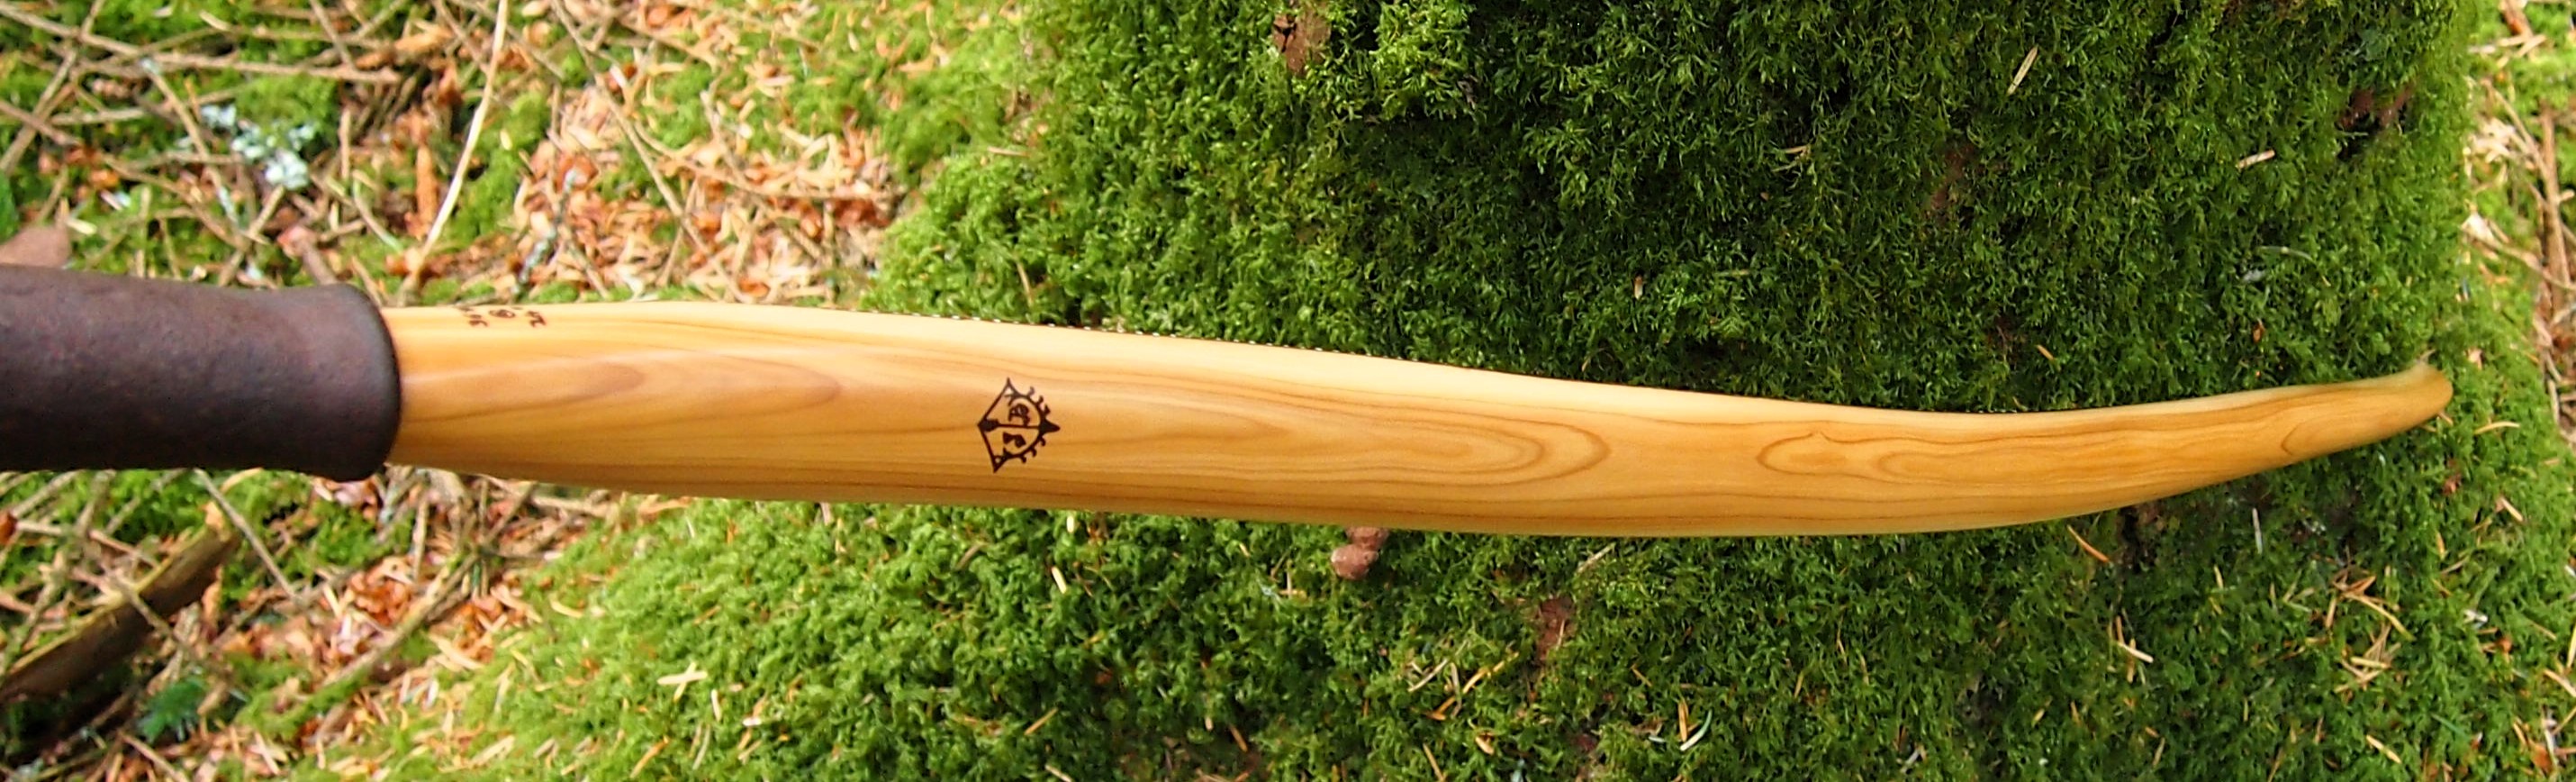
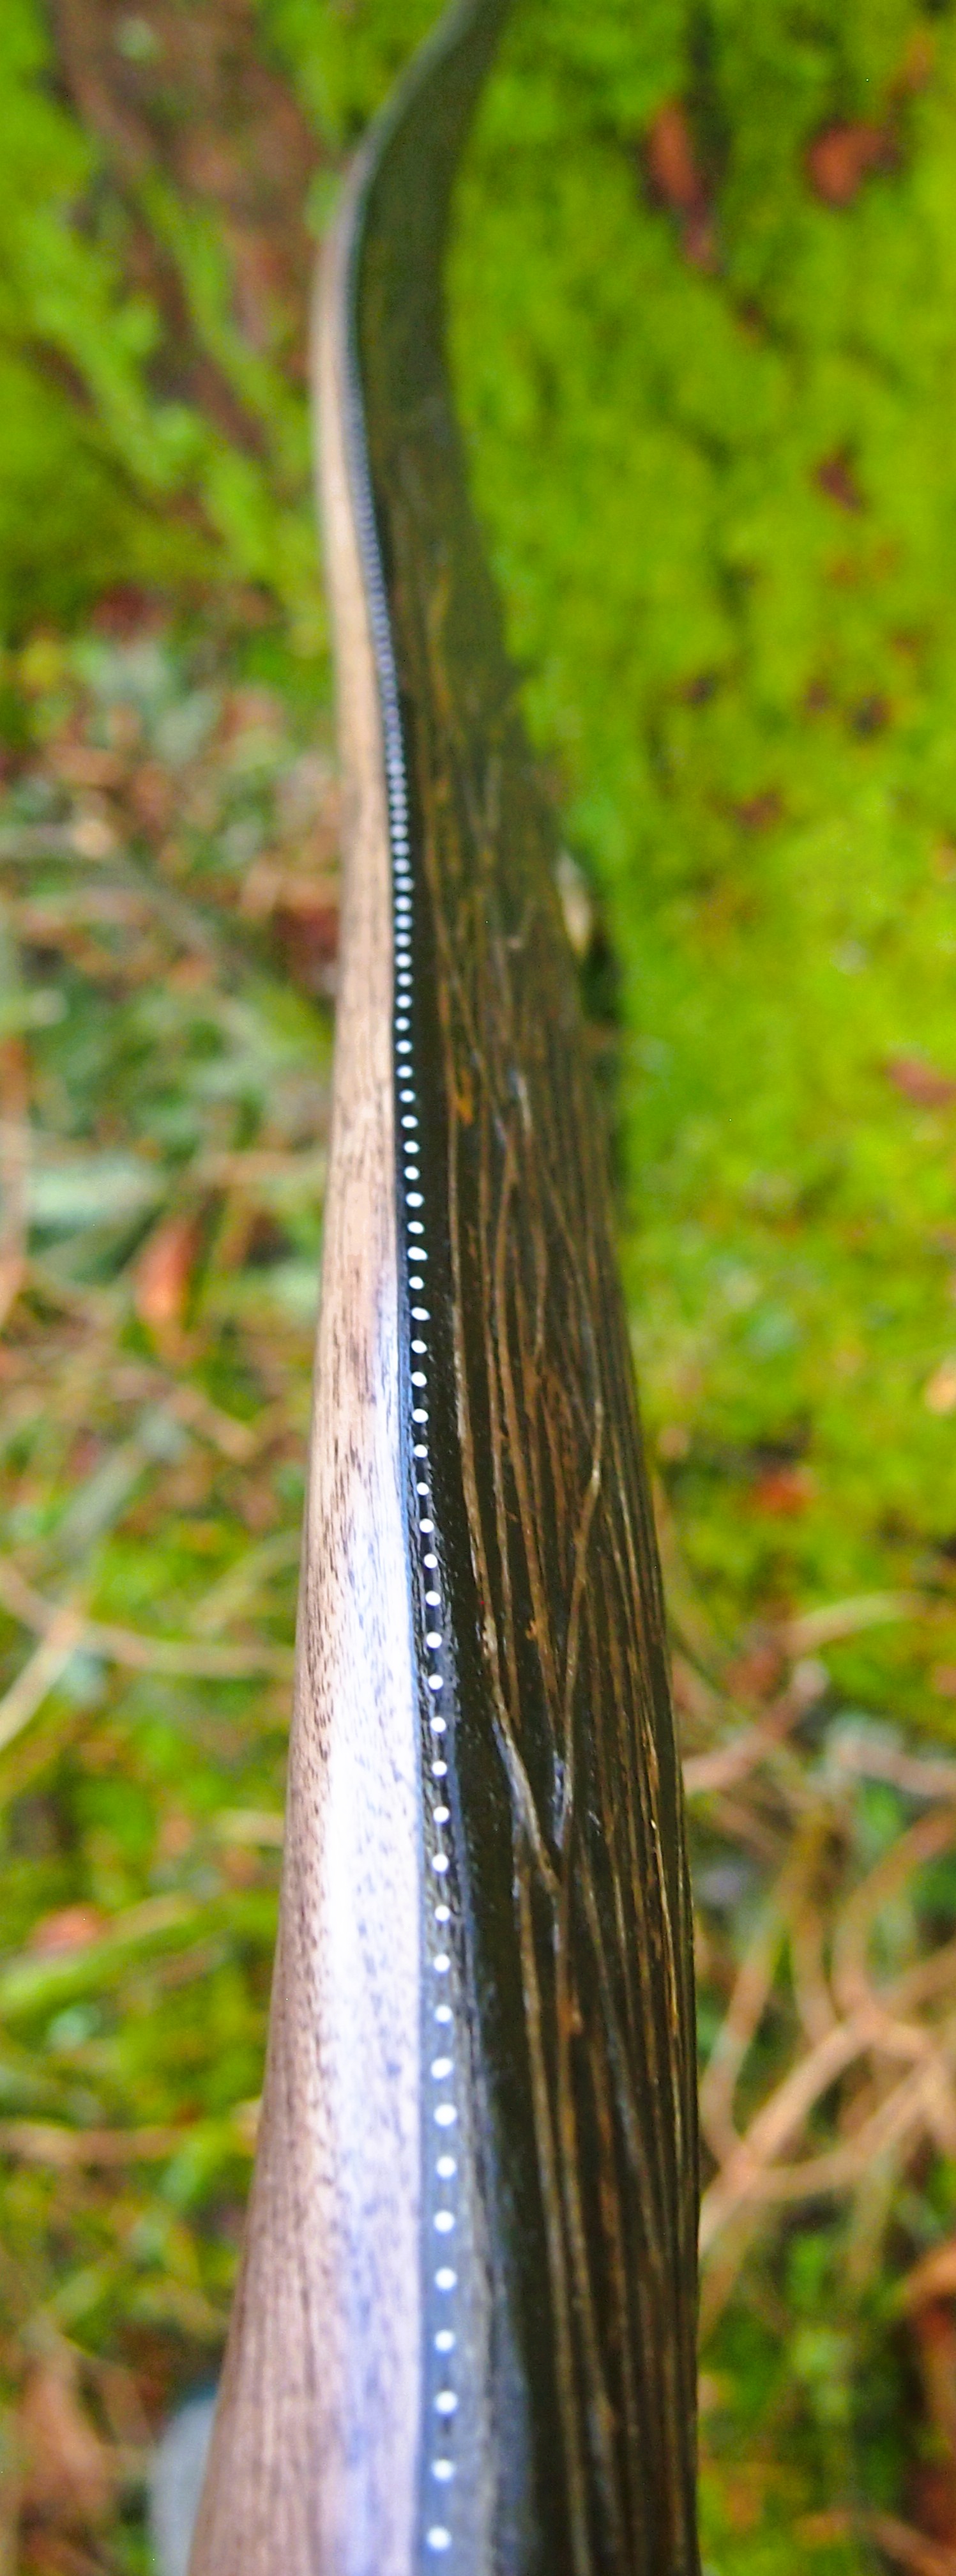
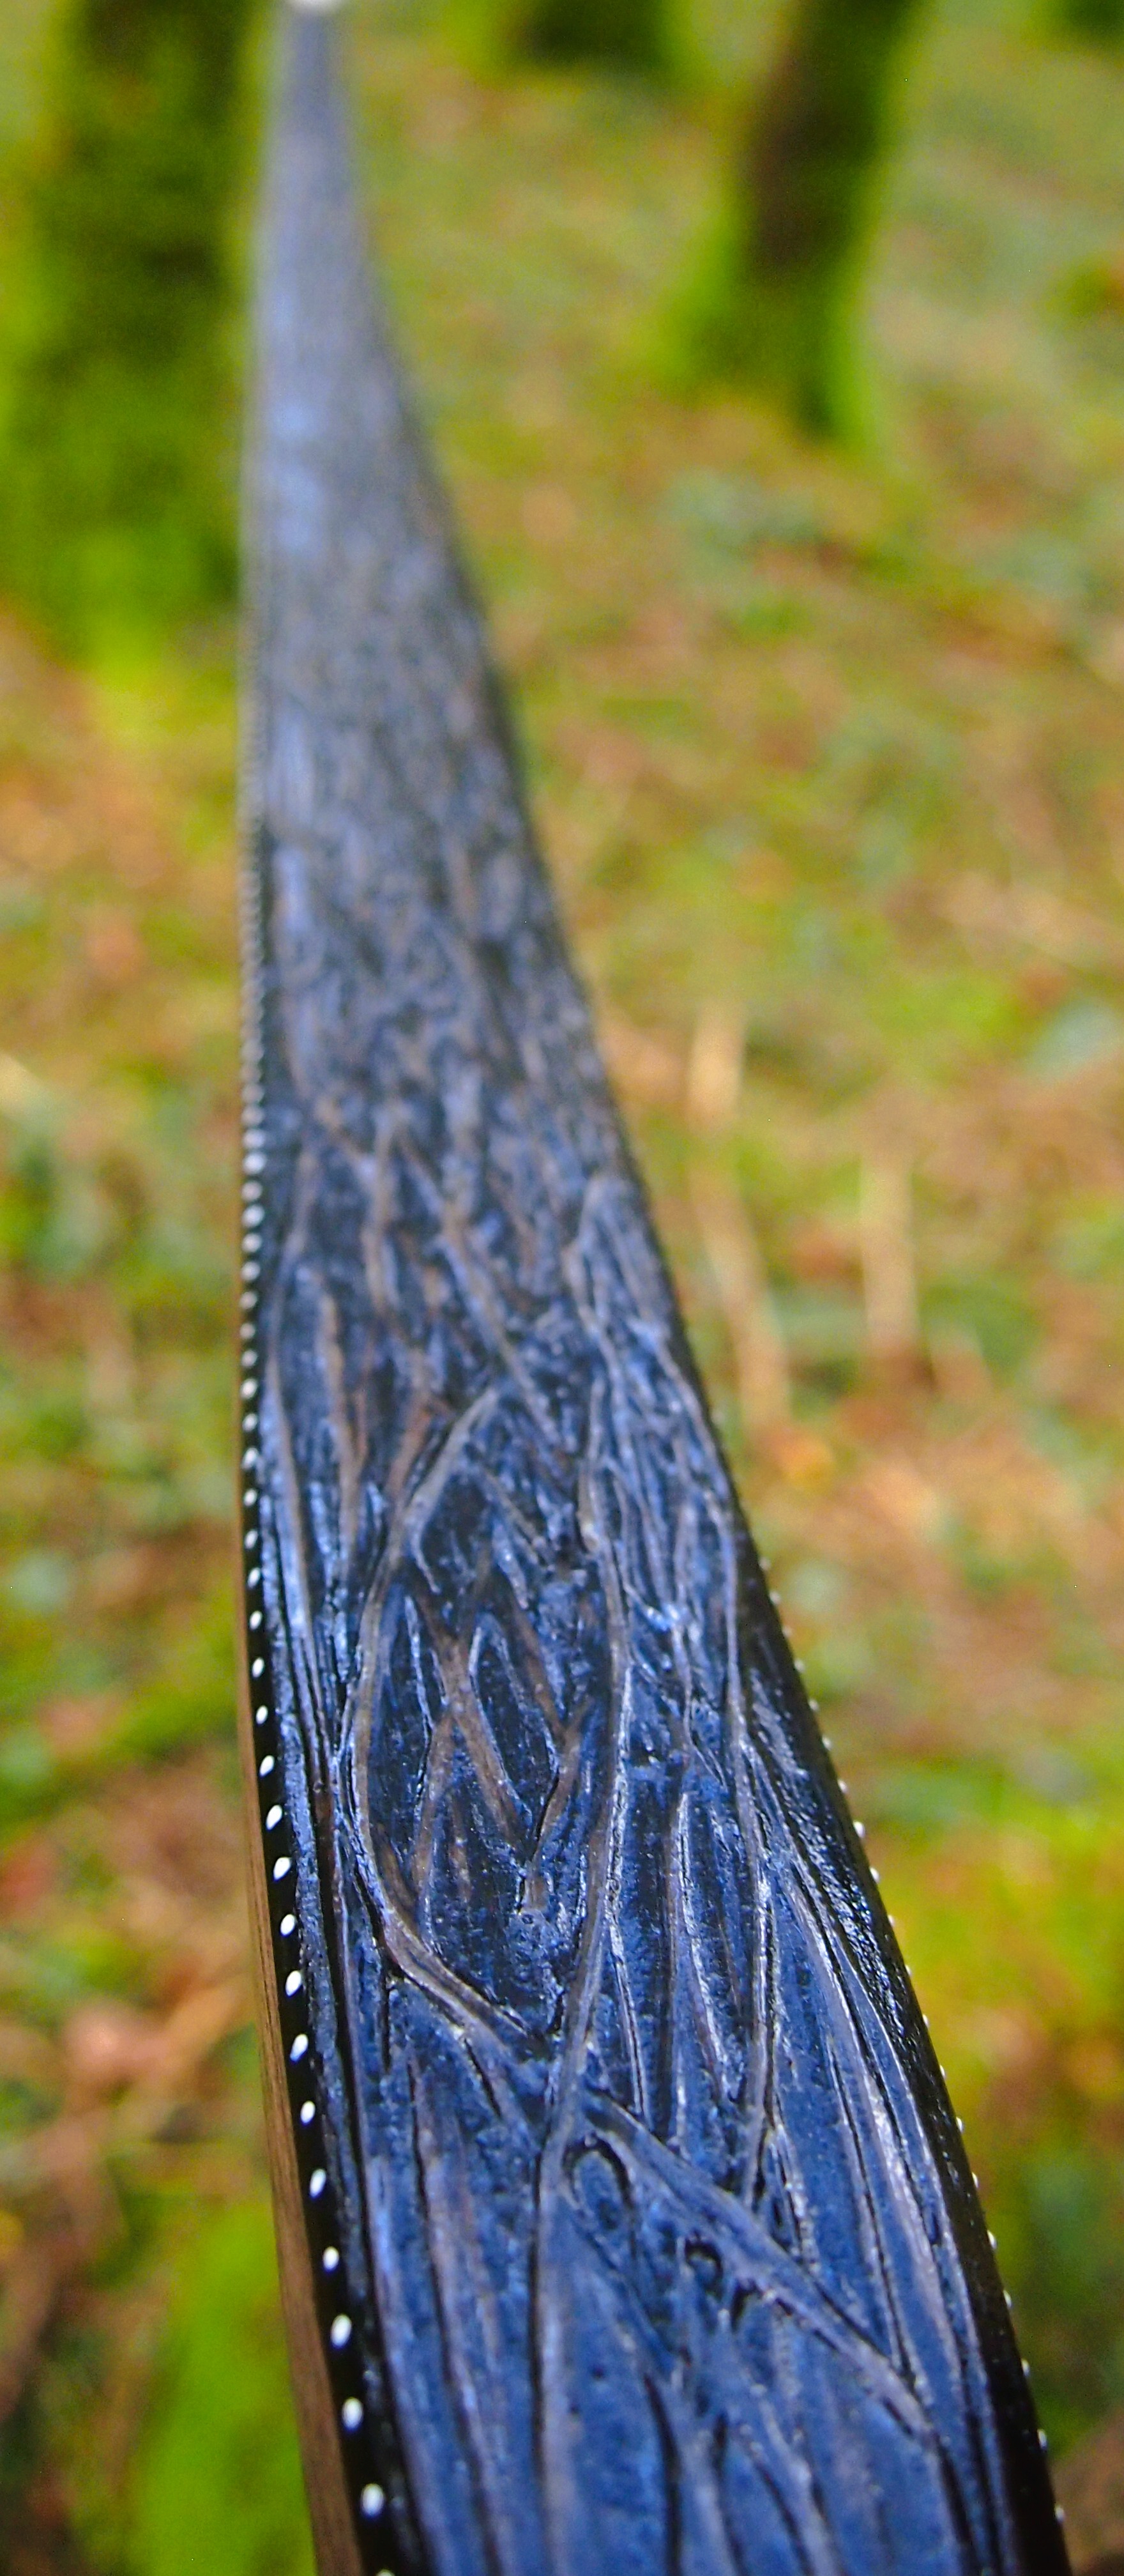
This time though I used a local Devon culm clay earth pigment as the underlying yellow/cream base colour. This contrasted wonderfully with the jet black sinew stands creating the mycelia look amongst the sinew backing. The tan wash to finish the look of the backing is once again concentrated spruce bark tanning painted on top of the creamy yellow clay pigment, then sanded/scraped through to expose the yellow/cream and dyed black sinew below. The tannin wash created a wonderful almost camo bark like affect on top of the creamy yellow, which almost looks like a natural creamy yew sapwood colour. This creamy yellow colour is fitting given the complete absence of any actual sapwood!
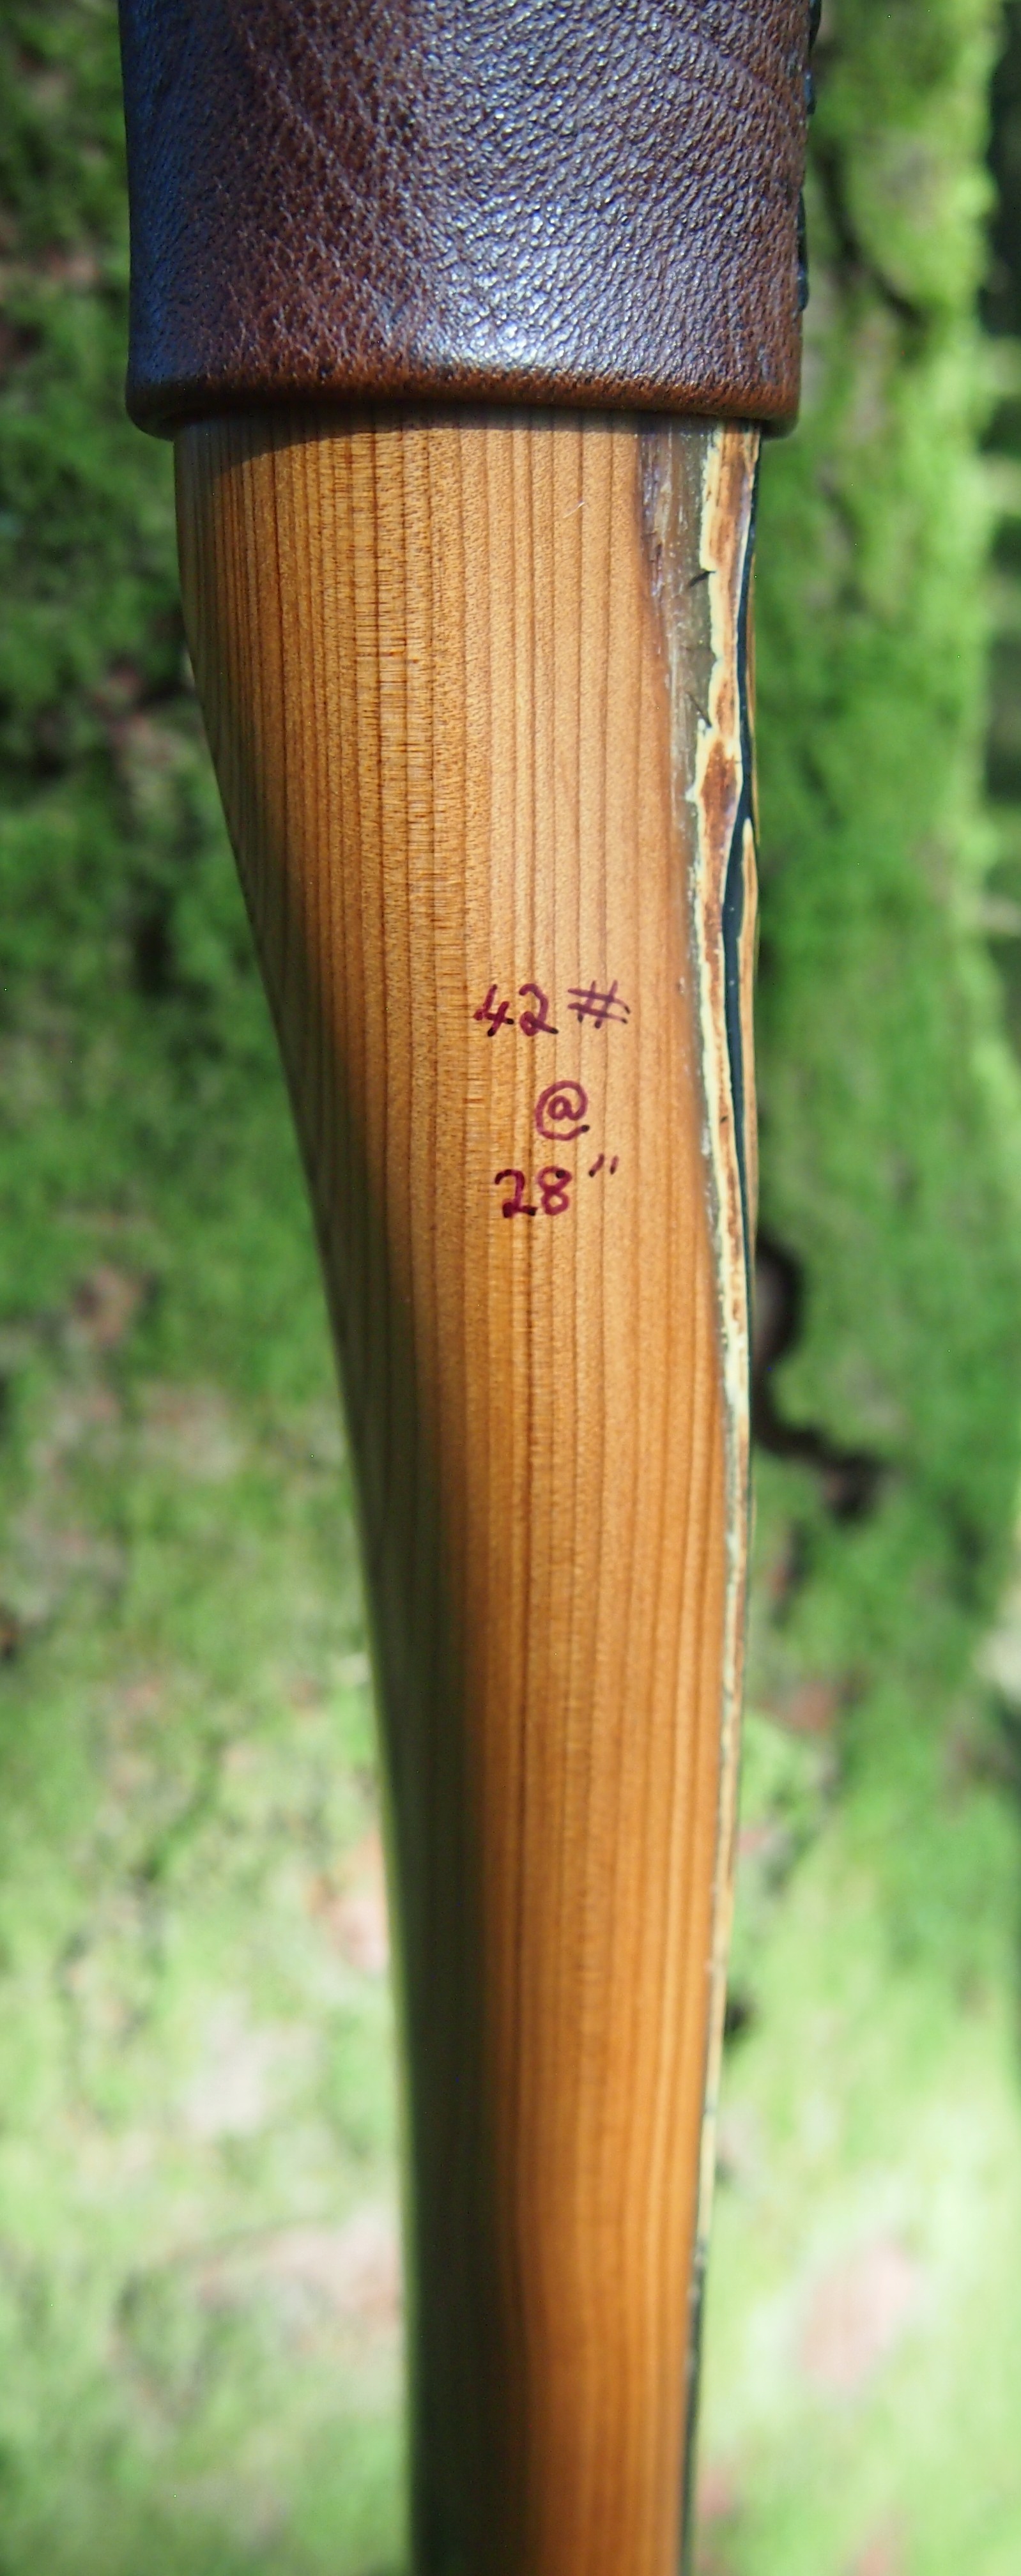
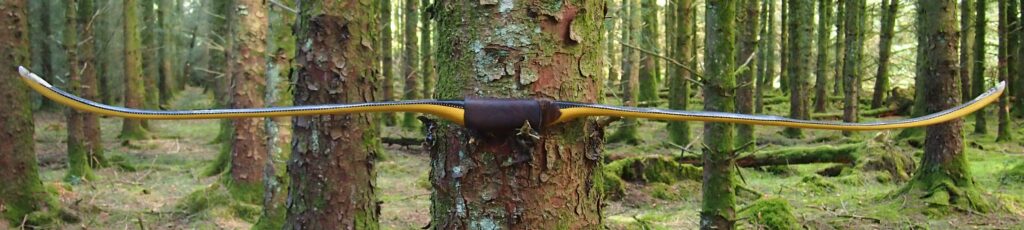
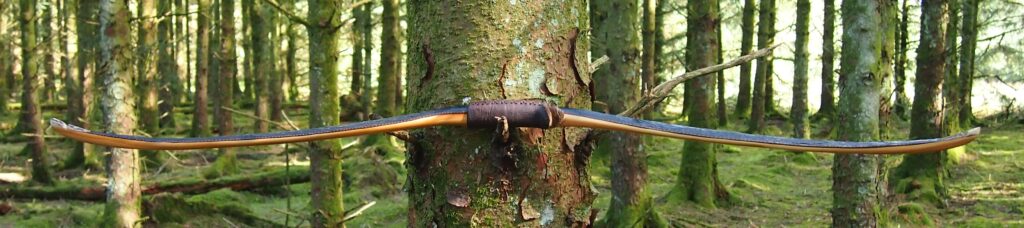
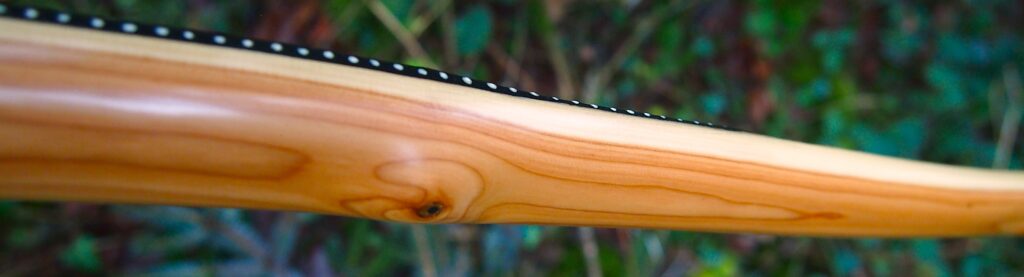
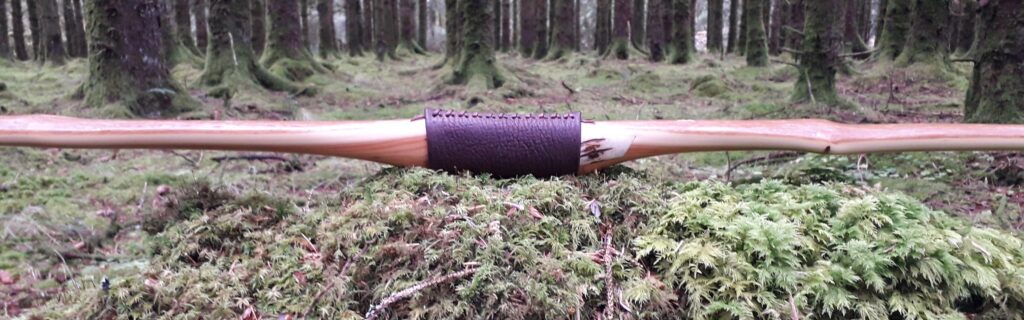
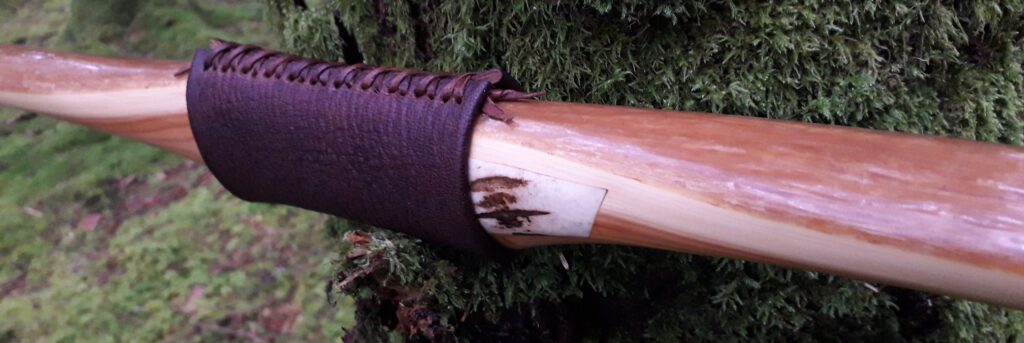
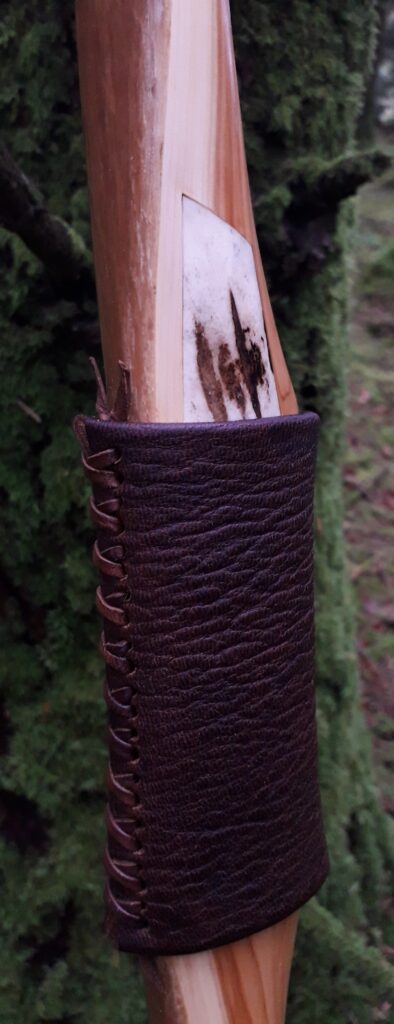
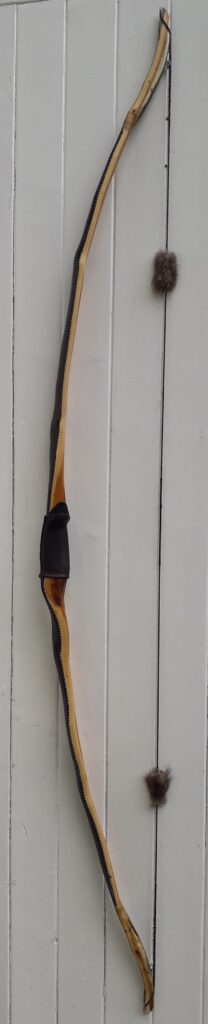
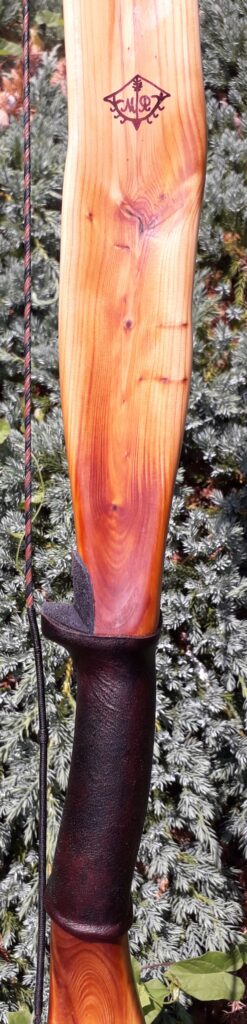
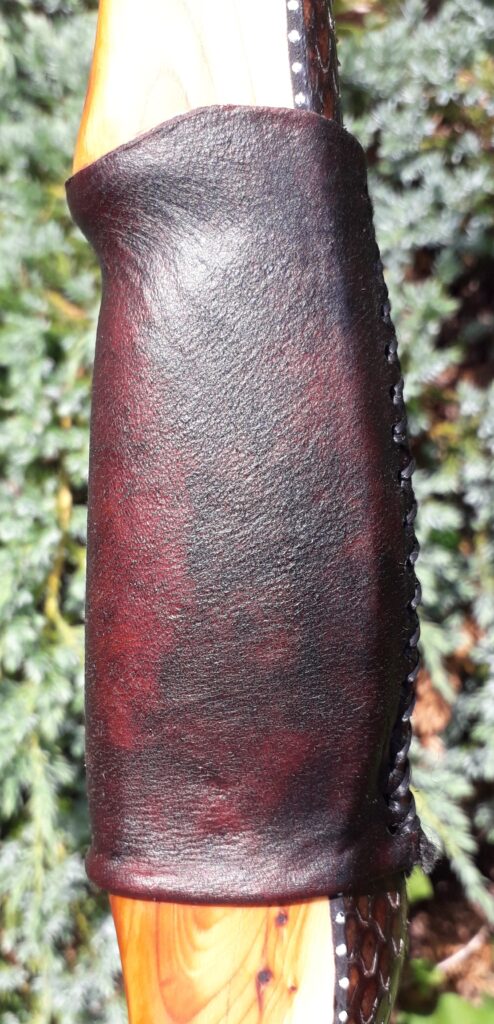
After sealing her up with many coats of shellac she got the polish and bees wax paste treatment leaving her with a wonderful satin sheen which realy make the rose gold almost translucent heartwood grain really pop. Especially beautiful are the pin whirls which I left nice a thick to remove any risk of pinching. The wood is a absolutely stunning even if I do say so myself!
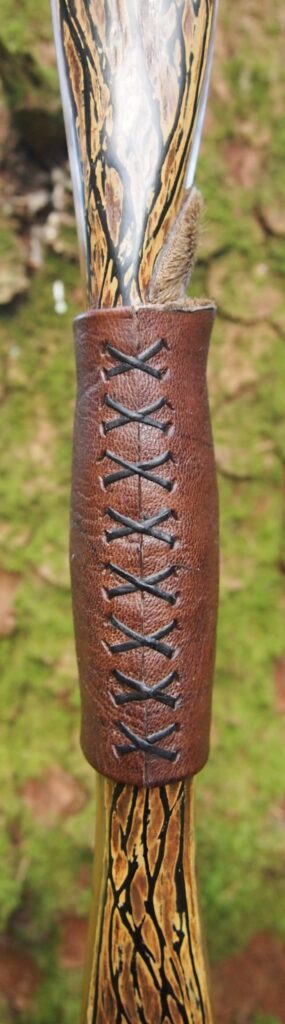
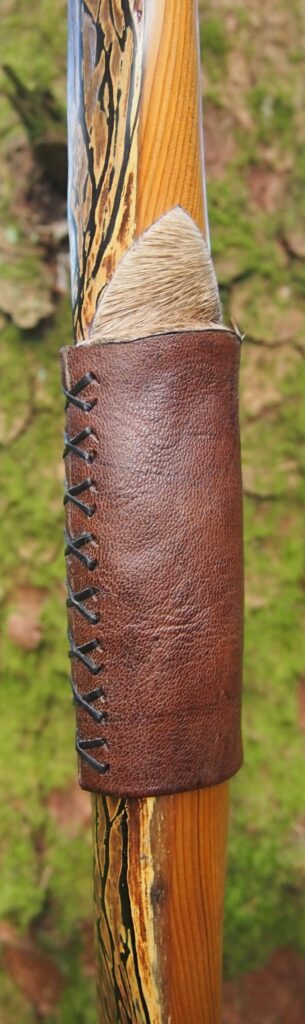
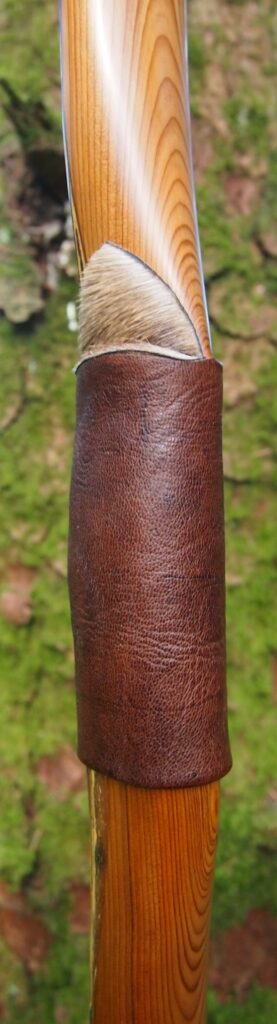
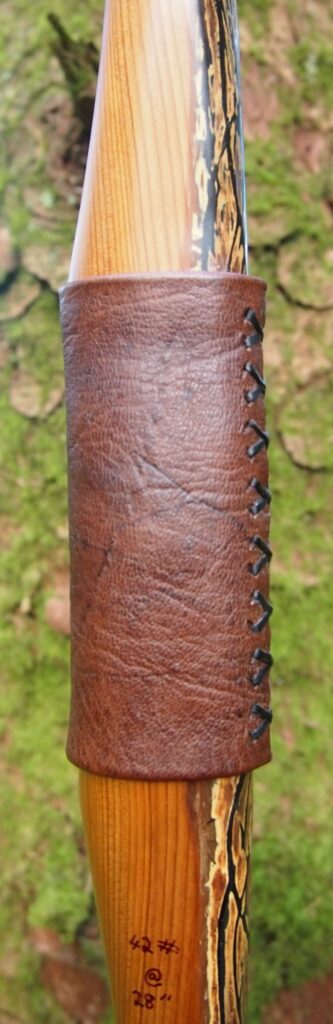
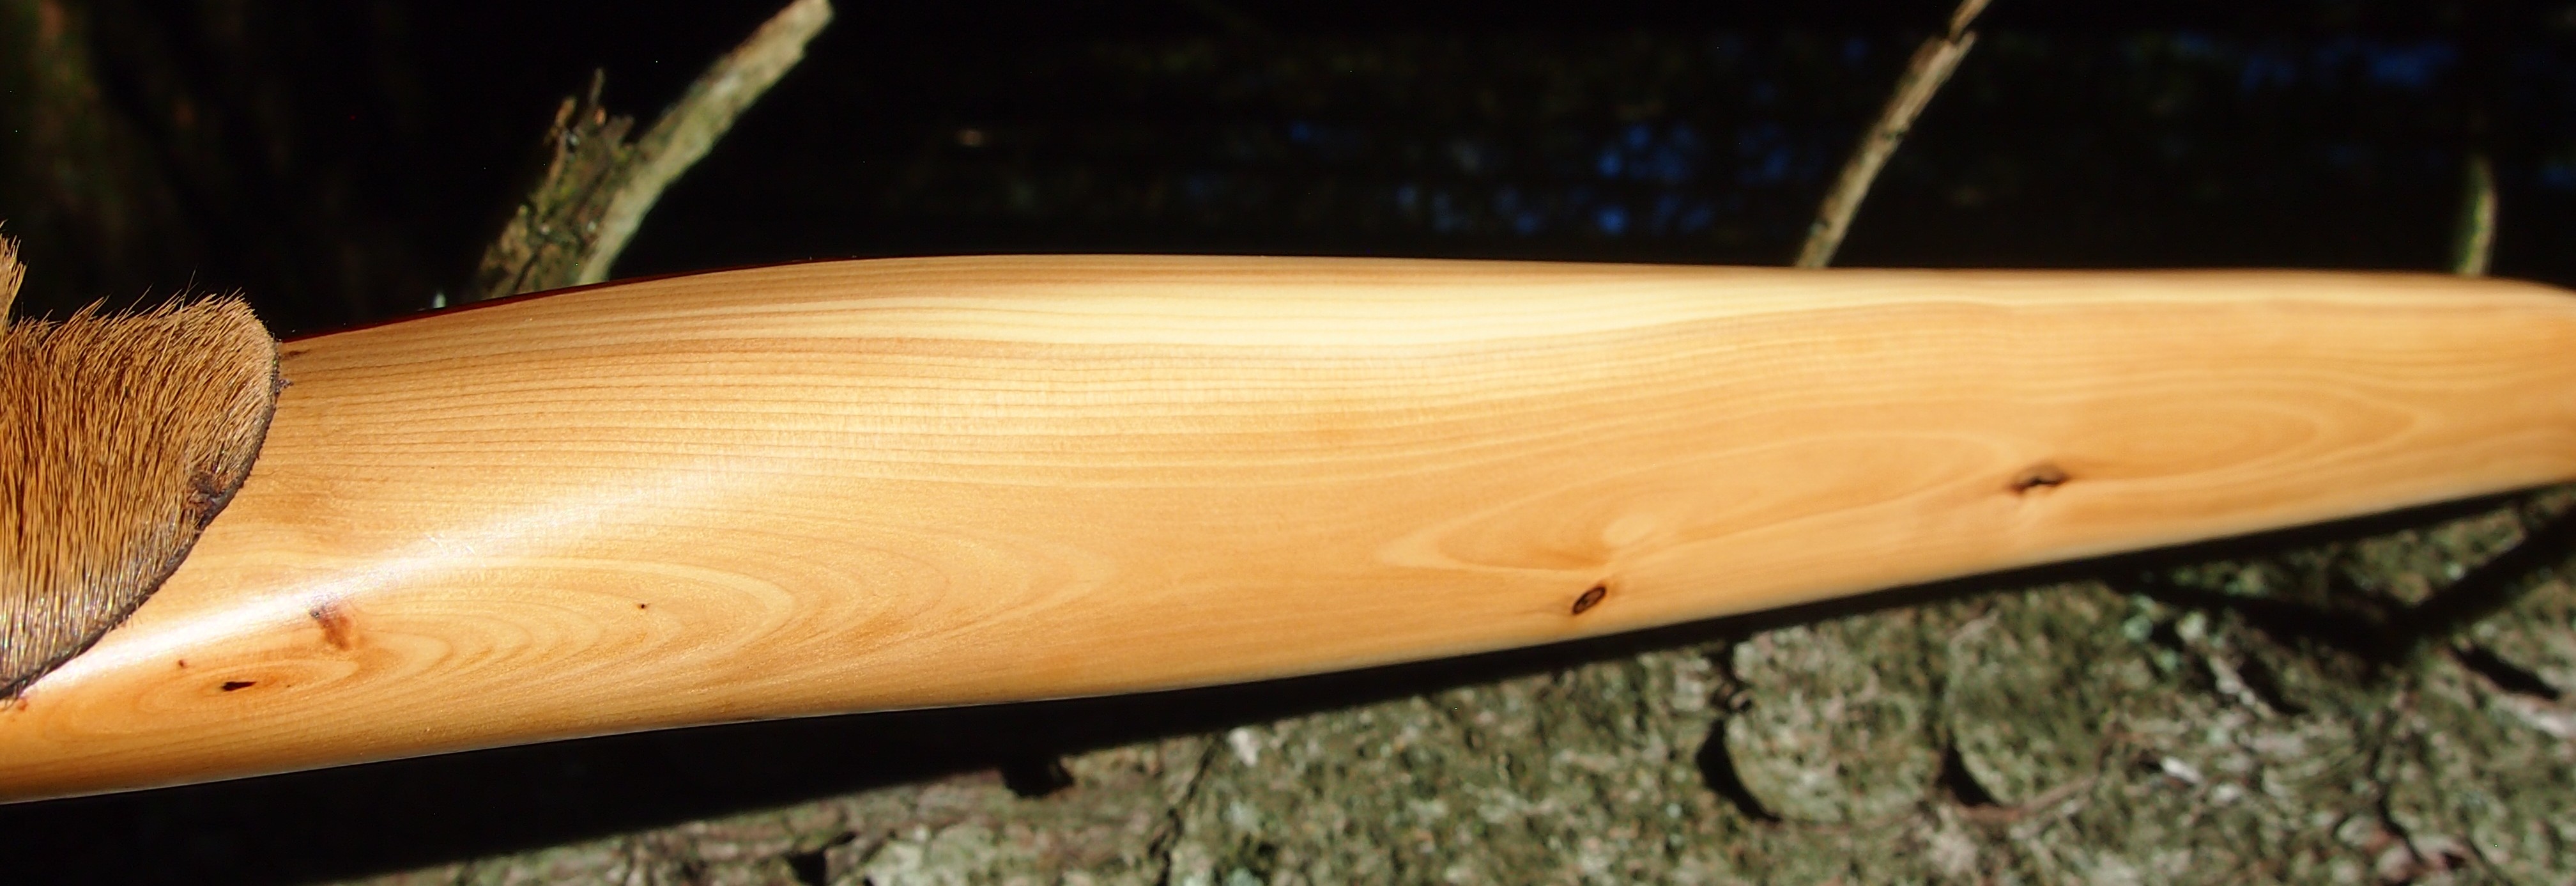
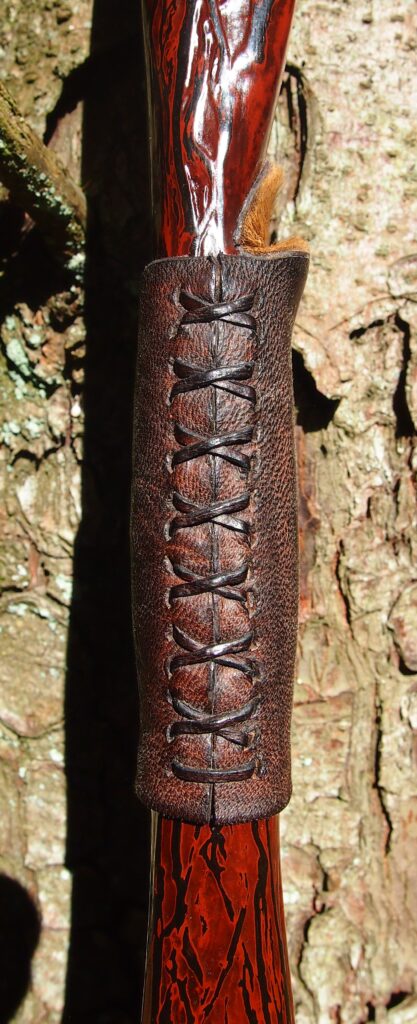
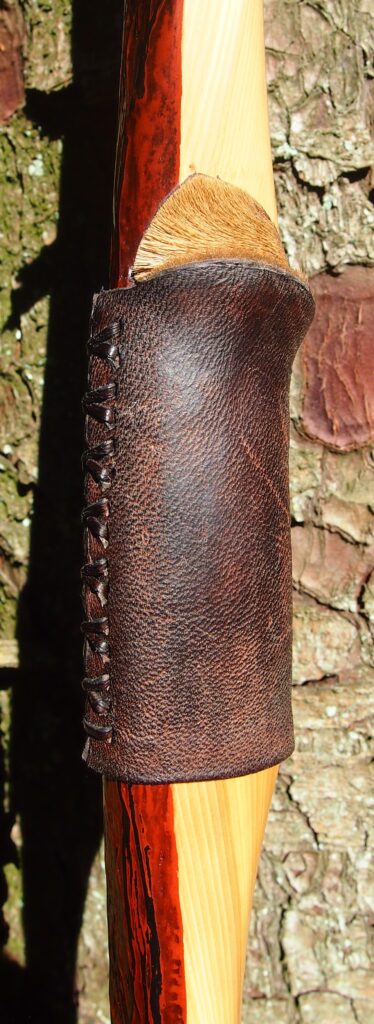
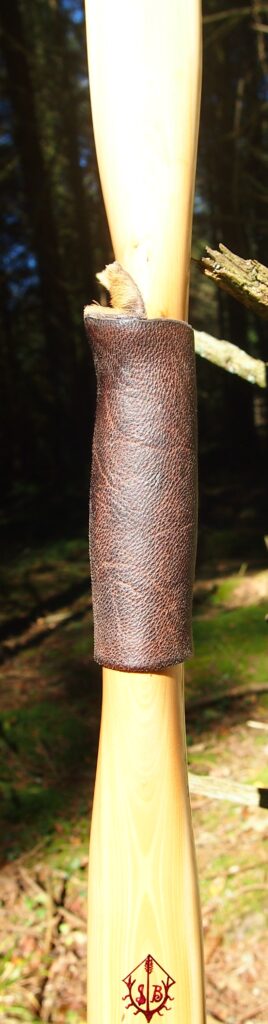
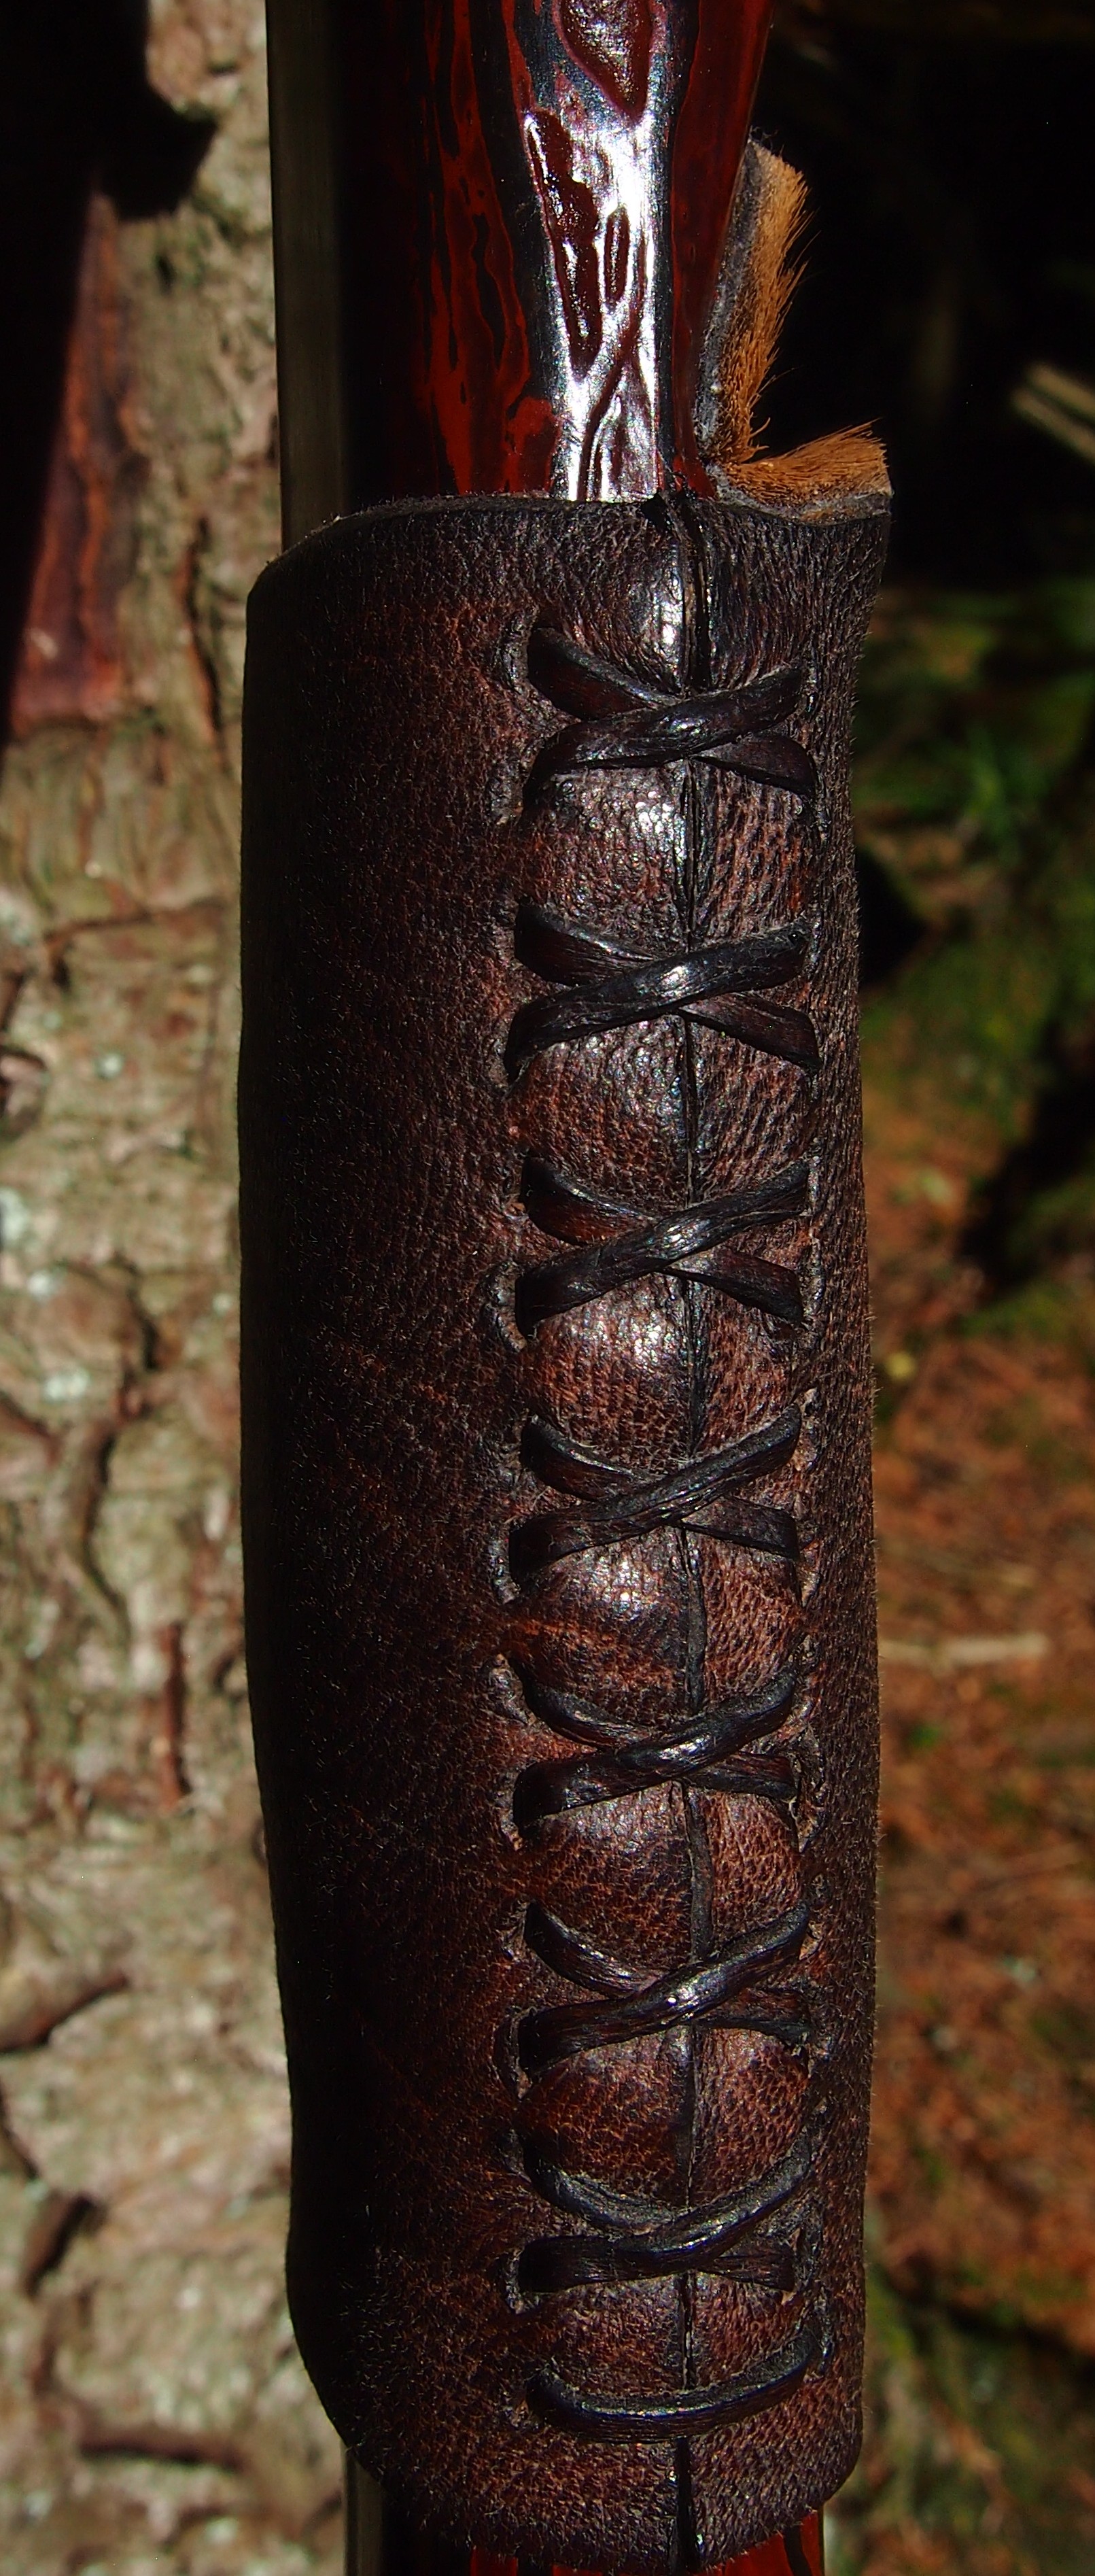
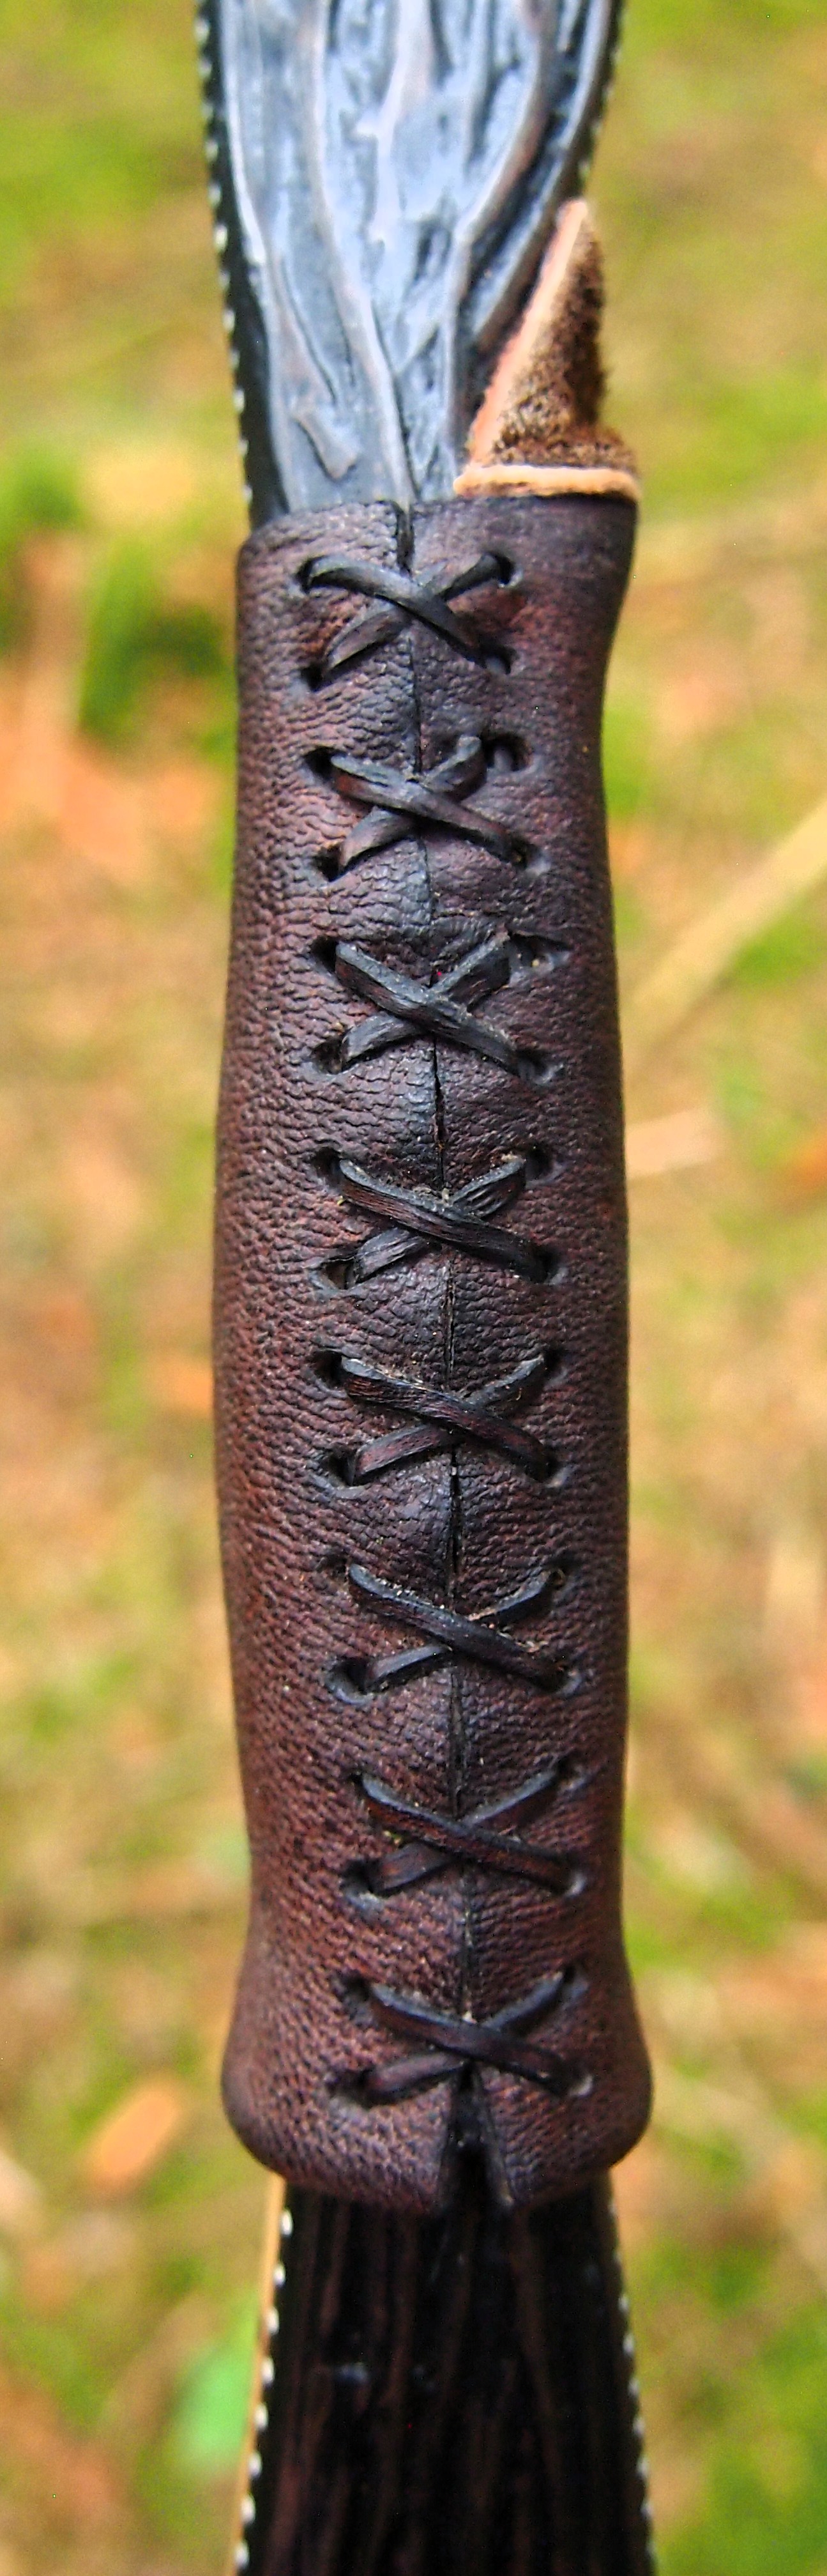
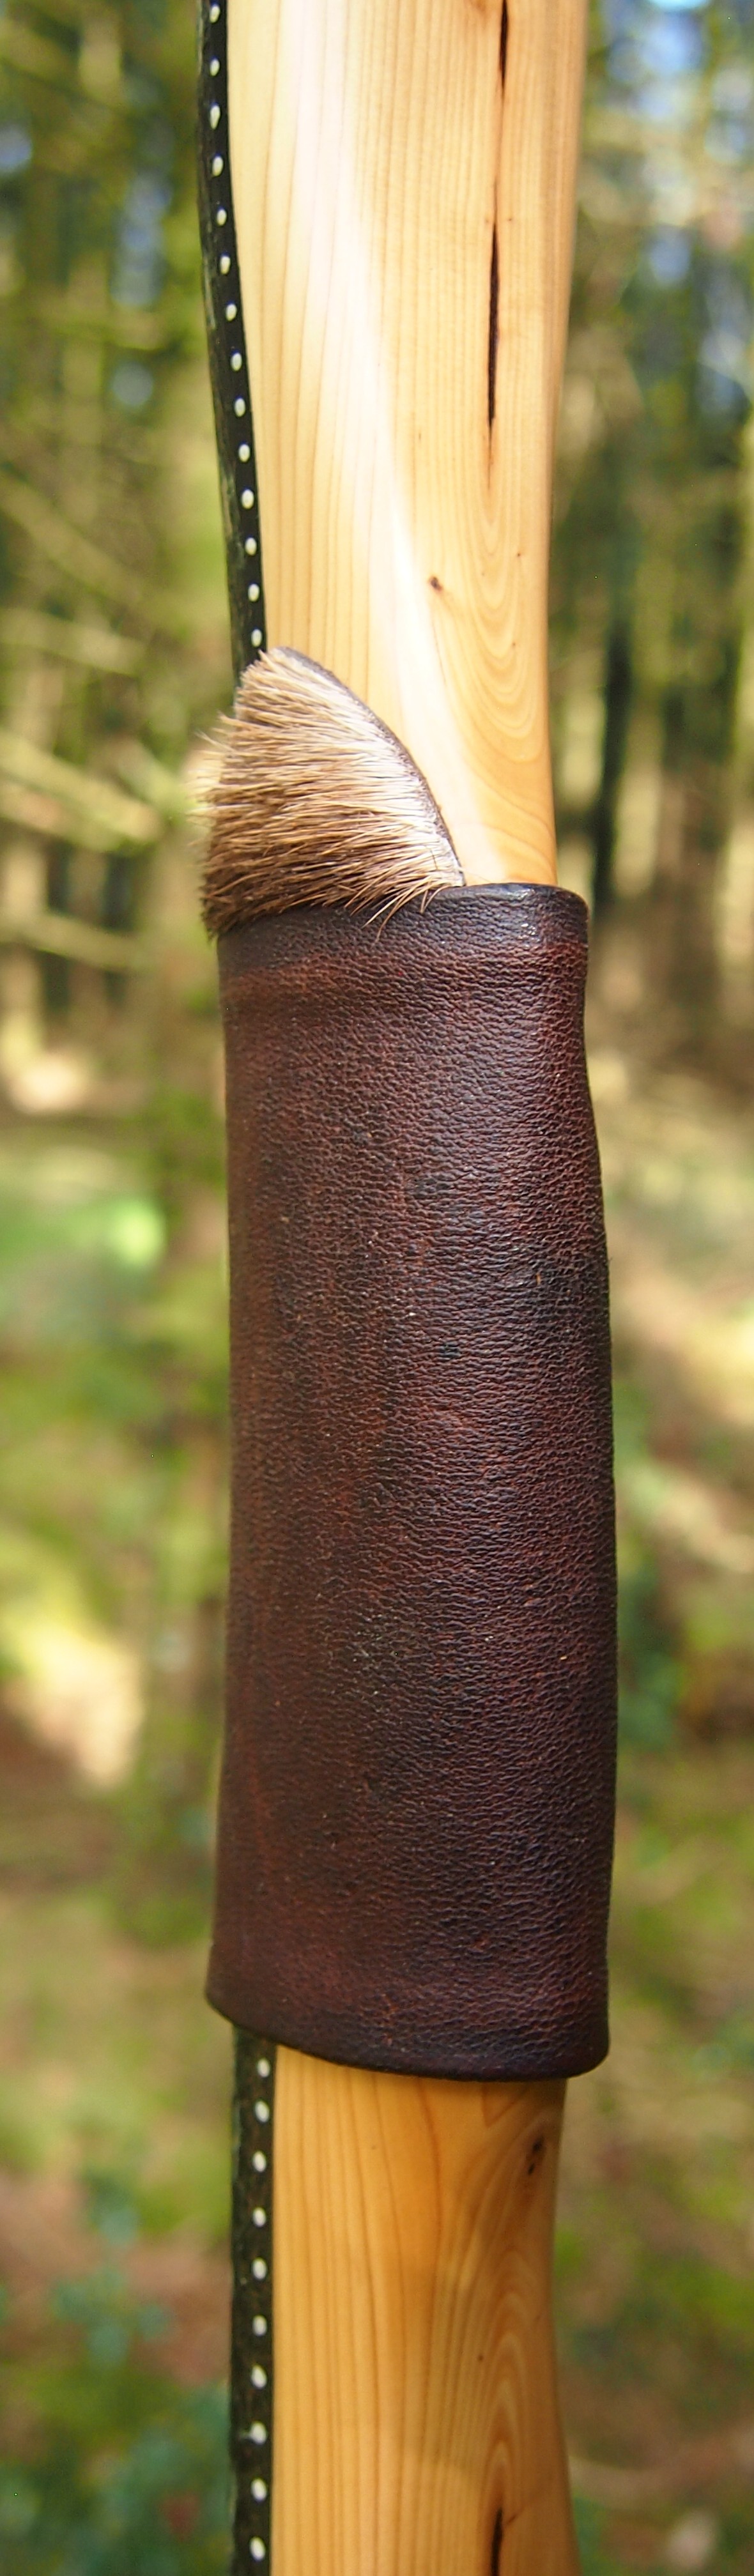
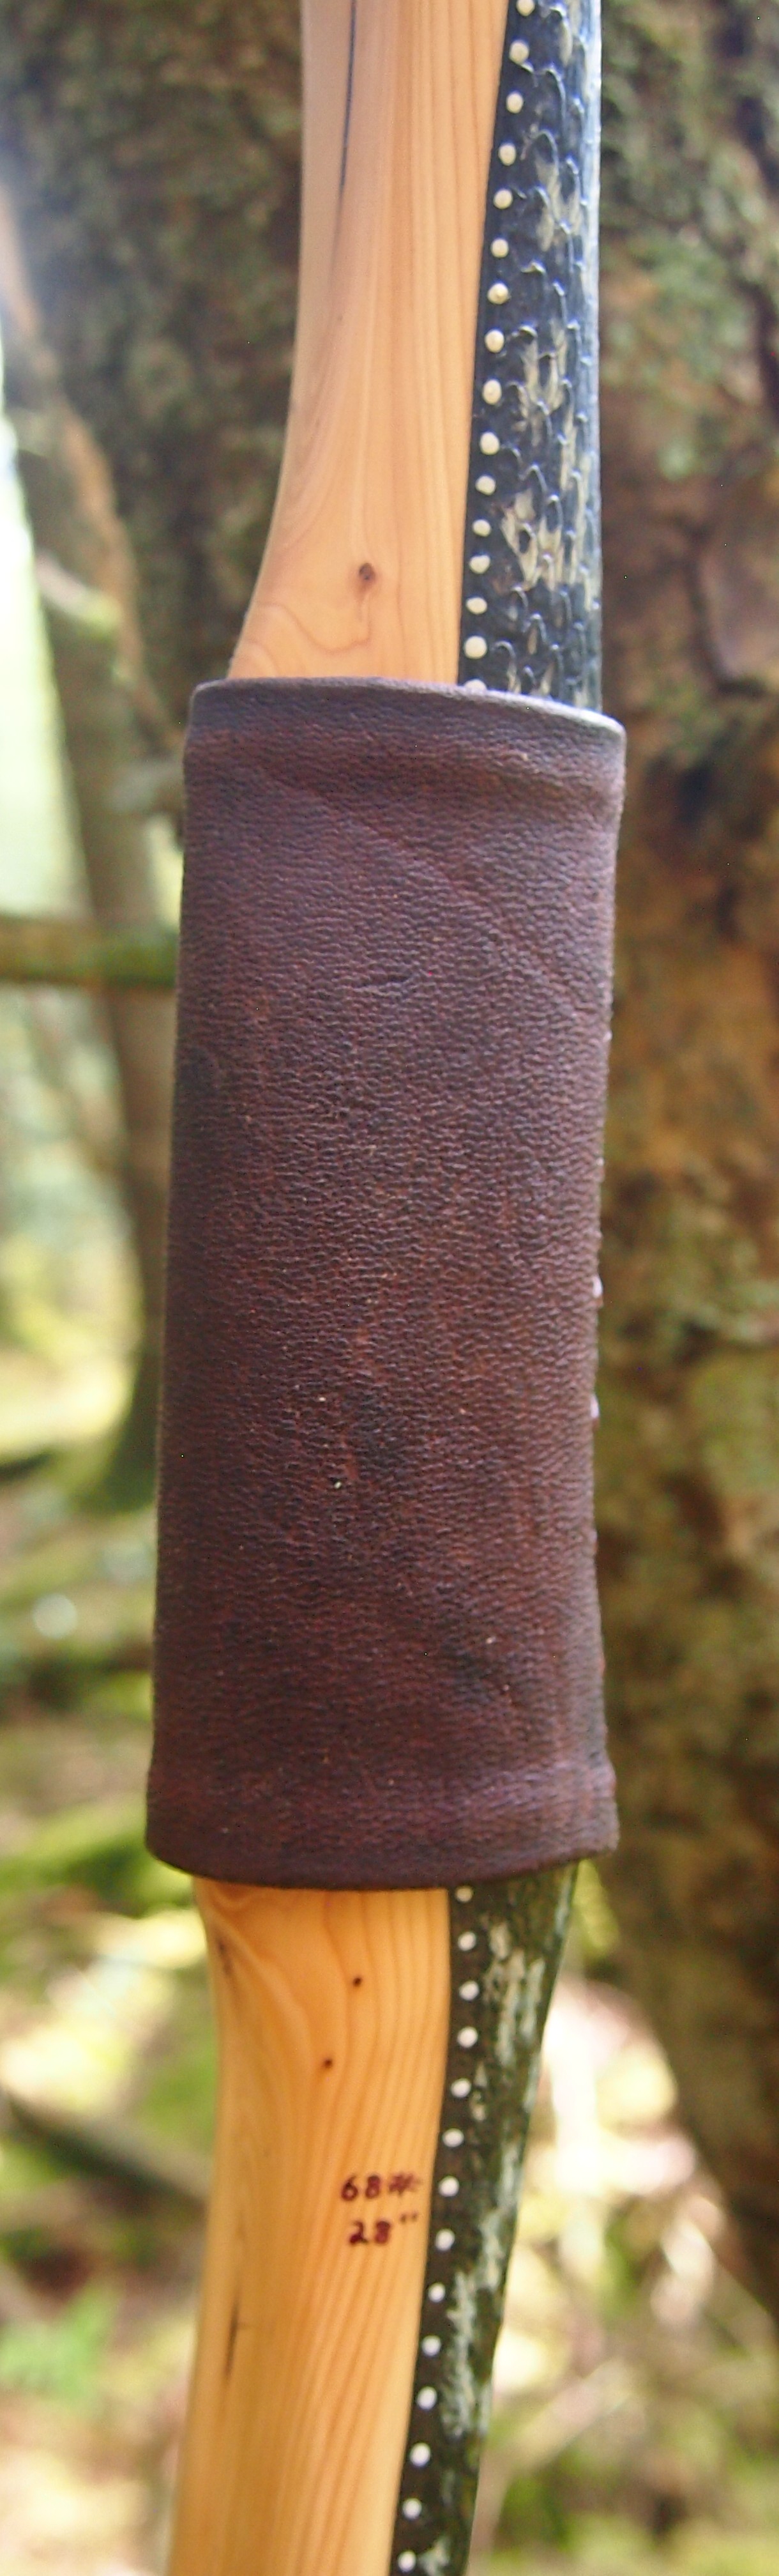
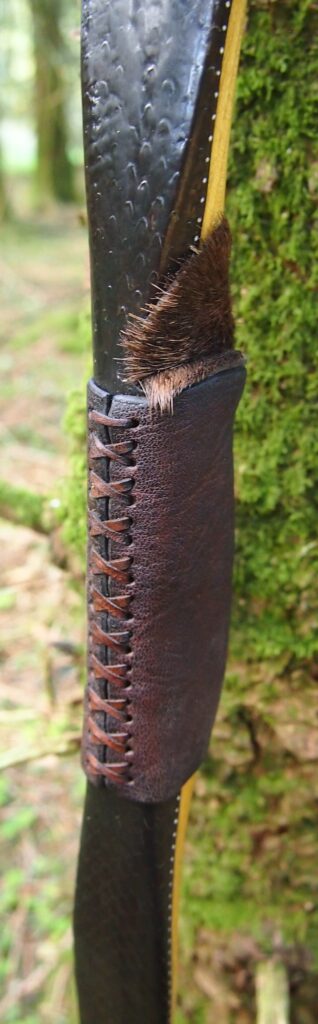
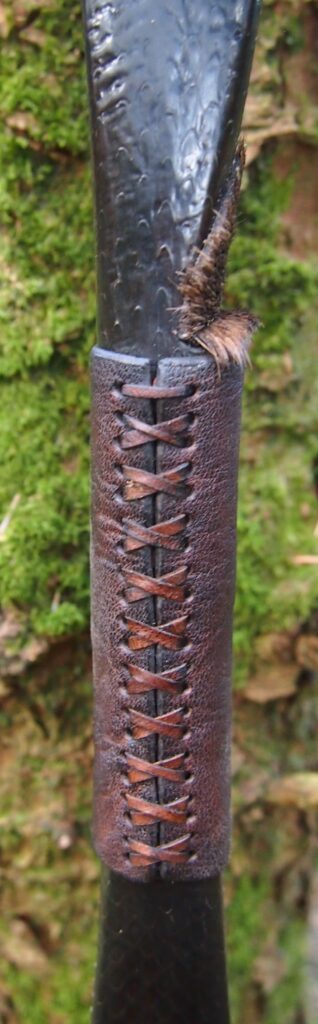
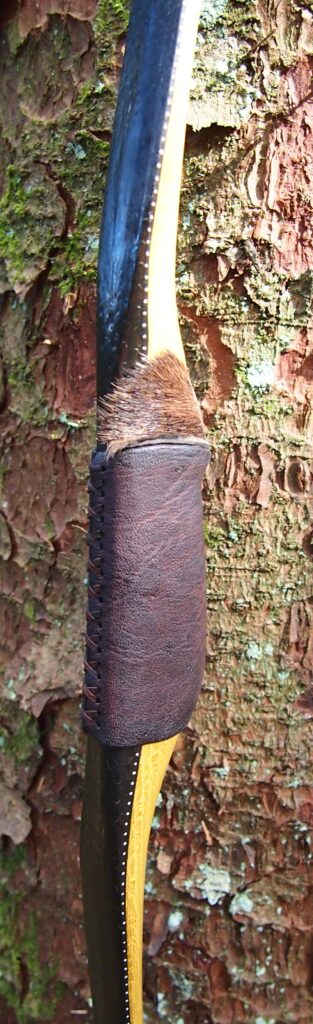
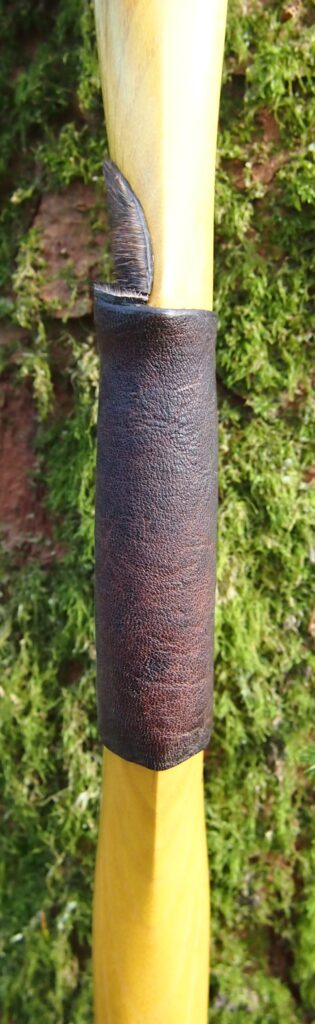
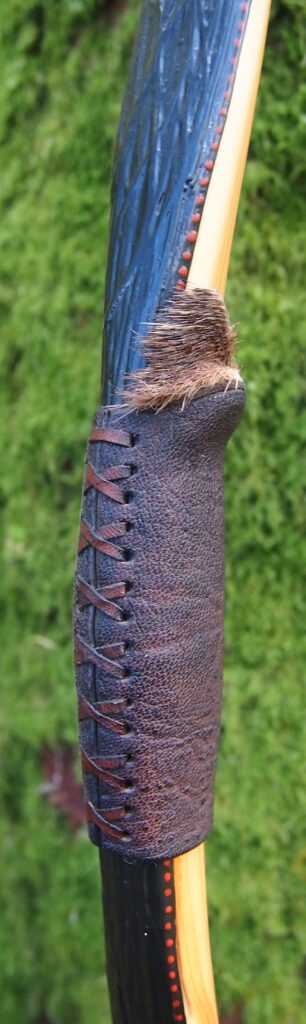
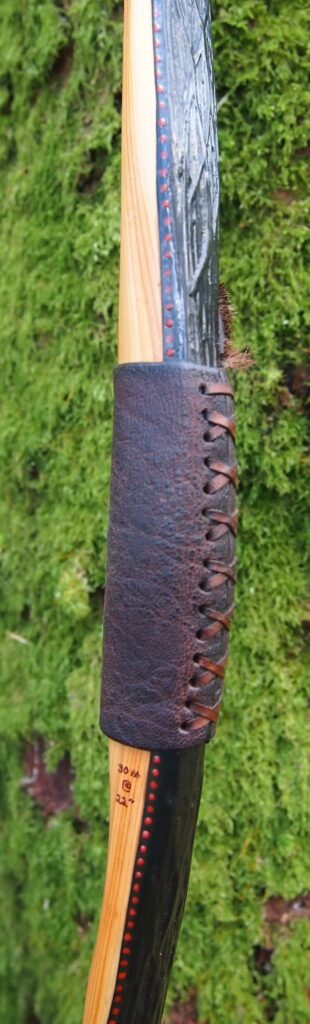
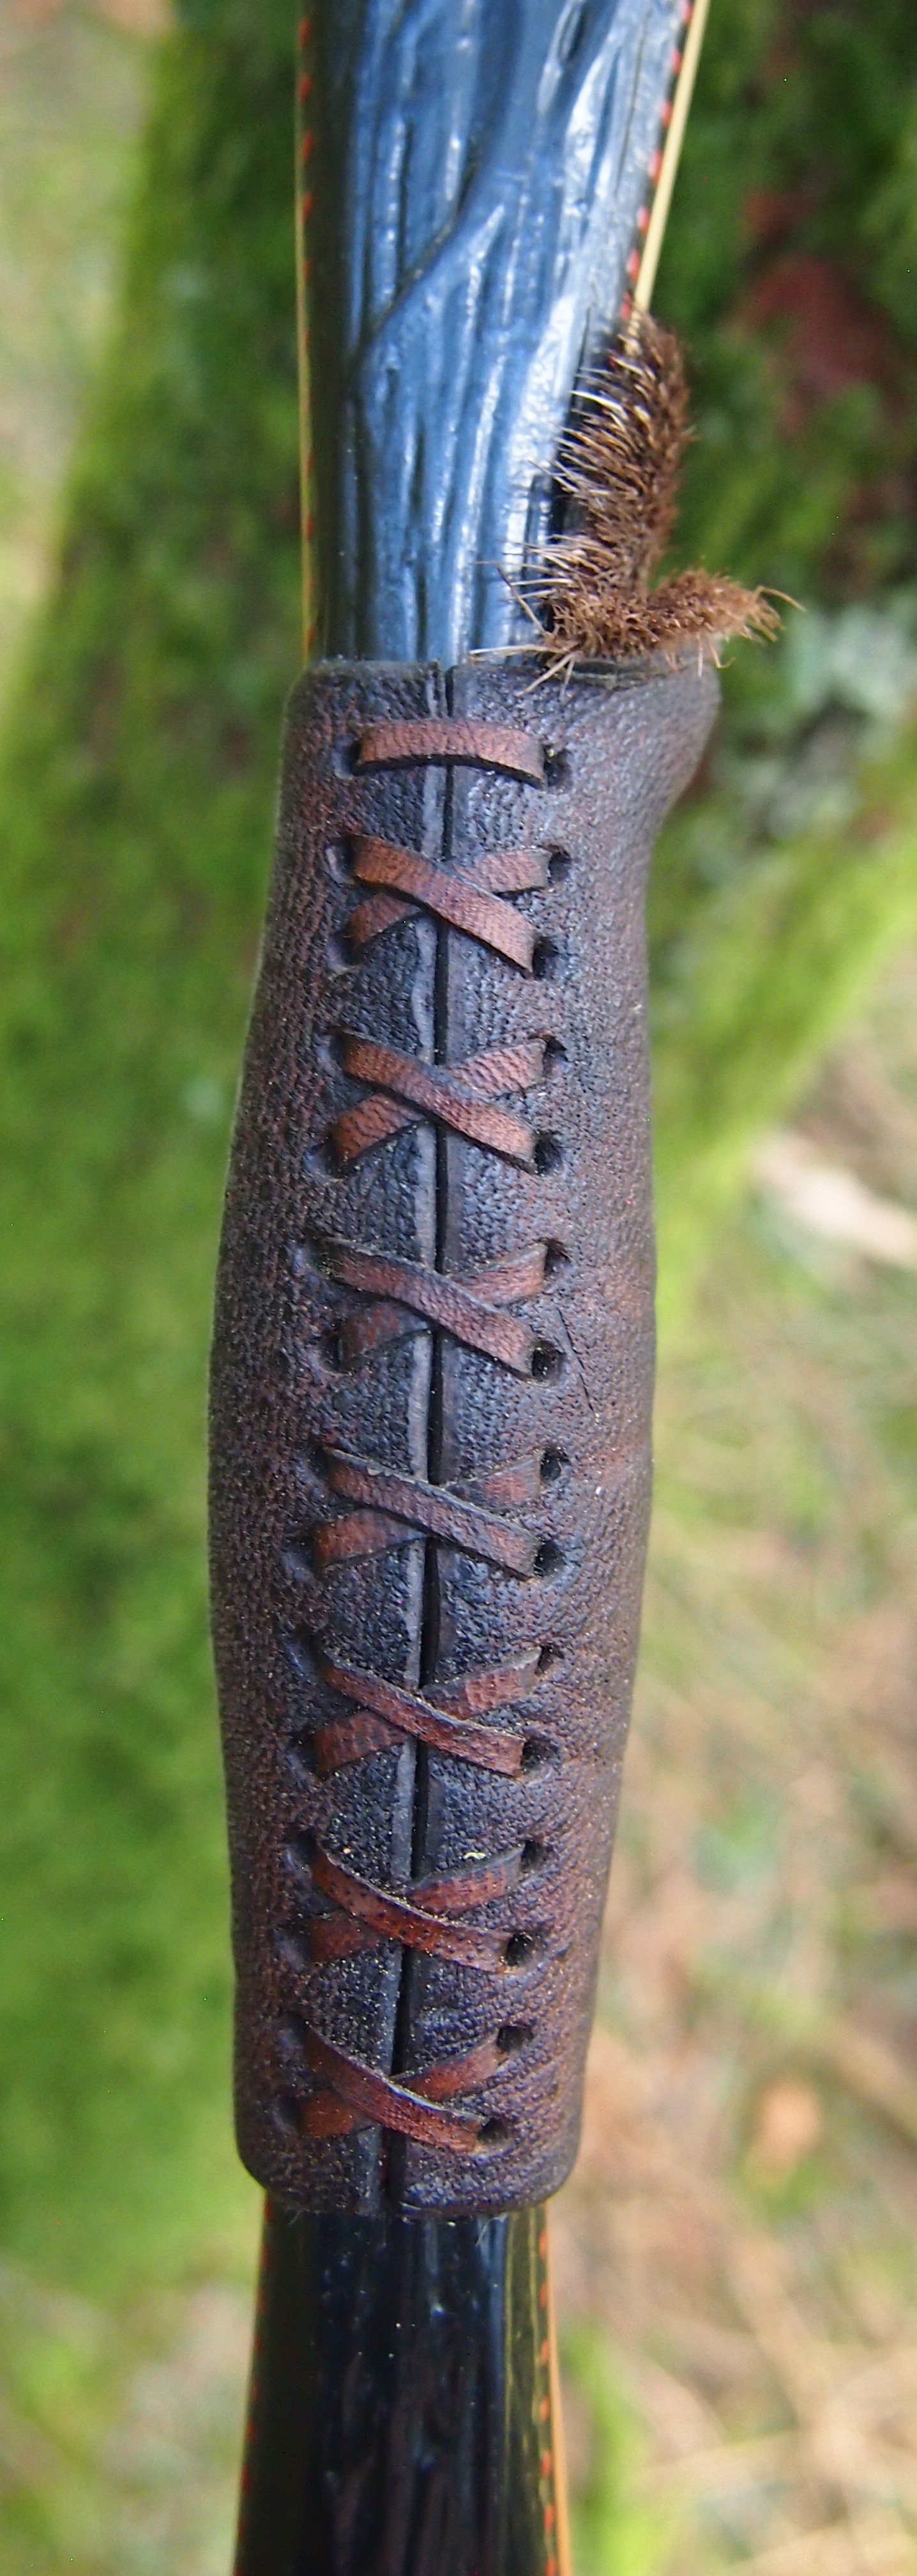
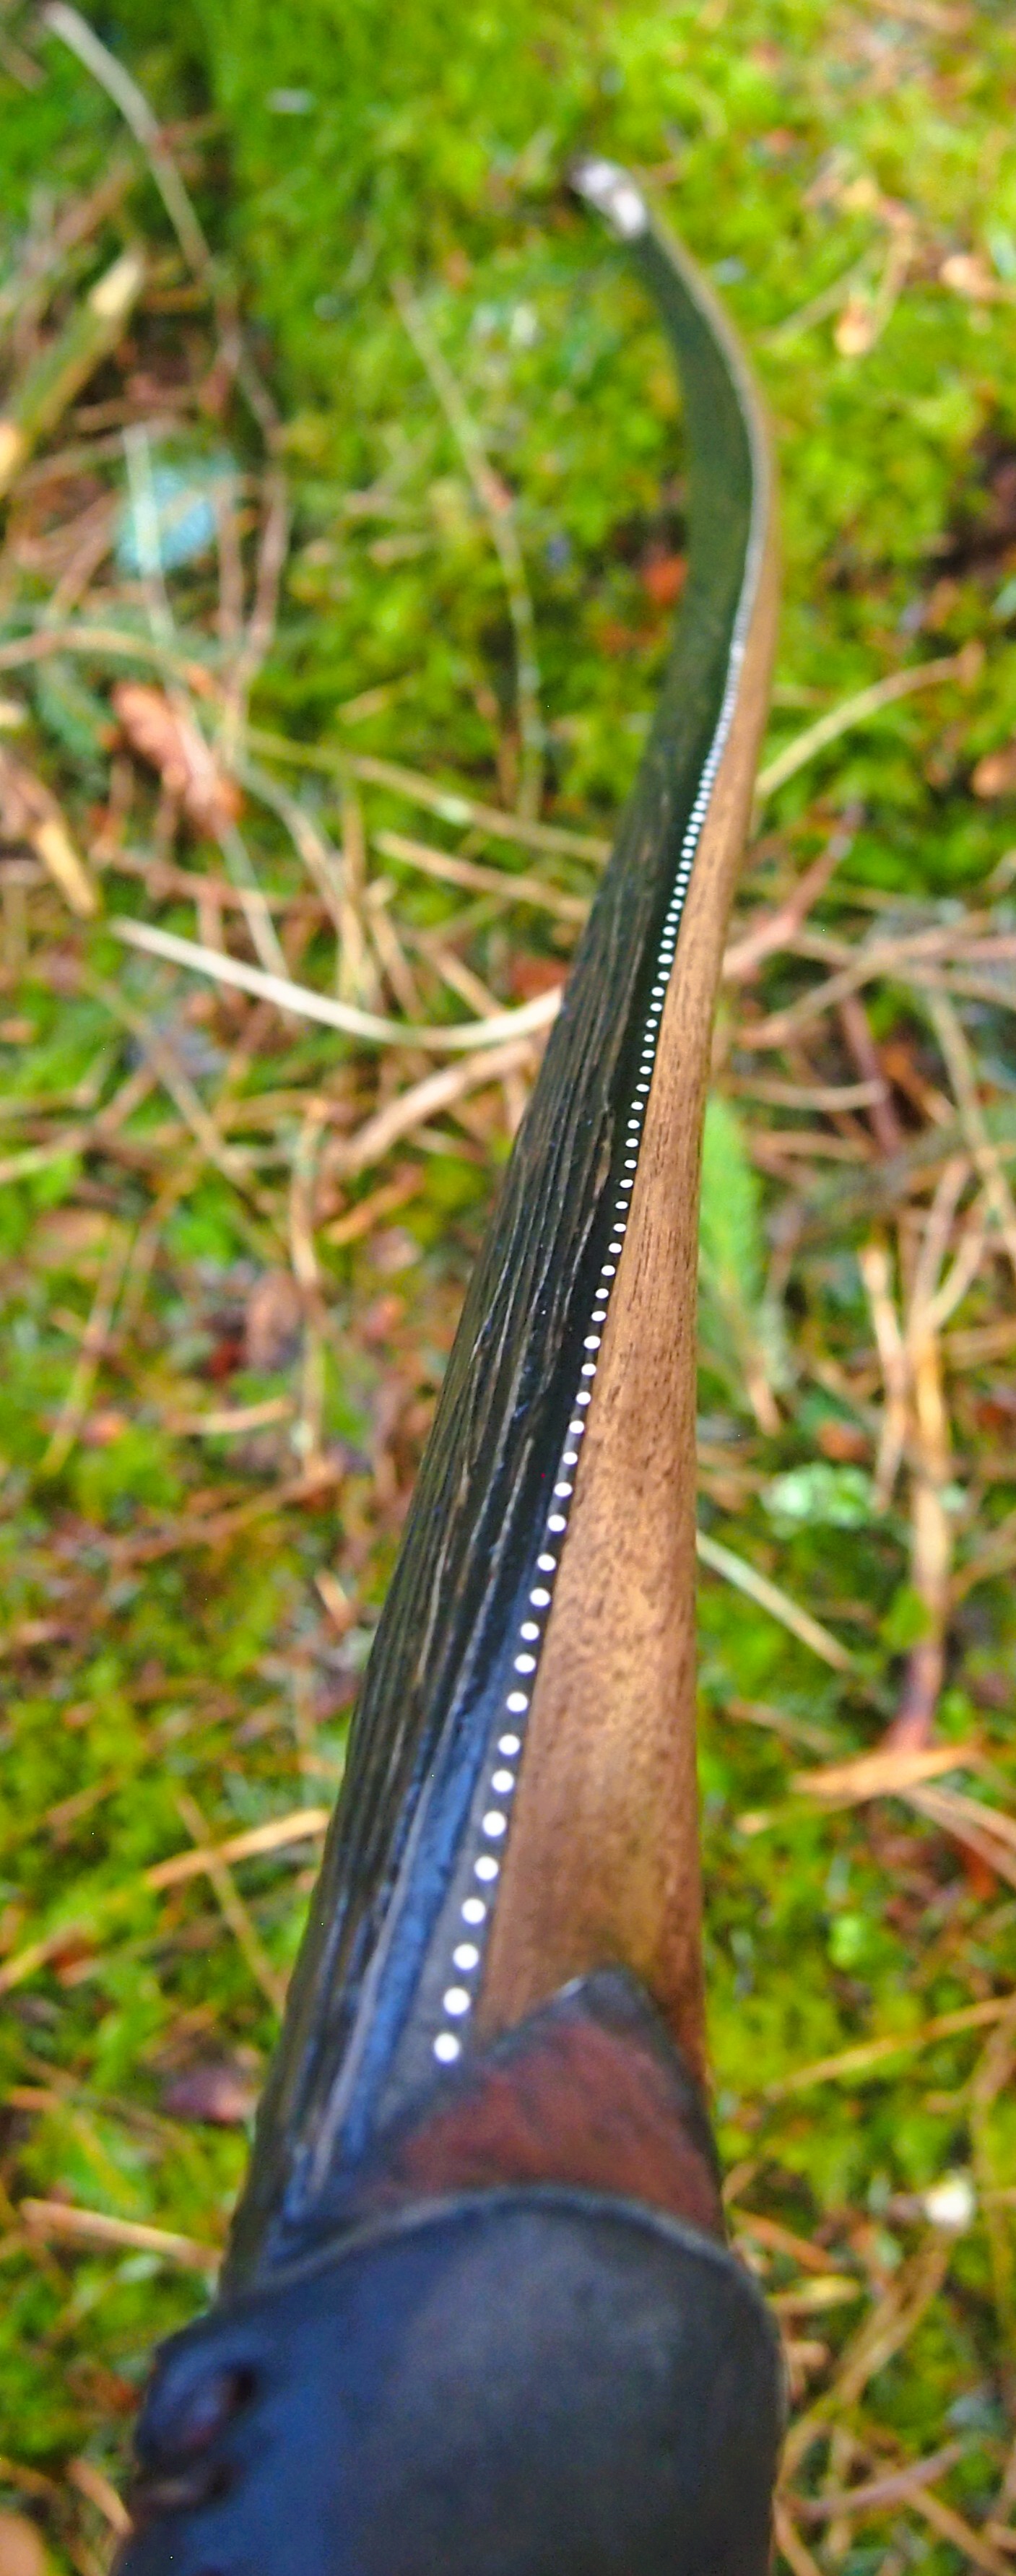
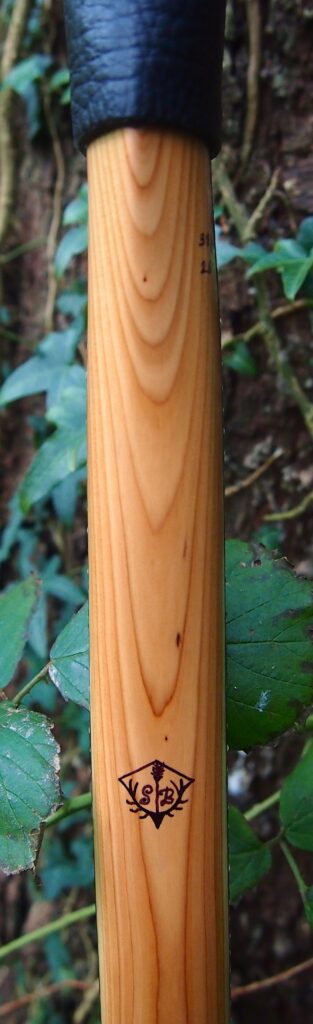
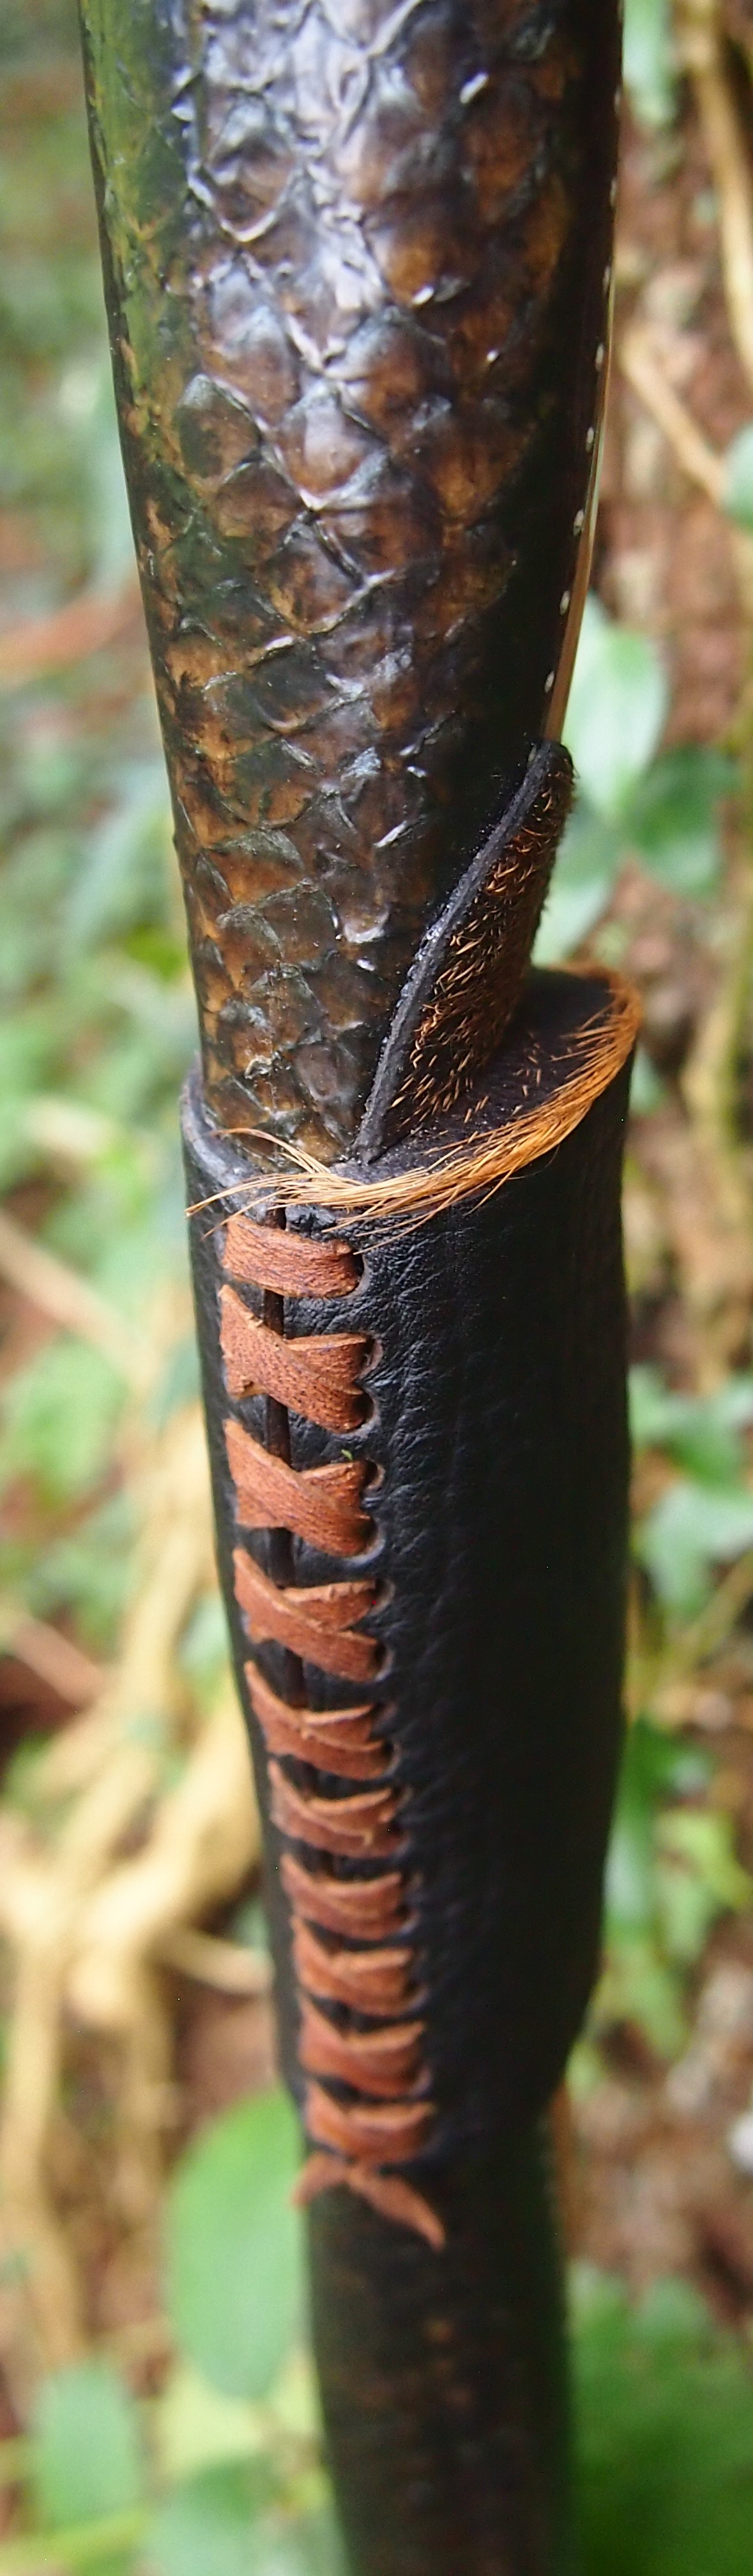
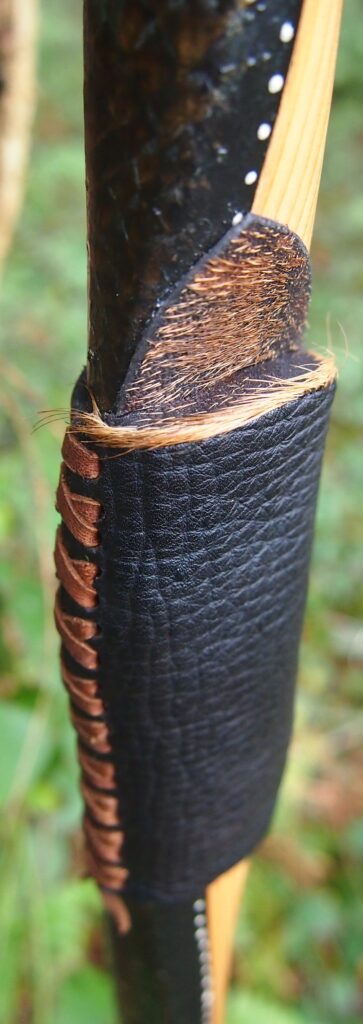
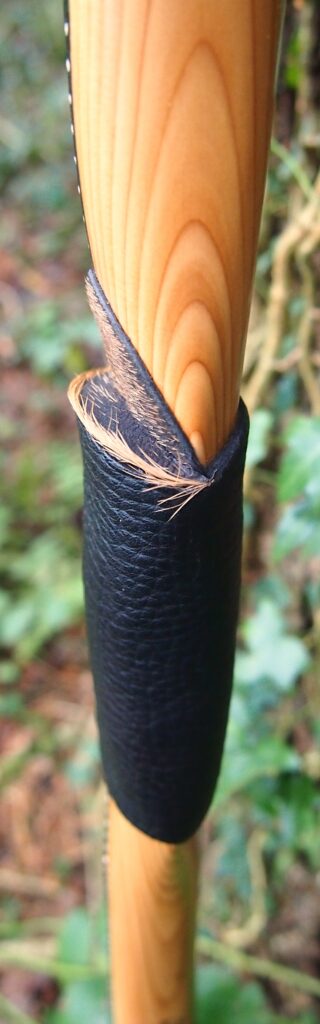
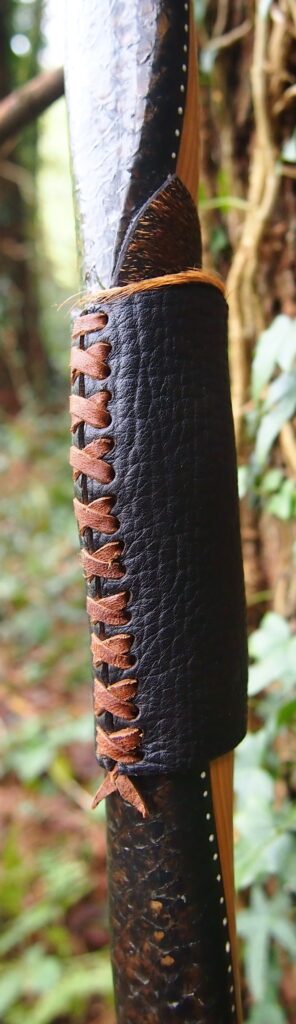
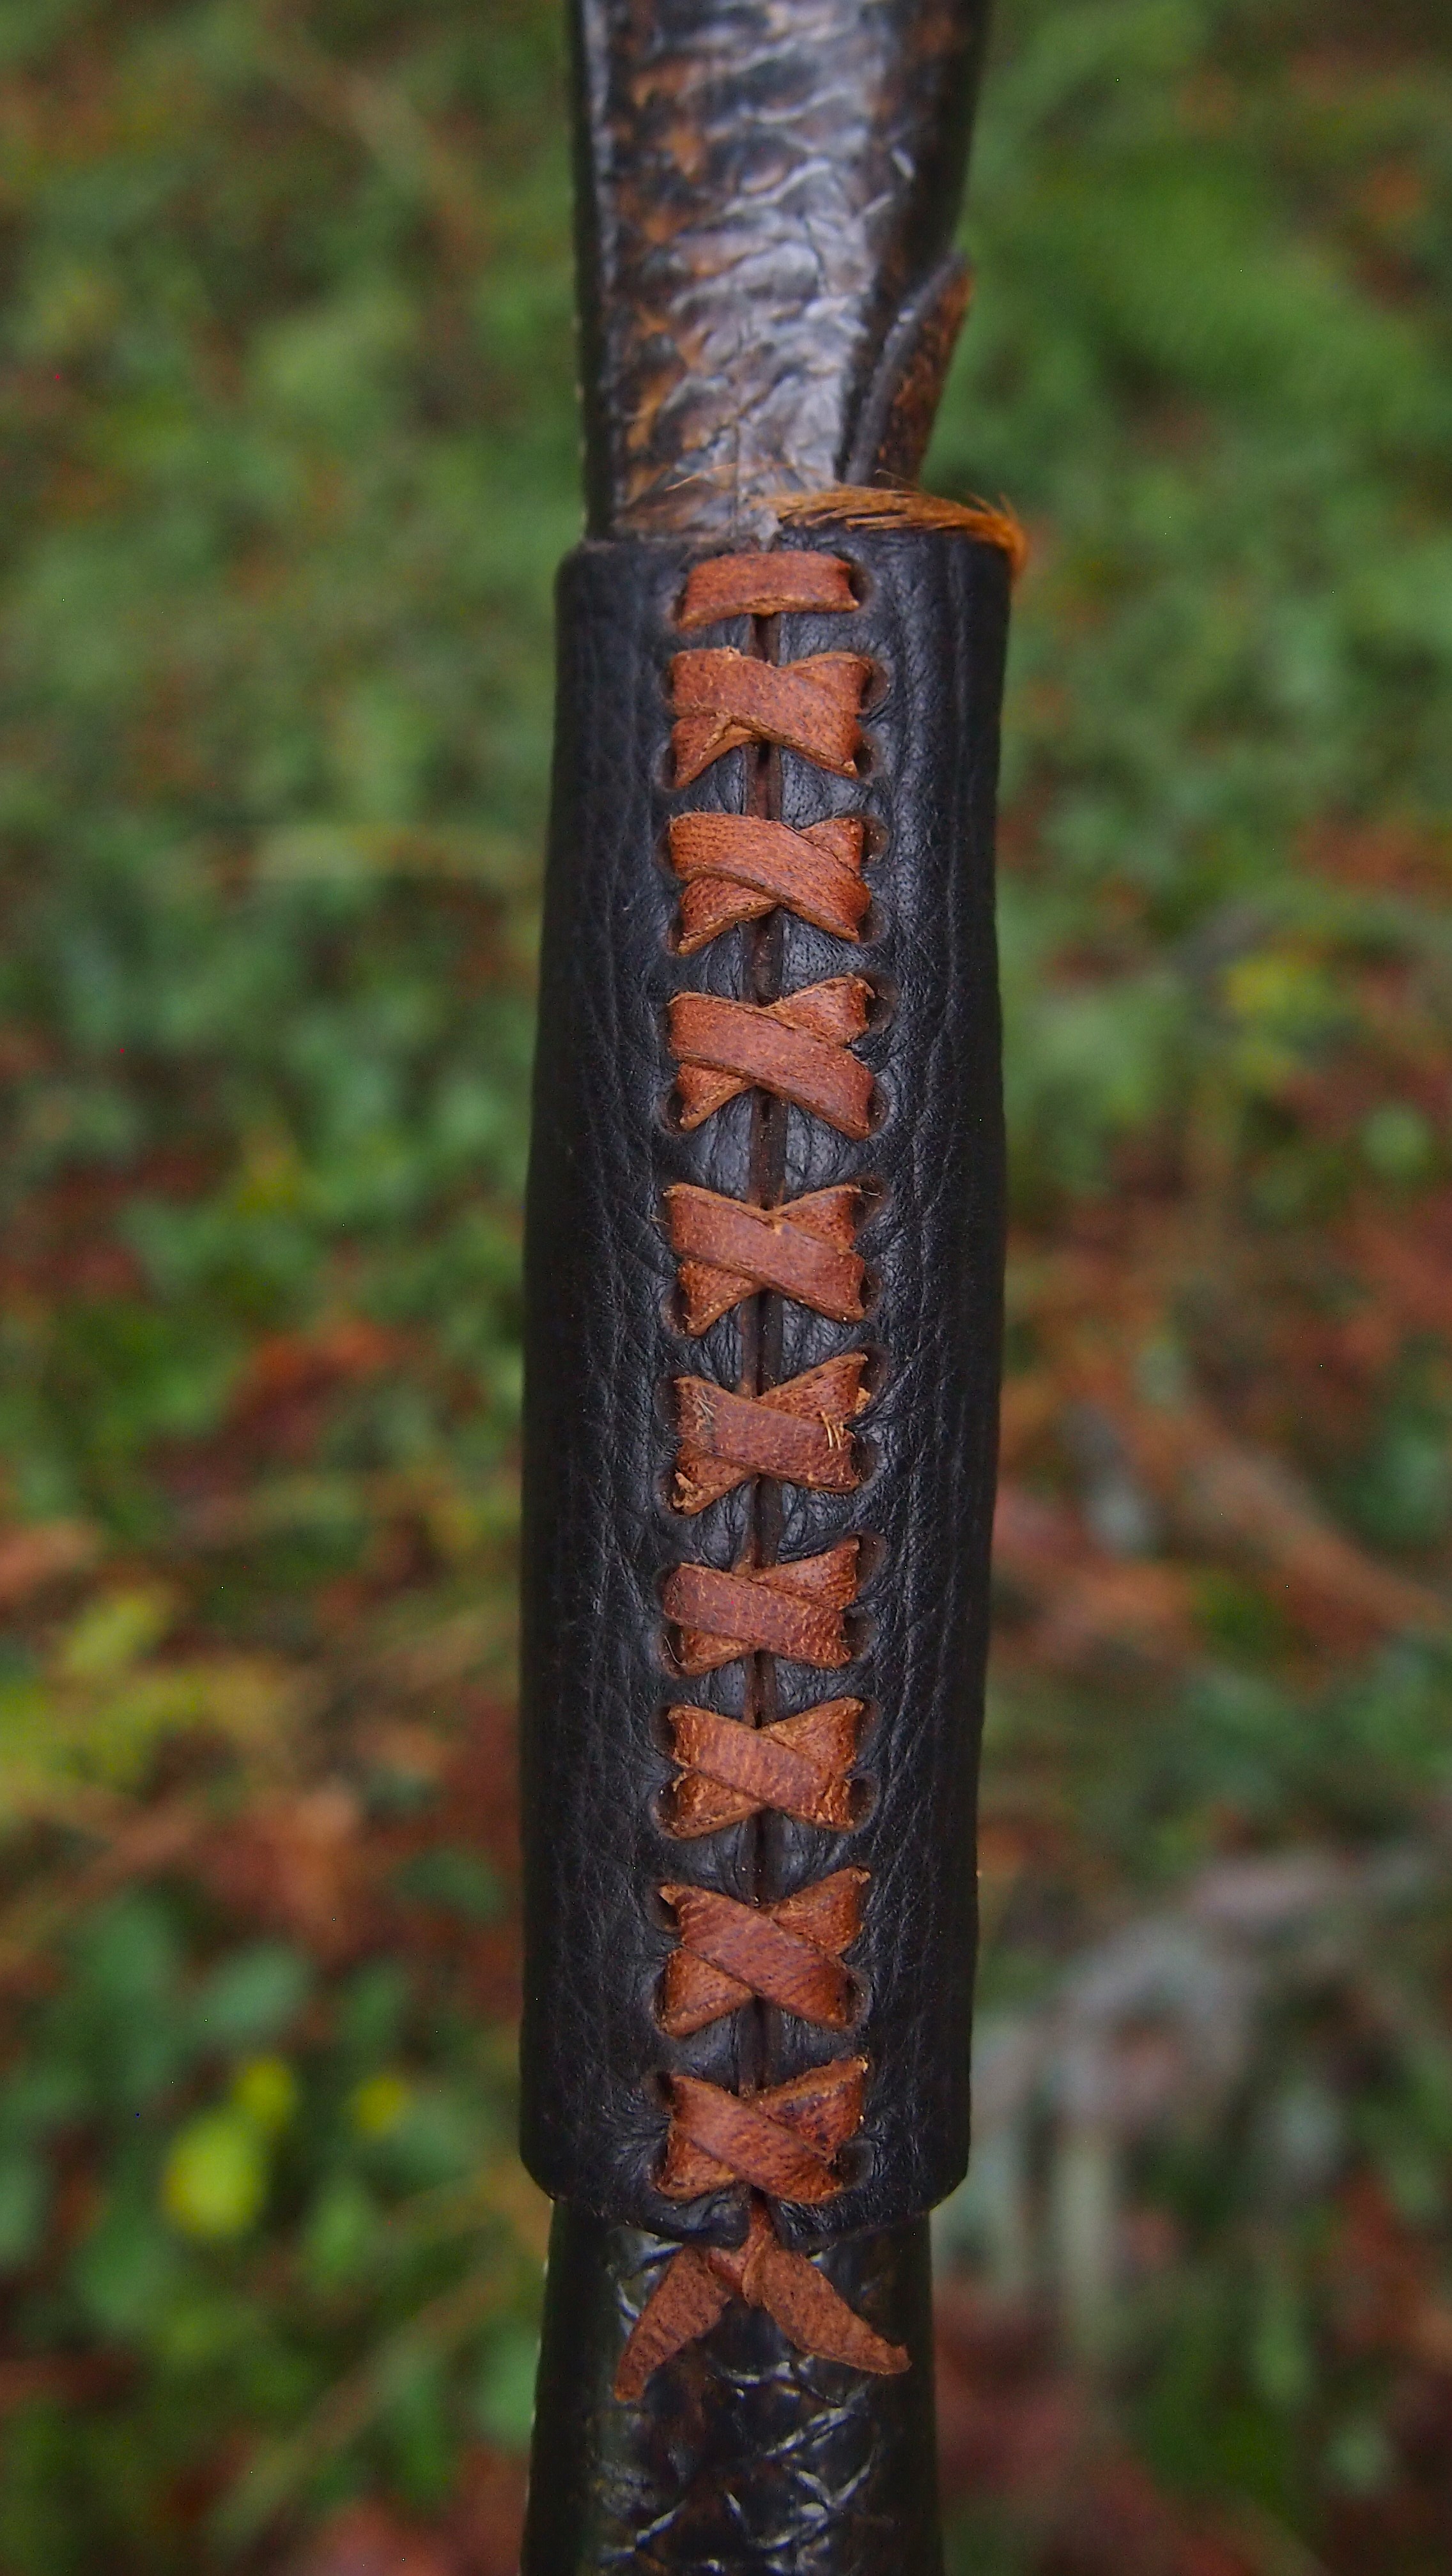
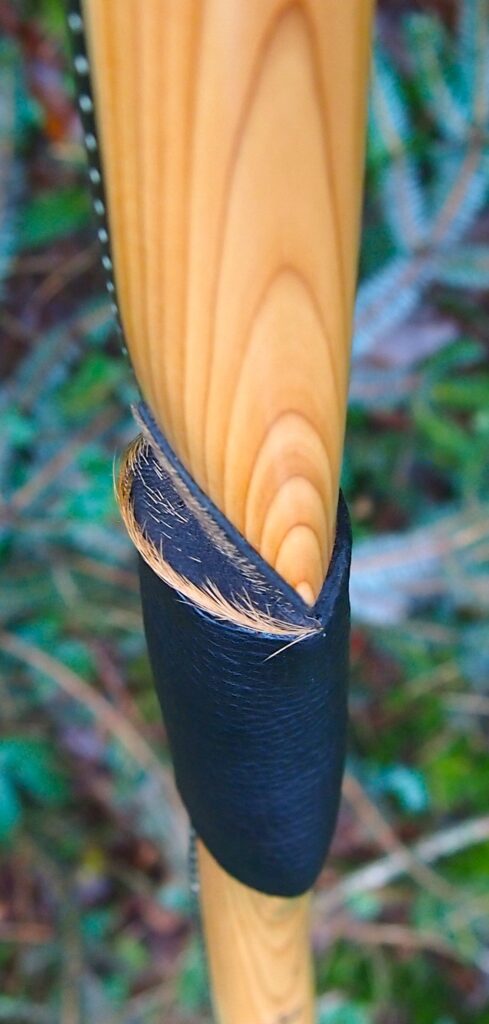
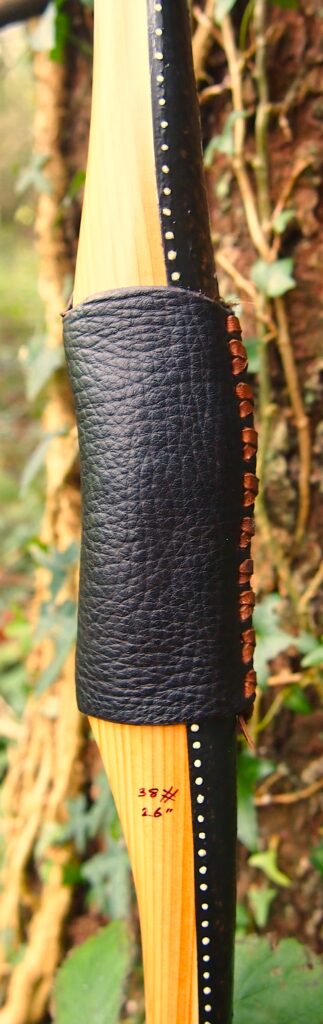
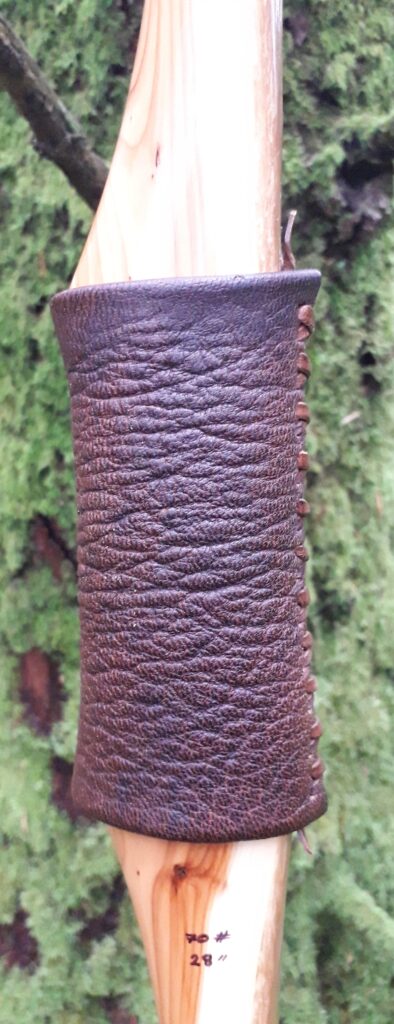
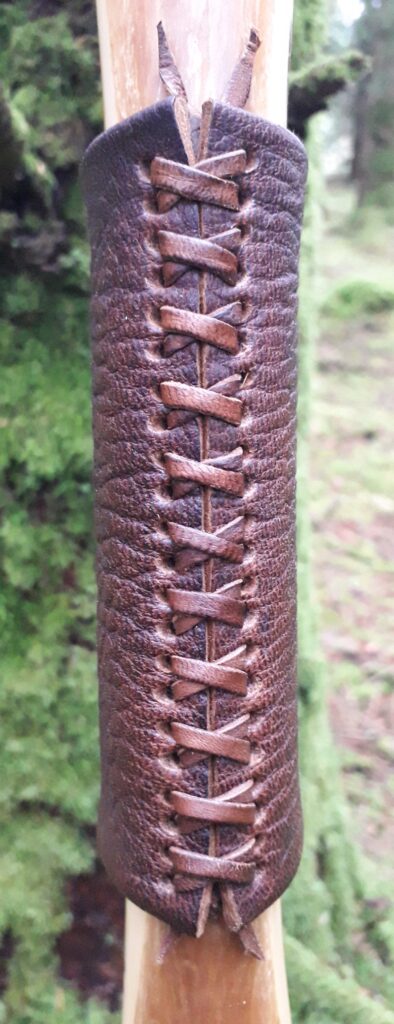
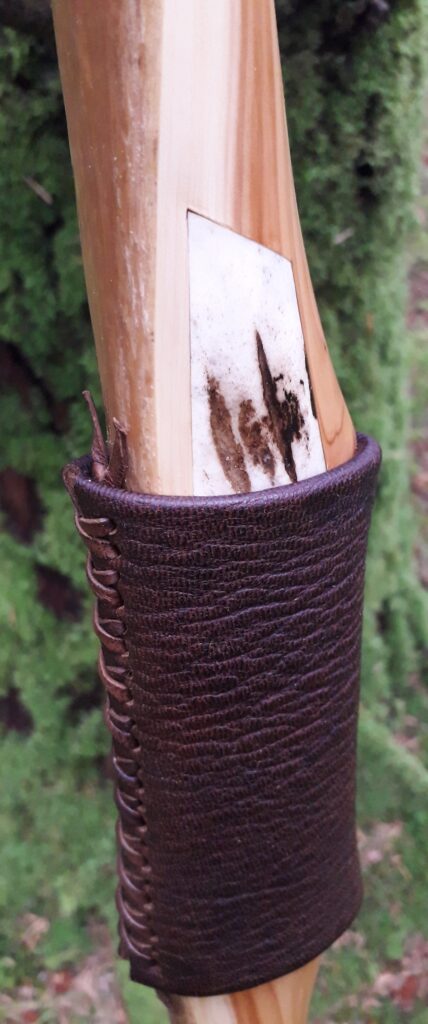
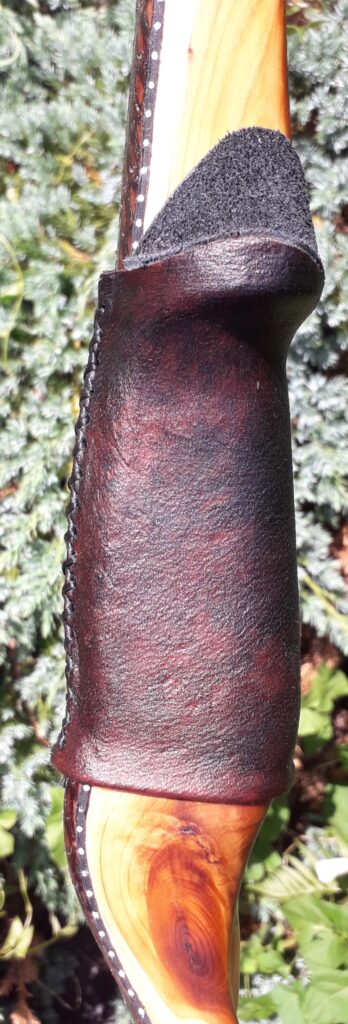
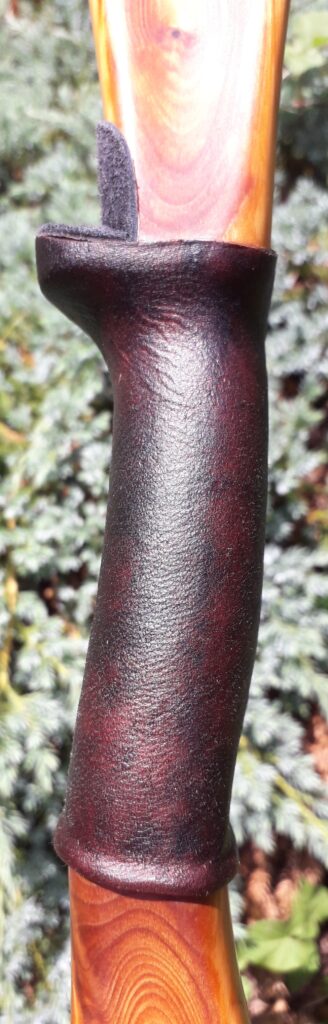
For the handle wrap and lacing I used some of my home produced spruce bark tanned red deer leather. And for the arrow shelf/pass I used my own produced bark tanned red deer hair on shin leather. I love this material for arrow passes as its both silent to shoot across and really hard wearing.
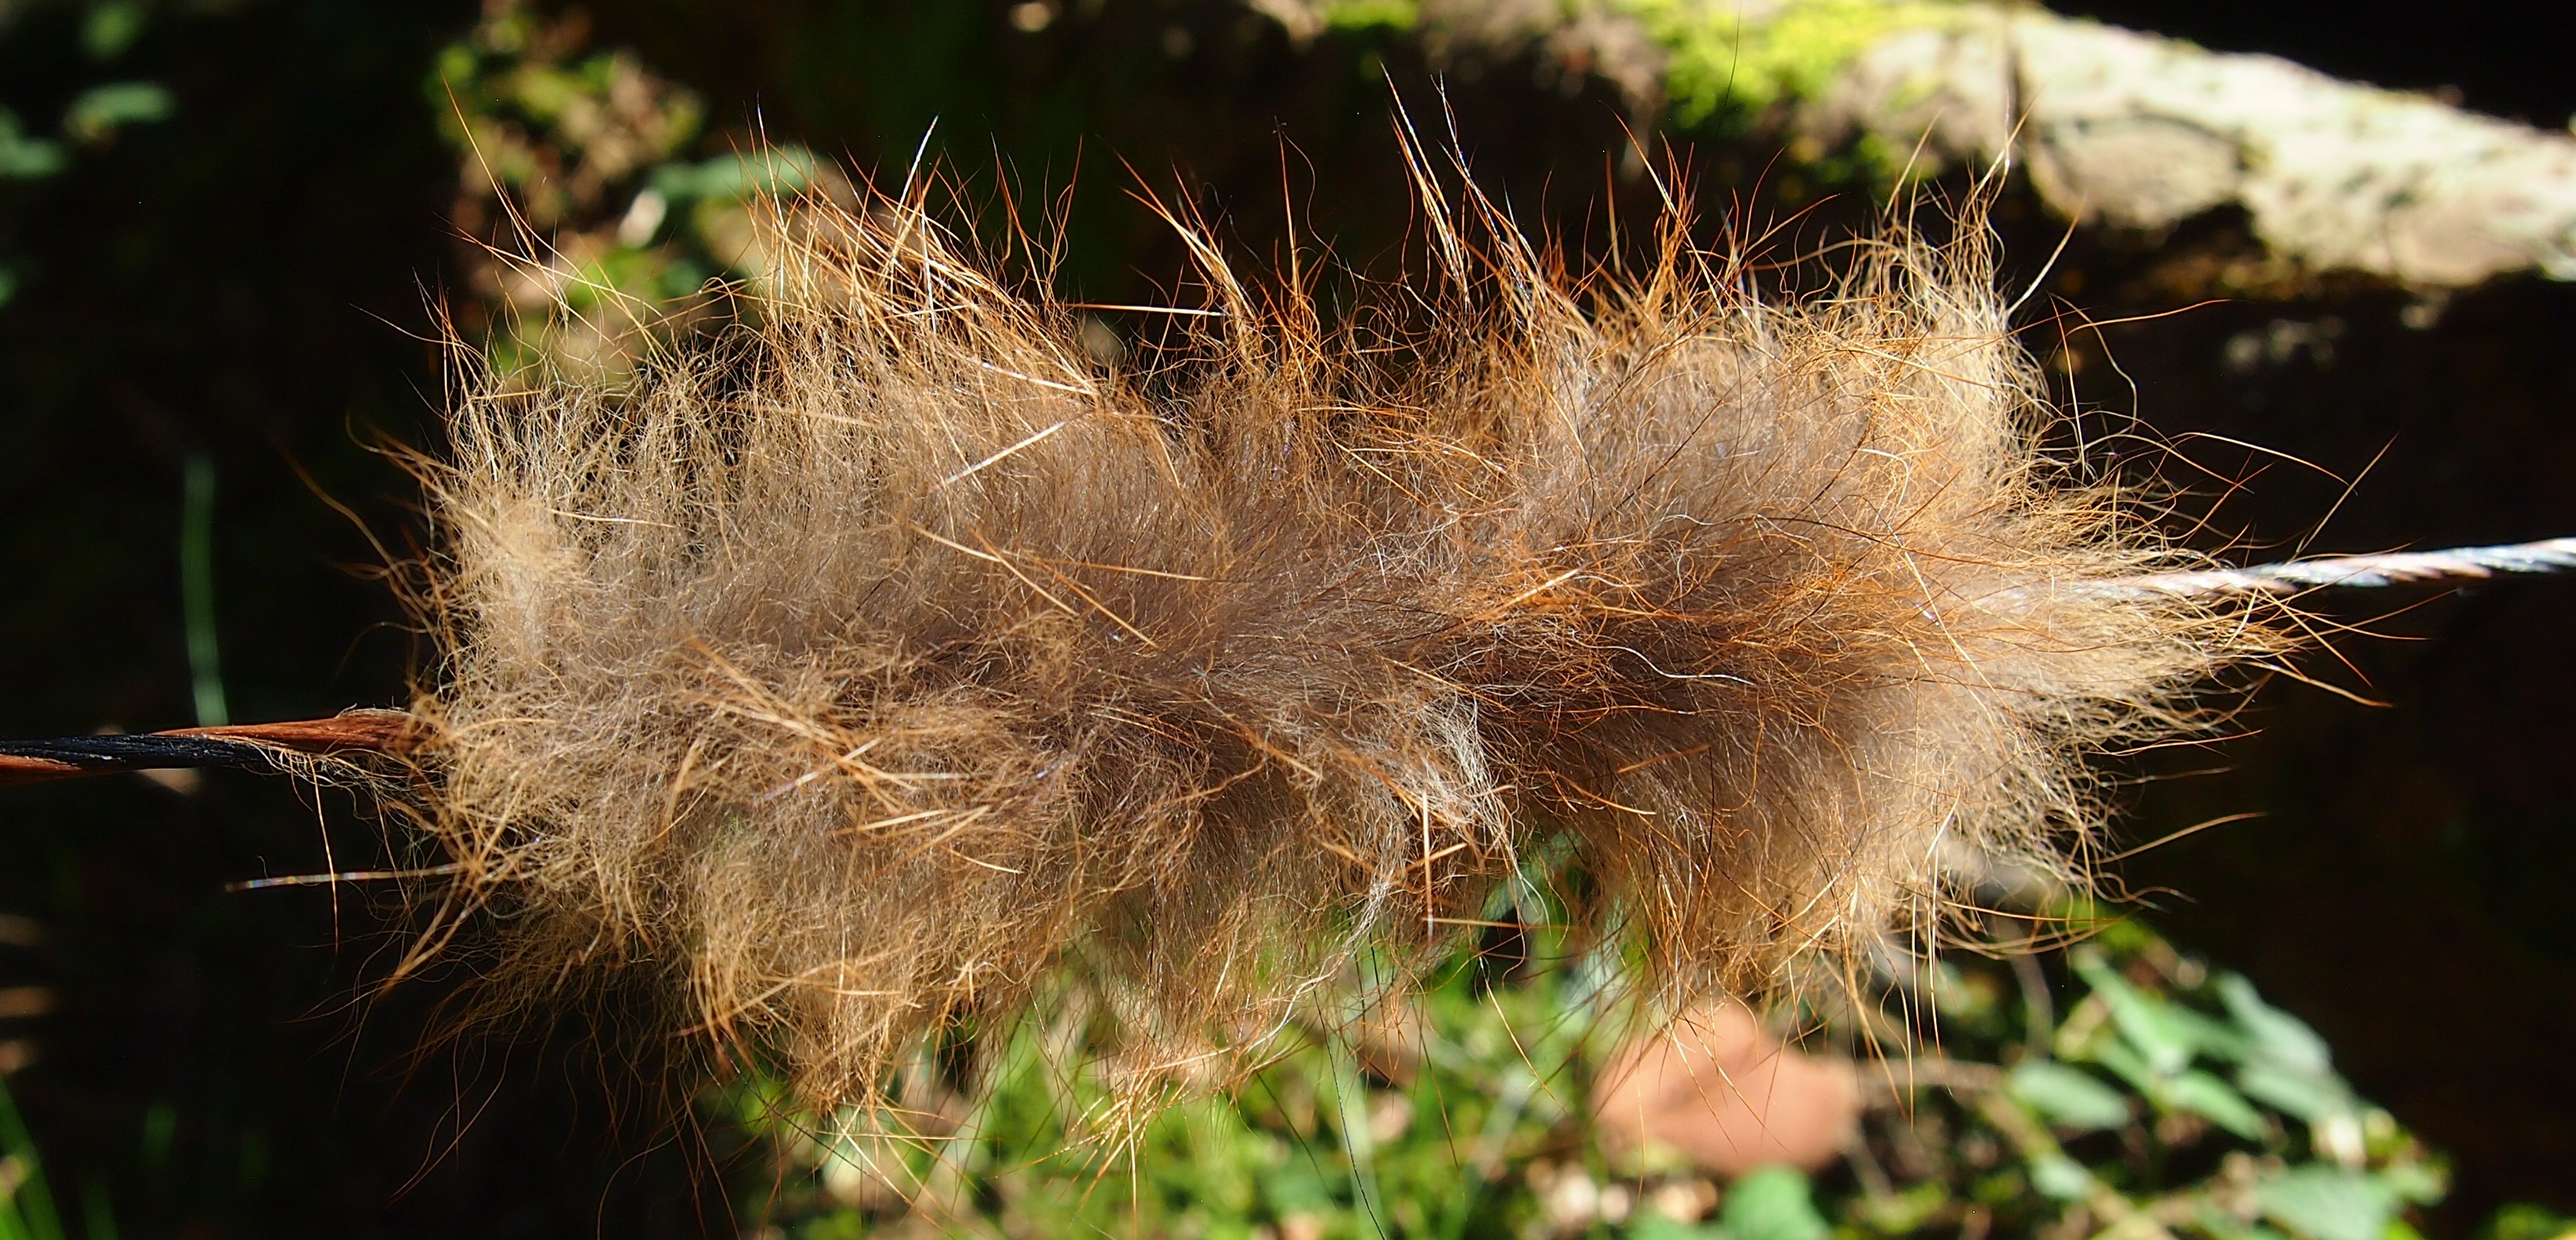
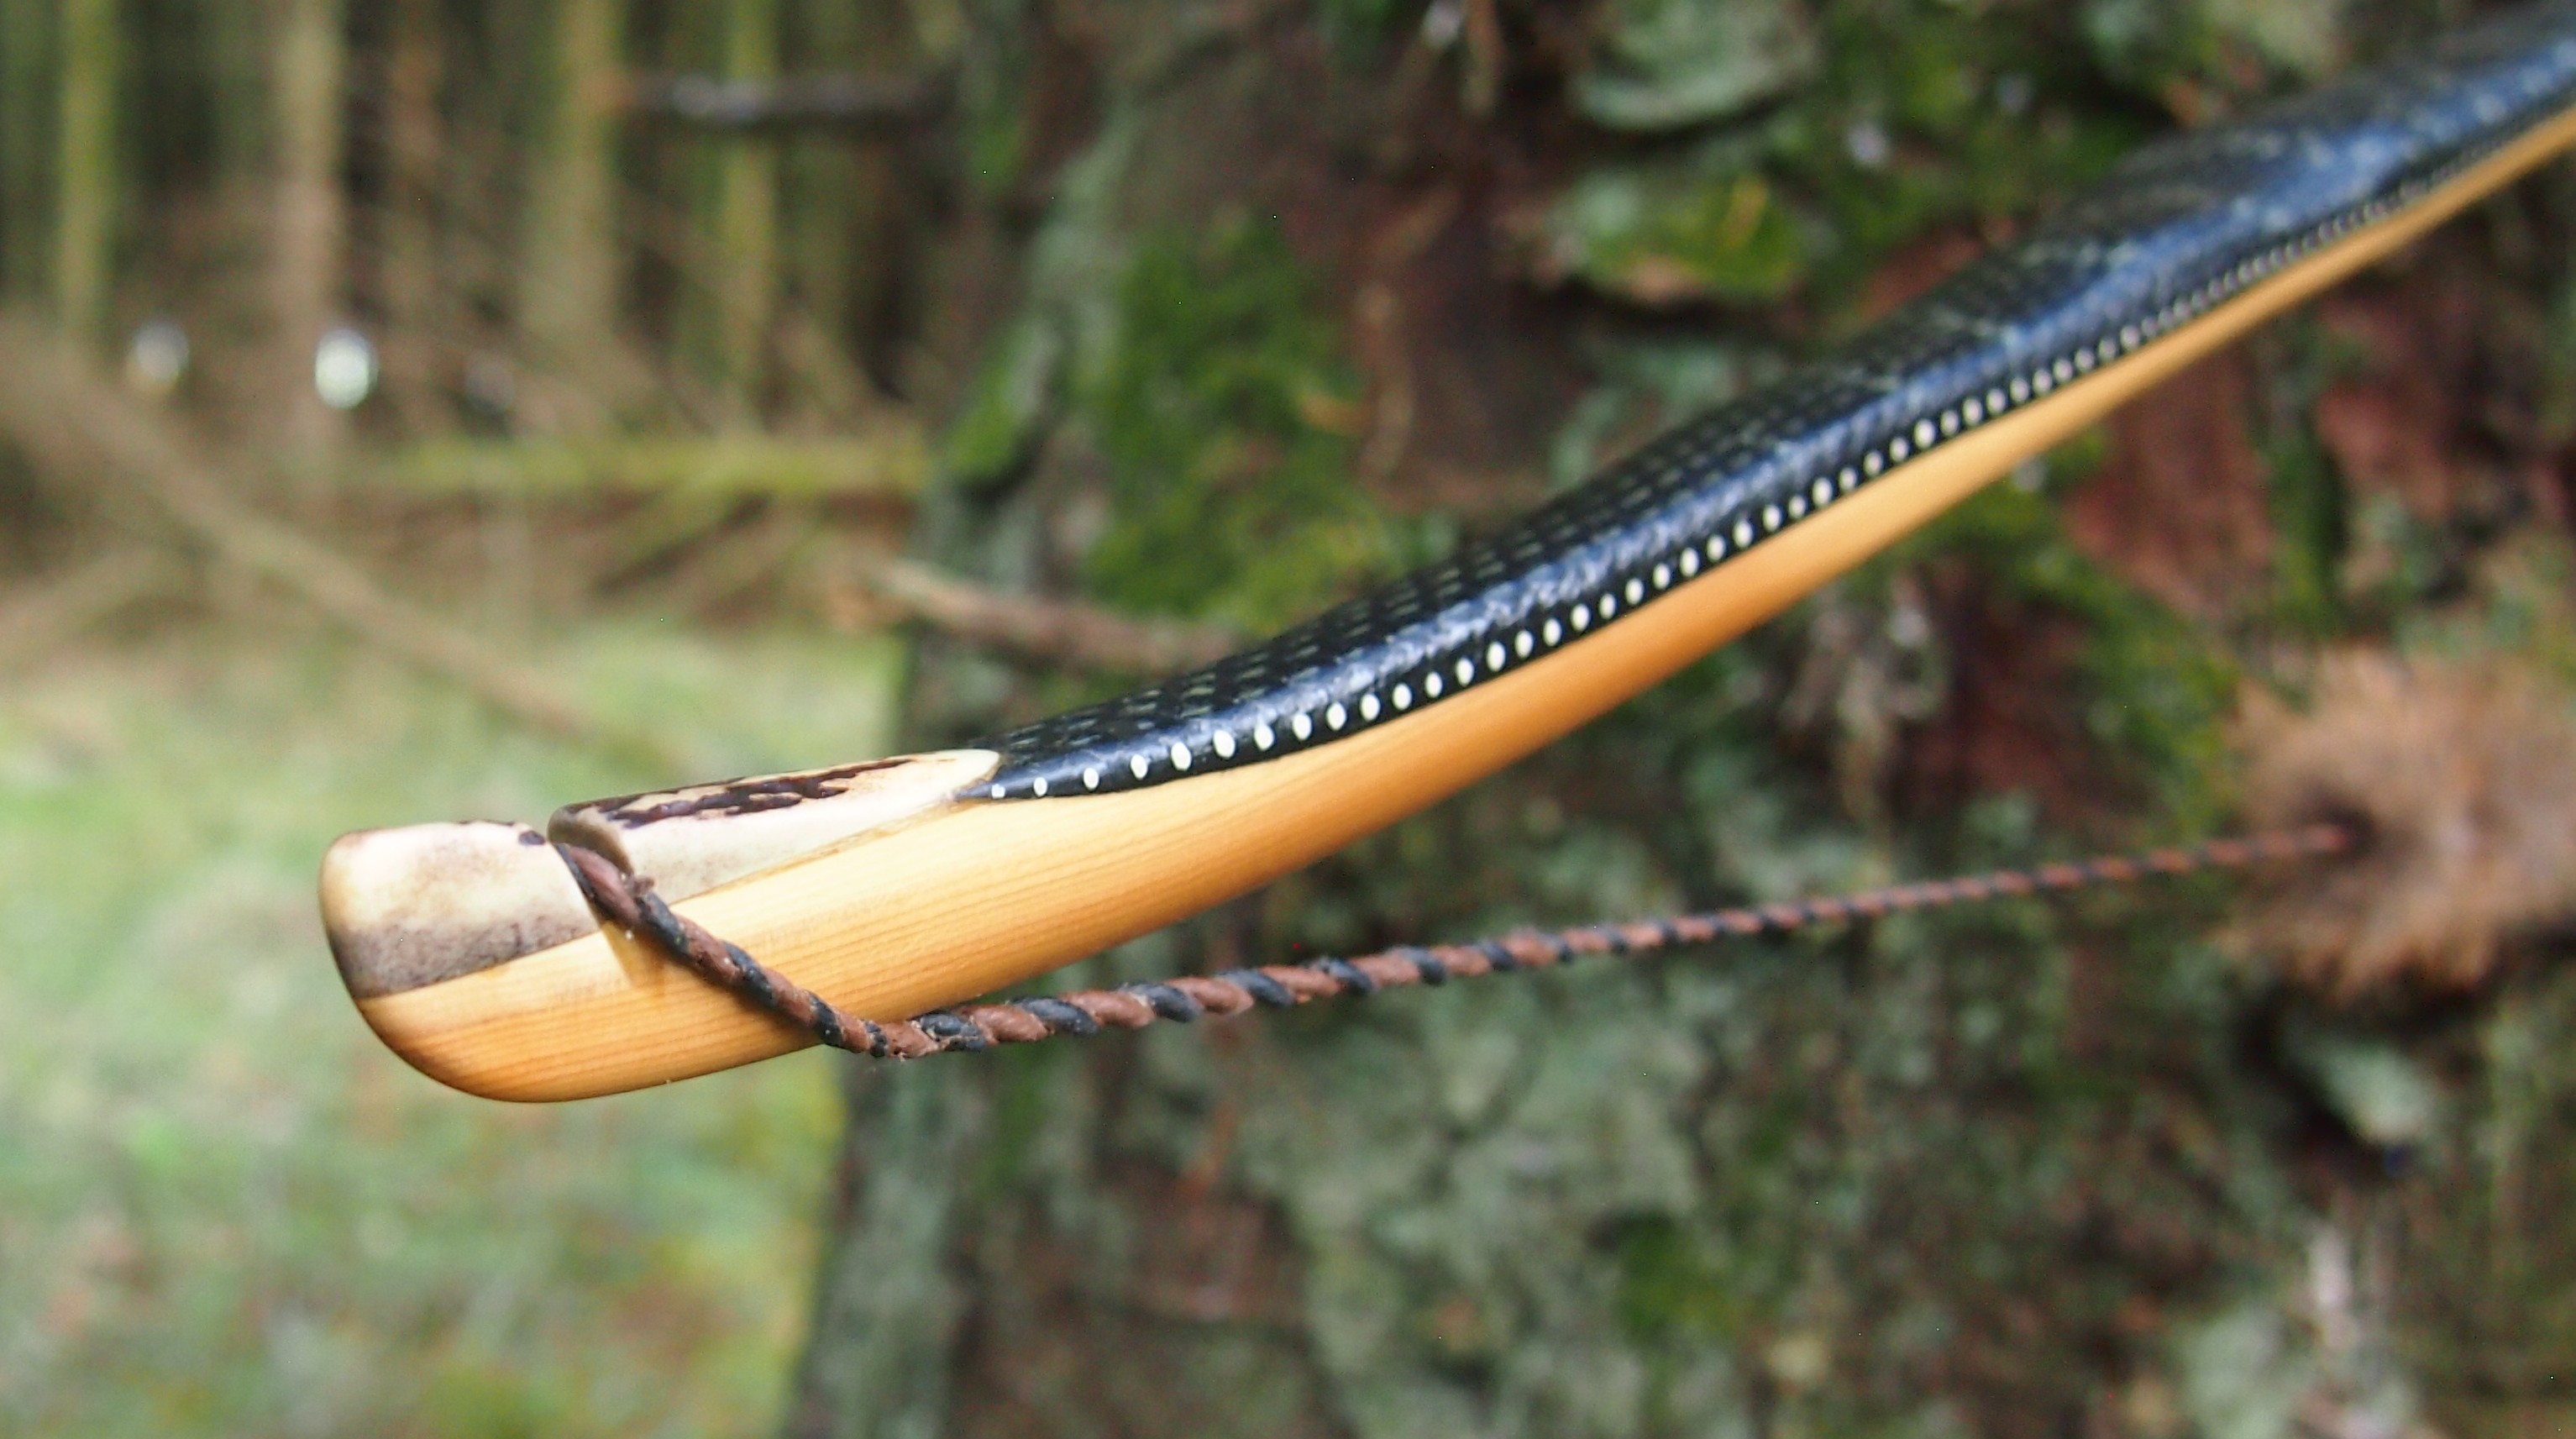
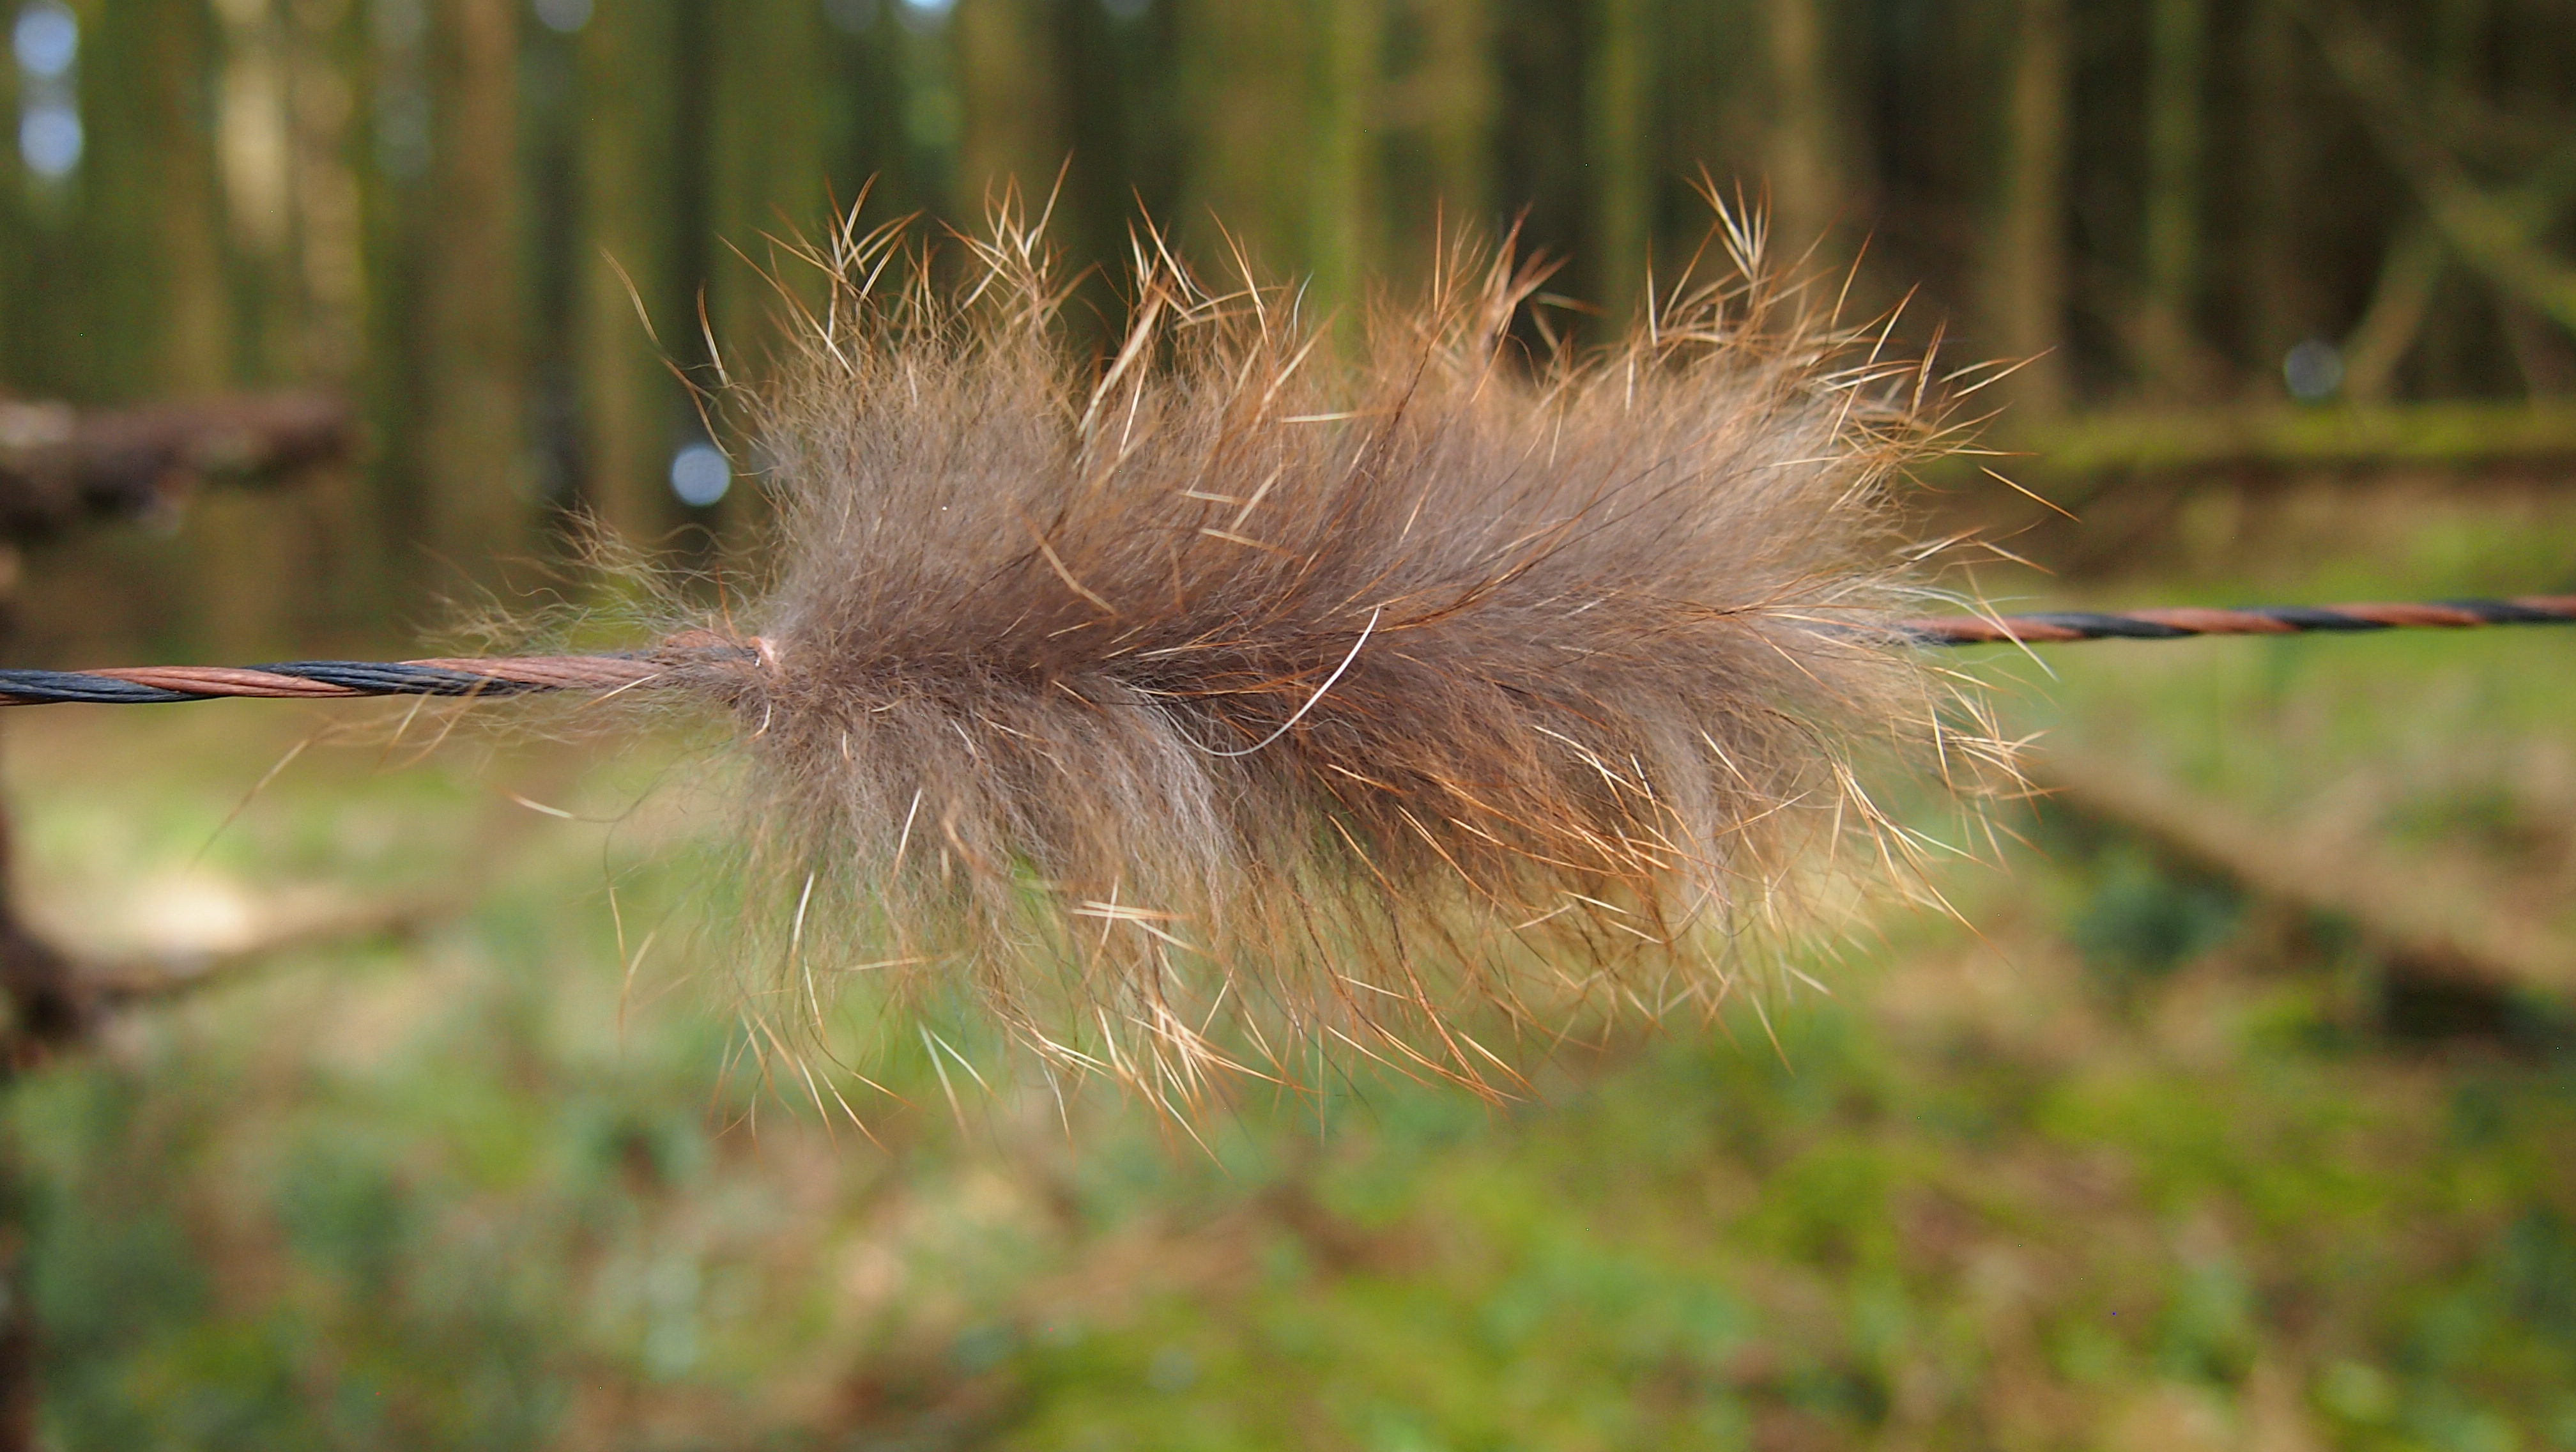
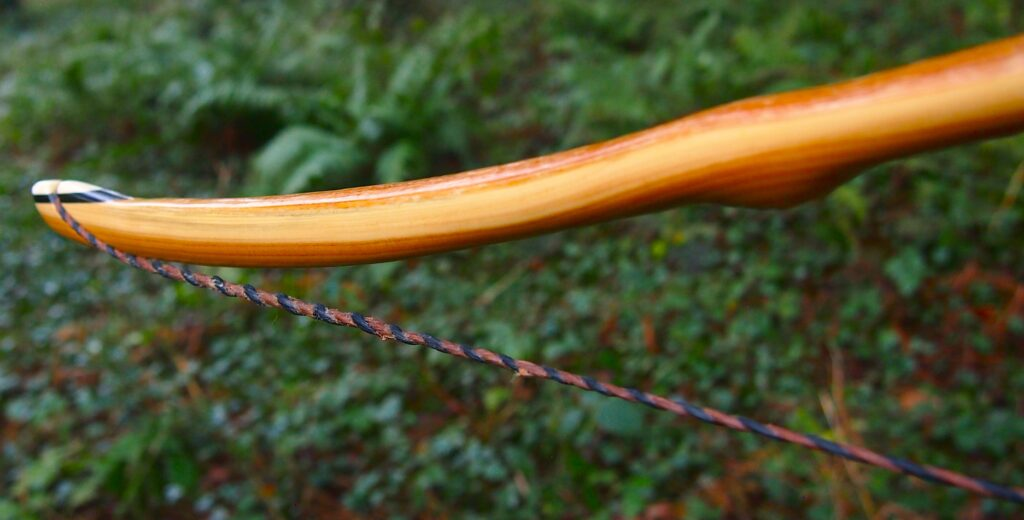
The string is 12 stands of B55 fitted with double loops and my own produced bark tanned wild brown hare fur puffs for silencers making this bow whisper quiet to shoot.
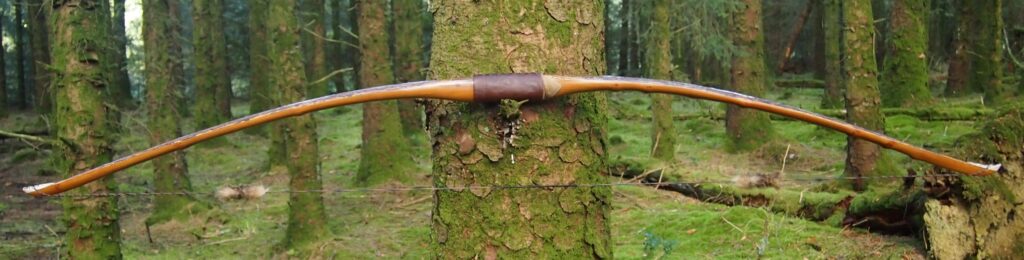
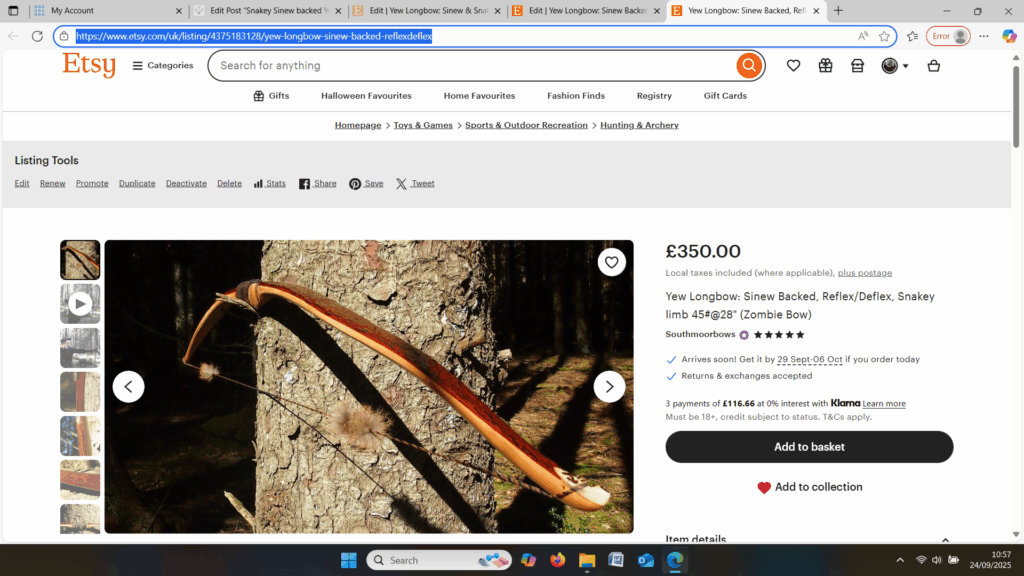
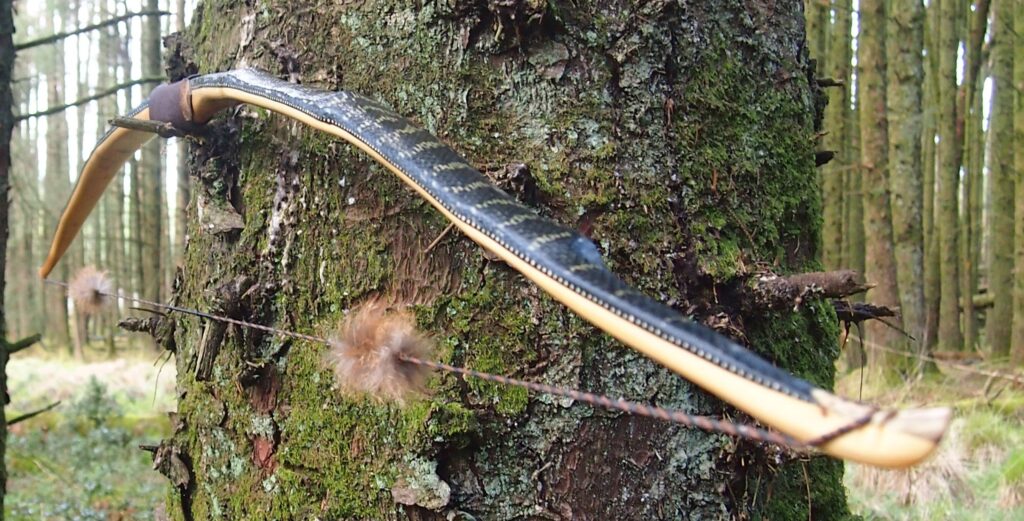
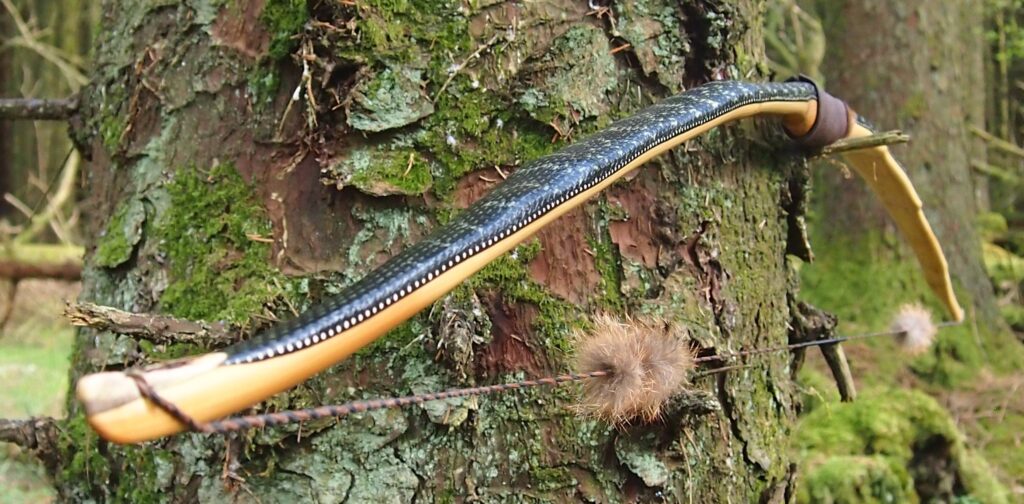
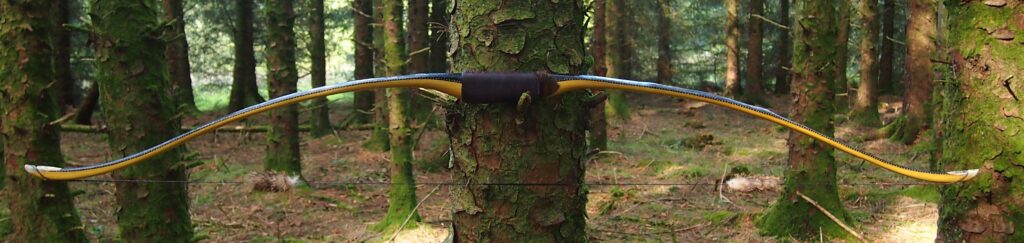
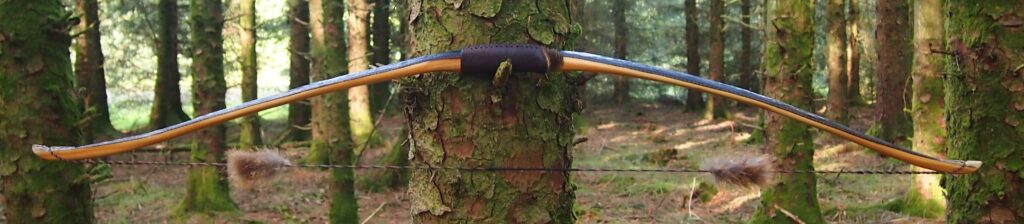
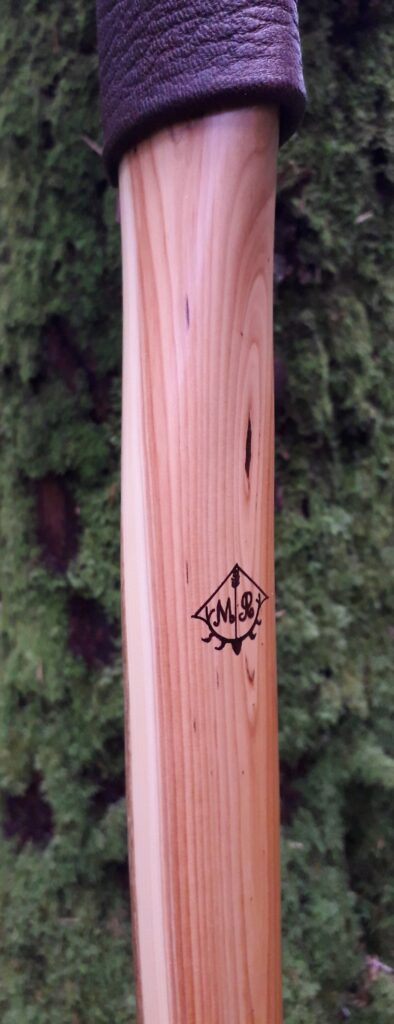
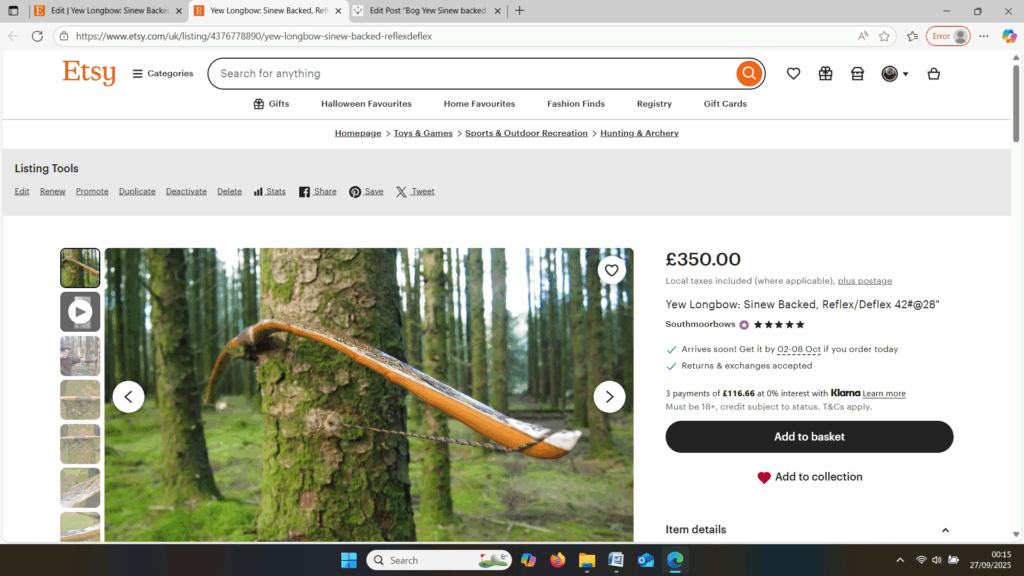
So here she is. I hope you enjoy the look as much as I do, and please feel free to leave a comment below telling me what you think. This bow is now available to purchase in my ETSY shop here: Yew Longbow: Sinew Backed, Reflex/deflex 42#@28″ – Etsy UK
Alternatively you can contact me directly through the Southmoor Bows contact page here: https://southmoorbows.com/contact/
Specifics are as follows:
Draw Weight: 42lbs at 28”
Mass: 970 grams
Length NTN: 65”
Width: 1 -5/16” at widest part
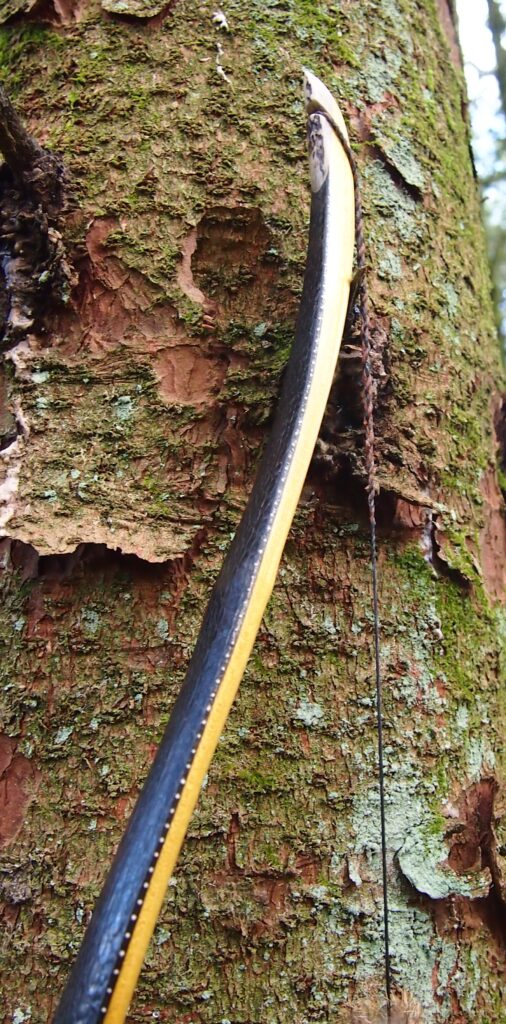
Tips: 6” static 3/8” wide at the nocks.
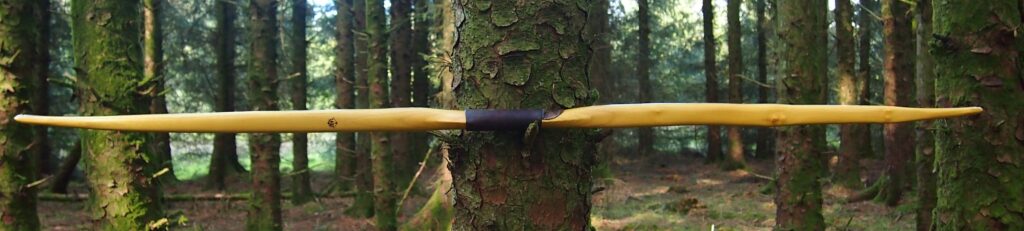
Back: lightly crowned with with a pyramidal face profile.
Belly Profile: Working limb sections D shaped, transitioning at the tips to ridged shaped cross section.
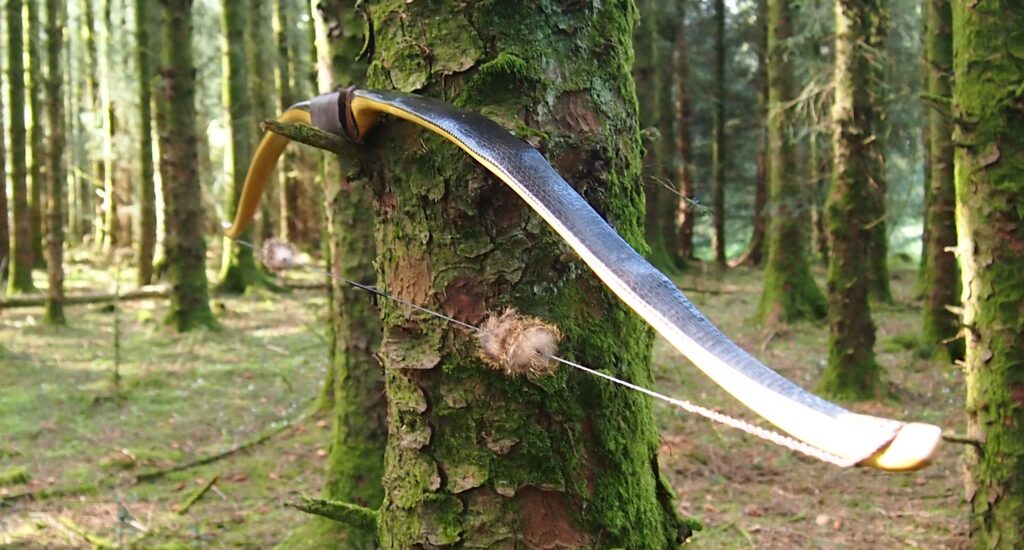
Tiller: Eliptical. 1/8” positive
Brace height: 5.5″