It’s not often I get my hands on a yew log which grew vertically, but the log which produced the stave which this bow was built from came from one of those light seeking leader type limbs you sometimes find on older hedgerow yew trees that have been forced to fight for the light as they have been denied access to the sun by the surrounding trees. Especially if these other surrounding trees are larger conifers.
Since it was a nice looking log and already seasoned, I didn’t mind paying the £80 asking price for it, especially as I felt quite confident in getting two nice staves out of it. So I bought it, plus another log, in the hope that I could make at least a couple of nice lightweight bows.
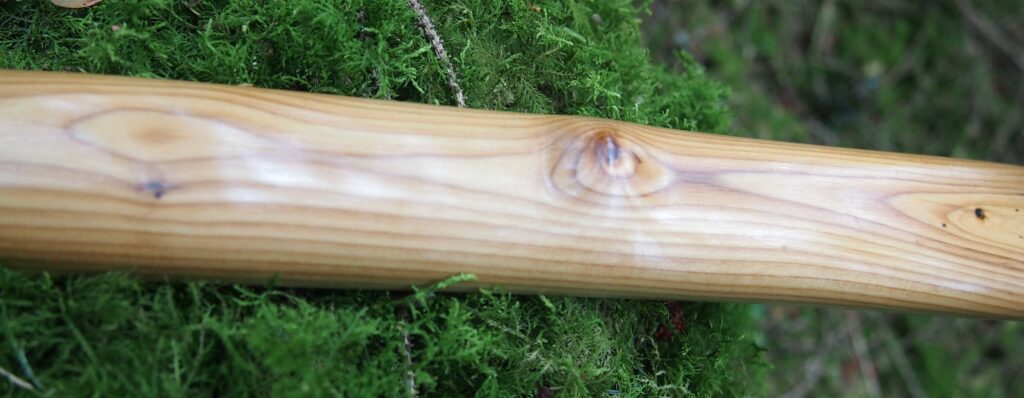
Back at the workshop I checked the log over more thoroughly, trying to find the best face to work with. To be honest though, the whole log was fairly clean except for a few small knots and a handfull of pins which would likely miss the layout altogether.
Growth rings were around 1.5mm thick and were evenly distributed from one side of the log to the other, so the pith was right down the middle of the entire log. This meant that I should be able to simply part this log straight down the middle and hopefully end up with two decent similar sized staves around 68″ long.
Now as tempting as it was to try and split this log in two with an axe and wedges, I’ve learnt over the years that thing can easily go very wrong with this method when applied to yew. The nature of yew grain makes it very hard to split accurately, and I don’t mind admitting that I lost an awful lot of good yew wood when I first started making bows many years ago. Splitting yew with wedges is a bit like trying to split seasoned elm. Another species of good bow wood which binds itself together with interlocking grain.
Having learnt my lessons previously, rather than trying to split this log, I opted to use my band saw to rip the log in two. And with a nice new sharp 3PTI band saw blade fitted, I had the log ripped down the middle in no time.
Even thought this log was seasoned for a couple of years, I could tell that it was still holding a fair bit of damp in its core. So after trimming the ends off both staves and re-sealing them up with shellac, I placed both halves of the log up in the barn rafters to air out for a few more months.
By December last year they were both good, stable and feeling a fair bit lighter, so I set to work first on the stave which looked like it needed to most straightening. This stave had a bit of side bend in what was going to be the bottom limb. This limb also had a fair bit of reflex in its inner third.
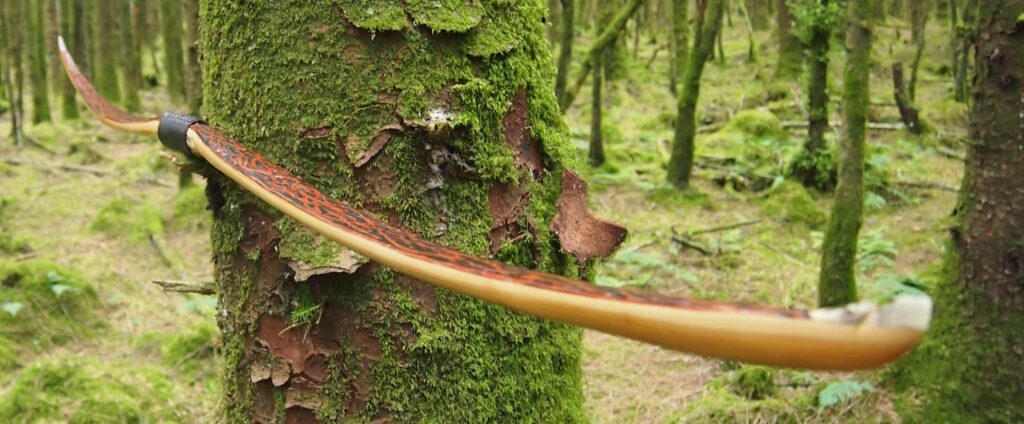
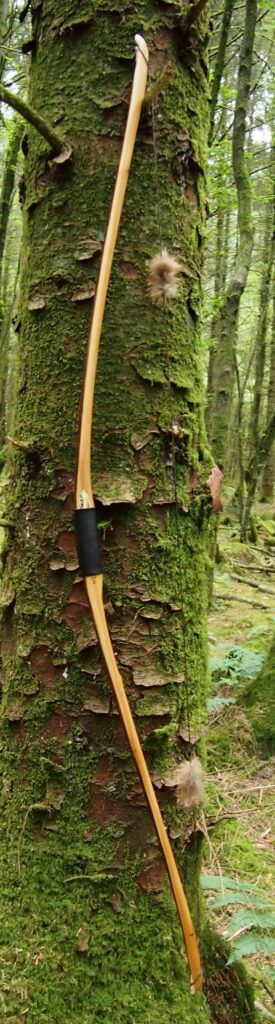
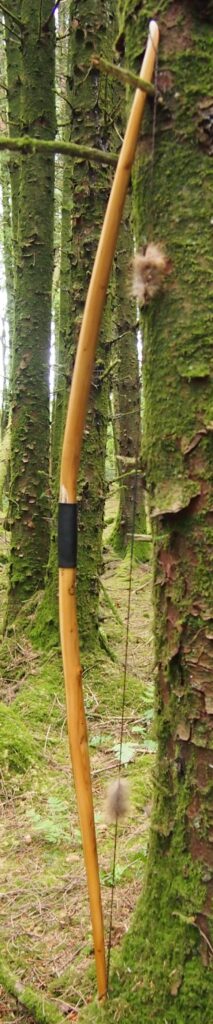
I wanted this bow to have a more classic reflex deflex side profile with a more V shaped appearance at brace like you see the laminate bowyers build from materials like Bamboo and Ipe. The reason being was that I’m slowly starting to get into building laminated wooden bows and have been building some R&D forms lately which are intended for use when building my own bamboo R&D bows in the future. I just fancied trying out the profile on a stave bow first.
Now a note on using heat to bend woods like yew. Firstly, some woods are more prone to cracking when heated with dry heat. Other woods seem not to crack that often. Green or seasoned ash for example hardly ever cracks unless badly scorched by dry heat. Yew however is prone to cracking, especially around the thicker parts of a stave like the handle section. A lot of fruit tree woods and thorn species are prone to cracking and splitting too.
With steam bending, even a wet stave will often conform to an intended shape without too much risk of cracking. But I’ve often found that steam bending a wet stave just produces a bend which doesn’t hold once the clamps are removed, unless other measures are applied afterwards.
So I still like to get my staves nice and dry, even before steam bending, as I find that steam bends/corrections are much more likely to hold once allowed to cool, dry out for a few days, before being set in place with the heat gun. And if you try and set a wet steamed stave with a heat gun immediately after steaming, your are back in the territory of wet wood with all the potential for cracking.
I’ve learned a few tricks in order to mitigate the risk of cracking/splitting timber when heating and hopefully the following advice will help you avoid problems when working on your own builds.
Firstly, get your wood as dry as possible before you attempt to heat straighten a stave of a timber prone to checking. But dry your wood slowly, unless it is a timber like ash which is safe to speed dry.
Many white woods will take a heat gun treatment when still green and still not check, but try that with yew or thorn/apple etc and you’ll end up with deep ugly splitting in all the worst of places.
What I do nowadays is season all my split or saw yew staves for a minimum of a year in the barn rafters. But before I tuck them away, I always seal the stave ends with shellac. If it’s osage, then I seal the back of the stave too. Especially if I’ve chased the stave’s back down to heartwood before putting it away for seasoning.
After at least a year in the rafters, once I’m ready to use a stave, I then rough out my staves as close to final dimensions as I dare. I then let the stave sit again in the barn rafters for another month. Before doing this though I weigh the roughed out stave and write the weight in grams on the handle section. You’ll be surprised how much water weight comes off a “seasoned” stave when you do this.
After a month roughed out in the rafters, I then bring the stave indoors and leave it in the spare room for a couple of weeks. My spare room has no heating on and is cool but not damp. Again I weigh it and note the weight in grams. A couple of week in my spare room will see another bunch of weight fall off.
Finally, I put the stave into my drying room where I have a dehumidifier running permanently maintaining a humidity of below 40% and a temp of 22 degrees Celsius. This is where the magic happens.
The purpose of the staggered and gradual drying is to allow the moisture to leave the stave slow enough to avoid cracking and splitting. Any quicker than this and I find that the handle section will often crack either in the fades or down the narrowest parts of the deepest section of the handle. Especially if the pith is left in the handle section.
The tips can sometimes crack too as a result of too much moisture leaving the stave through the ends too quickly, especially if the previously sealed end surfaces were trimmed off during the roughing out phase. Always reseal the tips of a yew stave. A couple of applications of thin shellac stops splitting in most cases.
I’ll usually leave a stave in my drying room for at least a month. Or I keep weighing it every week until the weight stops falling. Once the weight loss has plateaued, then I feel confident I can get heat directly onto the stave without much risk of cracking it.
This is also a good time to take a stave to the steam pipe to perform significant steam bends or whole stave corrections if full profile forms are being used. Just remember that steam bending puts a lot of moisture back into a stave, so once your stave is steamed and clamped to the shaping form, it will need to stay clamped to your form until it has fully dried again
To get your steamed stave dry again it will need to be returned to the last two stages of drying process previously described above. Only then, once you’re confident the steamed stave is now dry again, should you set the steamed shape in place with the heat gun. After fully drying, heating, then allowing a stave to cool completely, can we now remove the clamps to see what we’ve achieved.
It’s not uncommon to see as much as 100 plus grams of moisture weight being lost between roughing out and the point at which the staves weight stops dropping. And this stave was certainly much lighter after going through the same process just described. So once the weight had stopped falling, I pushed on with the build.
The new R&D form worked well and I used this form combined with my steam tube and a bunch of clamps to get this stave conforming to the desired shape. After putting the stave back into the drying process whilst still on the R&D form, I was confident that the stave was dry again, so I set the shape with the heat gun.
The advantage of using a form is that I can apply side bending at the same time as putting in whatever curves I need, all at the same time. This significantly reduces the amount of heat treating needed in order to get my staves aligned and shaped as balanced as possible prior to tillering.
This stave took the classic R&D shape very well and after a period of a few days settling in back in the drying room, I began the tillering process, which was made simple by the fact that the string alignment was now sorted, and a lot of balance was now installed through the heat shaping process.
I aimed to make a lighter draw weight bow from this stave for two reasons. Firstly I often get asked for bows in the 35# range. But since most primitive or traditional archers tend to prefer draw weights closer to 50#, this higher draw weight is what I usually plan for when roughing out a stave. So for this stave I was planning for a lighter bow from the outset.
Secondly, whilst roughing this stave out, I’d discovered a small hidden pocket of rotten, delaminated material, smack in the middle of the lower limb. And by the time I’d excavated the undesired material and surrounding muck, I wasn’t left with a huge amount of material to provide the kind of limb thickness that would be required for a bow over 40#. So circumstances were telling me to use this situation as a good reason to finally make the sub 40# bow which I keep getting asked to build.
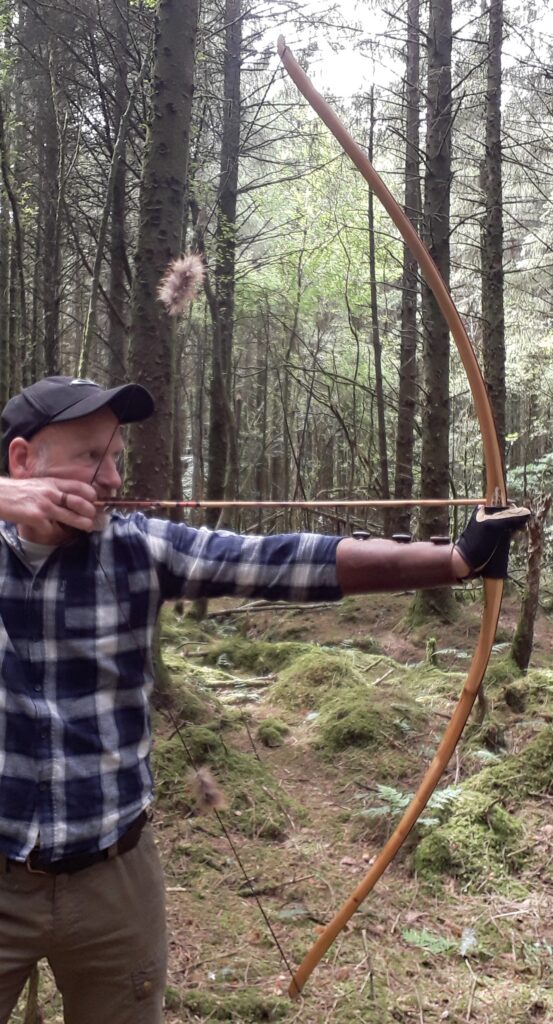
Tillering was so much easier with the limbs starting out with the exact same amount of bend. And whilst the classic V shape of this bow when strung is still growing on me, I have to say that the draw felt lovely and smooth and without any stack. These R&D bows are super easy to string too, which is always a bonus.
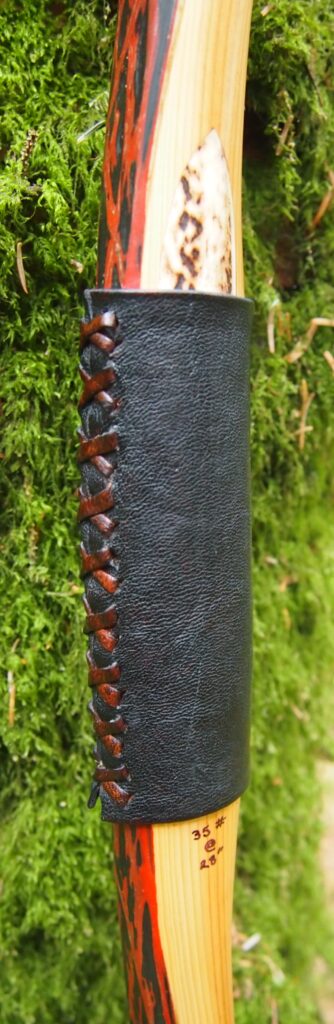
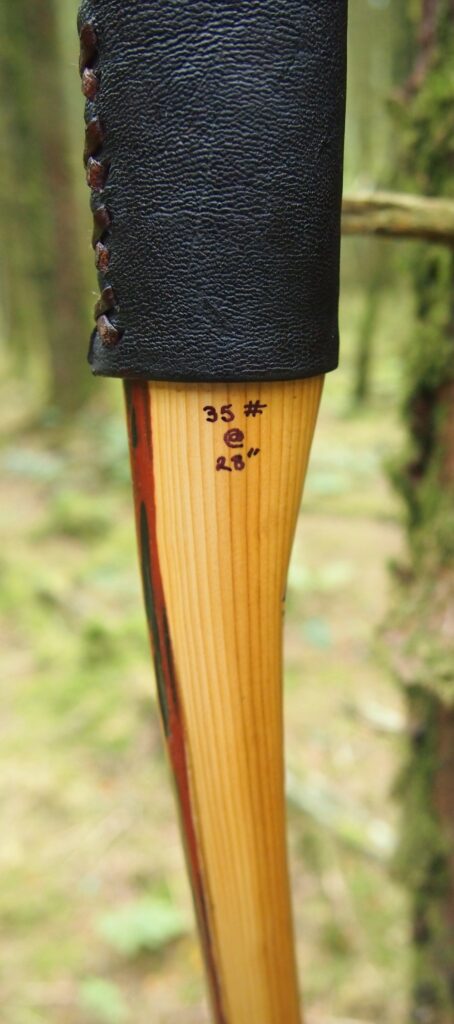
So with the scales reading 35# at 28″, shooting her in was actually a great bit of relaxing fun. And my right shoulder which has been giving me some trouble lately was really appreciative of a rest away from the normal 50-60 pounds of draw weight which I routinely shoot.
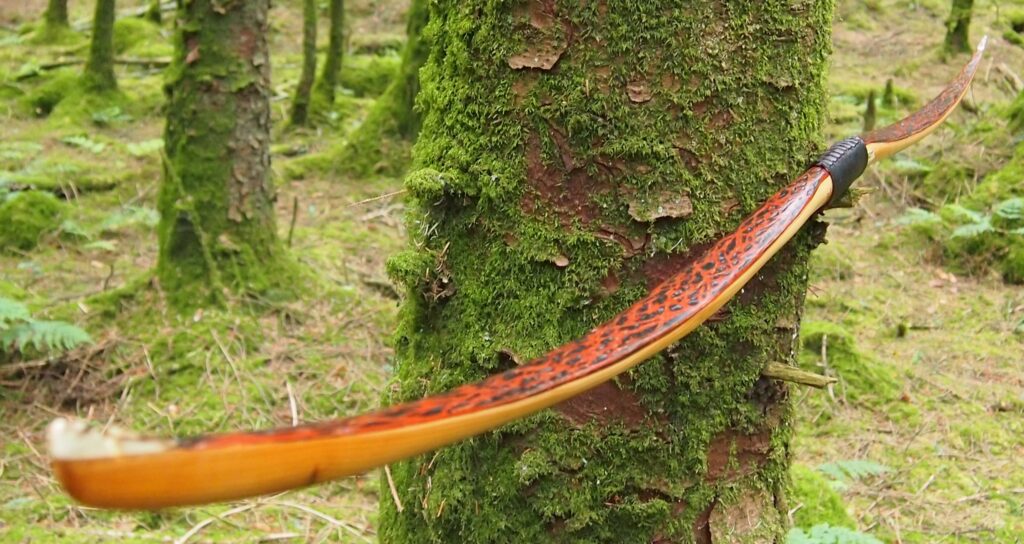
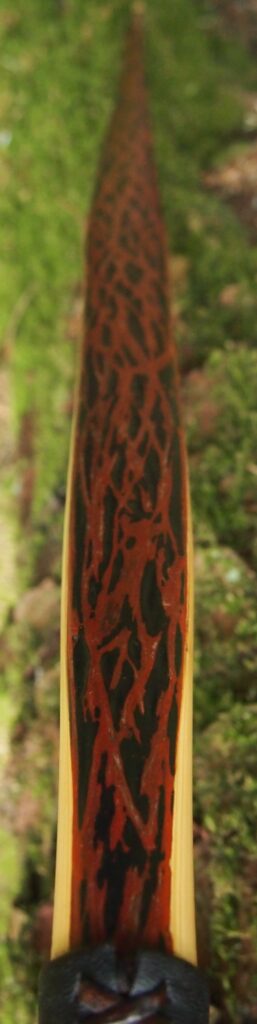
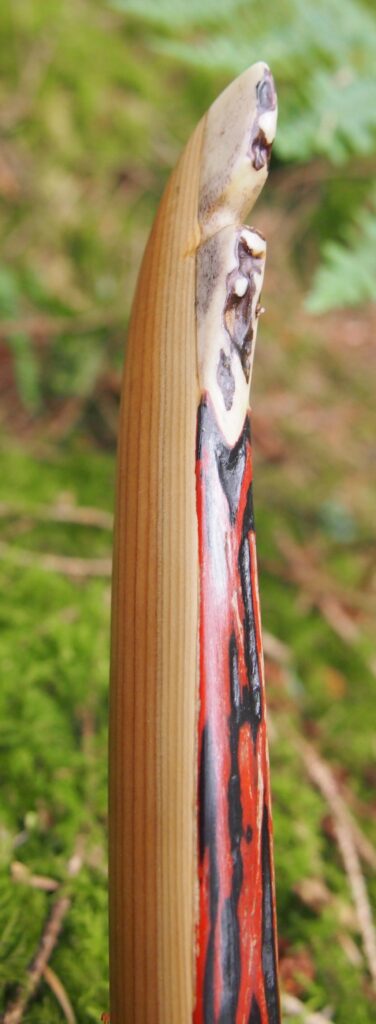
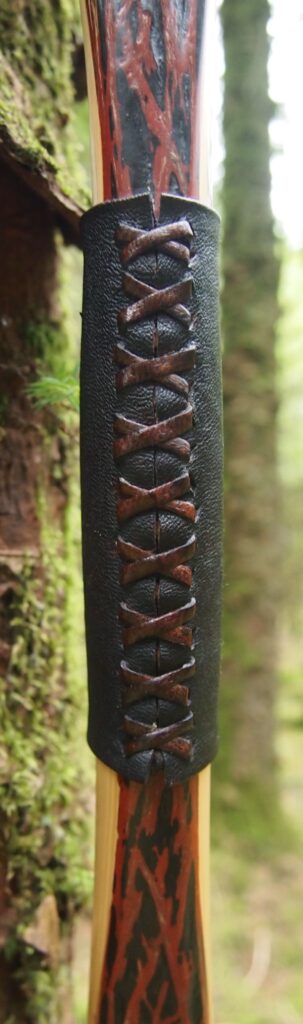
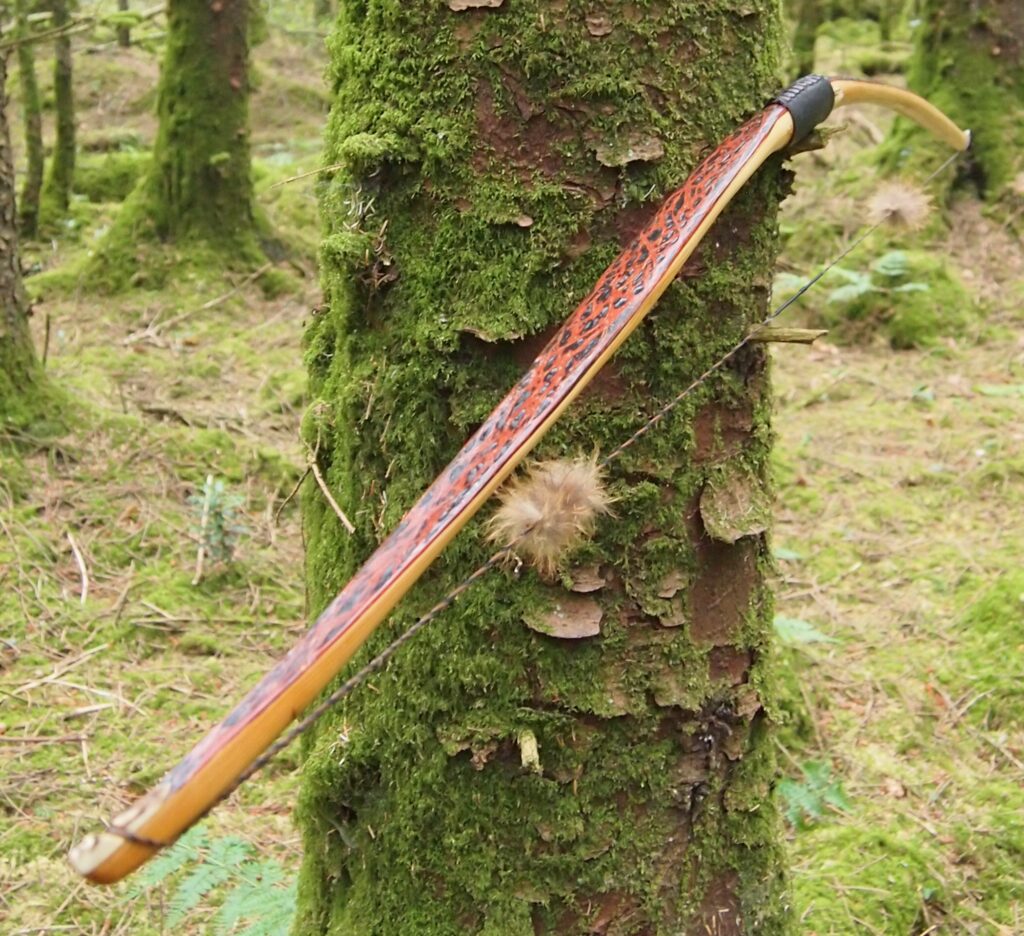
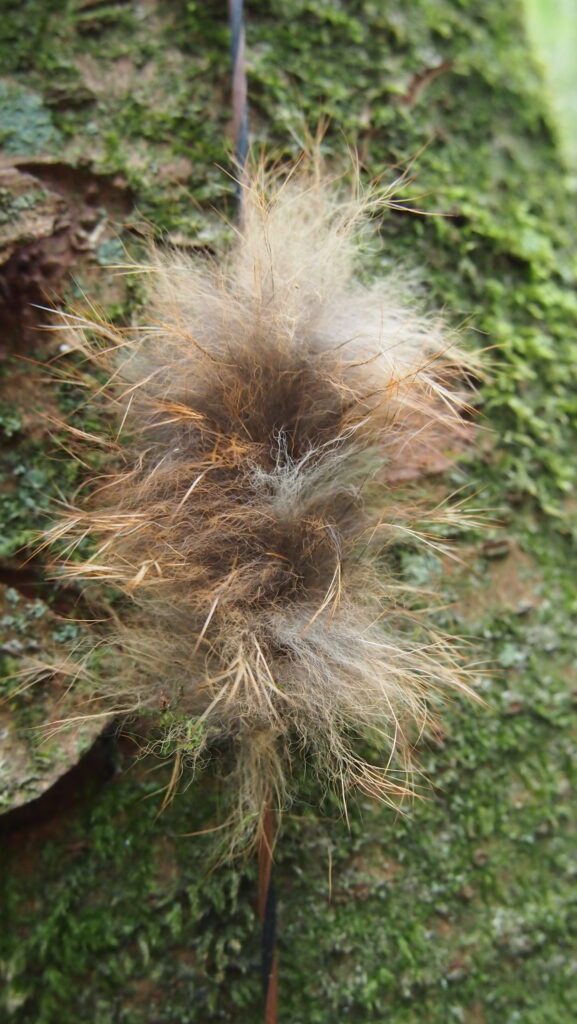
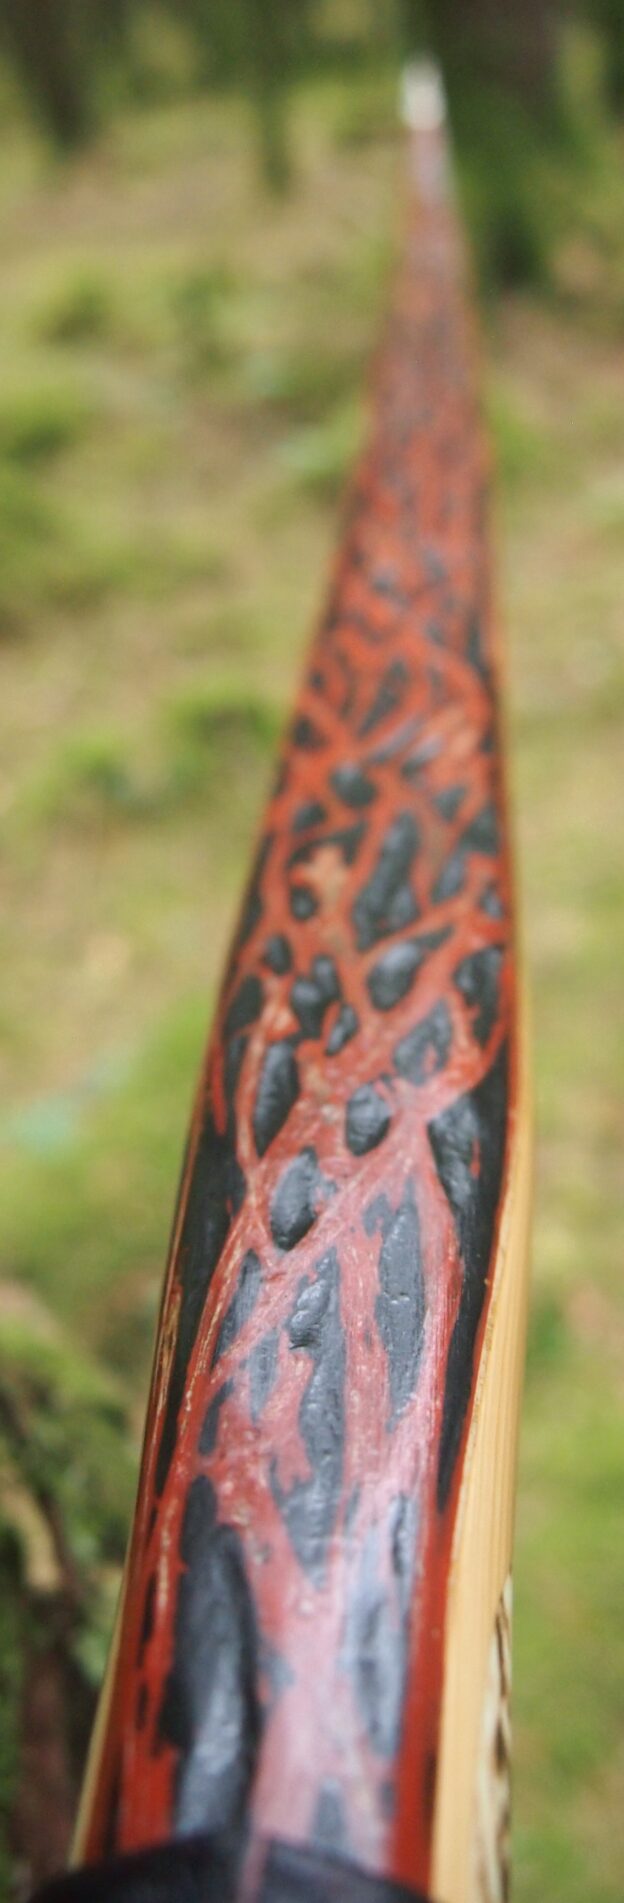
I decided to rawhide back this bow and decorate it with just an once of red deer leg sinew, more for safety, durability and aesthetics than anything else.
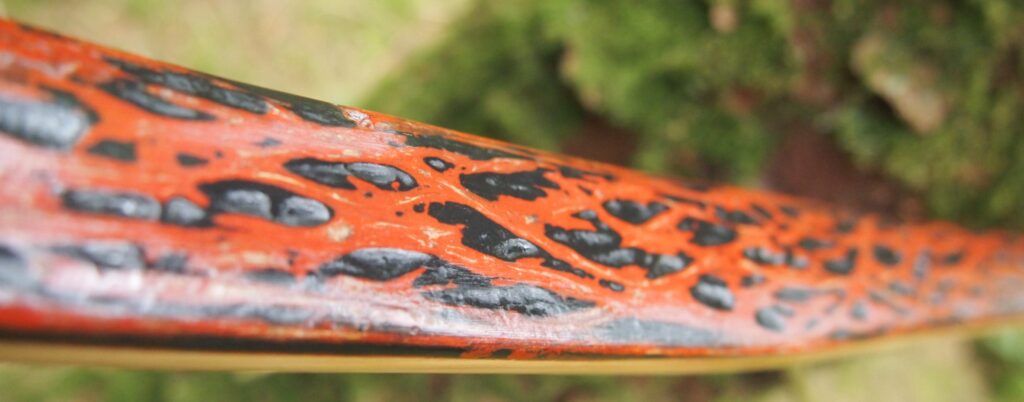
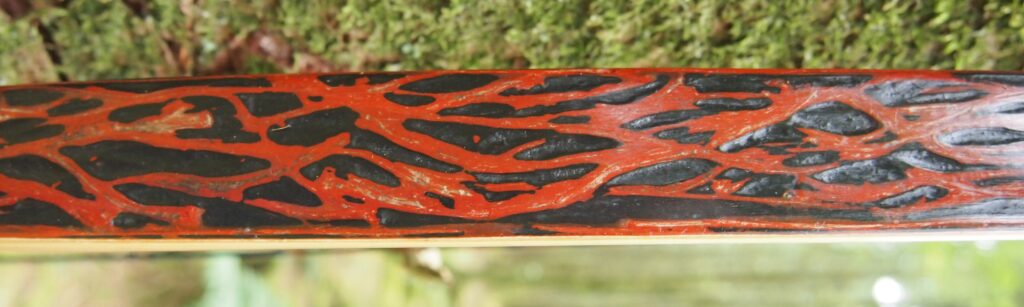
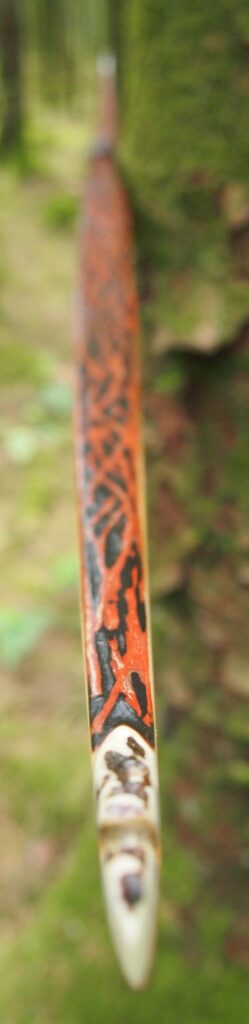
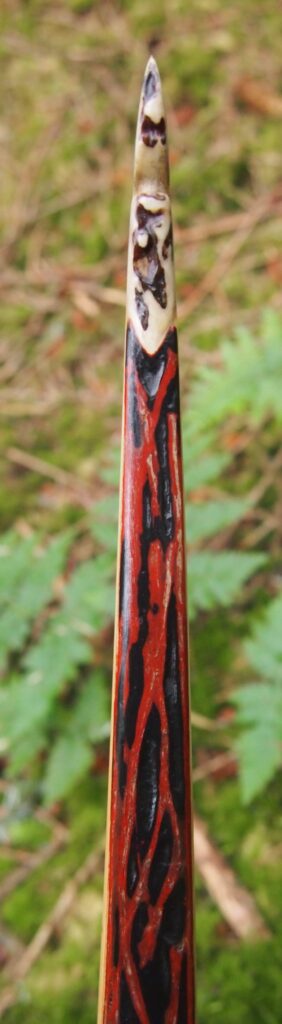
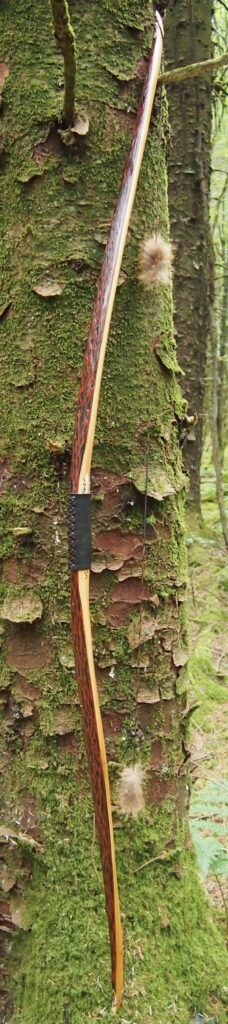
To create the textured coloured sinew backing effect, I rehydrated the sinew strands by dipped them into TBIII mixed with red ochre earth pigment to give it the nice red colour. And the black applied over the top is Bideblack earth pigment again mixed with TBIII painted over the top to ensure the sinew is waterproof. I then scraped and sanded through the black to reveal the red beneath.
The dirty red/black combo looks great and my lad commented that it looks a bit like the colour scheme worn by Marvel’s “Deadpool” character. And whilst I’m not usually one for naming bows, I couldn’t resist calling this one “Deadpool”.
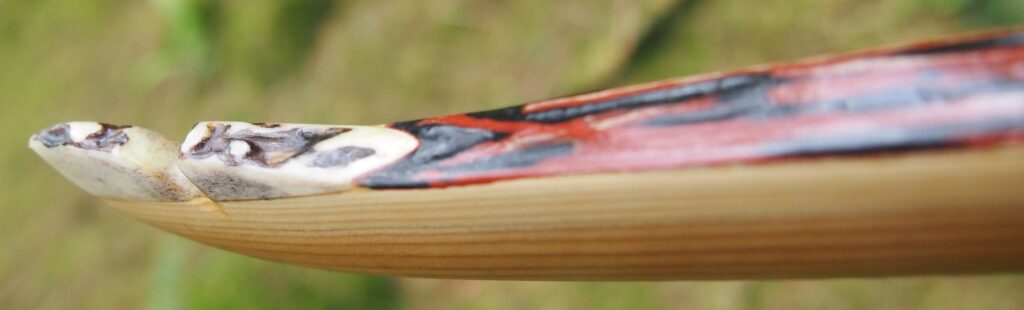
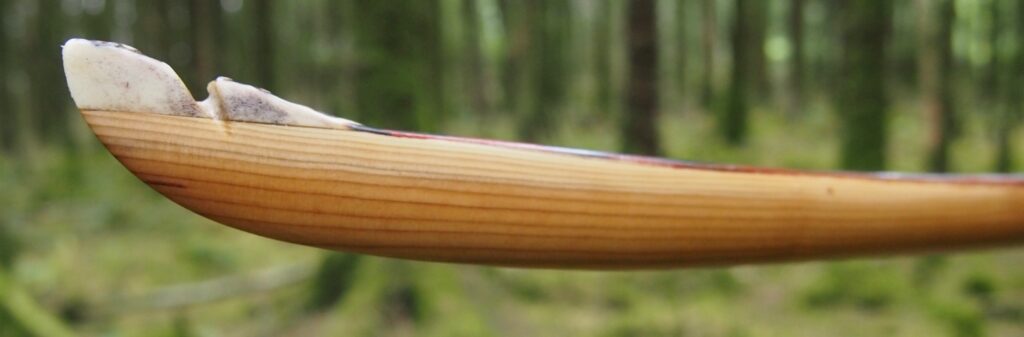
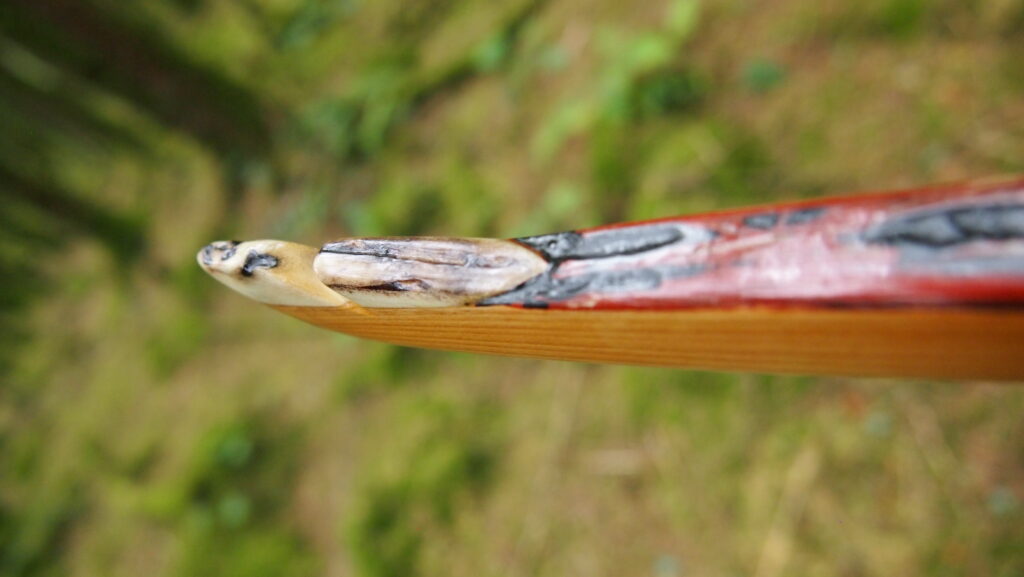
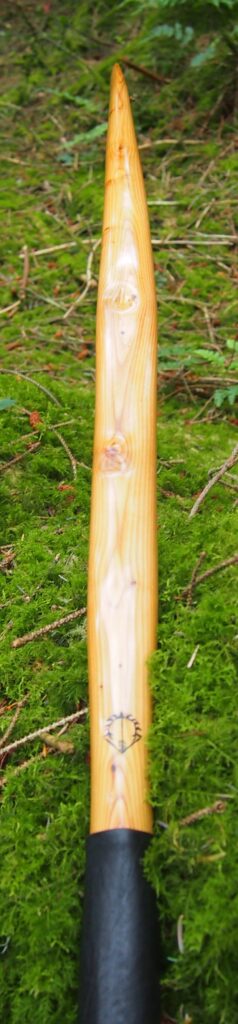
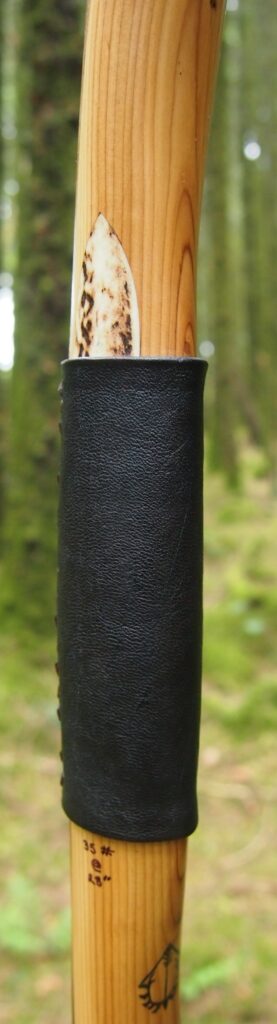
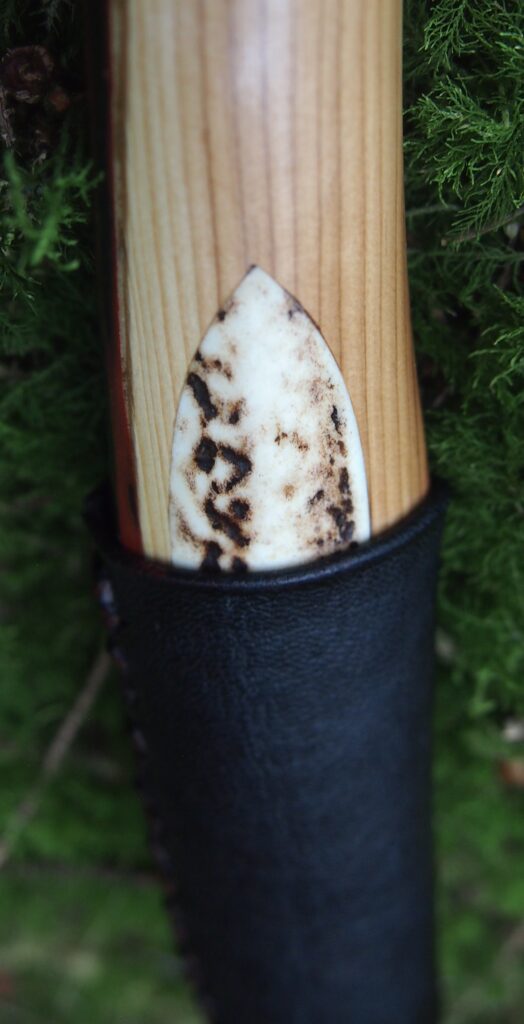
Overlays and arrow passes are both red deer antler. In addition to being asked to build some lighter bows, I also keep getting asked to build left handed bows. And since this bow was intended to be without an arrow shelf, and also had a string alignment right through the centre of the handle, I decided to inlay arrow passes on both sides so that it could be shot ambidextrously.
The handle wrap is my home bark tanned roe deer leather stained dark with home made vinegar stain and stitch up with the same leather thong but natural coloured. The really dark almost black handle compliments the black pigment used on the rawhide backing decoration nicely
I’ve decided to start finishing my bows a bit differently lately as the usual Danish oil finish is so time consuming and laborious. So now I’m sanding my bows down to 0000 wire wool before sealing them up with a half pound cut of shellac to act as a base layer primer. The shellac also really makes the grain and natural colour of the wood pop. Then, instead of finishing a bow with many long winded coats of Danish oil as I have done in the past, I’m now using a few good clear coat spray lacquer applications to completely seal and waterproof my bows.
I really like this new finishing method as I can complete the process in just a couple of days, as opposed to a couple of weeks, which was the norm for the Danish oil finish. The spray clear coat is also harder and therefore less prone to wear and tear, and since it is heat resistant too, in the event of a bow warping out of alignment, I can reheat and realign a limb if ever the need arises without running the risk of ruining the finish. Danish oil will not tolerate direct heat and will blister terribly even if you hit it with a hair drier!
So what I do now is give my bows three good coats with the spray lacquer clear coat with 12-24 hours between each coat. Once fully dried and cured out, I then polish the surface with fine pumice to create a nice glassy smooth finish which can be treated with a simple wipe on beeswax paste finish to bring out the colours below and create a wonderful satin finish.
For a lighter draw weight bow, I was happy with the performance of this bow. I had a great time shooting her in over a period of a couple of weeks stump shooting. She is quiet and well balanced. This balance combined with the low mass tips creates a shot which feels crisp and free from hand shock. Over the chrono she was sending my lads 350 grain arrows at 148ft/sec so whilst nothing spectacular, perfectly good for most archers purposes.
I really enjoyed building this one and have since build another sister bow from the other half of the log. That bow will be here on the blog soon so stay tuned for that one next week.
Until then, Hope you like the pics and video. Here’s “Deadpool”:
Draw Weight: 35lbs at 28”
Mass: 718 grams
Length NTN: 66.5” (asymmetrical limb layout)
Width: 1 7/16″” at widest part
Tips: last 8” semi static reflexed, 3/8” wide
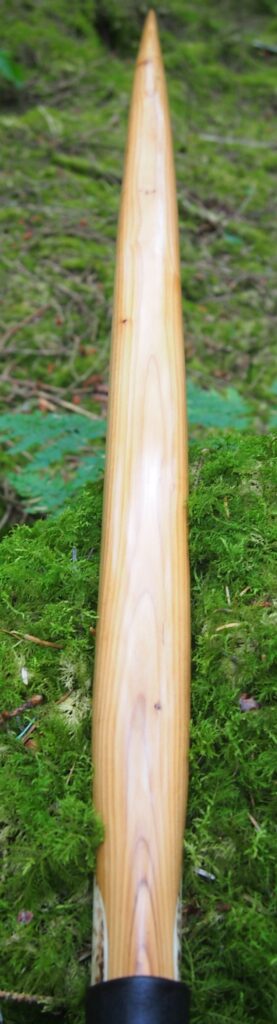
Back: Crowned. : Pyramidal face profile
Belly Profile: Working limb sections rounded D shaped, transitioning at the tips to a ridged cross section.
Tiller: Eliptical. 1/4” positive
Brace height: 5.5″